In This Post......
- Want your rainbow hair to look professional—not patchy or cartoonish?
- 1. What Is Hair Shading and Why It Matters
- 2. Choose the Right Color Combinations for Shading
- 3. Essential Tools for Pro-Level Shading
- 4. Section Your Hair Strategically for Shading
- 5. Mix and Dilute Dyes for Gradient Effects
- 6. Apply Rainbow Hair Color with Shading Technique
- 7. Fix Harsh Lines and Patchy Transitions
- 8. Heat & Time: Let the Shading Develop
- 9. Rinse Carefully to Keep Shading Intact
- 10. Maintain Your Shaded Rainbow Hair
Want your rainbow hair to look professional—not patchy or cartoonish?
Then it’s time to go beyond just applying color and learn the art of shading.
This detailed guide on how to shade like a pro using rainbow hair color will teach you how to blend, gradient, and layer your colors like a true artist.
Whether you’re aiming for a smooth ombré effect or a multidimensional burst of colors, the shading techniques covered in this guide will help you take your rainbow hair game to the next level.
From brush tips to color placement, you’ll discover the expert secrets behind vibrant, polished results.
By the end of this article on how to shade like a pro using rainbow hair color, you’ll be ready to create salon-worthy looks—right from home.
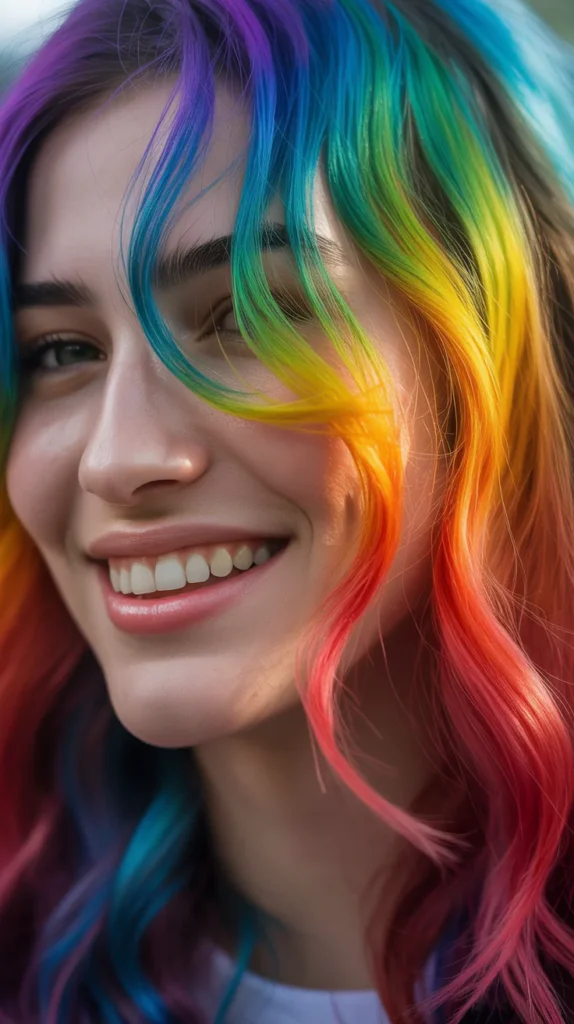
1. What Is Hair Shading and Why It Matters

Shading is what separates amateur rainbow hair from show-stopping beauty. Let’s break it down.
- Shading involves blending two or more colors to create smooth transitions
- It adds depth, movement, and dimension to your rainbow hair
- Good shading avoids harsh lines and makes your hair look softer and more natural
- It’s essential for creating ombre, balayage, or galaxy-inspired effects
Even in bold rainbow looks, proper shading is the reason people say “wow” instead of “whoa.”
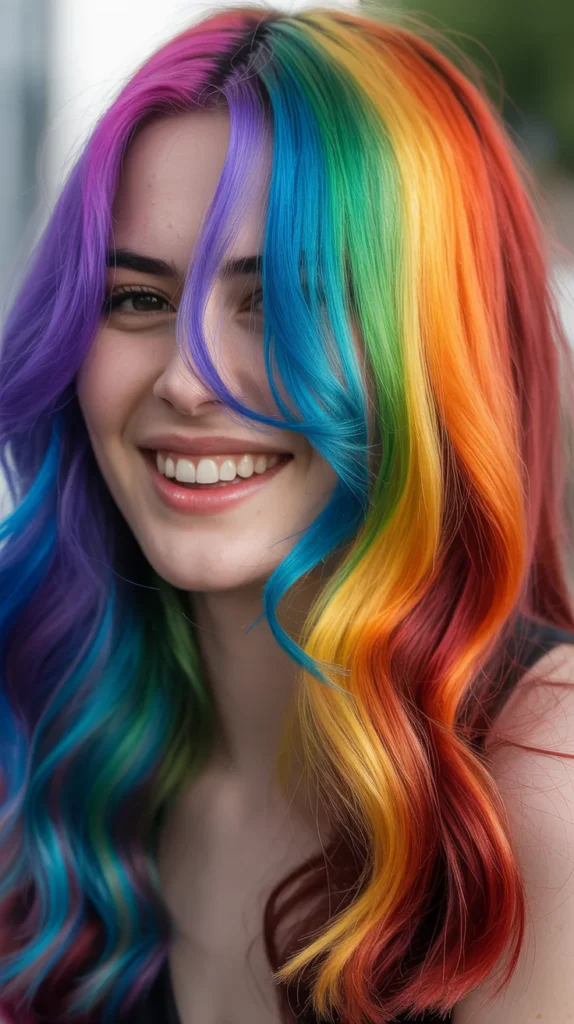
2. Choose the Right Color Combinations for Shading

Not all colors blend smoothly. Some combinations will turn muddy or clash. Here’s a helpful guide:
| Blend Type | Color Combinations That Work Well |
|---|---|
| Warm Transition | Red → Orange → Yellow |
| Cool Transition | Green → Blue → Purple |
| Pastel Blend | Mint → Lavender → Baby Pink |
| Fire Glow | Orange → Peach → Gold |
| Galaxy Fade | Teal → Indigo → Violet |
Pro Tip: Avoid placing complementary colors side by side (like red and green) unless you want a very bold, separated look.
3. Essential Tools for Pro-Level Shading

Good shading requires the right tools—no shortcuts here.
- Tint brushes (angled and soft-tip for blending)
- Color mixing bowls
- Hair clips
- Foil or mesh wrap
- Gloves
- Comb with fine teeth
- Conditioner (for pastel dilution or smoother blending)
- Sectioning clips
Optional: Use makeup sponges or blending sponges for seamless fades between shades.
4. Section Your Hair Strategically for Shading

Unlike basic rainbow styles, shaded looks need carefully planned placement.
- Divide your hair into horizontal or vertical sections depending on your design
- Identify transition zones where one color will fade into the next
- Keep those zones clean and well-separated during application
- Always clip and isolate the sections you’re not working on
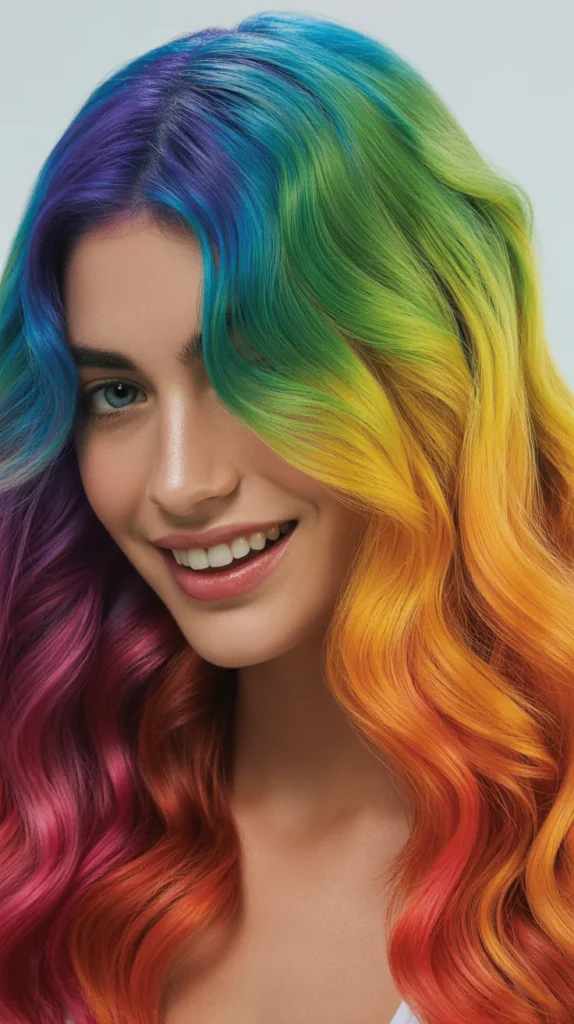
5. Mix and Dilute Dyes for Gradient Effects

Solid colors are too harsh for shading—dilution is key.
- Add white conditioner to your dye to create pastel tones
- Mix darker and lighter versions of the same shade for gradient blending
- Always test the mixture on a paper towel before applying to hair
- Keep a color wheel nearby to see which colors can blend into each other
Example Gradient Table:
| Base Color | Mid Blend Shade | Fade-To Shade |
|---|---|---|
| Red | Coral or Peach | Light Yellow |
| Blue | Sky Blue or Turquoise | Lilac or Silver |
| Purple | Lavender or Lilac | Pink |
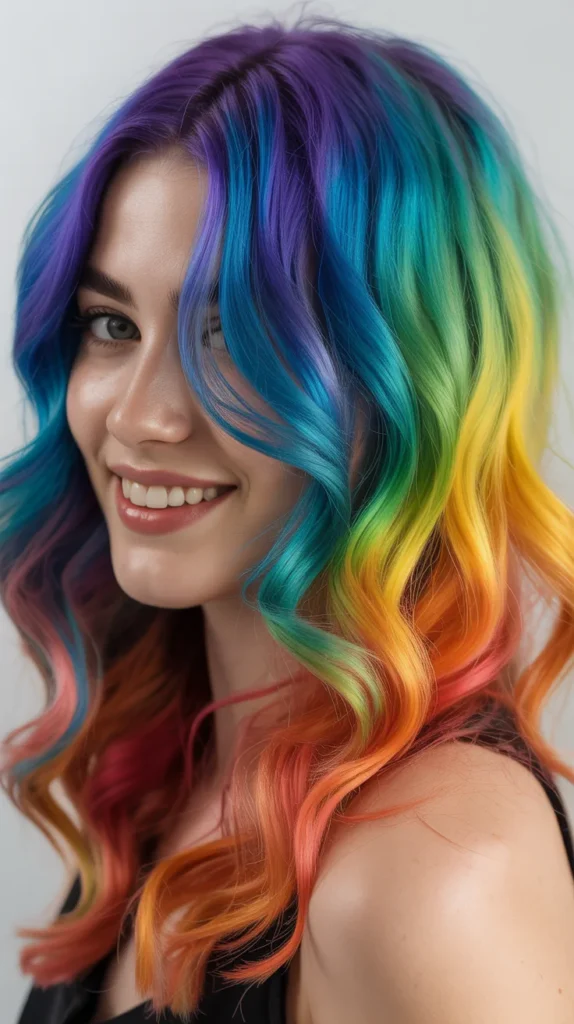
6. Apply Rainbow Hair Color with Shading Technique

Now for the magic moment—application.
- Start at the base of each section with the darkest shade
- Move mid-length with a slightly lighter or blended tone
- Finish the ends with a pastel or diluted color
- Use your brush in small circular or feathering motions to merge shades
- Where two colors meet, use a clean, damp sponge or your finger to blend gently
- Avoid brushing too hard to prevent muddy overlap
7. Fix Harsh Lines and Patchy Transitions
Not every shading attempt is perfect the first time. Here’s how to fix issues quickly.
| Problem | Cause | Fix |
|---|---|---|
| Harsh Color Lines | No overlap between colors | Blend using a sponge or finger |
| Patchy Look | Uneven dye distribution | Apply more dye and reblend |
| Colors Muddied | Incompatible dye overlap | Strip and redo one section only |
| No Gradient Effect | Same shade top to bottom | Use diluted colors on ends |
8. Heat & Time: Let the Shading Develop
Patience enhances pigment payoff and blending.
- After application, wrap each section in foil or plastic wrap
- Leave the dye in for 30 to 45 minutes depending on brand
- Avoid checking too early—let colors settle and blend on their own
- Use a timer to track section timing if you’re doing multiple layers
9. Rinse Carefully to Keep Shading Intact
Rinsing is just as important as the dyeing.
- Always rinse with cold water to lock in the colors
- Do not shampoo for at least 48 hours
- Tilt your head back and rinse downward to avoid cross-bleeding
- Rinse each section separately if possible
- Apply a color-sealing conditioner and pat dry with an old T-shirt
10. Maintain Your Shaded Rainbow Hair
The final look is stunning—but how do you keep it that way?
- Use sulfate-free color-safe shampoo
- Wash hair no more than twice per week
- Sleep with a silk pillowcase to prevent fade from friction
- Use leave-in treatments or color-refreshing conditioners
- Avoid hot water and chlorine at all costs
Conclusion
Now that you’ve learned how to shade like a pro using rainbow hair color, you can move from basic color application to masterful hair artistry.
With the right blends, tools, and technique, your rainbow hair won’t just be bright—it’ll be beautifully dimensional and full of life.
Let this guide to how to shade like a pro using rainbow hair color become your personal stylist’s manual to breathtaking color transitions.