Learning to braid your own hair can seem tricky at first. But with practice, it gets easier.
Braiding your hair is a great skill to have. It’s not just for special occasions; it’s perfect for everyday looks too.
Whether you want a simple braid or something a bit more intricate, knowing how to braid your own hair can be a real time-saver.
Plus, it can be a fun way to change up your style. In this guide, we’ll break down the steps to help beginners get started. No need to worry if you’ve never braided your hair before.
By the end of this blog, you’ll be able to create beautiful braids with confidence. Let’s dive in!
In This Post......
- 1.Introduction To Braiding
- 3.Essential Tools And Products
- Preparing Your Hair
- Basic Three-strand Braid
- French Braid Technique
- 8.Dutch Braid Method
- 11.Fishtail Braid Style
- Maintaining Braided Hair
- Troubleshooting Common Issues
- Advanced Braiding Techniques
- Tips For Practicing
- Frequently Asked Questions
- Conclusion
1.Introduction To Braiding

Learning to braid your own hair can be a fun and rewarding skill. Braiding not only enhances your appearance but also helps in keeping your hair neat and tidy.
This guide will introduce you to the basics of braiding, including its benefits and various styles you can try.
Benefits Of Braiding
Braiding your hair offers many advantages. It helps in protecting your hair from damage. Braids can keep your hair tangle-free.
They also reduce the risk of split ends. Braids are great for all hair types. They are especially useful for long hair. Braiding can also save time.
Once done, braids can last for days. This means less time spent on daily styling. Braids also offer a variety of looks. From casual to elegant, braids can suit any occasion.
2.Types Of Braids
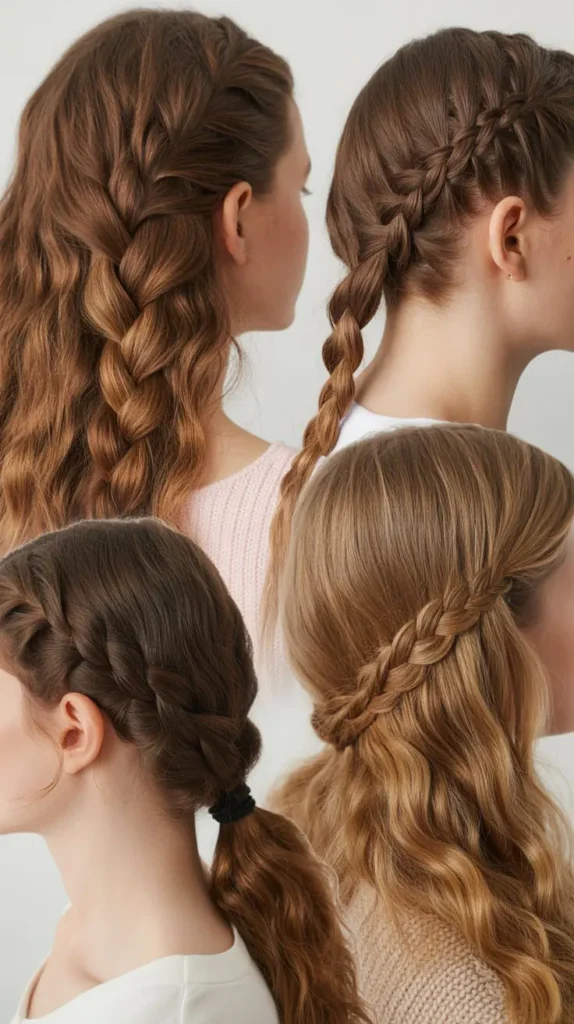
There are many types of braids you can try. The most basic is the three-strand braid. It is simple and easy to learn. Another popular type is the French braid.
It starts at the crown of your head and works its way down. The Dutch braid is similar to the French braid but has a more pronounced look.
Fishtail braids are unique and stylish. They look intricate but are simple once you get the hang of it. Box braids are more complex.
They involve sectioning the hair into small squares and braiding each section. Each type of braid offers a different look. Choose the one that suits your style and occasion.
3.Essential Tools And Products
Hey friends, today we’re diving into the essential tools and products you’ll need to braid your hair like a pro.
Whether you’re just starting or looking to polish your skills, having the right tools makes a world of difference.
Think of it like cooking; you wouldn’t make a cake without the right ingredients, right? The same goes for braiding. Let’s get started!
Combs And Brushes
First things first, you need a good comb and brush. They help you detangle your hair and make it smooth. This is important because tangled hair can be tough to braid. Here are some options:
- Wide-tooth comb: Great for detangling wet hair without causing breakage.
- Fine-tooth comb: Perfect for sectioning your hair evenly.
- Paddle brush: Ideal for brushing out knots and smoothing your hair.
Personally, I find that a wide-tooth comb is a lifesaver when my hair is wet. It glides through my hair without pulling too much.
Hair Products
Next up, let’s talk about hair products. These are like the secret sauce to perfect braids. They help keep your hair in place and make it easier to manage. Here’s what you might need:
- Leave-in conditioner: This keeps your hair soft and manageable.
- Hair gel: Helps to keep those pesky flyaways in check.
- Hairspray: Gives your braid a long-lasting hold.
I recently started using a leave-in conditioner, and it has made a big difference. My hair feels softer and is much easier to braid. Give it a try!
Remember, the right tools and products can make your braiding experience much smoother. So stock up, and you’ll be ready to create beautiful braids in no time!
Preparing Your Hair
Braiding your own hair can be a fun and rewarding skill. Before you start, it’s crucial to prepare your hair. Proper preparation ensures your braids look neat and last longer. This section covers the essential steps to get your hair ready for braiding.
Washing And Conditioning
Clean hair is easier to braid. Start by washing your hair with a gentle shampoo. This removes dirt and oil. After shampooing, use a conditioner.
Conditioner makes your hair soft and smooth. It helps in managing tangles and knots. Rinse thoroughly to ensure no product residue remains.
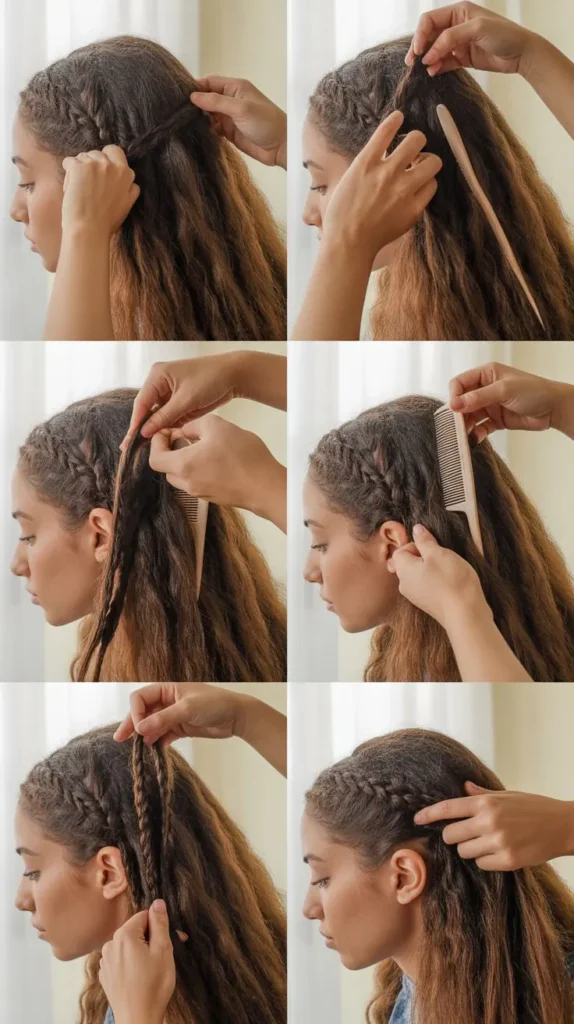
4.Detangling Tips
Detangling is a key step. Use a wide-tooth comb for this. Start from the ends of your hair. Work your way up to the roots slowly.
This reduces breakage and pain. You can also use your fingers to separate knots. If your hair is very tangled, apply a leave-in conditioner. This makes the process easier.
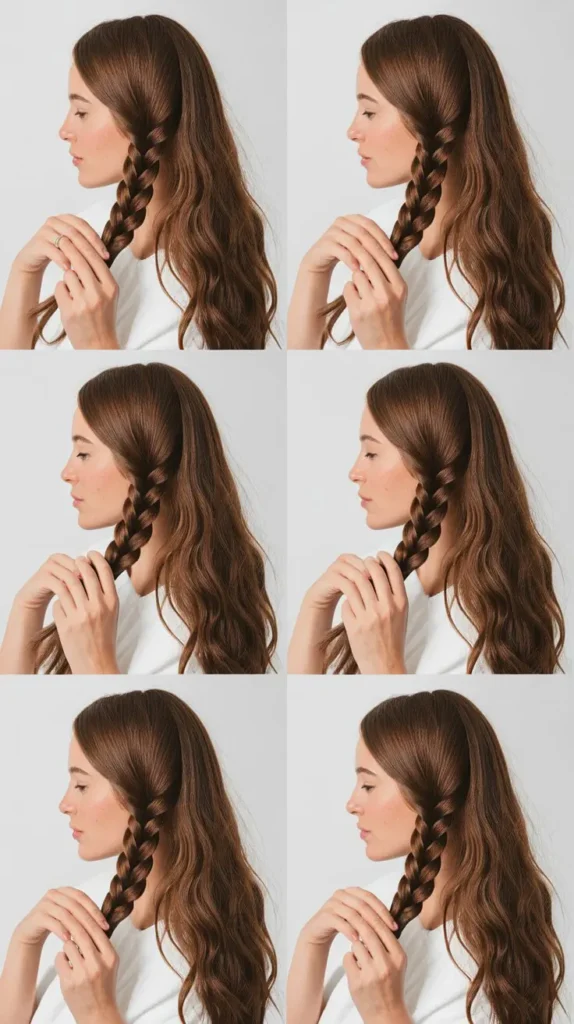
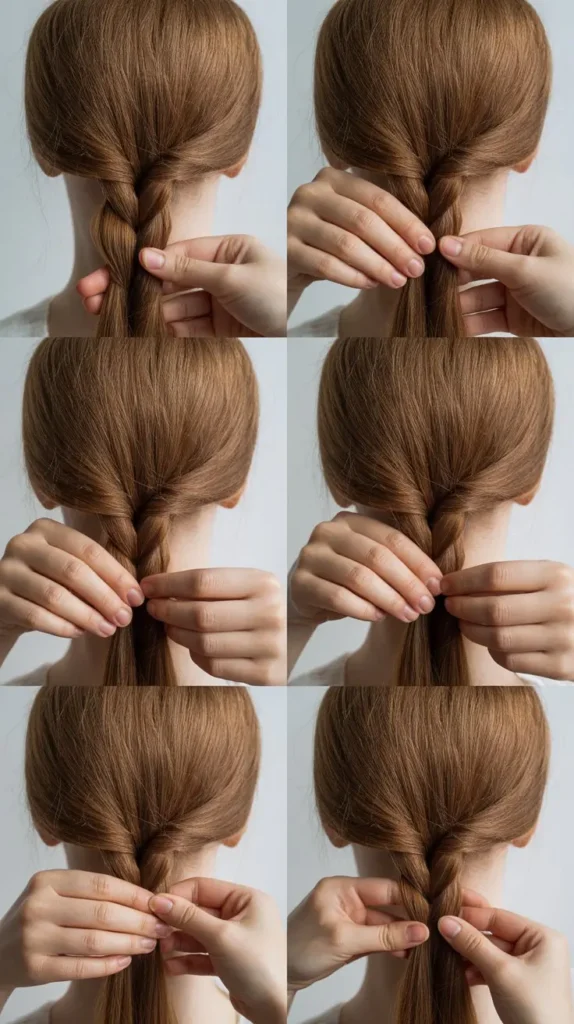
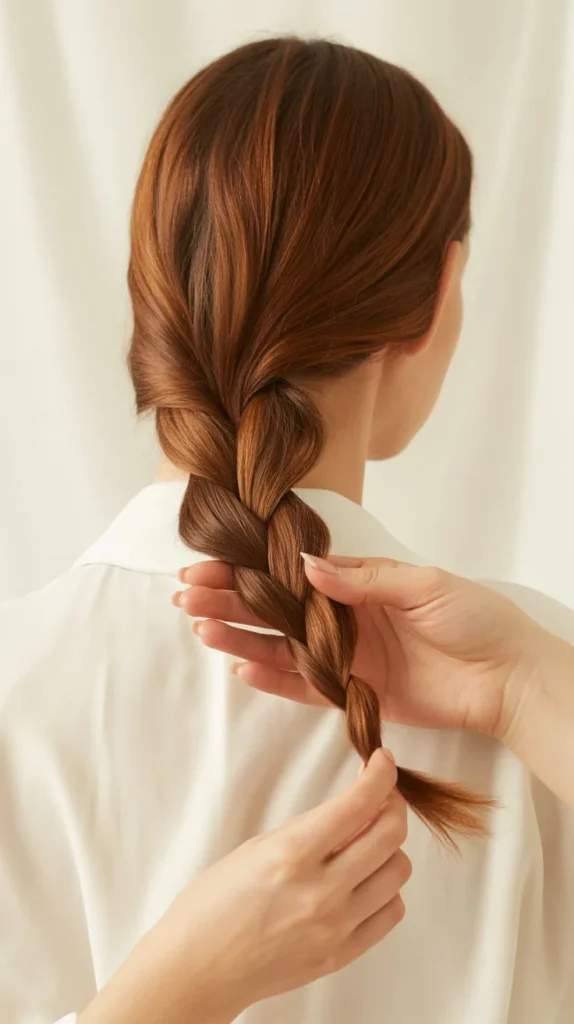
Basic Three-strand Braid
The basic three-strand braid is a classic hairstyle. It’s simple yet elegant. Perfect for beginners. Learning this braid can be a fun and rewarding experience. Follow these easy steps to get started.
Sectioning The Hair
Begin by brushing your hair. Ensure it’s free of tangles. Smooth hair makes braiding easier. Next, divide your hair into three equal sections. Use your fingers to create the sections. Hold one section in your left hand. Hold the other two sections in your right hand.
5.Crossing The Strands
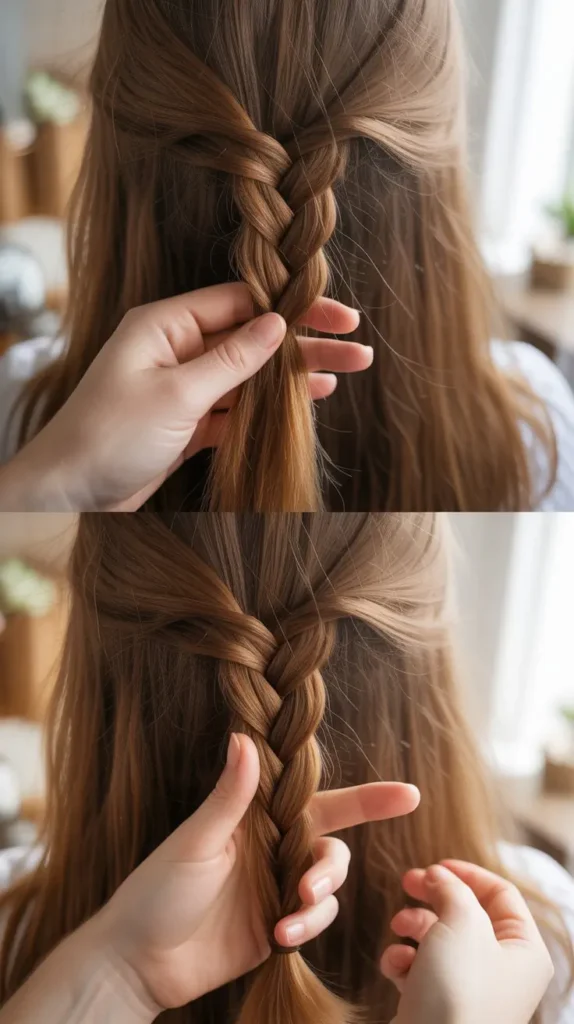
Take the right section and cross it over the middle section.
Now, the right section becomes the new middle section. Next, take the left section and cross it over the new middle section.
The left section is now the new middle section.
Repeat these steps until you reach the end of your hair.Secure the braid with a hair tie. Ensure it’s tight enough to hold.
Gently pull on the braid to make it look fuller. Now, admire your new hairstyle. Practice will make you better.
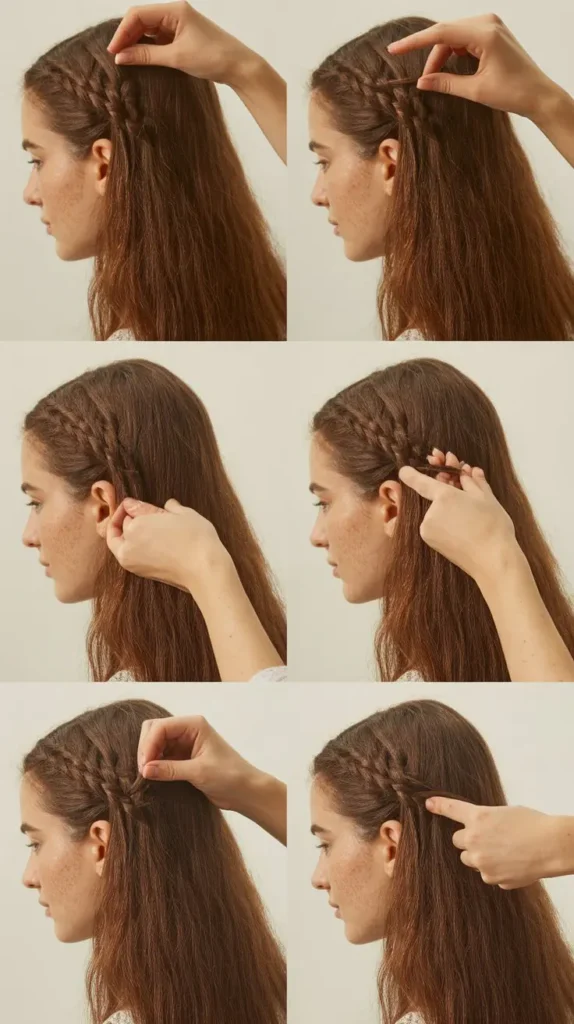
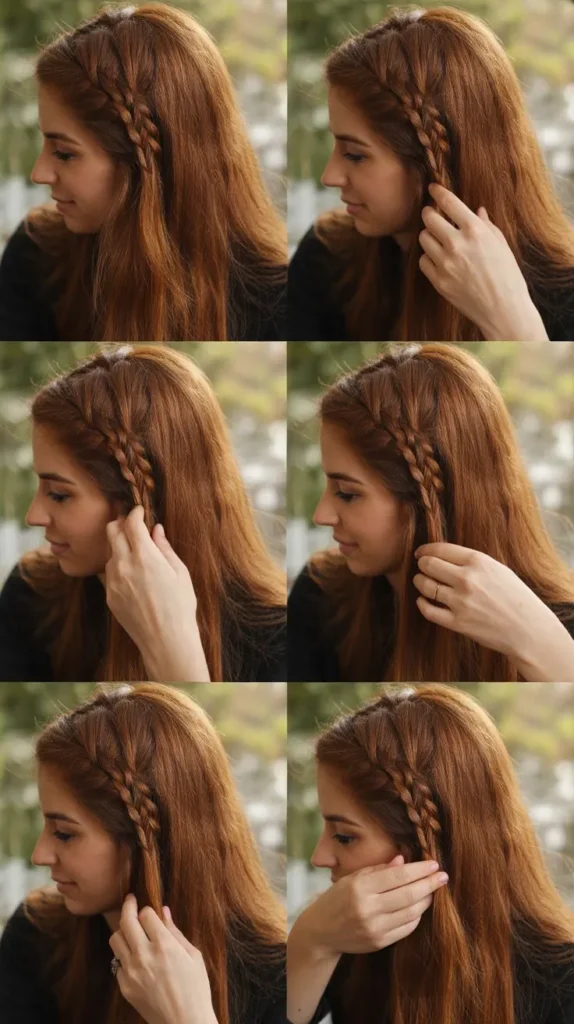
French Braid Technique
Hey friends, today we’re diving into the art of the French braid. This classic style might seem tough at first, but with a bit of practice, you’ll get the hang of it in no time.
Ready to impress yourself and everyone around you? Let’s get started with the French Braid Technique.
6.Starting At The Crown
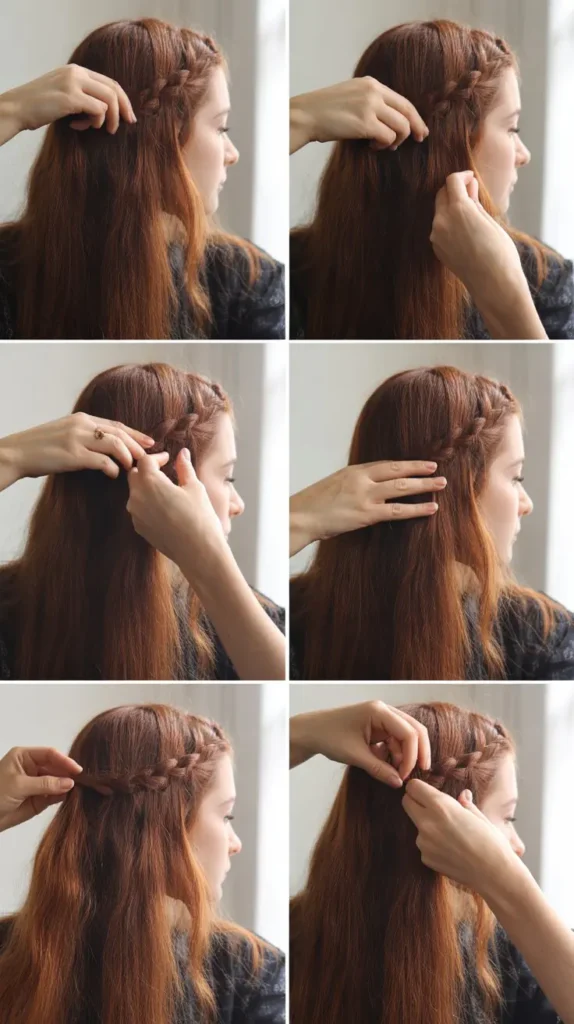
First things first, you need to get your starting point right. Here’s how you do it:
- Brush your hair: Make sure there are no tangles. Smooth hair is easier to braid.
- Section your hair: Grab a small section of hair from the crown of your head. This is the starting point.
- Divide into three parts: Split this section into three equal strands. Now, you’re ready to start braiding.
Remember when I first tried this? I was all thumbs! But starting at the crown really makes it easier.
7.Adding Sections
Now, let’s move on to adding sections. This is what makes the French braid unique and beautiful:
- Begin the braid: Take the right strand and cross it over the middle strand. Then, take the left strand and cross it over the new middle strand.
- Add hair: Before you cross each strand over the middle, add a bit of hair from the side of your head to the strand. This step is key.
- Continue this process: Keep adding hair and crossing the strands over the middle until you reach the nape of your neck.
The first time I tried adding sections, I felt like I needed more hands! But trust me, it gets easier with practice.
And there you have it! Follow these steps, and you’ll be able to create a lovely French braid. Practice makes perfect, so don’t give up if it’s tricky at first. Happy braiding!
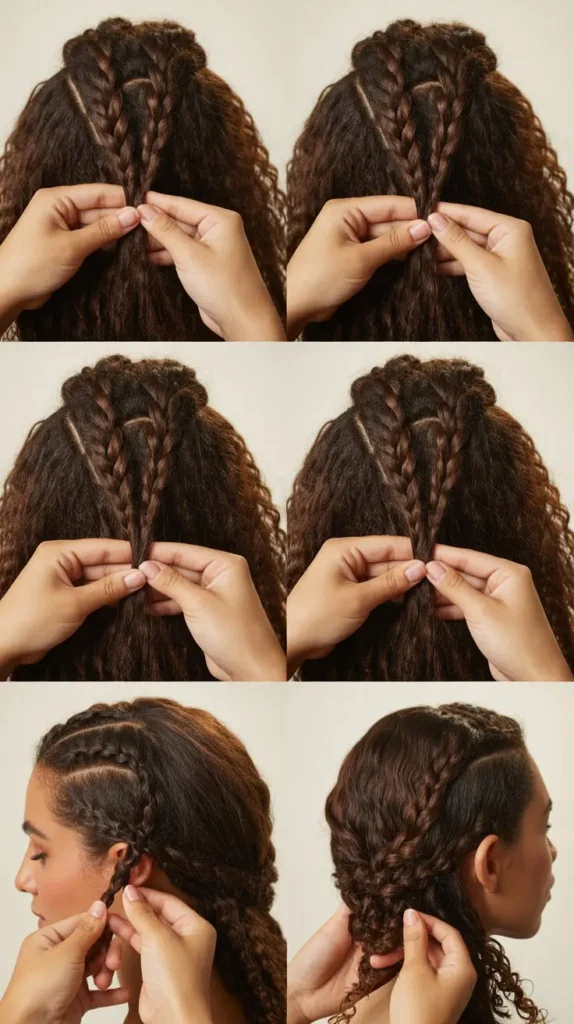
8.Dutch Braid Method
The Dutch Braid method is perfect for beginners. It’s a reverse braid that adds volume and style. You will learn to create a beautiful, elegant braid. Follow these simple steps to get started.
9.Reverse Braiding
First, brush your hair to remove knots. This makes braiding easier. Divide your hair into three equal sections. Hold one section in your left hand and two in your right hand.
Begin by crossing the right section under the middle section. Then, cross the left section under the new middle section.
This is the reverse braiding technique. Continue this pattern down the length of your hair.
As you braid, add a small section of hair from the side to each section. This will keep the braid tight and neat. Remember to keep the braid close to your head.
10.Securing The Braid
Once you reach the end of your hair, it’s time to secure the braid. Use a small elastic band to tie the ends. Make sure the band is tight to keep the braid in place.
If you want a more relaxed look, gently pull on the edges of the braid. This will loosen it slightly and add volume. You can also use bobby pins to tuck in any loose strands.
Finally, spray a light mist of hairspray to keep the braid intact. Now you have a beautiful Dutch Braid!
11.Fishtail Braid Style
The Fishtail Braid Style is a beautiful and unique way to braid your hair. It looks complex, but with practice, even beginners can master it.
The fishtail braid is perfect for any occasion, whether you’re dressing up or going casual.
Plus, it keeps your hair neat and stylish. Ready to learn how to braid your own hair into a fishtail braid? Let’s get started!
Splitting The Hair
First things first. You need to split your hair into two equal sections. Unlike the regular three-strand braid, the fishtail braid only uses two sections. This is the trick to its unique look.
- Comb your hair to remove any tangles. This makes it easier to work with.
- Divide your hair into two equal parts. Hold one section in each hand.
Remember to keep the sections even. This makes your braid look neat. When I first tried this, I made the mistake of having uneven sections. It looked a bit messy. But with practice, I got better!
Weaving The Strands
Now comes the fun part—weaving the strands! This is where the magic happens.
- Take a small piece of hair from the outside of the left section.
- Cross it over to the right section. Hold it tight.
- Then, take a small piece from the outside of the right section.
- Cross it over to the left section. Hold it tight.
Keep repeating these steps. The good news? The more you practice, the quicker you’ll get. It’s like riding a bike. Tricky at first, but soon it becomes second nature.
Make sure to pull each strand tight. This keeps the braid firm. If it’s too loose, it might fall apart. I learned this the hard way during a windy day at the beach!
And there you go! You have just made a fishtail braid. With a bit of practice, you’ll get faster and your braid will look even better. Remember, the key to a perfect fishtail braid is patience and practice. Happy braiding!
Maintaining Braided Hair
Hey there! So, you’ve successfully braided your own hair. That’s awesome! But now, you’re wondering how to keep it looking fresh and neat for as long as possible.
Well, maintaining braided hair is just as important as braiding it. Let’s dive into some easy tips to help you protect and care for your braids.
Protecting At Night
One of the biggest challenges with braids is keeping them neat overnight. But don’t worry, there are simple ways to protect your braids while you sleep.
- Use a Silk or Satin Scarf: Wrap your braids in a silk or satin scarf before you go to bed. These materials reduce friction and prevent frizz.
- Sleep on a Silk or Satin Pillowcase: If scarves aren’t your thing, a silk or satin pillowcase can also work wonders. It keeps your braids smooth and reduces breakage.
- Loose Bun: Gather your braids into a loose bun at the top of your head. This helps keep them from getting tangled during the night.
Moisturizing Tips
Keeping your braids moisturized is crucial for maintaining their look and health. Here are some easy tips for moisturizing your braids:
- Spray with Water: Lightly spray your braids with water every few days. This helps keep them hydrated and reduces dryness.
- Use a Leave-In Conditioner: A good leave-in conditioner can work wonders. Apply it to your braids to keep them soft and manageable.
- Oils are Your Friend: Use natural oils like coconut oil or olive oil. They add moisture and shine to your braids without making them greasy.
I remember when I first started braiding my own hair. I had no idea how to keep them looking nice. But with these simple steps, my braids stayed neat and healthy for weeks. You can do it too!
| Do | Don’t |
|---|---|
| Wrap your hair at night | Use heavy products |
| Moisturize regularly | Ignore your scalp |
| Use natural oils | Pull braids too tight |
So, there you have it! A few simple tips to keep your braids looking great. Try them out, and you’ll see a big difference. Happy braiding!
Troubleshooting Common Issues
Braiding your own hair can be a fun and creative activity. But sometimes, unexpected issues can arise. These common problems can turn a simple braid into a frustrating experience.
Let’s explore how to troubleshoot and fix some of these common issues.
Fixing Loose Braids
Loose braids can make your hairstyle look untidy. To fix a loose braid, start by tightening each section as you braid. Make sure you hold the hair firmly.
If the braid still feels loose, try braiding smaller sections of hair. This can provide a tighter and more secure braid.
Another tip is to use a bit of styling gel. Apply a small amount to your fingers before braiding. This helps hold the hair in place. It also reduces frizz, giving a neater look.
Dealing With Flyaways
Flyaways can make a braid look messy. To manage flyaways, start with clean, slightly damp hair. This helps in controlling loose strands.
Use a fine-tooth comb to smooth out the hair before braiding. This can minimize the number of flyaways.
You can also use a bit of hairspray or hair gel. Apply it to the areas with flyaways. This keeps the stray hairs in place. If you prefer a more natural approach, a dab of coconut oil can also work. It smooths the hair and adds shine.
If you still notice flyaways after braiding, use a toothbrush. Spray the toothbrush with a bit of hairspray. Then, gently brush the flyaways back into the braid. This trick can help achieve a polished look.
Advanced Braiding Techniques
Hey friends! Ready to step up your braiding game? Once you master the basics, it’s time to try some advanced techniques. Don’t worry, they might seem tricky at first, but with practice, you’ll get the hang of it.
Let’s dive into some exciting styles like Box Braids and the Waterfall Braid. These will surely add flair to your look and impress your friends!
Box Braids
Box Braids are a cool and stylish way to protect your hair. They look like little boxes on your head. Fun, right? Here’s how you can do it:
- Section Your Hair: Use a comb to divide your hair into small, equal sections. Think of it like making a grid on your head.
- Start Braiding: Take one section. Divide it into three parts. Begin a regular braid. Braid to the end.
- Secure the Ends: Use small rubber bands to tie the ends. This keeps your braids neat.
Tip: If your hair is short, you can add extensions. This gives your braids a fuller look.
Waterfall Braid
The Waterfall Braid looks elegant and is perfect for any occasion. It might seem complex, but it’s easier than you think. Let’s break it down:
- Start with a Small Section: Take a small section of hair near your temple. Split it into three strands.
- Begin a Regular Braid: Cross the right strand over the middle. Then, cross the left strand over the new middle.
- Add Hair: Before you cross the right strand again, add a small piece of hair from the top. Let the right strand fall. This creates the ‘waterfall’ effect.
- Continue Braiding: Keep adding hair and letting the right strand fall. Repeat until you reach the back of your head.
- Secure the Braid: Use a bobby pin to hold the braid in place. You can also braid the remaining hair or leave it as is.
Tip: Practice makes perfect. The more you try, the better your Waterfall Braid will look.
So, there you have it! Box Braids and the Waterfall Braid are fantastic ways to elevate your hairstyling skills. Remember, practice is key. Happy braiding!
Tips For Practicing
Hey there! Learning how to braid your own hair can be tricky at first. But don’t worry, with practice, you’ll get the hang of it. In this section, we’ll look at some tips to help you practice. These tips are simple and easy to follow. They will help you become more confident in braiding your hair.
Using A Mannequin
Before you start braiding your own hair, you might want to practice on a mannequin. This is a great way to get the feel of braiding without the pressure. A mannequin won’t complain if you make a mistake. Here’s why using a mannequin can help:
- Less Stress: You won’t worry about pulling your own hair.
- Better View: You can see what you’re doing easily.
- Repetition: Practice the same braid over and over.
When I first started, I used a mannequin my mom got me. It made a huge difference. I could practice while watching TV, and I didn’t have to worry about my arms getting tired.
Patience And Persistence
Braiding your own hair takes patience. You won’t get it perfect the first time. But that’s okay! The key is to keep trying. Here are some tips to stay patient and persistent:
- Set Small Goals: Focus on mastering one type of braid at a time.
- Take Breaks: If you get frustrated, take a break and come back later.
- Celebrate Small Wins: Every time you make progress, give yourself a pat on the back.
Remember, it’s all about practice. I remember the first time I tried a French braid. It looked like a mess. But after a few tries, I got better. So, don’t give up!
Keep these tips in mind as you practice. Happy braiding!
Frequently Asked Questions
What Is The Easiest Way To Braid Your Own Hair?
Start with brushed, tangle-free hair. Divide it into three equal sections. Cross the right section over the middle, then the left. Repeat until you reach the end, then secure with a hair tie.
What Do You Spray On Hair Before Braiding?
Use a light leave-in conditioner or detangling spray before braiding. This helps to moisturize and manage hair.
What Does The Bible Say About Braiding Hair?
The Bible mentions braiding hair in 1 Timothy 2:9, advising women to focus on modesty and good deeds over elaborate hairstyles.
Is It Easier To Braid Your Own Hair Wet Or Dry?
Braiding dry hair is easier. Wet hair is more fragile and prone to damage. Dry hair offers better grip.
Conclusion
Braiding your own hair might seem hard at first. But with practice, it gets easier. Follow the steps in this guide closely.
Soon, you will create beautiful braids on your own. Remember to be patient and gentle with your hair.
Enjoy the process and have fun experimenting. Soon, you’ll feel more confident in your braiding skills. Keep practicing, and don’t give up. Happy braiding!