Thin hair doesn’t have to limit your style choices when it comes to achieving a bold, edgy look. The right pixie cut can transform fine strands into a voluminous, textured masterpiece that exudes confidence and modern sophistication.
This comprehensive guide explores 37 carefully curated edgy pixie haircuts specifically designed to create the illusion of fuller, thicker hair while maintaining that coveted rebellious edge.
Throughout this article, we’ll dive deep into layering techniques, styling methods, and cutting angles that work harmoniously with thin hair’s natural characteristics.
From asymmetrical crops to textured spikes, each style has been selected for its ability to add visual weight and dimension to fine hair.
You’ll discover professional tips for maintenance, styling products that enhance volume, and creative color techniques that further amplify the fullness effect.
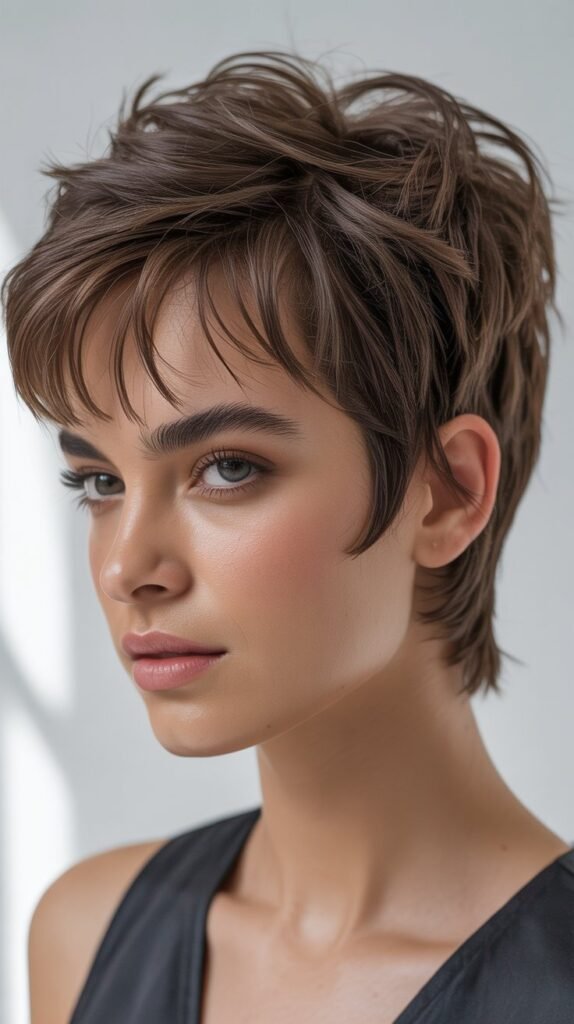
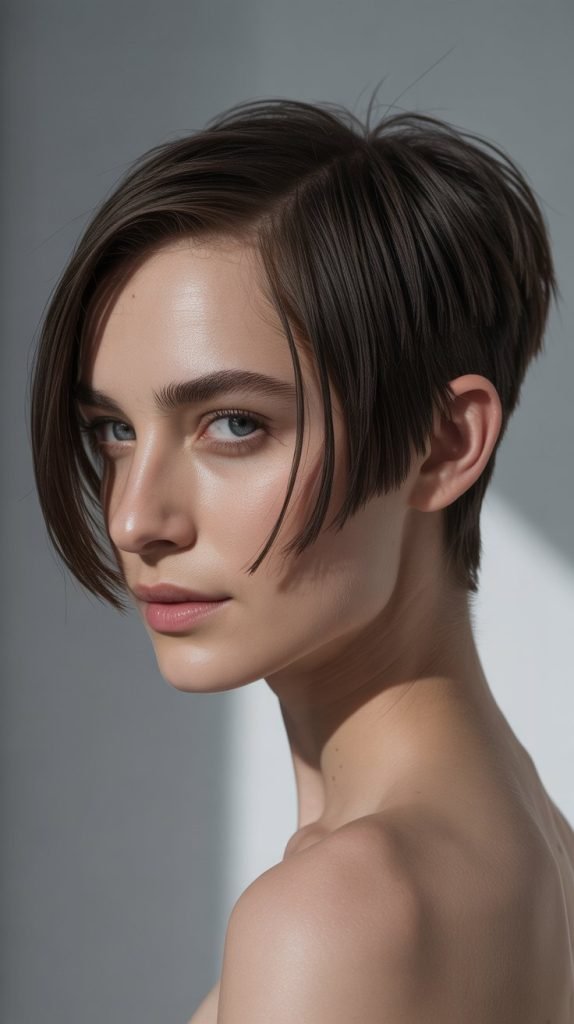
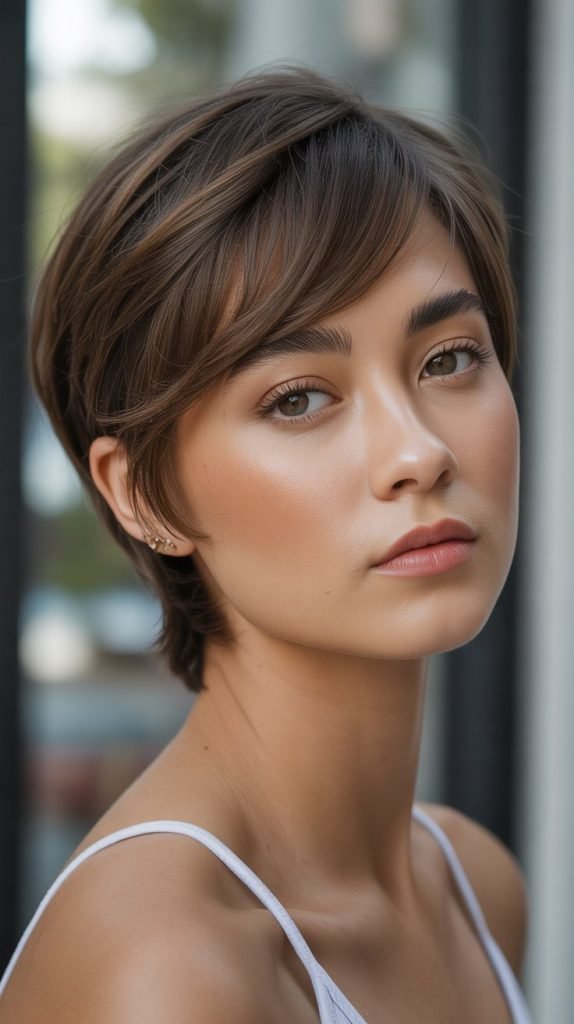
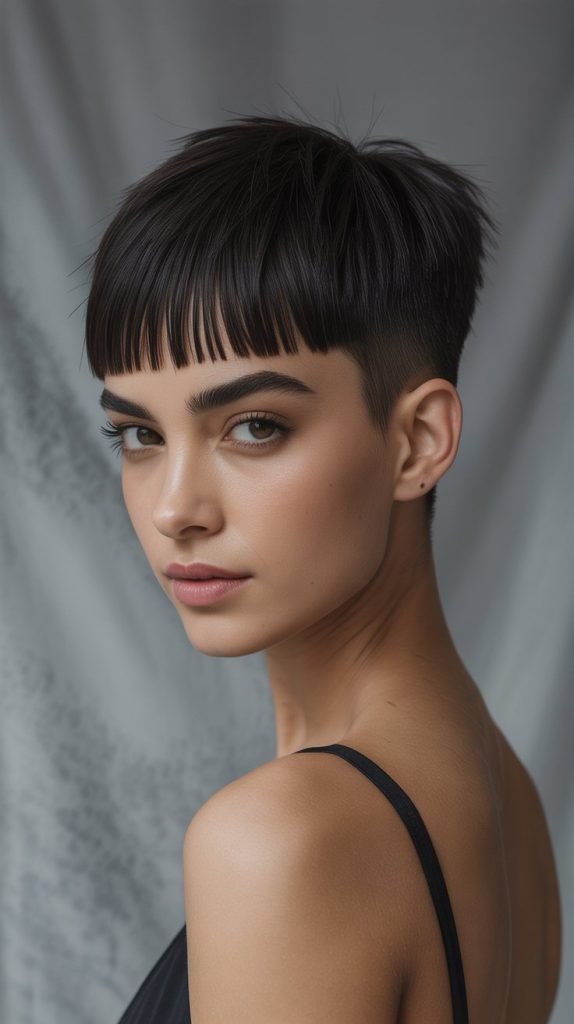
1. Asymmetrical Pixie with Side-Swept Bangs
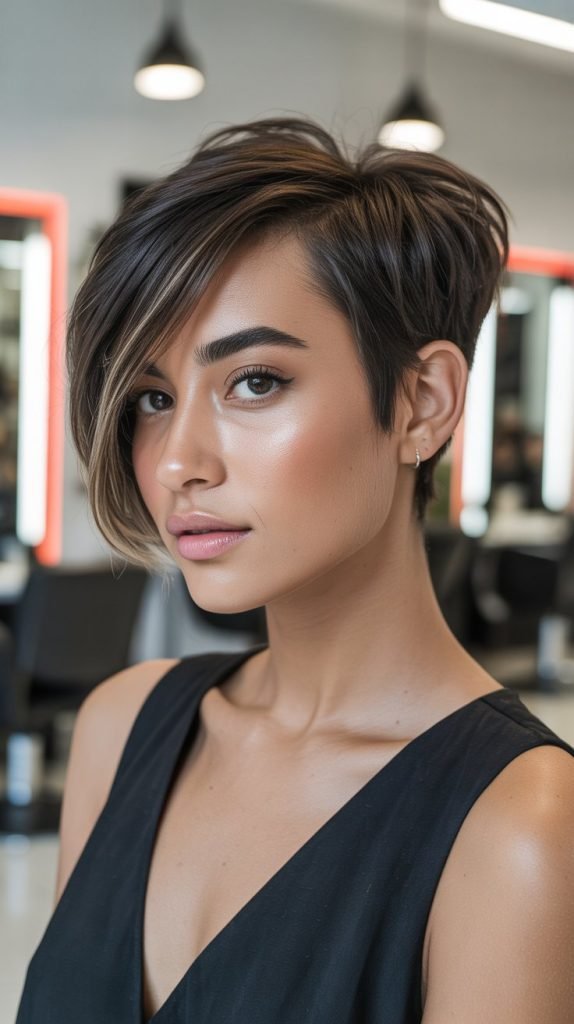
The asymmetrical pixie creates natural volume through strategic length variation that tricks the eye into perceiving more hair density. This style works particularly well for thin hair because the uneven lengths create multiple layers that stack upon each other.
The side-swept bangs add facial framing while contributing to the overall textured appearance.
- The longer side should typically measure 3-4 inches while the shorter side stays around 1-2 inches for optimal contrast
- Use texturizing paste to enhance the natural movement and create separation between sections
- This cut requires trimming every 4-6 weeks to maintain the sharp asymmetrical edge
- The side-swept bangs should be cut at an angle to blend seamlessly with the longer section
- Blow-dry with a round brush lifting at the roots for maximum volume enhancement
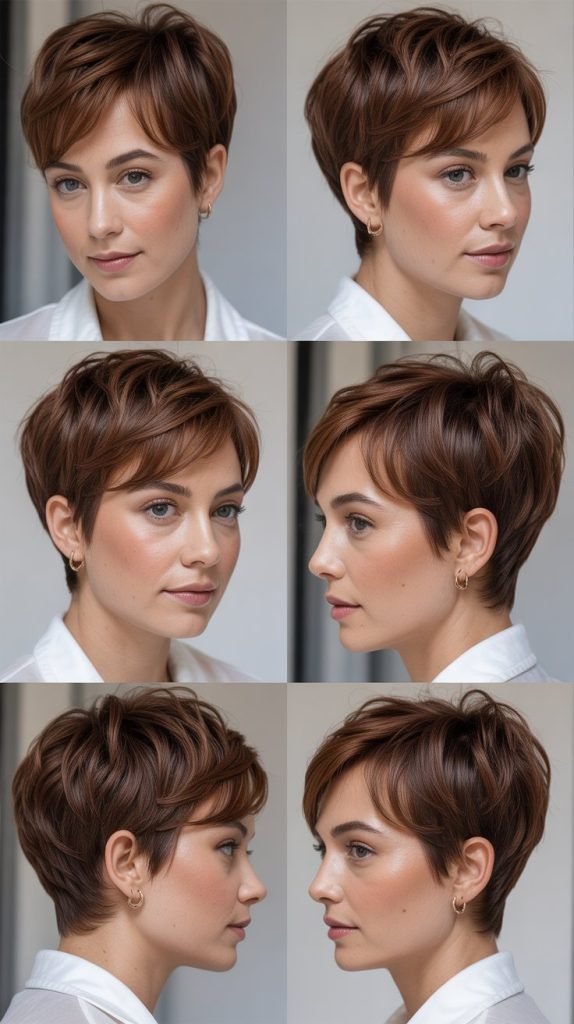
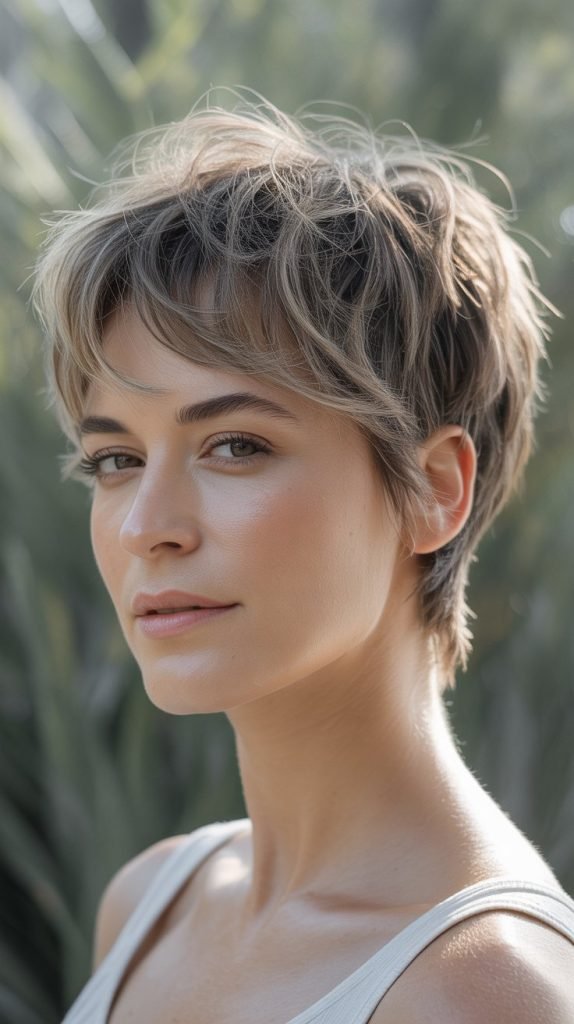
2. Textured Crop with Choppy Layers
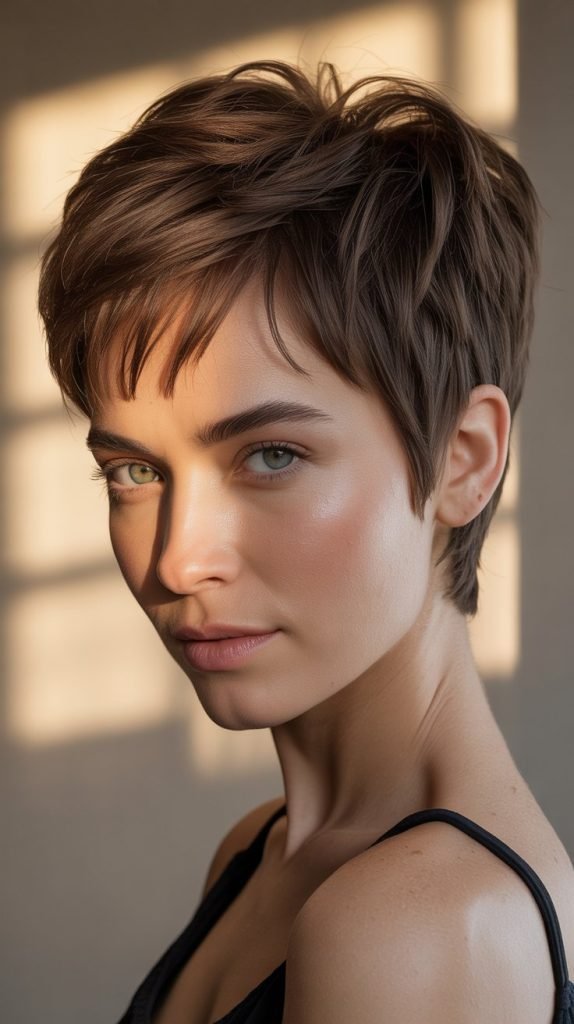
Choppy layers are the secret weapon for creating volume in thin hair pixie cuts. This technique involves cutting hair at various lengths throughout the crown and sides to build up texture and movement.
The irregular cutting pattern prevents hair from lying flat against the scalp, naturally creating the appearance of fuller hair.
- Request your stylist to use point cutting techniques for the most natural-looking choppy effect
- Focus the shortest layers around the crown area where volume is most needed
- Leave slightly longer pieces around the ears for a softer transition
- Use sea salt spray on damp hair before styling to enhance the natural texture
- Scrunch hair while blow-drying to encourage the choppy layers to separate and create dimension
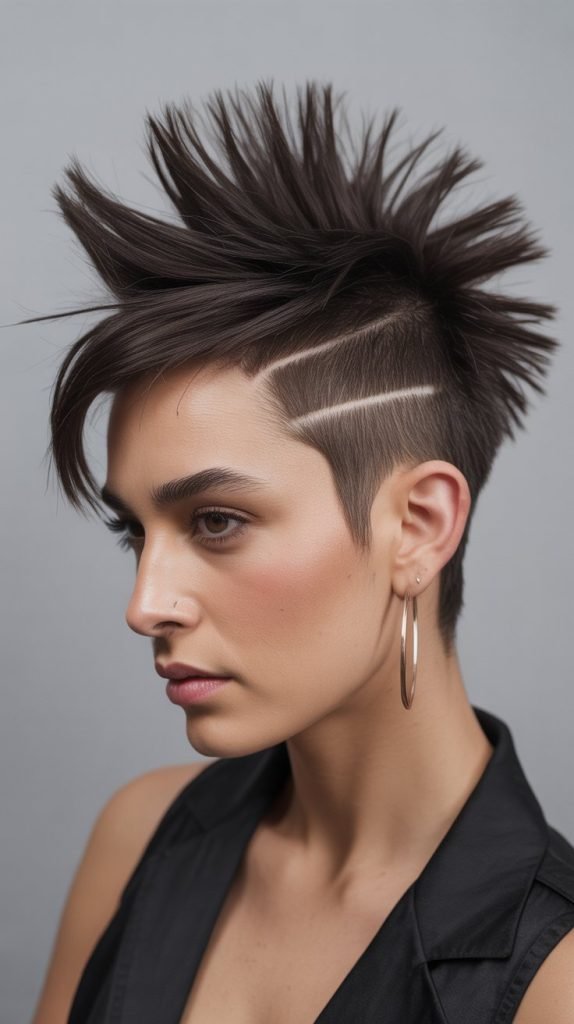
3. Spiky Pixie with Razor-Cut Edges
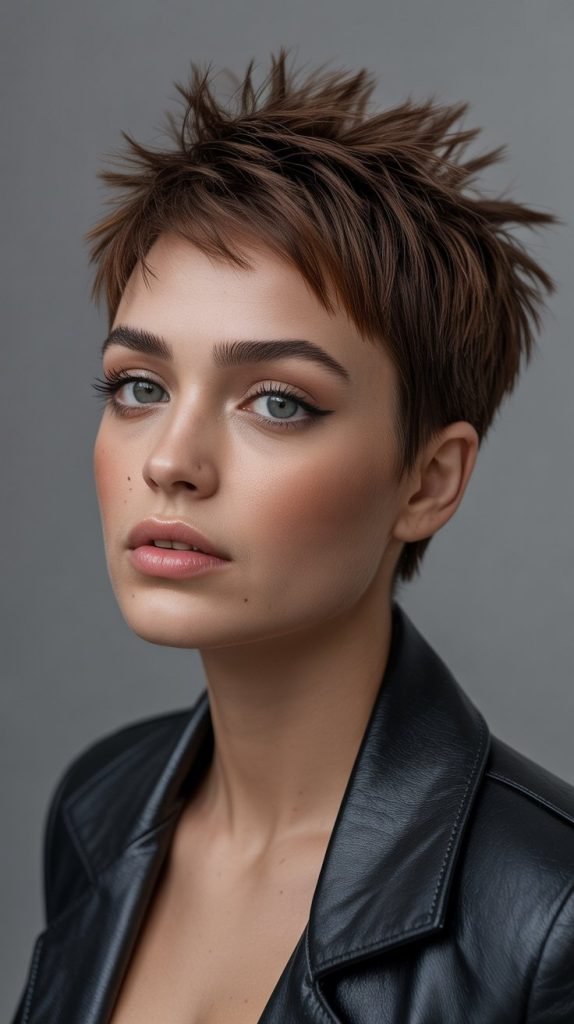
The spiky pixie delivers maximum edge while creating incredible volume for thin hair through strategic use of texture and height. Razor cutting creates feathered ends that naturally separate and stand up, giving the illusion of thicker, more abundant hair.
This style is perfect for those wanting to make a bold statement while addressing fine hair concerns.
- Apply strong-hold mousse to damp hair before styling for lasting spike formation
- Use a small round brush to lift sections straight up while blow-drying
- Finish with texturizing wax, working it through individual spikes for definition
- The razor-cut technique creates naturally irregular edges that prevent hair from looking too uniform or flat
- Consider subtle highlights to further enhance the spiky texture and add visual depth
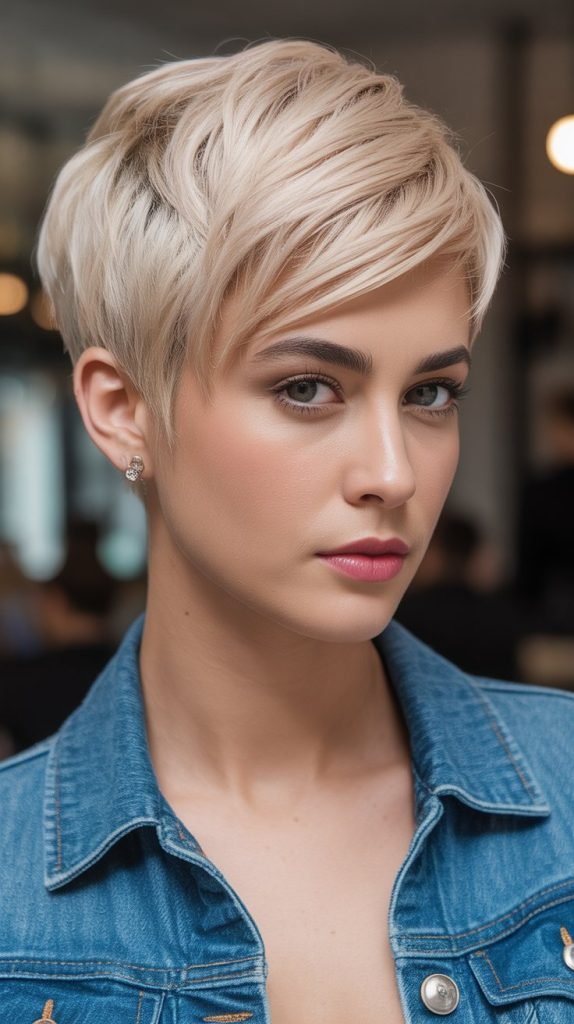
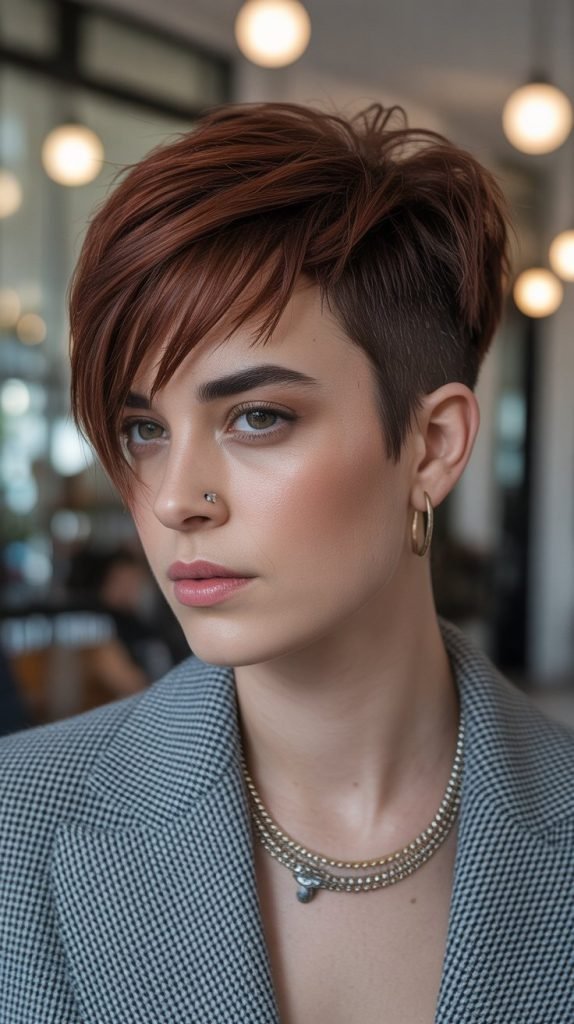
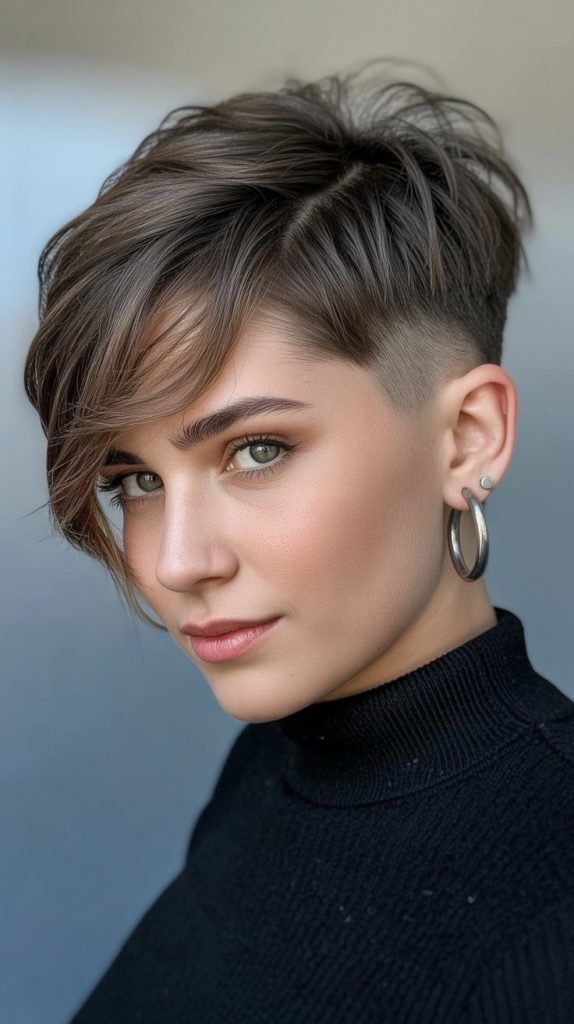
4. Undercut Pixie with Long Top Section
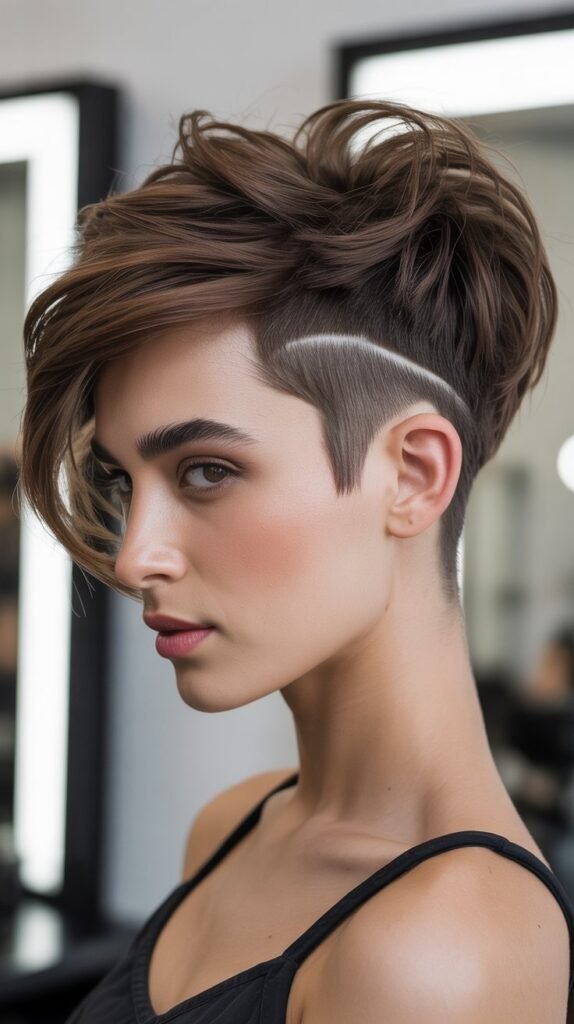
The undercut pixie creates a dramatic contrast that makes the remaining top section appear significantly thicker and more voluminous. By removing hair from the sides and back, all visual focus shifts to the longer crown area, creating the perfect illusion of fuller hair where it matters most.
- The top section should be at least 2-3 inches longer than the undercut areas for proper contrast
- Use volumizing powder at the roots of the top section for added lift and texture
- Style the longer top section forward or to one side for maximum impact
- Regular maintenance every 3-4 weeks is essential to keep the undercut clean and defined
- Consider gradual length transition rather than harsh lines for a more wearable everyday look
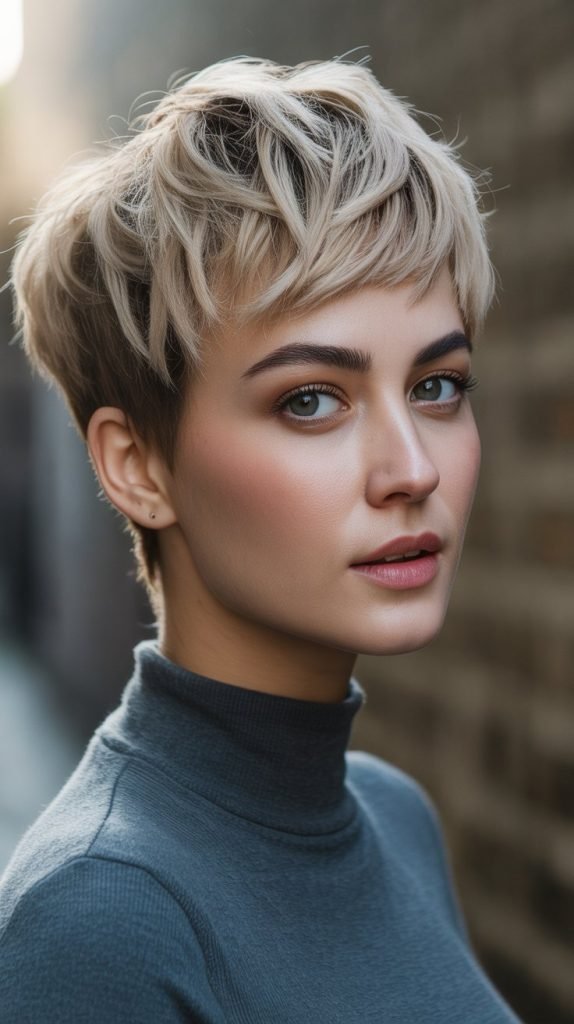
5. Tousled Pixie with Micro Bangs
Micro bangs combined with a tousled pixie create an unexpectedly voluminous effect for thin hair. The short, straight-across bangs draw attention upward while the tousled crown section appears fuller through strategic styling and texturizing techniques.
This combination creates multiple focal points that distract from any hair density concerns.
- Micro bangs should sit about 1 inch above the eyebrows for the most flattering proportion
- Use dry shampoo at the roots before styling to add grip and texture
- Scrunch sections of hair while applying texturizing cream for natural-looking tousled movement
- The contrast between structured bangs and messy crown creates visual interest that suggests more hair volume
- Style with fingers rather than brushes to maintain the deliberately imperfect tousled appearance
6. Layered Pixie with Face-Framing Wisps
Strategic layering combined with delicate face-framing wisps creates a softer approach to edgy pixie styling while maximizing volume for thin hair.
The multiple layers prevent hair from appearing flat while the wisps add feminine touches that balance the bold cut. This style works exceptionally well for fine hair because each layer contributes to the overall fullness.
- Ask for graduation cutting technique to create seamless layer blending
- The face-framing wisps should be the longest elements, extending slightly below ear level
- Use lightweight volumizing spray to avoid weighing down the delicate wispy sections
- Blow-dry each layer separately, lifting at the roots for maximum volume creation
- Regular deep conditioning treatments help maintain the health of frequently layered thin hair
7. Disconnected Pixie with Sharp Angles
The disconnected pixie features sections of hair cut to different lengths without blending, creating distinct geometric shapes that add visual weight to thin hair.
Sharp angles and clean lines make each section appear more substantial while the disconnected nature prevents the overall style from looking too uniform or flat.
- Each disconnected section should vary by at least 1-2 inches in length for proper definition
- Use strong-hold gel on individual sections to maintain the sharp, separated appearance
- The angular cutting technique creates natural shadows and depth that suggest fuller hair
- Focus on creating contrast between the shortest and longest disconnected sections
- This style requires precision cutting and regular maintenance to preserve the sharp geometric lines
8. Voluminous Crown Pixie
This style concentrates length and layers specifically in the crown area while keeping sides and back shorter, creating maximum height and volume where thin hair needs it most.
The dramatic height difference makes fine hair appear significantly thicker and more abundant through strategic proportion manipulation.
- The crown section should measure 3-4 inches while sides stay under 2 inches for optimal proportion
- Backcomb the crown section lightly before styling for added foundation volume
- Use volumizing mousse specifically on the longer crown area while avoiding the shorter sides
- Style the crown forward and upward using a round brush for maximum lift achievement
- Consider subtle lowlights in the crown area to create depth and shadow for enhanced volume illusion
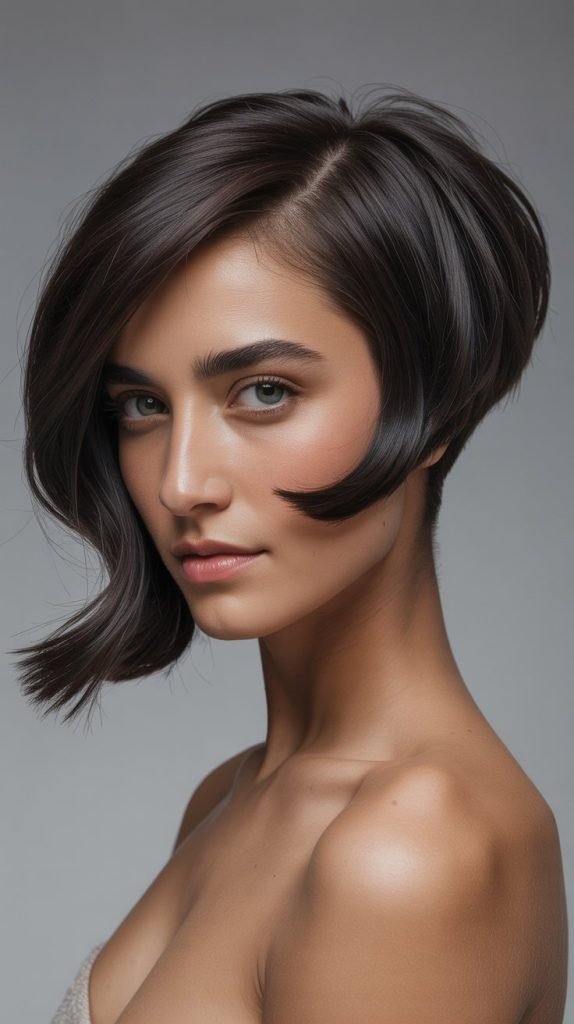
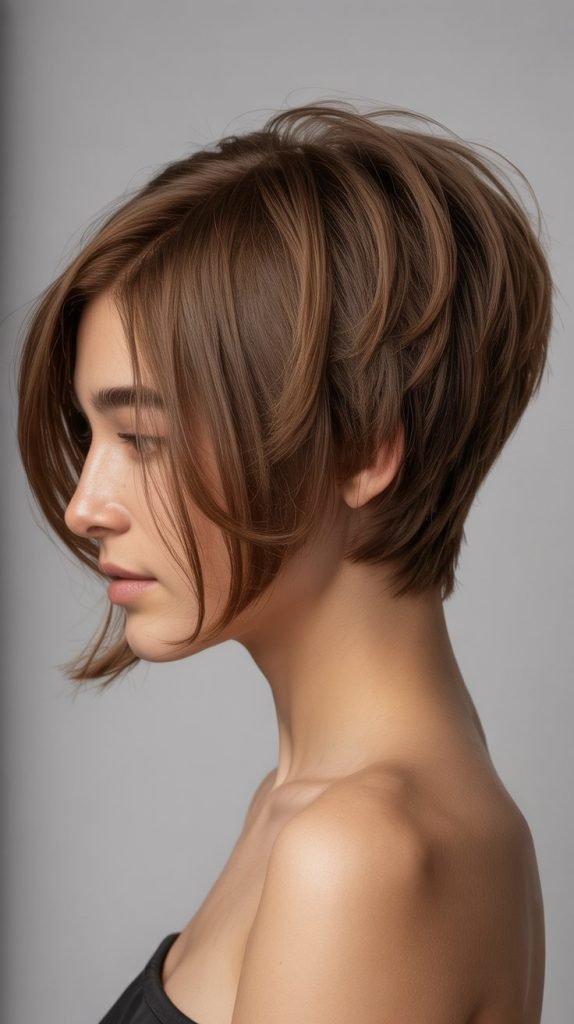
9. Edgy Bob-Pixie Hybrid
The bob-pixie hybrid combines the best elements of both cuts to create unique volume solutions for thin hair. This style features pixie-length back and sides with bob-length sections around the face, creating multiple layers and textures that work together to suggest fuller, thicker hair.
- The face-framing sections should extend to jaw length while back stays pixie-short
- Use different styling techniques on each section – texturize the pixie areas and smooth the bob sections
- This hybrid approach creates natural volume variation that prevents flat appearance
- Blow-dry the longer sections under with a round brush while lifting shorter sections upward
- The length contrast creates visual interest that distracts from fine hair texture
10. Messy Textured Pixie with Piecey Ends
The deliberately messy textured approach works exceptionally well for thin hair because it embraces natural movement while creating the appearance of more hair through separation and definition.
Piecey ends achieved through point cutting add to the overall textured effect while preventing the style from looking too polished or flat.
- Apply texturizing paste to damp hair before air-drying for natural messy texture
- Use fingers to separate and define individual pieces while hair is still slightly damp
- The piecey cutting technique creates irregular ends that naturally separate and add visual bulk
- Avoid over-brushing or smoothing to maintain the deliberately imperfect messy appearance
- Sleep with hair slightly damp and scrunch in the morning for effortless next-day texture
11. Pixie with Dramatic Side Part
A deep, dramatic side part instantly creates volume and visual weight on one side while adding asymmetrical interest to thin hair pixie cuts. This styling technique works with virtually any pixie variation while providing an easy way to add fullness and dimension to fine strands.
- Create the part when hair is damp for lasting hold throughout the day
- Use volumizing powder along the part line before styling for added lift
- Style the heavier side forward and down while lifting the lighter side up and back
- The dramatic part creates natural shadow and depth that suggests more hair density
- Switch part sides occasionally to prevent hair from becoming too accustomed to one direction
12. Layered Pixie with Flipped-Out Ends
Flipping the ends outward creates instant volume and movement that makes thin hair appear significantly fuller and more textured.
This technique works by directing hair away from the head, creating space and air between strands that suggests greater hair density and thickness.
- Use a small round brush to flip ends outward while blow-drying each section
- Apply light-hold hairspray while hair is still wrapped around the brush for lasting flip
- Focus the flipped-out technique on the crown and side sections for maximum volume impact
- The outward direction prevents hair from lying flat against the scalp
- Combine with texturizing spray for added grip and hold of the flipped position
13. Buzz Cut Fade with Textured Top

The buzz cut fade concentrates all remaining hair in the top section, making thin hair appear dramatically thicker and more substantial in the retained areas. The gradual fade creates clean contrast while the textured top provides ample opportunity for volume creation and styling versatility.
- The fade should transition gradually from longest to shortest over 2-3 inches for natural appearance
- Use strong-hold pomade on the textured top section for definition and control
- The textured top can be styled forward, backward, or to either side depending on preference
- Regular maintenance every 2-3 weeks keeps the fade clean and the contrast sharp
- This style works exceptionally well for those comfortable with very short sides and back
14. Asymmetrical Fringe Pixie
An asymmetrical fringe adds instant drama and visual weight to thin hair pixie cuts while creating the illusion of fuller hair through strategic length placement. The uneven fringe draws attention upward and forward, making the overall style appear more substantial and textured.
- Cut the fringe at varying lengths from 1 inch on one side to 3 inches on the other
- Use texturizing scissors on the fringe ends to create natural movement and separation
- Style the longer side of the fringe across the forehead while keeping the shorter side lifted
- The asymmetrical line creates visual interest that distracts from fine hair texture
- Apply lightweight styling cream to enhance the natural movement without weighing down thin strands
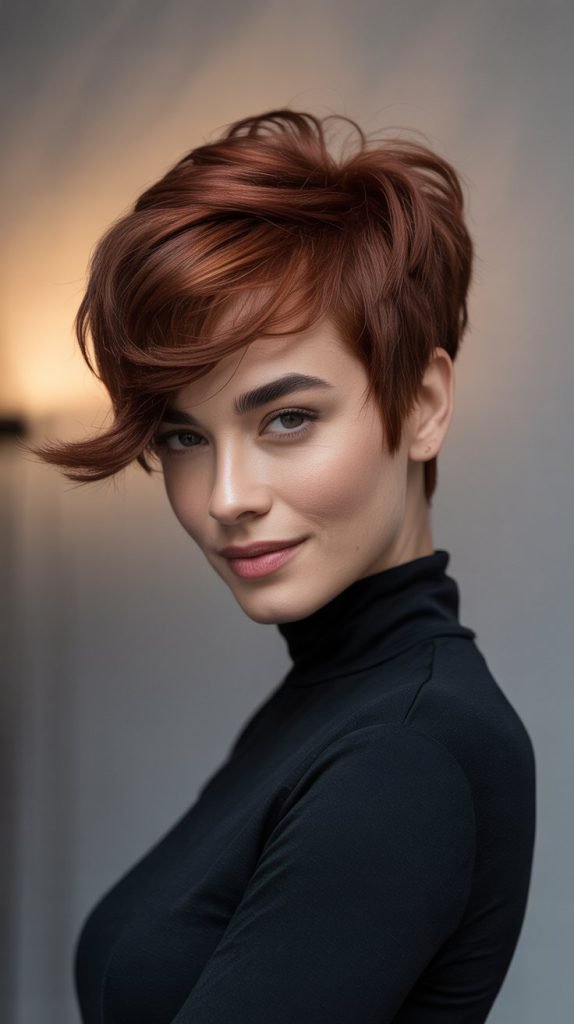
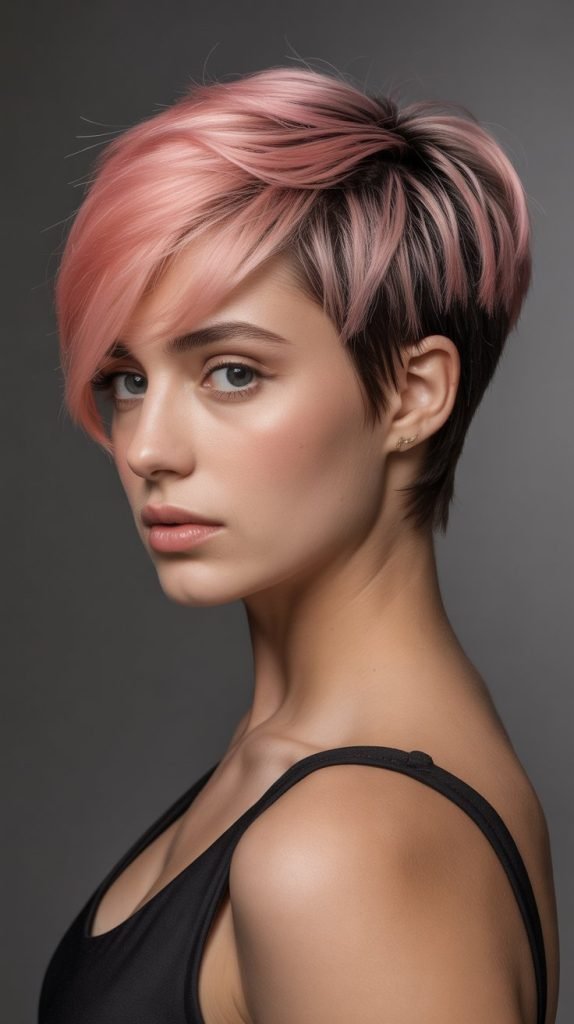
15. Choppy Pixie with Highlighted Ends
Strategic highlighting at the ends of a choppy pixie cut creates visual depth and dimension that makes thin hair appear significantly fuller. The lighter ends catch light differently than the darker base, creating the illusion of more hair through color contrast and reflection.
- Choose highlights 2-3 shades lighter than the base color for optimal contrast without damage
- Focus highlighting on the top layers and longest pieces for maximum visual impact
- The choppy cutting technique combined with color variation creates exceptional texture appearance
- Use purple shampoo weekly to maintain the highlighted ends without brassiness
- Style with texturizing paste to separate highlighted pieces and enhance the dimensional effect
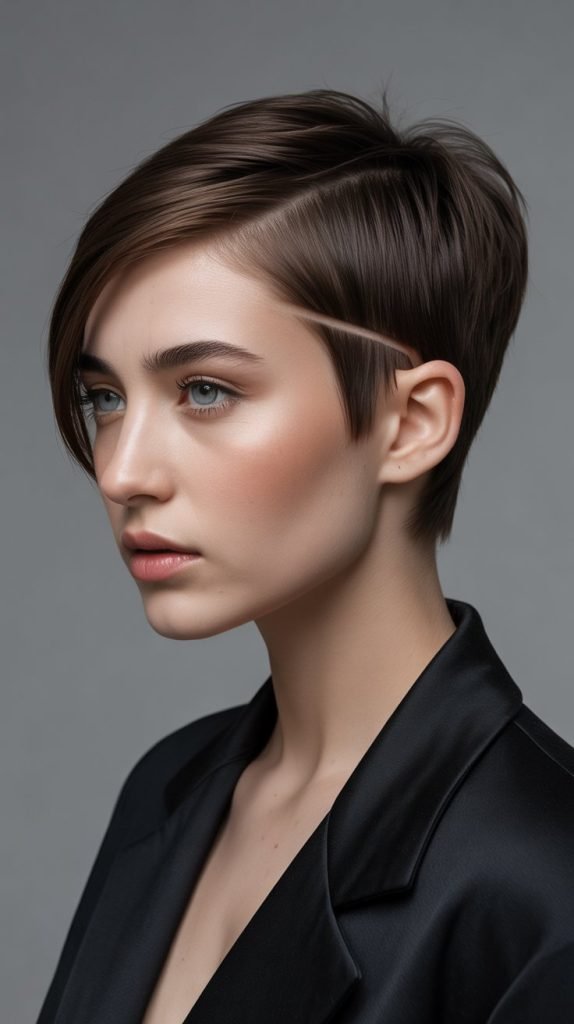
16. Slicked-Back Pixie with Side Fade
The slicked-back styling combined with side fades creates a sleek, edgy look while making thin hair appear thicker through concentrated styling in the top section.
This technique works by gathering all available hair into one focused area, creating the appearance of substantial volume and density.
- Apply strong-hold gel to damp hair and comb straight back from the forehead
- The side fades should be cut short to create maximum contrast with the slicked-back top
- Use a fine-tooth comb to create clean, precise lines in the slicked styling
- This style works best with hair that’s at least 2-3 inches long on top for proper slicking
- Finish with high-shine pomade for a polished, professional appearance
17. Tousled Crop with Razored Layers
Razor cutting combined with tousled styling creates maximum texture and movement for thin hair, making fine strands appear significantly fuller through deliberate imperfection and natural variation. The razor technique produces feathered edges that separate naturally and create dimensional styling.
- Request razor cutting throughout all layers for consistent feathered texture
- Scrunch hair with texturizing mousse while air-drying for natural tousled movement
- The razored edges create natural separation that prevents hair from clumping together
- Use sea salt spray to enhance the tousled texture without weighing down fine hair
- Sleep with hair in loose, twisted sections for enhanced next-day tousled appearance
18. Pixie with Curtain Bangs
Curtain bangs add instant volume and face-framing dimension to thin hair pixie cuts while creating the illusion of fuller hair through strategic length placement. The center-parted bangs create natural lift and movement that makes the overall style appear more substantial.
- Cut curtain bangs to cheekbone length with gradual layering for natural movement
- Style by blow-drying each side away from the center part with a round brush
- The curtain effect creates natural volume at the crown while softening the pixie cut
- Use volumizing cream on the bang sections for enhanced lift and hold
- Regular trimming every 4-6 weeks maintains the proper curtain bang shape and length
19. Edgy Pixie with Color Blocking
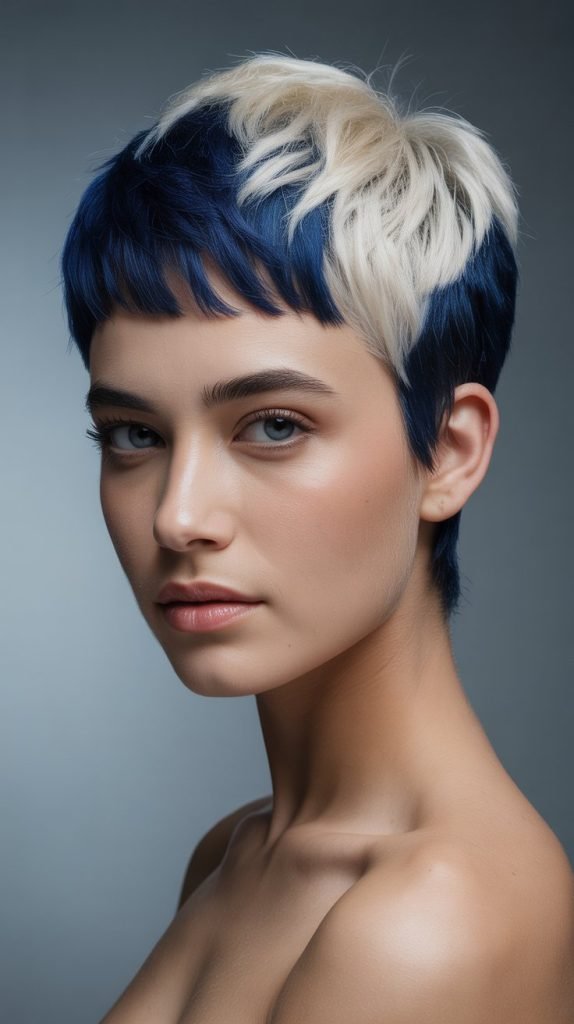
Strategic color blocking using contrasting tones creates visual depth and dimension that makes thin hair appear significantly thicker through optical illusion. Different colored sections catch light uniquely, creating the appearance of more substantial hair volume and texture.
- Choose colors with significant contrast – dark base with light sections or vice versa
- Focus color blocking on the top layers where volume enhancement is most needed
- The contrasting sections create natural shadows and highlights that suggest depth
- Use color-safe styling products to maintain the vibrancy of blocked sections
- Professional application ensures proper placement for maximum visual impact
20. Disconnected Undercut Pixie
The disconnected undercut creates dramatic contrast by completely separating the longer top section from the buzzed sides, making thin hair in the crown area appear exponentially thicker through concentrated styling focus. This technique eliminates any visual competition from side hair.
- The disconnection should be clean and sharp with no blending between sections
- Style the top section with maximum volume using root-lifting products
- The dramatic length difference creates optical illusion of substantial hair thickness
- Use strong-hold styling products to maintain separation between disconnected sections
- Regular maintenance keeps the undercut clean and the disconnection sharp
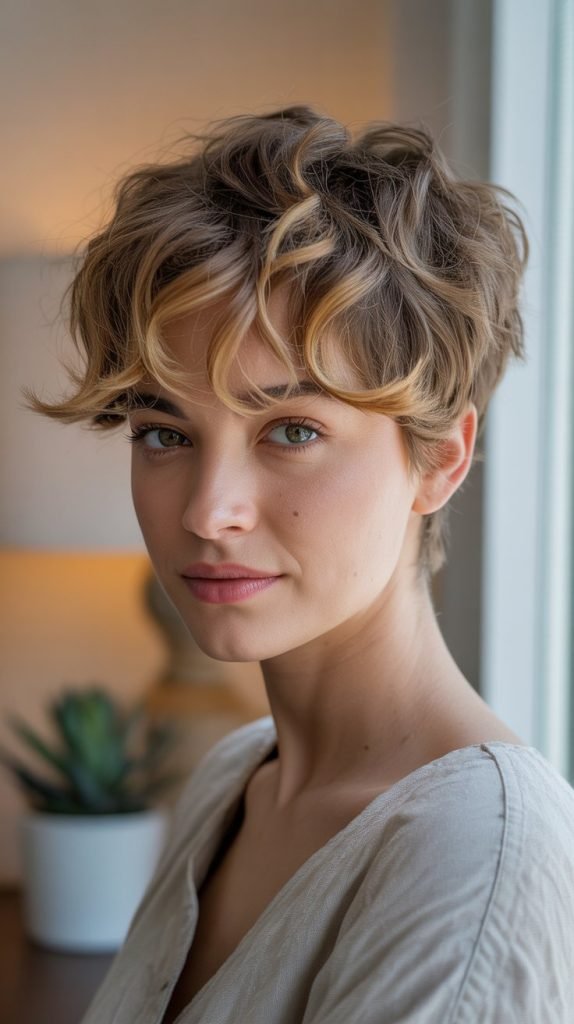
21. Wavy Textured Pixie
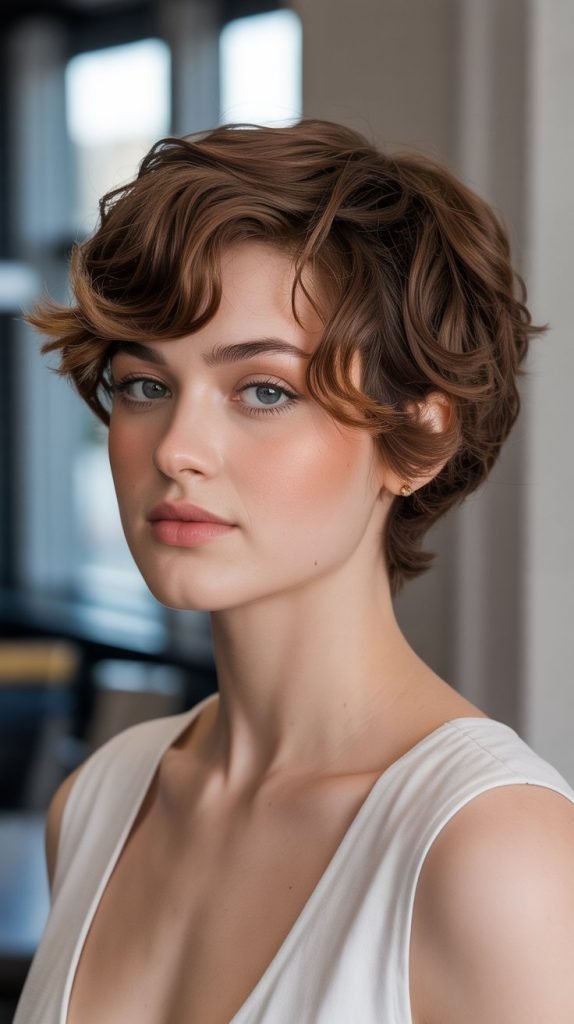
Working with natural wave patterns or creating artificial waves through styling adds incredible volume and movement to thin hair pixie cuts. The wave formation lifts hair away from the scalp, creating space and dimension that suggests much fuller, thicker hair.
- Use wave-enhancing cream on damp hair before air-drying or diffusing
- Scrunch sections while drying to encourage natural wave formation and separation
- The wave texture prevents hair from lying flat while creating natural volume
- Sleep with hair in small braids for enhanced wave texture the following day
- Avoid brushing waves when dry to maintain the natural textured appearance
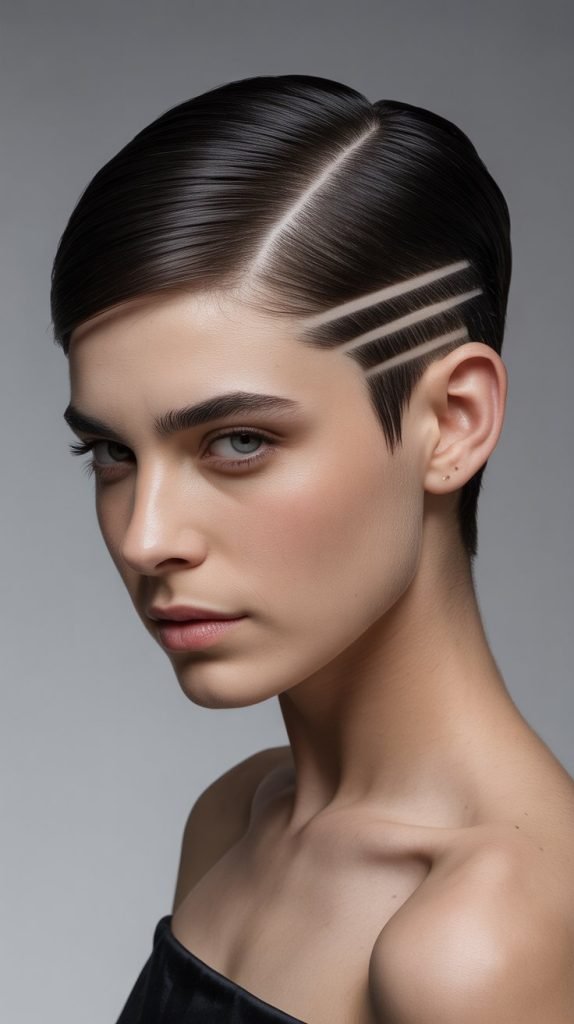
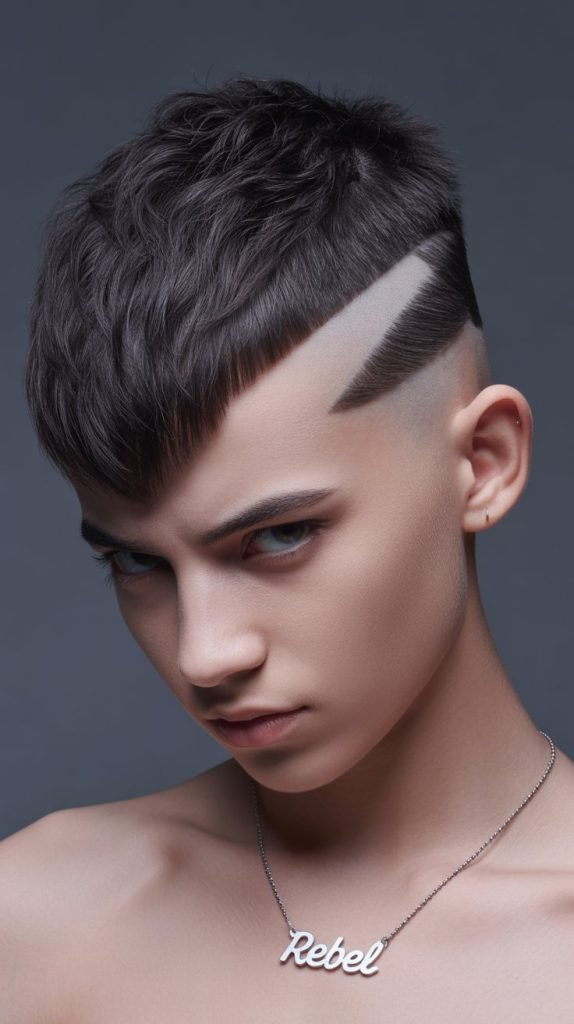
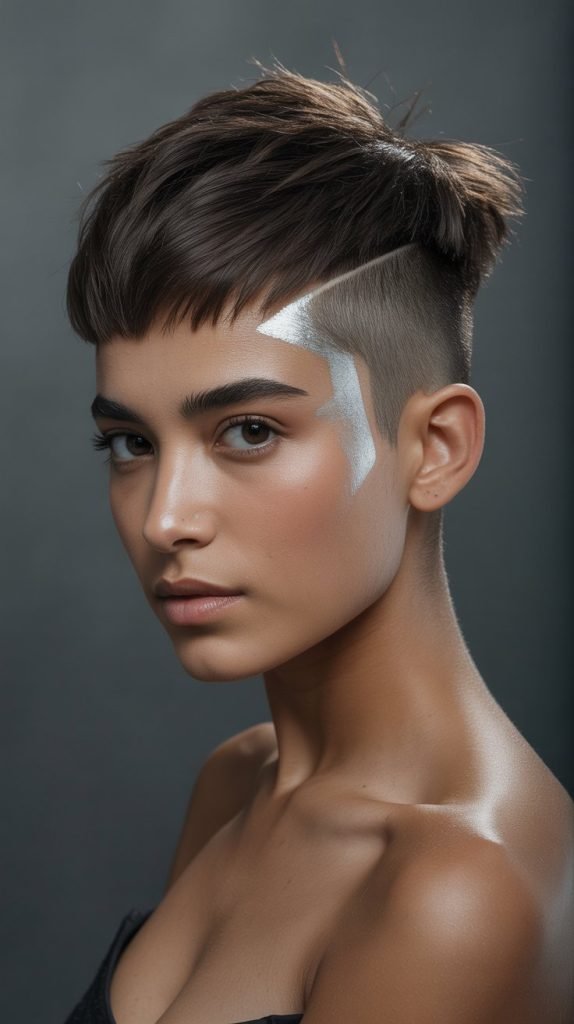
22. Pixie with Shaved Designs
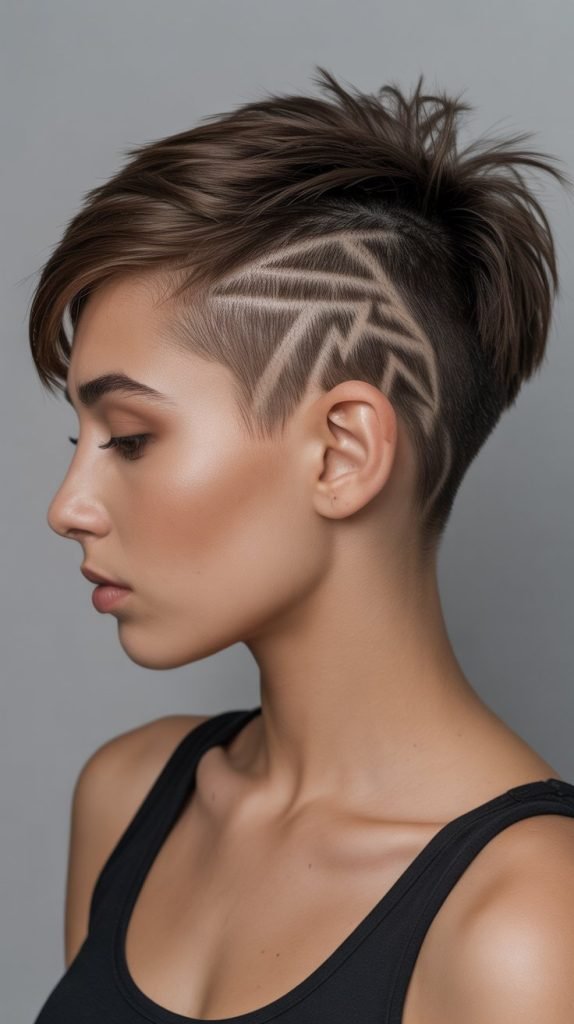
Incorporating shaved designs into pixie cuts creates visual interest while making the remaining hair appear thicker through contrast and focused attention. The artistic elements add edge while serving the practical purpose of volume enhancement through strategic hair removal.
- Choose simple geometric designs that complement the overall pixie shape
- The shaved areas create clean contrast that makes unshaved sections appear fuller
- Use precision clippers for clean, sharp design lines that enhance the overall effect
- Regular touch-ups every 2-3 weeks maintain the crispness of shaved design elements
- Consider temporary designs first to ensure satisfaction before committing to permanent styles
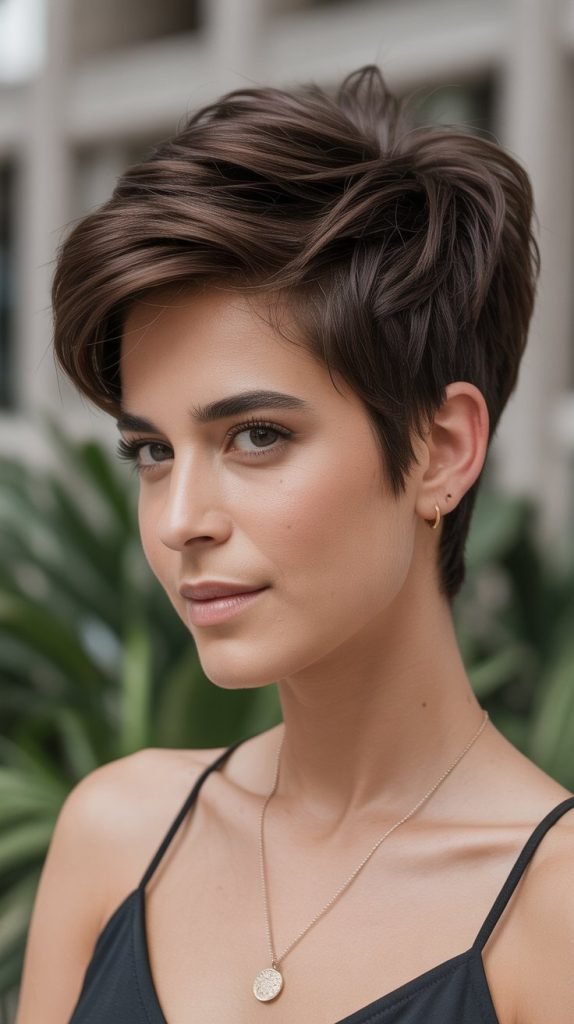
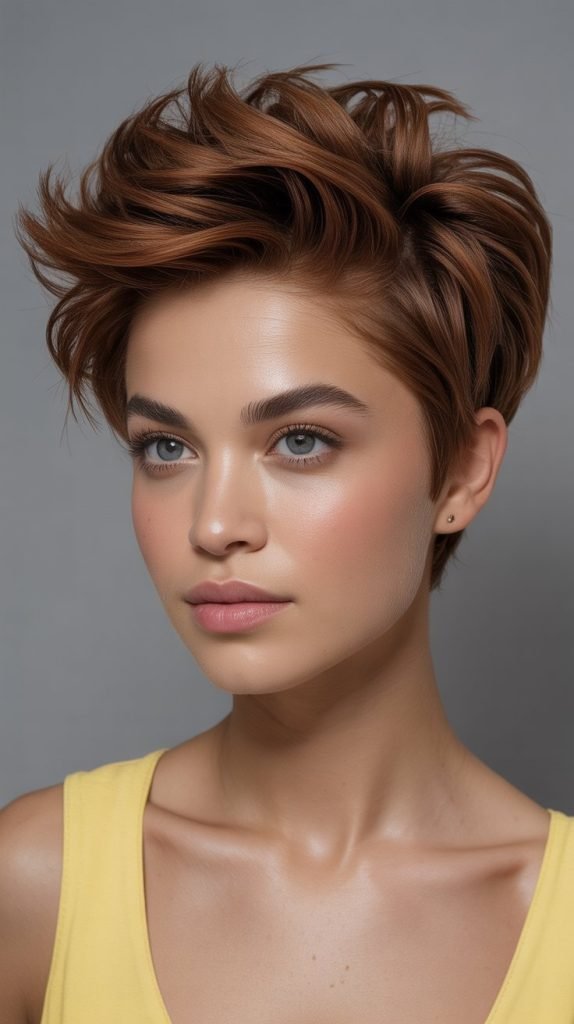
23. Forward-Swept Pixie
Styling hair forward creates instant volume and movement while making thin hair appear significantly fuller through directional manipulation. This technique concentrates all available hair toward the face, creating the appearance of substantial volume and density.
- Apply volumizing mousse before blow-drying hair forward with a round brush
- The forward direction creates natural lift at the crown while adding movement
- Use texturizing paste to separate forward-swept sections and enhance definition
- This styling works exceptionally well for hiding crown thinning or sparse areas
- Finish with light-hold hairspray to maintain the forward direction throughout the day
24. Layered Pixie with Feathered Ends
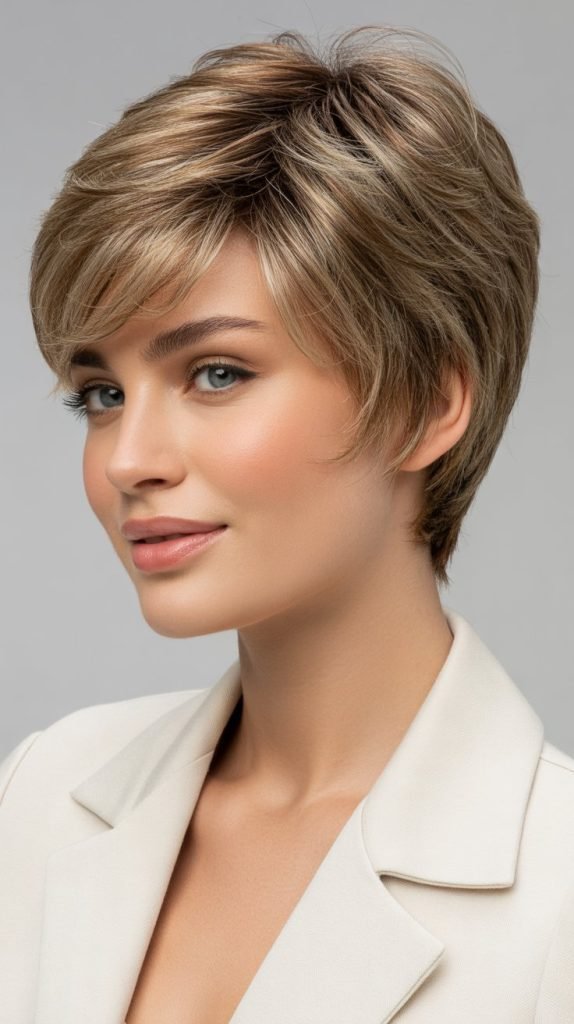
Feathered ends achieved through proper cutting techniques create natural movement and separation that makes thin hair appear significantly more voluminous.
The feathering technique produces soft, wispy ends that catch light beautifully while preventing the blunt appearance that can make fine hair look sparse.
- Use thinning shears to create natural feathered edges throughout all layers
- The feathering prevents harsh lines while encouraging natural hair movement
- Style with lightweight mousse to enhance the feathered texture without weighing down fine hair
- Blow-dry individual sections while lifting at the roots for maximum volume enhancement
- The soft, feathered appearance creates the illusion of naturally thicker, healthier hair
25. Pixie with Deep V-Cut Back
The deep V-cut at the back creates dramatic angles while concentrating length in specific areas, making thin hair appear thicker through strategic shape manipulation. This cutting technique adds visual interest while serving the practical purpose of volume enhancement.
- The V-cut should extend from the crown down to the nape in a sharp, defined line
- Keep side lengths shorter to emphasize the dramatic back shape
- Style the V-cut section with texturizing products to enhance the unique shape
- This technique works best with hair that’s at least 2-3 inches long in the back
- Regular maintenance preserves the sharp V-line and prevents the shape from becoming unclear
26. Spiky Mohawk Pixie
The mohawk-inspired pixie concentrates all visual focus on the center strip of hair, making thin strands appear dramatically thicker through concentrated styling. The spiky texture adds height and dimension while creating the edgiest possible pixie variation.
- Style the center section straight up using strong-hold gel and blow-dry vertically
- Keep side sections very short to create maximum contrast with the mohawk strip
- Use texturizing wax on individual spikes for definition and separation
- The vertical styling creates maximum height and visual impact from available hair
- Consider subtle color highlights in the mohawk section for additional visual interest
27. Asymmetrical Bob-Pixie
This hybrid style combines longer bob elements on one side with pixie-short sections on the other, creating natural volume through length variation. The asymmetrical approach prevents flat appearance while offering versatile styling options for thin hair.
- The longer side should reach jaw length while the shorter side stays above ear level
- Style each side differently – smooth the longer section and texturize the shorter
- The length contrast creates visual interest that distracts from fine hair texture
- Use different products on each side to enhance their individual characteristics
- This style requires regular maintenance to preserve the asymmetrical balance
28. Textured Pixie with Hair Rings
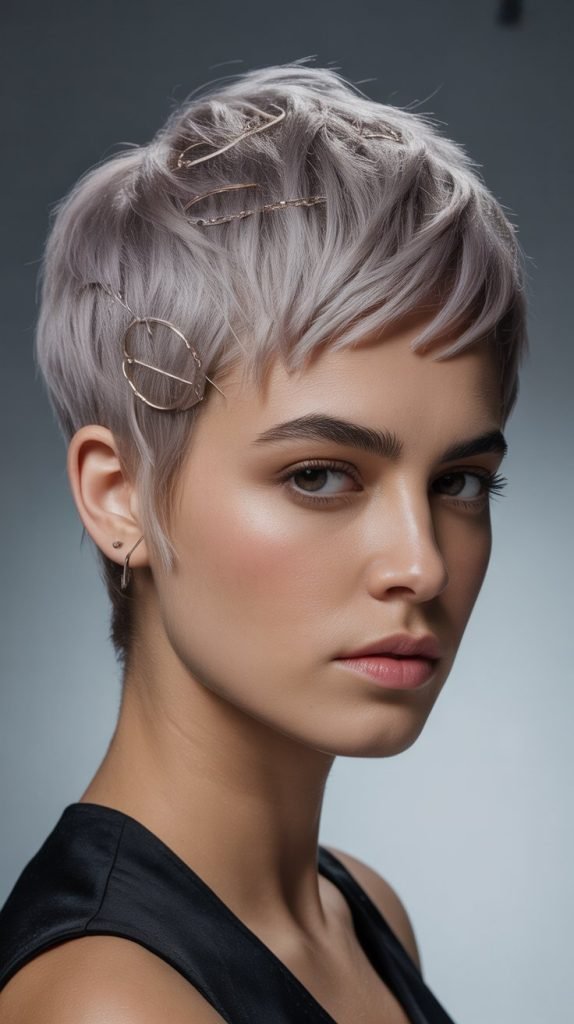
Adding hair rings or small hair accessories creates visual breaks that make thin hair appear fuller while adding edgy, contemporary style elements. The accessories create focal points that enhance the overall textured appearance of the cut.
- Choose thin metal rings that won’t weigh down fine hair strands
- Place rings strategically on longer pieces where they’ll be most visible
- The rings create visual interest while breaking up the hair’s natural fall pattern
- Use texturizing paste to enhance the natural movement around ringed sections
- Remove rings before sleeping to prevent hair breakage or tangling
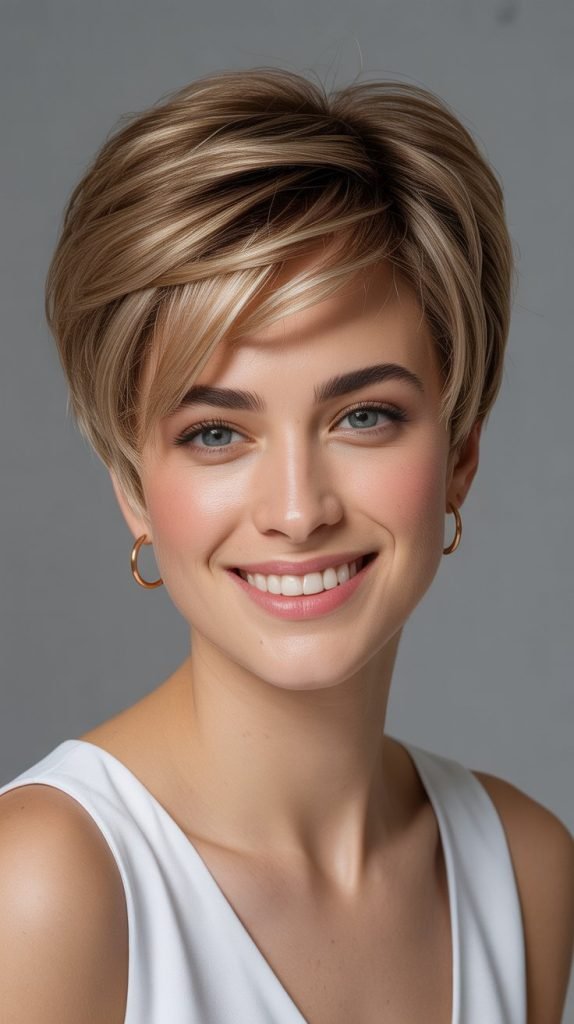
29. Graduated Pixie Cut
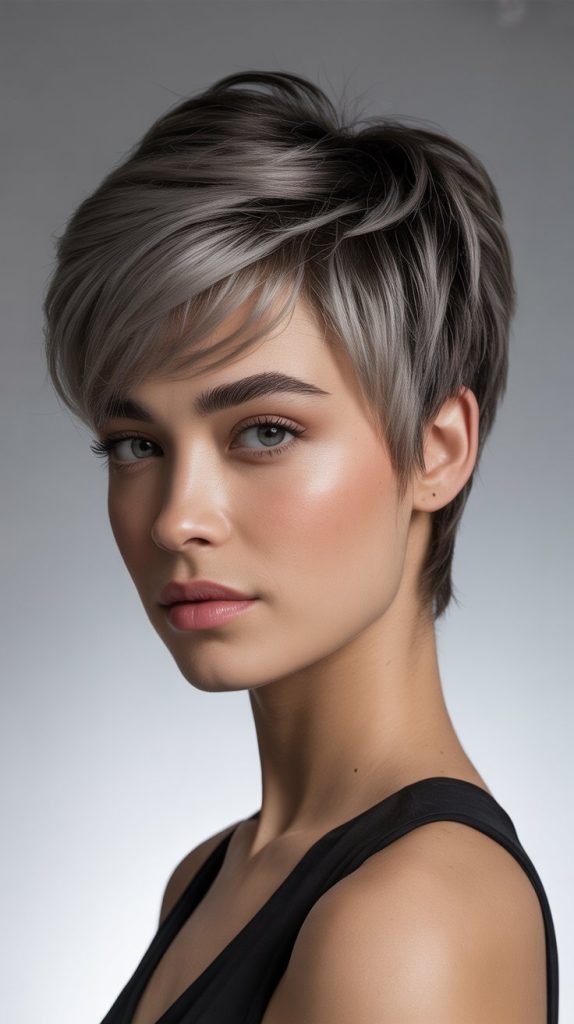
The graduated cutting technique creates natural volume buildup from back to front, with each layer building upon the previous one to create substantial visual weight.
This approach works exceptionally well for thin hair because it maximizes the appearance of density through strategic layering.
- Each graduated layer should be approximately half an inch longer than the layer below
- The graduation creates natural stacking that prevents hair from lying flat
- Style with volumizing powder at each layer for enhanced lift and separation
- Use a round brush while blow-drying to enhance the natural graduated shape
- This technique requires precision cutting to achieve proper graduation balance
30. Pixie with Razor-Straight Bangs
Razor-straight bangs create a bold contrast element while making the remaining hair appear thicker through visual balance. The sharp horizontal line draws attention while the blunt cutting technique makes fine hair appear more substantial and defined.
- Cut bangs with a straight razor for the sharpest, most precise line
- The bangs should sit just above the eyebrows for optimal facial proportion
- Style the rest of the pixie with texture while keeping bangs pin-straight
- Use smoothing serum on bangs only to maintain the straight line without affecting texture
- Regular trimming every 3-4 weeks maintains the razor-sharp bang line
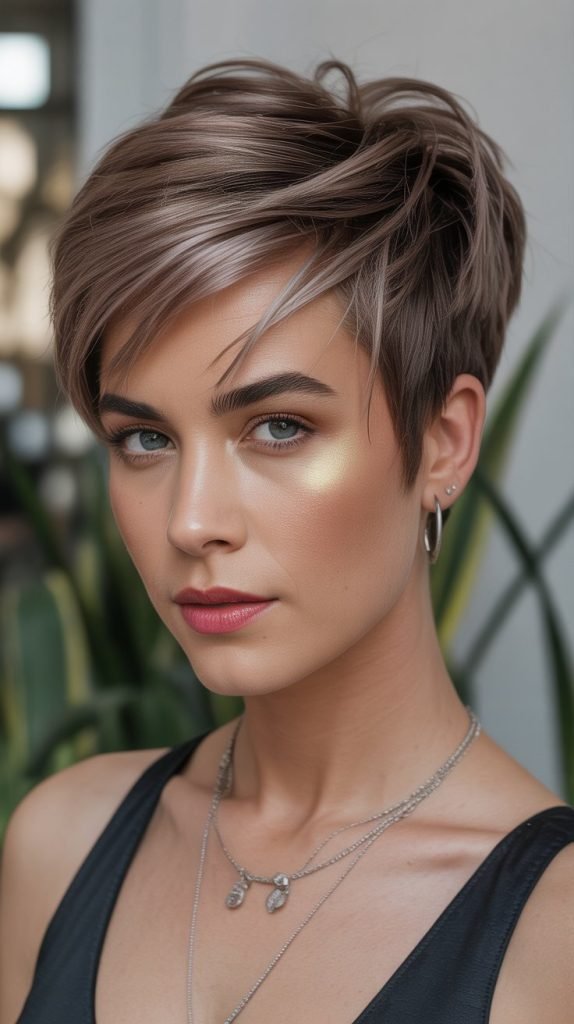
31. Layered Pixie with Side Undercut
Combining traditional layering with a side undercut creates the best of both techniques – natural volume from layers while concentrating visual focus through strategic hair removal. This approach maximizes the appearance of thickness in retained hair areas.
- Keep layers in the crown and opposite side while undercutting one side completely
- The contrast makes layered sections appear exponentially thicker
- Style layers with texturizing products while maintaining clean undercut lines
- This combination offers versatile styling – hide or showcase the undercut as desired
- Regular maintenance keeps both elements looking sharp and well-defined
32. Messy Bedhead Pixie
The deliberately messy bedhead approach works exceptionally well for thin hair because it embraces natural movement while creating volume through controlled chaos. This style makes fine hair appear thicker by preventing any uniform or flat appearance.
- Apply texturizing cream to damp hair and scrunch while air-drying naturally
- Use fingers instead of brushes to maintain the natural messy texture
- Sleep with slightly damp hair twisted in random directions for authentic bedhead texture
- The imperfect appearance masks any areas where thin hair might be more noticeable
- Embrace the natural movement and avoid over-styling for the most authentic effect
33. Pixie with Finger Waves
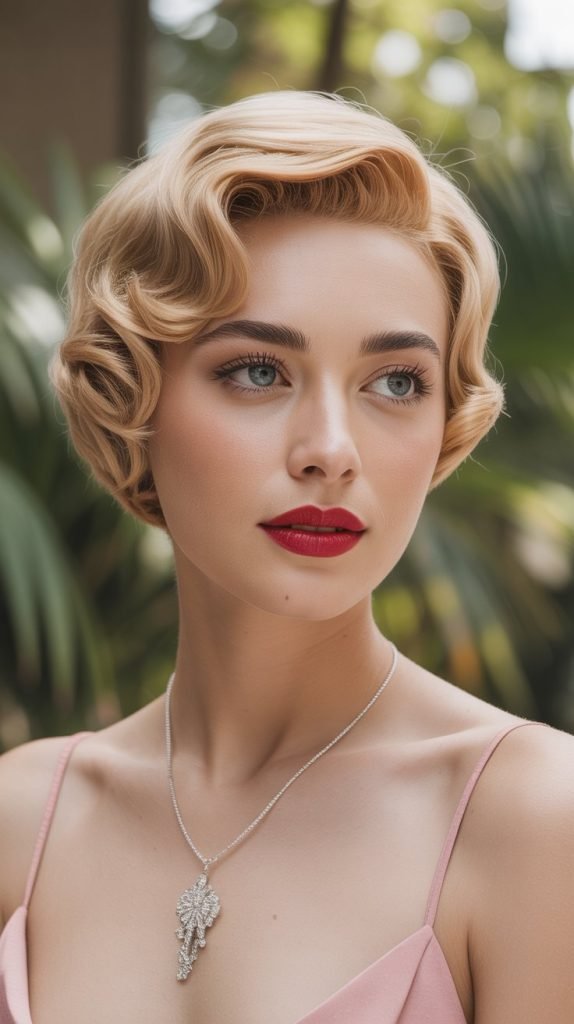
Creating finger waves in pixie cuts adds vintage glamour while significantly increasing visual hair volume through strategic wave placement. The waves create natural lift and movement that makes thin hair appear substantially fuller and more textured.
- Use wave-setting lotion on damp hair before creating finger wave patterns
- Press waves into place using fingers and hold until completely dry
- The waves create natural volume and prevent hair from lying flat against the scalp
- Brush out slightly for softer waves or leave defined for dramatic vintage effect
- This technique works best on hair that’s at least 2 inches long for proper wave formation
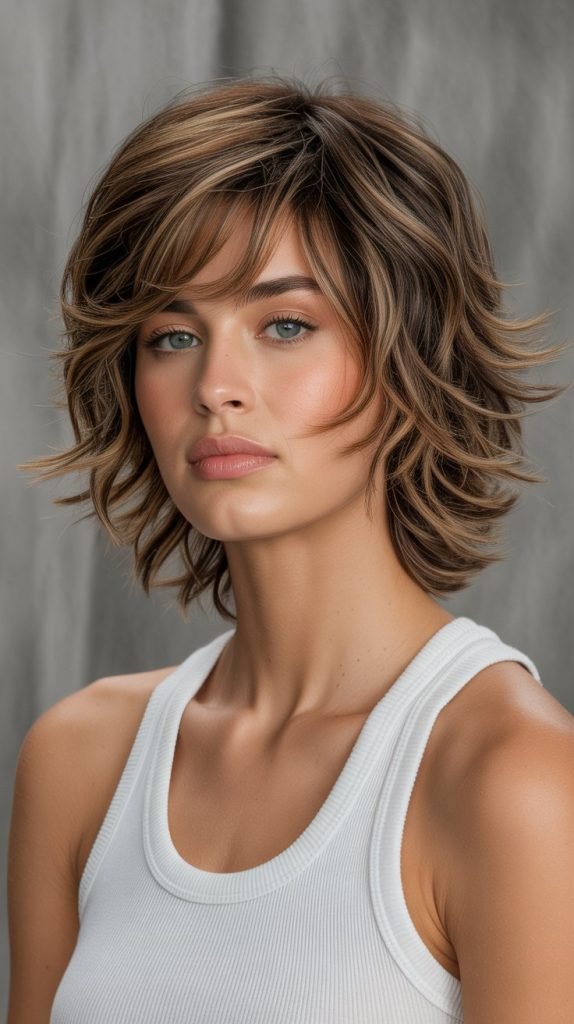
34. Pixie Bob with Graduated Layers
The pixie bob combines the best elements of both cuts while using graduated layers to maximize volume for thin hair. This approach creates natural stacking that builds substantial visual weight while maintaining the edgy pixie aesthetic.
- Keep the back pixie-short while allowing front sections to reach chin length
- Graduate layers from shortest to longest for natural volume building
- The length variation creates multiple styling options while enhancing fullness
- Style back sections with texture while smoothing longer front pieces
- This hybrid approach offers versatility while addressing thin hair concerns
35. Disconnected Pixie with Color Contrast
Using dramatic color contrast in disconnected sections creates optical illusions that make thin hair appear significantly thicker. The color separation enhances the disconnected cutting technique while adding visual weight through strategic color placement.
- Choose colors with maximum contrast for the most dramatic effect
- Apply different colors to disconnected sections to enhance separation
- The color contrast creates natural shadows and depth that suggest volume
- Use color-protecting styling products to maintain vibrancy
- Professional application ensures proper color placement for maximum visual impact
36. Pixie with Swept-Up Styling
Styling hair upward and away from the face creates maximum volume while making thin hair appear dramatically thicker through directional manipulation. This approach concentrates all available hair into high-impact styling that suggests substantial density.
- Apply strong-hold mousse before blow-drying hair straight up with a round brush
- Use texturizing paste to separate upward-styled sections and create definition
- The upward direction prevents any flat appearance while maximizing volume
- Finish with flexible-hold hairspray to maintain the swept-up position
- This styling technique works exceptionally well for special occasions or dramatic daily looks
37. Edgy Pixie with Metallic Highlights
Metallic highlights add dimension and visual weight to thin hair while creating the ultimate edgy pixie statement. The reflective quality of metallic tones catches light uniquely, creating depth and movement that suggests much fuller hair.
- Choose metallic tones that complement natural coloring – silver, rose gold, or copper
- Focus metallic highlights on top layers where light reflection will be most visible
- The metallic quality creates natural dimension without requiring extreme color changes
- Use color-enhancing styling products to maintain metallic vibrancy
- Professional application ensures proper tone achievement and hair health maintenance
Conclusion
The 37 Edgy Pixie Haircuts for Thin Hair: Fuller-Looking Styles presented in this comprehensive guide demonstrate that fine hair should never limit your style ambitions.
Each technique, from strategic layering to creative color applications, has been carefully selected to address the unique challenges of thin hair while delivering maximum edge and attitude.
These cuts prove that with the right approach, thin hair can appear dramatically fuller while maintaining that coveted rebellious pixie spirit.
The key to success with any of these styles lies in understanding how different cutting techniques, styling methods, and color applications work together to create optical illusions of thickness and volume.
Whether you prefer the subtle enhancement of graduated layers or the dramatic impact of disconnected sections with color contrast, there’s a perfect edgy pixie solution for every thin hair type and personal style preference.
Remember that regular maintenance and the right styling products are essential for keeping these cuts looking their absolute best while maximizing their volume-enhancing benefits.