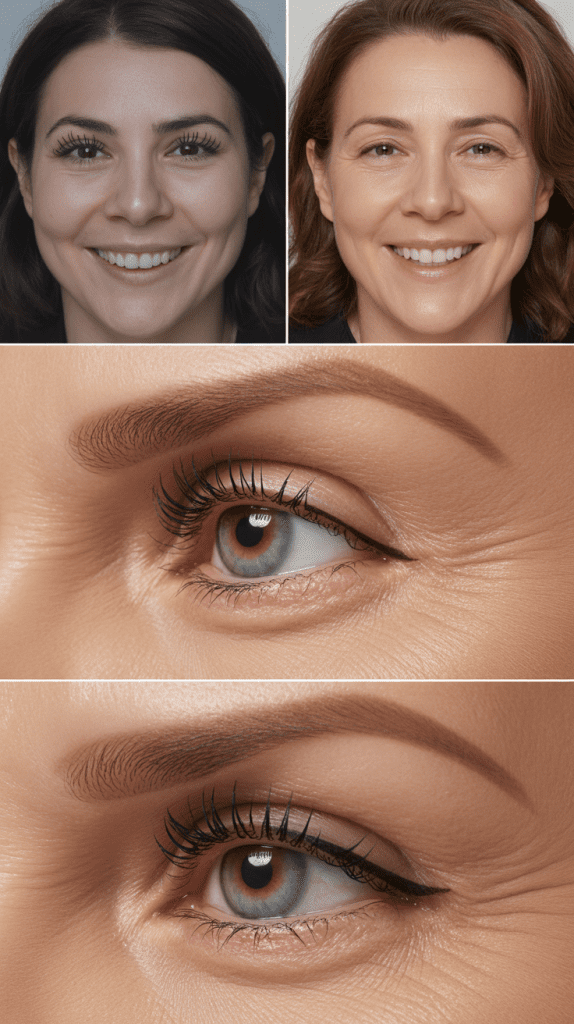
As we embrace the beauty of aging, our makeup techniques need to evolve alongside us.
If you’re searching for ways to enhance your natural features and create the illusion of larger, more youthful eyes, you’ve come to the right place.
This comprehensive guide on 35 Eye Makeup Tips for Women Over 50 to Make Eyes Look Bigger will transform your beauty routine with practical, age-appropriate techniques that celebrate your mature elegance.
Whether you’re dealing with hooded lids, fine lines, or simply want to brighten your gaze, these expert-approved strategies will help you achieve stunning results.
From choosing the right eyeshadow formulas to mastering eyeliner placement, each tip is designed specifically for mature skin and eye shapes.
Get ready to rediscover your eyes and learn professional secrets that will make you look refreshed, confident, and absolutely radiant.
In This Post......
- 1. Start with a Quality Eye Primer
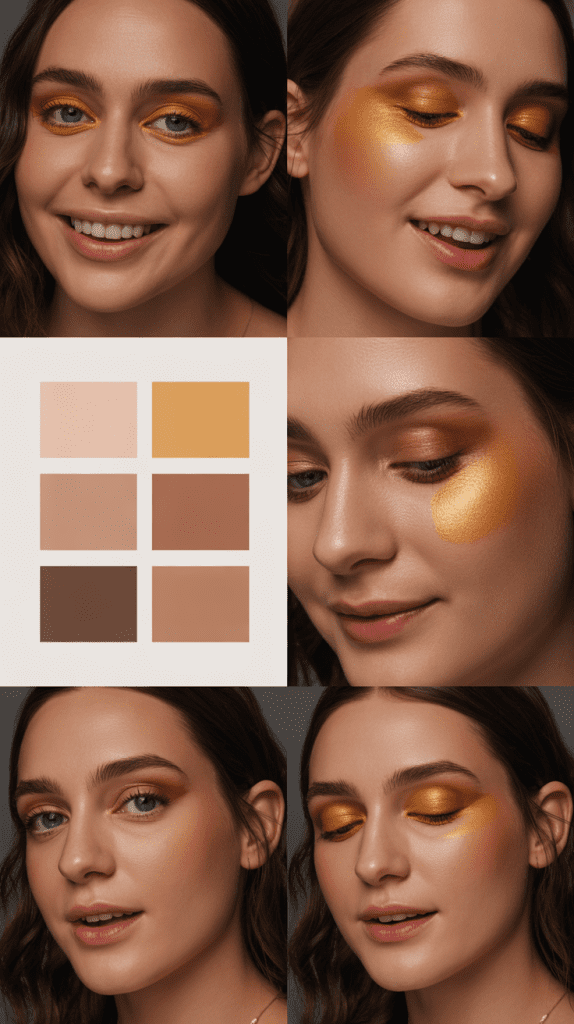
- 2. Choose Cream Eyeshadows Over Powder
- 3. Lighten Your Lower Lash Line
- 4. Master the Transition Shade Technique
- 5. Highlight the Brow Bone Strategically
- 6. Skip Heavy Black Eyeliner
- 7. Tight-Line Your Upper Lash Line
- 8. Create a Soft Wing at the Outer Corner
- 9. Use White or Nude Eyeliner on the Waterline
- 10. Curl Your Lashes Properly
- 11. Apply Mascara to Upper Lashes Only
- 12. Select Cool-Toned Neutral Eyeshadows
- 13. Place Darker Shades in the Outer V
- 14. Avoid Shimmer on the Entire Lid
- 15. Brighten the Inner Corner
- 16. Blend, Blend, Blend
- 17. Use Eyelash Primer Before Mascara
- 18. Define Your Brows Properly
- 19. Avoid Metallic Finishes in the Crease
- 20. Try the Halo Eye Technique
- 21. Use Smaller Brushes for Precision
- 22. Set Your Eye Makeup with Powder
- 23. Apply Concealer After Eye Makeup
- 24. Choose Lengthening Over Volumizing Mascara
- 25. Consider Lash Extensions or a Lash Lift
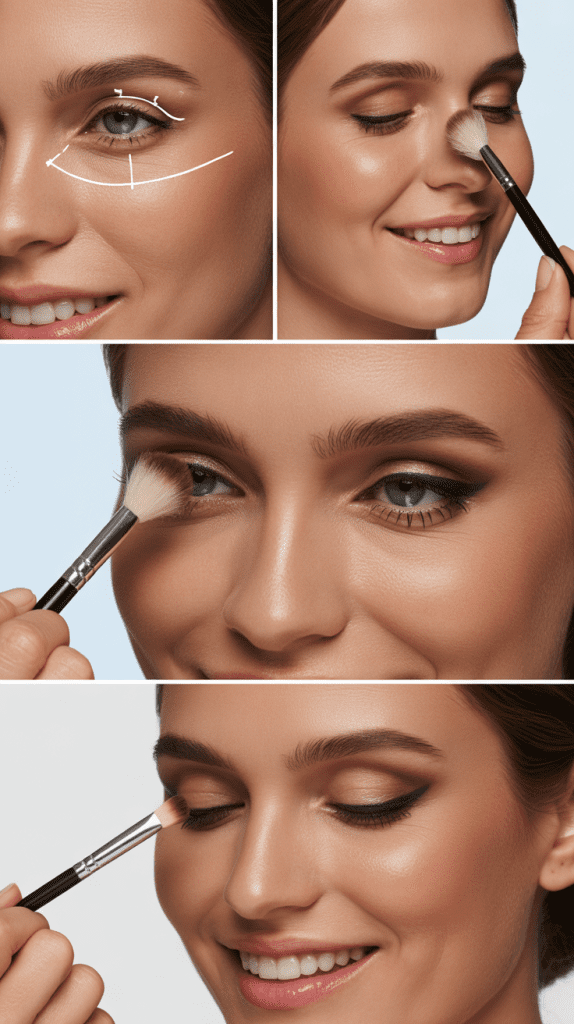
- 26. Use the Triangle Technique Under Eyes
- 27. Map Your Eyes Before Applying Makeup
- 28. Avoid Black Eyeshadow
- 29. Incorporate Warmer Tones Strategically
- 30. Use Q-Tips for Cleanup and Precision
- 31. Layer Eyeliners for Depth
- 32. Refresh Throughout the Day
- 33. Practice Good Skincare for Your Eyes
- 34. Experiment with Colored Eyeliner
- 35. Remove Makeup Gently Every Night
- Essential Eye Makeup Products Table
- Conclusion
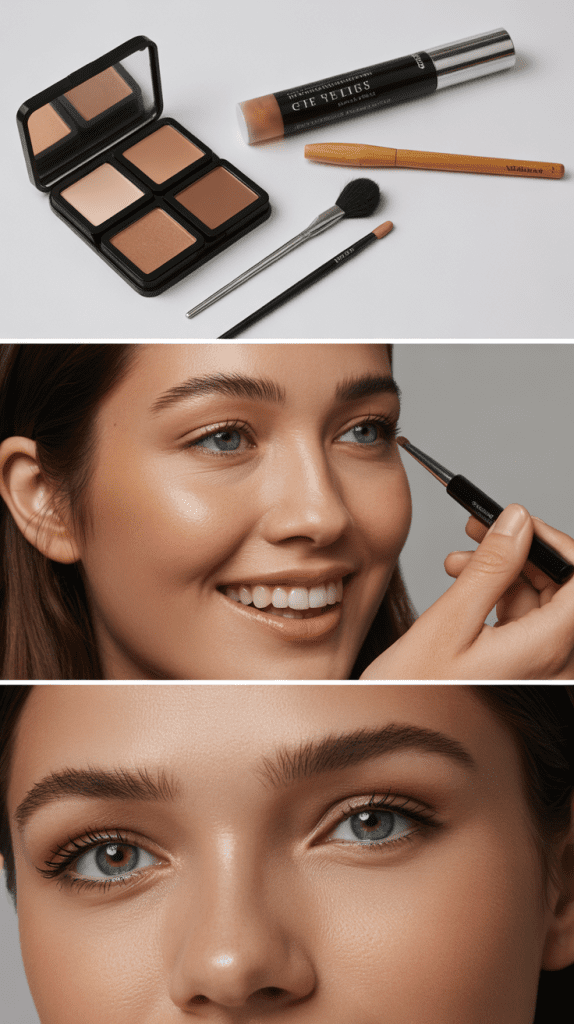
1. Start with a Quality Eye Primer
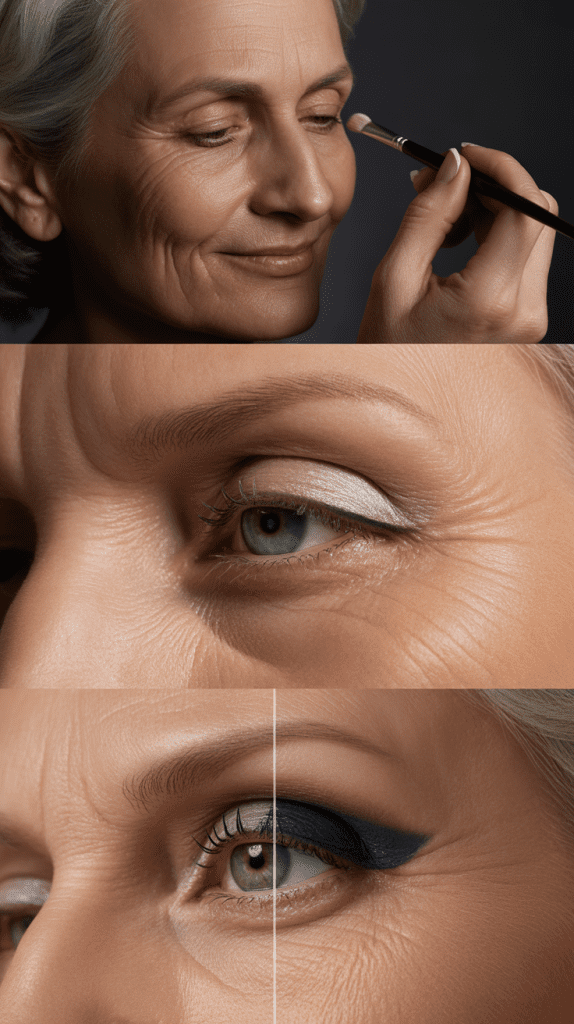
Eye primer becomes essential after 50 as it creates a smooth canvas for eyeshadow application and prevents creasing throughout the day.
The right primer can dramatically improve how your eye makeup looks and lasts.
- Choose a hydrating primer formula that won’t settle into fine lines or emphasize dryness around the delicate eye area
- Apply a thin layer from lash line to brow bone, gently patting it in with your ring finger for even distribution
- Wait 30-60 seconds for the primer to set before applying any eyeshadow to ensure maximum color payoff
- Look for primers with light-reflecting particles that naturally brighten the eye area and create a lifted appearance
- Avoid heavy, tacky formulas that can make mature eyelids appear more hooded or weighed down
2. Choose Cream Eyeshadows Over Powder
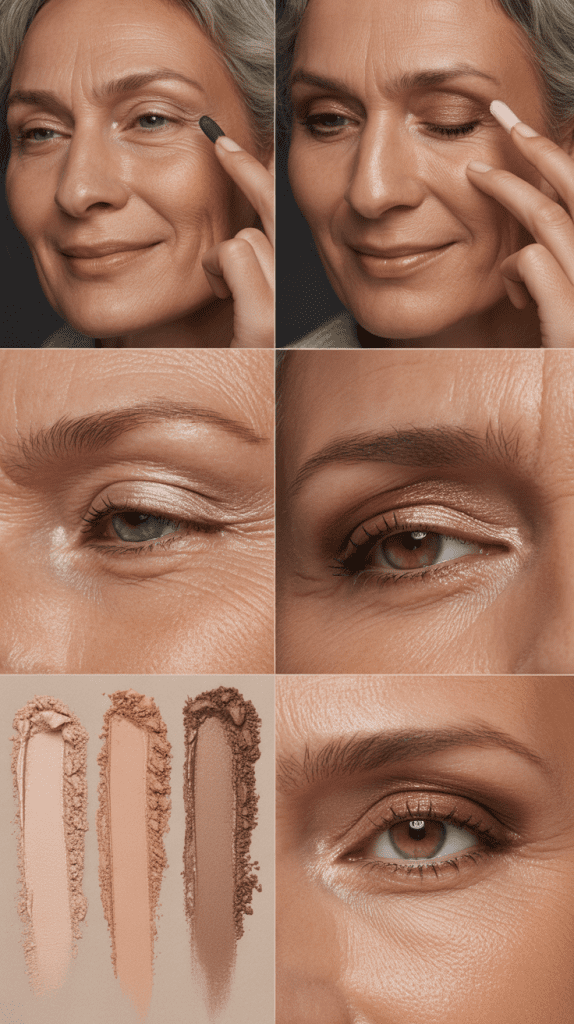
Cream eyeshadows work beautifully on mature skin because they provide moisture and blend seamlessly without settling into creases.
These formulas offer a modern, natural finish that powder shadows can’t always achieve.
- Cream shadows glide smoothly over textured eyelids and create a soft, luminous finish that looks youthful
- Apply with your fingertip or a synthetic brush, blending quickly before the product sets completely
- Opt for satin or pearl finishes rather than heavy glitters that can emphasize skin texture
- Layer cream shadows under powder shadows for dimension and longer-lasting color
- Choose neutral shades like champagne, taupe, and soft bronze that open up the eyes
3. Lighten Your Lower Lash Line
Darkening the lower lash line can make eyes appear smaller and draw attention to under-eye darkness.
Strategic lightening creates the illusion of larger, more awake eyes.
- Skip dark liner on the lower lash line entirely, or use it only on the outer third of the eye
- Apply a nude or flesh-toned liner to the waterline to make eyes look bigger and brighter instantly
- Use a light, shimmery shadow on the inner corner and along the lower lash line for an eye-opening effect
- Avoid pulling or tugging the delicate lower lid area during application to prevent further sagging
- Set any cream products with a light dusting of translucent powder to prevent smudging
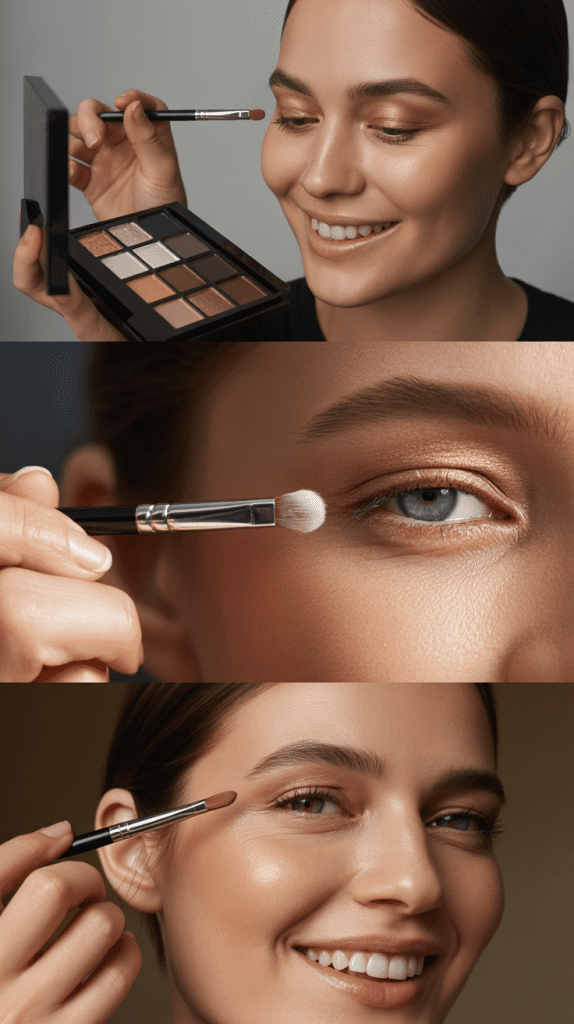
4. Master the Transition Shade Technique
A well-blended transition shade creates depth without harsh lines and serves as the foundation for a professionally blended eye look.
This technique is crucial for mature eyes.
- Choose a matte shade one to two tones darker than your natural skin tone for your crease area
- Apply the transition shade in windshield-wiper motions above your natural crease to create the illusion of a lifted lid
- Blend upward and outward toward the tail of your eyebrow for a flattering shape
- This neutral base allows you to add depth gradually without the risk of looking overdone
- Use a fluffy blending brush to diffuse any harsh edges for a seamless, professional finish
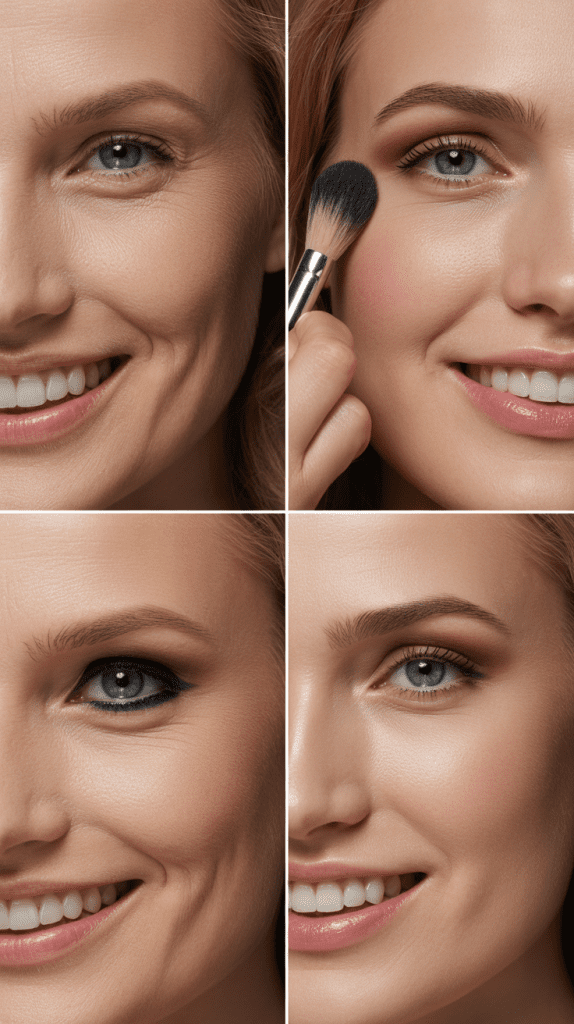
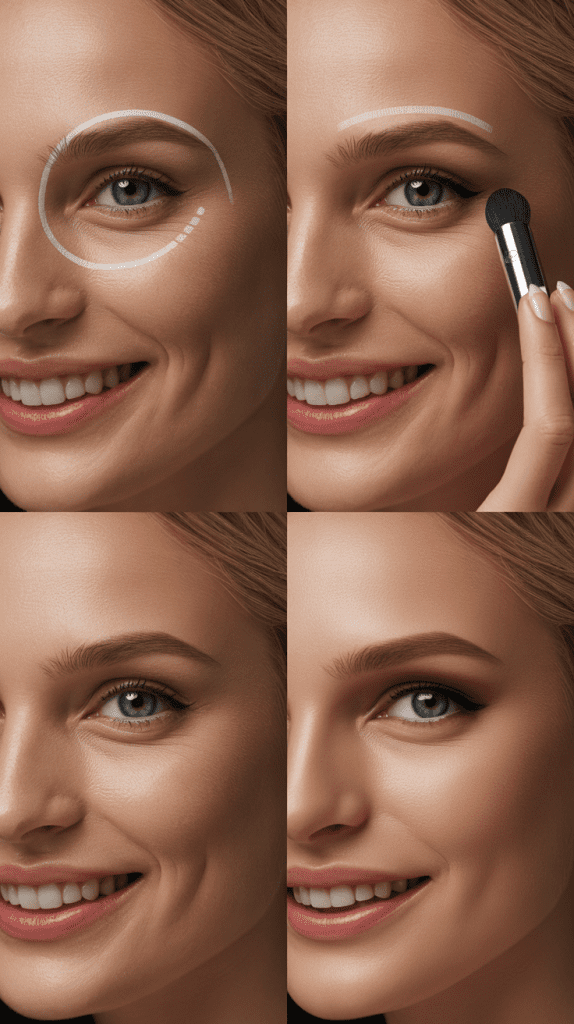
5. Highlight the Brow Bone Strategically
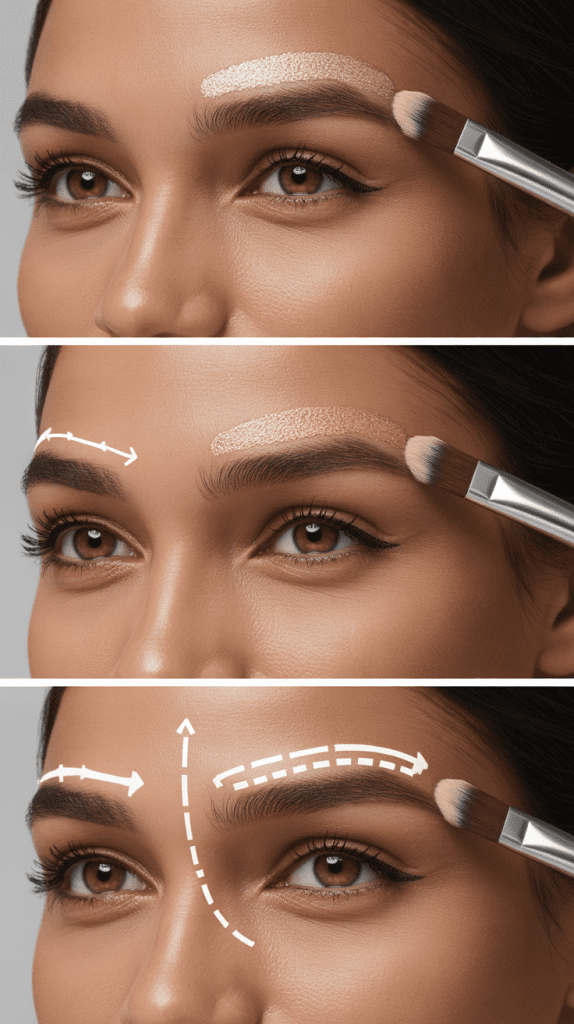
Highlighting the brow bone creates dimension and makes the eye area appear more lifted and prominent.
This classic technique works wonders for mature eyes.
- Apply a light, matte or satin highlight shade just below the eyebrow arch
- Avoid heavy shimmer or glitter that can emphasize creepy skin texture on the brow bone
- Blend the highlight seamlessly into your transition shade to avoid a striped appearance
- Use this technique to create the illusion of higher, more defined brows
- A champagne or vanilla shade works beautifully for most skin tones
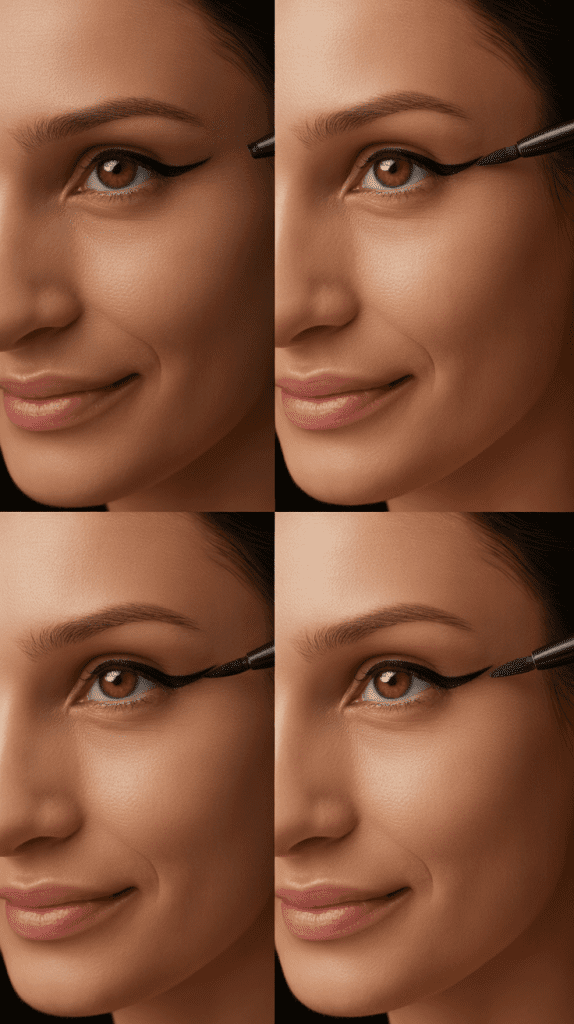
6. Skip Heavy Black Eyeliner
Black eyeliner can be harsh and aging on mature eyes, making them appear smaller and more closed off.
Softer alternatives create definition without the heaviness.
- Switch to brown, charcoal, or soft black liner for a more forgiving and natural look
- These softer shades define without creating stark contrast that can look harsh
- Apply liner in thin layers, building intensity gradually rather than drawing one thick line
- Smudge the liner slightly with a brush or cotton swab for a softer, lived-in appearance
- Reserve true black liner for evening looks when you want more drama
7. Tight-Line Your Upper Lash Line
Tight-lining fills in the gaps between lashes and creates the appearance of thicker, fuller lashes without obvious liner.
This subtle technique makes eyes look more defined.
- Gently lift your upper lid and apply liner directly to the waterline between the lashes
- Use a waterproof gel or pencil formula that won’t migrate or smudge throughout the day
- This technique adds definition without taking up valuable lid space
- Work in small sections, wiggling the liner into the lash roots for the most natural effect
- Tight-lining makes even sparse lashes appear fuller and more dramatic
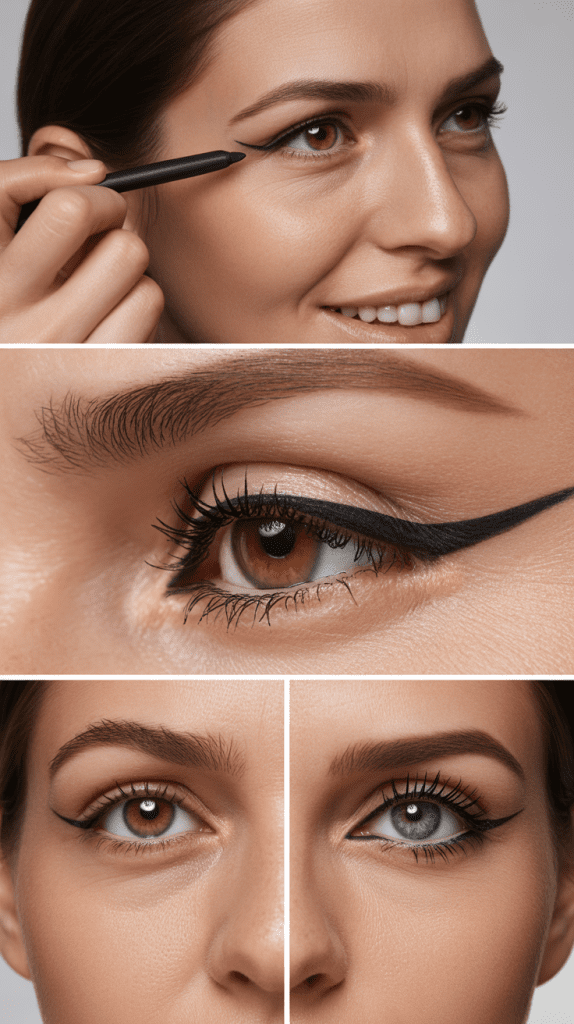
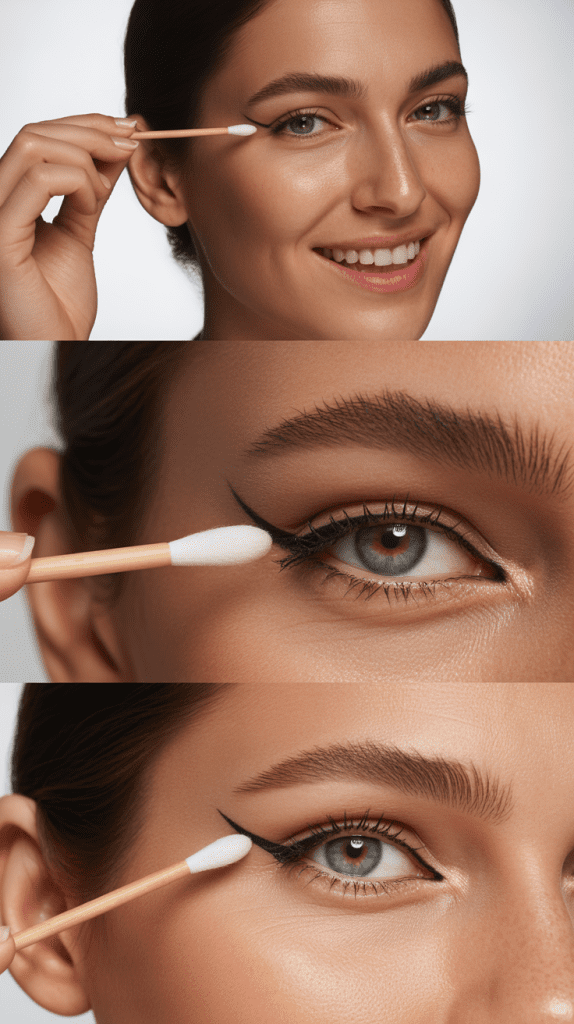
8. Create a Soft Wing at the Outer Corner
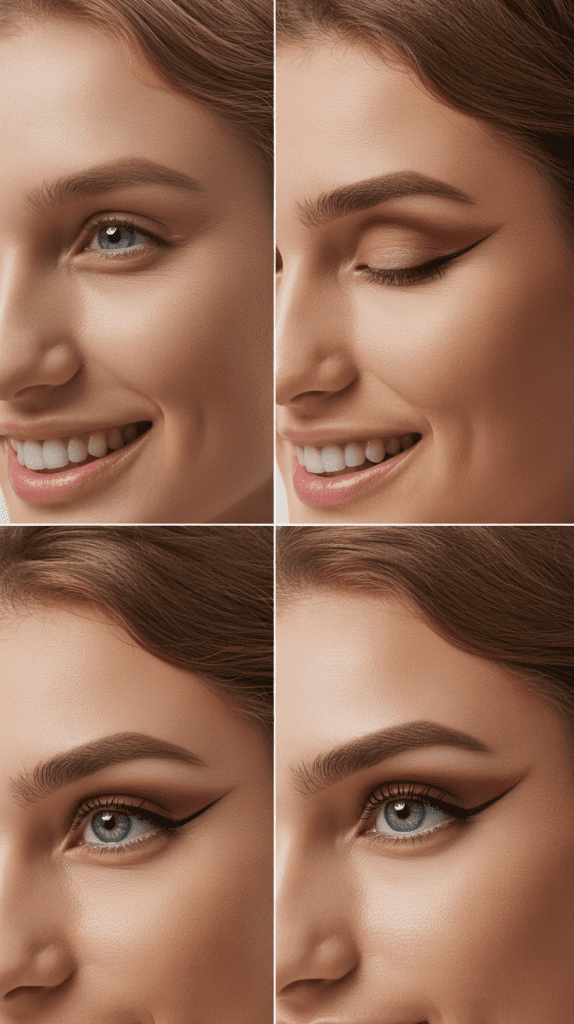
A subtle wing lifts the eye and creates an elongated, more youthful shape.
The key is keeping it soft and appropriate for mature eyes.
- Extend liner slightly past the outer corner, following the natural upward angle of your lower lash line
- Keep the wing thin and subtle rather than bold and dramatic
- Use a angled brush with eyeshadow for a softer wing than liquid liner provides
- Blend the wing slightly to avoid harsh lines that can emphasize skin texture
- This technique draws the eye upward and outward, creating a lifting effect
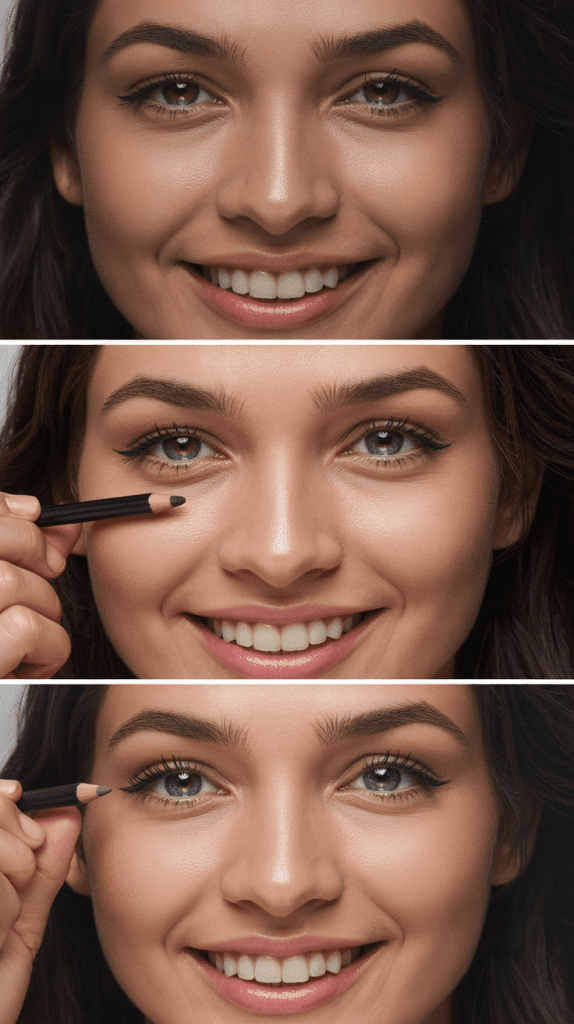
9. Use White or Nude Eyeliner on the Waterline
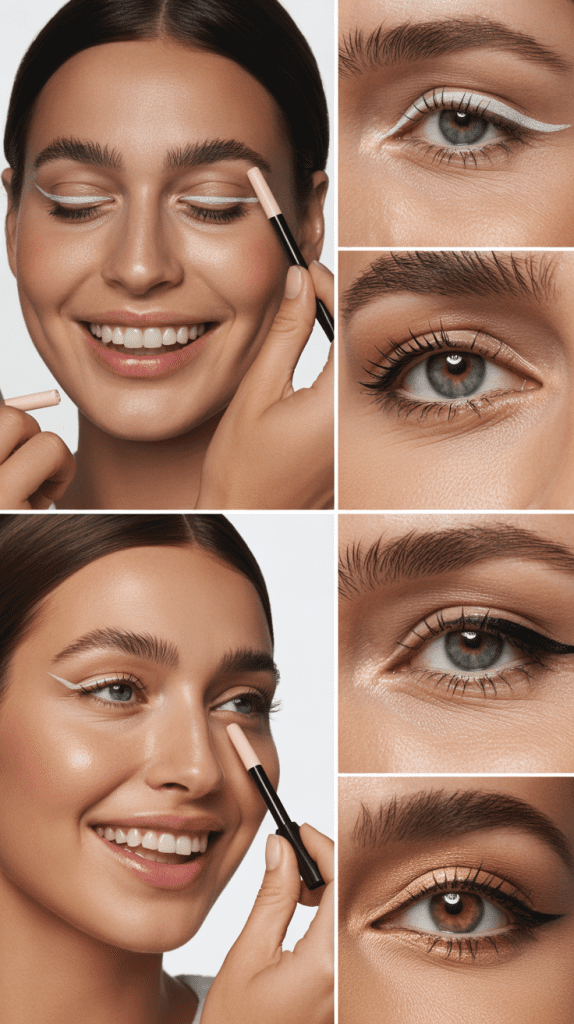
Light-colored liner on the lower waterline is one of the fastest ways to make eyes appear larger and more awake.
This simple trick has immediate impact.
- Choose a creamy, long-wearing formula in white, nude, or soft pink
- Apply to the lower waterline in smooth, even strokes
- Reapply throughout the day as needed since waterline products tend to fade
- This technique counteracts redness and makes the whites of your eyes appear brighter
- Avoid shimmery formulas that can irritate sensitive eyes
10. Curl Your Lashes Properly
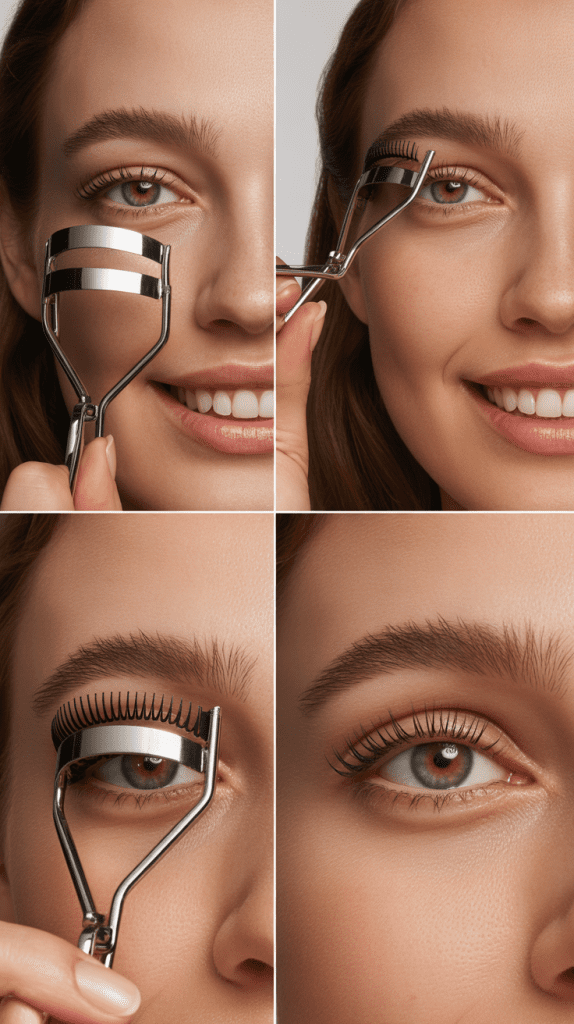
Curled lashes open up the eyes dramatically and create the appearance of larger, more lifted eyes.
Proper curling technique prevents damage while maximizing effect.
- Heat your eyelash curler slightly with a hair dryer for better, longer-lasting curl (test temperature first)
- Place the curler at the base of lashes and hold for 10 seconds, then move to mid-lash
- Pump gently rather than clamping hard to avoid breakage or crimped-looking lashes
- Always curl before applying mascara to prevent lash breakage
- Replace your curler pads regularly for optimal performance and hygiene
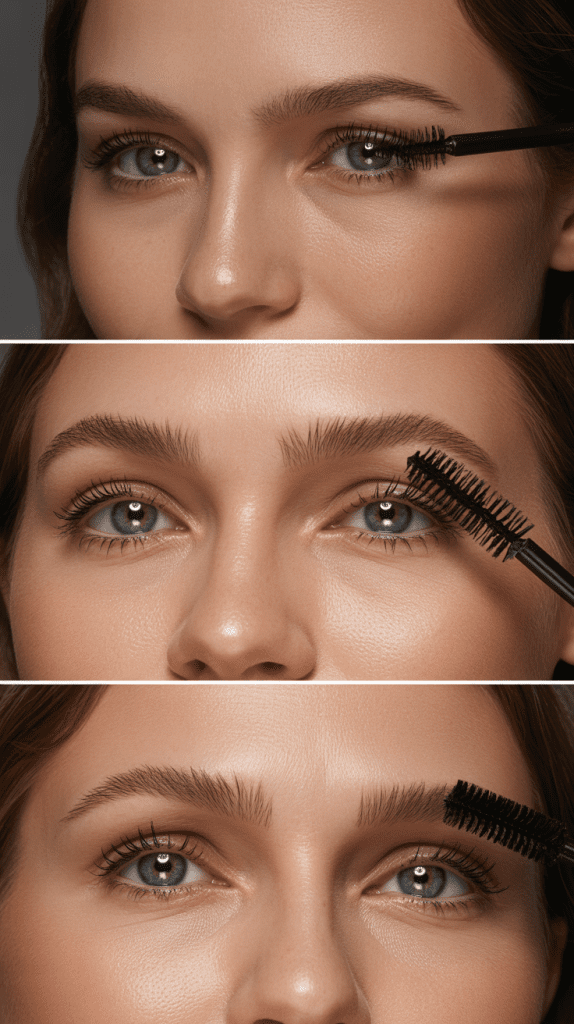
11. Apply Mascara to Upper Lashes Only
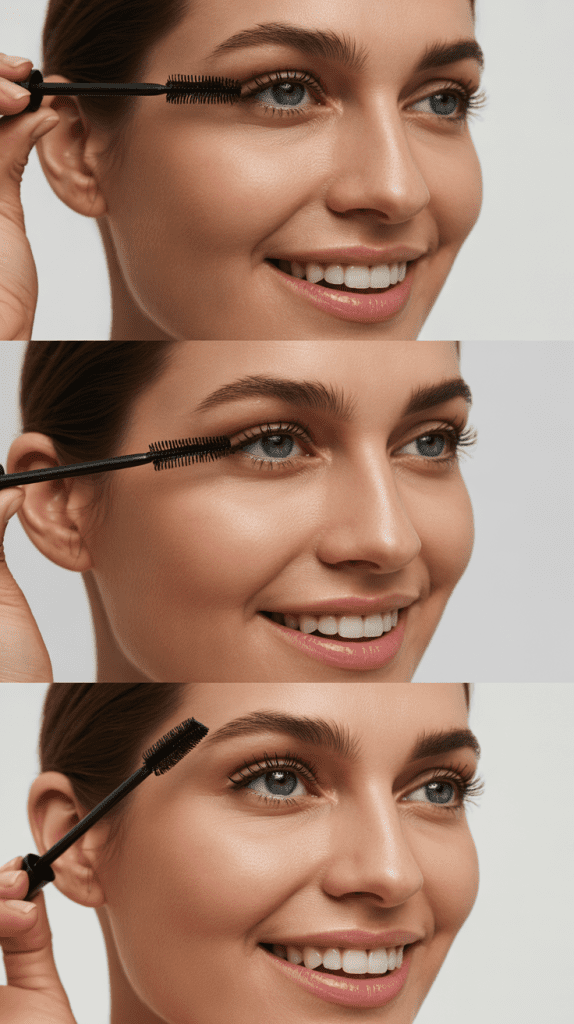
Mascara on lower lashes can drag the eye down and emphasize under-eye bags or circles.
Focusing on upper lashes creates a lifting, eye-opening effect.
- Apply two coats of mascara to upper lashes only, wiggling the wand at the base
- This concentrates definition where it matters most for larger-looking eyes
- Use a lash comb between coats to prevent clumping and separate lashes
- If you must use lower lash mascara, apply very sparingly only to outer lashes
- Choose a formula that lengthens rather than volumizes for the most natural look
12. Select Cool-Toned Neutral Eyeshadows
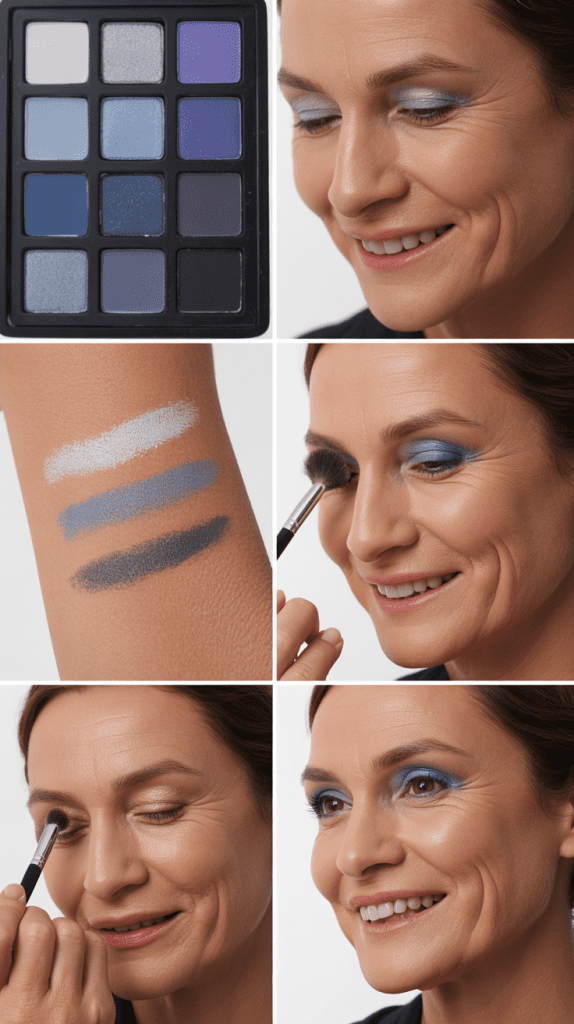
Cool-toned neutrals like taupes, soft grays, and cool browns are universally flattering and create the illusion of larger eyes.
These shades recede naturally, opening up the eye area.
- Warm tones can sometimes make eyes appear smaller or more recessed
- Cool neutrals create contrast with the warmth of the iris, making eyes pop
- Build depth gradually with multiple cool-toned shades for dimension
- These versatile colors work for day or night and complement all eye colors
- Avoid muddy brown tones that can look flat on mature skin
13. Place Darker Shades in the Outer V
Strategic placement of deeper shades creates dimension and the illusion of larger, more lifted eyes.
The outer V technique is a classic for good reason.
- Apply your darkest shade only to the outer corner in a V or C shape
- Blend inward and upward, never bringing dark color across the entire lid
- This creates depth while keeping the center of the lid light and open
- Use a small, dense brush for precise placement and control
- Blend thoroughly to avoid harsh lines that can look aging
14. Avoid Shimmer on the Entire Lid

While shimmer can be beautiful, applying it across the entire lid can emphasize texture and creasing.
Strategic shimmer placement is key for mature eyes.
- Reserve shimmer for the inner corner and center of the mobile lid only
- Keep the crease and outer corner matte for definition and depth
- Choose finely-milled shimmers over chunky glitters that emphasize texture
- A small amount of strategic shimmer brightens and lifts without overwhelming
- Matte shades in the crease create necessary depth and dimension
15. Brighten the Inner Corner
Inner corner highlighting is one of the most effective techniques for making eyes appear larger and more awake.
This simple step has dramatic impact.
- Apply a light, shimmery shade or highlighter to the inner corner of your eye
- Extend slightly onto the inner portion of your lower lash line
- Choose champagne, vanilla, or soft pink shades for a natural brightening effect
- Use your fingertip or a small brush for precise application
- This technique instantly opens up the eyes and makes you look refreshed
16. Blend, Blend, Blend

Thorough blending is crucial for mature eyes to avoid harsh lines and create a seamless, professional finish.
This step cannot be overlooked.
- Spend at least as much time blending as you do applying color
- Use clean blending brushes to soften all edges between color transitions
- Blend in circular motions at the edges where colors meet
- A well-blended eye look appears more youthful and sophisticated
- Keep blending until you can’t see where one color ends and another begins
17. Use Eyelash Primer Before Mascara
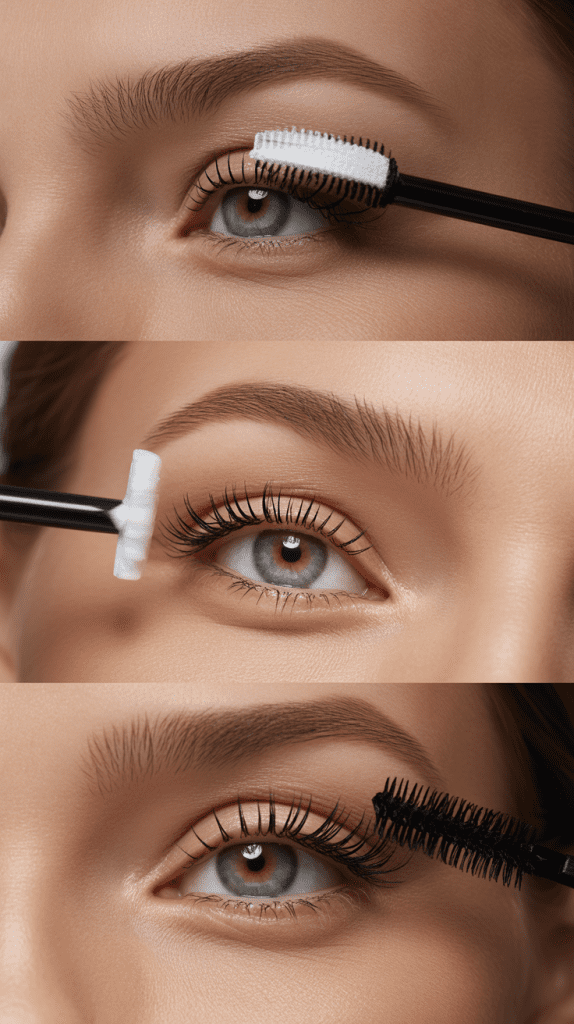
Eyelash primer creates the foundation for fuller, longer-looking lashes and helps mascara last longer.
This extra step makes a noticeable difference.
- Apply white or clear lash primer from root to tip before mascara
- The primer separates lashes, adds volume, and prevents clumping
- Let the primer dry for 30 seconds before applying mascara
- This creates the appearance of thicker, more dramatic lashes
- Primer also conditions lashes and can promote healthier lash growth
18. Define Your Brows Properly

Well-groomed, defined brows frame the eyes and make them appear larger and more prominent.
Brows become even more important as we age.
- Fill sparse areas with short, hair-like strokes using a pencil or powder
- Keep the color one shade lighter than your natural brow color to avoid harshness
- Focus on creating a slight arch to lift the eye area
- Brush brows upward with a spoolie to open up the eye area
- Set brows with a clear or tinted brow gel for all-day hold
19. Avoid Metallic Finishes in the Crease

Metallic eyeshadows in the crease can settle into fine lines and emphasize texture rather than creating depth.
Matte shades work better for definition.
- Keep metallic and shimmer finishes on the flat portions of the lid
- Use matte shades exclusively in the crease and outer V for depth
- Matte formulas create shadow and dimension without emphasizing texture
- This creates the contrast necessary for eyes to appear larger
- Reserve metallics for special accent areas only
20. Try the Halo Eye Technique
The halo eye technique places light in the center of the lid and darker shades on both the inner and outer corners, creating a lifted, dimensional effect.
This flattering technique suits mature eyes beautifully.
- Apply your lightest shade to the center of the mobile lid
- Place medium to dark shades on both the inner and outer thirds
- Blend thoroughly where the colors meet for a seamless transition
- This technique makes eyes appear rounder, larger, and more prominent
- The light center draws attention and creates the illusion of fuller lids
21. Use Smaller Brushes for Precision
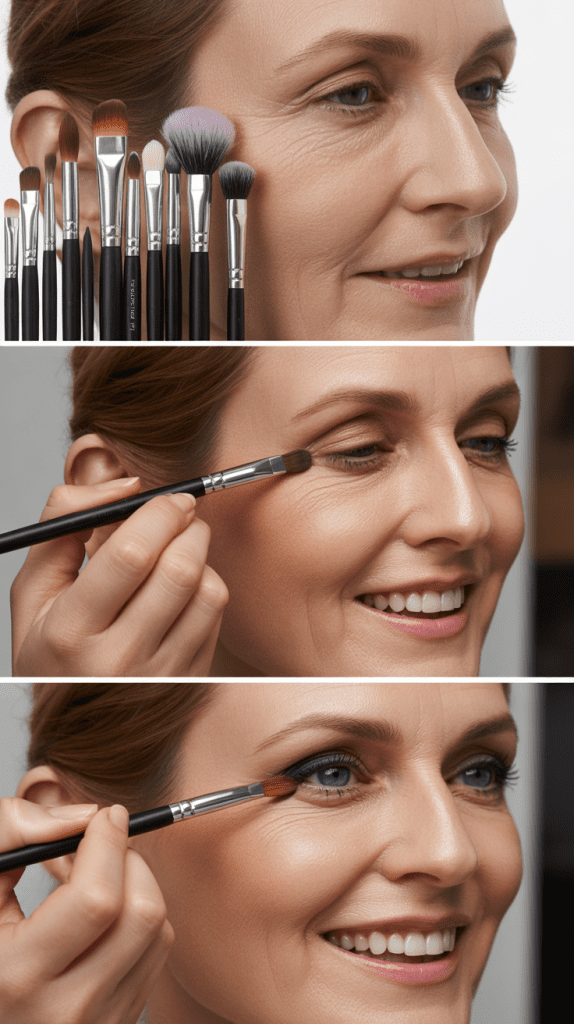
As lids become more hooded with age, precision becomes increasingly important.
Smaller brushes give you better control and more defined placement.
- Smaller brushes allow you to place color exactly where you want it
- Use pencil brushes for the crease and outer corner detail work
- Large, fluffy brushes can apply color beyond the visible lid space
- Precise placement prevents a messy, undefined appearance
- Invest in quality brushes designed for mature or hooded eyes
22. Set Your Eye Makeup with Powder
Setting your eye makeup helps prevent creasing and ensures your look lasts all day.
This finishing step is essential for mature skin.
- Lightly dust translucent powder under the eyes to catch any shadow fallout
- Use a fluffy brush to apply a thin layer over cream products
- This prevents eyeshadow from settling into fine lines throughout the day
- Don’t over-powder, which can emphasize dryness and texture
- Gently press powder in rather than sweeping to avoid disturbing your eyeshadow
23. Apply Concealer After Eye Makeup
Applying concealer after eyeshadow allows you to clean up any fallout and create a perfect, polished finish.
This professional trick ensures flawless results.
- Complete all eye makeup before touching your under-eye area
- Gently wipe away any fallen eyeshadow with a clean brush or makeup wipe
- Apply concealer in an inverted triangle shape under the eye
- This brightens the entire eye area and makes eyes appear larger
- Set with powder to prevent creasing throughout the day
24. Choose Lengthening Over Volumizing Mascara
Lengthening mascaras create the illusion of larger eyes by extending lashes upward and outward, while heavy volumizing formulas can weigh down lashes and make eyes appear smaller.
- Lengthening formulas contain fibers that extend lash length without clumping
- These lighter formulas won’t weigh down aging lashes that may be becoming more sparse
- Hold the mascara wand vertically and wiggle through lashes for maximum length
- Apply to the outer lashes with extra emphasis to create a lifting effect
- One to two coats is usually sufficient for a natural, eye-opening look
25. Consider Lash Extensions or a Lash Lift
Semi-permanent lash treatments can eliminate the need for daily mascara and create consistently open, larger-looking eyes.
These treatments are especially beneficial for mature women.
- Lash lifts curl lashes semi-permanently, opening up the eyes for 6-8 weeks
- Individual lash extensions add length and volume that looks natural
- Both options save time on daily makeup application
- Ensure you choose an experienced technician for safe, beautiful results
- These treatments can be especially beneficial if lashes have become sparse with age
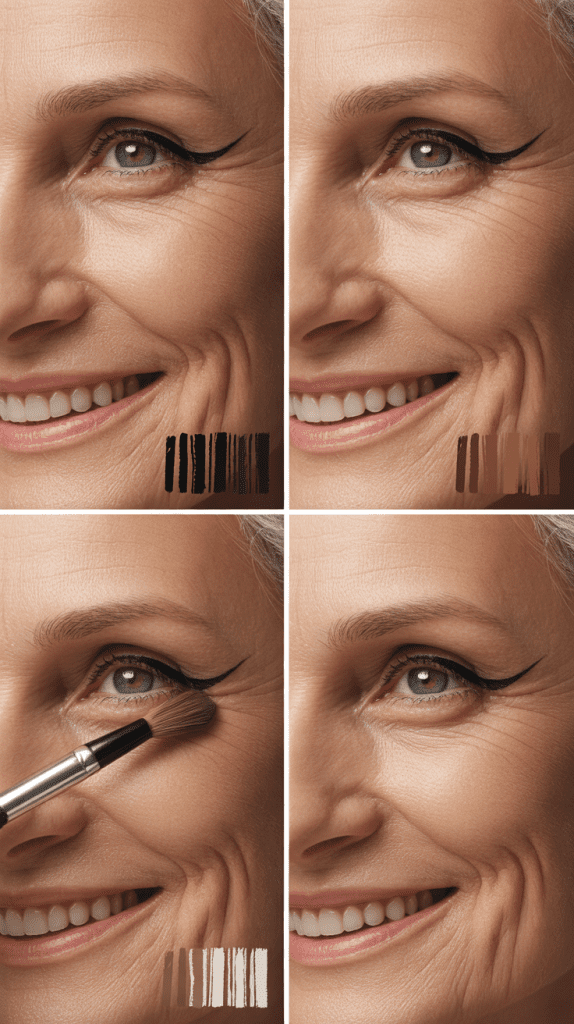
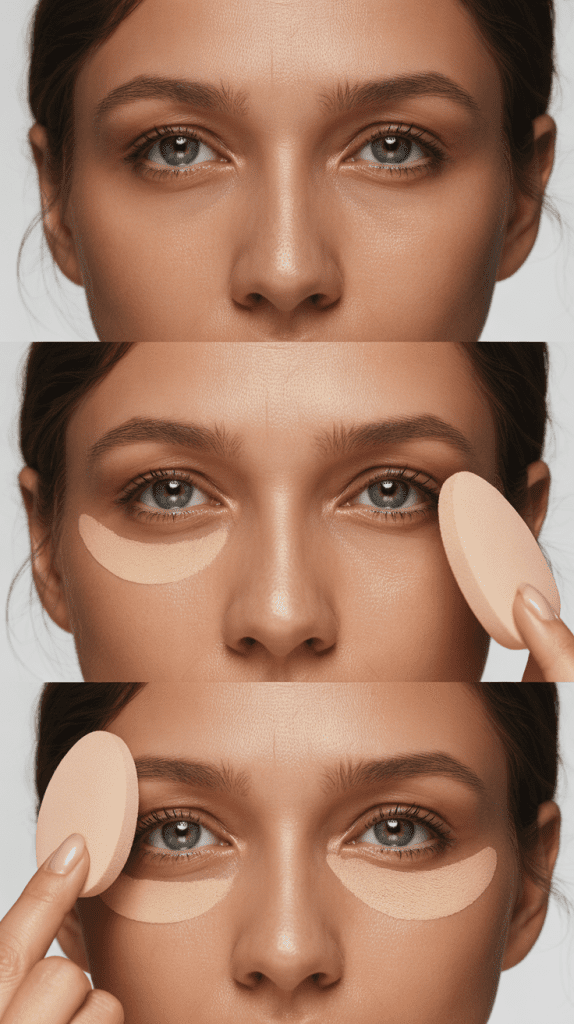
26. Use the Triangle Technique Under Eyes
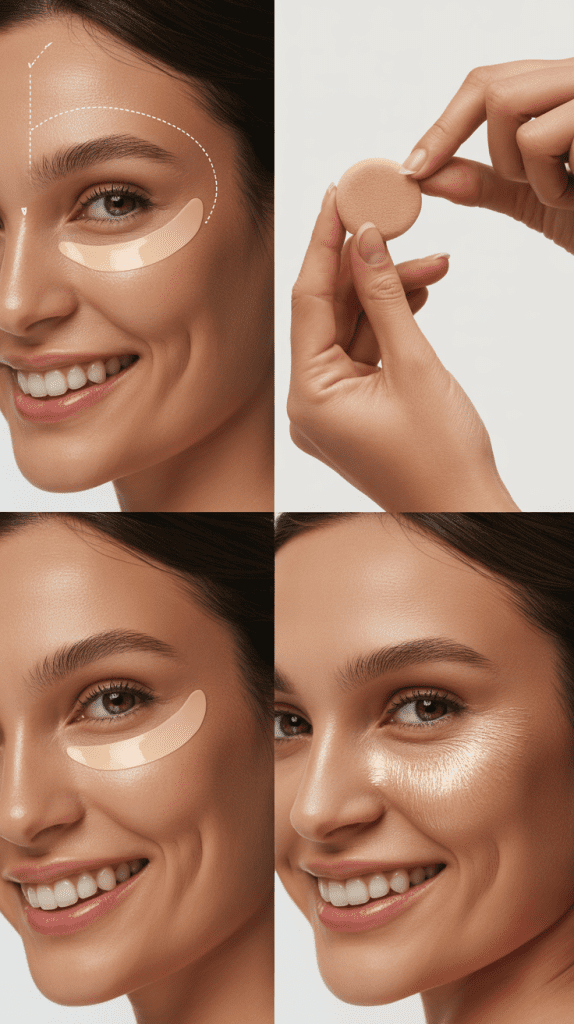
The triangle concealing method brightens and lifts the entire eye area, counteracting shadows that can make eyes appear smaller.
This professional technique is highly effective.
- Apply concealer in an inverted triangle from the inner corner down to the top of the cheekbone
- Use a shade one to two tones lighter than your skin tone
- Blend outward with a damp beauty sponge for a seamless finish
- This brightens a larger area and creates the illusion of lifted, more prominent eyes
- Set with a light powder to ensure all-day wear
27. Map Your Eyes Before Applying Makeup
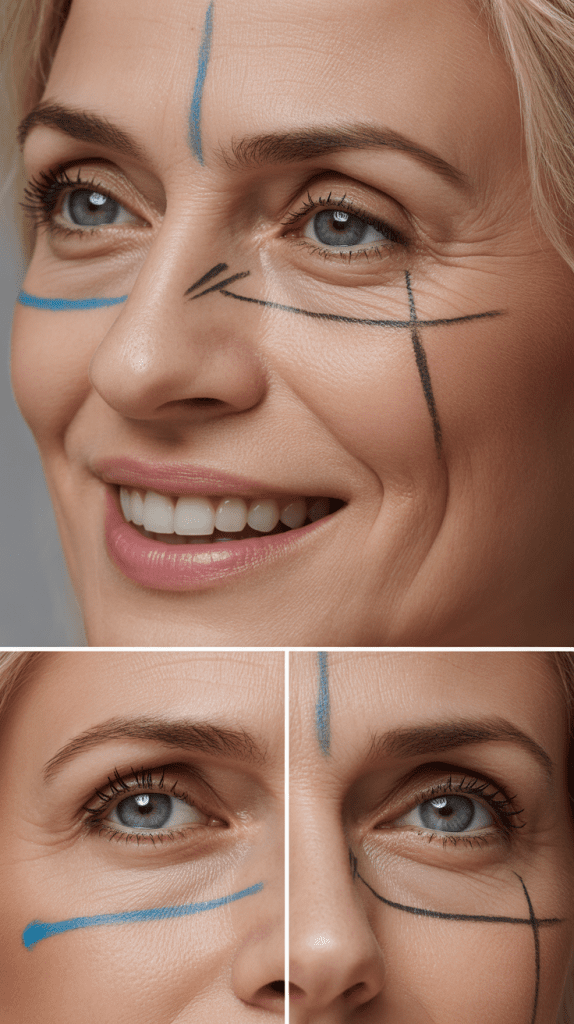
Understanding your unique eye shape and where to place products ensures the most flattering results.
Mapping prevents common mistakes that can make eyes appear smaller.
- Look straight ahead into a mirror and identify your natural crease
- Place your darkest color in the outer corner and crease only
- Keep lighter shades on the lid and inner corner
- Adjust techniques based on whether you have hooded, deep-set, or prominent eyes
- Taking time to plan prevents having to remove and reapply products
28. Avoid Black Eyeshadow
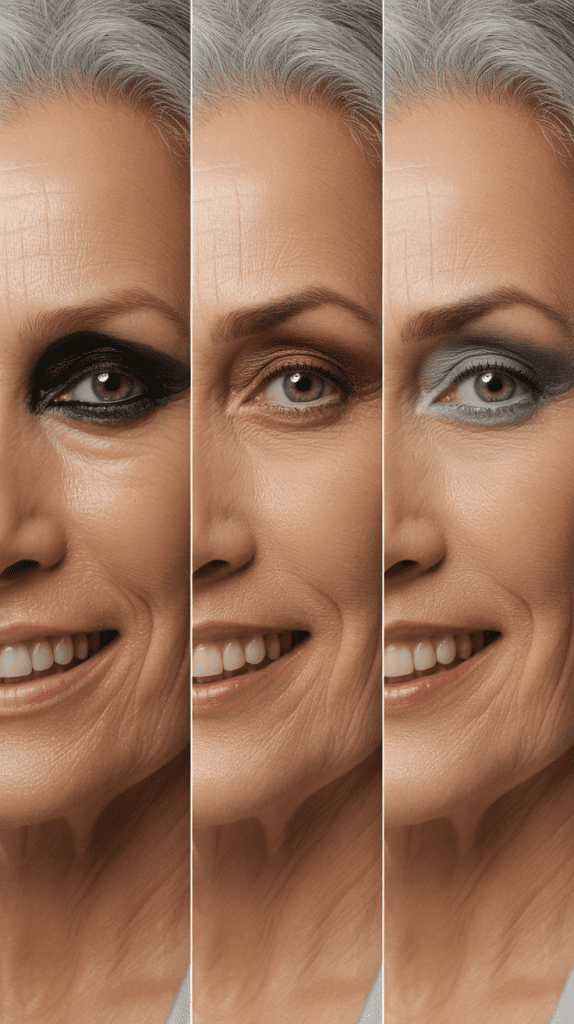
Black eyeshadow can be harsh and aging on mature eyes, creating too much contrast and making the eye area appear sunken.
Softer alternatives create definition without heaviness.
- Use deep charcoal, dark brown, or navy instead of true black
- These softer shades provide depth without the harshness
- Save black shadow only for very dramatic evening looks if desired
- Softer dark shades are more forgiving and easier to blend
- They create sophisticated depth that enhances rather than overwhelms
29. Incorporate Warmer Tones Strategically
While cool tones create the illusion of larger eyes, strategic use of warm tones adds life and prevents a flat appearance.
Balance is key.
- Add a touch of warm bronze or copper to the outer corner for dimension
- Warm tones in the crease can add depth when used sparingly
- Avoid placing warm oranges or reds near the inner eye, which can look irritated
- Balance warm and cool tones for the most flattering, dimensional look
- Warm metallic accents on the center lid catch light beautifully
30. Use Q-Tips for Cleanup and Precision
Q-tips are essential tools for correcting mistakes and creating clean, precise lines.
This simple tool elevates your eye makeup immediately.
- Dip a Q-tip in makeup remover to clean up edges and create sharp lines
- Use dry Q-tips to blend out harsh lines or remove excess product
- Point the tip for precise correction of small areas
- Keep both pointed and regular cotton swabs in your makeup kit
- This tool is especially helpful for perfecting winged liner and under-eye cleanup
31. Layer Eyeliners for Depth
Layering different eyeliner formulas and colors creates dimension and interest while maintaining a soft, blended appearance.
This technique adds sophistication without harshness.
- Start with a pencil liner along the lash line for soft definition
- Layer eyeshadow in a similar shade over the pencil to set and soften
- Add a gel or liquid liner on top only if you want more intensity
- This layering prevents harsh lines while creating lasting definition
- Smudge slightly for a softer, more mature-appropriate look
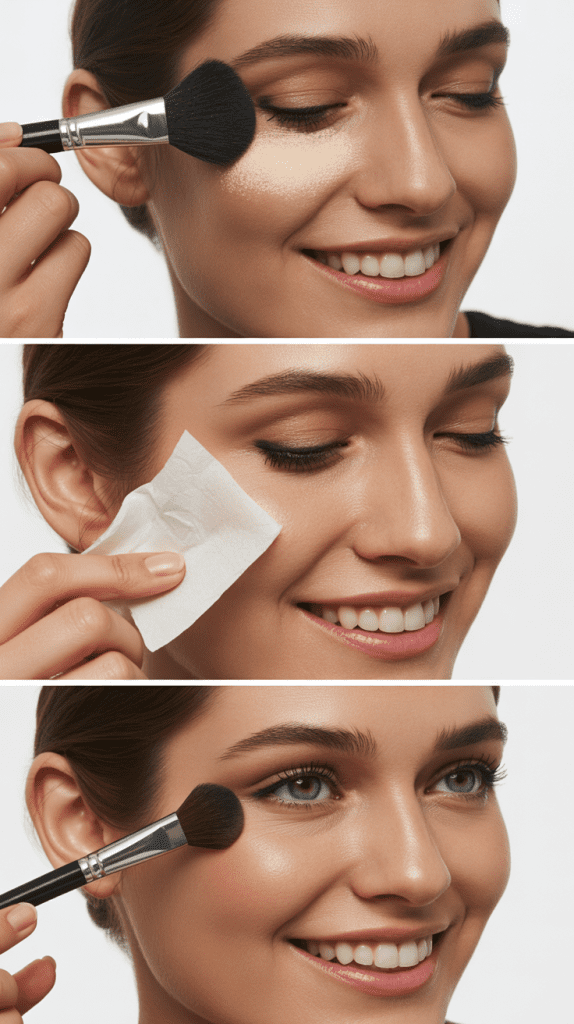
32. Refresh Throughout the Day
Mature eyes may require touch-ups to maintain a fresh, wide-awake appearance as products can fade or settle.
Strategic refreshing keeps eyes looking their best.
- Carry a small brush and your key eyeshadow shades for quick touch-ups
- Reapply waterline liner and inner corner highlight as they fade first
- Blot any oil from eyelids before refreshing to prevent creasing
- A quick curl and coat of mascara can revive tired-looking eyes
- Keep oil-blotting papers handy to prevent makeup breakdown
33. Practice Good Skincare for Your Eyes
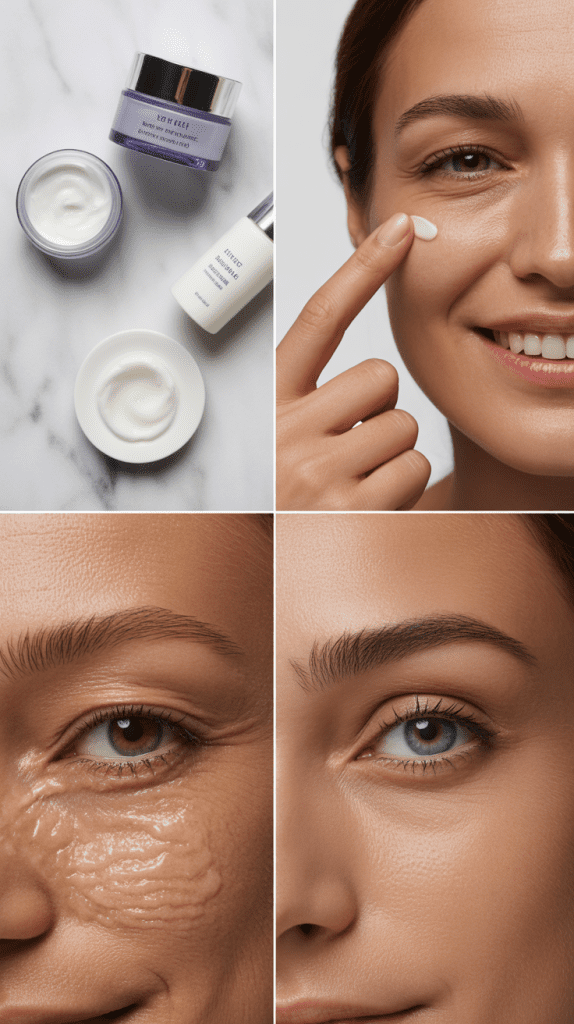
The best eye makeup results start with well-cared-for skin.
Proper skincare creates the ideal canvas for makeup application and can actually reduce the need for heavy correction.
- Use a hydrating eye cream daily to plump fine lines and prevent dryness
- Apply eye cream at night for maximum absorption and repair
- Consider retinol products to improve skin texture around the eyes over time
- Stay hydrated and get adequate sleep for naturally brighter, less puffy eyes
- Protect the eye area with SPF daily to prevent further aging
34. Experiment with Colored Eyeliner
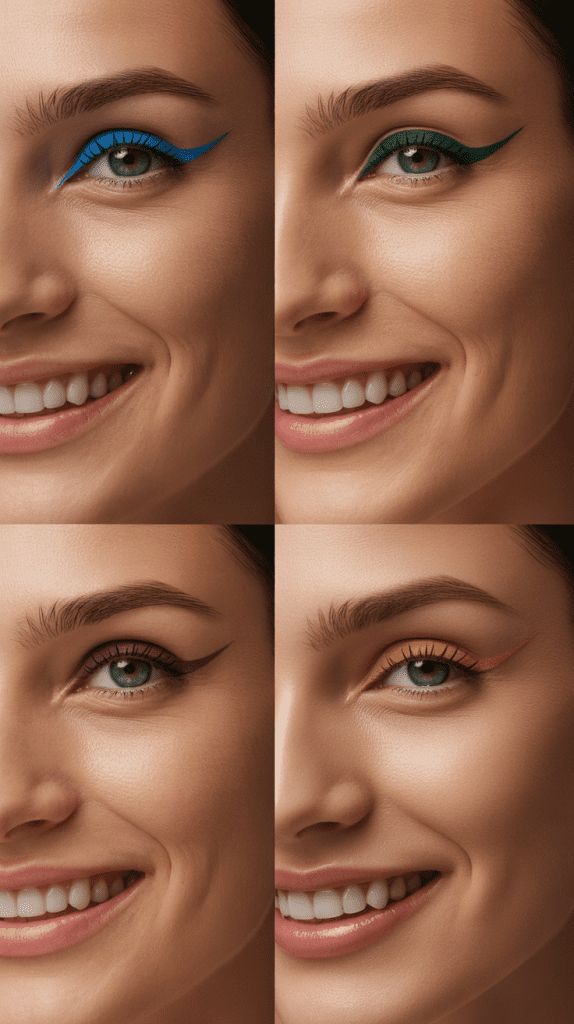
Colored eyeliners on the lower lash line can brighten eyes and make the whites appear whiter while adding a modern, youthful touch.
Strategic color placement is key.
- Try navy or dark purple liner on the lower lash line to brighten whites of eyes
- Emerald green liner complements and intensifies hazel and brown eyes
- Burgundy or plum tones add warmth and are universally flattering
- Apply colored liner only to the outer two-thirds of the lower lash line
- Keep upper liner neutral for the most sophisticated, wearable look
35. Remove Makeup Gently Every Night
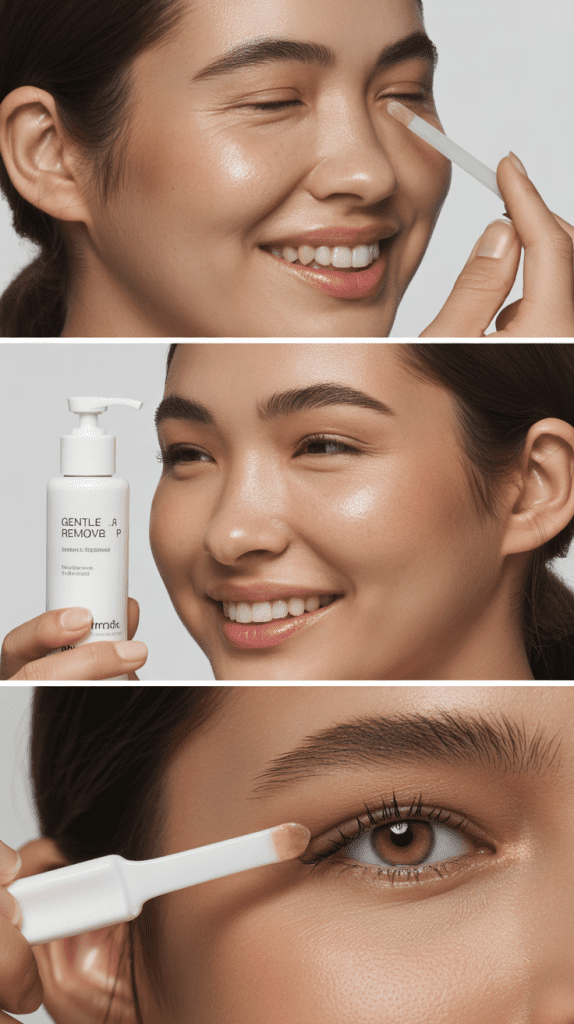
Proper makeup removal prevents irritation, maintains skin health, and actually helps your morning makeup apply better.
This essential step protects your delicate eye area.
- Use a dedicated eye makeup remover designed for the sensitive eye area
- Never pull or tug the delicate skin when removing makeup
- Hold a soaked cotton pad over closed eyes for a few seconds before wiping
- Follow with a gentle cleanser and eye cream
- Proper removal prevents product buildup and maintains eyelash health
Essential Eye Makeup Products Table
| Product Category | Recommended Type | Why It Works for 50+ Eyes | Application Tip |
|---|---|---|---|
| Eye Primer | Hydrating, light-reflecting | Prevents creasing, brightens | Pat in with ring finger |
| Eyeshadow Formula | Cream or satin powder | Doesn’t settle in lines | Blend immediately |
| Eyeliner | Brown or charcoal pencil | Softer than black | Smudge for soft effect |
| Mascara | Lengthening formula | Opens eyes without weight | Wiggle at base |
| Brow Product | Powder or fine pencil | Natural, hair-like strokes | One shade lighter than hair |
| Highlighting Shade | Champagne or vanilla | Brightens inner corner | Use fingertip for precision |
| Transition Shade | Cool-toned matte taupe | Creates lifted crease | Blend above natural crease |
| Setting Powder | Translucent, finely-milled | Prevents creasing | Press gently, don’t sweep |
Conclusion
Mastering these 35 Eye Makeup Tips for Women Over 50 to Make Eyes Look Bigger will transform not just your makeup routine, but your entire appearance and confidence.
Each technique has been carefully selected to address the unique needs of mature eyes while enhancing your natural beauty.
From choosing the right formulas to perfecting application techniques, you now have a comprehensive toolkit for creating larger, brighter, more youthful-looking eyes.
Remember that makeup should enhance your features, not mask them, and the goal is always to look like the best version of yourself.
Practice these tips consistently, and you’ll soon find which techniques work best for your unique eye shape and personal style.
Embrace this exciting phase of your beauty journey, experiment with confidence, and enjoy the compliments that will surely come your way.
Your eyes are the windows to your soul, and now you know exactly how to make them shine at their absolute brightest.
