The butterfly haircut has taken the hair world by storm, offering a perfect blend of volume, movement, and face-framing elegance that transforms long hair into a stunning masterpiece.
This versatile cut features shorter layers around the face that gradually blend into longer lengths, creating a beautiful cascading effect reminiscent of butterfly wings in flight.
Whether you’re looking to add dimension to flat hair, frame your facial features beautifully, or simply refresh your look without sacrificing length, the butterfly haircut offers endless possibilities for customization.
From subtle variations that maintain a classic appearance to bold interpretations with dramatic layering, these 33 DIY Butterfly Haircuts for Long Hair will guide you through achieving salon-quality results at home.
This comprehensive guide explores various techniques, styling methods, and creative adaptations suitable for different hair textures, face shapes, and personal preferences, empowering you to master this trending hairstyle with confidence and precision.
In This Post......
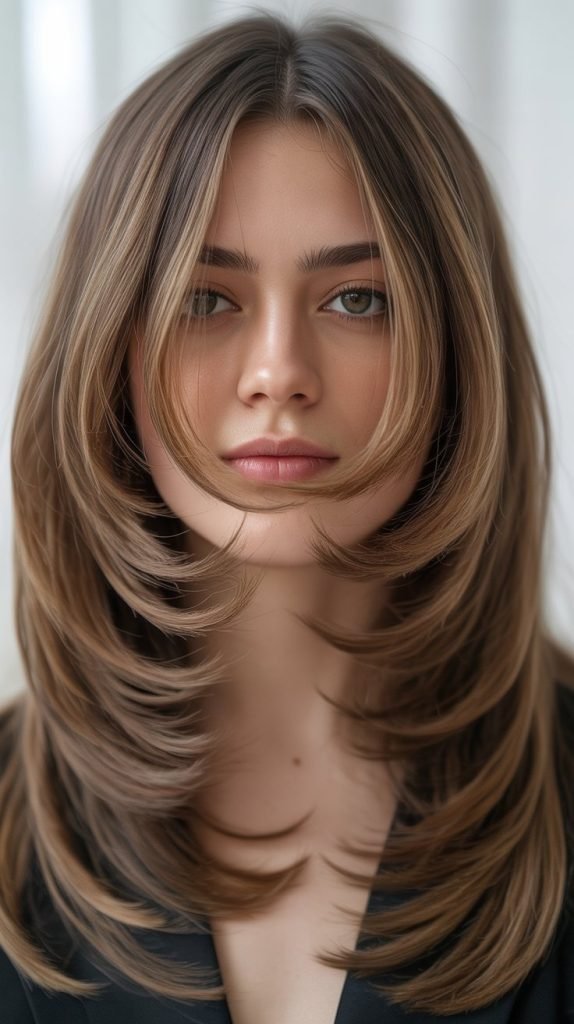
- 1. Classic Butterfly Cut with Face-Framing Layers
- 2. Curtain Bangs Butterfly Haircut
- 3. Layered Butterfly Cut for Thick Hair
- 4. Soft Butterfly Cut with Minimal Layers
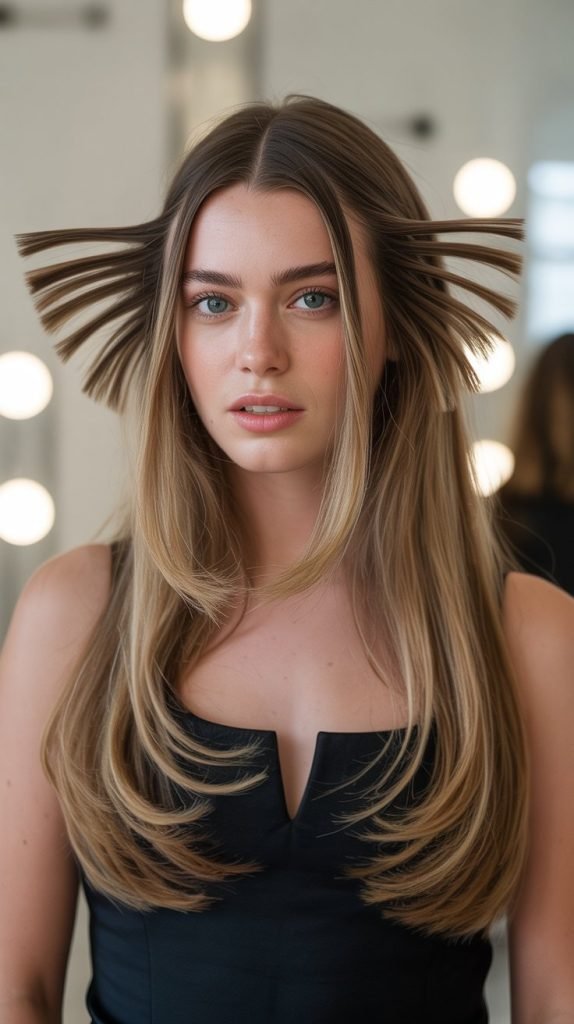
- 5. Dramatic Butterfly Cut with Short Crown Layers
- 6. Butterfly Cut with Wispy Ends
- 7. Side-Parted Butterfly Haircut
- 8. Butterfly Cut with Blunt Ends
- 9. Butterfly Cut for Fine Hair
- 10. Shaggy Butterfly Cut
- 11. Butterfly Cut with Money Piece Highlights
- 12. Butterfly Cut with V-Shaped Back
- 13. Asymmetrical Butterfly Cut
- 14. Butterfly Cut with Razor Layers
- 15. Butterfly Cut with Interior Layers Only
- 16. Butterfly Cut with Balayage
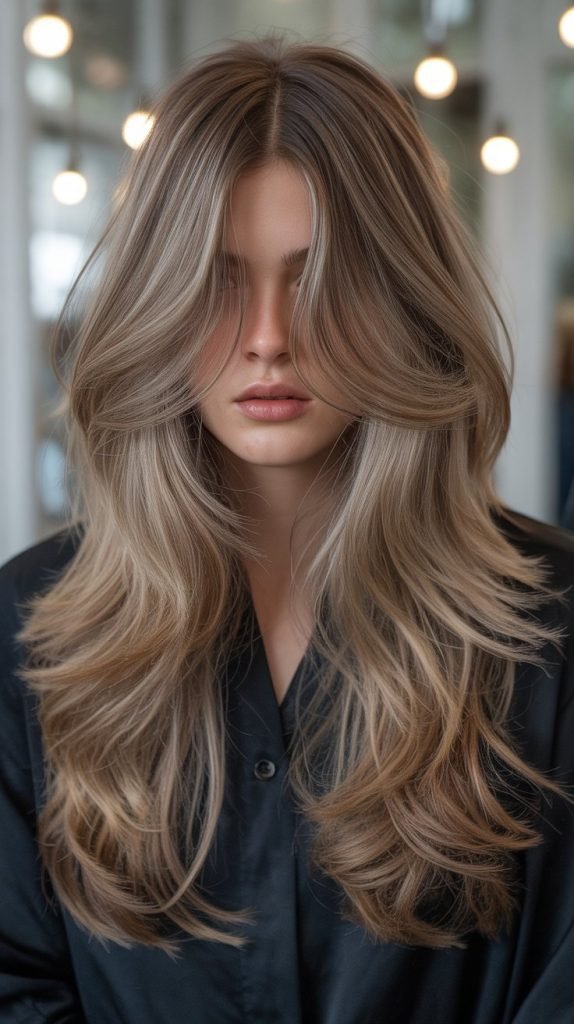
- 17. Butterfly Cut with Long Layers
- 18. Butterfly Cut for Curly Hair
- 19. Butterfly Cut with Flipped Ends
- 20. Butterfly Cut with Micro Layers
- 21. Butterfly Cut with Sliced Layers
- 22. Butterfly Cut with Round Layers
- 23. Butterfly Cut with Undercut
- 24. Butterfly Cut with Beveled Layers
- 25. Butterfly Cut with Disconnected Layers
- 26. Butterfly Cut with Tapered Ends
- 27. Butterfly Cut with Feathered Crown
- 28. Butterfly Cut with Graduated Angles
- 29. Butterfly Cut with Invisible Layers
- 30. Butterfly Cut with Twist-Cut Layers
- 31. Butterfly Cut with Graduated Bob Front
- 32. Butterfly Cut with Horizontal Graduation
- 33. Butterfly Cut with Precision Point-Cutting
- Conclusion
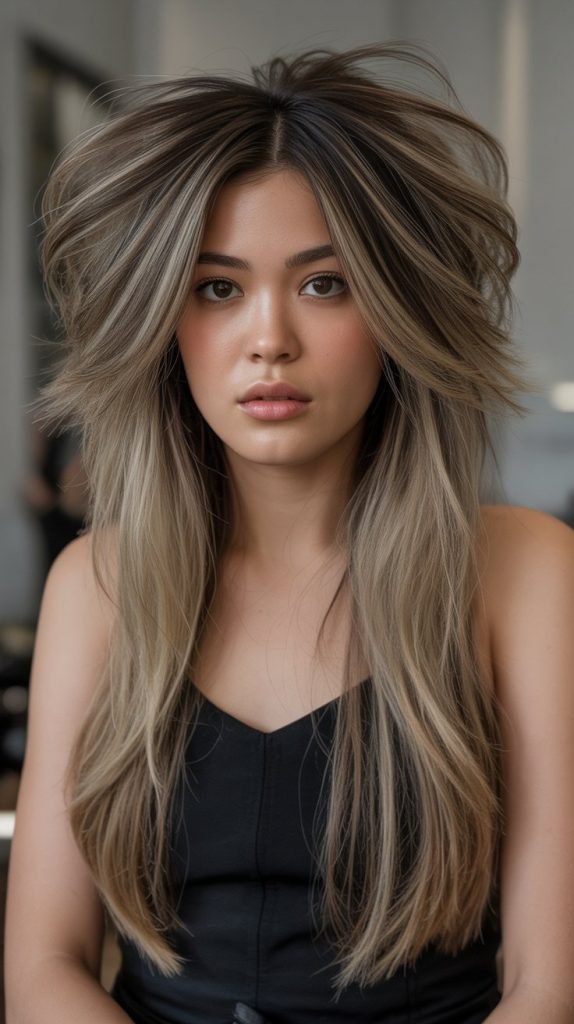
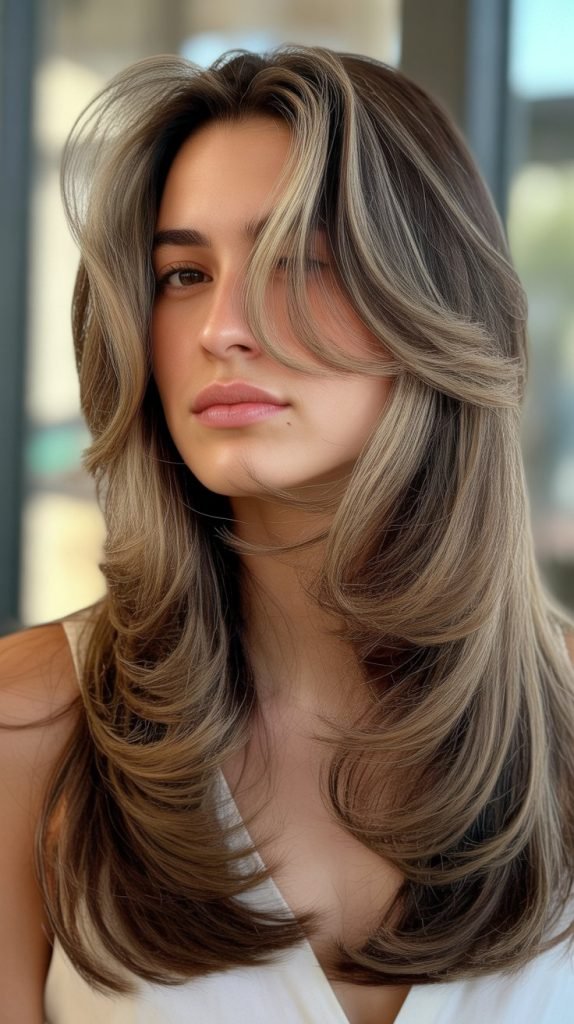
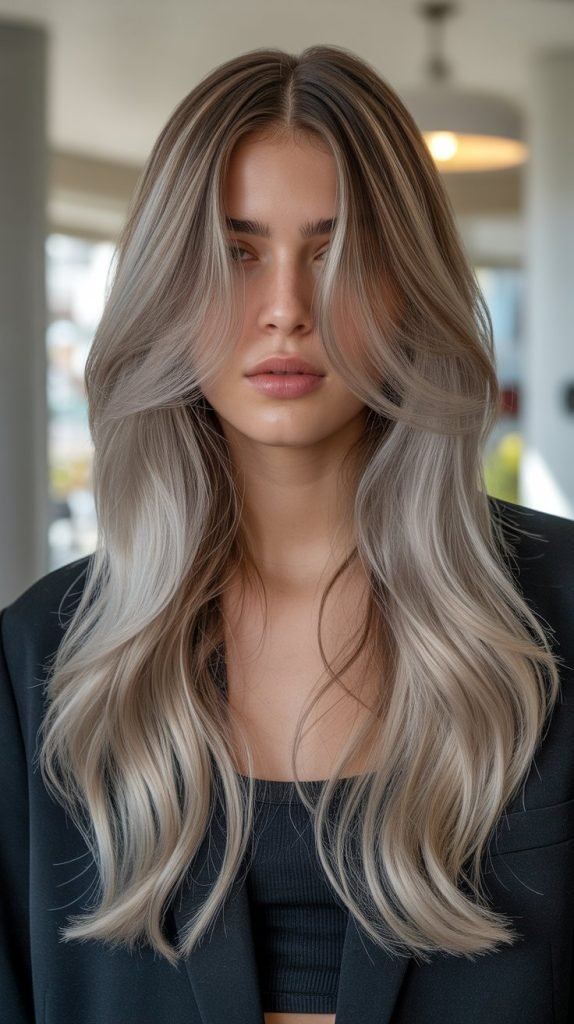
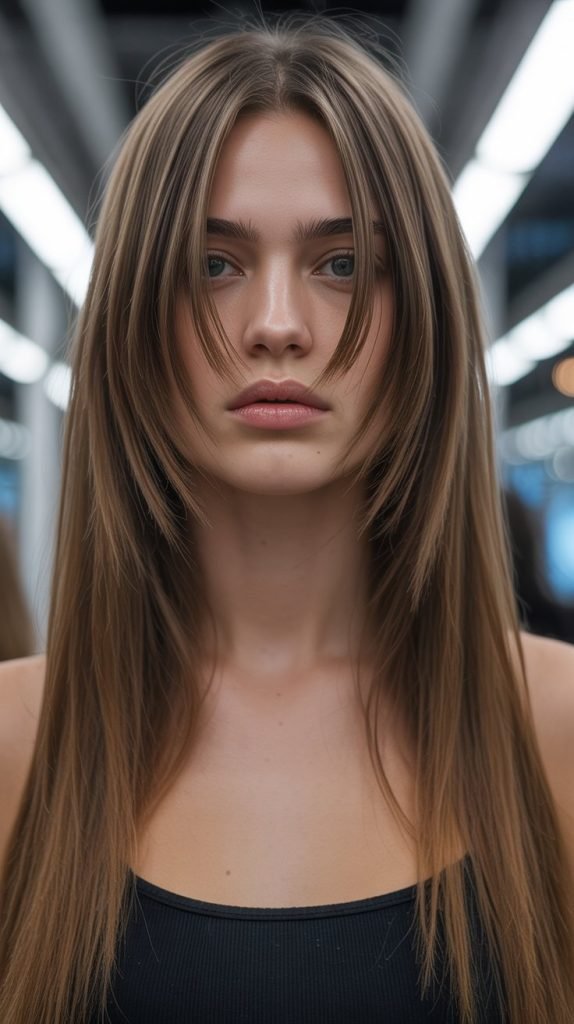
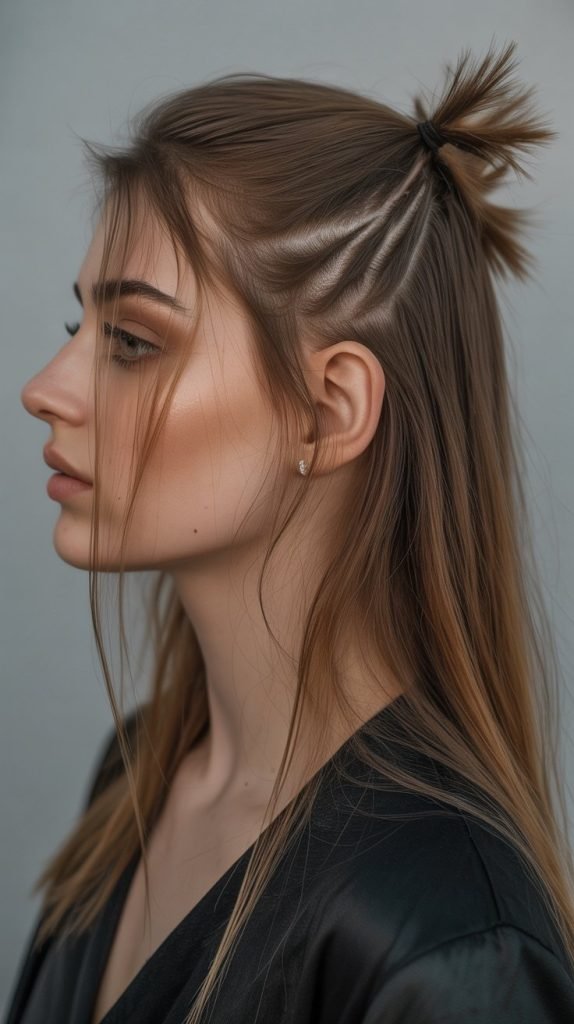
1. Classic Butterfly Cut with Face-Framing Layers
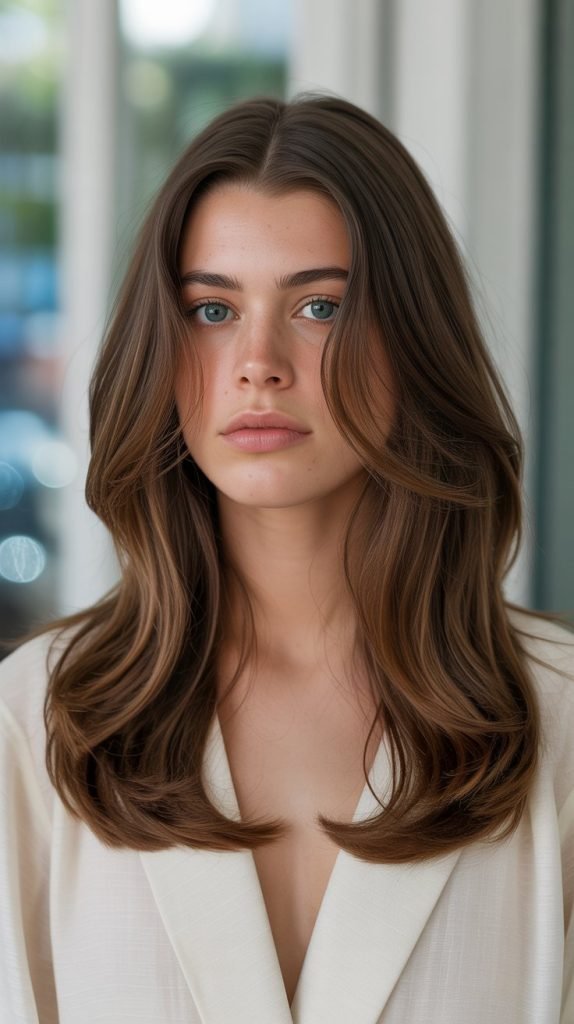
The classic butterfly cut establishes the foundation for this trendy hairstyle by incorporating strategically placed layers that create natural volume and movement.
This timeless approach focuses on shorter pieces around the face that seamlessly blend into the longer back sections.
How to Create:
- Start by sectioning your hair into three parts: two front sections and one back section, securing the back with a clip.
- Take the front sections and pull them forward, determining where you want the shortest layer to begin (typically around cheekbone or chin length).
- Cut the front pieces at a slight angle, creating a diagonal line that slopes downward from your face toward the back.
- Gradually blend these shorter layers into the mid-lengths by using point-cutting technique for a softer, more natural transition.
- Release the back section and create subtle long layers by taking vertical sections and trimming minimal length to maintain overall hair length.
- Style with a round brush while blow-drying, directing the shorter layers away from your face to emphasize the butterfly wing effect.
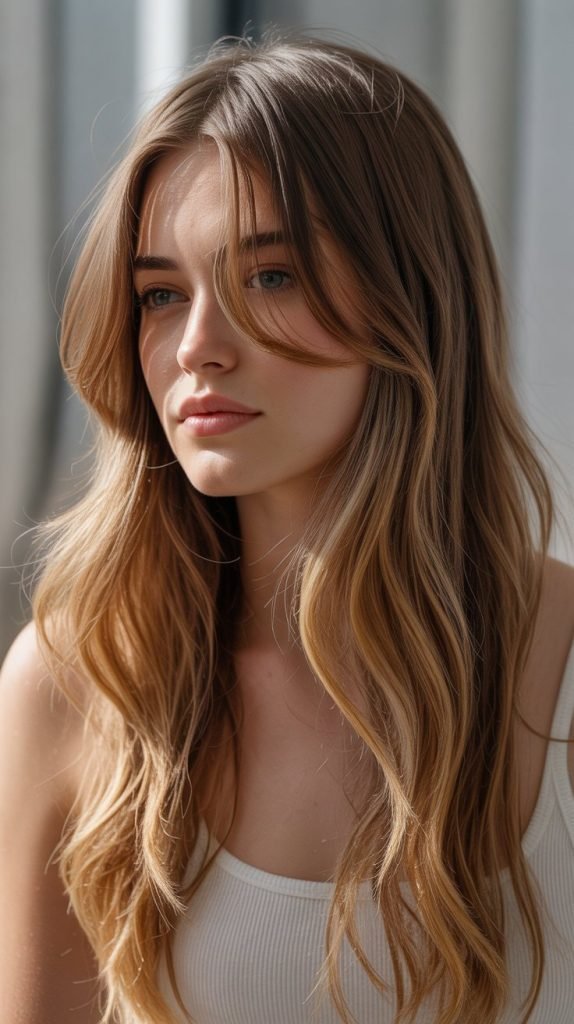
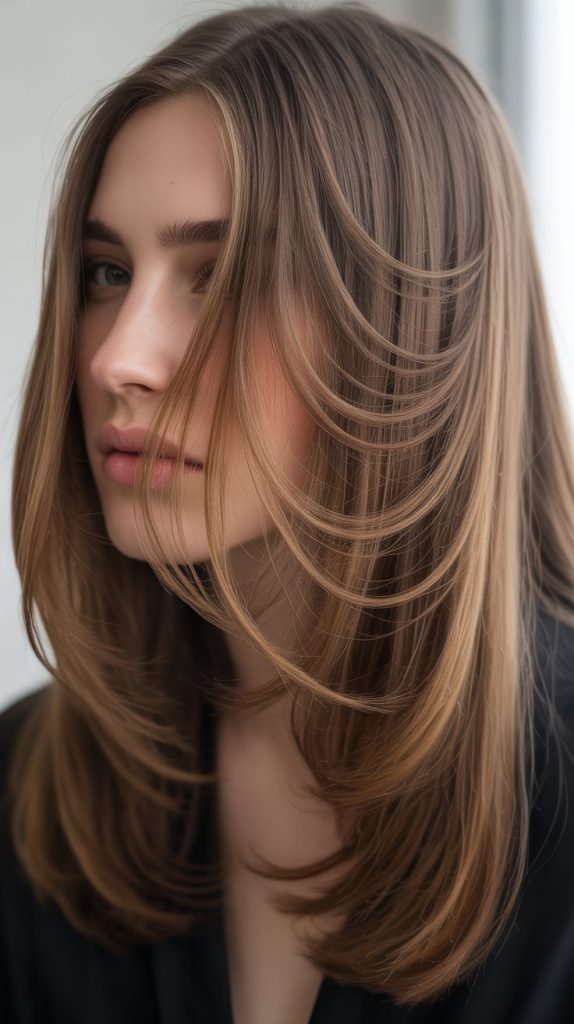
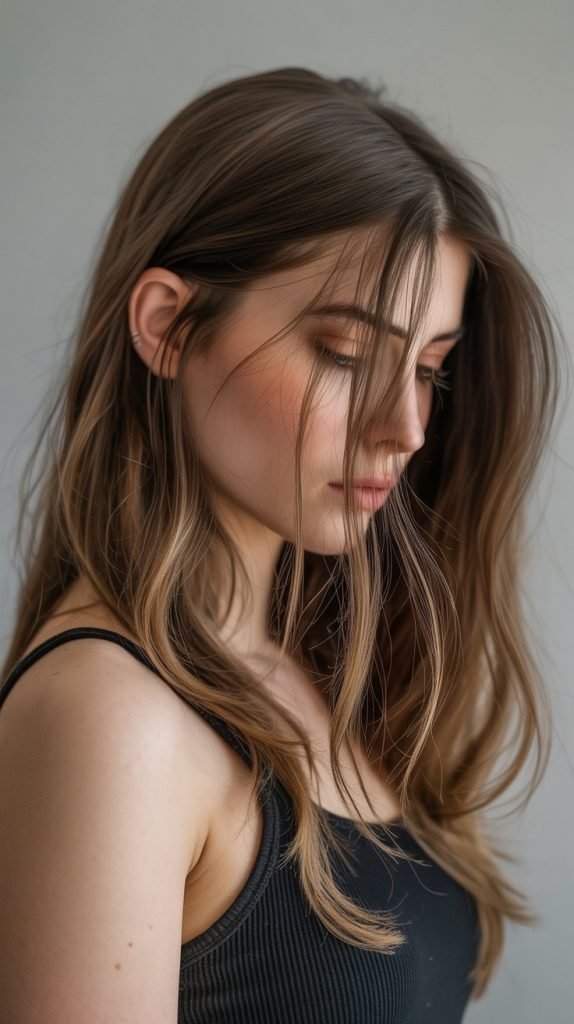
2. Curtain Bangs Butterfly Haircut
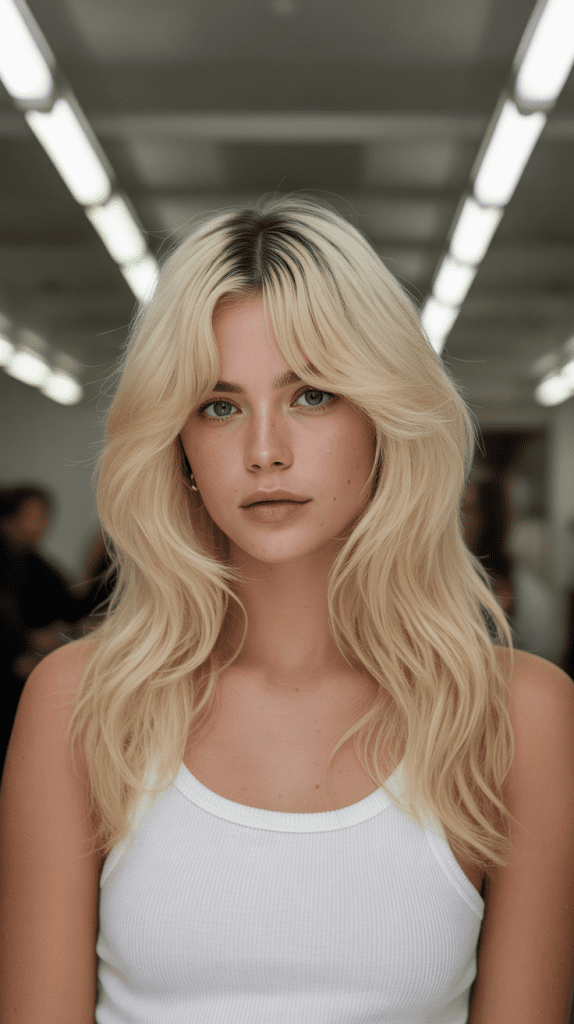
Combining curtain bangs with the butterfly cut creates an effortlessly chic look that frames the face beautifully while adding dimension throughout the length.
The curtain bangs provide a softer, more gradual transition into the face-framing layers.
Technique Details:
- Begin by creating a triangular section at the front of your hair, starting from the highest point of your forehead where your hair naturally parts.
- Cut the curtain bangs to fall around eyebrow length in the center, gradually increasing length toward the sides.
- Connect these bangs seamlessly to the butterfly layers by creating a gentle graduation that flows into the cheek-length pieces.
- Use a texturizing technique by point-cutting into the ends to remove bulk and create a feathered appearance.
- Maintain the longer back sections while adding subtle internal layers for movement without losing density.
- Style the curtain bangs by blow-drying with a round brush, sweeping them to either side of your face for that signature curtain effect.
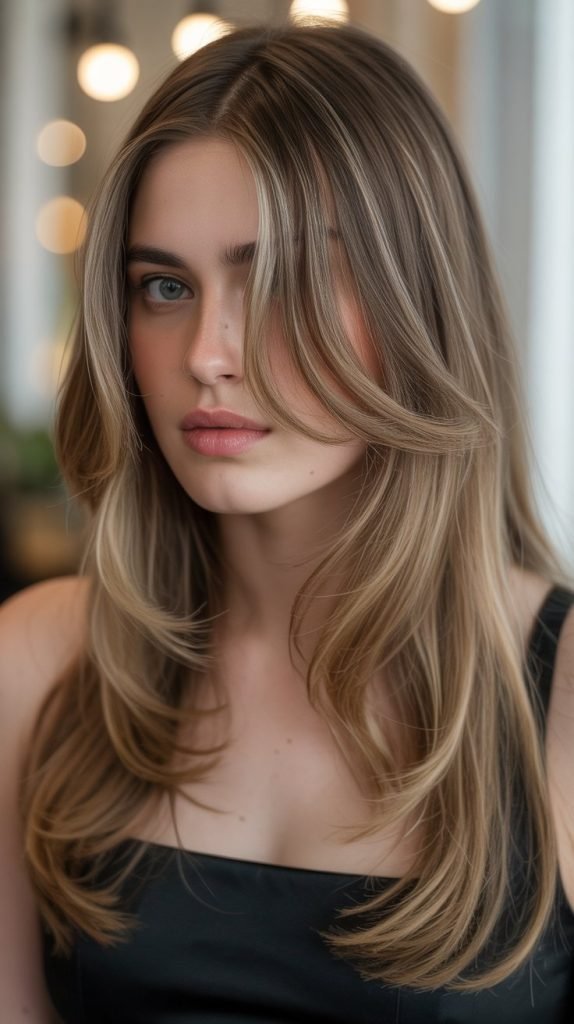
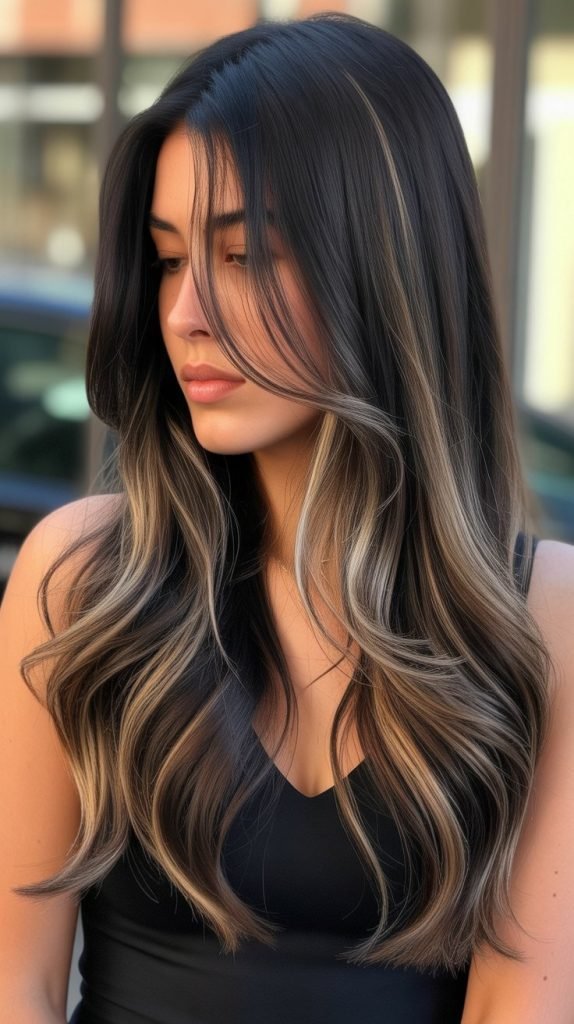
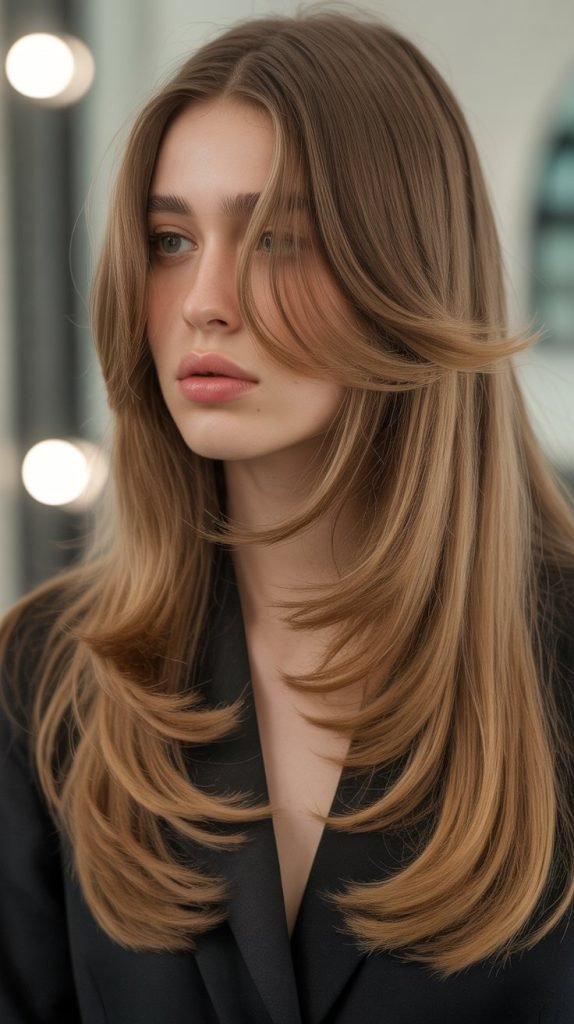
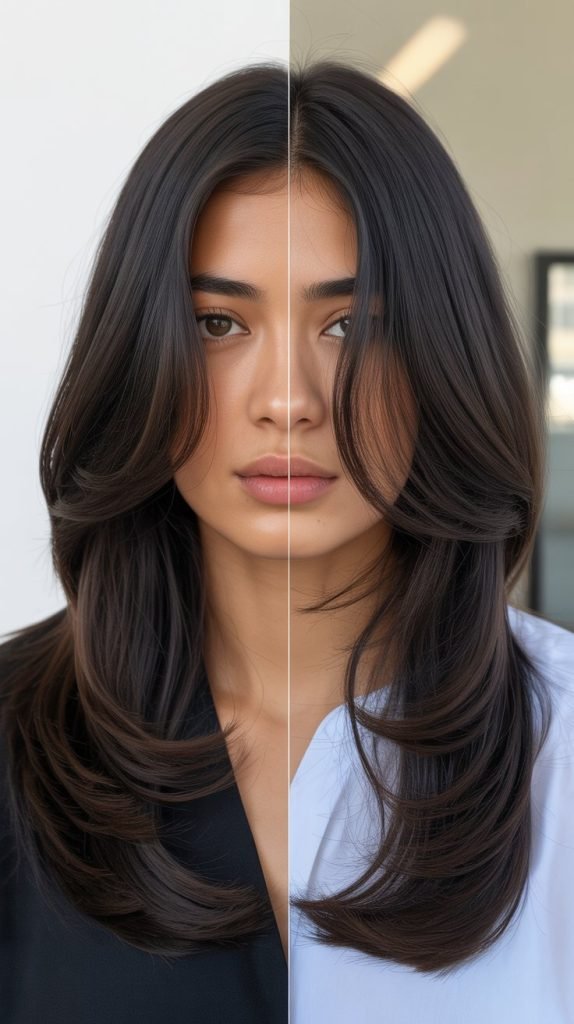
3. Layered Butterfly Cut for Thick Hair
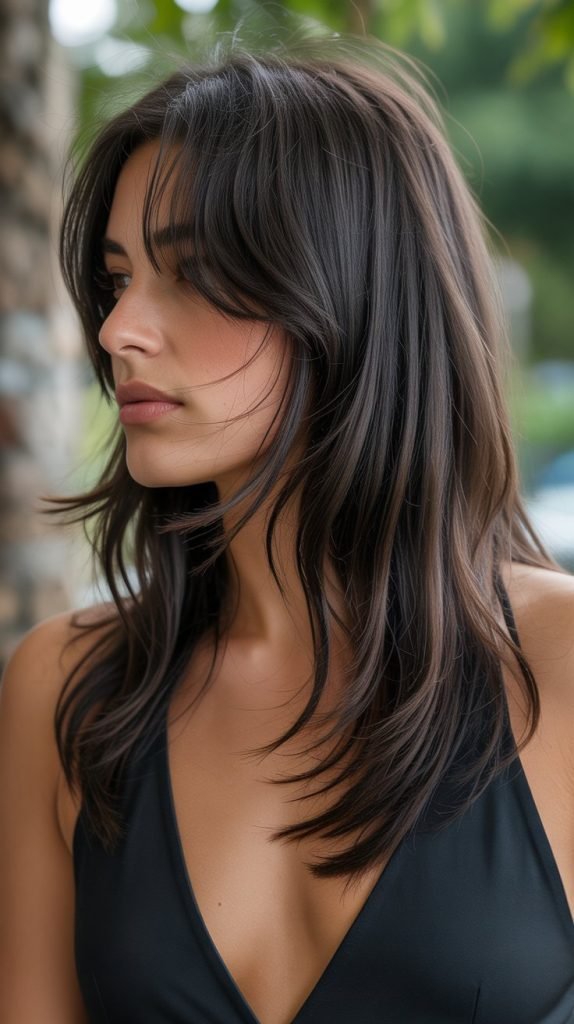
Thick hair benefits tremendously from the butterfly cut as the strategic layering removes bulk while creating shape and movement.
This variation focuses on internal texturizing to prevent the heavy, triangular silhouette common with thick hair.
Cutting Method:
- Divide your hair into horizontal sections, starting from the bottom and working upward to ensure even layer distribution.
- Create more aggressive internal layers by taking vertical subsections and using slide-cutting technique to remove weight from within the hair shaft.
- Focus the shortest layers around the face starting at lip or chin length, depending on your face shape preferences.
- Establish multiple layer levels throughout the mid-lengths, ensuring each layer is at least one to two inches shorter than the one below it.
- Use thinning shears on the underneath sections to remove additional bulk while maintaining surface smoothness and shine.
- Apply texturizing spray and scrunch while blow-drying to enhance the natural movement created by the layers.
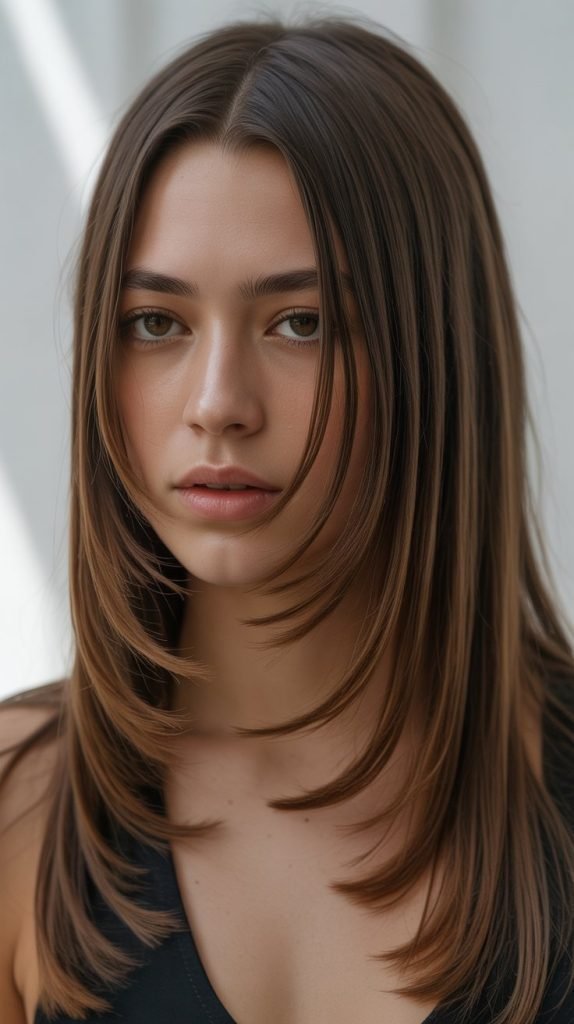
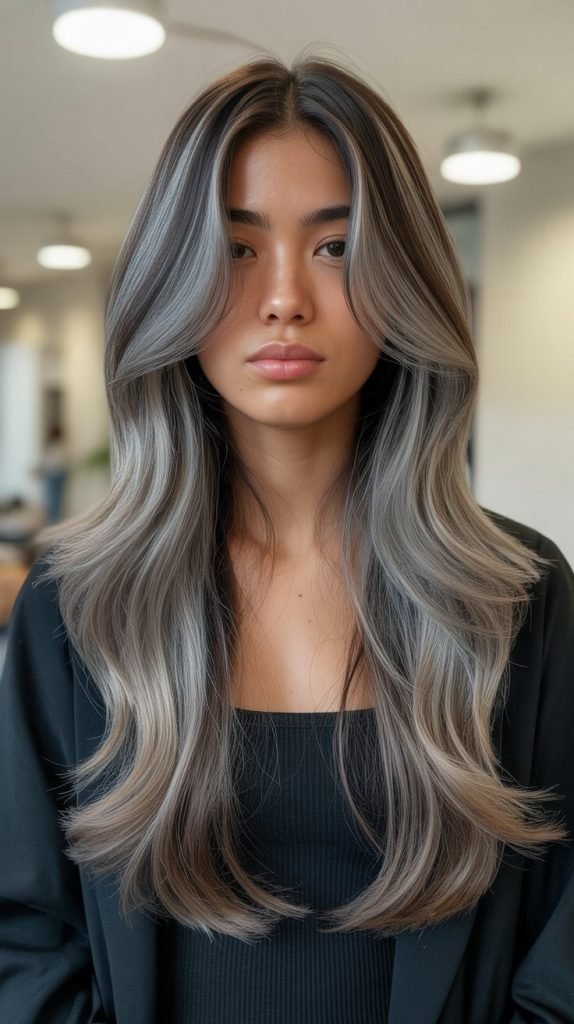
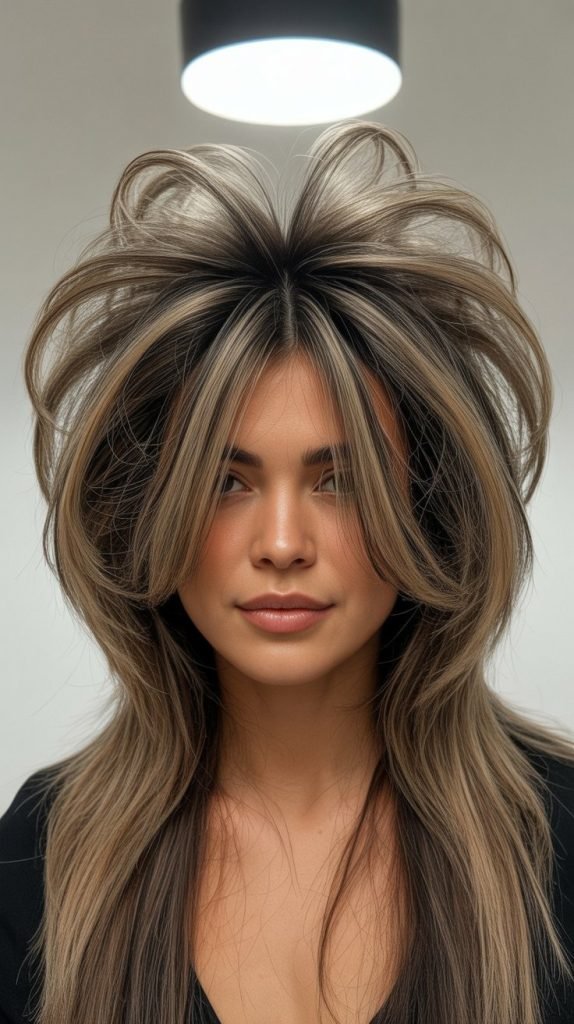
4. Soft Butterfly Cut with Minimal Layers
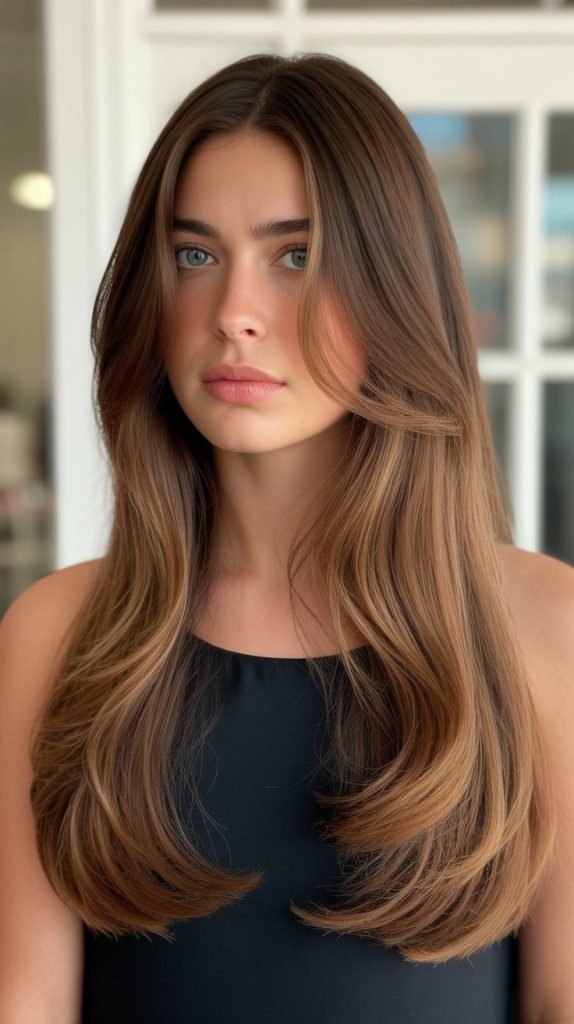
For those hesitant to commit to dramatic layering, the soft butterfly cut offers a gentle introduction with subtle dimension and barely-there layers.
This conservative approach maintains length while adding just enough movement to avoid a flat appearance.
Application Steps:
- Section hair into front and back portions, keeping the majority of length intact in the back sections.
- Create face-framing pieces that are only one to two inches shorter than your overall length for a whisper-soft effect.
- Use a blending technique that incorporates very gradual transitions, making the layers almost imperceptible when hair is down.
- Focus on just two or three layer levels rather than multiple tiers to maintain a more uniform appearance.
- Point-cut the very ends of all sections to soften the perimeter and create subtle texture without obvious choppy pieces.
- Style with minimal product and gentle waves to showcase the delicate layering without overwhelming the natural hair flow.
5. Dramatic Butterfly Cut with Short Crown Layers
The dramatic butterfly cut pushes the boundaries with noticeably short layers at the crown that create maximum volume and a bold statement. This adventurous version works exceptionally well for those seeking significant transformation.
Execution Guide:
- Start by creating a circular section at the crown area, approximately three to four inches in diameter.
- Cut this crown section to approximately four to six inches in length, creating a dramatically shorter layer that will provide lift.
- Establish intermediate layers radiating outward from the crown, each progressively longer until blending with face-framing pieces.
- Maintain significant length in the back sections to preserve the overall long hair aesthetic while creating contrast.
- Use a combination of point-cutting and slide-cutting to ensure all layers blend seamlessly despite the dramatic length differences.
- Style by blow-drying the crown layers upward and outward using a round brush to maximize the voluminous butterfly wing effect.
6. Butterfly Cut with Wispy Ends
Incorporating wispy, textured ends into the butterfly cut creates a romantic, ethereal quality that softens the overall look. This technique focuses on creating feathered, piece-y ends throughout all layers.
Creating Wispy Texture:
- After establishing your basic butterfly cut structure, focus specifically on texturizing the ends of each layer.
- Hold scissors vertically and use a deep point-cutting technique, cutting into the hair at various depths to create irregular, feathered ends.
- Apply this texturizing method to all layers, including face-framing pieces, mid-lengths, and the longest back sections.
- Use a razor tool sparingly on selected pieces to create even softer, more diffused ends that blend beautifully together.
- Avoid cutting straight across at any point to prevent blunt lines that contradict the wispy aesthetic.
- Style with lightweight texturizing spray and allow hair to air-dry or use minimal heat to preserve the delicate, piece-y end texture.
7. Side-Parted Butterfly Haircut
The side-parted butterfly cut shifts the focus to one side of the face, creating asymmetrical interest while maintaining the signature layered structure. This styling variation adds sophistication and works beautifully for various face shapes.
Styling Approach:
- Create a deep side part approximately two to three inches from your natural center part location.
- Cut face-framing layers with the side part in mind, making the layers on the heavier side slightly longer to create balance.
- Ensure the shorter side layers frame the face elegantly without appearing too short or choppy when styled to the side.
- Incorporate slightly longer layers on the lighter side of the part to prevent the hair from looking sparse or thin.
- Use a flat iron or curling iron to direct the heavier side across the forehead for a glamorous, sweeping effect.
- Apply volumizing mousse at the roots on the lighter side to prevent the hair from lying flat against the head.
8. Butterfly Cut with Blunt Ends
Combining the layered structure of the butterfly cut with intentionally blunt ends creates striking contrast and modern edge. This approach maintains clean, straight perimeters at each layer level for a more polished appearance.
Cutting Technique:
- Establish your butterfly layer structure first, determining exact lengths for face-framing pieces and subsequent layers.
- Instead of point-cutting or texturizing the ends, cut each layer with scissors held horizontally for a clean, blunt line.
- Ensure each subsection within a layer is cut to exactly the same length to maintain the sharp, uniform appearance.
- Use a fine-toothed comb to ensure hair is completely smooth and tangle-free before each cut for maximum precision.
- Check your work by blow-drying the hair straight and examining whether all blunt lines are even and intentional.
- Style with smoothing serum and a flat iron to emphasize the crisp, clean lines of the blunt ends against the layered structure.
9. Butterfly Cut for Fine Hair
Fine hair gains substantial body and fullness through a carefully executed butterfly cut that creates the illusion of thickness.
This variation focuses on strategic placement of layers to maximize volume without creating stringy, thin-looking ends.
Volume-Building Method:
- Keep layers slightly longer and less dramatic than you would for thick hair to prevent fine hair from appearing sparse or straggly.
- Focus the shortest layers around the face starting at chin length or slightly below to create framing without sacrificing density.
- Avoid over-texturizing or thinning fine hair as this removes precious volume and can make hair look thinner.
- Create internal layers primarily in the mid-lengths rather than at the crown to maintain fullness at the top.
- Cut slightly fewer layers overall, perhaps three to four distinct levels instead of five or six, to preserve the appearance of thickness.
- Style with volumizing products and blow-dry with a round brush, focusing on lifting the roots for maximum body.
10. Shaggy Butterfly Cut

The shaggy butterfly cut infuses rock-and-roll attitude into the elegant butterfly structure, creating a deliberately messy, textured look. This edgy interpretation features choppy layers and significant texturizing throughout.
Creating Shag Texture:
- Begin with the basic butterfly cut framework but create more dramatic length differences between layers.
- Use heavy point-cutting throughout all sections, cutting deeply into the hair to create visible chunks and separation.
- Apply razor techniques liberally to add texture and remove weight, creating that signature shaggy appearance.
- Don’t worry about perfect precision or evenness—the beauty of the shag lies in its imperfect, undone quality.
- Create shorter, choppy pieces throughout the crown and sides that stand out from the rest of the hair.
- Style with sea salt spray or texturizing cream, scrunching and tousling the hair to enhance the deliberately messy aesthetic.
11. Butterfly Cut with Money Piece Highlights
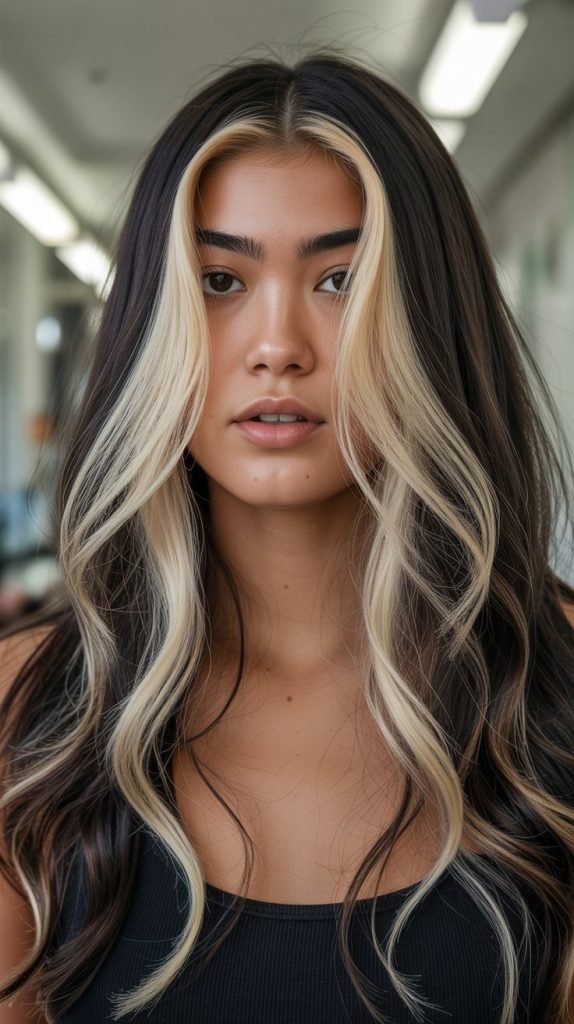
Adding money piece highlights to your butterfly cut draws attention to the face-framing layers while creating stunning dimension. These bright face-framing sections complement the layered structure beautifully.
Color and Cut Integration:
- Plan your butterfly cut layers to showcase the money piece highlights, typically cutting these sections to fall around chin to shoulder length.
- Apply highlights to the front sections that will become your face-framing layers before cutting for more precise placement.
- Cut the highlighted sections to be among the shortest layers in your butterfly cut to maximize visibility and impact.
- Consider making the money pieces slightly longer than traditional butterfly face-framing layers to show more of the color contrast.
- Use the highlights to create visual emphasis on the butterfly wing effect, with the lighter color drawing the eye to the layered movement.
- Style with loose waves or curls that showcase both the dimensional color and the flowing layers simultaneously.
12. Butterfly Cut with V-Shaped Back
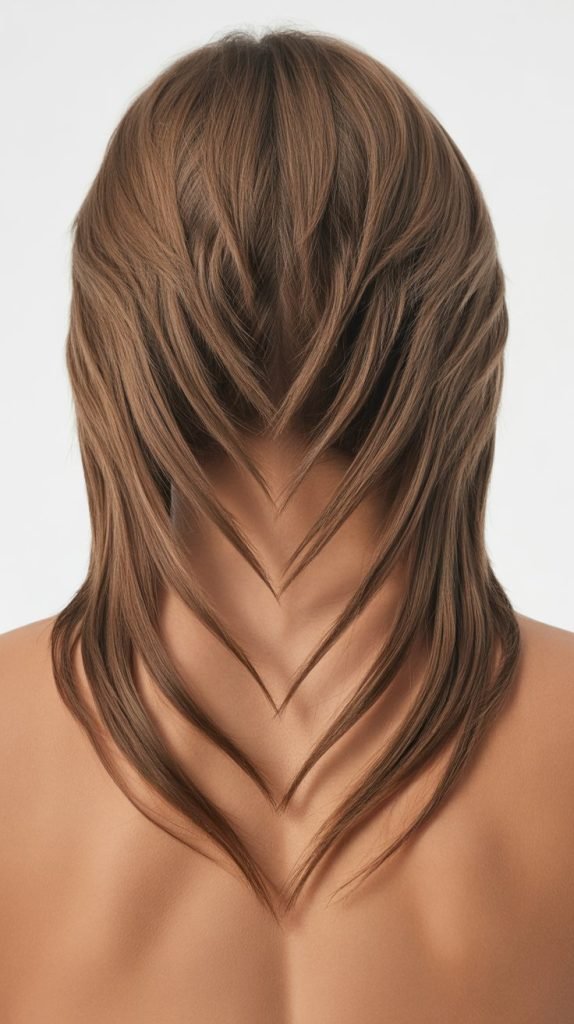
Incorporating a V-shaped back into your butterfly cut adds visual interest from all angles while maintaining beautiful face-framing layers in front. This technique creates a pointed, elongated silhouette at the back.
Back Section Technique:
- After creating your face-framing butterfly layers, focus attention on shaping the back sections into a V formation.
- Divide the back hair into two equal sections along the center back part line.
- Pull each back section forward over the shoulders and cut at an angle, with the hair closest to the face shorter and gradually lengthening toward the back center.
- When released, these angled cuts create a natural V point at the center back when hair hangs down.
- Blend the sides of the butterfly layers into this V-shaped back by creating transitional layers that connect the two areas smoothly.
- Style by straightening or adding loose waves, ensuring the back is visible to showcase the distinctive V-shape.
13. Asymmetrical Butterfly Cut
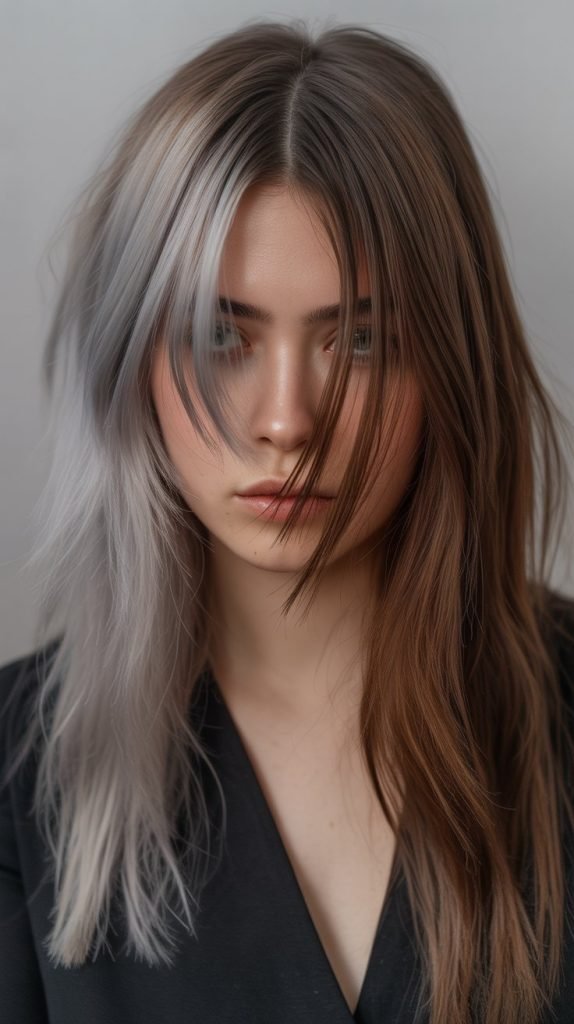
The asymmetrical butterfly cut intentionally creates different lengths on each side of the face, offering edgy sophistication and unique styling options. This bold variation breaks traditional symmetry for artistic effect.
Asymmetrical Cutting Method:
- Decide which side will feature shorter layers and which will maintain longer lengths before beginning.
- Create face-framing layers on one side starting at approximately chin length, while the opposite side begins at shoulder length or below.
- Ensure the asymmetry is intentional and noticeable rather than appearing as a cutting mistake by making distinct length differences.
- Maintain the butterfly structure on both sides despite different starting lengths, with each side having its own graduated layer system.
- Cut the back sections relatively symmetrically to prevent the asymmetry from looking unbalanced when viewed from behind.
- Style the shorter side with more volume or curl to emphasize the intentional asymmetrical design.
14. Butterfly Cut with Razor Layers
Using a razor instead of scissors to create butterfly layers produces ultra-soft, seamless blending with enhanced texture and movement. This technique creates a more diffused, organic transition between lengths.
Razor Cutting Technique:
- Use a professional razor tool specifically designed for hair cutting rather than attempting this with regular razors.
- Work on slightly damp hair as the razor glides more smoothly and creates better texture on moistened strands.
- Hold hair sections at an angle and glide the razor down the hair shaft in smooth, controlled motions to create layers.
- Apply less pressure with the razor than you would with scissors, allowing the blade to gently remove length and create texture simultaneously.
- Focus razor work on mid-lengths and ends rather than near the roots to avoid creating frizz or damaging the hair shaft.
- Style with smoothing products that combat potential frizz while maintaining the soft, feathered texture created by the razor.
15. Butterfly Cut with Interior Layers Only
This subtle variation keeps the perimeter of the hair at one length while creating all butterfly layers internally, resulting in a sleek exterior with hidden volume and movement. This approach works beautifully for those wanting versatility.
Internal Layering Process:
- Maintain the entire perimeter of your hair at the same length, creating a blunt baseline that remains untouched.
- Section hair horizontally and work on the underneath layers, creating shorter lengths within the interior that won’t be visible from the surface.
- Pull each internal section straight up or forward and cut at an angle to create graduation that remains hidden beneath the surface layers.
- Keep the very top layer long and one-length to create a sleek, polished appearance when hair is straight or smooth.
- Create face-framing pieces that are technically interior layers, cutting them shorter than the perimeter but ensuring they fall inside the outer layer envelope.
- Style either straight to showcase the one-length appearance or with waves to reveal the hidden internal layers and volume.
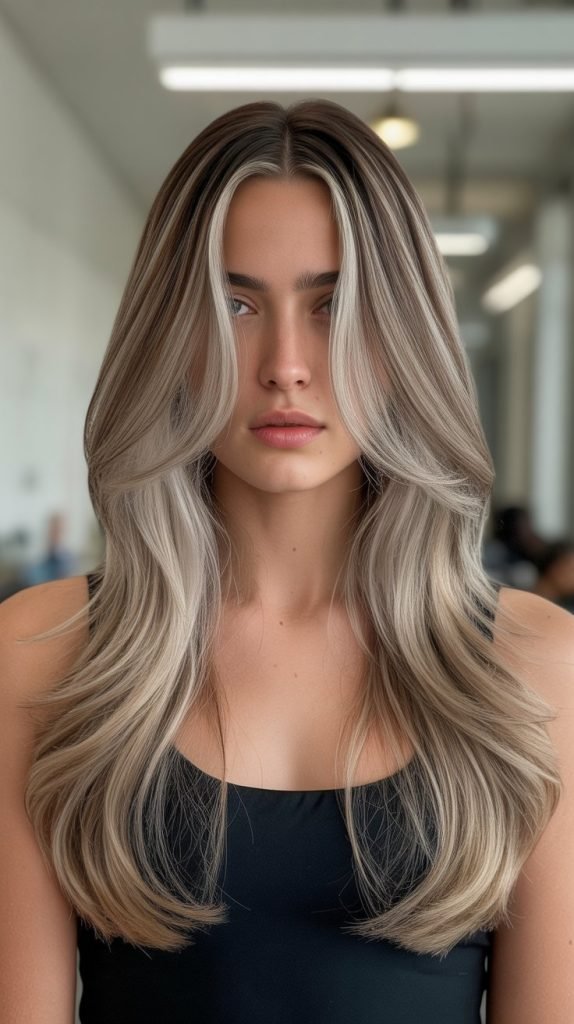
16. Butterfly Cut with Balayage
Combining butterfly cut layers with balayage color creates stunning dimensional effects that enhance the layered structure through strategic color placement. The hand-painted highlights follow and accentuate the cut’s natural movement.
Balayage Integration Strategy:
- Plan balayage placement to follow the natural flow of your butterfly layers, concentrating lighter pieces where layers frame the face.
- Apply more highlights to the face-framing sections and graduated layers to draw attention to the cut’s structure.
- Keep the underneath sections darker and apply most color to the top layers where light naturally hits and where movement is most visible.
- Use the butterfly layers to create ribbon-like highlights by painting color onto each distinct layer level.
- Consider babylights around the face where the shortest butterfly layers fall to create a softly illuminated framing effect.
- Style with waves or curls to maximize the interplay between the dimensional color and the layered cut, creating depth and visual interest.
17. Butterfly Cut with Long Layers
The long-layered butterfly cut maintains substantial length throughout while creating the butterfly effect through subtle, elongated layers. This conservative approach suits those wanting minimal transformation while gaining movement.
Long Layer Creation:
- Begin face-framing layers at shoulder length or below rather than at chin or cheek length for a more subtle butterfly effect.
- Create very gradual transitions between layers, with each subsequent layer only slightly longer than the previous one.
- Maintain significant length in the back, keeping the longest pieces at or near the original hair length to preserve overall length.
- Space out your layers with three to four inches between each distinct level rather than creating many closely stacked layers.
- Use primarily point-cutting and minimal texturizing to keep the ends soft while maintaining density and weight.
- Style with large barrel curls or waves that emphasize the long, flowing nature of the layers without creating too much volume or separation.
18. Butterfly Cut for Curly Hair
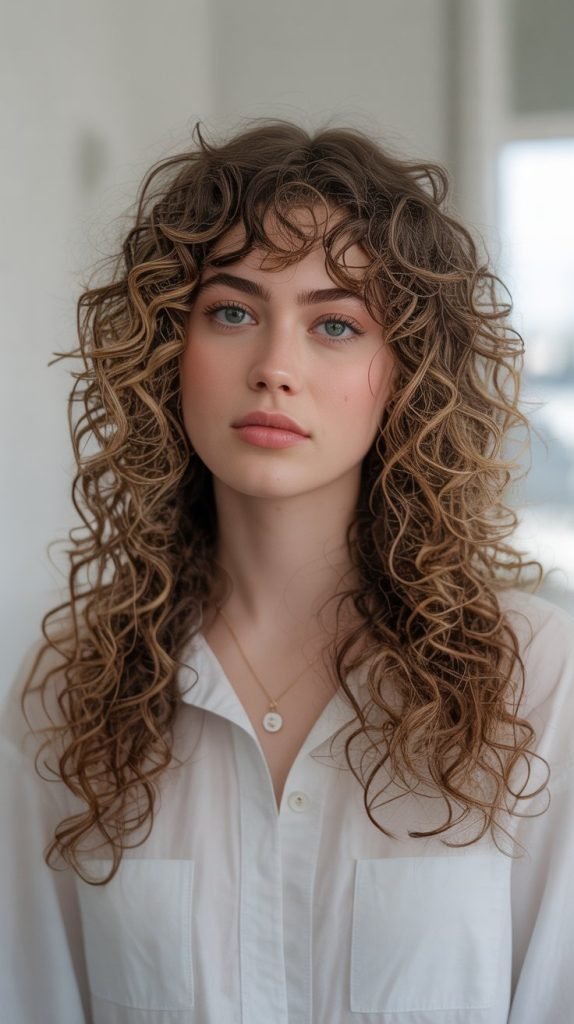
Adapting the butterfly cut for naturally curly hair requires special considerations regarding shrinkage, curl pattern, and dry cutting techniques. This variation celebrates natural texture while creating beautiful shape and definition.
Curly Hair Cutting Approach:
- Always cut curly hair when completely dry so you can see the true length and how each curl will fall naturally.
- Account for significant shrinkage by cutting layers longer than you would for straight hair, as curls will bounce up considerably.
- Use curl-by-curl cutting technique, separating individual curl clumps and trimming each one to the appropriate length for that layer.
- Create face-framing layers that work with the natural curl pattern, ensuring they enhance rather than fight against the hair’s natural movement.
- Avoid thinning or over-texturizing curly hair as this can create frizz and disrupt the curl pattern integrity.
- Style with curl-defining cream and allow hair to air-dry or diffuse, scrunching to encourage the butterfly layers to form defined, bouncy sections.
19. Butterfly Cut with Flipped Ends
Adding flipped ends to your butterfly cut creates a retro-inspired, playful look with outward-facing layers that enhance the wing-like appearance. This styling technique amplifies the butterfly effect through directional styling.
Flipping Technique:
- Use a round brush or flat iron to deliberately curl the ends of each layer outward and away from the face and body.
- Start with the face-framing layers, wrapping them around a round brush and directing heat upward and outward to create the flip.
- Apply the flipping technique to each visible layer, creating a cascading effect of outward-turned ends at different lengths.
- Use strong-hold styling products like mousse or hairspray to maintain the flipped shape throughout the day.
- Consider hot rollers placed strategically at each layer level and rolled under for a longer-lasting flip effect.
- Finish with a light hairspray mist, holding the can at least 10 inches away to avoid weighing down the flipped ends or creating stiffness.
20. Butterfly Cut with Micro Layers
Creating micro layers within the butterfly cut framework adds extreme texture and movement through numerous closely-stacked short layers. This detailed approach requires precision but delivers maximum dimension and flow.
Micro Layer Method:
- Establish more layer levels than a traditional butterfly cut, creating five to seven distinct lengths rather than three to four.
- Space layers very closely together, with only one to two inches difference between each level for that micro-layered effect.
- Start with face-framing pieces and create each subsequent layer only slightly longer, building up gradually to the longest back sections.
- Use precise point-cutting and slide-cutting techniques to ensure all micro layers blend seamlessly despite being closely stacked.
- Focus micro layering primarily on the top sections and sides where movement will be most visible, keeping underneath sections less heavily layered.
- Style with volumizing products and blow-dry with fingers to separate and emphasize each individual micro layer for maximum texture and body.
21. Butterfly Cut with Sliced Layers

Sliced layers incorporate a specific cutting technique that creates controlled, piece-y texture throughout the butterfly cut. This method uses scissors in a slicing motion along the hair shaft for a modern, editorial finish.
Slicing Technique Explained:
- After establishing basic butterfly cut structure, use slicing technique as a texturizing method throughout each layer.
- Hold scissors at a slight angle to the hair shaft and make short, controlled slicing motions along the length to create breaks and texture.
- Focus slicing primarily on the mid-lengths to ends rather than near the roots to maintain fullness at the base.
- Create more sliced texture in the face-framing layers and top sections where the piece-y effect will be most visible and impactful.
- Vary the depth and frequency of slices throughout different sections to create natural-looking, random texture rather than uniform choppy pieces.
- Style with lightweight paste or texturizing spray, using fingers to separate and define the sliced pieces for an effortlessly undone appearance.
22. Butterfly Cut with Round Layers
Round layers create a more circular, soft silhouette around the face rather than the traditional diagonal butterfly shape. This variation offers a gentler, more romantic interpretation of the butterfly cut.
Round Layer Creation:
- Instead of cutting face-framing layers in a straight diagonal line, create a curved, semi-circular shape around the face.
- Pull front sections forward and cut in a horseshoe or U-shape pattern, with the shortest point at the center of the face and gradually lengthening toward the sides.
- Ensure the round layers create a halo-like frame that softly encircles the face rather than sharply angling downward.
- Blend these round layers into the mid-lengths and back sections using graduation techniques that maintain the circular movement.
- Create additional round layer levels throughout the hair, each forming its own curved pattern that stacks to create overall volume and shape.
- Style by blow-drying with a round brush, directing layers to curve around the face and emphasizing the soft, romantic circular movement.
23. Butterfly Cut with Undercut

Combining an undercut with the butterfly cut creates edgy contrast between the clean, shaved underneath sections and the flowing, layered top sections. This bold combination offers versatility and cooling comfort.
Undercut Integration:
- Decide on the placement and size of your undercut before creating butterfly layers, typically choosing the nape area or side sections.
- Use clippers to create the undercut, maintaining a clean line between the shaved section and the hair that will remain long and layered.
- Create butterfly layers in the remaining long sections, ensuring they can fall naturally to cover the undercut when desired.
- Cut layers slightly longer in areas above the undercut to ensure adequate coverage when hair is worn down.
- Consider the styling versatility this combination offers—wear hair down to hide the undercut or style it up to reveal the edgy shaved design.
- Style the butterfly layers normally with the undercut hidden, or use clips and styling techniques to showcase the undercut while displaying the flowing layers.
24. Butterfly Cut with Beveled Layers
Beveled layers add architectural interest to the butterfly cut through sharp, angled cutting that creates clean, defined edges at each layer level. This precise technique delivers a structured, modern interpretation.
Beveling Technique:
- Cut each layer with scissors held at a specific angle to create a beveled edge rather than a soft or blunt line.
- Maintain consistent bevel angles throughout all layers for a cohesive, intentional geometric appearance.
- Use fine-toothed combs and precise sectioning to ensure each beveled layer is cut with mathematical accuracy and clean edges.
- Create sharper, more noticeable angles in the face-framing sections where the architectural quality will be most visible.
- Avoid texturizing or point-cutting beveled edges as the beauty lies in the sharp, clean lines of the angular cuts.
- Style with a flat iron to emphasize the straight, sleek lines of the beveled layers, using smoothing products to enhance shine and definition.
25. Butterfly Cut with Disconnected Layers
Disconnected layers create intentional, dramatic gaps between layer lengths rather than seamless blending. This avant-garde approach to the butterfly cut makes bold artistic statements through obvious length separations.
Disconnection Method:
- Create face-framing layers at one specific length, then make the next layer significantly longer with noticeable space between them rather than gradual blending.
- Establish three to four distinct length sections with visible gaps between each level, making the disconnection intentional and clear.
- Cut each disconnected section with precision so the separation appears artistic rather than accidental or poorly executed.
- Consider disconnecting the face-framing pieces significantly from the mid-lengths for maximum dramatic impact.
- Avoid any blending or transition cutting between the disconnected sections to maintain the stark length contrasts.
- Style with straightening tools or defined waves that emphasize the separate layer sections, making the disconnection a focal point of the look.
26. Butterfly Cut with Tapered Ends
Tapering the ends of each butterfly layer creates a refined, gradually narrowing point at each level. This technique produces elegant, feminine results with delicate, fine-tuned endings at every layer.
Tapering Process:
- After cutting each layer to the desired length, use scissors or a razor to create a tapered point at the end of each section.
- Hold hair taut and use a slicing motion to gradually thin the hair toward the very end, creating a delicate, pointed finish.
- Apply tapering to every visible layer, including face-framing pieces, mid-lengths, and the longest back sections for consistency.
- Vary the intensity of tapering based on hair thickness, with thicker hair requiring more aggressive tapering to achieve the refined point.
- Use deep point-cutting combined with tapering for the softest, most diffused tapered ends that blend beautifully.
- Style with minimal product to showcase the delicate tapered ends without weighing them down or creating clumps that hide the refined points.
27. Butterfly Cut with Feathered Crown
Adding feathered layers specifically at the crown creates lift and volume at the top of the head while maintaining the classic butterfly face-framing elements. This technique combats flatness and adds height.
Crown Feathering Technique:
- Create a circular section at the crown approximately four inches in diameter dedicated specifically to crown feathering.
- Cut this crown section in short layers (four to six inches) and heavily point-cut to create soft, feathered texture.
- Use razor techniques or deep point-cutting to make the crown layers extra wispy and light for maximum lift potential.
- Connect the feathered crown seamlessly to the face-framing butterfly layers by creating intermediate transitional layers.
- Keep the sides and back less heavily layered to create contrast with the voluminous feathered crown area.
- Style by blow-drying the crown layers upward with a round brush, using volumizing powder or spray at the roots for enhanced lift and fullness.
28. Butterfly Cut with Graduated Angles
Graduated angles create a precise, mathematical approach to the butterfly cut with each layer cut at a specific degree angle. This methodical technique ensures consistent, predictable results with scientifically calculated layering.
Angle Graduation Method:
- Use a protractor or angle guide to establish exact degree measurements for each layer cut, typically starting at 45 degrees for face-framing pieces.
- Cut each subsequent layer at a progressively shallower angle, perhaps moving from 45 to 30 to 15 degrees as you progress toward the back.
- Maintain mathematical precision by carefully measuring and maintaining each angle throughout the entire section at that layer level.
- Create consistent tension when pulling hair sections out from the head to ensure accurate angle execution.
- Use the graduated angles to control exactly how much layering and volume the cut will create based on the angle degrees chosen.
- Style to showcase the precise graduation by blow-drying smooth or with systematic waves that follow the angular progression.
29. Butterfly Cut with Invisible Layers
Invisible layers create movement and dimension that remains almost imperceptible when hair is straight but reveals itself beautifully when styled with waves or curls. This subtle technique offers versatility and controlled transformation.
Creating Invisible Layers:
- Cut layers that live primarily in the hair’s interior, keeping the surface layers long and one-length for a seamless appearance when straight.
- Make subtle length differences between layers—only half an inch to one inch rather than dramatic two to three inch gaps.
- Use point-cutting exclusively to avoid any blunt lines that would make layers visible in straight styling.
- Focus invisible layers in strategic locations where they’ll add movement when styled but won’t be obvious in sleek styles.
- Keep face-framing pieces only minimally shorter than the overall length to maintain the invisible quality when hair is worn smooth.
- Style straight with a flat iron to showcase the nearly imperceptible layering, then curl or wave to reveal the hidden dimension and movement.
30. Butterfly Cut with Twist-Cut Layers
Twist-cutting creates organic, natural-looking layers by twisting sections of hair before cutting, resulting in varied lengths that create textured, lived-in butterfly layers. This technique produces effortlessly undone results.
Twist-Cutting Process:
- Section hair for butterfly cut placement but twist each section several times before cutting rather than cutting straight sections.
- Make cuts through the twisted hair, which creates varied lengths and natural texture when the section is untwisted.
- Vary the number of twists and the tightness of each twist to create different levels of texture and irregularity in each section.
- Apply twist-cutting to face-framing layers, mi
31. Butterfly Cut with Graduated Bob Front

Combining a graduated bob silhouette in the front sections with long back lengths creates a dramatic butterfly interpretation. This hybrid approach delivers the structure of a bob with the versatility of long hair.
Bob-Butterfly Hybrid Method:
- Cut face-framing sections to classic bob length, typically between chin and shoulder length, creating a structured front silhouette.
- Establish a graduated angle in these front sections, with hair slightly shorter at the back of the jaw and gradually lengthening toward the back.
- Maintain significantly longer lengths in the back sections, creating dramatic contrast between the bob-length front and long back.
- Create intermediate layers that bridge the gap between the short graduated front and the long back sections for smoother transitions.
- Use this technique to achieve the face-framing benefits of a bob while preserving the styling versatility and femininity of long hair.
- Style the front sections with volume and structure while keeping the back sleek or wavy to emphasize the interesting length contrast.
32. Butterfly Cut with Horizontal Graduation
Horizontal graduation creates layers that move across the head from side to side rather than front to back. This unconventional approach to the butterfly cut offers unique dimension and movement patterns.
Horizontal Layering Technique:
- Section hair horizontally across the head rather than in traditional vertical or radial sections for butterfly cutting.
- Create layers that are shorter on one side of the head and gradually lengthen as they move across to the opposite side.
- Establish multiple horizontal layer levels, each with its own gradual side-to-side length increase for dimensional effects.
- Combine horizontal graduation with traditional face-framing butterfly pieces to maintain the signature look while adding unique movement.
- Use this technique to create interesting styling options, with hair falling differently depending on which side you part it.
- Style by emphasizing the horizontal movement through directional blow-drying that sweeps hair across the head following the graduated pattern.
33. Butterfly Cut with Precision Point-Cutting

Precision point-cutting elevates the butterfly cut through meticulous, detailed texturizing at every layer level. This refined technique creates the softest possible transitions and the most natural-looking movement throughout.
Precision Point-Cutting Method:
- After establishing all basic butterfly layer lengths, spend significant time point-cutting every single layer for perfect texture and blending.
- Hold scissors at a 45-degree angle to the hair and make small, precise cuts into the ends, working systematically through every section.
- Vary the depth of point-cuts based on desired texture, cutting deeper into thicker sections and more shallowly into finer areas.
- Pay special attention to transition zones between layers, using extensive point-cutting to ensure absolutely seamless blending with no visible lines.
- Work slowly and methodically, checking your progress frequently to ensure even texture distribution throughout all sections.
- Style with products that enhance the natural movement created by precision texturizing without weighing down the carefully crafted texture.
Conclusion
The world of 33 DIY Butterfly Haircuts for Long Hair offers endless possibilities for transformation, personalization, and creative expression without sacrificing the length you’ve worked hard to grow.
From classic interpretations that provide timeless elegance to bold variations that push creative boundaries, the butterfly cut adapts beautifully to different hair types, face shapes, and style preferences.
Whether you’re drawn to subtle face-framing layers that add gentle movement, dramatic graduated cuts that create maximum volume, or unique hybrid approaches that combine multiple techniques, there’s a butterfly cut variation perfectly suited to your individual needs and aesthetic vision.
By understanding the fundamental techniques, investing in proper tools, avoiding common mistakes, and maintaining your cut with regular trims and appropriate products, you can achieve and sustain salon-quality butterfly haircuts from the comfort of your home.
The versatility of these 33 DIY Butterfly Haircuts for Long Hair ensures that you’ll find inspiration for your next hair transformation while maintaining the flowing, feminine length that makes long hair so captivating and beautiful.