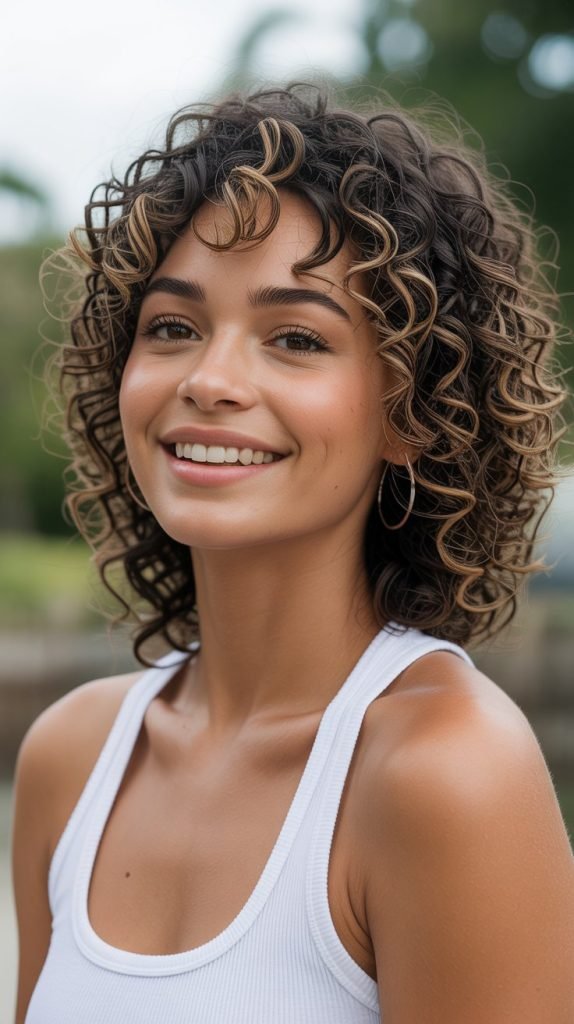
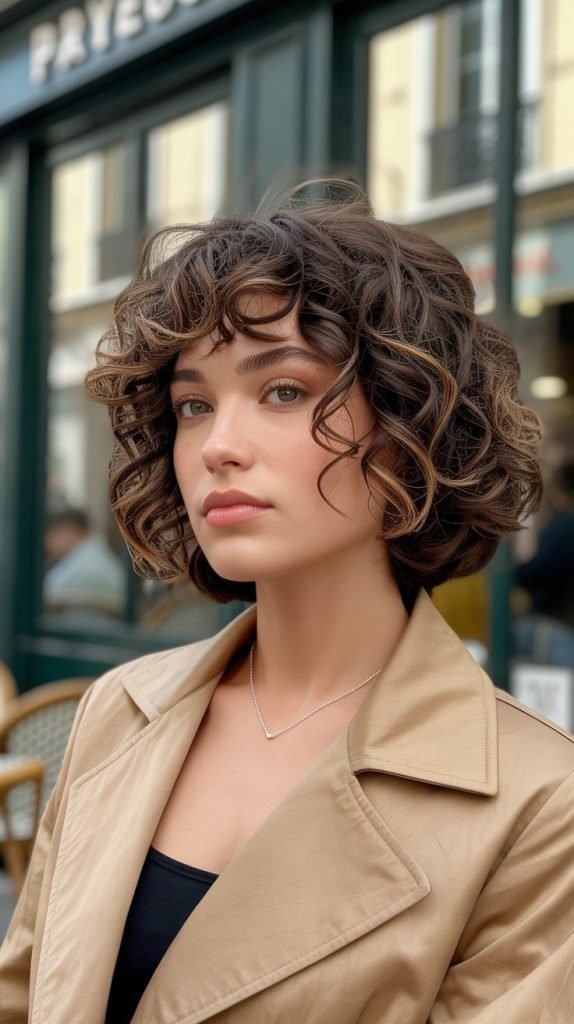
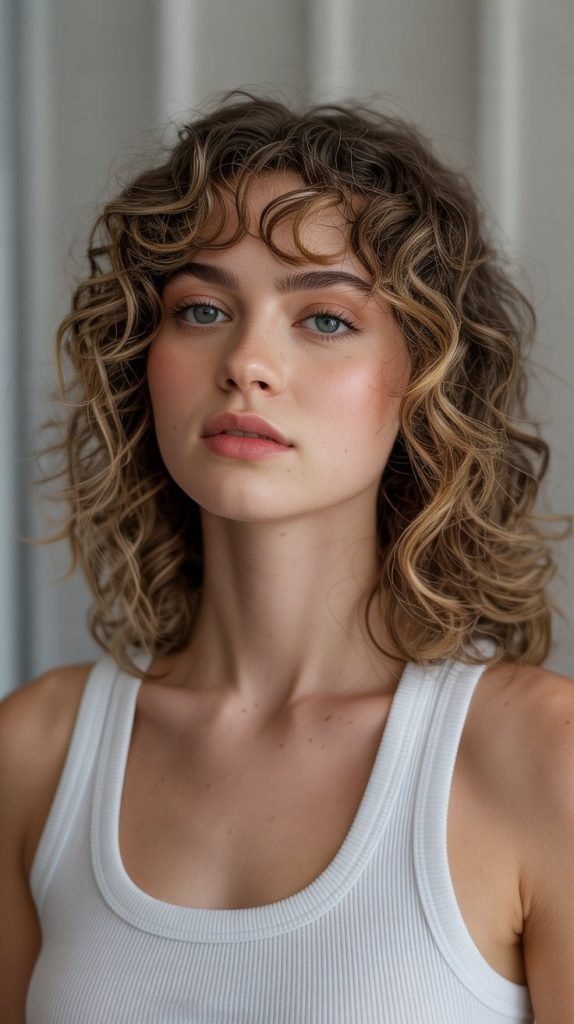
Curly hair paired with medium length creates the perfect canvas for stunning, versatile hairstyles that balance elegance with practicality.
Whether you’re blessed with natural spirals, loose waves, or tight coils, medium-length curly hair offers endless styling possibilities that can transform your look from casual to glamorous in minutes.
This comprehensive guide to 33 Beautiful Curly Hairstyles for Medium Hair will walk you through a diverse collection of styles ranging from effortless everyday looks to sophisticated updos perfect for special occasions.
You’ll discover techniques for enhancing your natural texture, managing volume, and creating definition while learning how to adapt each style to suit your unique curl pattern, face shape, and personal aesthetic.
From romantic half-up styles and playful ponytails to chic buns and trendy accessories, these hairstyles celebrate the natural beauty of curls while offering practical solutions for various occasions and lifestyle needs.
In This Post......
- 1. Classic Wash and Go
- 2. Defined Curl Refresh
- 3. Pineapple Updo
- 4. Side-Swept Curls
- 5. Half-Up Top Knot
- 6. Twisted Crown
- 7. Low Curly Ponytail
- 8. Messy Curly Bun
- 9. Braided Headband
- 10. Curly Faux Hawk
- 11. Vintage Pin Curls
- 12. Curly Shag with Layers
- 13. Accessorized with Headscarf
- 14. Curly Ponytail with Volume
- 15. Side Curly Bun
- 16. Waterfall Braid
- 17. Curls with Middle Part
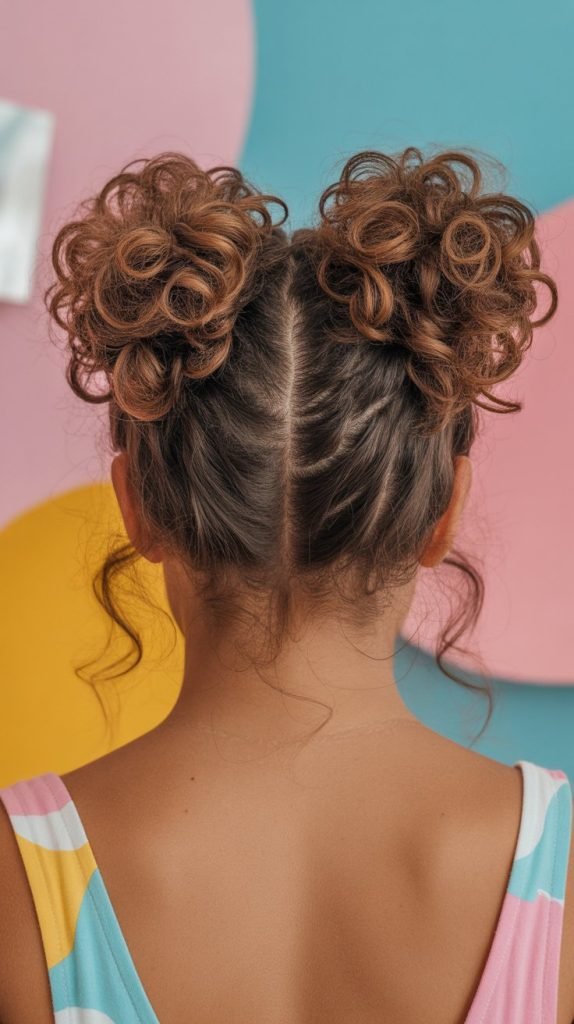
- 18. Curly Space Buns
- 19. Rolled Updo
- 20. Half-Up Half-Down with Twist
- 21. Curly Mohawk Braid
- 22. Curly Bob with Bangs
- 23. Pulled-Back with Clips
- 24. Voluminous Blowout
- 25. Braided Low Bun
- 26. Textured Curly Pixie
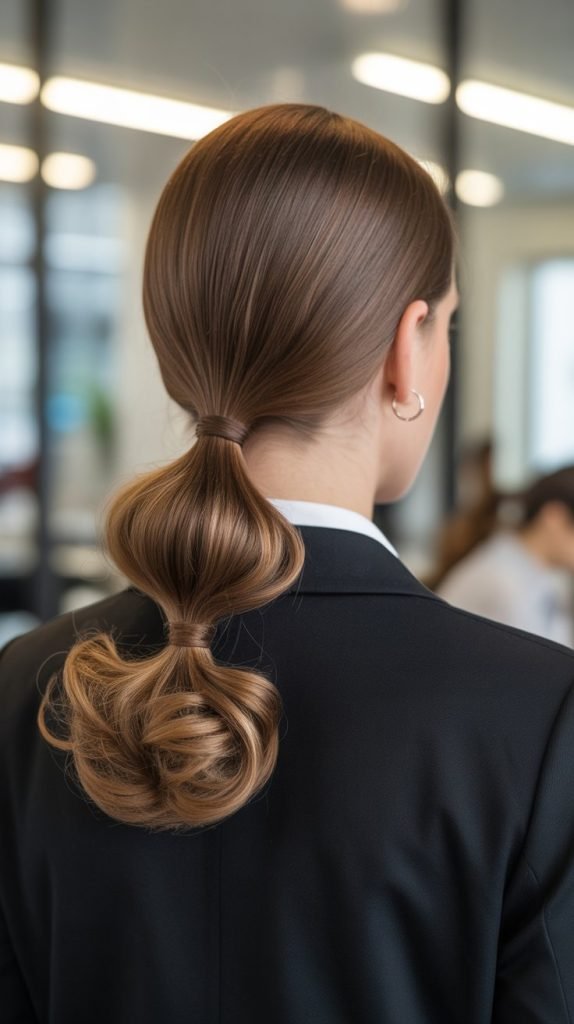
- 27. Slicked-Back Curly Ponytail
- 28. Curly Halo Braid
- 29. Curly Crochet Style
- 30. Curly Curtain Bangs
- 31. Twisted Low Ponytail
- 32. Curly High Bun with Wrap
- 33. Natural Curl Definition with Finger Coiling
- Conclusion
1. Classic Wash and Go
The wash and go remains the most liberating style for curly-haired individuals who want to embrace their natural texture with minimal manipulation.
This technique involves applying styling products to freshly washed hair and allowing curls to air-dry or diffuse naturally into their pattern.
- Start with freshly cleansed hair using a sulfate-free shampoo that won’t strip natural oils from your curls.
- Apply a leave-in conditioner while hair is soaking wet to lock in maximum moisture and create slip for detangling.
- Use the praying hands method or raking technique to distribute curl-defining gel or cream evenly through each section.
- Scrunch hair gently upward toward the scalp to encourage curl formation and reduce frizz.
- Allow hair to air-dry completely or use a diffuser on low heat to speed up the process without disrupting curl clumps.
- Once fully dry, gently scrunch out any gel cast for soft, touchable curls with natural movement.
- Refresh on subsequent days with a water-based spray and light curl cream to revive definition.
2. Defined Curl Refresh
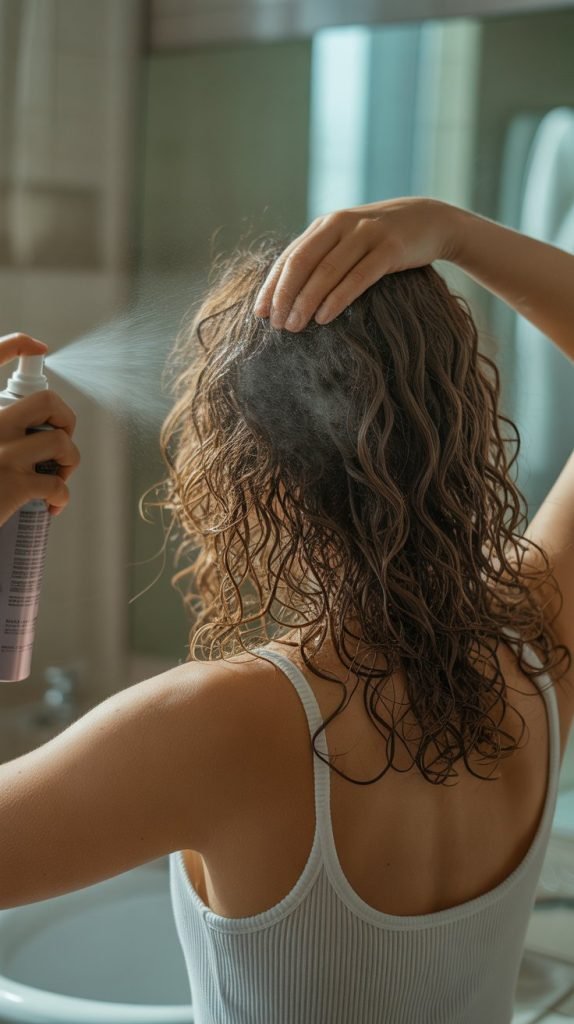
Between wash days, curls often lose their definition and become frizzy or flattened, making a reliable refresh technique essential. This approach revitalizes your curl pattern without requiring a full wash routine.
- Begin by identifying which sections need the most attention based on frizz level and curl definition loss.
- Lightly dampen hair with a spray bottle containing water mixed with a small amount of leave-in conditioner.
- Apply a small amount of lightweight curl cream or gel to your palms and emulsify before touching hair.
- Scrunch product into dampened sections, reforming curl clumps that have separated overnight.
- For flattened roots, flip your head upside down and scrunch at the root area to restore volume.
- Use a diffuser on cool setting for a few minutes if you need curls to set quickly.
- Avoid touching hair excessively throughout the day to prevent frizz and maintain definition.
3. Pineapple Updo
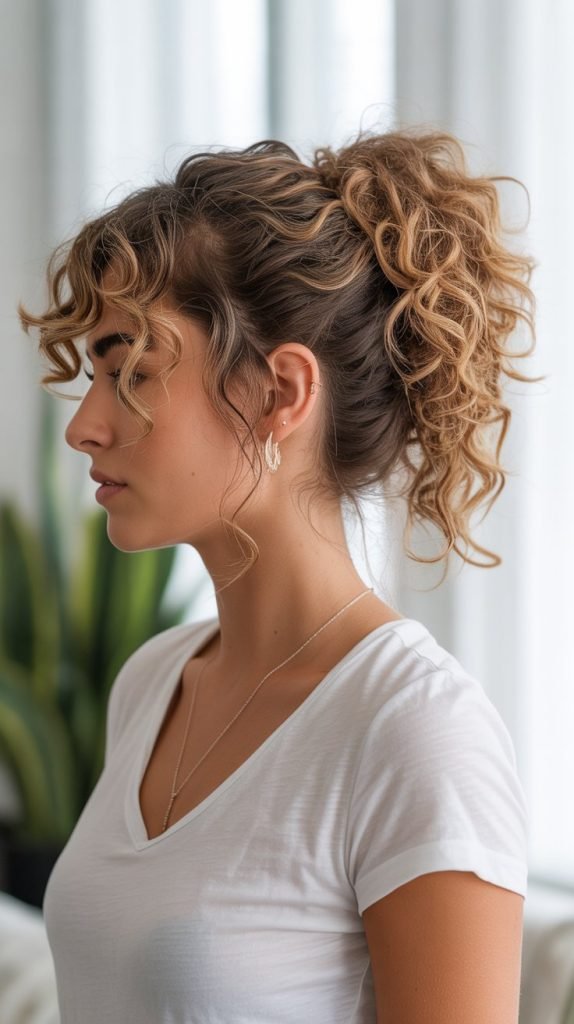
The pineapple updo serves as both a protective nighttime style and a casual daytime look that showcases curls while keeping them out of your face. This high, loose ponytail positioned at the crown preserves curl integrity.
- Flip your head forward and gather all hair toward the highest point of your head at the crown.
- Use a satin or silk scrunchie to secure hair loosely without creating tension or creasing curls.
- Allow curls to fan out naturally from the ponytail base, creating a fountain effect.
- For a more voluminous look, gently pull sections of the ponytail to add width and dimension.
- This style works excellently for sleeping as it keeps curls elevated and prevents crushing.
- In the morning, simply remove the scrunchie and shake out curls for instant volume.
- Add decorative hair clips or a headband around the base for an elevated daytime version.
4. Side-Swept Curls
Side-swept curls create an asymmetrical, romantic look that adds sophistication to medium-length curly hair while highlighting facial features. This style works beautifully for both casual outings and formal events.
- Create a deep side part using a rattail comb, positioning it approximately two inches from your natural part.
- Apply a medium-hold styling cream to add definition and control without stiffness.
- Sweep the larger section of hair across your forehead and over one shoulder.
- Pin the hair behind the opposite ear using bobby pins that match your hair color for seamless blending.
- Arrange individual curls on the forward shoulder to create the desired shape and volume.
- Use a light-hold hairspray to keep the style in place throughout the day or evening.
- For added glamour, incorporate a decorative hair clip or jeweled pins along the pinned side.
5. Half-Up Top Knot
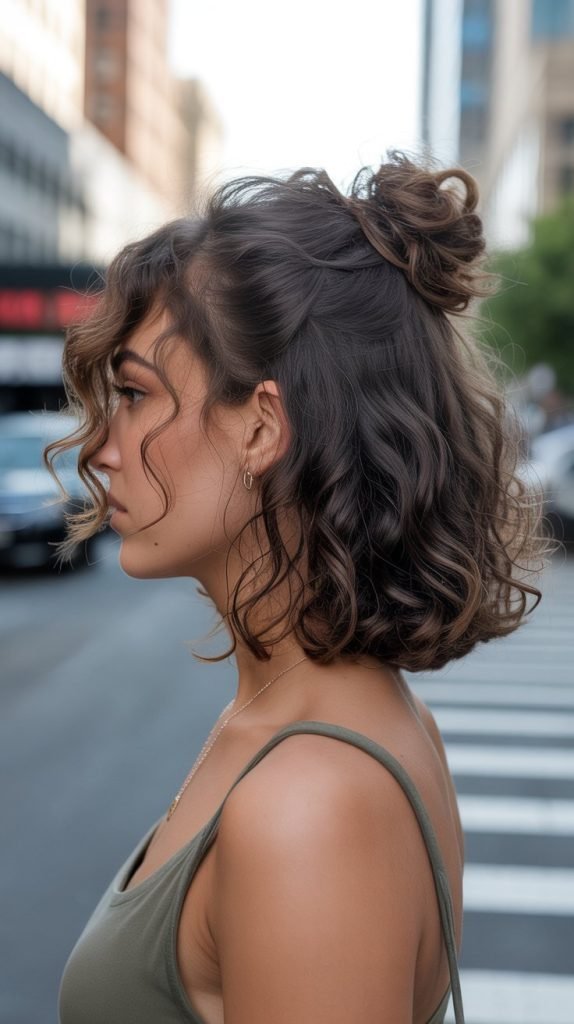
The half-up top knot combines the practicality of keeping hair away from your face with the beauty of showcasing your curls below. This trendy style adds height and creates a balanced silhouette.
- Section off the top portion of hair from temple to temple, creating a horizontal part at ear level.
- Gather this top section into a high ponytail at the crown, securing with an elastic band.
- Twist the ponytail loosely and wrap it around the base to form a bun.
- Secure the bun with bobby pins, allowing some curly pieces to escape for a relaxed, undone aesthetic.
- Leave the bottom section of curls free and natural, giving them a gentle scrunch to enhance definition.
- Pull out a few face-framing tendrils around the hairline to soften the overall look.
- This versatile style transitions easily from gym sessions to brunch dates with minimal adjustment.
6. Twisted Crown
A twisted crown creates a regal, bohemian appearance by incorporating hair from both sides of the head into twisted sections that meet at the back. This style keeps hair controlled while celebrating your curl texture.
- Part your hair down the middle or slightly off-center depending on your preference.
- Take a two-inch section of hair from one front side near the temple area.
- Divide this section into two parts and twist them around each other, moving toward the back of your head.
- Secure the twist temporarily with a clip when you reach behind your ear.
- Repeat the same twisting process on the opposite side, ensuring both twists are at the same height.
- Pin both twists together at the back center of your head using bobby pins in an X-pattern for security.
- Allow the remaining curls to flow freely down your back, creating a beautiful contrast with the structured crown.
7. Low Curly Ponytail
The low curly ponytail offers an elegant, polished look that works equally well for professional settings and casual weekends. Positioning the ponytail at the nape creates a sophisticated silhouette.
- Brush or smooth the top and sides of your hair using a boar bristle brush or edge control product.
- Gather all hair at the nape of your neck, positioning the ponytail base just above the hairline.
- Secure with a hair elastic that matches your hair color for a seamless appearance.
- Take a small section from the ponytail and wrap it around the elastic to conceal it completely.
- Pin this wrapped section underneath the ponytail with a bobby pin for a polished finish.
- Fluff and arrange the curly ponytail to create volume and prevent a flat appearance.
- Apply a light serum or oil to the ponytail for enhanced shine and definition without weighing curls down.
8. Messy Curly Bun

The messy curly bun embraces the natural texture and volume of curls while creating an effortlessly chic updo. This style appears intentionally undone, making it perfect for both laid-back days and trendy evening looks.
- Flip your head upside down and gather hair into a high ponytail without worrying about smoothness.
- Twist the ponytail loosely just once or twice to maintain curl separation and volume.
- Wrap the twisted ponytail around its base in a circular motion, allowing loops and pieces to stick out naturally.
- Secure the bun with multiple bobby pins inserted at various angles for maximum hold.
- Gently pull at sections of the bun to create more volume and a fuller, messier appearance.
- Allow several curly strands to fall around your face and neck for a soft, romantic frame.
- Use minimal product to keep the intentionally undone texture intact without making hair look overly styled.
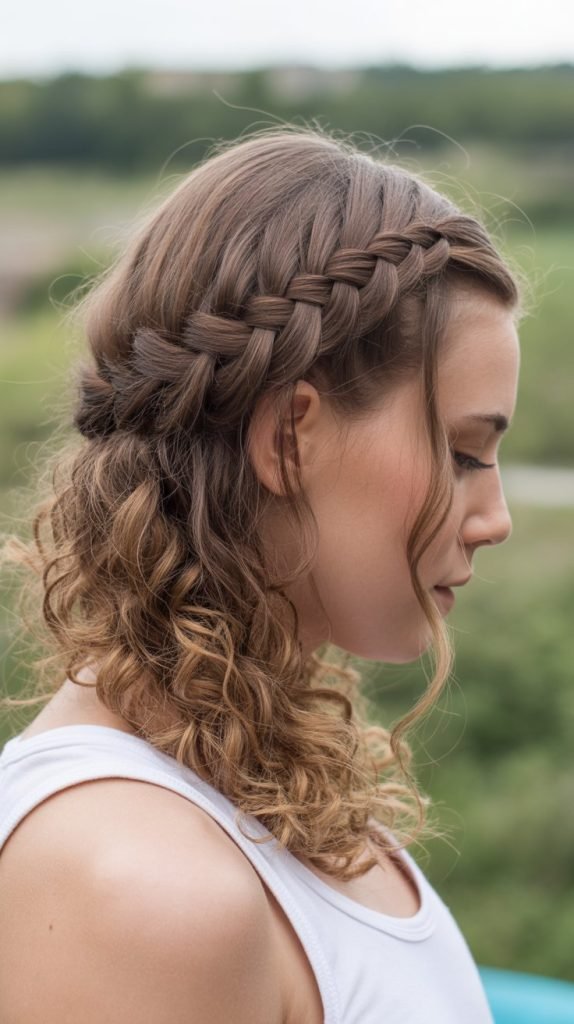
9. Braided Headband
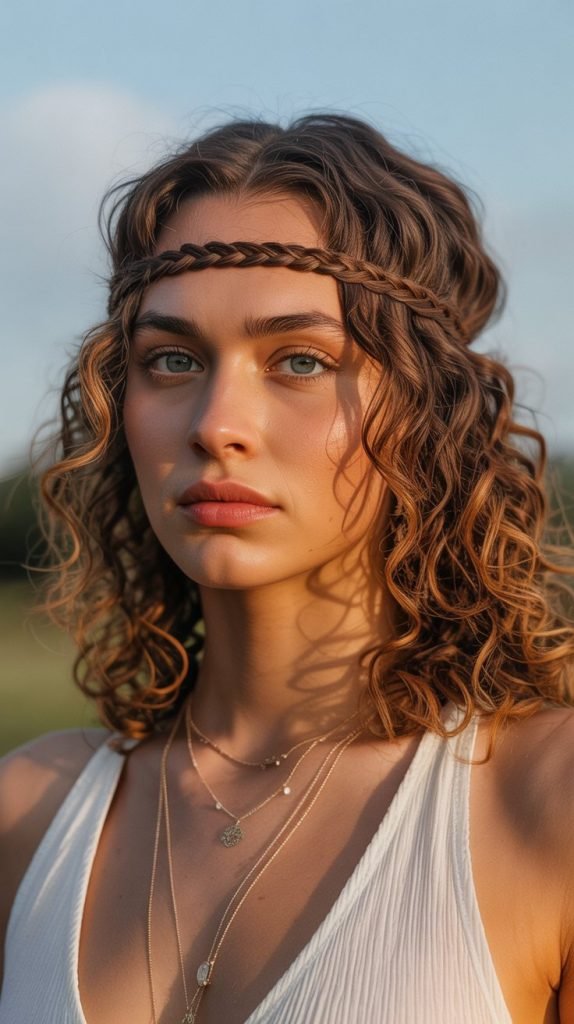
Incorporating a braided headband into curly hair adds texture contrast and bohemian flair while keeping hair away from your face. This style beautifully frames facial features and works for various occasions.
- Create a deep side part and take a three-inch section of hair from the heavier side near the hairline.
- Divide this section into three parts and create a traditional three-strand braid, keeping it relatively tight.
- Continue braiding along your hairline, moving toward the opposite temple like a headband.
- Secure the braid end with a small clear elastic behind your ear.
- Pin the braid to your head along its length using bobby pins that match your hair color.
- Allow all remaining curls to flow naturally, providing beautiful contrast to the structured braid.
- For variation, create two thinner braids on each side that meet and connect at the back.
10. Curly Faux Hawk
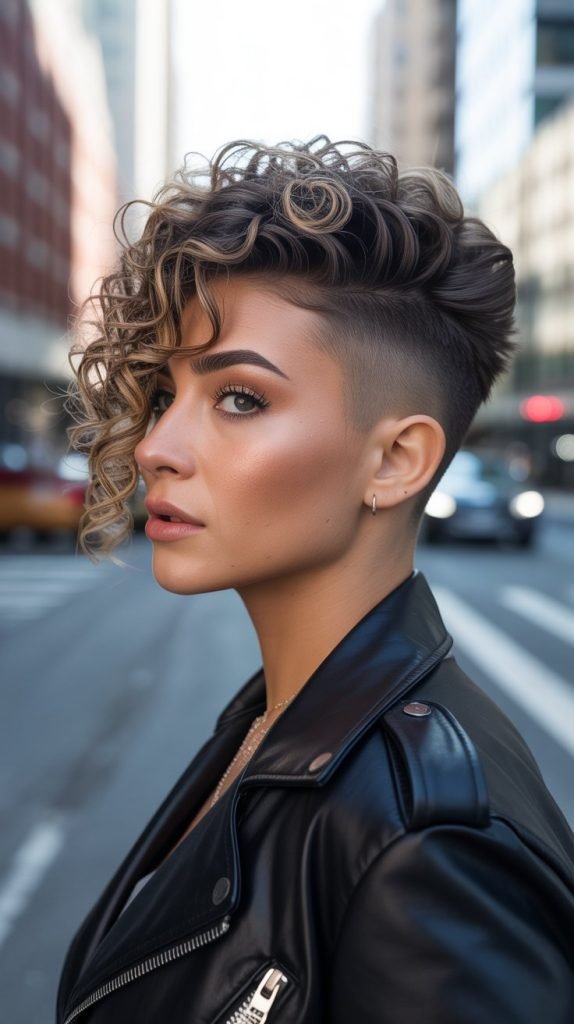
The curly faux hawk brings edge and drama to medium-length curly hair by creating height and volume through the center while slicking or pinning the sides. This bold style makes a confident statement.
- Apply strong-hold gel or mousse to damp hair, focusing on the crown and top sections.
- Create a mohawk-like section down the center of your head from forehead to nape.
- Use clips to section and pin hair on both sides flat against your head, or slick it back with gel.
- Scrunch and arrange the center curls upward to create maximum height and volume.
- Allow the center section to dry completely while maintaining its elevated position with clips if needed.
- Once dry, remove any clips and use fingers to separate and define individual curls in the center section.
- Finish with a strong-hold hairspray to ensure the dramatic height stays intact throughout the day.
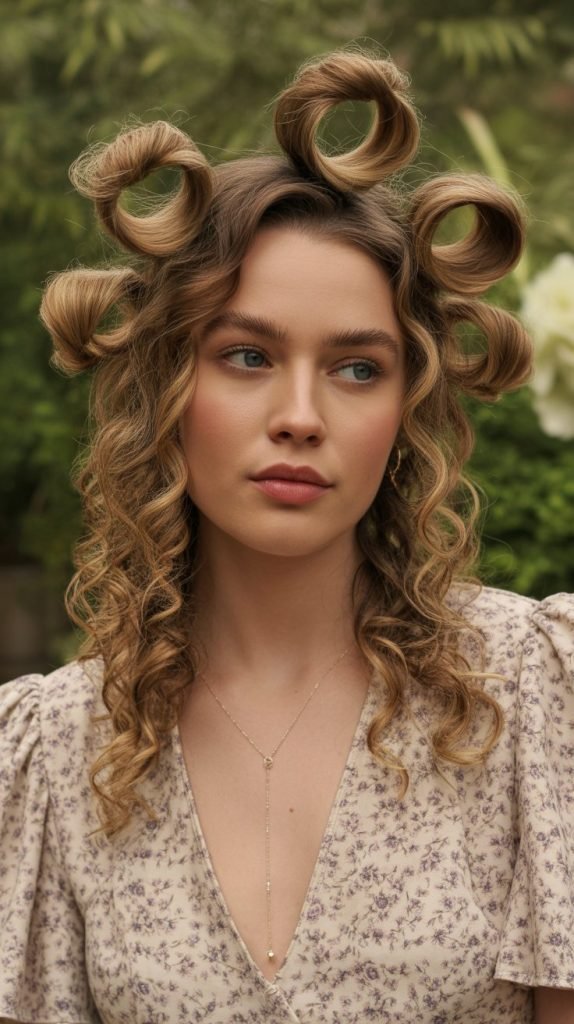
11. Vintage Pin Curls
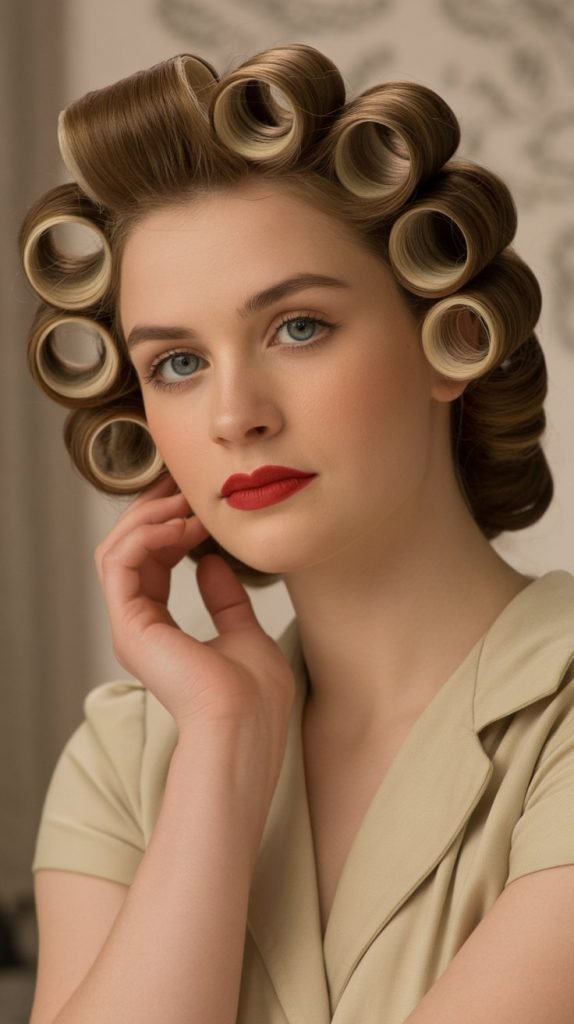
Pin curls offer a retro-inspired look that transforms natural curls into defined, uniform spirals reminiscent of 1940s Hollywood glamour. This technique creates polished, elegant curls with lasting definition.
- Start with damp hair that has been freshly washed and treated with setting lotion or mousse.
- Section hair into one-inch squares across your entire head for uniform curl placement.
- Take one section, twist it, and curl it flat against your scalp in a circular motion.
- Pin each curl circle flat to your head using two crossed bobby pins for security.
- Allow hair to dry completely, either air-drying overnight or using a hooded dryer for faster results.
- Once fully dry, carefully remove all bobby pins and gently separate curls with your fingers.
- Use a light hairspray to set the style without weighing down the bouncy, vintage curls.
12. Curly Shag with Layers
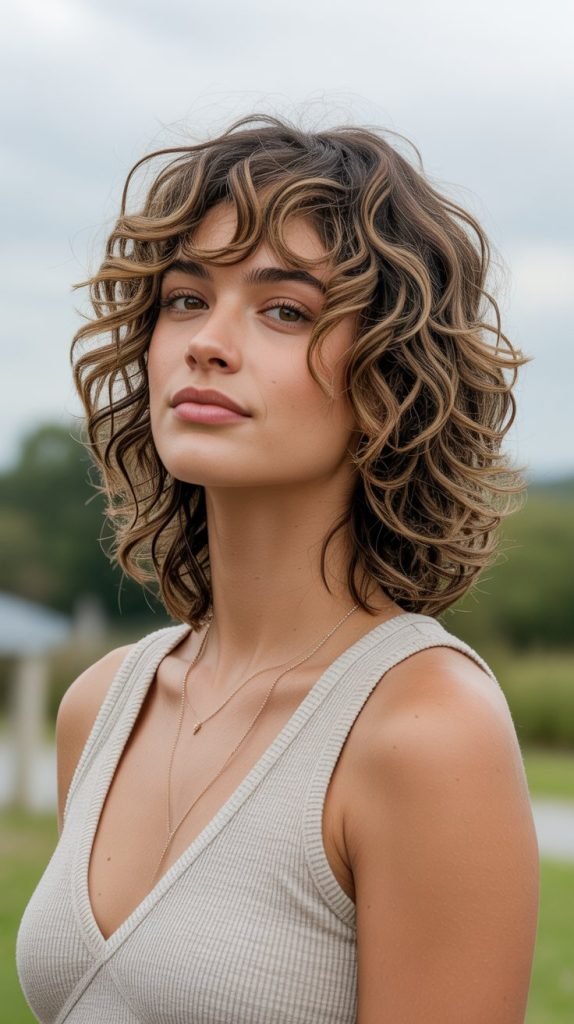
The curly shag incorporates strategic layering throughout medium-length curly hair to create movement, reduce bulk, and enhance curl definition. This cut and style combination offers a modern, textured appearance.
- Work with a curl-specialized stylist who understands how to cut curls dry in their natural state.
- Request layers that start around chin-length and graduate throughout to remove weight without losing length.
- Incorporate face-framing layers that begin at cheekbone level to highlight facial features.
- Style with a curl-enhancing cream applied section by section for even distribution and definition.
- Scrunch hair while applying product to encourage curl formation and prevent frizz.
- Diffuse with head tilted in various directions to create volume at the roots throughout all layers.
- The varying lengths will create natural movement and prevent the triangular shape that uniform-length curly hair can create.
13. Accessorized with Headscarf
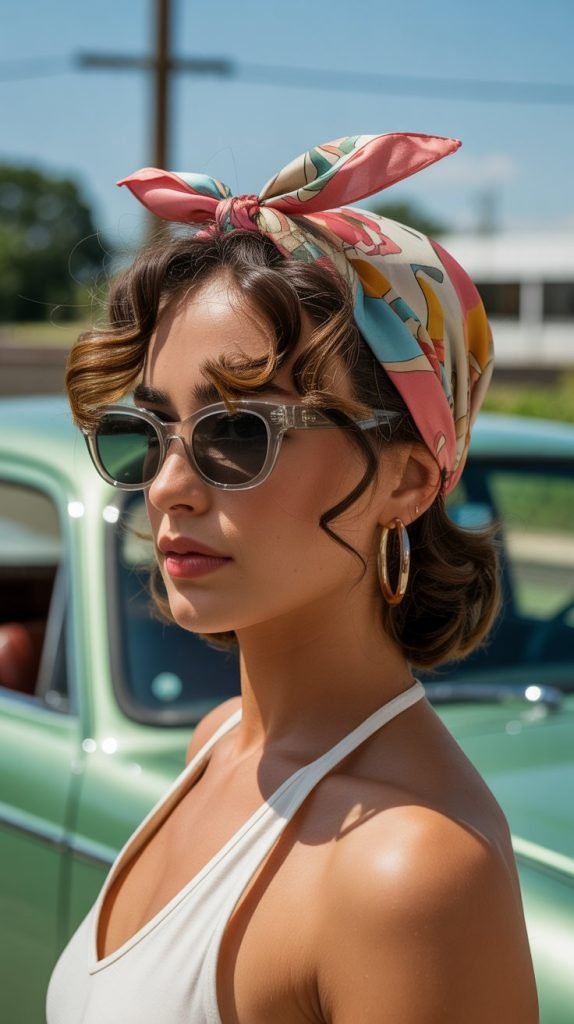
Headscarves add color, pattern, and vintage charm to curly hairstyles while serving the practical purpose of protecting hair and controlling volume. This versatile styling option offers endless creative possibilities.
- Choose a silk or satin scarf to prevent friction and maintain hair moisture while looking stylish.
- Fold the scarf into a long strip approximately four inches wide for easier handling.
- Position the middle of the scarf at your nape and bring both ends forward toward your forehead.
- Cross the ends at your forehead or slightly to one side, then bring them back toward the nape.
- Tie the ends in a knot or bow at the top, side, or back depending on your desired aesthetic.
- Allow curls to peek out from the bottom and sides of the scarf for a balanced look.
- Experiment with different scarf fabrics, patterns, and tying methods to create various styles from retro to modern.
14. Curly Ponytail with Volume
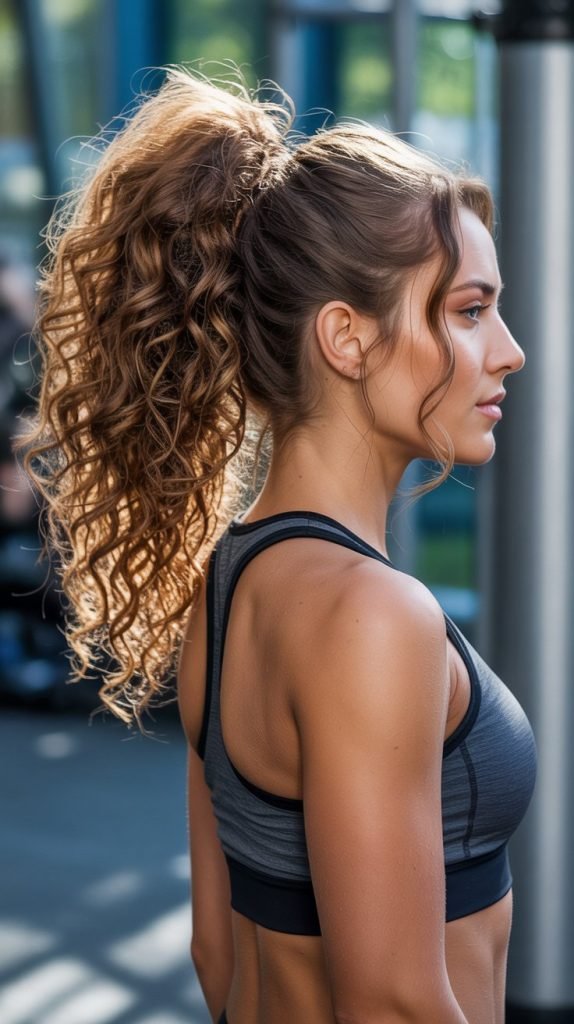
Elevating a standard curly ponytail with intentional volume creates a statement style that appears both polished and full of personality. This technique prevents the flat, deflated look that curly ponytails can sometimes create.
- Before creating the ponytail, backcomb or tease the crown section to create lift at the roots.
- Smooth only the very top surface of the teased section to maintain volume underneath while appearing polished.
- Gather hair into a ponytail at your desired height, securing with a strong elastic band.
- Once secured, gently pull at the crown section to add even more volume and height.
- Take small sections of the ponytail and fluff them individually to create maximum fullness.
- Wrap a section of hair from the ponytail around the elastic to conceal it and add polish.
- Use a pick or your fingers to gently lift curls in the ponytail from underneath for additional dimension.
15. Side Curly Bun
The side curly bun creates an asymmetrical, romantic updo that showcases curls while appearing elegant and intentional. This style works beautifully for weddings, date nights, and special occasions.
- Create a deep side part and sweep all hair toward one side of your head, just behind the ear.
- Gather hair at this side position and secure with an elastic band to create a side ponytail.
- Twist the ponytail loosely to maintain curl definition while creating a rope-like structure.
- Wrap this twisted section around the ponytail base, allowing curls to maintain their shape and volume.
- Pin the bun securely using multiple bobby pins inserted at different angles throughout the structure.
- Pull gently at sections of the bun to create a fuller, more romantic appearance with visible curl texture.
- Leave a few tendrils loose around the face and nape for a soft, whimsical finishing touch.
16. Waterfall Braid
The waterfall braid creates a cascading effect where sections of hair fall through the braid like a waterfall, creating a romantic and intricate appearance. This style beautifully showcases curls while adding structured detail.
- Begin at the front section near your temple with a three-strand braid.
- After the first stitch, drop the bottom strand and pick up a new section from above to continue braiding.
- The dropped sections will cascade down like a waterfall, blending with your natural curls below.
- Continue this pattern across the back of your head, maintaining consistent tension for a uniform appearance.
- Secure the braid behind the opposite ear with bobby pins that blend with your hair color.
- Allow all remaining curls to flow freely, creating a beautiful contrast with the structured braid.
- For enhanced definition, gently separate the braid sections slightly to create a fuller, more intricate appearance.
17. Curls with Middle Part
A simple middle part can dramatically change the appearance of curly hair, creating symmetry and framing the face in a balanced, modern way. This classic styling approach never goes out of fashion.
- Use a rattail comb to create a precise middle part from forehead to crown while hair is damp.
- Apply styling product evenly to both sides to ensure uniform curl definition and pattern.
- Scrunch each side individually to encourage symmetrical curl formation.
- Allow hair to dry naturally or diffuse while maintaining the center part position.
- Once dry, use your fingers to gently adjust the part and ensure it remains centered.
- This simple style highlights facial symmetry and works well for round, oval, and heart-shaped faces.
- Pair with curtain bangs or face-framing layers for added dimension and movement.
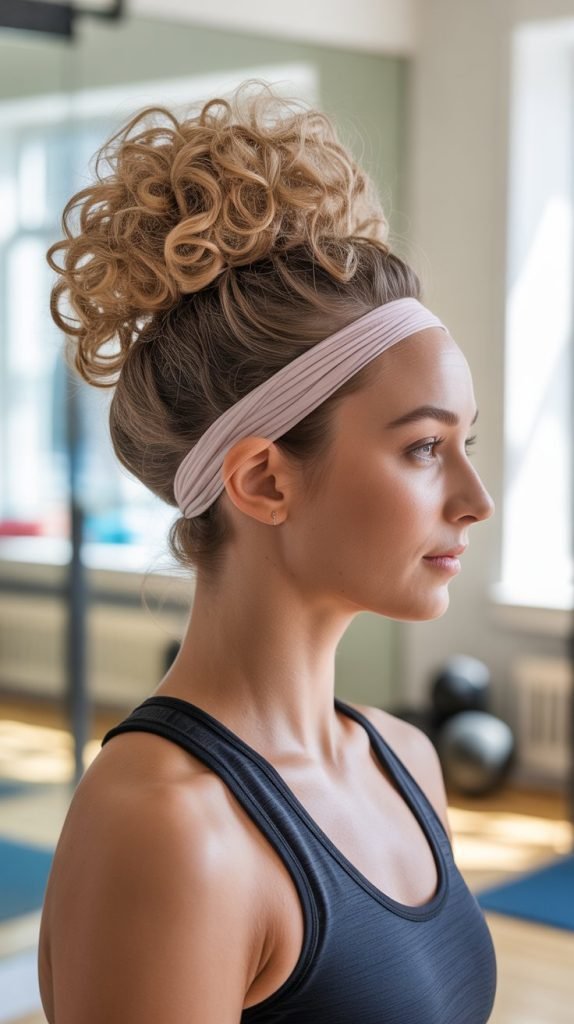
18. Curly Space Buns
Space buns bring a playful, youthful energy to curly hair by creating two high buns positioned on either side of the head. This fun style works perfectly for festivals, casual outings, or simply expressing personality.
- Part hair down the center from forehead to nape, creating two equal sections.
- Gather one section high on the head, slightly back from the temple, and secure with an elastic.
- Twist the ponytail and wrap it around the base to form a bun, leaving the ends to stick out for texture.
- Secure with bobby pins and repeat the exact process on the opposite side at the same height.
- Pull gently at each bun to create more volume and a fuller appearance.
- Allow curly ends to protrude from the buns naturally for an intentionally messy, carefree aesthetic.
- This symmetrical style creates a bold, fun look that celebrates the playful nature of curls.
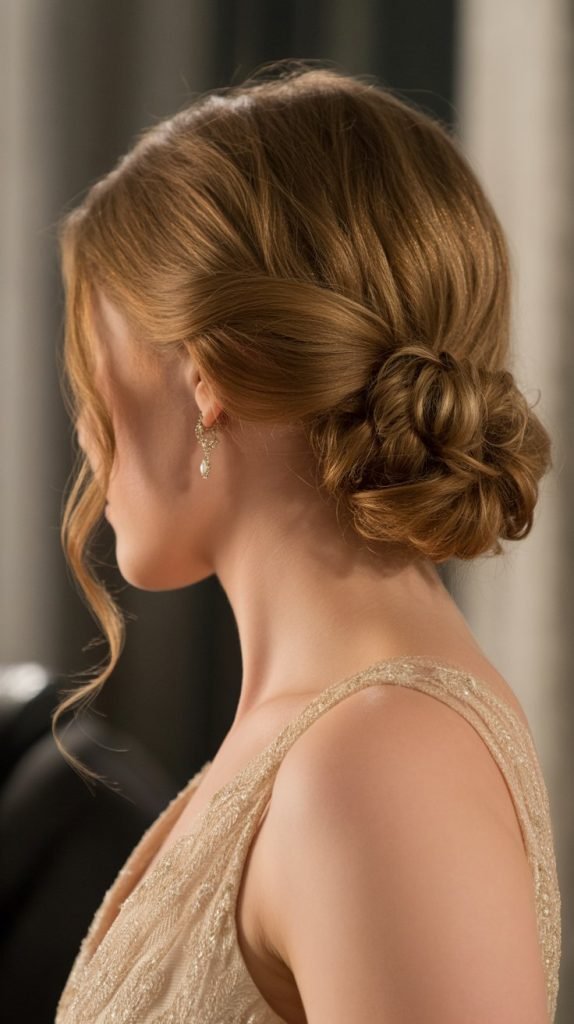
19. Rolled Updo
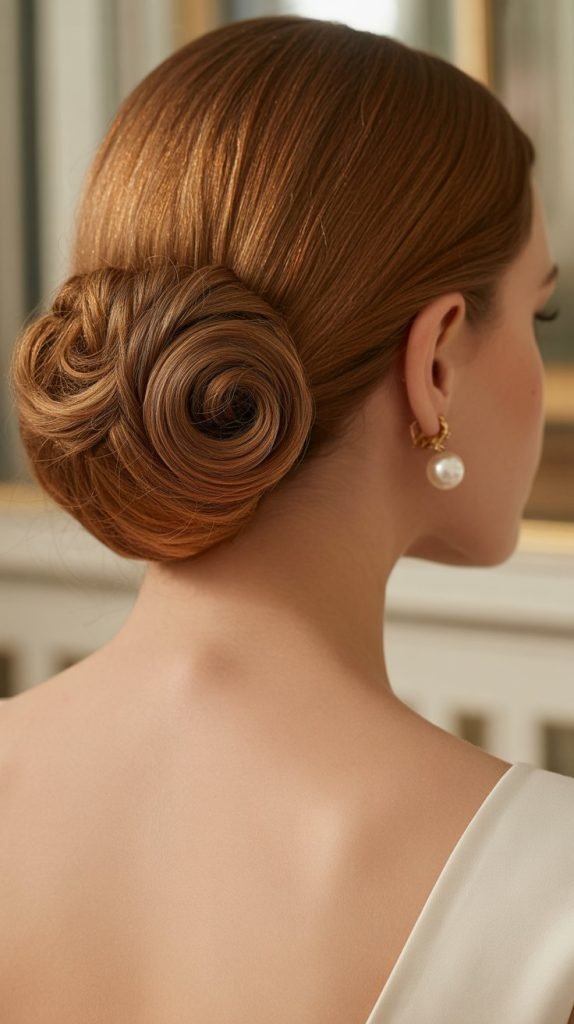
The rolled updo creates an elegant, vintage-inspired style by rolling sections of curly hair upward and pinning them into place. This sophisticated look works beautifully for formal events and professional settings.
- Start with hair that has been lightly smoothed with a curl cream for manageability without losing texture.
- Section hair horizontally into three layers: bottom, middle, and top.
- Take the bottom section and roll it upward toward the crown, tucking the ends under.
- Pin the rolled section securely using multiple bobby pins inserted horizontally into the roll.
- Repeat with the middle section, rolling it upward and pinning it above the first roll.
- Finally, roll the top section and pin it, ensuring all sections are secure and integrated.
- Smooth any flyaways with a small amount of gel or edge control for a polished finish while maintaining curl texture throughout the roll.
20. Half-Up Half-Down with Twist
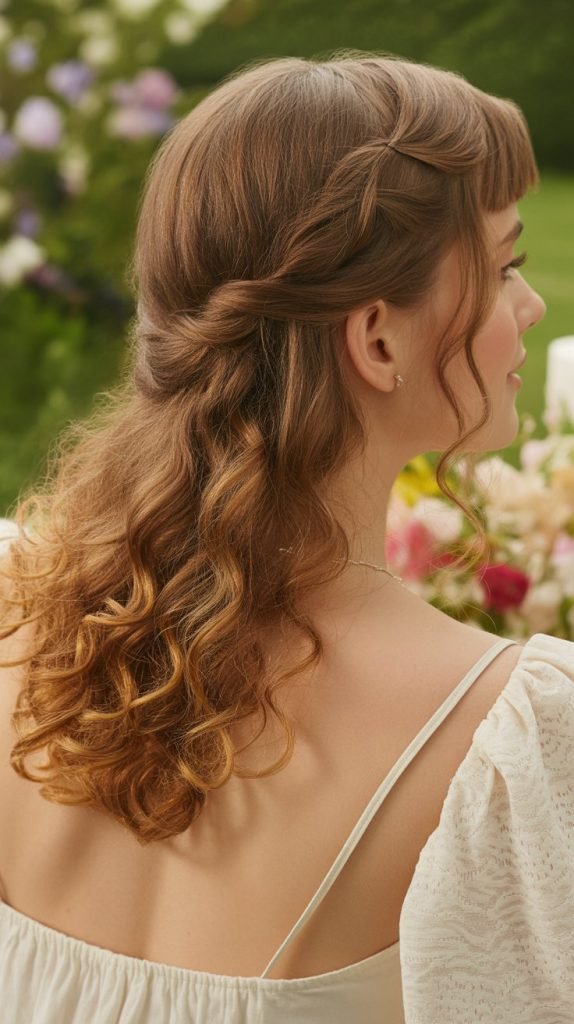
This classic style combines the elegance of an updo with the beauty of wearing curls down, using twists to add detail and sophistication. The half-up half-down with twist flatters virtually every face shape and occasion.
- Section off the top half of your hair from temple to temple at approximately ear level.
- Divide this top section into two parts, creating a center part.
- Take one side and twist it backward toward the crown, gathering more hair as you twist like a French twist.
- Secure the twist temporarily with a clip at the back center of your head.
- Repeat the twisting process on the opposite side, ensuring both twists meet at the same point in back.
- Pin both twists together using bobby pins in a crisscross pattern for secure hold.
- Allow the bottom section of curls to cascade naturally, creating a beautiful balance between structured and free-flowing elements.
21. Curly Mohawk Braid
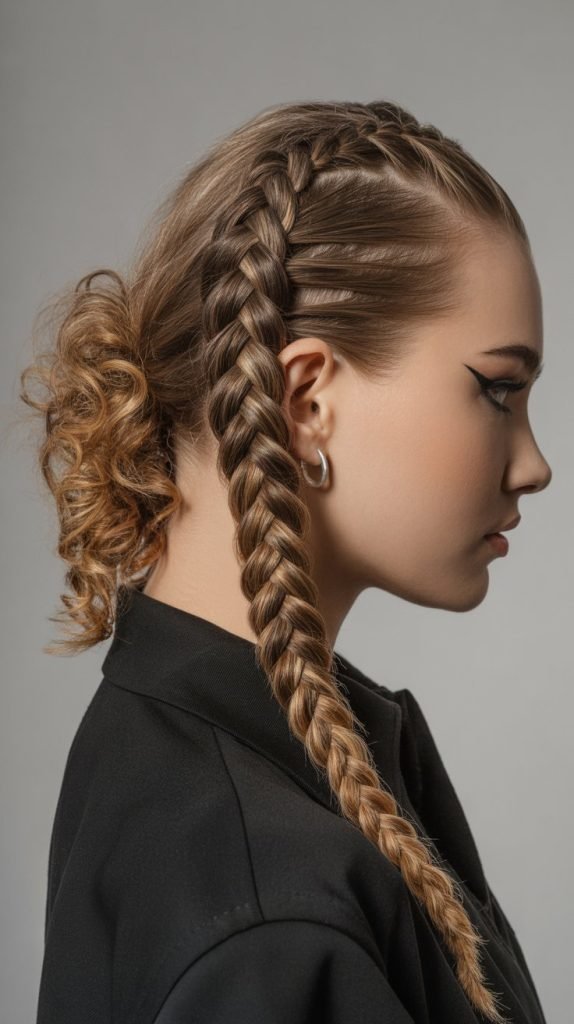
The curly mohawk braid combines the edginess of a faux hawk with the intricate detail of braiding, creating a bold statement style. This look keeps sides controlled while celebrating volume and texture through the center.
- Create a section down the center of your head approximately three inches wide from forehead to nape.
- Apply gel to the side sections and slick them flat against your head, pinning them in place.
- Beginning at the forehead, create a Dutch braid (reverse French braid) down the center section.
- Pull gently at the edges of each braid stitch to create width and volume as you work toward the nape.
- Secure the braid at the nape and allow any remaining curls at the end to flow freely.
- Pancake the braid by pulling at the sides of each section to create maximum width and drama.
- This structured style creates impressive height and makes a confident fashion statement.
22. Curly Bob with Bangs
While technically a cut rather than a temporary style, the curly bob with bangs deserves mention as it creates a chic, modern silhouette for medium curly hair. This combination offers versatility and frames the face beautifully.
- Work with a curl specialist to cut hair at a length between chin and shoulders while maintaining curl pattern.
- Incorporate bangs that complement your curl pattern, whether curly, wavy, or slightly straightened for variation.
- Style with a curl-defining cream applied to soaking wet hair for maximum definition.
- Scrunch hair upward while applying product to encourage curl formation and prevent elongation.
- Diffuse using the pixie diffusing method, cupping sections of curls into the diffuser bowl.
- Allow bangs to air-dry or diffuse separately, positioning them as desired across your forehead.
- This polished style requires minimal daily maintenance while offering a sophisticated, fashion-forward appearance.
23. Pulled-Back with Clips
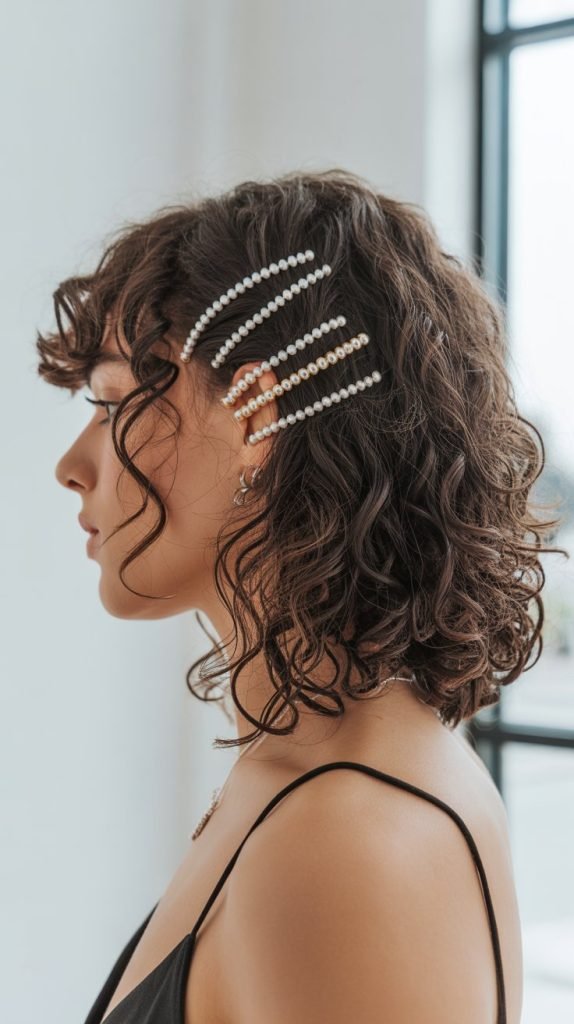
Using decorative hair clips to pull back sections of curly hair offers both functionality and fashion, keeping hair controlled while adding personal style through accessory choices. This trend has resurged with modern, statement clip options.
- Select clips that complement your personal style, from minimalist metal to ornate vintage designs.
- Take a section of hair from one front side, approximately two inches from the hairline.
- Twist or smooth this section back toward your ear and secure it with one or multiple clips.
- Repeat on the opposite side, either symmetrically or at a different position for an asymmetrical look.
- Arrange clips in patterns such as clustered together, spaced apart, or following the hairline.
- Allow remaining curls to flow naturally, creating contrast between the secured sections and free-flowing hair.
- This versatile styling method can be adjusted throughout the day and requires no special skills or tools beyond the clips themselves.
24. Voluminous Blowout
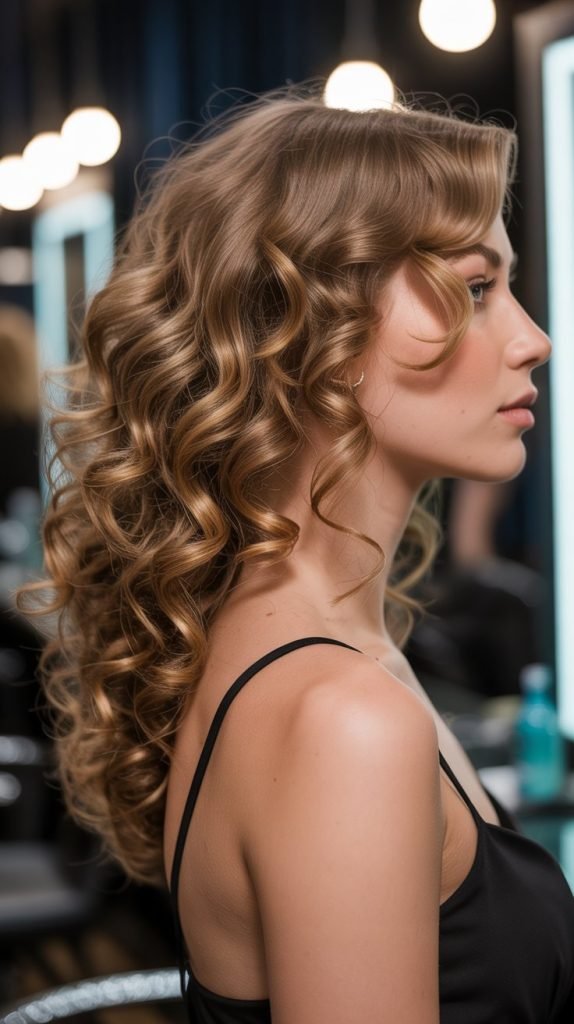
A curly blowout stretches and elongates natural curl pattern while maintaining volume and movement, creating a softer, more flowing appearance. This style offers a different silhouette while protecting natural curl integrity.
- Begin with freshly washed hair and apply a heat protectant spray throughout all sections.
- Use a blow dryer with a concentrator nozzle attachment for directed airflow and smoother results.
- Work in small sections, using a paddle brush or round brush to gently stretch curls while blow-drying.
- Direct airflow down the hair shaft from roots to ends to seal the cuticle and create shine.
- Once completely dry, gently shake hair to restore some natural curl pattern and prevent overly straight appearance.
- Use a large-barrel curling iron on cool setting to add uniform waves throughout if desired.
- Finish with a lightweight oil or serum to add shine and combat any heat-related dryness.
25. Braided Low Bun
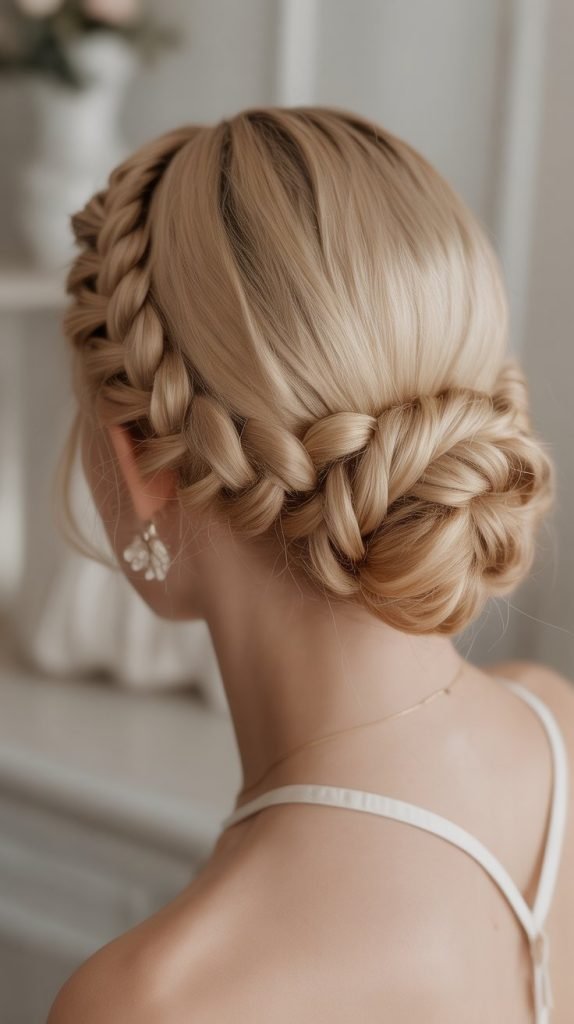
Combining braids with a low bun creates an intricate, elegant updo that appears complex but remains achievable with practice. This style works exceptionally well for formal events and creates a romantic, timeless appearance.
- Create two French braids starting at the temples and working toward the nape on each side.
- Once both braids reach the nape, gather all remaining hair including the braids into a low ponytail.
- Twist the ponytail loosely to maintain curl definition while creating structure.
- Wrap the twisted ponytail around the base to form a bun, allowing some curls to escape naturally.
- Pin the bun securely using bobby pins that match your hair color, crossing them for maximum hold.
- Gently pull at sections of the bun and braids to create a fuller, more romantic appearance.
- Use light-hold hairspray to set the style without creating stiffness or diminishing the soft, romantic quality.
26. Textured Curly Pixie
For those with medium-length curls who want to explore shorter styling options, the textured curly pixie offers a bold, liberating look. This cut showcases curl texture while maintaining enough length for styling versatility.
- This cut requires a skilled stylist who specializes in curly hair and understands curl patterns.
- Request shorter sides and back with more length maintained on top for maximum curl definition and versatility.
- Style by applying curl cream to damp hair and scrunching to encourage curl formation.
- Allow hair to air-dry or diffuse using the hover method, keeping the diffuser slightly away from hair.
- Use a pick at the roots to create lift and volume throughout the crown area.
- This low-maintenance style celebrates natural curl texture and creates a confident, modern appearance.
- Add headbands, clips, or small braids to the longer top section for styling variety despite shorter length.
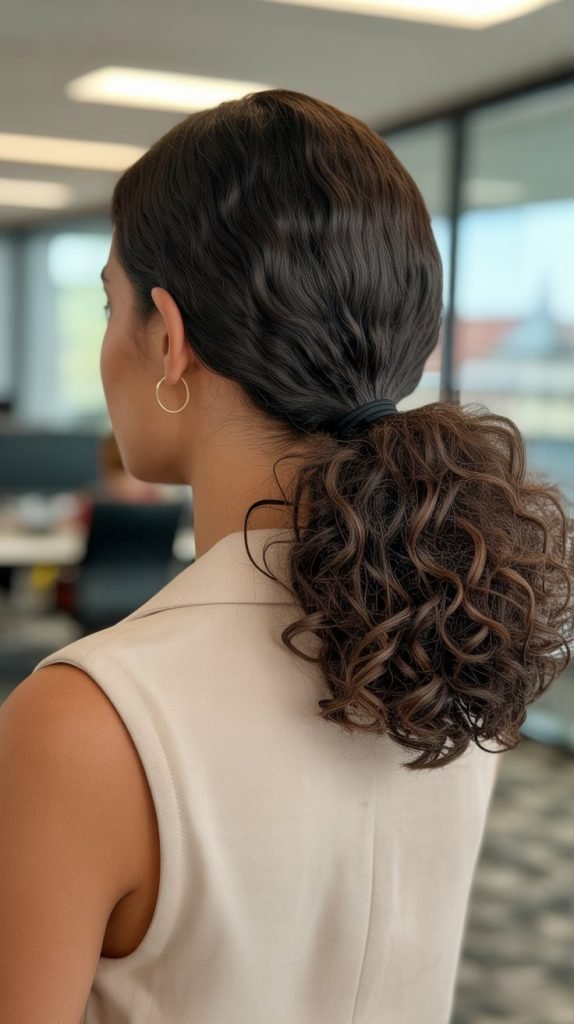
27. Slicked-Back Curly Ponytail
The slicked-back curly ponytail creates a polished, sleek look at the front while maintaining curl volume and texture in the ponytail itself. This style transitions seamlessly from day to night and professional to casual settings.
- Apply a strong-hold gel or edge control product to the front, sides, and crown of damp hair.
- Use a boar bristle brush or edge brush to smooth hair back from the hairline toward the crown.
- Gather all hair into a ponytail at your desired height, ensuring the top and sides remain smooth and tight.
- Secure with a strong elastic band that can hold the weight of curly hair without slipping.
- Wrap a section of hair from the ponytail around the elastic to conceal it and add polish.
- Fluff and separate the curls in the ponytail to create maximum volume and definition.
- Use a satin scarf to tie down the slicked sections for a few minutes to set the smooth texture, then remove before heading out.
28. Curly Halo Braid
The halo braid creates a crown-like effect by braiding hair around the entire perimeter of the head, offering an ethereal, romantic appearance. This protective style showcases curls while keeping them controlled and elegant.
- Part hair down the middle and begin a Dutch braid at one side near the temple.
- Continue braiding around the perimeter of your head, following the hairline and incorporating curly sections as you work.
- When you reach the starting point, continue braiding the remaining hair without adding new sections.
- Tuck the braid end underneath the halo and pin it securely to hide it from view.
- Gently pull at the braid edges to create width and a fuller halo effect.
- Use bobby pins along the entire braid to ensure it stays secure against your head throughout the day.
- This versatile style works for casual days, formal events, or as a beautiful base for adding flowers or decorative pins.
29. Curly Crochet Style
While crochet braids technically involve extensions, they deserve mention as a popular protective styling option for those with natural curls who want to give their hair a break while maintaining a curly aesthetic.
- Consult with a professional braider who specializes in crochet installations for best results.
- Choose curly crochet hair that closely matches your natural curl pattern and color.
- Your natural hair is cornrowed flat against the scalp in strategic patterns before installation.
- Curly hair extensions are crocheted into the cornrows using a latch hook tool.
- This protective style allows your natural curls to rest from manipulation and environmental stressors.
- Maintenance involves regular moisturizing of your natural hair underneath and gentle cleansing of the scalp.
- Crochet styles typically last 4-8 weeks and offer versatility in curl types, colors, and lengths without commitment.
30. Curly Curtain Bangs
Curtain bangs frame the face by parting down the middle and sweeping to each side, creating a flattering, face-framing effect. When styled with curls, these bangs add softness and versatility to medium-length curly hair.
- This style requires cutting bangs that are longer at the outer edges and shorter toward the center part.
- When styling, create a middle part through the bang section extending back a few inches.
- Apply a light curl cream to damp bangs and twist small sections away from the face.
- Allow bangs to air-dry or diffuse, letting them naturally fall to frame your face on both sides.
- Use a small curling iron to touch up individual bang pieces if they dry in unwanted directions.
- The longer side pieces blend seamlessly with the rest of your hair while shorter center pieces create gentle face-framing.
- This versatile bang style flatters most face shapes and can be styled swept back when you want
31. Twisted Low Ponytail
The twisted low ponytail adds sophistication to a simple style by incorporating twists that wrap around and integrate into the ponytail base. This elegant approach elevates an everyday look into something special.
- Create a side part and divide the front section of hair into two parts on the heavier side.
- Twist these two sections around each other, moving toward the back and gathering more hair as you progress.
- When the twist reaches the nape, gather all remaining hair including the twisted section into a low ponytail.
- Secure the ponytail with an elastic band at the nape of your neck.
- Take a small section from the ponytail and wrap it around the elastic to conceal it completely.
- Pin the wrapped section underneath with a bobby pin for a seamless, polished finish.
- Gently tug at the twisted section to add width and create a more relaxed, voluminous appearance.
- This style works beautifully for work presentations, dinner dates, or any occasion requiring understated elegance.
32. Curly High Bun with Wrap
A high bun gains extra dimension and detail when paired with a wrapped section that creates a headband effect. This style combines practicality with visual interest, making it perfect for active days or casual elegance.
- Before creating the bun, section off a one-inch strip of hair along your entire front hairline.
- Gather the remaining hair into a high ponytail at the crown and secure it tightly.
- Twist the ponytail and wrap it around the base to create a voluminous bun, securing with bobby pins.
- Take the reserved front section and smooth it with a bit of gel or cream for sleek texture.
- Wrap this section back from your forehead toward the bun base like a natural headband.
- Secure the wrapped section at the bun base with bobby pins, tucking the ends into the bun structure.
- This creates a polished headband effect that frames your face beautifully while keeping all hair secure.
- Pull gently at the bun to increase volume and create a fuller, more substantial appearance.
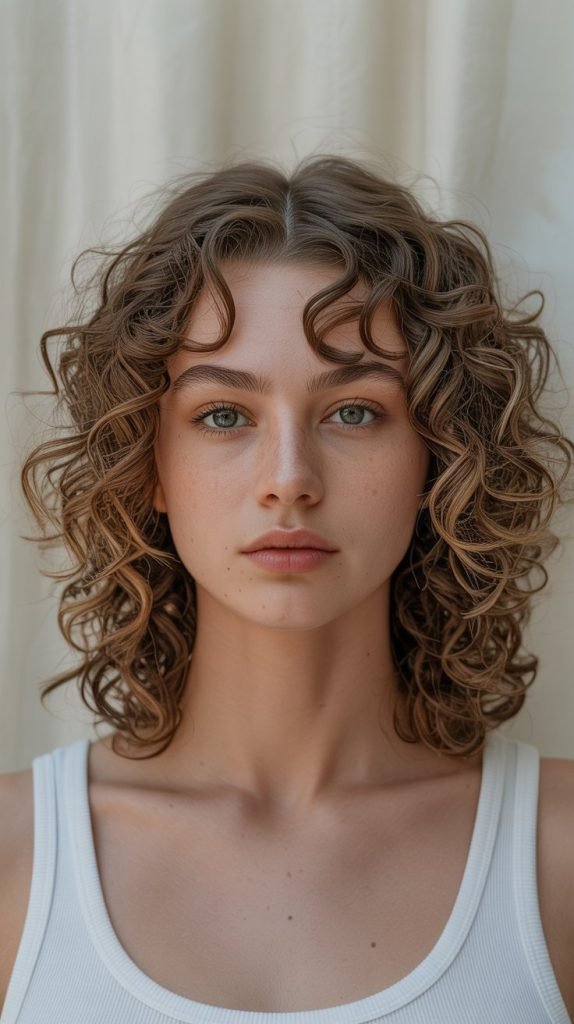
33. Natural Curl Definition with Finger Coiling
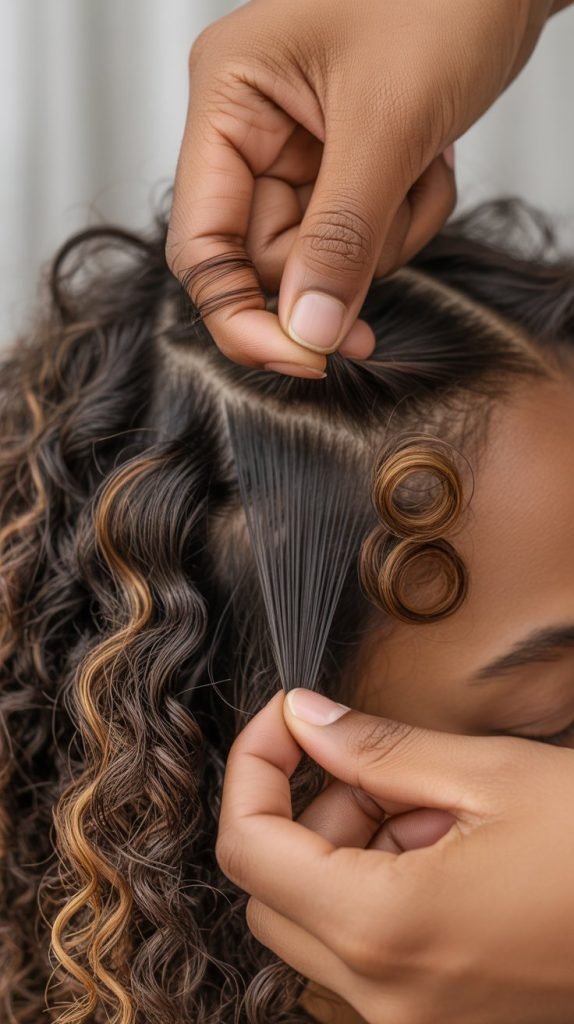
Finger coiling enhances individual curl definition by manually wrapping small sections of hair around your finger to create uniform, defined spirals. This technique works especially well for those seeking maximum curl definition and uniform pattern.
- Start with freshly washed, soaking wet hair that has been detangled completely.
- Apply a generous amount of curl defining gel or cream to maintain moisture during the coiling process.
- Divide hair into small one-inch sections throughout your entire head for uniform results.
- Take one section and wrap it tightly around your index finger from root to tip, then slide your finger out.
- The hair will maintain the spiral shape created by your finger, forming a defined curl.
- Repeat this process on every section of hair, which requires time and patience but yields stunning results.
- Allow hair to air-dry completely without touching to prevent frizz and maintain definition.
- Once fully dry, gently separate some of the coils with your fingers to create fuller volume while maintaining the defined curl pattern.
- This method works exceptionally well for special events or when you want your most defined, uniform curl appearance.
Conclusion
Embracing your natural curls opens up a world of styling possibilities that celebrate texture, volume, and individuality.
These 33 Beautiful Curly Hairstyles for Medium Hair demonstrate that curly hair offers remarkable versatility, from effortless everyday looks to sophisticated updos perfect for life’s special moments.
Whether you prefer the simplicity of a wash and go, the elegance of a twisted crown, or the playful energy of space buns, medium-length curly hair provides the ideal canvas for creative expression.
Remember that the key to successful curly hairstyles lies in understanding your unique curl pattern, maintaining proper hair health through consistent moisture and gentle handling, and experimenting with different techniques until you discover what works best for your lifestyle and aesthetic preferences.
With patience, practice, and the right products, you’ll master these styles and develop the confidence to showcase your beautiful curls in ways that make you feel amazing every single day.
The journey of styling 33 Beautiful Curly Hairstyles for Medium Hair is not just about achieving a particular look but about celebrating the natural beauty and endless possibilities that your curls offer.