The Renaissance era remains one of history’s most celebrated periods for elegance, artistry, and breathtaking beauty standards that continue to inspire modern fashion.
When you think of Renaissance hairstyles for long hair, images of elaborate braids, romantic waves, and jeweled adornments likely come to mind—styles that transformed women into walking masterpieces.
This comprehensive guide to 29 Simple Renaissance Hairstyles for Long Hair will walk you through achievable, stunning looks that capture the essence of this golden age without requiring a royal court hairdresser.
Whether you’re preparing for a themed event, a Renaissance fair, a wedding, or simply want to add historical elegance to your everyday style, these hairstyles range from beginner-friendly to moderately challenging.
You’ll discover techniques for creating classic braided crowns, cascading curls, twisted updos, and jeweled arrangements that defined the beauty standards of the 14th through 17th centuries.
Each style has been adapted for modern wearers, ensuring you can recreate these timeless looks with contemporary tools and products while maintaining authentic Renaissance charm.
In This Post......
- 1. The Classic Renaissance Crown Braid
- 2. Flowing Maiden Waves
- 3. The Italian Renaissance Twist
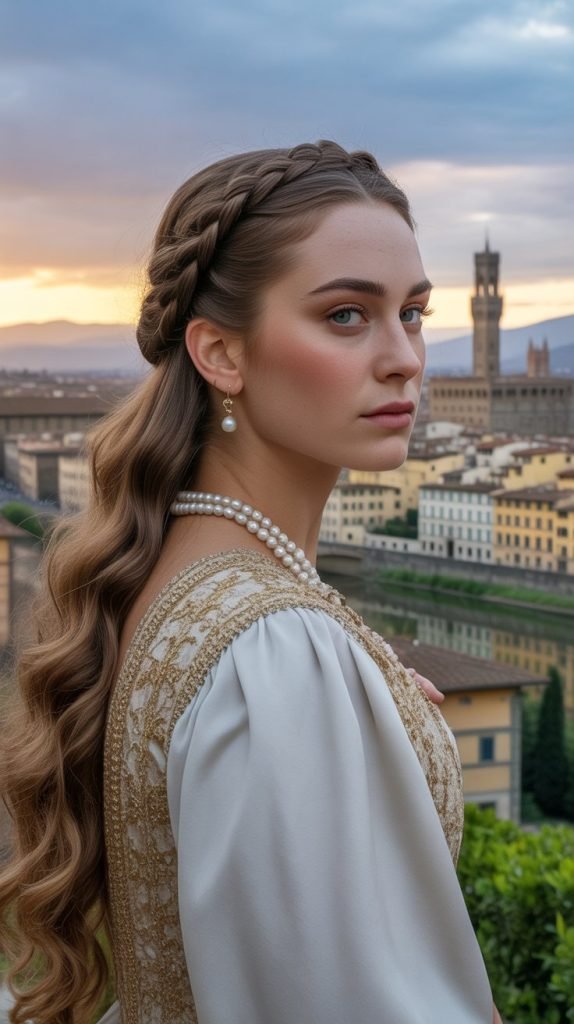
- 4. Braided Half-Up Renaissance Style
- 5. The French Hood Hairstyle
- 6. Cascading Side Braid
- 7. The Venetian Courtesan Style
- 8. Simple Renaissance Ponytail
- 9. Double Dutch Braid Updo
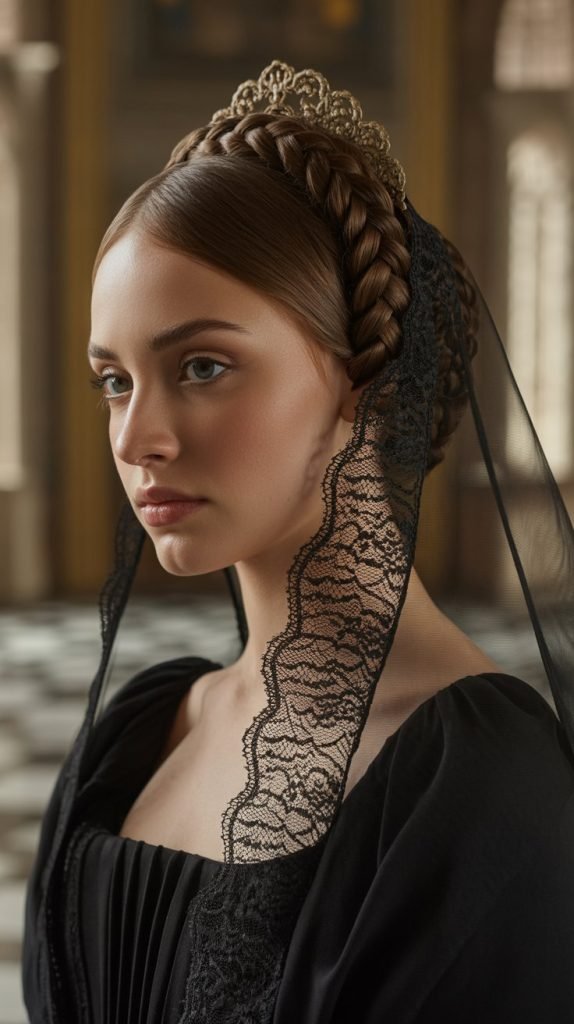
- 10. The Elizabethan Heart-Shaped Hairline
- 11. Romantic Loose Chignon
- 12. Braided Crown with Flowing Hair
- 13. The Spanish Renaissance Mantilla Style
- 14. Twisted Rope Braid
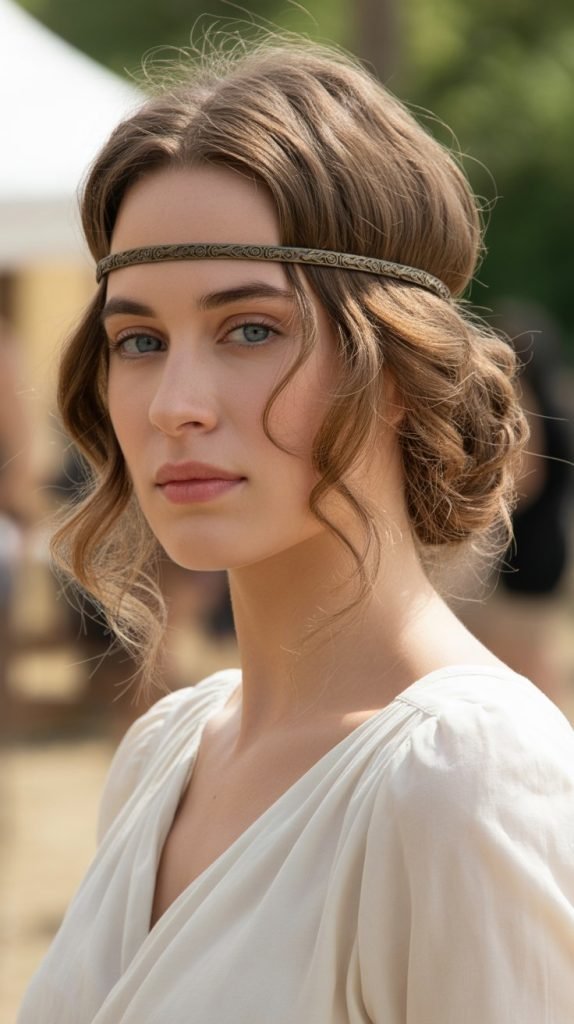
- 15. The Medici-Inspired Headband Braid
- 16. Coiled Serpentine Braid
- 17. Renaissance Side Swept Curls
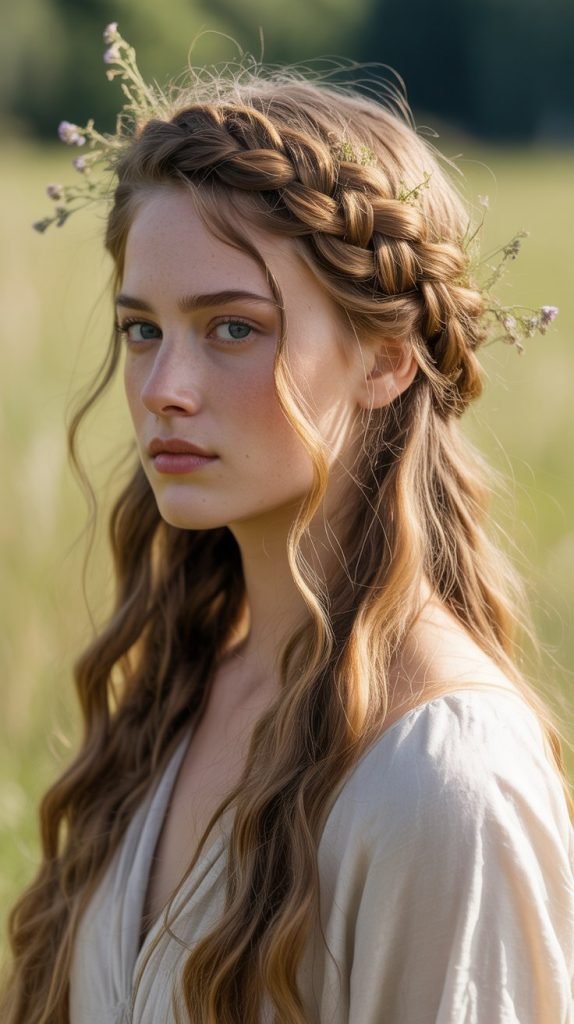
- 18. The Milkmaid Braid Crown
- 19. Jeweled Renaissance Updo
- 20. The German Renaissance Wrapped Braid
- 21. Renaissance Gibson Tuck
- 22. Waterfall Braid with Flowing Locks
- 23. The Tudor Mary Braid
- 24. Loose Renaissance Half-Crown
- 25. The Flemish Renaissance Loop Style
- 26. Simple Renaissance Top Knot
- 27. Romantic Asymmetrical Braid
- 28. The Renaissance Pretzel Bun
- 29. Natural Renaissance Waves with Headband
- Conclusion
1. The Classic Renaissance Crown Braid
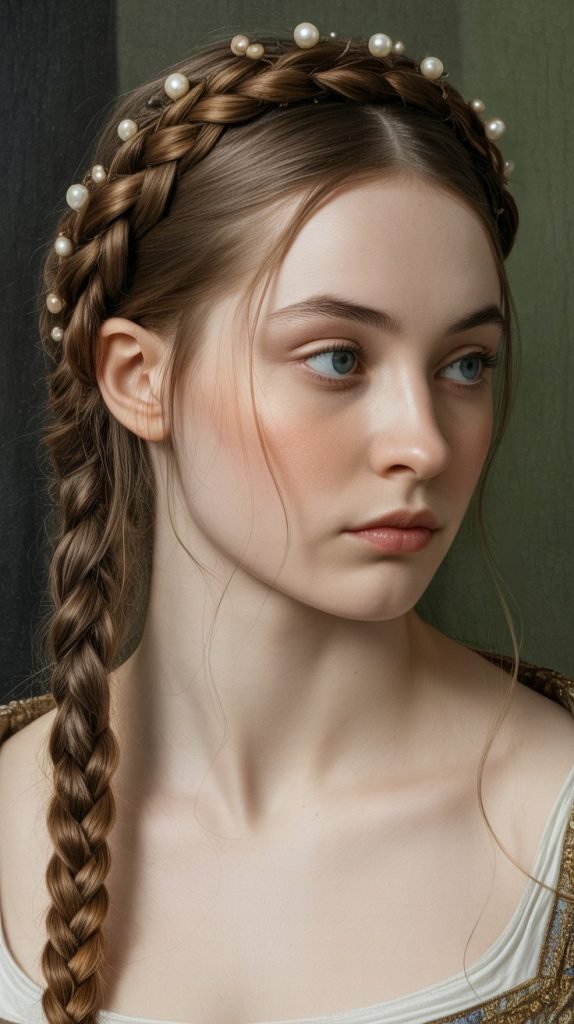
The crown braid served as one of the most recognizable Renaissance hairstyles, symbolizing nobility and grace throughout European courts.
This style wraps braided hair around the head like a natural crown, creating an elegant frame for the face while keeping hair secure and sophisticated.
How to Create:
- Begin by parting your hair down the middle from forehead to nape
- Create two equal sections on either side of your head
- Dutch braid each section, starting from behind the ear and working toward the opposite ear
- Cross the braids over the top of your head, creating a crown effect
- Secure the ends with bobby pins, tucking them beneath the opposite braid
- Gently pull at the braid edges to create fuller, more romantic-looking plaits
- Add small pearl pins or gold hairpins for authentic Renaissance embellishment
Best For: Medium to long hair, oval and heart-shaped faces, formal occasions
2. Flowing Maiden Waves
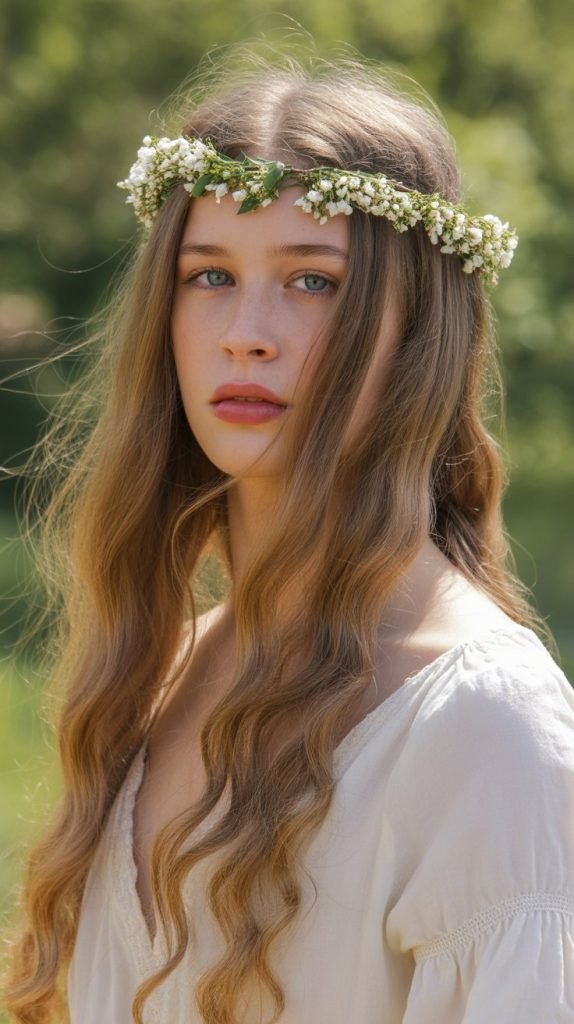
Loose, flowing waves represented youth, innocence, and unmarried status during the Renaissance period, making this one of the simplest yet most beautiful historical hairstyles.
Young noblewomen often wore their hair down in gentle cascades that caught the light and moved gracefully with every step.
Styling Steps:
- Wash and condition hair thoroughly, allowing it to air dry until slightly damp
- Apply a heat protectant spray throughout all sections
- Divide hair into 2-inch sections for even curl distribution
- Use a 1.5-inch curling iron or wand, wrapping hair away from your face
- Hold each section for 8-10 seconds before releasing
- Allow curls to cool completely before touching them
- Gently brush through with a paddle brush to create soft, flowing waves
- Finish with a light-hold hairspray to maintain the style without stiffness
- Optional: Add a jeweled headband or floral crown across the hairline
Best For: All face shapes, casual Renaissance events, romantic occasions
3. The Italian Renaissance Twist
Popular in Florence and Venice, this sophisticated updo combined twisted sections with elegant height at the crown.
Italian noblewomen favored this style for its ability to showcase expensive hair ornaments while maintaining a refined silhouette.
Creation Process:
- Part hair down the center from forehead to crown
- Take a 2-inch section from the front right side
- Twist it tightly while moving backward toward the crown
- Secure with bobby pins at the crown area
- Repeat on the left side, crossing the twist over the right one
- Gather remaining loose hair at the nape
- Twist this section upward, coiling it into a low bun
- Secure the bun with U-shaped hairpins
- Tuck any loose ends under the twisted sections
- Add decorative elements like gold chains or jeweled pins
Best For: Long thick hair, square and oval faces, weddings
4. Braided Half-Up Renaissance Style
This versatile hairstyle combined the modesty of secured hair with the beauty of flowing locks, making it appropriate for various social occasions.
The half-up style allowed women to display their hair’s length while maintaining control over the upper sections.
Step-by-Step Guide:
- Create a horizontal part from ear to ear across the crown
- Clip the lower section out of the way
- Divide the upper section into three equal parts
- Create a three-strand braid with the right section
- Repeat with the center section
- Repeat with the left section
- Bring all three braids together at the back of the crown
- Secure with an elastic band, then cover with a decorative ribbon
- Release the lower section, allowing it to flow freely
- Curl the loose ends with a curling iron for added romance
Best For: Medium to long hair, all face shapes, Renaissance fairs
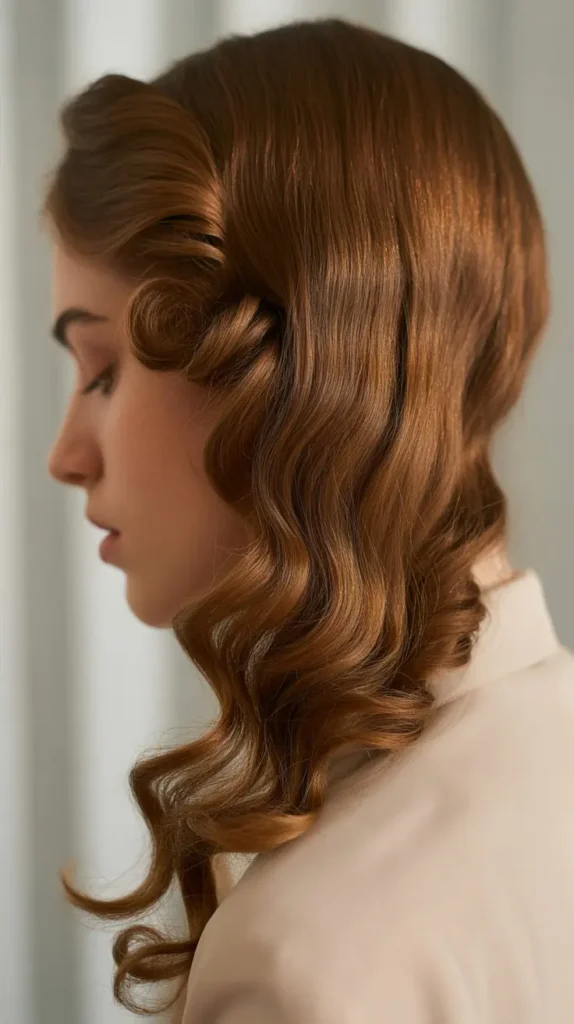
5. The French Hood Hairstyle

Though technically requiring a headdress accessory, this iconic Tudor-era style shaped how hair was arranged beneath the famous French hood.
The hair was parted severely and smoothed back, with the sides visible in elegant loops.
Preparation Steps:
- Create a precise center part from hairline to crown
- Apply smoothing serum to eliminate flyaways and frizz
- Brush hair flat against the head on both sides
- Take front sections on each side of the part
- Create small loops by folding hair back on itself near the temples
- Pin these loops securely with bobby pins
- Gather remaining hair at the nape into a low bun or braid
- Wrap a decorative hair net or snood over the bun
- Position a French hood headpiece (or decorative headband) over the arrangement
- Ensure the side loops remain visible and symmetrical
Best For: Long hair, oval faces, Tudor-themed events
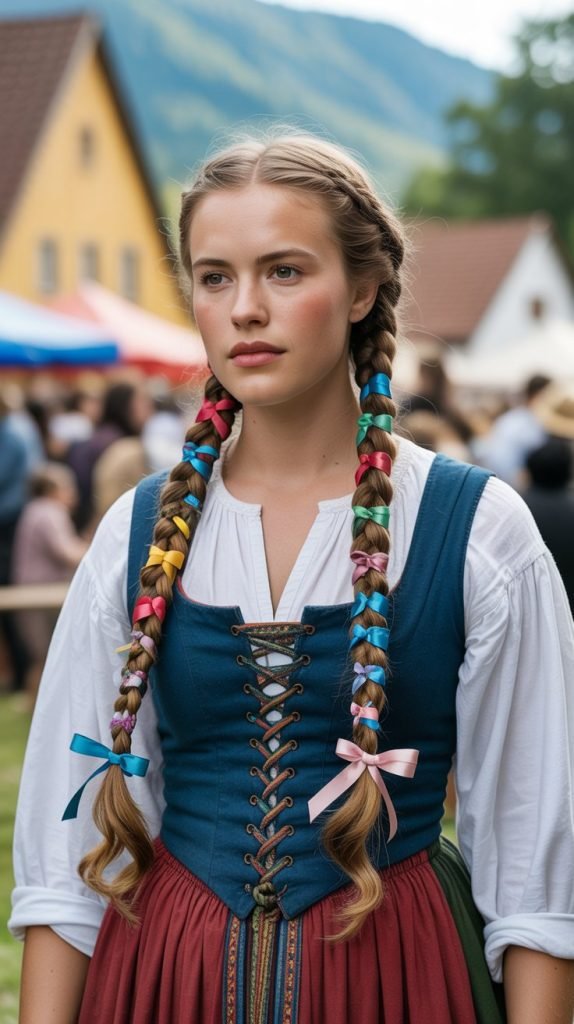
6. Cascading Side Braid
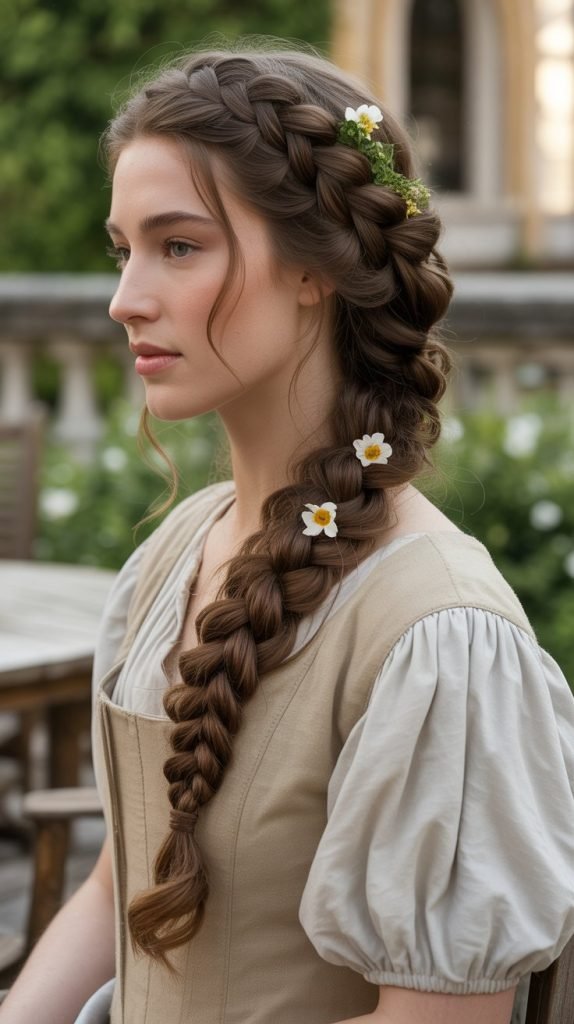
This romantic style swept all hair to one side in an elaborate braid that cascaded over the shoulder, displaying both technical skill and feminine grace. Side-swept styles were particularly popular during the later Renaissance period.
Braiding Instructions:
- Brush all hair over to your preferred shoulder
- Divide into three thick, equal sections
- Begin a loose French braid at the crown, adding hair as you work downward
- Continue braiding past the shoulder and down the length
- Secure the end with a ribbon or covered elastic
- Gently pull at the outer edges of the braid to create volume
- Pancake the braid by pulling each woven section slightly apart
- Tuck small flowers or pearl pins throughout the braid
- Allow a few face-framing wisps to escape naturally
Best For: Very long hair, round and square faces, outdoor events
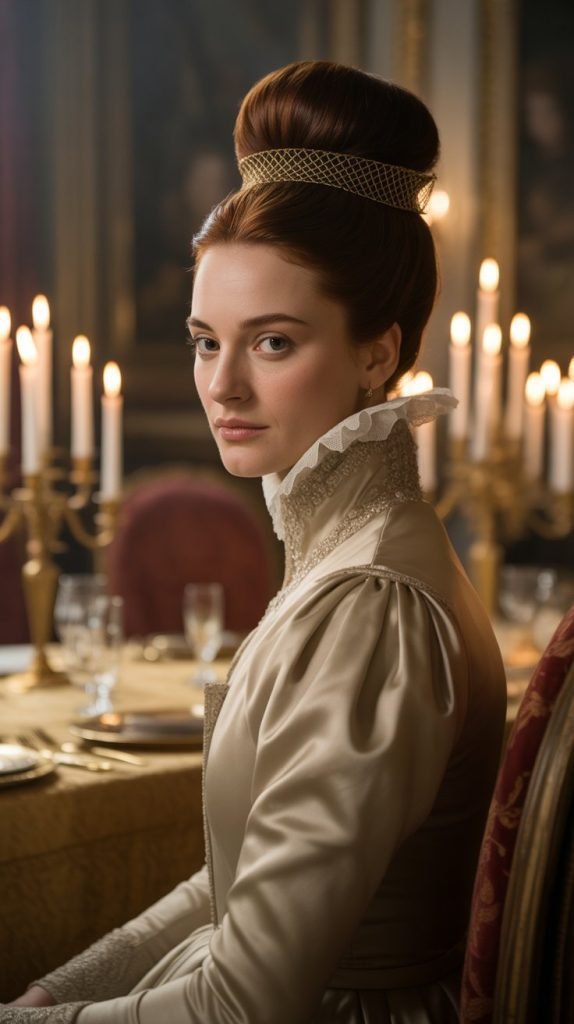
7. The Venetian Courtesan Style
This bold, sensual hairstyle showcased bleached or naturally blonde hair in elaborate arrangements that emphasized height and volume. Venetian women were famous for their hair lightening techniques and dramatic styling.
Styling Method:
- Backcomb hair at the crown to create significant height
- Smooth the top layer over the teased section
- Pull hair back from the face, maintaining the volume
- Secure at the mid-crown with hidden pins
- Allow the remaining length to flow freely down the back
- Create loose ringlets in the flowing sections using a curling iron
- Apply gold dust or shimmer spray to catch light
- Add strings of pearls or gold chains woven through the style
- Position decorative combs at the sides for added ornamentation
Best For: Long, thick hair, special occasions, dramatic looks
8. Simple Renaissance Ponytail
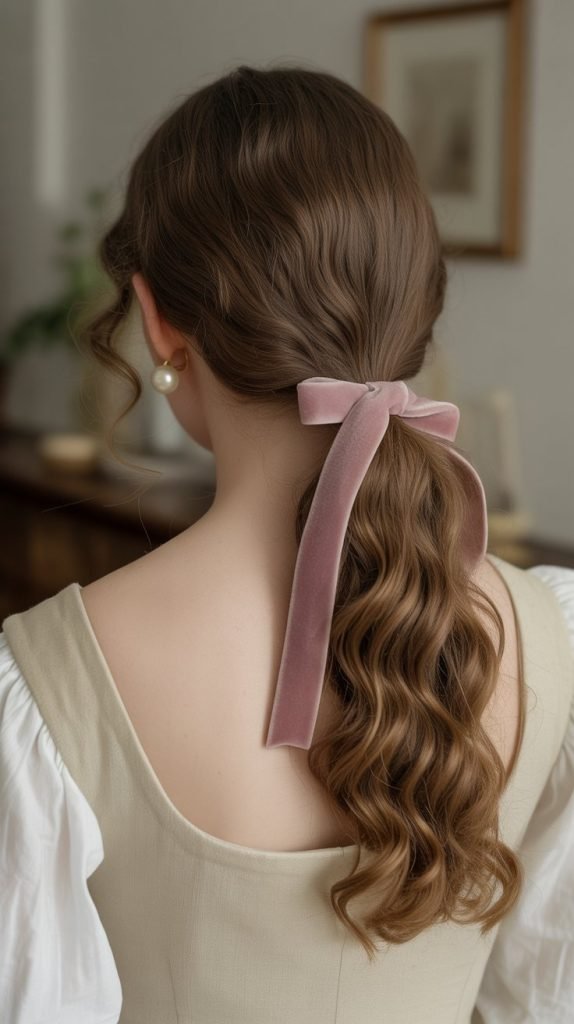
Even the humble ponytail took on Renaissance elegance when positioned correctly and adorned with period-appropriate accessories. This style offered practicality without sacrificing beauty.
Easy Steps:
- Brush hair thoroughly to remove all tangles
- Create a center or slight side part
- Gather all hair at the nape of the neck
- Secure with a fabric-covered elastic or ribbon
- Wrap a long ribbon around the base, tying it in a bow
- Curl the ponytail length with a curling iron
- Allow curls to cool and gently separate them
- Add a jeweled hair clip at the elastic base
- Leave a few face-framing tendrils loose
Best For: All hair lengths over shoulder-length, everyday Renaissance styling
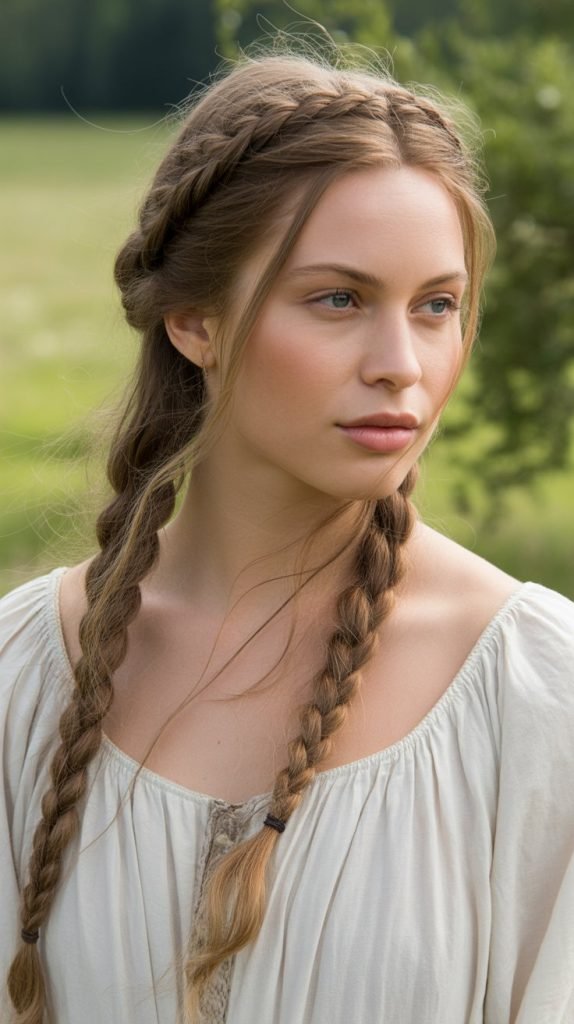
9. Double Dutch Braid Updo

This intricate style combined two Dutch braids that wrapped around the head before being secured in a low bun, creating architectural interest and securing even the longest hair.
Construction Process:
- Part hair down the center from forehead to nape
- Begin a Dutch braid on the right side at the hairline
- Continue braiding along the hairline toward the back
- Repeat the process on the left side
- When both braids reach the nape, cross them over each other
- Coil the remaining length into a low bun
- Secure with U-pins and bobby pins
- Tuck all ends neatly inside the bun
- Apply hairspray for hold
- Add decorative pins or a jeweled hair net over the bun
Best For: Very long, thick hair, formal Renaissance events
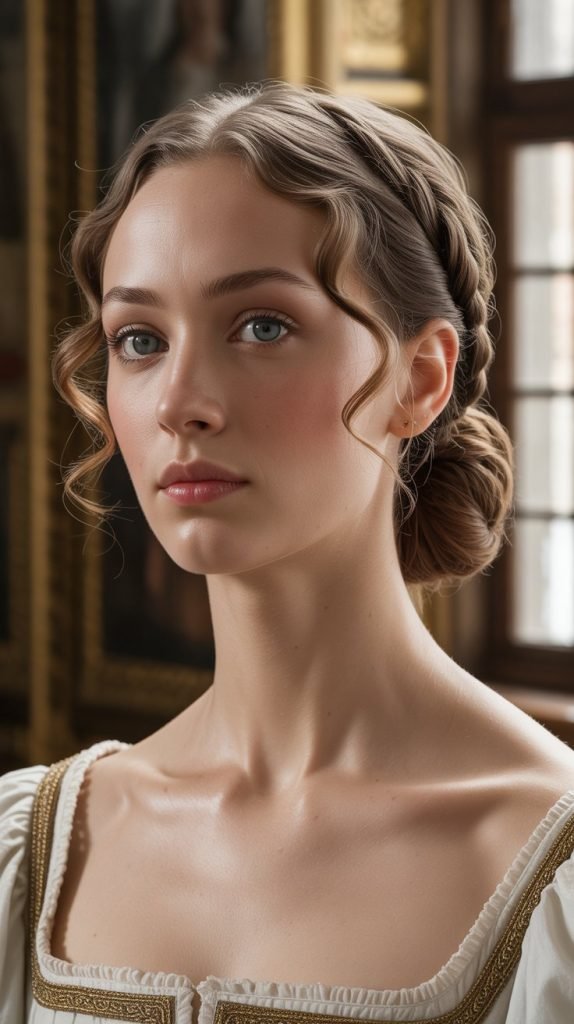
10. The Elizabethan Heart-Shaped Hairline
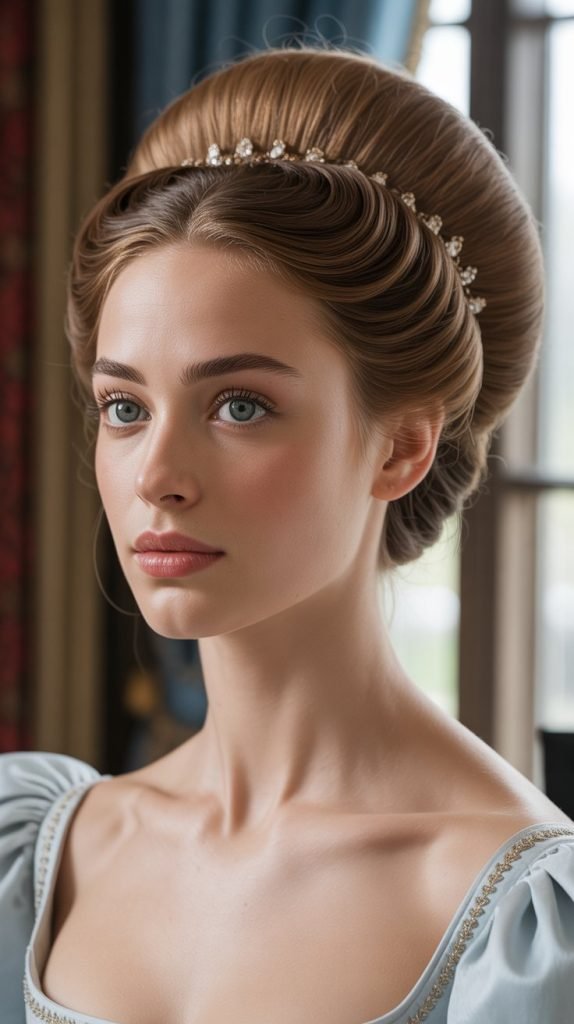
Queen Elizabeth I popularized this distinctive look featuring a heart-shaped hairline created through careful styling and sometimes enhancement with false hair pieces. The style emphasized a high, broad forehead considered beautiful in the period.
Creating the Look:
- Create a widow’s peak or heart shape at the center hairline
- Pin back side sections to emphasize the heart shape
- Apply styling gel or pomade to keep front hair smooth and defined
- Gather remaining hair into a high bun at the crown
- Pad the bun with a hair rat or foam donut for volume
- Wrap your hair around the padding
- Secure with numerous pins for stability
- Add decorative elements like jeweled pins or small crown
- Apply hairspray to maintain the sculptural shape
Best For: Long hair, oval and heart-shaped faces, Elizabethan-themed events
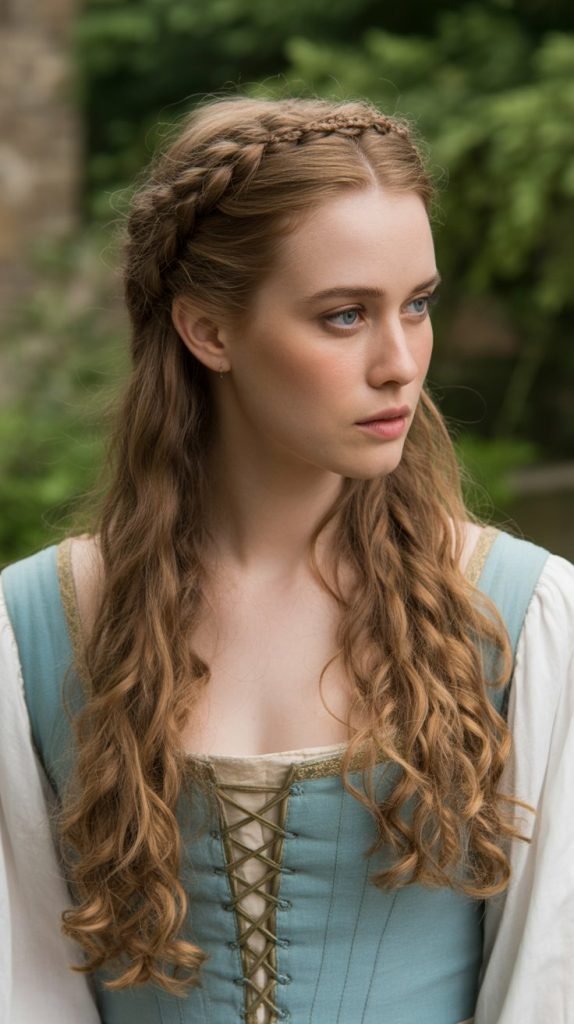
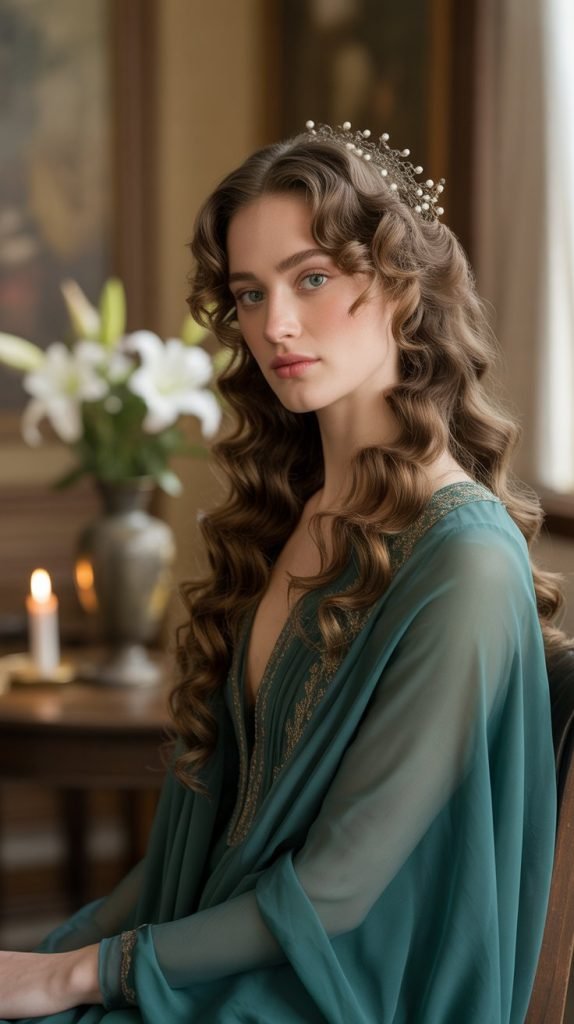
11. Romantic Loose Chignon
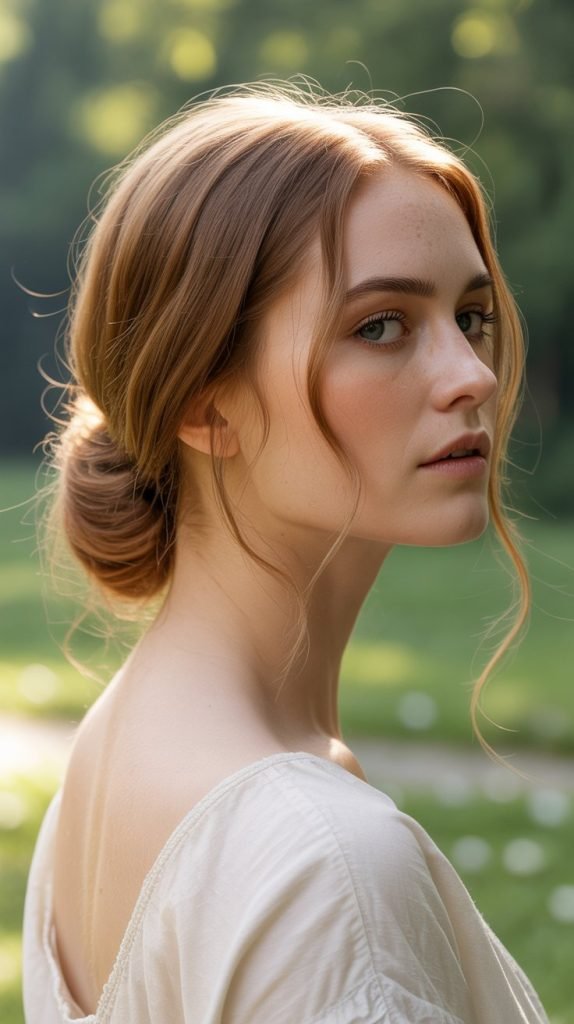
This softer interpretation of Renaissance styling created a low, loose bun that appeared effortless while maintaining period-appropriate modesty. The style worked particularly well for daytime and informal occasions.
Assembly Instructions:
- Part hair on the side for a romantic asymmetry
- Gather hair loosely at the nape
- Twist the gathered hair gently, not too tightly
- Wrap the twisted section into a loose coil
- Secure with bobby pins, leaving the bun slightly loose
- Pull out a few face-framing pieces
- Allow some strands to escape from the bun naturally
- Add a decorative comb or pin to one side
- Mist with flexible-hold hairspray
Best For: Medium to long hair, relaxed Renaissance looks, all face shapes
12. Braided Crown with Flowing Hair
Combining secured and loose elements, this style featured a braided crown around the head while allowing the remaining length to flow freely, representing both control and freedom.
Braiding Technique:
- Create a horizontal part from ear to ear across the crown
- Leave the back section loose and free
- Dutch braid the front section from left to right
- Continue braiding around the head like a halo
- Secure the braid end near the opposite ear
- Tuck the end under the braid and pin securely
- Curl the loose flowing section for added texture
- Add small flowers or pearls along the braided crown
- Apply light hairspray to the braid only
Best For: Very long hair, outdoor Renaissance events, bohemian looks
13. The Spanish Renaissance Mantilla Style
Spanish Renaissance women often wore their hair beneath decorative mantillas (veils), but the hair arrangement underneath followed specific styling principles featuring center parts and low, elegant arrangements.
Styling Foundation:
- Create a perfect center part with a tail comb
- Apply smoothing cream to both front sections
- Brush hair flat against the head on both sides
- Gather hair at the nape into a low ponytail
- Braid the ponytail in a three-strand braid
- Coil the braid into a flat bun against the neck
- Secure with bobby pins in a spiral pattern
- Place a decorative comb at the crown
- Drape a lace mantilla or veil over the arrangement
- Secure the veil with decorative pins
Best For: Long hair, oval faces, Spanish-themed Renaissance events
14. Twisted Rope Braid
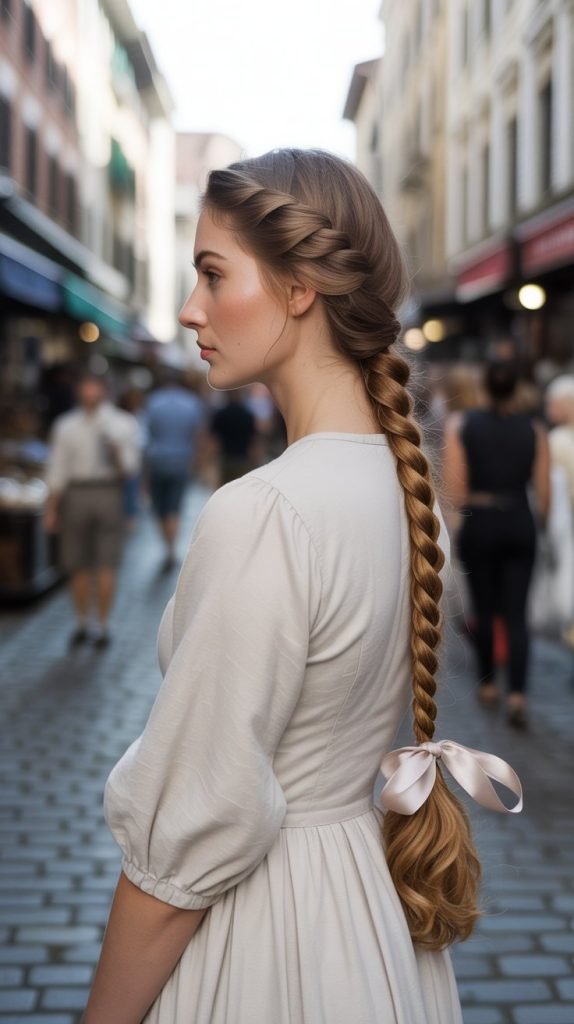
This deceptively simple style created the appearance of an intricate rope through a basic two-strand twisting technique, making it accessible for Renaissance styling beginners.
Twisting Process:
- Brush hair smooth and gather at desired height
- Divide hair into two equal sections
- Twist the right section clockwise several times
- Twist the left section clockwise several times
- Cross the right twisted section over the left counterclockwise
- Continue this pattern down the entire length
- The sections will naturally wrap around each other like rope
- Secure the end with a ribbon or covered elastic
- Gently pull on the rope braid to create fuller appearance
- Add decorative elements along the length
Best For: All hair types, quick Renaissance styling, beginners
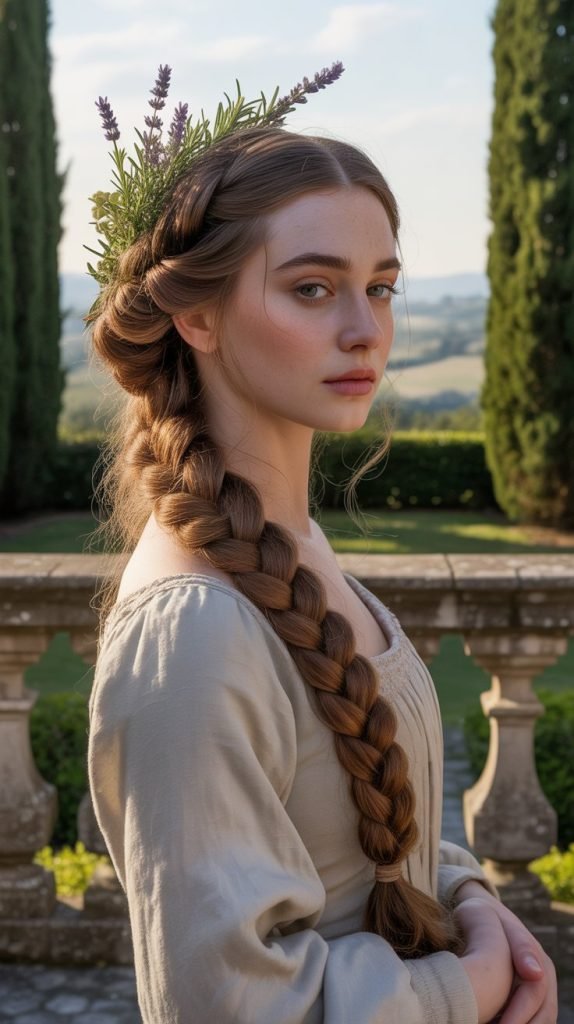
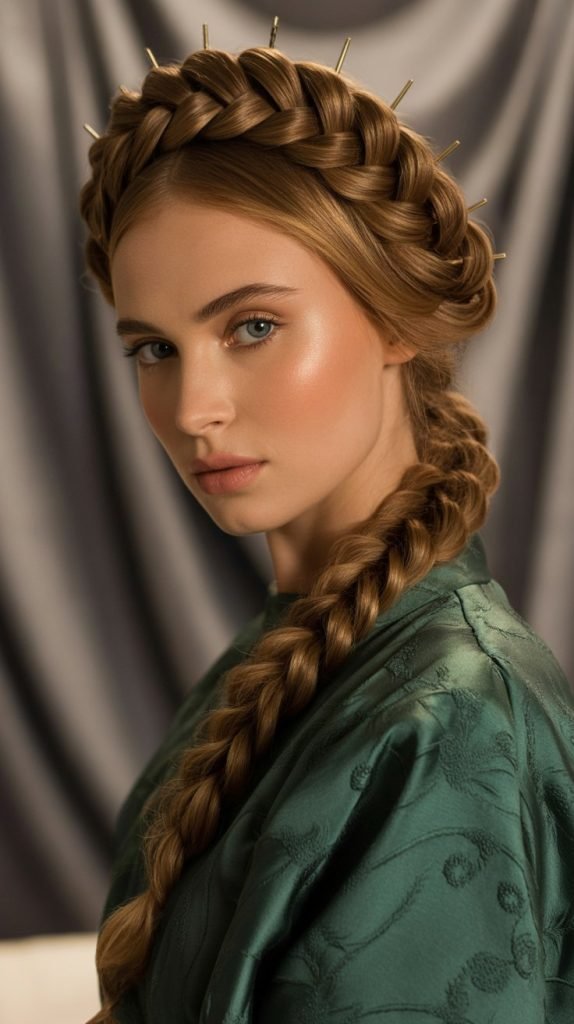
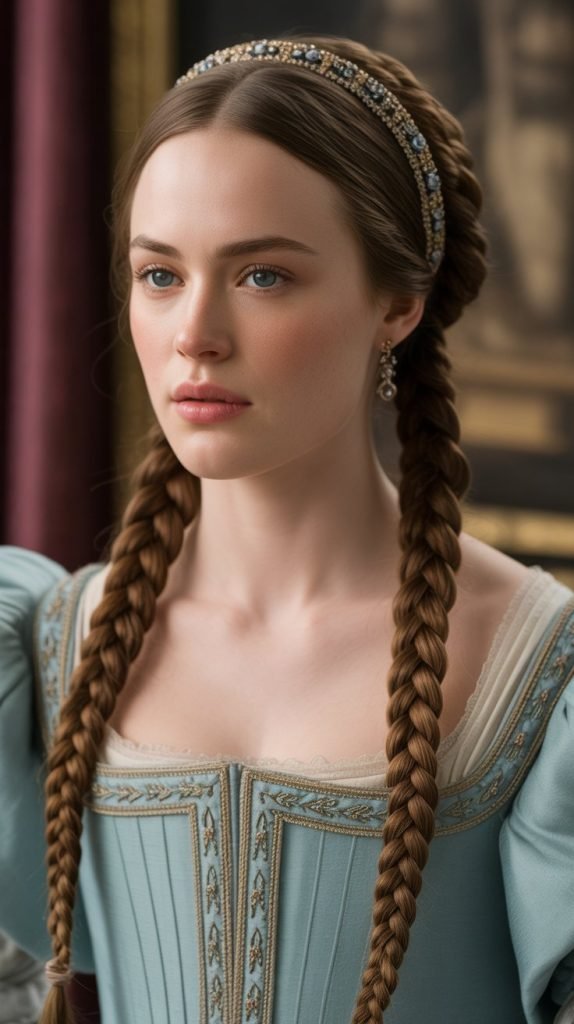
15. The Medici-Inspired Headband Braid
Noble Italian families like the Medici inspired this style featuring a thick braid positioned like a headband across the front hairline while the remaining hair flowed freely or was partially secured.
Creation Steps:
- Section off a 2-inch width of hair along the hairline from ear to ear
- Clip the remaining hair away temporarily
- French braid this front section from left to right
- Keep the braid tight and close to the hairline
- Secure the end behind the right ear with bobby pins
- Release the remaining hair
- Style the loose hair in gentle waves or curls
- Position the braid to sit like a natural headband
- Add small jewels or pearls pinned into the braid
- Apply hairspray to the braided section only
Best For: Long hair with layers, round and oval faces, festival events
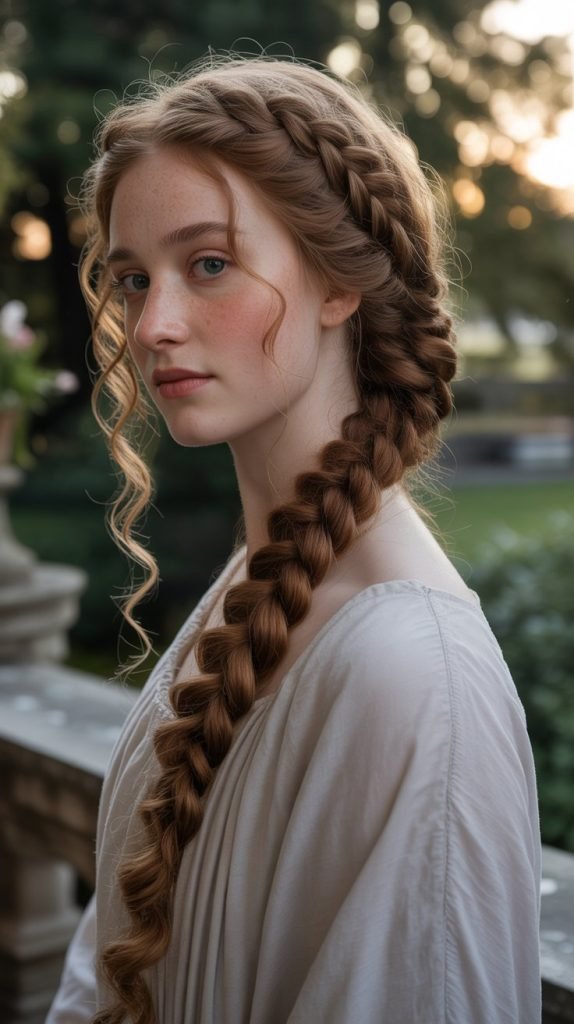
16. Coiled Serpentine Braid
Named for its snake-like appearance, this style coiled a long braid around itself in an elaborate pattern that showcased the hair’s length and the stylist’s skill.
Coiling Method:
- Brush hair and gather it all at the crown
- Create a standard three-strand braid down the entire length
- Secure the end temporarily with a small elastic
- Begin wrapping the braid around the base in a spiral pattern
- Work outward, creating a coiled disk shape
- Secure each loop with bobby pins as you work
- Remove the temporary elastic when nearing the end
- Tuck the final end under the coiled structure
- Pin securely from multiple angles for stability
- Add decorative pins at intervals around the coil
Best For: Very long, thick hair, dramatic Renaissance looks
17. Renaissance Side Swept Curls
This asymmetrical style gathered all hair to one side in a cascade of romantic curls, creating movement and drama while maintaining period-appropriate modesty.
Curling Process:
- Wash and completely dry hair before styling
- Apply heat protectant and volumizing mousse
- Sweep all hair over to your preferred shoulder
- Secure at the nape on that side with bobby pins
- Divide the swept section into 1-inch pieces
- Curl each piece with a 1-inch curling iron
- Alternate curl directions for natural-looking results
- Allow curls to cool completely before touching
- Gently separate curls with fingers, not a brush
- Add decorative pins or a jeweled comb where hair is secured
- Finish with medium-hold hairspray
Best For: Long hair, round and square faces, evening Renaissance events
18. The Milkmaid Braid Crown
Popular among working-class Renaissance women but adopted by nobility for its charming simplicity, this style wrapped braids over the crown in a practical yet beautiful arrangement.
Braiding Instructions:
- Part hair down the center from forehead to nape
- Create two equal sections
- Braid each section in a simple three-strand braid
- Secure both ends with small elastics
- Lift the right braid up and over the crown
- Pin it in place above the left ear
- Lift the left braid up and over the crown
- Pin it above the right ear
- Tuck all ends beneath the opposite braid
- Secure with additional bobby pins for stability
- Gently pull the braids to create fuller appearance
- Add small flowers tucked into the braids
Best For: Medium to long hair, casual Renaissance styling, all face shapes
19. Jeweled Renaissance Updo

This opulent style combined twisted sections, braids, and abundant jeweled decorations to create a truly regal appearance suitable for the highest nobility.
Assembly Process:
- Divide hair into multiple sections (front, sides, back)
- Create small braids and twists in each section
- Begin pinning sections at the crown, working upward
- Build height by layering twisted and braided sections
- Create an elaborate architectural structure
- Secure each component with multiple bobby pins
- Add jeweled pins, small chains, and decorative combs throughout
- Insert pearl strands woven between sections
- Apply strong-hold hairspray to maintain the structure
- Finish with a light dusting of gold shimmer spray
Best For: Very long, thick hair, weddings, formal Renaissance balls
20. The German Renaissance Wrapped Braid
Popular in German territories, this style featured long braids wrapped with ribbons or fabric, creating colorful, intricate patterns that extended the braid’s visual length.
Wrapping Technique:
- Create one or two braids depending on hair thickness
- Select a ribbon 1-2 inches wide and several feet long
- Beginning at the top of the braid, place ribbon alongside it
- Wrap the ribbon around the braid in a spiral pattern
- Keep wraps close together or spaced evenly as preferred
- Secure the ribbon periodically with small pins
- Continue wrapping down the entire braid length
- Tie the ribbon at the end in a decorative bow
- Allow the braid to hang down the back or coil it into a bun
- Add additional ribbons in contrasting colors for more visual interest
Best For: Very long hair, German Renaissance events, colorful styling
21. Renaissance Gibson Tuck
Though named after a later period, this tucked style has Renaissance roots in creating elegant, secure updos that kept long hair controlled while maintaining a sophisticated appearance.
Tucking Method:
- Brush hair smooth and gather at the nape
- Position your hands to create a horizontal roll
- Tuck the ends under and upward, rolling hair toward the head
- Continue rolling upward until reaching desired height
- Secure the roll with bobby pins along its entire length
- Pin from both the bottom and top of the roll
- Ensure all ends are tucked invisibly inside
- Smooth any flyaways with gel or pomade
- Add a decorative comb or jeweled pins along the roll
- Apply hairspray for lasting hold
Best For: Long hair, oval and square faces, formal occasions
22. Waterfall Braid with Flowing Locks
This romantic style created the illusion of hair cascading through a braid like water, combining technical skill with natural-looking beauty perfect for Renaissance recreations.
Braiding Technique:
- Create a deep side part
- Begin near the part on the heavier side
- Take three small sections to start a braid
- Cross the back section over the middle
- Cross the front section over the middle
- Drop the back section, allowing it to fall
- Pick up a new section to replace the dropped one
- Continue this pattern across the back of the head
- The dropped sections create the “waterfall” effect
- Secure the braid end behind the opposite ear
- Curl all the dropped sections and remaining hair
- Add small pearl pins along the braid line
Best For: Medium to long hair, romantic Renaissance looks, all face shapes
23. The Tudor Mary Braid
Named after Mary Tudor, this style combined a center part with neat braids wrapped around the head, creating a modest yet elegant appearance favored in English Renaissance courts.
Creating the Style:
- Create a precise center part from hairline to crown
- Divide hair into two equal sections
- Braid each section in a tight three-strand braid
- Bring the right braid across the back of the head
- Pin it above the left ear
- Bring the left braid across the back
- Pin it above the right ear
- Ensure braids lie flat against the head
- Tuck all ends securely beneath the opposite braid
- Add a jeweled headband or decorative pins where braids cross
- Apply smoothing serum to the parted front sections
Best For: Long hair, oval faces, Tudor-themed events
24. Loose Renaissance Half-Crown
This softer interpretation of crown braiding left portions of hair loose while creating a partial crown effect, balancing structure with natural movement.
Styling Steps:
- Leave the back lower section of hair loose
- Section off hair from temple to temple across the crown
- Divide this section into three parts
- Dutch braid the center section straight back
- Create loose three-strand braids on each side section
- Bring all three braids together at the back crown
- Secure where they meet with bobby pins or a ribbon
- Allow the remaining loose hair to flow freely
- Curl the loose section for added texture
- Gently pull at braid edges for a softer appearance
- Add small decorative pins throughout the crown area
Best For: Medium to long hair, casual Renaissance styling, outdoor events
25. The Flemish Renaissance Loop Style
Popular in the Low Countries, this distinctive style created loops of hair arranged around the face and secured at the back, showcasing elaborate pinning techniques.
Loop Creation:
- Part hair down the center
- Take a 1-inch section from each front side
- Create a loop by folding hair back toward the crown
- Pin each loop securely with bobby pins
- Repeat with additional sections, working backward
- Create 2-3 loops on each side of the part
- Gather remaining hair at the nape
- Braid or twist the back section
- Coil the braid into a low bun
- Secure the bun with U-pins
- Ensure all loops are visible and symmetrical
- Add jeweled pins to embellish the loops
Best For: Long, thick hair, historically accurate Renaissance recreations
26. Simple Renaissance Top Knot
This elevated version of a basic bun positioned hair high on the head, creating height and elegance while keeping the neck cool—practical for indoor Renaissance festivities.
Construction Guide:
- Brush hair upward toward the crown
- Gather into a high ponytail at the desired position
- Secure with a strong elastic band
- Twist the ponytail length tightly
- Wrap the twisted hair around the elastic base
- Create a neat, round bun shape
- Secure with bobby pins around the perimeter
- Tuck all ends invisibly into the bun
- Smooth any flyaways with hairspray or gel
- Add a decorative hair net in gold or jeweled design
- Position jeweled pins around the bun base
Best For: Long hair, oval and heart-shaped faces, warm-weather events
27. Romantic Asymmetrical Braid
This style created visual interest through purposeful asymmetry, with a side braid that incorporated face-framing sections while maintaining Renaissance aesthetic principles.
Braiding Process:
- Create a deep side part (70/30 ratio)
- Begin a French braid on the heavier side
- Start at the part line near the forehead
- Braid diagonally back toward the opposite ear
- Add hair sections as you work down and across
- Continue braiding past the shoulder
- Secure with a ribbon that matches your costume
- Allow the braid to rest over one shoulder
- Leave a few wispy pieces loose near the face
- Curl these face-framing sections gently
- Add small decorative pins along the braid path
Best For: Long hair, round and square faces, romantic Renaissance looks
28. The Renaissance Pretzel Bun

This intricate style twisted hair into shapes resembling pretzels or figure-eights, showcasing advanced pinning skills and creating architectural interest at the back of the head.
Twisting Technique:
- Gather hair into a low ponytail at the nape
- Divide the ponytail into two equal sections
- Twist each section individually in the same direction
- Cross the twisted sections over each other in a figure-eight pattern
- Continue creating loops and twists in decorative patterns
- Pin each loop and crossing point securely
- Create a pretzel or infinity symbol shape
- Secure all ends by tucking them into the design
- Add decorative pins at intersection points
- Apply strong-hold hairspray to maintain the sculptural shape
- Embellish with jeweled pins or small chains
Best For: Very long hair, special Renaissance occasions, advanced styling
29. Natural Renaissance Waves with Headband
This accessible style combined loose, natural waves with a decorative headband, creating an instantly Renaissance appearance without requiring advanced braiding skills.
Simple Styling:
- Wash hair and allow to air dry until slightly damp
- Apply curl-enhancing mousse throughout hair
- Braid hair in 2-3 loose braids before bed
- Sleep with braids in to create natural waves
- Remove braids in the morning and gently separate waves
- Do not brush—use fingers to arrange waves
- Position a decorative headband across the hairline
- Choose jeweled, beaded, or metallic headbands for authenticity
- Allow hair to flow naturally over shoulders and down back
- Add a few strategically placed pearl or jeweled pins
- Apply light-hold hairspray to maintain waves without stiffness
Best For: All hair types and lengths, Renaissance beginners, casual events
Conclusion
The timeless elegance of 29 Simple Renaissance Hairstyles for Long Hair continues to captivate modern audiences with its combination of artistry, history, and romantic beauty.
These styles transcend their historical origins to offer contemporary wearers versatile options for themed events, special occasions, or everyday elegance with a historical twist.
From the accessible flowing maiden waves to the intricate jeweled updos worthy of Renaissance royalty, each style connects us to an era that celebrated beauty, craftsmanship, and attention to detail.
Whether you’re preparing for a Renaissance fair, a themed wedding, a theatrical performance, or simply exploring historical beauty techniques, these hairstyles provide a gateway to experiencing the grace and sophistication of one of history’s most aesthetically rich periods.
The beauty of these Renaissance styles lies not only in their visual appeal but in their adaptability—each can be modified to suit different skill levels, hair types, and personal preferences while maintaining authentic historical character.
By combining period-appropriate techniques with modern hair care knowledge and products, you can achieve stunning results that honor Renaissance tradition while ensuring your hair remains healthy and beautiful.
Remember that the most successful Renaissance hairstyle is one that makes you feel confident, elegant, and connected to the artistic spirit of this extraordinary historical period, so experiment with these 29 styles until you find the ones that resonate with your personal aesthetic and bring the magic of the Renaissance into your modern life.Retry