Creating beautiful Fulani braids on yourself is an empowering skill that combines artistic expression with practical hair care, allowing you to achieve stunning protective styles without the expense of salon visits.
This detailed tutorial breaks down the entire process into manageable, easy-to-follow steps that even complete beginners can master with patience and practice.
You’ll learn everything from initial preparation and tool selection to the final finishing touches that make your braids look professionally done.
Each step is carefully explained with clear instructions, helpful tips, and troubleshooting advice to ensure your success throughout the braiding journey.
Whether you’re new to protective styling or looking to expand your hair braiding repertoire, this comprehensive guide provides the structured approach you need to create authentic Fulani braids with confidence.
By following this “Step-by-Step Guide to Doing Fulani Braids on Yourself,” you’ll develop a valuable skill that offers endless styling possibilities while honoring the rich cultural heritage of this traditional African hairstyle.
1. Gathering All Necessary Tools and Materials
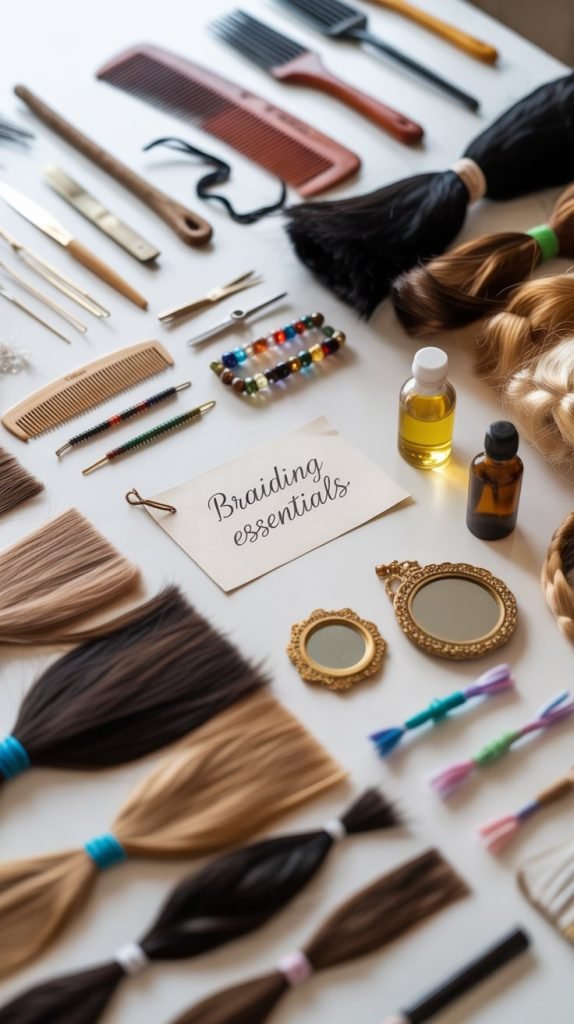
Before beginning your Fulani braiding journey, assembling all required tools and materials ensures a smooth, uninterrupted process that leads to professional-looking results.
Having everything organized and within reach prevents frustration and maintains your braiding momentum throughout the lengthy styling session.
- Collect a rat-tail comb for creating precise parts and sectioning hair with clean lines
- Gather small hair clips or rubber bands to keep sectioned hair organized during the braiding process
- Purchase high-quality braiding hair extensions in your preferred color and texture combination
- Obtain traditional Fulani accessories like beads, cowrie shells, or decorative hair cuffs
- Prepare edge control or strong-hold gel for maintaining smooth edges and clean part lines
- Set up multiple mirrors including a large wall mirror and handheld mirror for angle checking
- Have hair moisturizer or leave-in conditioner ready for pre-braiding hair preparation
- Keep bobby pins nearby for securing loose ends and maintaining neat finishing touches
2. Preparing Your Natural Hair Properly
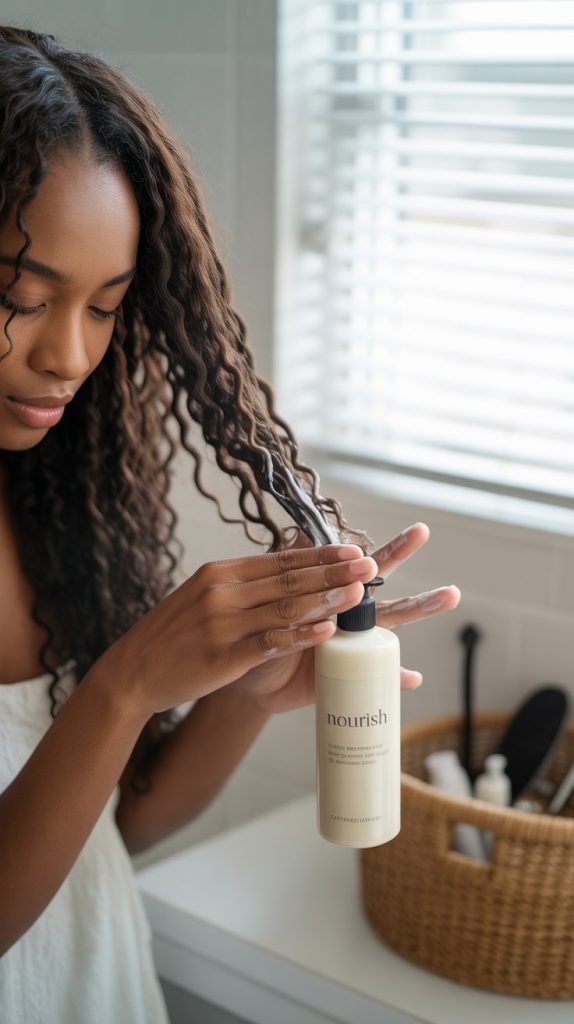
Proper hair preparation creates the ideal foundation for long-lasting Fulani braids while ensuring your natural hair remains healthy throughout the protective styling period.
This crucial step determines how well your braids will hold and how comfortable they’ll feel during extended wear.
- Start with freshly washed hair using a clarifying shampoo to remove all product buildup
- Apply a deep conditioning treatment and allow it to penetrate for 15-20 minutes before rinsing
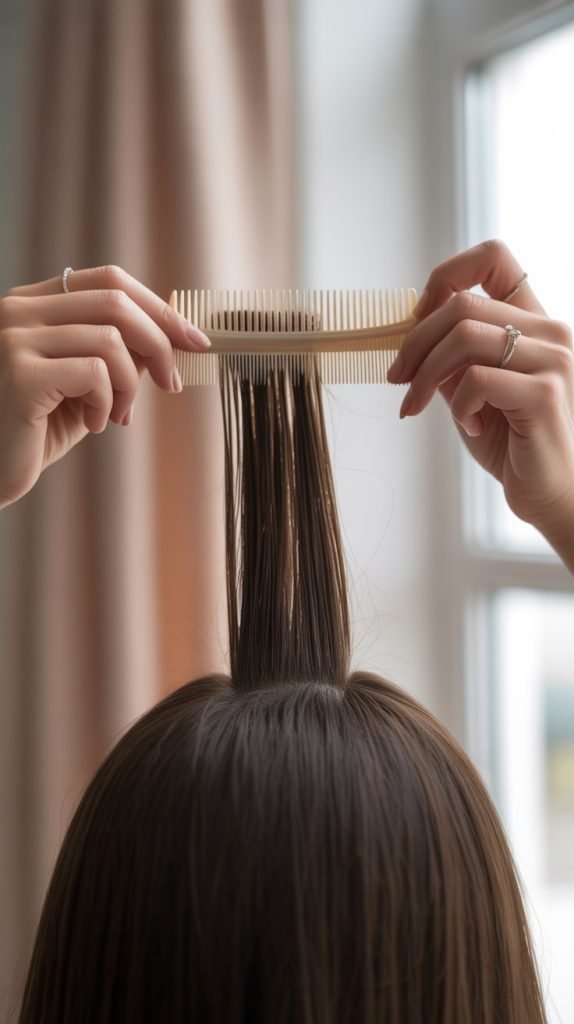
- Gently detangle damp hair using a wide-tooth comb, working from ends toward roots
- Apply leave-in conditioner throughout your hair to provide moisture and protection during braiding
- Allow hair to air dry until it reaches the optimal dampness level for easy manipulation
- Trim any damaged or split ends to prevent further breakage during the braiding process
- Apply a light protective oil to your scalp to create a barrier against potential irritation
- Ensure your hair is completely detangled and smooth before beginning the sectioning process
3. Creating the Foundation Center Part
The signature center part serves as the architectural foundation of authentic Fulani braids and requires precision to achieve the clean, symmetrical appearance that defines this traditional style.
Mastering this fundamental step ensures your finished braids will have the proper structure and visual balance.
- Begin at your natural hairline using the pointed end of your rat-tail comb for accuracy
- Draw a straight line from your forehead back to the crown area, maintaining consistent pressure
- Check that the part is perfectly centered by measuring equal distances from each ear
- Apply edge control along the part line to smooth any flyaways and maintain clean edges
- Use clips to separate the center part section from the hair on either side
- Ensure the part extends from your hairline back approximately 4-5 inches toward the crown
- Make any necessary adjustments to the part placement before proceeding with sectioning
- Take photos from multiple angles to verify the part appears straight and symmetrical
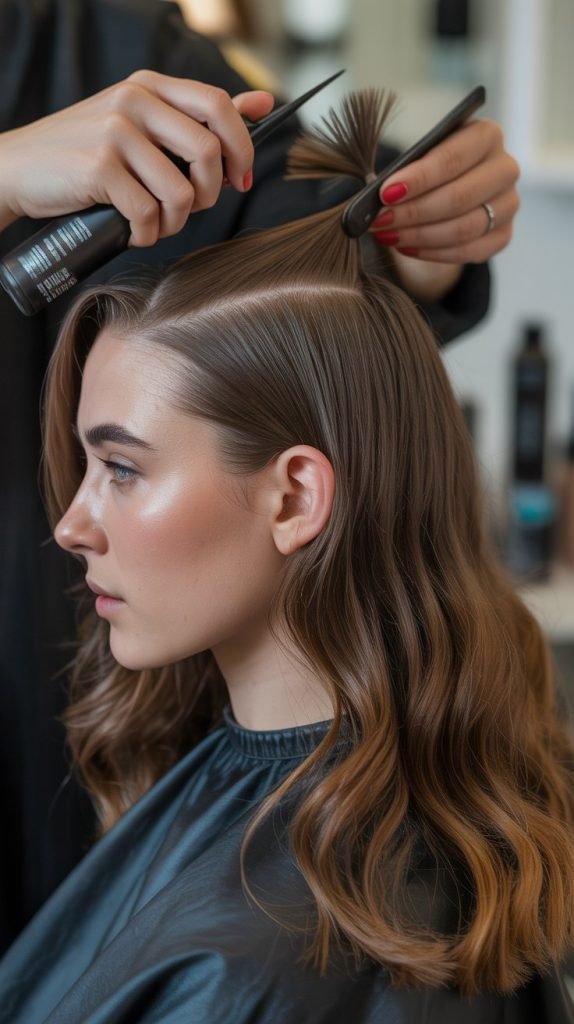
4. Systematic Hair Sectioning and Organization
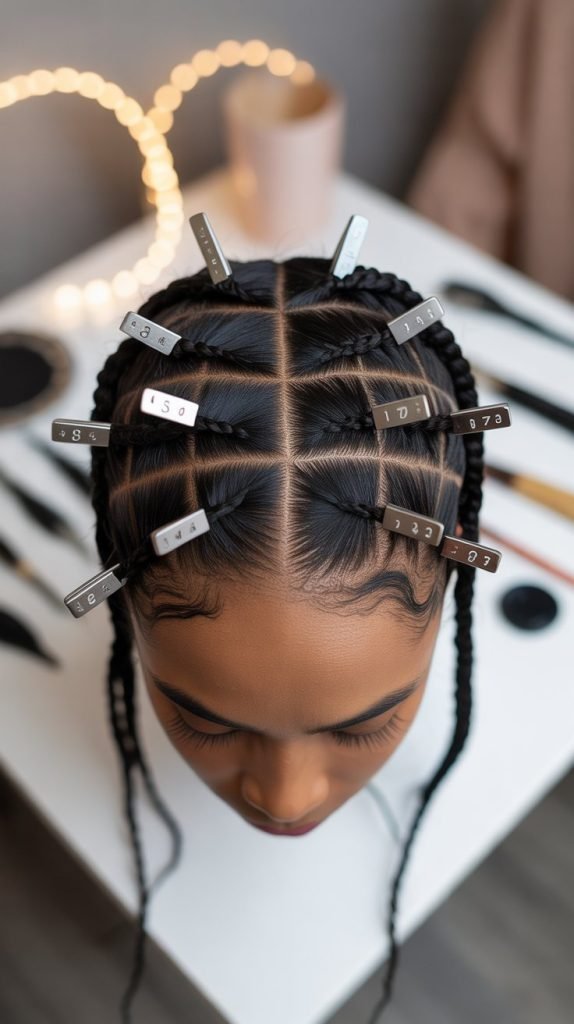
Strategic sectioning creates the framework for uniform, well-proportioned Fulani braids while ensuring manageable working sections throughout the styling process.
Proper organization at this stage prevents confusion and maintains pattern consistency as you work through each area of your head.
- Create horizontal sections moving from the front hairline toward the back of your head
- Make each section approximately the same width to ensure uniform braid thickness
- Use the rat-tail comb to draw clean, straight lines for professional-looking results
- Clip each completed section to prevent tangling and maintain organization while working
- Number your sections mentally or with temporary markers to track your progress
- Adjust section sizes based on your desired final braid thickness and head shape
- Ensure all sections are secure and won’t interfere with adjacent areas during braiding
- Double-check your sectioning pattern before applying any styling products or beginning braids
5. Starting Your First Cornrow Foundation
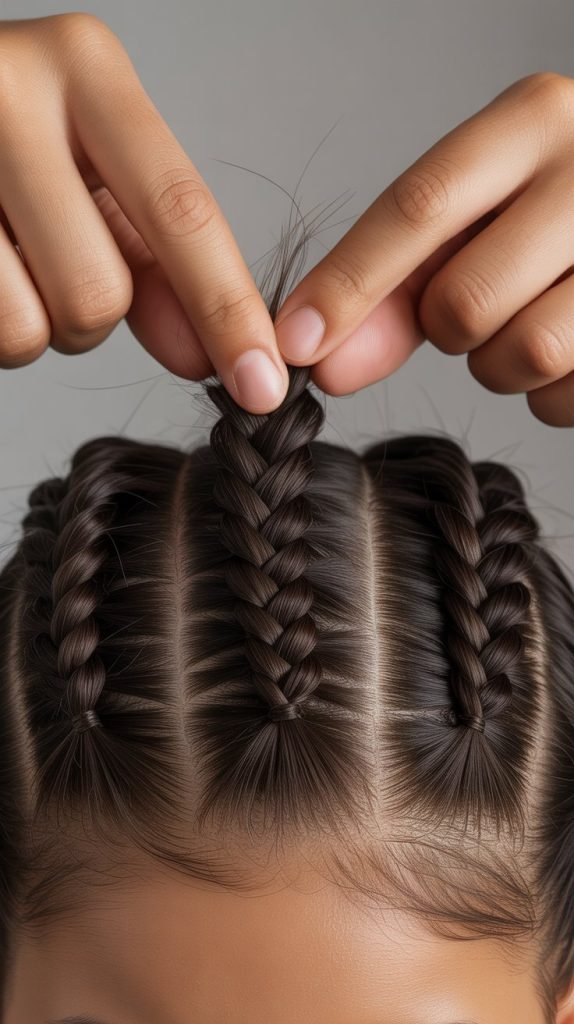
Beginning your first cornrow establishes the technique and rhythm you’ll maintain throughout the braiding process, making this initial step crucial for overall success.
Starting with proper form and tension sets the standard for all subsequent braids and builds your confidence as you progress.
- Select your first section and divide the hair at the hairline into three equal strands
- Begin braiding using the standard three-strand technique, keeping the braid close to your scalp
- Pick up small amounts of additional hair with each cross-over to create the cornrow effect
- Maintain consistent tension that feels secure but not uncomfortably tight on your scalp
- Keep your fingers close to your scalp to ensure the cornrow lies flat and smooth
- Practice the braiding motion several times before committing to the full length
- Check your tension regularly by gently tugging on the braid to ensure it’s not too tight
- Secure the end temporarily with a small elastic while you practice the technique on other sections
6. Mastering the Cornrow Braiding Technique
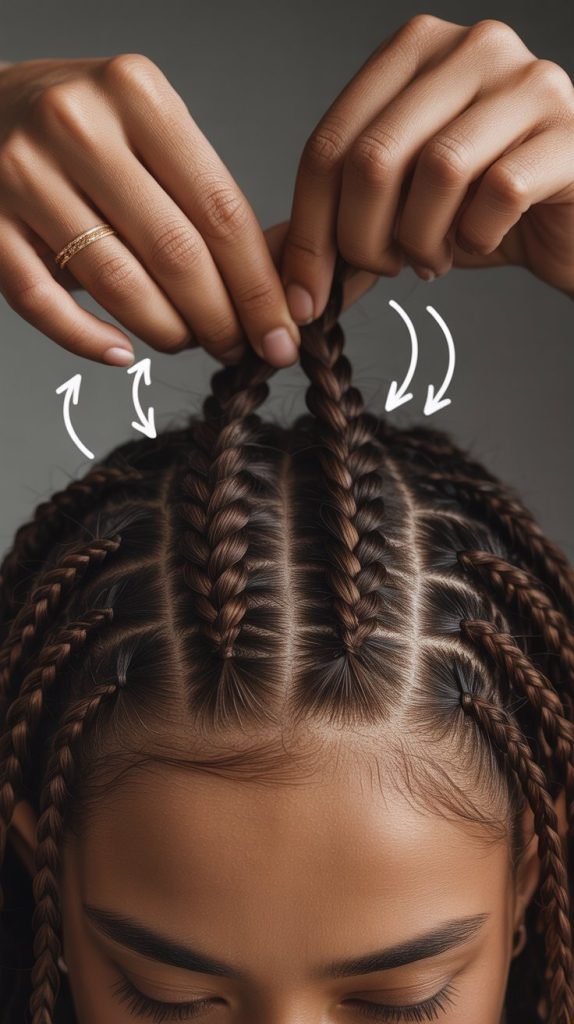
Developing consistent cornrow technique requires understanding proper hand positioning, tension control, and hair pickup patterns that create smooth, uniform braids.
This fundamental skill forms the backbone of authentic Fulani braiding and improves with focused practice and attention to detail.
- Hold the outer strands with your thumb and pinky finger while using your index finger to pick up new hair
- Keep your hands positioned close to your scalp throughout the braiding process for better control
- Pick up consistent amounts of hair with each cross-over to maintain uniform braid thickness
- Maintain steady braiding rhythm to prevent sections from becoming loose or uneven
- Braid in the direction you want the finished cornrow to lay for natural-looking results
- Check your progress frequently in the mirror to catch any irregularities early
- Practice switching between your dominant and non-dominant hands for ambidextrous braiding ability
- Focus on keeping the braid pathway straight and following your predetermined sectioning lines
7. Creating Individual Face-Framing Braids
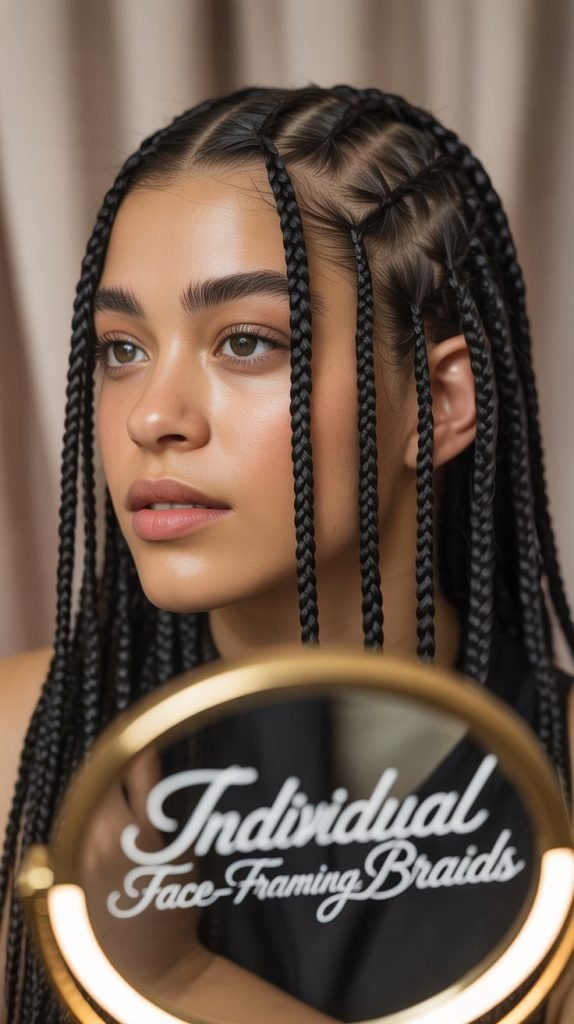
Individual braids add texture contrast and styling versatility to your Fulani braid pattern while framing your face with elegant, moveable elements.
These braids require different techniques than cornrows and provide opportunities to incorporate extensions seamlessly for added length and fullness.
- Start individual braids with only your natural hair for the first 2-3 crosses before adding extensions
- Gradually introduce small amounts of extension hair to avoid creating bulk at the root area
- Match extension texture and color as closely as possible to your natural hair for seamless blending
- Maintain consistent braid thickness by monitoring the amount of hair in each section carefully
- Create braids that complement your facial features and desired overall silhouette
- Vary the length slightly for a more natural, organic appearance that doesn’t look too uniform
- Practice the extension integration technique on test sections before committing to visible areas
- Secure each completed braid temporarily while working on adjacent sections to prevent tangling
8. Seamless Extension Integration Methods
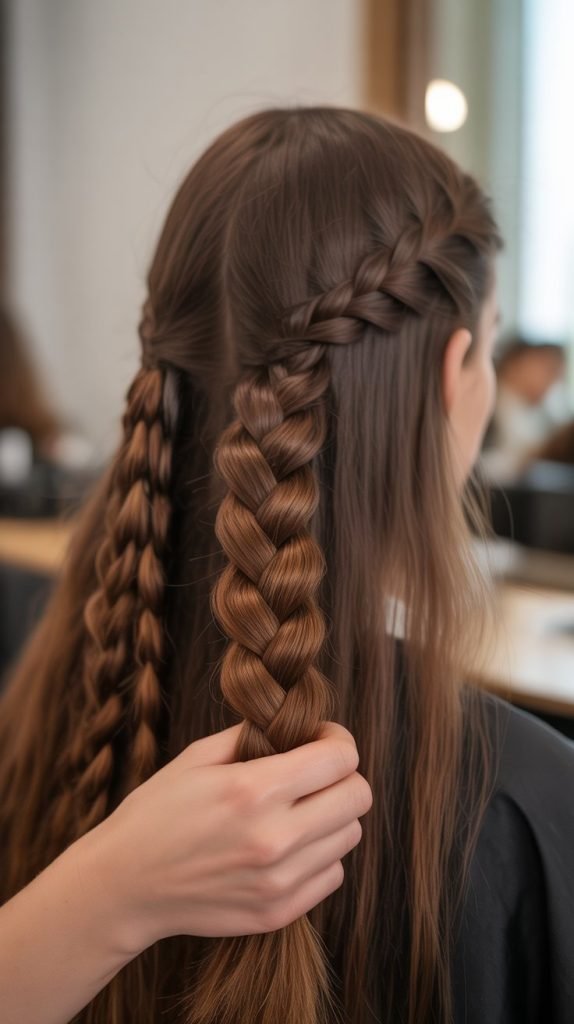
Proper extension integration creates the illusion that your braids grow naturally from your scalp while providing the length and fullness characteristic of traditional Fulani styles.
Mastering these blending techniques ensures professional-looking results that appear authentic and well-executed.
- Begin each braid with 100% natural hair and gradually introduce extension hair over several crosses
- Use the feathering technique to blend extension ends with your natural hair texture smoothly
- Control the bulk distribution to prevent heaviness at the root while maintaining adequate fullness
- Test different integration points to find what works best with your natural hair length
- Ensure extensions are securely attached without relying on excessive tension that could cause breakage
- Practice color-blending techniques using multiple extension shades for dimensional effects
- Monitor the transition points to ensure they remain invisible once braiding is complete
- Document successful integration methods for consistent reproduction in future styling sessions
9. Adding Traditional Accessories and Beads
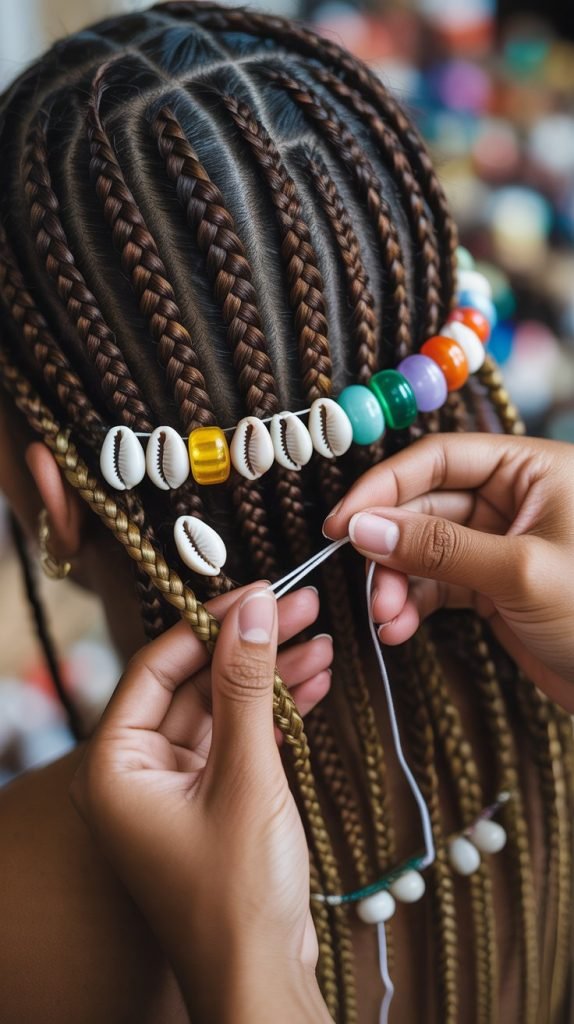
Strategic placement of beads, cowrie shells, and other traditional accessories transforms basic braids into authentic Fulani expressions while adding personal style elements.
Proper accessory application requires specific techniques to ensure secure attachment and cultural appropriateness.
- Select accessories that honor traditional Fulani aesthetics while reflecting your personal style preferences
- Thread beads onto braids while the hair is still slightly damp for easier manipulation
- Space accessories evenly throughout your hairstyle to create visual balance and cultural authenticity
- Secure beads by creating small knots or using crimping techniques to prevent sliding
- Choose bead sizes appropriate for your braid thickness to avoid strain or breakage
- Consider the total weight of accessories to prevent discomfort during extended wear
- Mix different materials like wood, metal, and shells for authentic dimensional interest
- Document your accessory placement pattern for consistent recreation in future styles
10. Final Finishing and Style Perfection
Professional finishing techniques elevate your DIY Fulani braids from good to exceptional, ensuring every detail appears intentional and polished.
These final steps require patience and attention to detail but make the difference between amateur and professional-looking results.
- Trim any uneven extension ends to create uniform lengths while maintaining natural-looking variation
- Apply lightweight oil or serum throughout your braids to add shine and reduce any remaining frizz
- Use edge control and a small brush to smooth baby hairs and create crisp hairline definition
- Gently adjust any braids that appear too tight or uncomfortable without compromising security
- Take progress photos from multiple angles to assess symmetry and make necessary corrections
- Style your face-framing braids to complement your facial features and desired aesthetic
- Apply a light finishing spray if desired to enhance shine and provide humidity protection
- Document your completed style and the techniques that worked best for future reference
Completing this “Step-by-Step Guide to Doing Fulani Braids on Yourself” represents a significant achievement that combines technical skill with cultural appreciation and personal empowerment.
The systematic approach outlined in this tutorial provides you with a reliable framework for creating beautiful Fulani braids whenever you desire this elegant protective style.
Remember that mastering this technique takes practice and patience, so be kind to yourself during the learning process and celebrate each improvement you make along the way.
With dedication and the detailed instructions provided here, you’ll soon be creating stunning Fulani braids that not only protect and beautify your natural hair but also connect you to a rich tradition of African hair artistry that spans generations of skilled practitioners and cultural expression.