Cutting your own hair in layers at home might seem intimidating, but with the right technique and a bit of confidence, you can achieve salon-quality results without spending a fortune.
Whether you’re looking to add volume, remove weight, or simply maintain your style between professional appointments, learning to layer your own hair is a valuable skill that puts you in control of your look.
This comprehensive guide will walk you through everything you need to know about cutting layers at home, from gathering the essential tools to mastering different layering techniques for various hair types and lengths.
You’ll discover how to prepare your hair properly, avoid common mistakes, and create beautiful, dimensional layers that enhance your natural texture.
By following this Step-by-Step Guide: How to Cut Your Own Hair in Layers at Home, you’ll gain the knowledge and confidence to transform your hair in the comfort of your own space.
1. Understanding Hair Layers and Their Benefits

Before diving into the cutting process, it’s essential to understand what hair layers actually are and why they can transform your overall appearance.
Layers are sections of hair cut at different lengths to create dimension, movement, and shape throughout your hairstyle.
What Are Hair Layers?
- Hair layers are graduated sections where the top portions are cut shorter than the bottom sections, creating a cascading effect.
- Unlike a blunt cut where all hair ends at the same point, layers add depth and prevent hair from looking flat or heavy.
- Layers can be subtle with minimal length variation or dramatic with significant differences between the shortest and longest sections.
- The technique involves cutting hair at angles rather than straight across to achieve a seamless blend between different lengths.
Benefits of Layered Hair
- Adds natural volume and body to fine or thin hair by removing excess weight that pulls hair down.
- Creates movement and flow that makes hair appear more dynamic and alive rather than static.
- Reduces bulk in thick, heavy hair making it more manageable and easier to style on a daily basis.
- Frames the face beautifully by strategically placing shorter layers around facial features.
- Enhances natural curls and waves by allowing them to form more defined patterns without weighing them down.
- Makes styling more versatile as layers work with various techniques from straightening to curling.
- Helps remove damaged ends gradually while maintaining overall length in the longer sections.
2. Essential Tools and Materials You’ll Need

Having the right tools is absolutely critical for achieving professional-looking layers at home.
Using household scissors or inappropriate equipment can lead to uneven cuts, split ends, and disappointing results.
Must-Have Cutting Tools
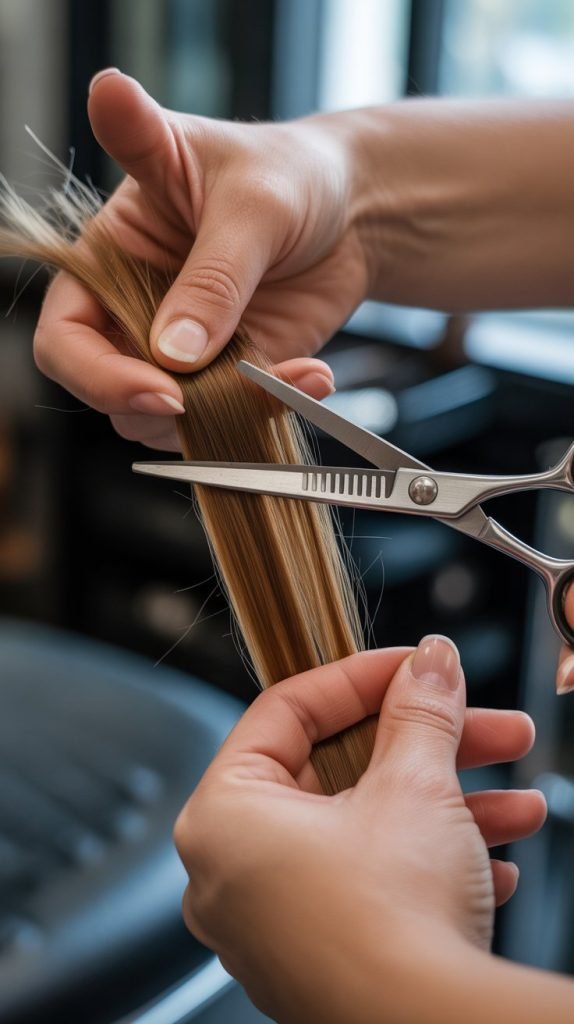
- Professional hair-cutting shears with sharp, beveled blades specifically designed for cutting hair, not regular household scissors.
- Hair-cutting shears should be between 5.5 to 6.5 inches long for better control and precision during the cutting process.
- Thinning shears or texturizing scissors with teeth on one or both blades to blend layers and soften harsh lines.
- A fine-tooth comb for creating clean sections and ensuring hair is smooth before cutting.
- A wide-tooth comb for detangling without causing breakage, especially important for curly or textured hair.
- Multiple sectioning clips or hair clamps to keep hair separated and organized while you work on different areas.
Preparation Materials
- A spray bottle filled with clean water to keep hair damp throughout the cutting process for better precision.
- Hair ties or elastics to create ponytails when using certain layering techniques.
- A handheld mirror in addition to your main mirror to check the back and sides of your head.
- A cape or old towel to drape over your shoulders and catch falling hair for easier cleanup.
- Good lighting from multiple angles to ensure you can see clearly what you’re cutting.
- A comfortable chair at the right height so you can maintain good posture while cutting.
3. Preparing Your Hair Before Cutting

Proper preparation is the foundation of a successful home haircut.
Taking time to prepare your hair correctly will make the cutting process smoother and help you achieve more accurate, professional-looking results.
Washing and Conditioning
- Wash your hair with your regular shampoo to remove all dirt, oil, styling products, and buildup that could interfere with cutting.
- Apply conditioner focusing on mid-lengths to ends to make hair more manageable and easier to comb through.
- Rinse thoroughly with lukewarm water to ensure no product residue remains that could affect how scissors glide through hair.
- Gently squeeze excess water from hair using a towel without rubbing vigorously to prevent tangling and damage.
Detangling and Sectioning
- Start detangling from the ends and gradually work your way up to the roots using a wide-tooth comb to prevent breakage.
- Hair should be damp, not soaking wet or completely dry, as damp hair provides the most accurate cutting length.
- Part your hair in your natural part or the style you typically wear so layers fall naturally when finished.
- Divide hair into manageable sections based on the technique you’ll use, typically separating top, sides, and back portions.
- Secure each section with clips positioned away from the area you’ll be cutting first to keep hair organized.
- Check that hair is evenly damp throughout, misting any sections that have dried with your spray bottle.
4. The Ponytail Method for Easy Layering

The ponytail method is one of the simplest and most foolproof techniques for cutting layers at home, making it perfect for beginners.
This approach creates long, flowing layers throughout your hair with minimal risk of major mistakes.
Setting Up the Ponytail
- Flip your head upside down and brush all hair forward toward your forehead to gather it at the crown of your head.
- Create a high ponytail positioned at the very top of your head, securing it tightly with a hair elastic.
- The ponytail should be centered and positioned where you would place a unicorn horn for the most balanced layers.
- Smooth out any bumps in the ponytail by running your comb through it while ensuring the elastic is secure.
- Make sure all hair is captured in the ponytail without any sections left out that could create unevenness.
Cutting the Layers
- Hold the ponytail straight up perpendicular to your head with one hand, keeping tension firm and consistent.
- Slide your fingers or a hair tie down the ponytail to the point where you want your shortest layer to end.
- Cut straight across the ponytail at your desired length, keeping scissors parallel to the floor for even layers.
- Make small, careful snips rather than one large cut to ensure you don’t remove more length than intended.
- After cutting, release the ponytail and shake out your hair to see how the layers fall naturally.
- Check for symmetry by looking at both sides in the mirror and making small adjustments if needed.
5. The Twist and Cut Technique for Textured Layers
The twist and cut method offers more control and creates beautifully textured layers that work especially well for medium to thick hair.
This technique allows you to customize the amount of layering in different sections of your hair.
Sectioning for the Twist Method
- Divide your hair into four main sections: left side, right side, back left, and back right quadrants.
- Clip up three sections securely while you work on the first section to prevent confusion and maintain organization.
- Start with a front section as it’s easier to see and will give you confidence before moving to the back.
- Take a vertical subsection of hair about 1-2 inches wide from the section you’re working on.
Executing the Twist Cut
- Hold the subsection of hair straight out from your head at a 90-degree angle with tension.
- Twist the hair section tightly several times until it forms a rope-like shape that reveals the natural taper.
- Decide how much length you want to remove, typically starting conservatively with just an inch or two.
- Use your scissors to point cut into the twisted section at your desired length, angling the scissors diagonally.
- Make multiple small snips rather than one straight cut to create texture and softness in the layers.
- Untwist the hair and check the layer before moving to the next adjacent section.
- Repeat this process throughout all four sections, maintaining consistent tension and twist tightness for uniform results.
- Use the previously cut section as a guide for the next section to ensure layers blend seamlessly together.
6. Face-Framing Layers for Flattering Results

Face-framing layers are shorter pieces at the front of your hair that highlight your facial features and create a polished, intentional look.
These strategic layers can make your entire haircut appear more professional and customized to your face shape.
Identifying Your Face Shape and Ideal Layer Placement
- Oval faces can wear face-framing layers at virtually any length from cheekbone to chin level.
- Round faces benefit from longer face-framing layers starting below the chin to create length and elongate the face.
- Square faces look best with soft, wispy layers starting at the jawline to soften angular features.
- Heart-shaped faces are flattered by layers that begin at the cheekbone to balance a wider forehead with a narrower chin.
- Long faces should opt for layers around the cheekbone to add width and break up vertical length.
Cutting Face-Framing Layers
- Part your hair down the middle or in your natural part to ensure symmetrical face-framing on both sides.
- Pull forward a triangular section from your part line toward your ear, about 1-2 inches wide at the hairline.
- Comb this section smooth and hold it with slight tension in front of your face where you want the layer to end.
- Position your scissors at an angle pointing diagonally downward to create a soft, graduated effect rather than a blunt line.
- Cut conservatively at first, remembering you can always cut more but cannot add length back immediately.
- Release the hair and check how it falls naturally before making any additional adjustments.
- Repeat the exact process on the opposite side, using the first side as a guide for matching length.
- Blend the face-framing layers into the rest of your hair by taking slightly longer sections behind them and cutting to connect.
7. Layering Techniques for Different Hair Types
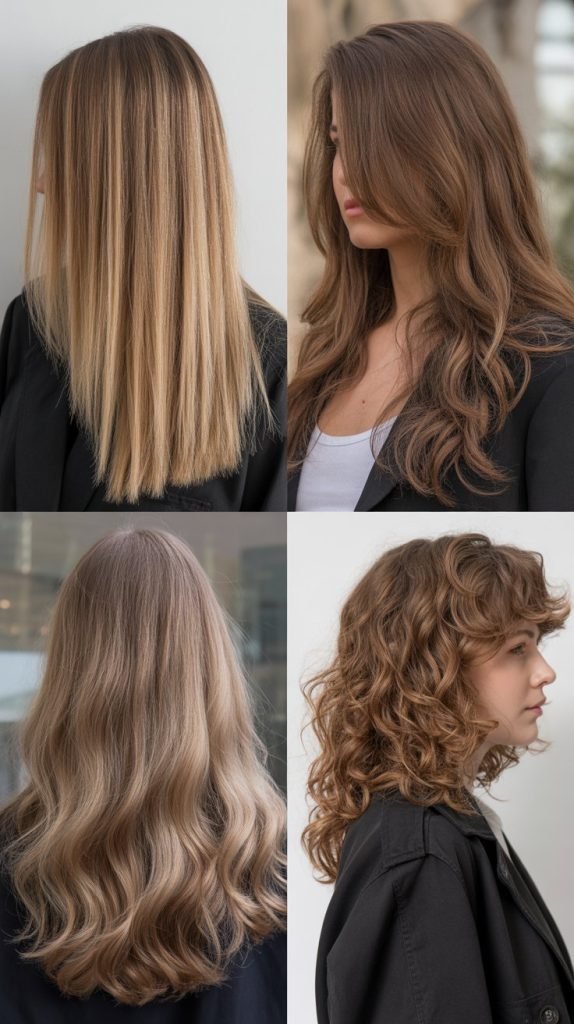
Each hair type has unique characteristics that require specific approaches to layering for the best results.
Understanding your hair texture and adjusting your technique accordingly is crucial for achieving layers that enhance rather than fight your natural hair.
Layering Straight Hair
- Straight hair shows every cutting line clearly, so precision and clean cuts are absolutely essential for polished results.
- Use the point-cutting technique by holding scissors vertically and snipping into the ends to soften harsh lines.
- Cut hair when it’s slightly damp to see the true length, as straight hair doesn’t shrink significantly when it dries.
- Create more layers on top to add volume since straight hair tends to lie flat without natural lift.
- Check your work frequently from all angles as mistakes and unevenness are highly visible in straight textures.
Layering Wavy Hair
- Wavy hair has natural movement that helps disguise small imperfections, making it more forgiving for home cutting.
- Cut hair when it’s damp and stretched to its wave pattern to account for how it will spring back when dry.
- Focus on removing weight from the interior layers to enhance wave definition and prevent a triangular shape.
- Use a combination of point cutting and slide cutting to maintain the flowing nature of waves without creating choppy sections.
- Consider cutting wavy hair when dry if your waves are very defined, cutting each wave pattern individually for custom results.
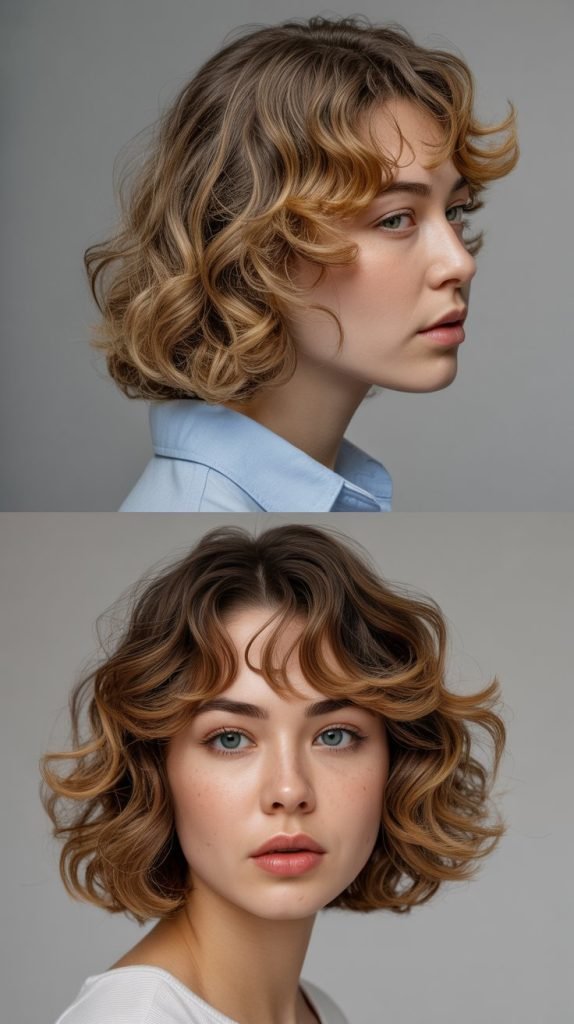
Layering Curly and Coily Hair
- Curly hair should ideally be cut when completely dry so you can see the true curl pattern and how layers will fall.
- Account for significant shrinkage by cutting much longer than your desired final length, often 2-3 inches longer depending on curl tightness.
- Never cut curly hair in a ponytail method as it can create pyramid shapes and unbalanced proportions.
- Cut curl by curl, following the natural spiral pattern and removing weight from underneath rather than length from ends.
- Use extremely sharp scissors to avoid snagging and creating frizz that damages the curl structure.
- Layer curly hair by taking horizontal sections and cutting at an angle to maintain shape while adding dimension.
8. How to Check and Fix Uneven Layers

Even with careful cutting, layers might turn out slightly uneven, especially when you’re cutting your own hair and can’t see all angles simultaneously.
Knowing how to assess and correct unevenness will save your haircut and build your confidence.
Checking Your Layers Systematically
- Allow your hair to dry completely in its natural state before making final judgments about layer placement and evenness.
- Stand in front of your primary mirror and use a handheld mirror to check the back and sides from multiple angles.
- Part your hair down the middle and pull equal sections from each side forward to compare their length visually.
- Take small sections from corresponding spots on each side and hold them together to check if they match exactly.
- Look for any obvious gaps, choppy areas, or sections that stick out awkwardly from the overall shape.
- Check your layers in different lighting conditions as natural daylight often reveals issues that artificial light hides.
Correcting Common Problems
- If one side is noticeably shorter than the other, carefully trim the longer side to match rather than continuing to cut both sides.
- Use the shortest section as your guide and blend other areas to match, working conservatively to avoid removing too much length.
- For choppy or disconnected layers, use thinning shears to soften transitions between different lengths and create better blending.
- If layers are too short on top, you’ll need to wait for regrowth, but you can blend them better by point-cutting the surrounding hair.
- Overly bulky areas can be addressed with thinning shears or by removing more interior weight without affecting overall length.
- When a layer doesn’t blend smoothly, take vertical sections and point-cut into the problematic area to create gradual transitions.
- If you’re unsure about a fix, make minimal adjustments and live with the style for a few days before cutting more.
9. Styling and Maintaining Your New Layers

After successfully cutting layers at home, proper styling and maintenance will keep your hair looking its best and help the layers grow out gracefully.
The right care routine extends the life of your haircut and maximizes its flattering effects.
Styling Tips for Layered Hair
- Apply a volumizing mousse or lightweight styling cream to damp hair before blow-drying to enhance the dimension layers create.
- Use a round brush while blow-drying to lift layers at the roots and create movement throughout the length.
- Direct the airflow downward along the hair shaft to smooth the cuticle and add shine while maintaining volume.
- Consider using a diffuser attachment when air-drying wavy or curly layered hair to enhance natural texture without frizz.
- Hot tools like curling irons and straighteners work beautifully with layers, allowing you to emphasize or minimize the layered effect.
- Experiment with different parting positions as layers look different depending on how you distribute the hair.
Maintaining Your Layers Between Cuts
- Trim your ends every 6-8 weeks to prevent split ends from traveling up the hair shaft and ruining your layer definition.
- Focus on maintaining the overall shape rather than trying to maintain exact lengths as hair grows at different rates.
- Use a deep conditioning treatment weekly to keep layers looking healthy and prevent the dryness that makes layers appear scraggly.
- Protect your hair from heat damage with a thermal spray before using hot styling tools to preserve the integrity of your layers.
- Sleep on a silk or satin pillowcase to reduce friction that can cause frizz and disrupt the smooth flow of layers.
- Touch up face-framing layers more frequently as they grow out faster and their placement is most noticeable around your face.
- Keep your hair-cutting tools clean and sharp so they’re ready for maintenance trims without damaging your hair.
10. Common Mistakes to Avoid When Cutting Layers
Learning what not to do is just as important as learning the correct techniques when cutting your own hair.
Avoiding these common pitfalls will help you achieve better results and prevent haircut disasters that require professional correction.
Technical Cutting Errors
- Never cut your hair when it’s completely dry unless you have curly hair, as dry straight or wavy hair is harder to control and cut evenly.
- Avoid using dull or household scissors that crush hair strands instead of cleanly cutting them, leading to split ends and damage.
- Don’t cut too much length at once, as removing just one inch initially allows you to assess and adjust before committing to shorter layers.
- Resist the urge to cut hair vertically straight down, which creates blunt, harsh lines rather than the soft blending layers require.
- Never cut layers on dirty or product-filled hair as buildup affects how hair falls and can lead to uneven results.
- Avoid cutting in poor lighting conditions where you can’t clearly see what you’re doing and might miss uneven sections.
Planning and Judgment Mistakes
- Don’t skip sectioning your hair properly, as trying to cut everything at once leads to confusion and inconsistent layer placement.
- Resist cutting layers when you’re emotional, tired, or rushed, as these mental states lead to impulsive decisions and poor judgment.
- Never copy a celebrity’s layered haircut without considering whether it suits your face shape, hair type, and maintenance commitment.
- Avoid assuming your hair will behave the same as tutorial videos show, as hair texture differences dramatically affect results.
- Don’t forget to account for shrinkage in wavy and curly hair, which can make layers appear much shorter than anticipated when dry.
- Never continue cutting if you feel unsure or overwhelmed, as it’s better to stop and seek professional help than create a major mistake.
- Resist the temptation to “fix just one more thing” repeatedly, as this leads to cutting too much length and creating choppy results.
Recovery Tips If Things Go Wrong
- If you cut too much, focus on styling techniques that add volume and texture to disguise the shorter length while it grows.
- Use bobby pins, headbands, or small clips to secure awkward shorter layers away from your face during the grow-out phase.
- Consider getting a professional consultation to assess the damage and determine the best path forward for correction.
- Apply protein treatments and regular deep conditioning to keep hair healthy and growing at its optimal rate for faster recovery.
Conclusion
Mastering the art of cutting your own hair in layers at home is an empowering skill that saves money, time, and gives you complete creative control over your appearance.
By understanding the fundamentals of layering, gathering the right tools, and following proven techniques like the ponytail method or twist-and-cut approach, you can achieve beautiful, dimensional results that rival professional salon work.
Remember to always start conservatively, cutting less length than you think you need since you can always trim more but cannot instantly add length back.
With practice, patience, and attention to detail, this Step-by-Step Guide: How to Cut Your Own Hair in Layers at Home will help you develop the confidence and expertise to maintain gorgeous layered hair whenever you choose, transforming your relationship with your hair and your self-care routine.
Whether you have straight, wavy, curly, or coily hair, the techniques and insights shared here will guide you toward successful at-home layering that enhances your natural beauty and personal style.