Creating stunning Fulani braids in the comfort of your own home is an achievable goal that can save you hundreds of dollars while giving you complete creative control over your hairstyle.
This comprehensive guide will walk you through every step of the process, from understanding the cultural significance and unique characteristics of Fulani braids to mastering the intricate techniques required for professional-looking results.
You’ll discover essential tools, preparation methods, step-by-step braiding instructions, and finishing touches that transform your natural hair into a work of art.
Whether you’re a complete beginner or someone looking to refine your braiding skills, this article provides detailed instructions for creating authentic Fulani braids with their signature center parts, cornrows, and decorative elements.
By the end of this guide on “How to Do Fulani Braids at Home on Yourself,” you’ll have the confidence and knowledge needed to create this beautiful protective style that celebrates African heritage while providing versatile, low-maintenance hair care for weeks to come.
1. Understanding Fulani Braids History and Characteristics
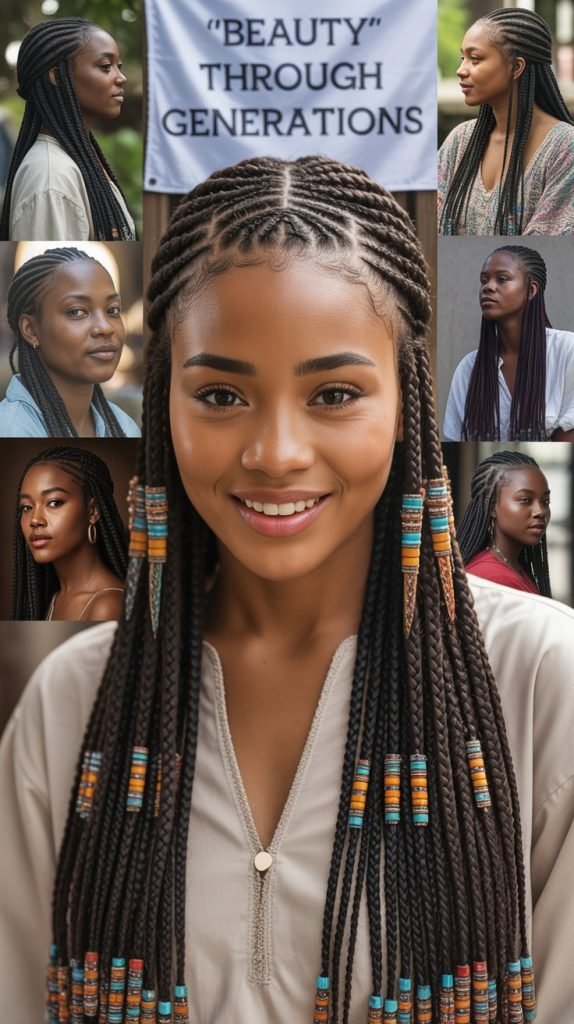
Fulani braids represent a rich cultural tradition originating from the Fulani people of West and Central Africa, featuring distinctive patterns that combine cornrows, individual braids, and decorative elements.
Understanding these cultural roots and traditional characteristics ensures you create authentic styles while honoring the heritage behind this beautiful protective hairstyle.
- Fulani braids originated from the nomadic Fulani people who traveled across West and Central Africa
- The traditional style features a distinctive center part with cornrows braided toward the back
- Signature elements include thin braids framing the face and decorative beads or cowrie shells
- The style traditionally signified social status, age, and marital status within Fulani communities
- Modern interpretations maintain core elements while allowing for personal creativity and adaptation
- The protective nature of the style helped preserve hair health during long journeys across harsh terrains
- Understanding cultural significance promotes respectful appreciation rather than appropriation
- Traditional patterns often incorporated geometric designs that held spiritual and cultural meaning
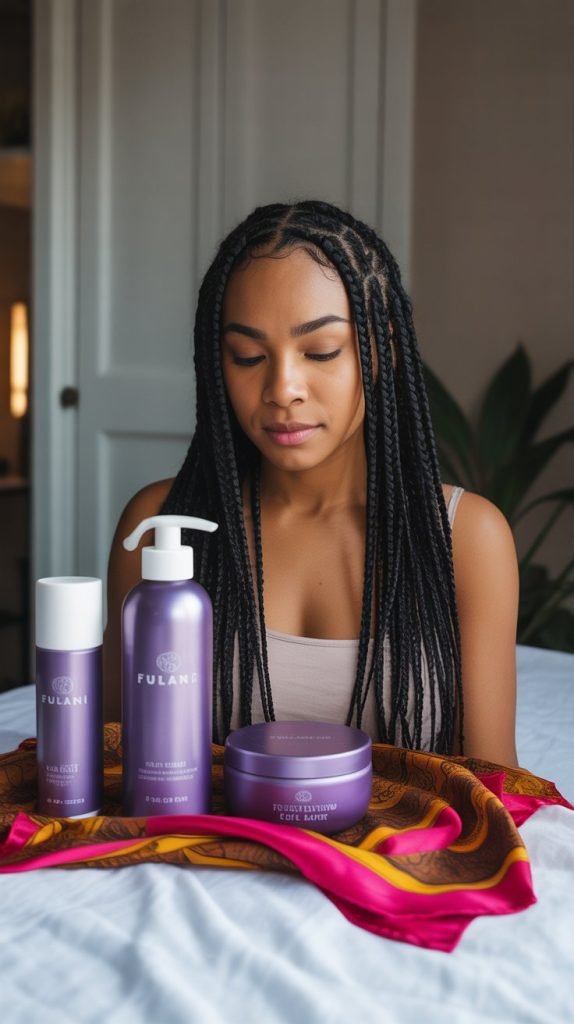
2. Essential Tools and Materials Needed
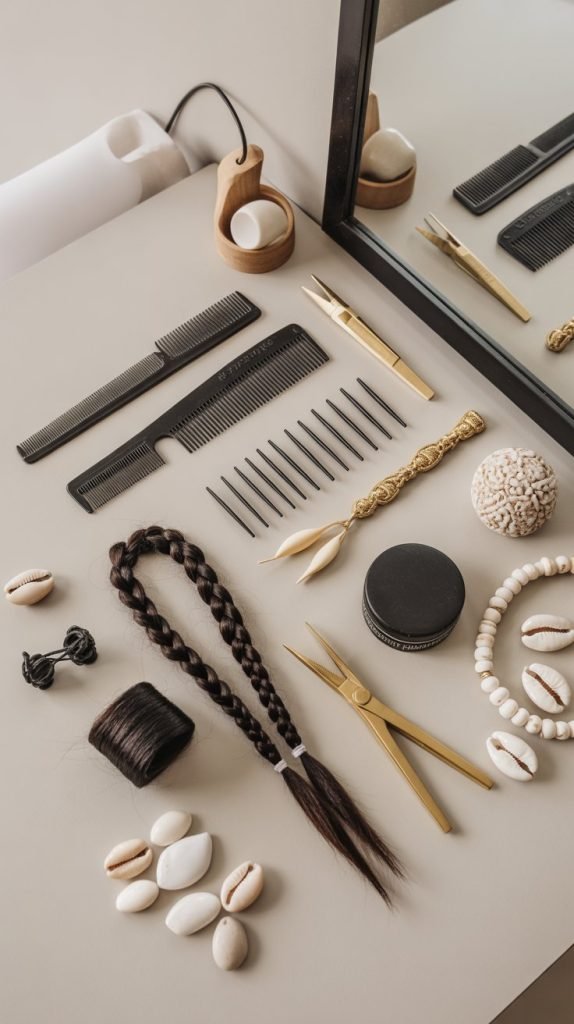
Gathering the proper tools and high-quality materials before beginning ensures your DIY Fulani braids will look professional and last for weeks without premature loosening or damage.
Investing in quality supplies makes the braiding process smoother and produces superior long-term results.
- Rat-tail comb for creating precise parts and sectioning hair with clean lines
- Small hair clips or rubber bands for keeping sectioned hair organized during braiding
- High-quality braiding hair extensions in desired colors and textures
- Decorative beads, cowrie shells, or hair cuffs for authentic Fulani styling elements
- Edge control or strong-hold gel for maintaining smooth hairlines and clean parts
- Large handheld mirror plus wall mirror for checking all angles during self-braiding
- Hair moisturizer or leave-in conditioner for pre-braiding hair preparation
- Bobby pins for securing loose ends and maintaining neat finishing touches
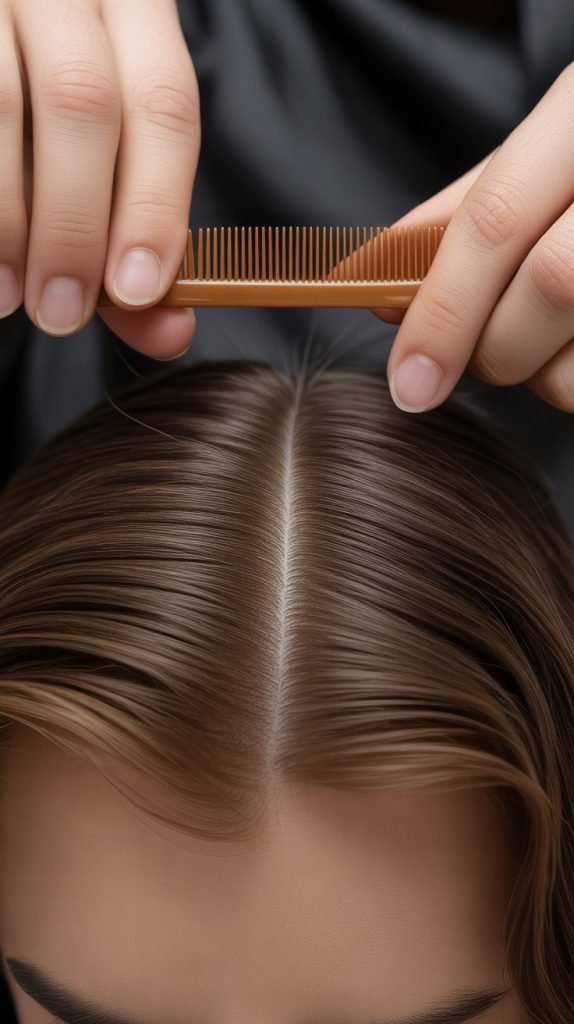
3. Hair Preparation and Sectioning Techniques
Proper hair preparation creates the foundation for long-lasting Fulani braids while ensuring your natural hair remains healthy throughout the protective styling period.
Thorough preparation and strategic sectioning determine the overall appearance and longevity of your finished style.
- Start with freshly washed and deep-conditioned hair to ensure optimal cleanliness and moisture
- Apply leave-in conditioner throughout damp hair to provide protection during the braiding process
- Create the signature center part running straight from forehead to nape of neck
- Section hair into geometric patterns that will accommodate both cornrows and individual braids
- Use the rat-tail comb to ensure all parts are straight and evenly spaced for symmetrical results
- Clip each sectioned area to prevent tangling and maintain organization while working
- Test your sectioning pattern before applying products to ensure the design works with your head shape
- Allow hair to be slightly damp but not wet for easier manipulation and better hold
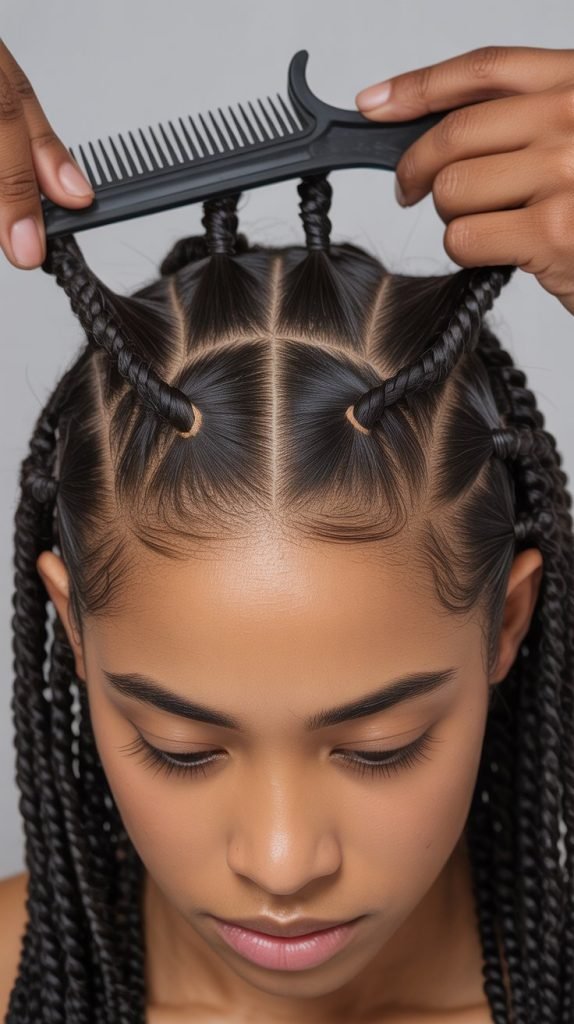
4. Creating the Signature Center Part and Framework
The distinctive center part serves as the foundation of authentic Fulani braids and requires precision to achieve the clean, symmetrical appearance characteristic of this traditional style.
Mastering this fundamental element ensures your DIY braids will have professional-quality structure and visual impact.
- Begin the center part at your natural hairline using the pointed end of your rat-tail comb
- Draw a straight line from your forehead back to the crown area, maintaining consistent width
- Ensure the part is perfectly centered by measuring equal distances from each ear
- Apply edge control along the part line to keep hair smooth and prevent flyaways
- Create horizontal sections perpendicular to the center part for organized cornrow placement
- Mark where cornrows will begin and end to maintain consistent pattern placement
- Use clips to separate the center part section from side sections during initial setup
- Double-check part placement from multiple angles before proceeding with braiding
5. Cornrow Foundation Techniques
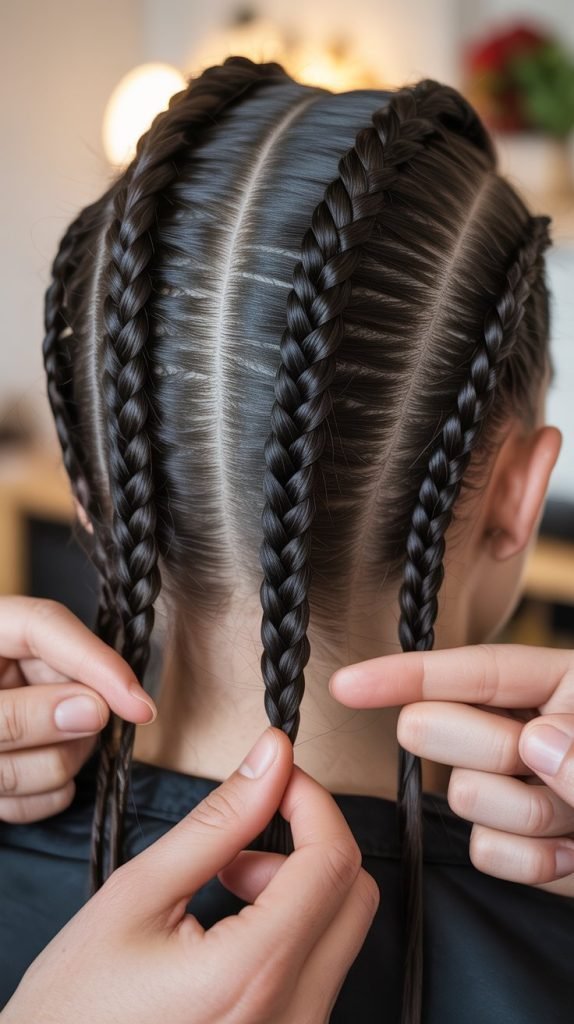
Mastering cornrow techniques forms the structural backbone of Fulani braids, requiring steady hands and consistent tension to create the smooth, flat braids that characterize this traditional style.
These foundational skills determine the overall quality and longevity of your finished Fulani braids.
- Start each cornrow by dividing the sectioned hair into three equal strands at the hairline
- Maintain consistent tension throughout the braiding process to ensure uniform appearance
- Braid close to the scalp by picking up small amounts of hair with each cross-over motion
- Keep your grip firm but not tight to prevent scalp discomfort and hair breakage
- Practice the under-and-over weaving motion until it becomes smooth and automatic
- Ensure each new section of hair added is roughly the same size for consistent braid thickness
- Work systematically from one side of the head to the other to maintain pattern symmetry
- Secure the end of each cornrow temporarily while working on adjacent sections
6. Individual Braid Creation and Extension Integration
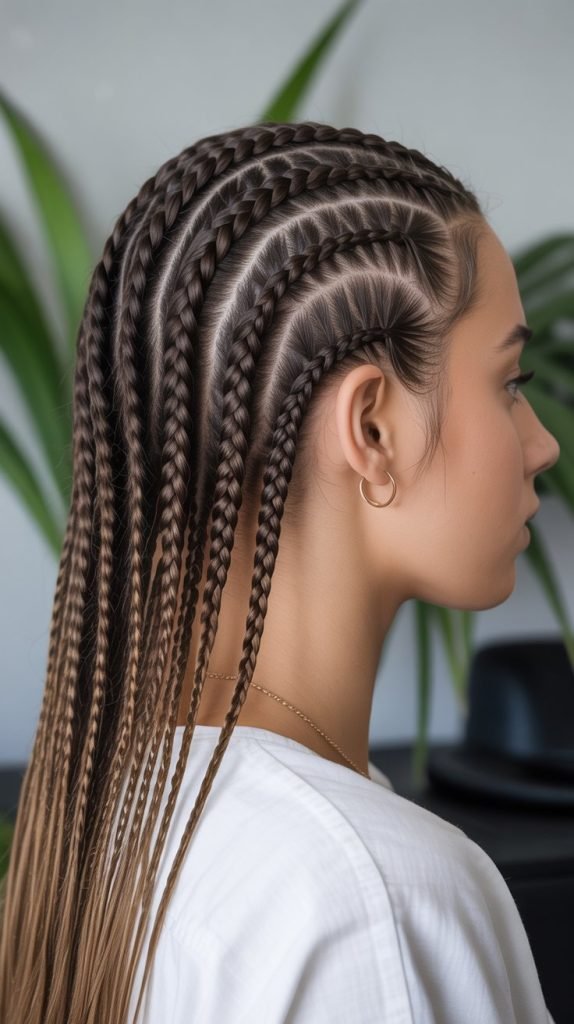
Individual braids provide texture contrast and styling versatility within the Fulani braid framework, requiring different techniques than cornrows for seamless extension integration.
These braids typically frame the face and add movement to the overall style while maintaining the protective benefits of the hairstyle.
- Begin individual braids with only your natural hair for the first few crosses
- Gradually incorporate extension hair in small amounts to avoid bulk at the root
- Match extension texture and color as closely as possible to your natural hair
- Maintain consistent braid thickness by monitoring the amount of hair in each section
- Create face-framing braids that complement your facial features and bone structure
- Vary braid thickness slightly for a more natural, organic appearance
- Secure extension hair properly to prevent slipping or loosening over time
- Test braid tension regularly to ensure comfort without compromising hold
7. Bead and Accessory Placement Techniques
Strategic placement of beads, cowrie shells, and other traditional accessories transforms basic Fulani braids into authentic cultural expressions while adding personal style elements.
Proper accessory application requires specific techniques to ensure secure attachment and visual balance throughout the hairstyle.
- Select beads and accessories that complement your personal style while respecting cultural traditions
- Thread beads onto braids while hair is still slightly damp for easier manipulation
- Space accessories evenly throughout the hairstyle to create visual balance and rhythm
- Secure beads by creating small knots above and below each one to prevent sliding
- Choose bead sizes that accommodate your braid thickness without causing stress or breakage
- Consider the weight of accessories to prevent strain on individual braids over time
- Mix different textures and materials like wood, metal, and shells for dimensional interest
- Document your accessory placement pattern for consistent recreation in future styles
8. Troubleshooting Common DIY Challenges
Self-braiding presents unique challenges that require specific problem-solving strategies to achieve professional-quality results at home.
Understanding common issues and their solutions helps you navigate difficulties while maintaining motivation throughout the lengthy braiding process.
- Uneven parts can be corrected by dampening hair and re-combing with steady, measured strokes
- Loose braids often result from inconsistent tension and can be prevented with practice and awareness
- Hand fatigue during long braiding sessions requires regular breaks and hand stretching exercises
- Mirror positioning challenges can be solved with multiple mirror setups and good lighting
- Extension color matching issues may require blending multiple shades for natural appearance
- Scalp soreness indicates excessive tension and requires immediate loosening of tight braids
- Flyaway hairs can be smoothed with edge control applied with a small brush or fingers
- Braid size inconsistencies can be minimized through careful sectioning and constant monitoring
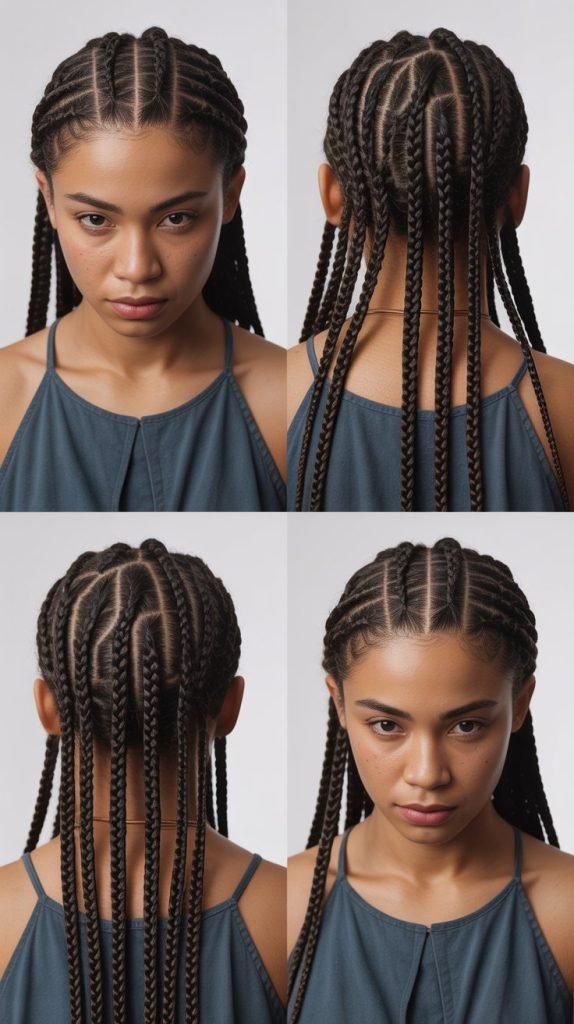
9. Finishing Touches and Style Refinement

Professional finishing techniques elevate DIY Fulani braids from amateur attempts to salon-quality results, requiring attention to detail and specific refinement methods.
These final steps ensure your braids look polished and will photograph beautifully while maintaining their structure over time.
- Trim any uneven extension ends to create clean, uniform braid lengths throughout
- Apply lightweight oil or serum to add shine and reduce any remaining frizz or flyaways
- Smooth baby hairs and edges with a small brush and strong-hold edge control
- Check all braid tension one final time to ensure comfort without compromising security
- Take photos from multiple angles to assess overall symmetry and make necessary adjustments
- Gently tug at cornrows to create slight looseness if initial braiding was too tight
- Style face-framing braids to complement your facial features and desired overall look
- Document your process and results for reference during future self-braiding sessions
10. Maintenance and Longevity Tips
Proper maintenance routines extend the life of your DIY Fulani braids while keeping your scalp healthy and your style looking fresh for weeks.
Establishing good care habits from the first day ensures you maximize your investment in time and materials while protecting your natural hair underneath.
- Sleep with a silk or satin scarf to reduce friction and prevent frizz development
- Cleanse your scalp weekly using a diluted shampoo applied with a spray bottle
- Moisturize your scalp every few days with lightweight oils applied directly to the roots
- Avoid heavy products that can cause buildup and attract dirt to your braids
- Gently massage your scalp to promote circulation and prevent itching or irritation
- Touch up edges and baby hairs weekly to maintain the crisp, fresh appearance
- Monitor individual braids for loosening and re-braid sections as needed
- Plan for professional maintenance every 6-8 weeks to assess hair health and style longevity
Learning “How to Do Fulani Braids at Home on Yourself” opens up a world of creative possibilities while connecting you to rich cultural traditions that span centuries of African heritage.
The techniques and strategies outlined in this comprehensive guide provide you with the foundation needed to create stunning protective styles that rival professional salon work while saving significant money and time.
Remember that mastering this skill requires patience, practice, and self-compassion as you develop the muscle memory and precision needed for consistently beautiful results.
With dedication and the detailed instructions provided here, you’ll soon be creating gorgeous Fulani braids that not only protect and nourish your natural hair but also serve as a beautiful expression of cultural appreciation and personal style that you can wear with pride and confidence.