Creating a low bun hairstyle is easier than you think. It’s chic, timeless, and perfect for any occasion.
If you’re looking for an elegant hairstyle that’s simple to achieve, you’re in the right place.
The low bun is a versatile look that works for casual days and special events alike.
It keeps your hair neat and stylish with minimal effort.
Whether you have long or medium-length hair, you can master this look with just a few steps.
No need for fancy tools or a trip to the salon.With our easy guide, you’ll be able to create a polished low bun in no time.
Ready to transform your hair?Let’s get started on this stylish journey together.
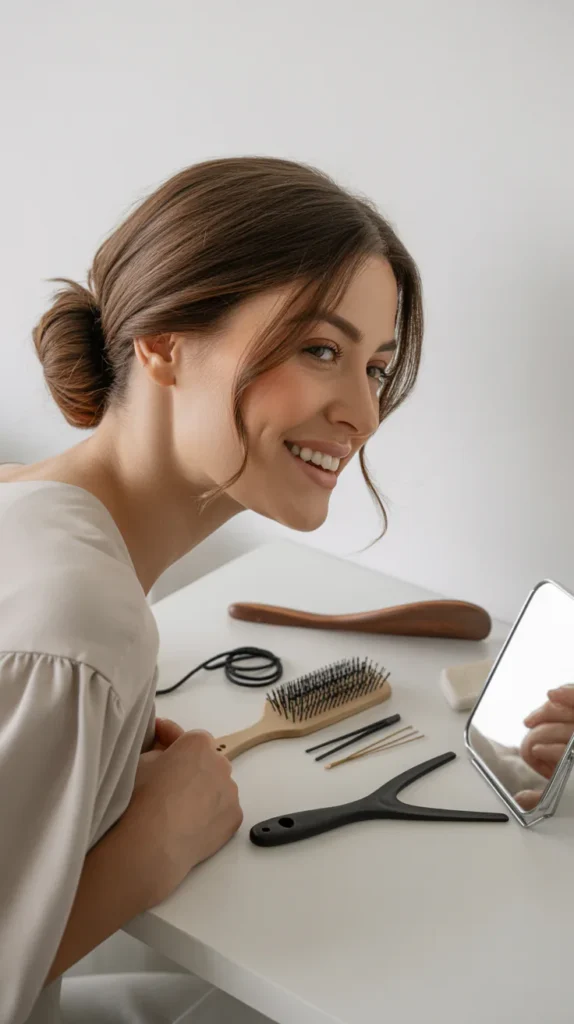
Gather Your Tools
Hey friends, today I’ll walk you through a simple and elegant low bun hairstyle.
But first, let’s talk about the tools you need.
Getting your tools ready before you start is like setting the table before a meal.
It makes everything smoother and more enjoyable.
So, let’s gather what you need to create that perfect low bun!
Essential Items
Before you start, make sure you have these must-have items.
Trust me, they make a big difference:
- Hair Brush or Comb: To detangle and smooth out your hair.
- Hair Tie: To secure your ponytail.
- Bobby Pins: To hold the bun in place.
- Hairspray: To keep everything neat and tidy.
Optional Accessories

Want to add a bit of flair?
Consider these optional accessories.
They can turn a simple bun into a fancy updo:
- Decorative Pins: Great for adding a touch of elegance.
- Hair Donut: Helps to create a fuller-looking bun.
- Headbands: To add style and keep flyaways in check.
Having these tools ready will save you time and frustration.
Plus, it ensures your low bun looks polished and professional.
Now that you have your tools, you’re ready to move on to the next step.
Let’s get started on creating that beautiful low bun!
Prepare Your Hair

Hey there! Getting ready to rock a stylish low bun?
Great choice!
But first, we need to prepare your hair.
This step is super important.
It ensures your low bun looks sleek and stays put all day.
Let’s dive into the preparation process, shall we?
Brush Thoroughly
First things first, grab your favorite hairbrush.
It’s time to brush your hair thoroughly.
This step removes any tangles and knots.
It makes your hair smooth and easy to work with.
If you skip this part, your bun might look messy.
And not the good kind of messy.
So, brush from the roots to the tips.
Take your time.
Make sure every strand is tangle-free.
I remember once, I skipped brushing in a hurry.
Big mistake!
My bun looked bumpy and uneven.
Trust me, you don’t want that.
Apply Hair Products

Now, let’s talk about hair products.
They can be your best friend for this hairstyle.
Applying the right products can help keep your bun in place and give it a polished look. Here are a few essentials:
- Hair Serum: If your hair is frizzy, a few drops of serum can tame those flyaways.
- Hairspray: A light spritz will keep everything in place.
- Don’t overdo it though!
- Texturizing Spray: If your hair is too silky, a texturizing spray can add some grip.
- This makes it easier to style.
When I first started styling my hair, I didn’t know about these products.
My buns would fall apart in a couple of hours.
But with the right products, my bun now lasts all day!
Preparing your hair is like setting the foundation for a building.
If the foundation is weak, the building won’t stand strong. So take your time with these steps.
You’ll thank yourself later when your bun looks fabulous and stays in place.
Now that your hair is prepped and ready, let’s move on to the fun part – creating the low bun!
Create A Low Ponytail
Creating a low ponytail is the foundation of a stunning low bun hairstyle.
This step ensures your hair is neat and tidy, making it easier to form a smooth bun.
Follow these simple steps to create the perfect low ponytail.
Positioning The Ponytail

Start by brushing your hair to remove any tangles.
Make sure your hair is smooth and free of knots.
Then, gather your hair at the nape of your neck.
Keep it low for a sleek look.
You can use a comb to make it even smoother.
Hold the gathered hair with one hand.
Securing With An Elastic
Take an elastic band with your free hand.
Wrap the elastic around the gathered hair.
Make sure it is tight but not too tight.
You want it to hold the hair securely.
This keeps the ponytail in place and prevents it from slipping.
Adjust the position if needed.
Your low ponytail is now ready for the next steps of creating a low bun.
Twist The Ponytail
Mastering a low bun hairstyle can add elegance to your look.
One key step in achieving this style is twisting the ponytail.
This process is simple yet adds a sophisticated touch to the final bun.
Below, we will break down the steps to twist the ponytail effectively.
Starting The Twist
Begin with a neat, low ponytail.
Use a comb to smooth out any bumps.
Hold the ponytail firmly at the base with one hand.
With your other hand, start twisting the ponytail from the base.
Make sure to twist in one direction only.
Keep the twist tight and uniform.
Securing The Twist
Once you have twisted the entire ponytail, wrap it around the base.
Form a bun shape by coiling the twisted hair.
Use bobby pins to secure the bun in place.
Insert the pins in a cross pattern for better hold.
Finally, spray some hairspray to ensure the bun stays intact.
Your low bun with a twist is now ready!
Form The Bun
Forming a low bun can seem tricky, but it’s quite simple.
Follow these steps to achieve a sleek and stylish low bun.
The process involves wrapping the twist and tucking the ends neatly.
Let’s dive into the details.
Wrapping The Twist
First, gather your hair into a low ponytail at the nape of your neck.
Secure it with a hair tie.
Next, twist the ponytail gently.
Make sure to twist it firmly but not too tight.
This will create a neat base for your bun.
Once twisted, start wrapping the twisted ponytail around the base of the hair tie.
Continue wrapping until you reach the end of the twist.
Tucking The Ends
After wrapping the twist, you will have some loose ends.
Tuck these ends under the bun to hide them.
Use bobby pins to secure the tucked ends in place.
Make sure the pins are not visible.
Adjust the bun to ensure it looks even and smooth.
Spray a little hairspray to keep the bun in place all day.
Now, you have a beautiful low bun!
Secure The Bun

Hey friends, today we’re going to learn how to secure a low bun.
You’ve already done the hard part by forming the bun, but making sure it stays in place is just as important.
Let’s get into it!
Using Bobby Pins
Bobby pins are your best friend when it comes to securing a low bun.
They are small but mighty.
Here’s how to use them:
- Take a bobby pin and slide it into the bun.
- Make sure it goes through the bun and touches your scalp.
- Use another bobby pin to cross over the first one.
- This creates an ‘X’ shape that holds the bun firmly.
- Continue adding bobby pins around the bun. Focus on the areas that feel loose.
Remember to use enough bobby pins to make your bun feel secure.
But don’t overdo it.
Too many pins can make your bun look messy.
Adjusting For Tightness
Now that your bun is pinned, it’s time to adjust it for tightness.
This step is crucial to ensure your bun stays put all day.
- Gently tug on the bun to check its stability. If it feels loose, add more bobby pins.
- If your bun feels too tight, remove a bobby pin or two.
- Comfort is key.
- Look in the mirror and adjust any flyaways.
- Use hairspray if needed to keep everything in place.
Adjusting the tightness is like tuning a guitar.
You want it to be just right, not too loose, not too tight.
And there you have it! Securing your low bun is simple with these easy steps.
Whether you’re heading to work or a special event, your bun will stay in place, looking fabulous all day long.
Remember, practice makes perfect.
Don’t be discouraged if it takes a few tries to get it right.
Happy hairstyling!
Add Finishing Touches

Hey friends, you’ve made it this far with your low bun hairstyle.
Great job! Now, it’s time to add the finishing touches.
This step is crucial because it can make your hairstyle last longer and look more polished.
Let’s dive into how you can perfect your low bun with two simple steps: applying hair spray and adding accessories.
Hair Spray Application
Hair spray is like the cherry on top of your hairstyle.
It helps to keep every strand in place and gives your hair a nice shine.
Here’s how you can do it:
- Grab your favorite hair spray.
- If you’re not sure which one to use, go for a medium-hold spray.
- It’s flexible but strong enough to keep your bun intact.
- Hold the can about 12 inches away from your head.
- This distance helps to evenly distribute the spray.
- Lightly mist your entire head, focusing on the bun and any loose strands.
- For extra hold, spray a bit more on the areas that tend to frizz or come loose.
And that’s it! You’ve just locked in your hairstyle.
This step will help your bun stay neat all day long.
Adding Accessories
Now, let’s talk about adding a bit of flair to your low bun.
Accessories can take your hairstyle from simple to stunning.
Here are some ideas:
- Hairpins: Use decorative hairpins to secure the bun and add a touch of elegance.
- Headbands: A headband can make your hairstyle look more sophisticated.
- Choose one that matches your outfit.
- Scarves: Wrap a colorful scarf around the bun for a chic, bohemian look.
- Flowers: Fresh or faux flowers can add a romantic touch.
- Simply tuck them into the bun.
Adding accessories is all about personal style.
Choose what makes you feel confident and happy.
There you have it! By applying hair spray and adding a few accessories, you can make your low bun look perfect.
Remember, practice makes perfect.
Keep trying, and soon you’ll be a pro at creating this elegant hairstyle.
Tips For Longevity
Hey friends, so you’ve mastered the low bun hairstyle.
But how do you keep it looking fresh all day long?
Don’t worry, I’ve got you covered.
Here are some simple tips to help your low bun look great from morning to night.
Maintaining The Style
First things first, let’s talk about keeping your low bun in shape.
It’s all about the prep work and a few handy tricks:
- Start with clean hair: Freshly washed hair holds styles better.
- Use a good shampoo and conditioner for best results.
- Use a good hair tie: A strong, no-slip hair tie can make a big difference.
- It keeps your bun secure without damaging your hair.
- Secure with pins: Bobby pins are your best friend.
- Use them to tuck in any loose strands and keep everything in place.
- Apply hair spray: A light mist of hair spray can help keep flyaways in check and your style looking neat.
Refreshing Throughout The Day
Now, let’s talk about keeping your low bun looking fresh as the day goes on.
Here are some quick tips:
- Carry a small comb: A quick comb through can help smooth out any frizz or flyaways.
- Re-adjust the bun: If it starts to feel loose, take a moment to re-twist and re-pin.
- It only takes a minute!
- Use a touch of hair spray: Keep a travel-sized hair spray in your bag.
- A quick spritz can do wonders.
- Keep some pins handy: Extra bobby pins can save the day if any strands come loose.
And remember, practice makes perfect.
The more you do it, the quicker and easier it gets. With these simple tips, your low bun will look fabulous all day long. Happy styling!
Conclusion
Creating a low bun is simple and stylish. Follow these seven steps. You’ll have a chic look in minutes.
Perfect for any occasion.Remember to use bobby pins and hairspray.They keep your bun secure.
Practice makes perfect.Soon you’ll do it with ease.Try different variations for fun.
Enjoy your new hairstyle skills.Share this guide with friends. Happy styling!