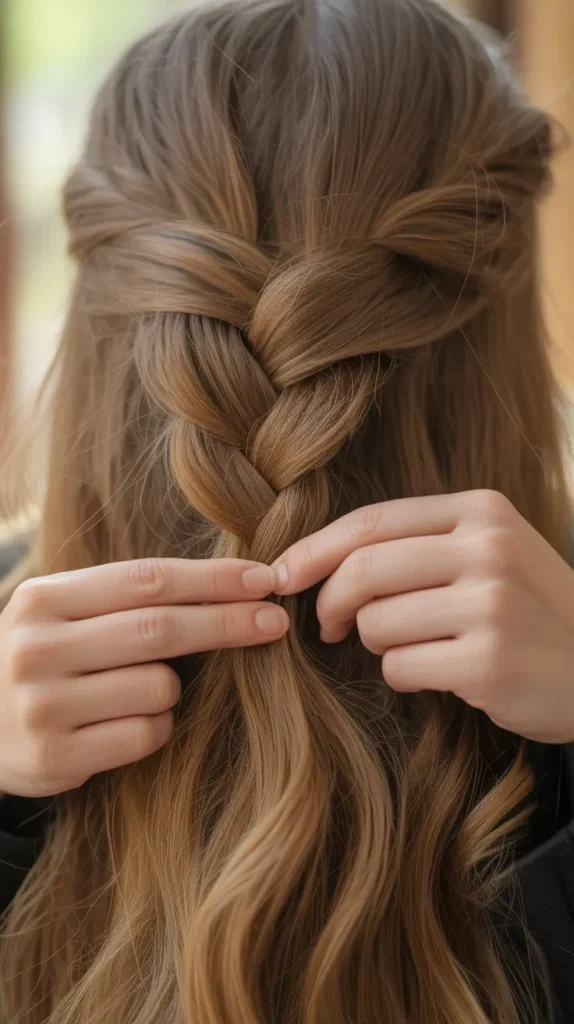
A fishtail braid looks intricate but is surprisingly simple to create. With a bit of practice, you can master this stylish hairdo.
The fishtail braid, also known as the herringbone braid, gives a chic, elegant look that’s perfect for any occasion.
Whether you’re heading to a casual outing or a formal event, this braid adds a touch of sophistication to your style.
Unlike the traditional braid, the fishtail braid involves weaving two sections of hair instead of three.
This technique creates a tighter, more textured appearance.
Don’t worry if it sounds complicated.
With step-by-step guidance, you will soon create a fishtail braid with ease.
Ready to impress with this beautiful braid? Let’s get started!
1. Introduction To Fishtail Braids
Fishtail braids are a stunning yet simple hairstyle. They look intricate but are surprisingly easy to create.
This guide will help you master the fishtail braid. With practice, you’ll be braiding like a pro.
What Is A Fishtail Braid?
A fishtail braid is a type of plait. It creates a woven pattern that resembles a fish’s tail. The braid uses two sections of hair instead of three. This gives it a unique and elegant appearance.
2. Why Choose A Fishtail Braid?
Fishtail braids are versatile. They suit many occasions.
Wear them for casual days or special events.
They add a touch of elegance to any look.
Fishtail braids also work for all hair types.
Straight, curly, or wavy, they look beautiful.
These braids are also practical.
They keep hair neat and tidy. Perfect for busy days.
You can make them tight for a sleek look.
Or, loosen them for a relaxed style.
Fishtail braids offer endless possibilities.
3. Tools And Materials Needed
Creating a perfect fishtail braid starts with gathering the right tools and materials.
Using the right equipment ensures a smooth braiding process and a flawless finish.
Let’s explore what you need to get started.
4. Essential Tools
First, you need a good brush or comb.
This will help detangle your hair.
Smooth hair makes braiding easier and neater.
A hair tie is also necessary.
Use it to secure the end of your braid.
A mirror is helpful, especially if you’re braiding your own hair.
It lets you see your progress and adjust as needed.
5. Optional Accessories
Optional accessories can enhance your fishtail braid.
Hairpins can keep stray hairs in place.
They help maintain a clean look.
Decorative hairpins or beads can add a stylish touch.
They make your braid unique and eye-catching.
A small amount of hair spray can provide extra hold.
It keeps your braid intact throughout the day.
6. Preparing Your Hair
Before you dive into creating a stunning fishtail braid, it’s essential to prepare your hair properly.
This step ensures your braid looks neat and stays in place longer.
Let’s get started with the basics: washing, conditioning, detangling, and brushing your hair.
7. Washing And Conditioning
Clean hair is the foundation of any great hairstyle.
Start by washing your hair with a gentle shampoo.
Make sure to rinse thoroughly to remove all shampoo residue.
Follow up with a good conditioner, focusing on the ends of your hair.
This will add moisture and make your hair easier to manage.
Here’s a quick tip: Use a wide-tooth comb to distribute the conditioner evenly through your hair.
This prevents tangles and ensures every strand gets the care it needs.
8. Detangling And Brushing

After washing and conditioning, it’s time to detangle your hair.
Use a wide-tooth comb or a detangling brush to gently work through any knots.
Start from the ends and gradually work your way up to the roots.
This method reduces breakage and makes the process less painful.
Once your hair is tangle-free, brush it thoroughly. This helps distribute natural oils from your scalp to the rest of your hair, giving it a healthy shine.
Now that your hair is clean, conditioned, detangled, and brushed, you’re ready to move on to the next steps in creating your fishtail braid.
Remember, good preparation is key to achieving that perfect, Instagram-worthy braid!
Sectioning The Hair
Learning how to do a fishtail braid can be a fun and rewarding experience.
This unique braid style is perfect for any occasion, from casual outings to fancy events.
Before you start braiding, it’s essential to section the hair correctly.
This step ensures your braid looks neat and even.
Let’s dive into the process of sectioning the hair.
9. Creating Two Even Sections
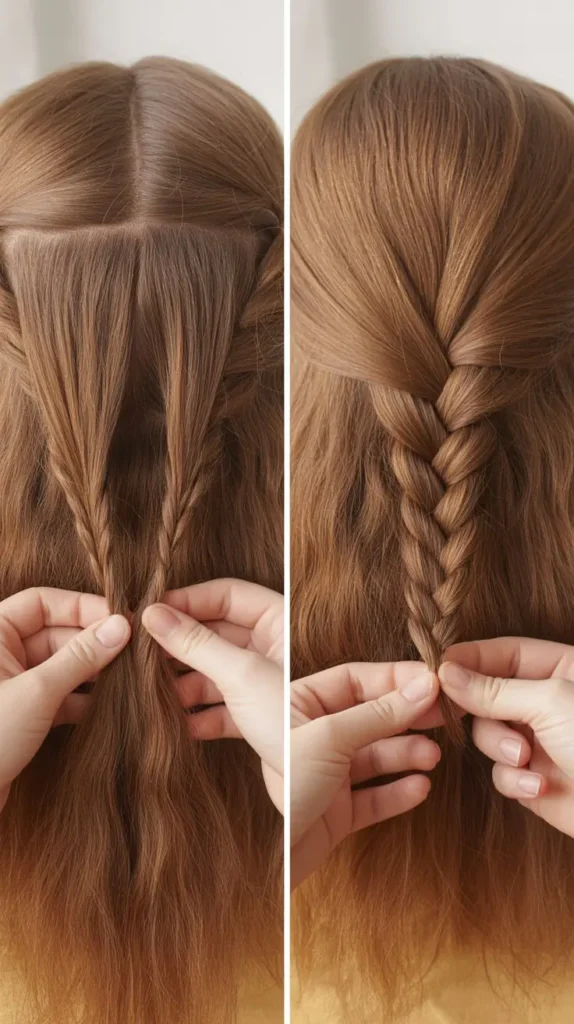
First things first, you need to divide your hair into two even sections.
This is the foundation of your fishtail braid.
- Brush Your Hair: Make sure your hair is tangle-free.
- Use a comb or brush to smooth it out.
- This will make sectioning much easier.
- Use Your Fingers: Part your hair down the middle using your fingers.
- Start from your forehead and go all the way to the back of your head.
- Check for Evenness: Once you have two sections, hold them up and compare.
- They should be roughly the same size. Adjust if necessary.
Pro tip: If you have layers, some pieces might be shorter. Don’t worry too much about making it perfect.
A little imperfection adds character to your braid!
10. Securing The Sections
Now that you have two even sections, it’s time to secure them.
This will keep them from mixing together while you braid.
- Use Hair Clips: Clip one section to keep it out of the way.
- This makes it easier to work on the other section without any interference.
- Hold Firmly: Hold the section you are working on firmly but not too tight.
- You want to maintain control, but also keep it comfortable.
- Repeat as Needed: If you have very thick hair, you might need to secure the sections multiple times as you braid.
- This helps in keeping the sections distinct.
It’s a piece of cake, right?
By following these simple steps, you’ll have a solid foundation for your fishtail braid.
Just remember, practice makes perfect.
So, don’t get discouraged if it takes a few tries to get it just right. Happy braiding!
| Step | Action |
|---|---|
| 1 | Brush your hair |
| 2 | Part your hair into two sections |
| 3 | Secure each section with clips |
With these steps, you’re well on your way to mastering the fishtail braid.
Stay patient and enjoy the process!
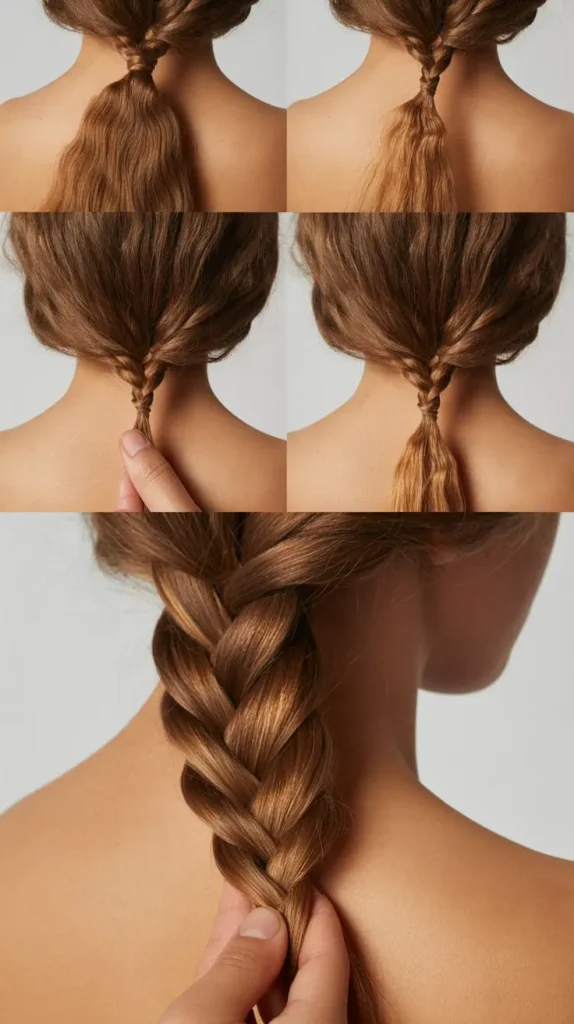
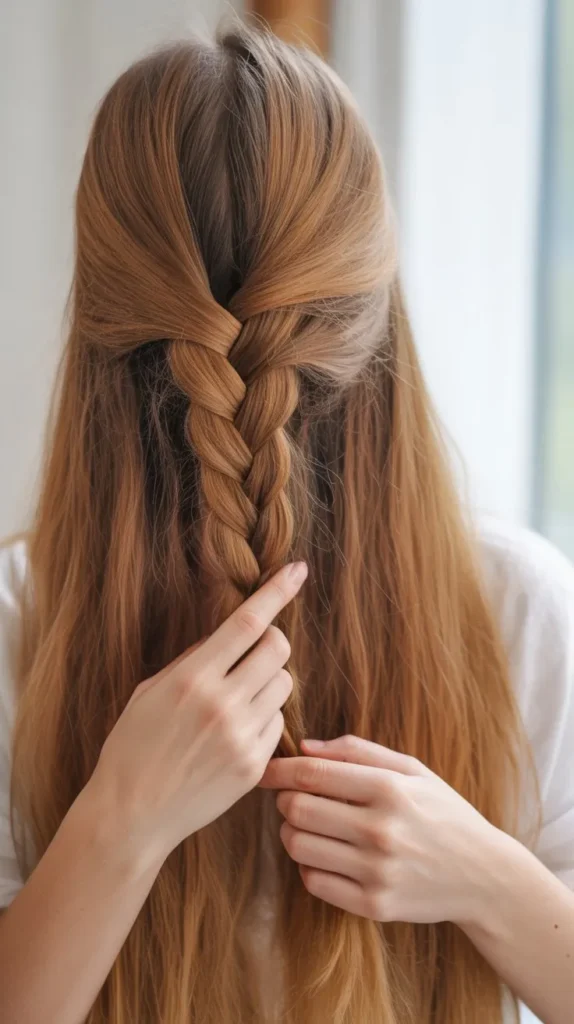
Starting The Braid
Creating a fishtail braid might seem tricky at first, but with some practice, you’ll be braiding like a pro!
Let’s break down the steps to make this elegant braid easy to understand and even easier to do.
First things first, you need to start the braid.
This is where the magic begins!
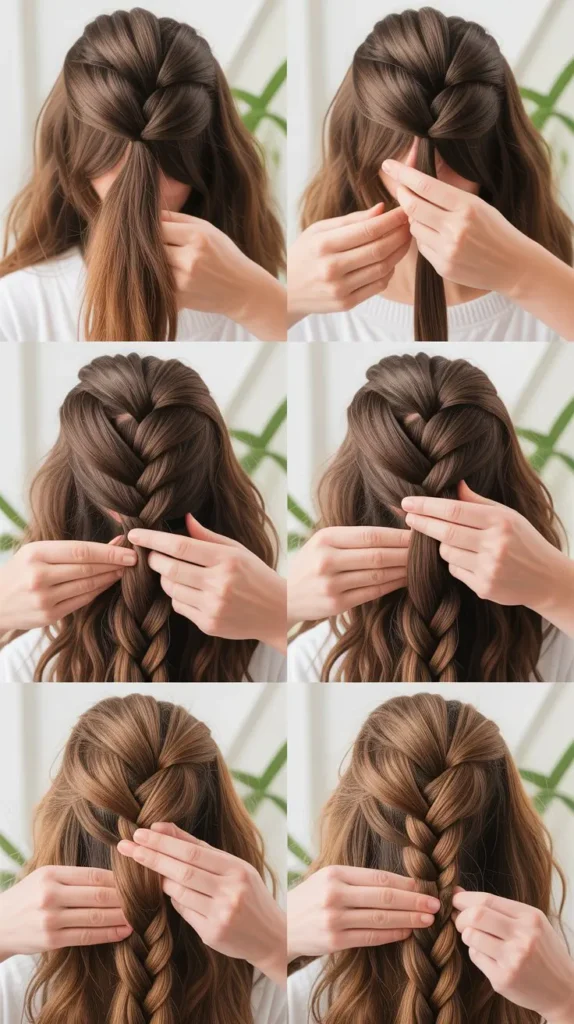
Crossing Small Sections
Once you have your hair divided into two equal sections, it’s time to start crossing those small sections. Don’t worry, we’ll go step by step:
- Take a small section: From the outside of the left section, take a small piece of hair.
- Cross it over: Bring this small piece over to the right section.
- Repeat on the other side: Now, take a small piece from the outside of the right section and cross it over to the left section.
Feeling a bit like a hair magician yet?
You should be! Remember, the smaller the sections you take, the more intricate your braid will look.
11. Maintaining Tension
Keeping the braid tight is essential for a neat look.
Here’s how you can maintain tension while braiding:
- Firm grip: Hold the sections firmly but not too tight.
- You don’t want to hurt your scalp!
- Consistent pressure: Apply the same amount of pressure as you cross each section. This ensures that the braid looks even.
- Adjust as needed: If you feel the braid loosening, gently pull on the ends of the hair to tighten it up.
Maintaining tension can feel a bit like juggling at first, but with practice, it becomes second nature.
And don’t worry, your arms will get used to it!
So, that’s it for starting the braid.
It’s all about small sections and keeping things tight.
Next, we’ll move on to finishing touches to make your fishtail braid truly shine.
But for now, keep practicing these steps, and soon you’ll be braiding with your eyes closed—well, maybe not literally, but you get the idea!
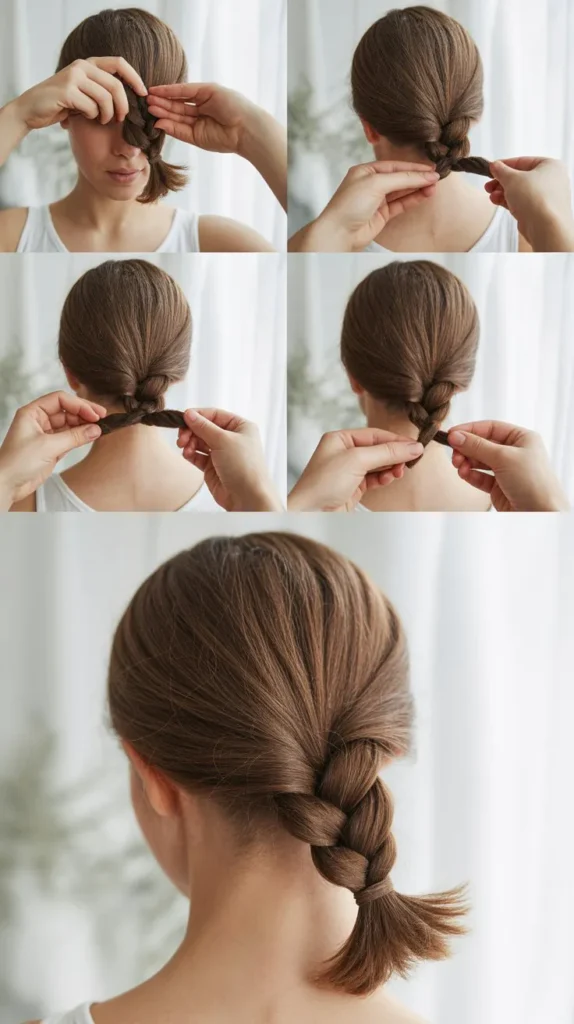
12. Continuing The Braid
Starting a fishtail braid involves dividing hair into two sections.
Take a small piece from the outer edge of one section.
Cross it over to the other section.
Repeat the process until you reach the end.
Secure with an elastic band.
Continuing the braid is crucial for a smooth and neat fishtail braid.
Once you have started, you need to keep the pattern consistent.
This section will guide you through the steps to continue braiding effectively.
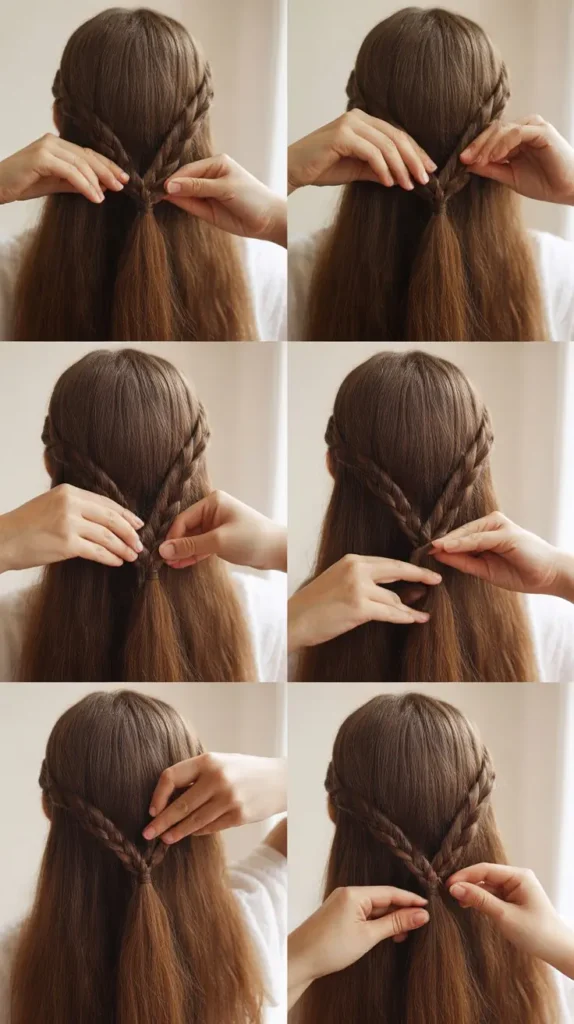
13. Repeating The Process
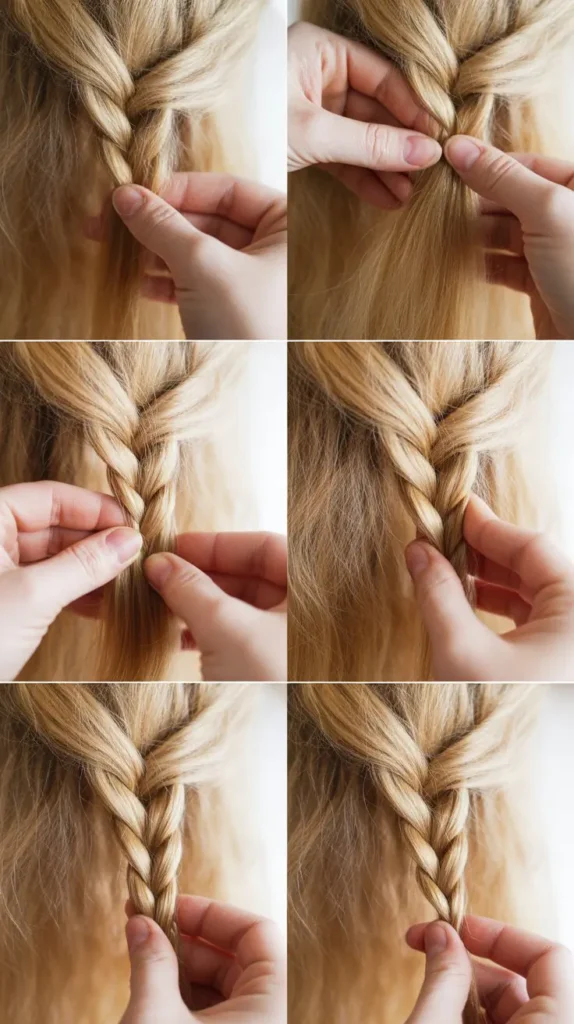
Separate a small section from the outer edge of one of the two main sections.
Cross it over to the opposite section.
Then, do the same with the other section.
Continue this pattern.
Each time, take a small piece from the outer edge.
Keep the sections tight.
This keeps the braid neat.
If the strands are too big, the braid will look messy.
Smaller pieces create a more detailed braid.
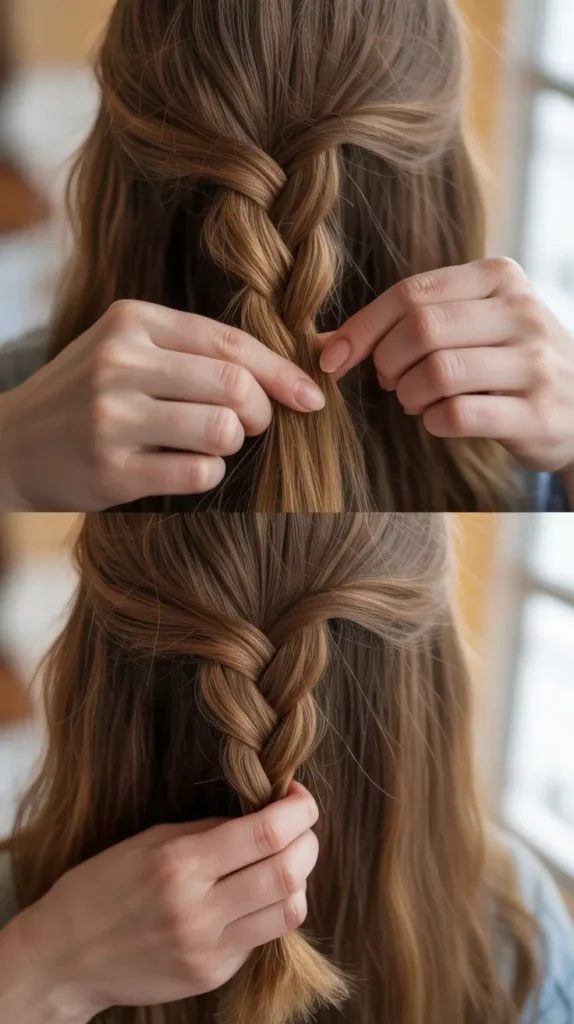
Ensuring Evenness
Check the braid often. Make sure both sides are even.
If one side is thicker, adjust it.
Take smaller pieces from the thicker side.
This balances the braid. Feel the braid with your fingers.
This helps you find uneven areas.
Adjust as needed. Keep the tension even.
This avoids bumps and gaps.
Braiding takes practice.
Keep trying and you will get better.
The more you braid, the easier it becomes.
You will soon create beautiful fishtail braids with ease.
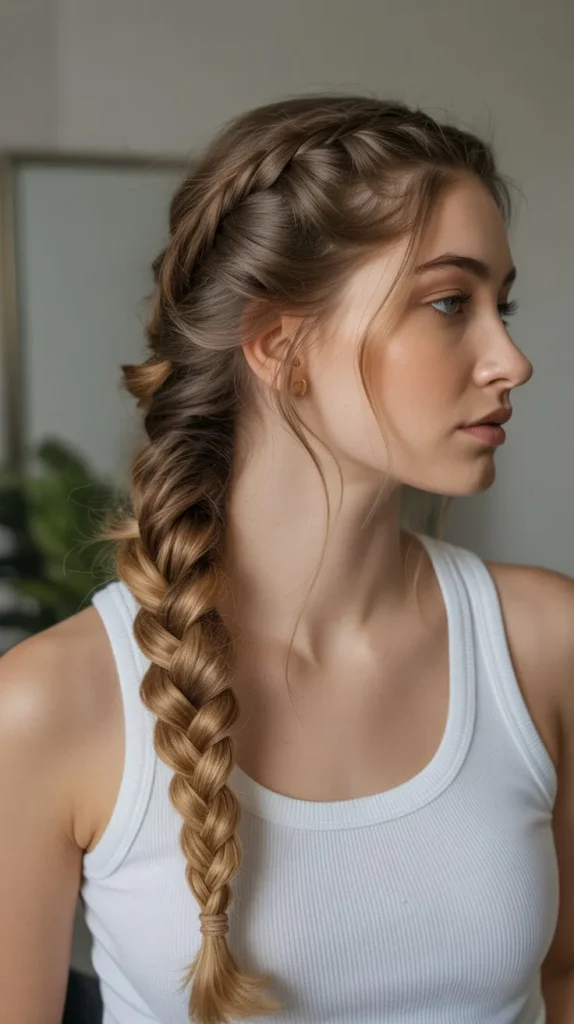
Securing The Braid
Securing the fishtail braid is essential to keep it neat and lasting.
Once you have braided your hair, it’s time to lock it in place.
This section guides you through using hair ties and adding the final touches to your braid.
Using Hair Ties
First, choose a hair tie that matches your hair color.
This helps the tie blend in. Secure the end of your braid with the hair tie.
Ensure it is tight enough to hold the braid. But not so tight that it damages your hair.
Adding Finishing Touches
After securing the braid, gently pull on sections.
This makes the braid look fuller and more relaxed.
Spray a bit of hairspray to set the braid in place.
Add accessories like small clips or ribbons for a stylish touch.
These simple steps will make your braid look polished and beautiful.
Tips And Tricks
So, you’ve decided to master the art of the fishtail braid.
Good choice! Fishtail braids are stylish, versatile, and perfect for any occasion.
But, like any good hairstyle, there are a few tips and tricks that can make the process smoother and the result more stunning.
Let’s dive into some key pointers that will help you braid like a pro.
Avoiding Common Mistakes
Everyone makes mistakes, especially when learning something new.
Here are some pitfalls you can avoid:
- Too Much Tension: Pulling the hair too tightly can make the braid look stiff and uncomfortable. Aim for a relaxed hold.
- Uneven Sections: Try to keep the sections of hair you pull from each side even. This keeps the braid looking balanced.
- Not Enough Hair: If you use very small sections, the braid can look thin.
- Use thicker sections for a fuller appearance.
- Messy Hands: Keep your hands clean and dry.
- Oily or sticky fingers can make the hair hard to handle.
Experimenting With Styles
Once you’ve got the basics down, it’s time to get creative.
The fishtail braid is versatile, and you can customize it in many ways:
- Loose and Romantic: After braiding, gently pull apart the braid for a softer, more relaxed look.
- This is great for casual events.
- Double Fishtail: Create two fishtail braids and then twist them together.
- This style is unique and eye-catching.
- Side Braid: Instead of braiding straight down your back, start on one side of your head. This asymmetrical style adds a touch of elegance.
- Accessorize: Add ribbons, beads, or flowers to your braid for a festive touch.
- Perfect for weddings or parties.
Remember, practice makes perfect.
The more you experiment, the better you’ll get at finding your unique fishtail braid style.
Now, go ahead and braid away with confidence!
Frequently Asked Questions
How To Do A Fishtail Braid Step By Step?
Separate hair into two sections.
Take a small piece from the outer edge of one section.
Cross it over to the other section.
Repeat on the opposite side. Continue alternating until the braid is complete.
Secure with an elastic band at the end.
How To Do Dutch Fishtail?
Start by dividing your hair into two sections.
Cross small pieces from each side over to the opposite section.
Continue until you reach the end and secure with a hair tie.
How To Make A Waterfall Braid?
To make a waterfall braid, start by sectioning your hair.
Create a regular braid, dropping the top strand every few twists.
Continue this pattern around your head, securing with a hair tie.
Finish by styling the rest of your hair as desired.
What’s The Easiest Braid To Learn?
The easiest braid to learn is the three-strand braid.
It requires minimal practice and basic hand coordination.
Perfect for beginners.
Conclusion
Creating a fishtail braid is fun and easy. With practice, it gets better.
Follow the steps carefully for best results.Share your new skill with friends. Enjoy your stylish, new look.Happy braiding!