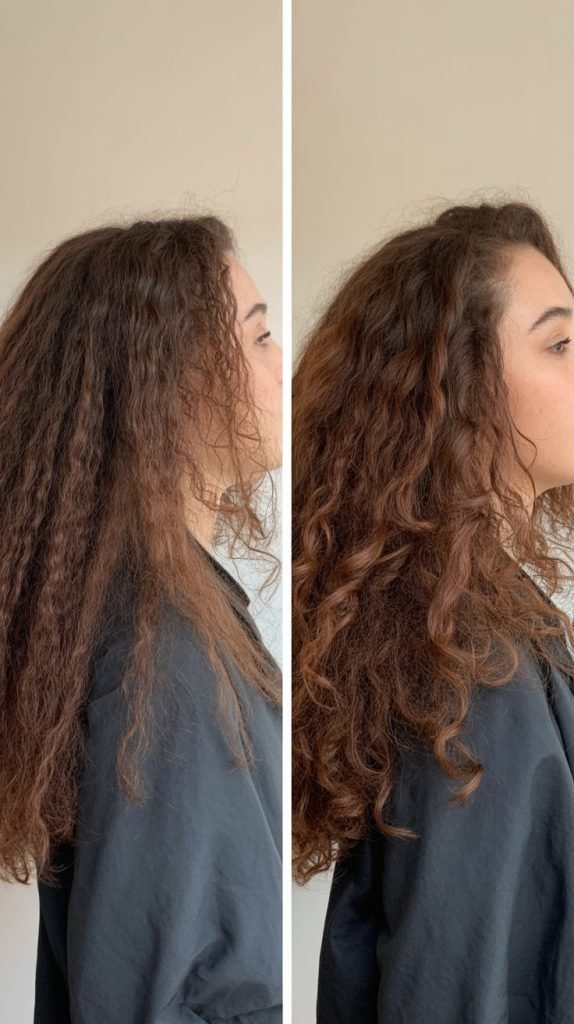
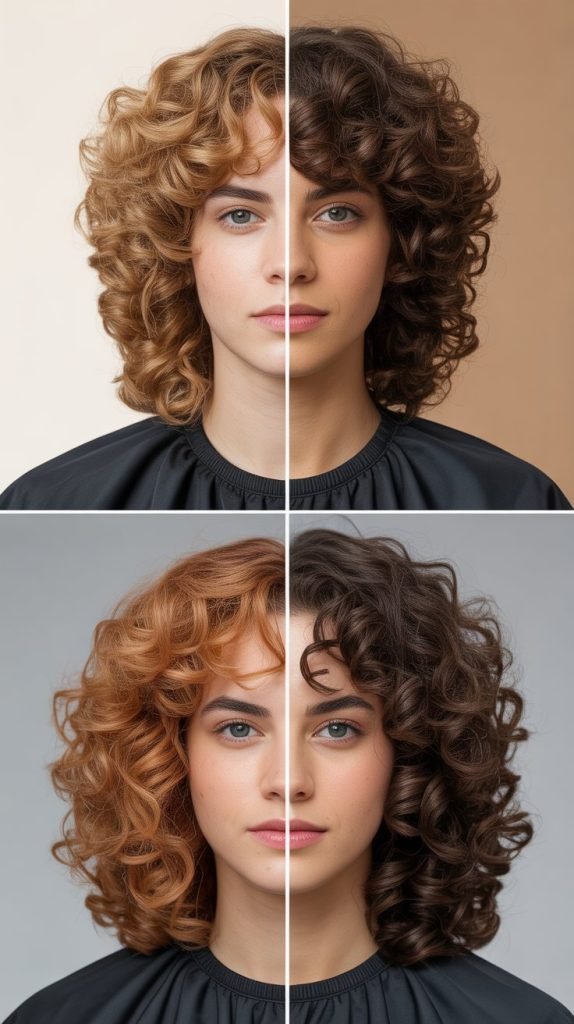
Curly hair presents unique challenges when it comes to layering, but with the right techniques, you can achieve stunning, bouncy layers that enhance your natural texture.
Understanding how to cut layers for different curly hair types is essential for creating movement, reducing bulk, and showcasing your curls’ natural beauty.
This comprehensive guide will walk you through everything you need to know about layering curly hair, from identifying your curl pattern to mastering specific cutting techniques for each type.
You’ll discover professional methods for creating dimension, managing volume, and ensuring your layers complement your face shape while maintaining healthy, defined curls.
1. Understanding Curly Hair Types and Their Layering Needs
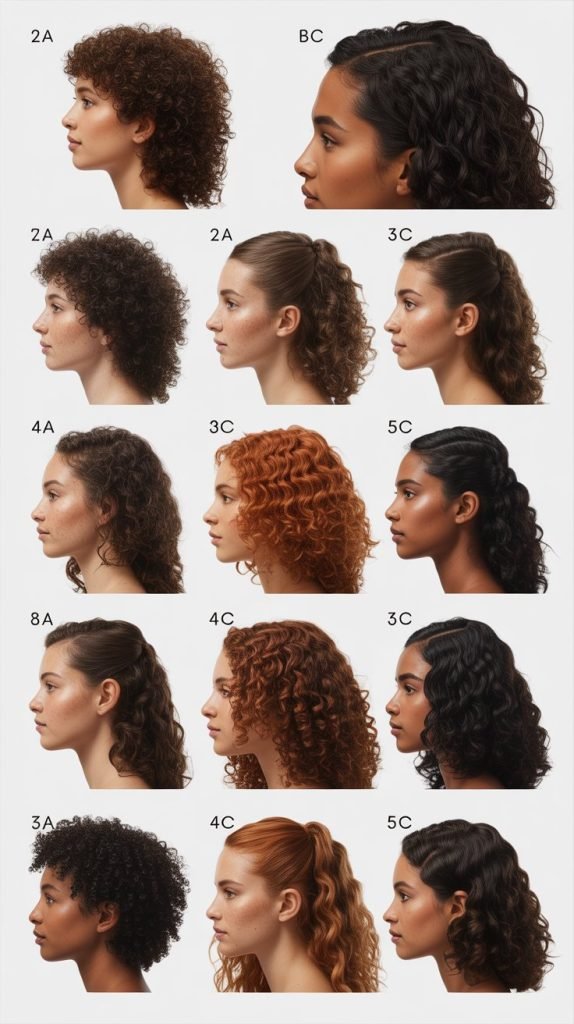
Before diving into cutting techniques, it’s crucial to understand that curly hair comes in various patterns, each requiring different layering approaches to achieve optimal results.
The curl pattern determines how layers will fall and behave once cut.
- Type 2A hair has loose waves that tend to be fine and can easily fall flat without proper layering
- Type 2B features more defined waves with moderate volume that benefits from strategic layer placement
- Type 2C hair displays strong waves with some curls that require careful weight distribution through layering
- Type 3A curls are large and loose, needing layers that enhance bounce without creating triangle shapes
- Type 3B hair has well-defined curls that benefit from layers to prevent pyramid effects
- Type 3C features tight corkscrew curls requiring layers that maintain curl integrity while reducing bulk
- Type 4A hair has soft coils that need layers to create movement without disrupting the curl pattern
- Type 4B displays Z-pattern curls requiring strategic layering to prevent excessive shrinkage
- Type 4C hair has tight coils that benefit from subtle layers to maintain length while adding shape
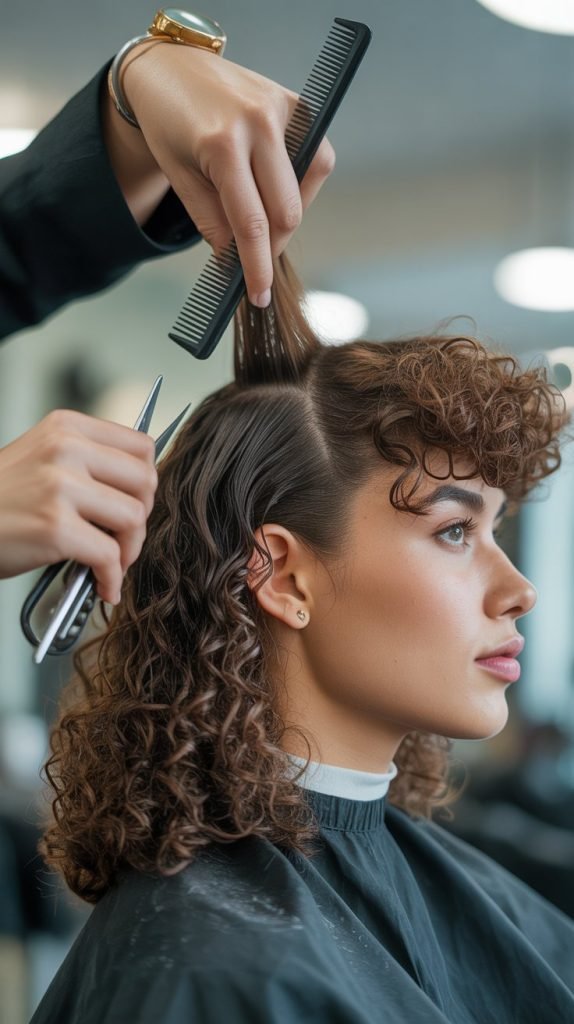
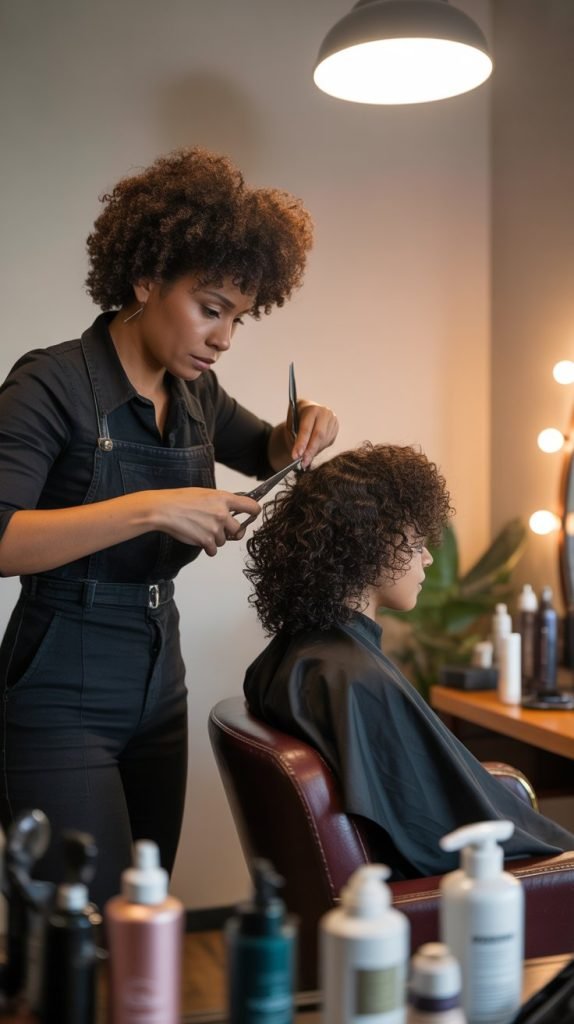
2. Essential Tools and Preparation for Cutting Curly Hair Layers
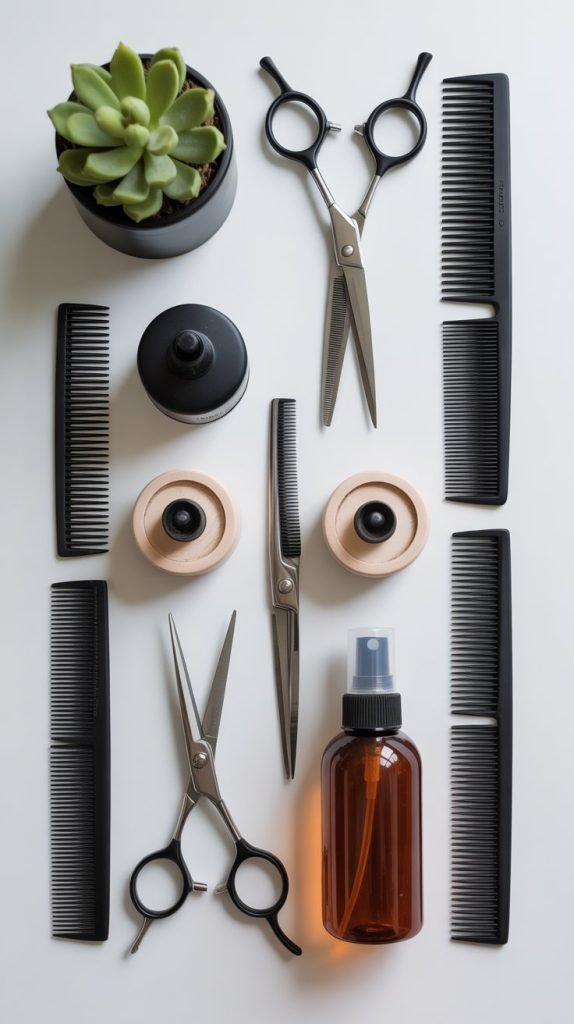
Proper preparation and having the right tools are fundamental to achieving successful layered cuts on curly hair. Professional-grade equipment ensures clean cuts that won’t disrupt the hair’s natural curl pattern.
- Sharp haircutting shears are essential for clean cuts that prevent damage and frizz
- A wide-tooth comb helps detangle curls without breaking the natural curl formation
- Sectioning clips allow for precise organization during the cutting process
- A spray bottle with water keeps hair at optimal moisture levels throughout the cut
- Point-cutting shears create softer, more natural-looking layer transitions
- A diffuser attachment helps assess the cut’s appearance when hair is properly styled
- Natural leave-in conditioner maintains curl definition during the cutting process
- A rat-tail comb assists in creating precise sections and parting lines
- Hair clips of various sizes accommodate different section thicknesses during layering
3. The Dry Cutting Method for Curly Hair Layers
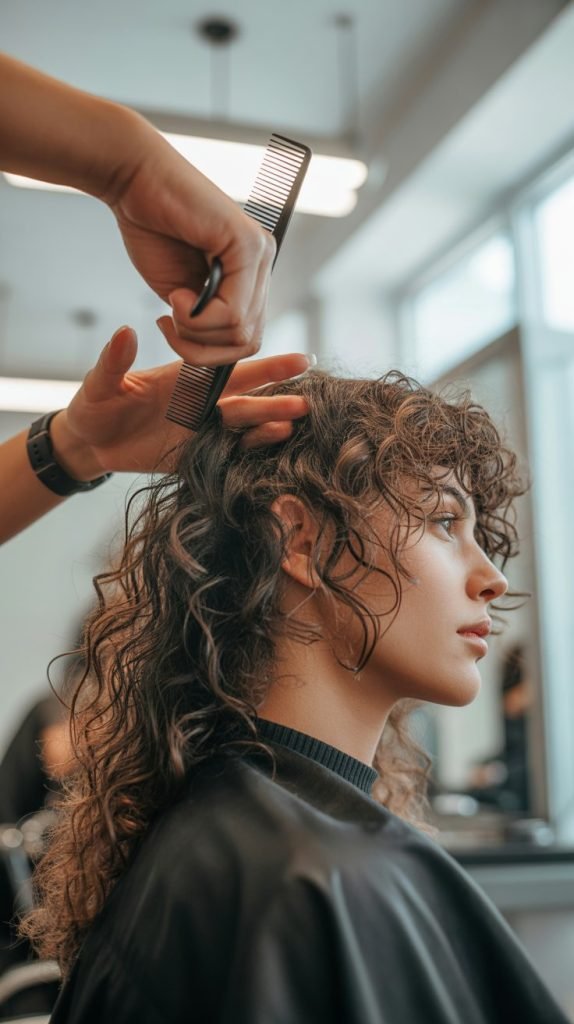
Cutting curly hair in its natural dry state allows for the most accurate assessment of how layers will fall and behave after styling.
This method is particularly effective for creating layers that work with, rather than against, the hair’s natural curl pattern.
- Start with clean, dry hair that has been styled in its natural curl pattern
- Work in small sections to ensure even layer distribution throughout the head
- Cut each curl individually at its natural breaking point for seamless blending
- Follow the curl’s natural direction rather than forcing it into unnatural positions
- Make cuts at a slight upward angle to encourage curl bounce and movement
- Assess the overall shape frequently by stepping back to view the entire head
- Trim conservatively, as curly hair springs up more than expected after cutting
- Focus on removing weight from areas where curls appear heavy or triangular
- Blend layers gradually to avoid harsh lines that can disrupt curl formation
4. Wet Cutting Techniques for Specific Curl Patterns
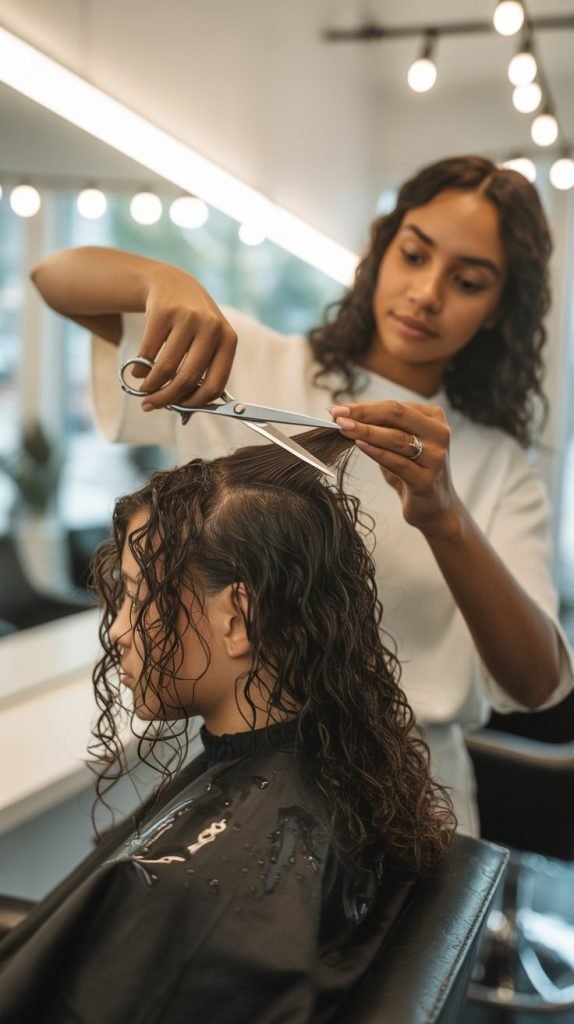
While dry cutting is often preferred, certain curl patterns and desired outcomes may benefit from wet cutting techniques when executed properly.
Understanding when and how to apply wet cutting methods is crucial for optimal results.
- Wet cutting works best for looser curl patterns (2A-3A) that maintain predictable shrinkage
- Stretch curls gently while wet to assess true length and layer placement needs
- Cut hair at 10-15% longer than the desired final length to account for shrinkage
- Use a consistent cutting angle throughout each section to ensure even layering
- Apply light tension to curls while cutting to maintain control without damaging the curl pattern
- Work quickly to prevent hair from drying unevenly during the cutting process
- Check curl spring-back regularly by releasing tension and observing natural curl formation
- Focus on creating internal layers that will provide movement once hair is dry
- Finish with point-cutting techniques to soften harsh lines and create natural transitions
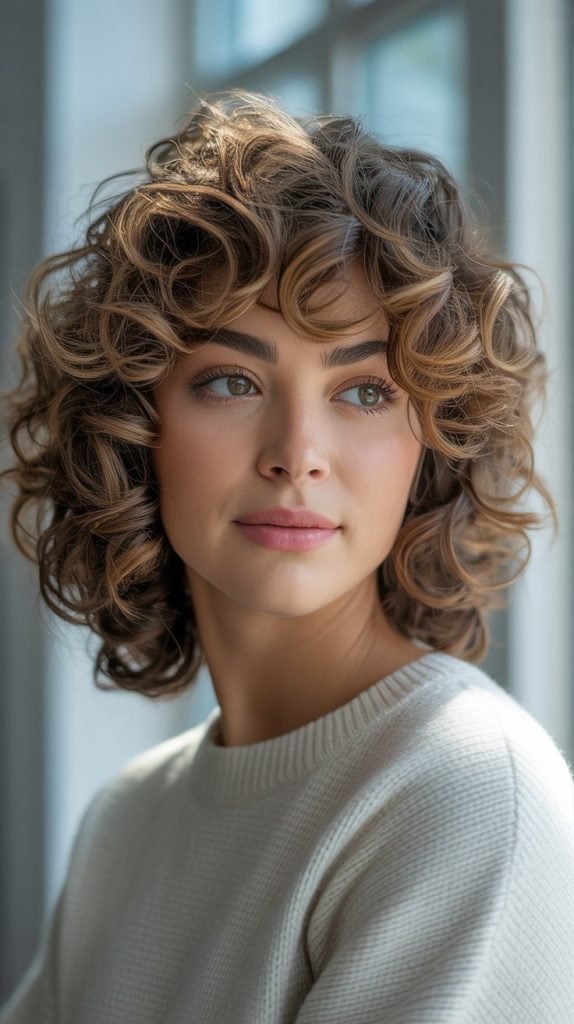
5. Creating Long Layers for Loose Curls (Types 2A-3A)
Loose curls and waves require specific layering techniques that enhance their natural movement while maintaining adequate weight to prevent frizz and maintain curl definition throughout the day.
- Begin with the longest layer at shoulder length or below to maintain curl weight
- Create subtle layers that are 2-3 inches apart to avoid choppy appearance
- Focus on removing bulk from the interior rather than creating dramatic length variations
- Use slide cutting techniques to create soft, gradual transitions between layers
- Maintain more weight around the face to frame features while preventing triangle shapes
- Cut layers in a curved pattern that follows the head’s natural shape
- Leave the perimeter slightly longer to anchor the curl pattern and prevent floating layers
- Test curl bounce after each section by scrunching gently with your hands
- Blend layers seamlessly by cross-checking cuts from multiple angles
6. Medium Layer Cuts for Defined Curls (Types 3B-3C)
Well-defined curls require strategic layering that maintains their structural integrity while creating movement and preventing the dreaded pyramid shape that can occur with improper cutting.
- Start with hair at its maximum stretched length to accurately assess layer placement
- Create layers that are 1-2 inches apart to maintain curl cohesion
- Remove weight primarily from the interior layers while preserving perimeter length
- Use point-cutting exclusively to maintain curl spring and prevent blunt edges
- Focus on creating subtle graduation that enhances natural curl groupings
- Avoid cutting into the curl’s center, instead trimming at natural separation points
- Maintain consistent moisture levels throughout the cutting process
- Check curl formation frequently by allowing sections to spring back naturally
- Create internal layers that support outer curls without competing for space
7. Layering Techniques for Tight Coils and Kinks (Types 4A-4C)
Tight coils and kinky hair textures require specialized layering approaches that respect the hair’s unique structure while creating movement and shape that enhances natural beauty.
- Work exclusively with hair in its natural dry state for accurate assessment
- Create very subtle layers with minimal length variation to prevent breakage
- Focus on shape creation rather than dramatic layering effects
- Use single-strand cutting techniques to maintain individual coil integrity
- Remove bulk through interior thinning rather than external length variation
- Maintain maximum length preservation while creating subtle shape enhancement
- Work with the hair’s natural growth patterns and cowlick directions
- Use specialized tools designed for textured hair to prevent damage
- Create internal movement through strategic weight distribution rather than dramatic layers
8. Face-Framing Layers and Their Impact on Curl Patterns
Strategic face-framing layers can dramatically enhance facial features while working harmoniously with natural curl patterns, but they require careful consideration of curl direction and individual face shapes.
- Assess natural curl direction around the hairline before creating face-framing layers
- Create graduated lengths that complement facial bone structure
- Maintain adequate weight to prevent face-framing pieces from becoming frizzy
- Consider curl shrinkage when determining final lengths for face-framing sections
- Use point-cutting techniques to create soft, natural-looking edges
- Work with natural partings and cowlicks rather than against them
- Test curl behavior around the face by styling each section individually
- Create subtle angles that enhance cheekbones and jawline definition
- Avoid creating layers that compete with natural curl groupings around the face
9. Maintaining Layer Health and Curl Definition

Proper maintenance of layered curly hair is essential for preserving both the cut’s integrity and the hair’s natural curl pattern, requiring specific care routines and regular touch-ups.
- Schedule maintenance cuts every 8-12 weeks to prevent layers from growing out unevenly
- Use sulfate-free shampoos that won’t strip natural oils from curly hair
- Apply deep conditioning treatments weekly to maintain moisture balance in layered sections
- Trim individual damaged curls as needed between full cuts
- Sleep on silk or satin pillowcases to prevent friction damage to layered curls
- Use curl-specific styling products that enhance definition without weighing down layers
- Avoid brushing or combing dry curls to prevent disrupting layer formation
- Protect layers from heat damage by using heat protectant products when styling
- Refresh curls between washes using leave-in conditioners and curl enhancing sprays
10. Common Mistakes to Avoid When Layering Curly Hair
Understanding and avoiding common layering mistakes can save you from disappointing results and help you achieve the beautiful, healthy curly layers you desire.
- Never cut curly hair with regular straight-hair techniques or tools
- Avoid creating too many layers, which can lead to excessive volume and frizz
- Don’t cut curls when they’re stretched beyond their natural length
- Resist the urge to thin out curls with thinning shears, which can cause damage
- Avoid cutting into the center of curl groups, which disrupts natural formation
- Never cut curly hair when it’s completely soaked, as shrinkage assessment becomes impossible
- Don’t create blunt edges, which can look harsh and unnatural on curly hair
- Avoid using dull scissors, which can cause split ends and frizz
- Don’t rush the cutting process, as curly hair requires patience and precision
How to cut layers for different curly hair types requires understanding your unique curl pattern, using appropriate techniques, and maintaining proper care routines.
With the right knowledge and tools, you can achieve stunning layered curls that enhance your natural texture while maintaining healthy, defined curl patterns.
Remember that patience and practice are key to mastering these techniques, and when in doubt, consult with a curly hair specialist who understands the intricacies of working with textured hair.
The investment in proper layering will reward you with beautiful, manageable curls that showcase your hair’s natural beauty and movement.