Cutting curly hair at home might seem intimidating, but with the right techniques and tools, you can achieve beautiful, professional-looking layers without stepping foot in a salon.
“How to Cut Curly Hair in Layers Yourself at Home” is entirely possible when you understand your curl pattern and follow proper cutting methods.
This comprehensive guide will walk you through everything from preparation to final styling, ensuring you get the layered look you’ve always wanted while maintaining your curls’ natural bounce and shape.
This article covers essential preparation steps, understanding different curl types, gathering the right tools, mastering cutting techniques, avoiding common mistakes, and proper aftercare.
You’ll also learn troubleshooting tips and maintenance strategies to keep your newly layered curls looking their best.
By the end of this guide, you’ll have the confidence and knowledge to transform your curly hair with stunning layers from the comfort of your own home.
1. Understanding Your Curl Type and Pattern

Before attempting to cut your curly hair, it’s crucial to identify your specific curl type and understand how your curls naturally fall and behave.
Different curl patterns require different cutting approaches to achieve the most flattering layered look.
- Curl types range from 2A (loose waves) to 4C (tight coils), with each requiring specific cutting considerations
- Type 2 curls (wavy hair) benefit from longer layers that enhance the natural wave pattern without creating frizz
- Type 3 curls (curly hair) respond well to medium-length layers that reduce bulk while maintaining curl integrity
- Type 4 curls (coily hair) require careful layering to avoid disrupting the natural curl formation and causing shrinkage issues
- Observe your curl pattern when hair is completely dry and in its natural state, not when wet or styled
- Note where your curls are tightest and loosest, as these areas will need different layer lengths
- Consider your hair’s density and porosity, as these factors influence how layers will look and behave
- Document your curl pattern with photos from multiple angles to reference during cutting
2. Essential Tools and Equipment for DIY Curly Hair Cutting
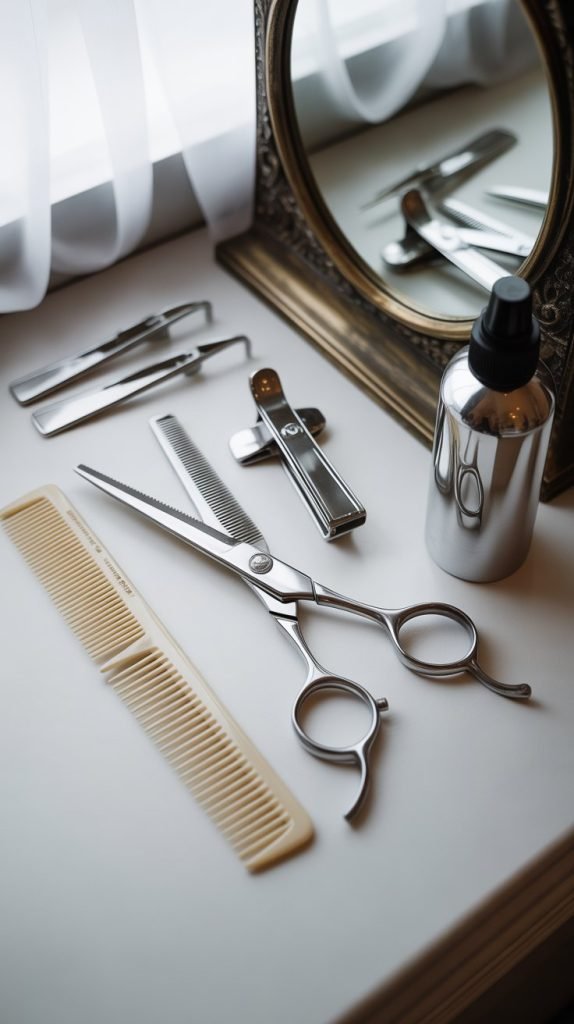
Having the right tools makes the difference between a successful DIY layered cut and a potential hair disaster. Professional-grade equipment designed for curly hair ensures clean cuts that won’t damage your curl structure.
- Invest in high-quality hairdressing scissors (6-7 inches) specifically designed for cutting hair, never use regular household scissors
- Purchase a wide-tooth comb or detangling brush to section hair without disrupting curl patterns
- Use a spray bottle filled with water to keep curls moist and defined during the cutting process
- Gather multiple hair clips or elastics to section off different areas of your hair systematically
- Set up proper lighting with a handheld mirror and wall mirror for 360-degree visibility
- Have a cape or old towel to protect your clothing from falling hair
- Keep a fine-mist spray bottle with leave-in conditioner for touch-ups during cutting
- Prepare point-cutting shears if you want to create softer, more natural-looking layer edges
3. Preparation Steps Before Cutting

Proper preparation is essential for achieving even, well-balanced layers that complement your face shape and curl pattern. Taking time to prepare your hair and workspace prevents mistakes and ensures better results.
- Wash your hair with a sulfate-free shampoo and deep condition to ensure curls are healthy and hydrated
- Detangle hair gently while wet using a wide-tooth comb or detangling brush, starting from ends to roots
- Apply a leave-in conditioner or curl cream to define your natural curl pattern and reduce frizz
- Allow hair to air dry completely or use a diffuser on low heat to maintain natural curl formation
- Work in a well-lit area with mirrors positioned to see all angles of your head clearly
- Wear a button-up shirt or cutting cape to easily remove hair clippings without disturbing your finished cut
- Have someone available to help check the back sections and ensure evenness if possible
- Plan to cut when you have plenty of time and won’t feel rushed through the process
4. Step-by-Step Layering Techniques
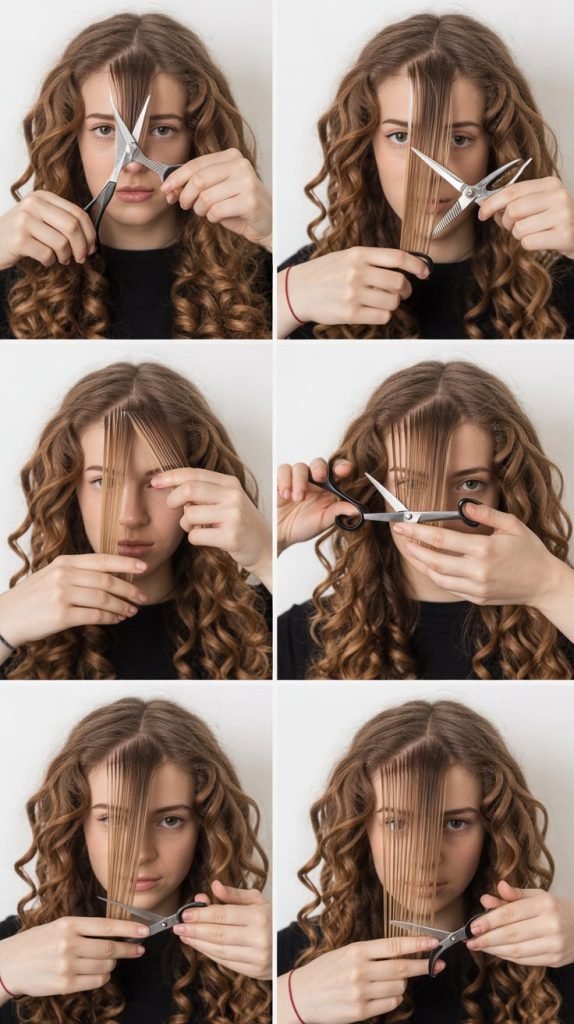
Mastering the proper cutting techniques for curly hair requires understanding how curls shrink and move after cutting. These methods help create natural-looking layers that enhance your curl pattern rather than fighting against it.
- Start with small sections (1-2 inches wide) to maintain control and accuracy throughout the cutting process
- Use the twist-and-cut method by gently twisting each section and cutting at a diagonal angle
- Cut curly hair when it’s in its natural, dry state to see exactly how each cut will affect the final look
- Work from the bottom layers up, cutting longer pieces first and gradually shortening upper layers
- Cut each curl individually rather than cutting straight across multiple curls at once
- Use point-cutting technique at the ends to create soft, natural-looking layer transitions
- Check for balance frequently by comparing both sides of your head in the mirror
- Make small, conservative cuts initially – you can always trim more but can’t add length back
5. Face Shape Considerations for Layered Curly Cuts

Your face shape significantly influences which layering techniques will be most flattering and help balance your features. Understanding these principles ensures your DIY layers enhance rather than detract from your natural beauty.
- Oval faces can wear almost any layer length and style, from short choppy layers to long cascading ones
- Round faces benefit from longer layers that start below the chin to elongate and slim the face
- Square faces look best with soft, curved layers that begin around the jawline to soften angular features
- Heart-shaped faces need more volume at the bottom with layers that add width around the chin area
- Long faces should avoid layers that are too long, instead opting for medium-length layers that add width
- Consider your hairline and cowlick patterns when determining where to place the shortest layers
- Frame your face with face-framing layers that complement your cheekbones and jawline
- Take into account your lifestyle and styling preferences when choosing layer placement and length
6. Common Mistakes to Avoid

Learning from common DIY cutting errors helps prevent irreversible mistakes that could require professional correction. Being aware of these pitfalls keeps your layering project on track for success.
- Never cut curly hair when it’s wet, as curls shrink significantly when dry and will result in shorter-than-expected layers
- Avoid cutting too much length at once – work gradually and check your progress frequently
- Don’t attempt to create perfectly straight, even layers as this looks unnatural on curly hair
- Resist the urge to keep “evening up” sections, which often leads to cutting hair progressively shorter
- Never use thinning shears or razors on curly hair as they can cause frizz and damage curl structure
- Don’t cut layers too close together in length, as this creates a choppy, unblended appearance
- Avoid cutting when you’re tired, stressed, or in a hurry, as mistakes are more likely to occur
- Don’t ignore your natural growth patterns and cowlicks when planning layer placement
7. Styling and Finishing Your New Layers

Proper styling techniques bring out the best in your newly layered curls and help you achieve the look you envisioned. Learning how to enhance your layers ensures you get the most from your DIY cutting efforts.
- Apply a curl-enhancing cream or gel to damp hair using the “praying hands” method to smooth the hair cuticle
- Scrunch out excess water with a microfiber towel or cotton t-shirt to prevent frizz formation
- Use the “plopping” technique by wrapping wet curls in a t-shirt for 10-20 minutes to enhance curl formation
- Diffuse on low heat and speed, or air dry completely to maintain the integrity of your new layers
- Once hair is completely dry, gently scrunch out any gel cast for soft, touchable curls
- Use a small amount of lightweight oil or serum on the ends to add shine and reduce frizz
- Avoid touching or manipulating your curls too much during the drying process
- Sleep on a silk or satin pillowcase to maintain your layered style and reduce overnight frizz
8. Troubleshooting and Touch-ups
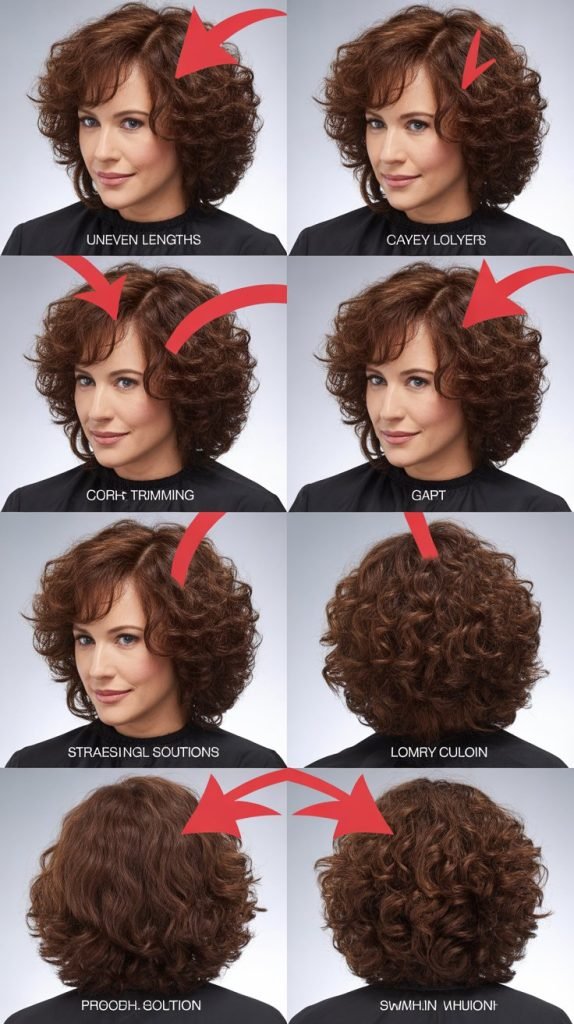
Even with careful planning and execution, you may need to make minor adjustments to perfect your layered cut. Knowing how to identify and fix common issues saves you from potential styling frustration.
- If you notice uneven lengths, resist cutting more and instead try different styling methods to see if the issue resolves
- Address gaps between layers by cutting a few connecting pieces to create smoother transitions
- Fix overly bulky areas by removing weight through internal layering rather than shortening the overall length
- Correct minor asymmetries by trimming only the longer side, being very conservative with cuts
- If layers are too short, focus on growing them out while using styling techniques to blend the length differences
- Seek professional help if you’ve made significant errors that can’t be corrected with minor adjustments
- Wait at least 2-3 days after cutting before making any touch-ups, as curls need time to settle into their new shape
- Document what works and what doesn’t for future reference when maintaining your layered cut
9. Maintaining Your Layered Curly Hair

Proper maintenance keeps your DIY layers looking fresh and prevents them from losing their shape and definition over time. Establishing a good routine extends the life of your cut and keeps your curls healthy.
- Trim your layers every 6-8 weeks to maintain their shape and remove any damaged ends
- Use a deep conditioning treatment weekly to keep curls moisturized and prevent breakage
- Sleep with your hair in a loose pineapple or medusa clipping to preserve your layer definition
- Refresh your curls on non-wash days using a spray bottle with water and leave-in conditioner
- Rotate between different styling products to prevent buildup and maintain curl health
- Get regular trims from a professional every few months to maintain the overall shape and health
- Adjust your layering technique based on how your hair grows and changes over time
- Keep a hair diary to track which products and techniques work best for your layered style
Conclusion
Learning “How to Cut Curly Hair in Layers Yourself at Home” empowers you to take control of your hair care routine while saving time and money.
With the right knowledge, tools, and techniques, you can achieve beautiful, professional-looking layers that enhance your natural curl pattern and complement your face shape.
Remember that practice makes perfect, and even professional stylists continue learning throughout their careers. Start with conservative cuts, be patient with the process, and don’t hesitate to seek professional help if needed.
Your curly hair journey is unique, and mastering the art of DIY layering opens up endless possibilities for expressing your personal style while maintaining healthy, gorgeous curls.