Cutting curly hair at home might seem intimidating, but with the right techniques and understanding of your curl pattern, you can achieve salon-quality results without the expensive price tag.
Learning How to Cut Curly Hair at Home with Layers opens up a world of freedom where you control your hair’s shape, volume, and movement according to your preferences.
This comprehensive guide walks you through every essential step, from preparing your tools and understanding your unique curl type to mastering the art of layering techniques specifically designed for curly textures.
You’ll discover professional methods like the DevaCut technique, the best scissors to use, how to section your hair properly, and crucial maintenance tips that keep your layers looking fresh between cuts.
Whether you’re a complete beginner or someone looking to refine their home hair-cutting skills, this article equips you with the knowledge and confidence to transform your curly mane into a beautifully layered masterpiece right in the comfort of your own home.
1. Understanding Your Curl Type Before Cutting

Before you pick up scissors, understanding your specific curl type is absolutely essential because different curl patterns require different cutting approaches and techniques. The curl typing system helps you identify whether you have wavy, curly, or coily hair, which directly influences how your layers will fall and how much hair you should remove.
Why Curl Type Matters for Layering
- Your curl type determines how much your hair will spring up after cutting, which means you need to account for shrinkage when deciding layer lengths.
- Type 2 wavy hair has minimal shrinkage and can handle more dramatic length differences between layers.
- Type 3 curly hair springs up significantly when dry, requiring conservative cutting to avoid unexpectedly short results.
- Type 4 coily hair has maximum shrinkage (up to 75%), making it crucial to cut conservatively and stretch the hair while cutting.
- Understanding your curl pattern prevents common mistakes like cutting too much length or creating unbalanced layers that don’t complement your natural texture.
Identifying Your Curl Pattern
- Examine your hair when it’s completely dry and in its natural state without any styling products or manipulation.
- Type 2A to 2C hair forms loose S-shaped waves with 2A being barely wavy and 2C having more defined waves with some frizz.
- Type 3A to 3C hair creates well-defined spiral curls, with 3A having loose curls, 3B having springy ringlets, and 3C having tight corkscrew curls.
- Type 4A to 4C hair forms tight coils, with 4A having defined S-pattern coils, 4B having Z-pattern bends, and 4C having the tightest coils with minimal definition.
- Take photos of your hair from different angles to reference during cutting, especially if you have multiple curl patterns throughout your head.
- Most people have a combination of curl types, so identify the dominant pattern and any areas that differ significantly.
2. Essential Tools and Products You’ll Need

Having the right tools makes the difference between a professional-looking cut and a disaster, so investing in quality equipment is non-negotiable for achieving excellent results.
Professional-grade tools designed specifically for cutting curly hair will last longer and provide cleaner cuts that prevent damage and split ends.
Must-Have Cutting Tools
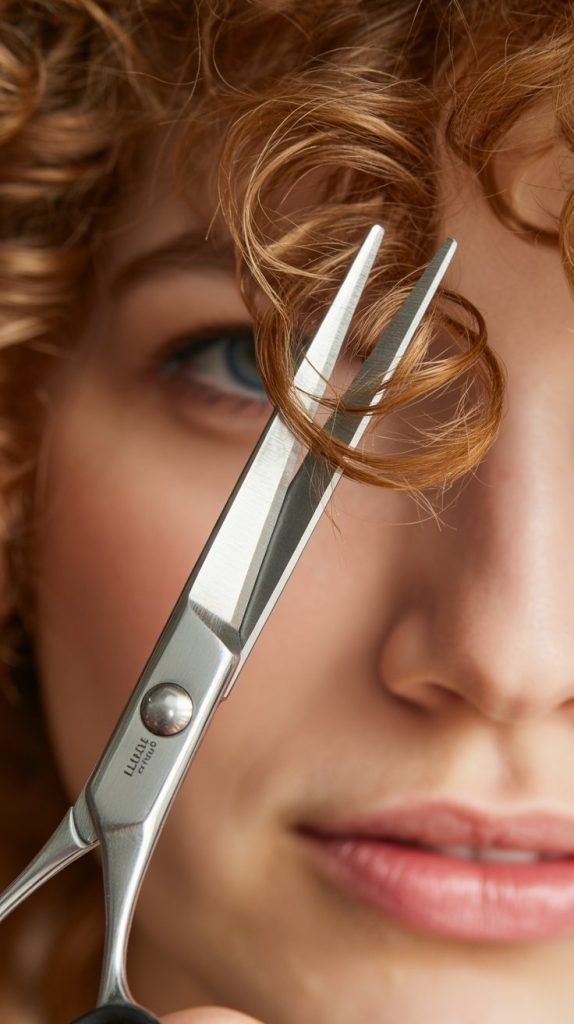
- Professional hair-cutting shears with a blade length of 5.5 to 6.5 inches provide the precision and sharpness necessary for clean cuts without pulling or snagging curls.
- Regular household scissors should never be used as they’re too dull and will create ragged edges that lead to split ends and frizz.
- Sectioning clips (at least 6-8 large clips) help divide your hair into manageable sections and keep cut portions separate from uncut areas.
- A spray bottle filled with water keeps your curls hydrated and defined throughout the cutting process.
- A wide-tooth comb or detangling brush specifically designed for curly hair helps separate sections without disrupting your curl pattern.
- A handheld mirror allows you to see the back of your head when checking your work and ensuring even layers.
- A clean towel or cape protects your clothing from hair clippings and keeps your workspace tidy.
Products to Use During Cutting
- Leave-in conditioner maintains moisture and helps curls clump together naturally, making it easier to see your true curl pattern while cutting.
- Curl-defining cream or gel can be applied lightly to help visualize how your layers will look when styled.
- A light oil or serum smooths individual strands without weighing down your curls or making them appear greasy.
- Keep a bottle of your regular wash-day products nearby to refresh curls if they start to lose definition during the cutting process.
- Avoid heavy products that alter your natural curl pattern as this will give you a false representation of how your cut will look in everyday life.
3. Preparing Your Hair for the Cut
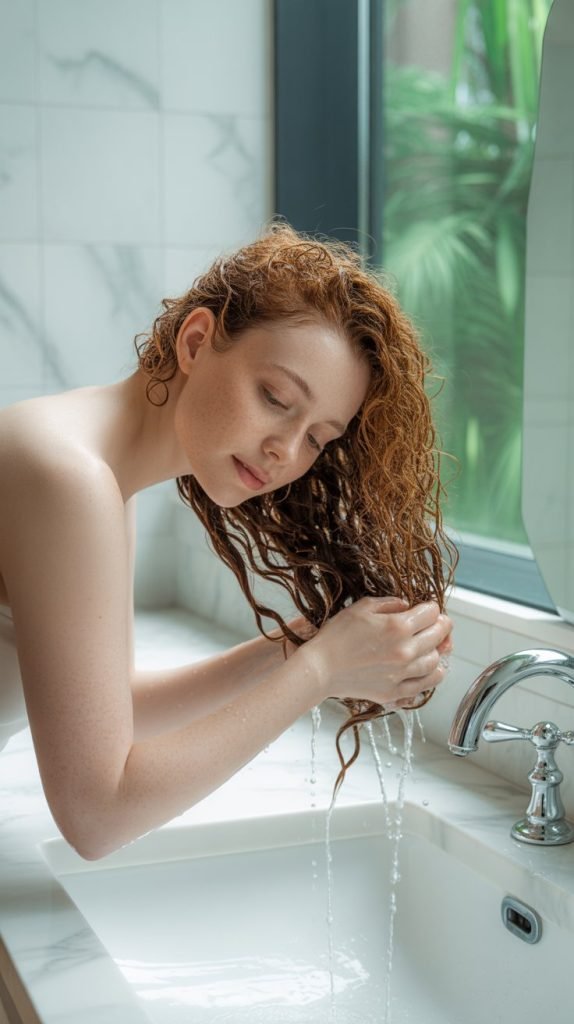
Proper preparation sets the foundation for a successful cut and determines how accurately you can see your curl pattern and existing length.
The debate between cutting curly hair wet versus dry is significant, and the preparation method you choose dramatically affects your final results.
Washing and Conditioning
- Wash your hair with a sulfate-free shampoo to remove buildup, oils, and products that might weigh down your curls or distort their natural pattern.
- Apply a moisturizing conditioner from mid-length to ends, avoiding the roots to prevent your hair from lying too flat.
- Detangle thoroughly while the conditioner is in your hair using your fingers or a wide-tooth comb, starting from the ends and working toward the roots.
- Rinse with cool water to help seal the hair cuticle and enhance shine and curl definition.
- Gently squeeze out excess water with a microfiber towel or cotton t-shirt rather than rubbing, which causes frizz and disrupts curl formation.
Wet vs. Dry Cutting Decision
- The dry cutting method (DevaCut style) is generally preferred for curly hair because it allows you to see exactly how your curls fall naturally and where volume needs to be reduced.
- Cutting dry helps you account for shrinkage and spring, ensuring you don’t remove too much length accidentally.
- Wet cutting can work for wavy hair (Type 2) or if you’re doing a major length change rather than detailed layering.
- If cutting dry, let your hair air-dry completely in its natural state with minimal product to see your true curl pattern.
- Some stylists use a damp (not soaking wet) approach where hair is 70-80% dry, providing a middle ground between the two methods.
4. How to Section Your Curly Hair Properly
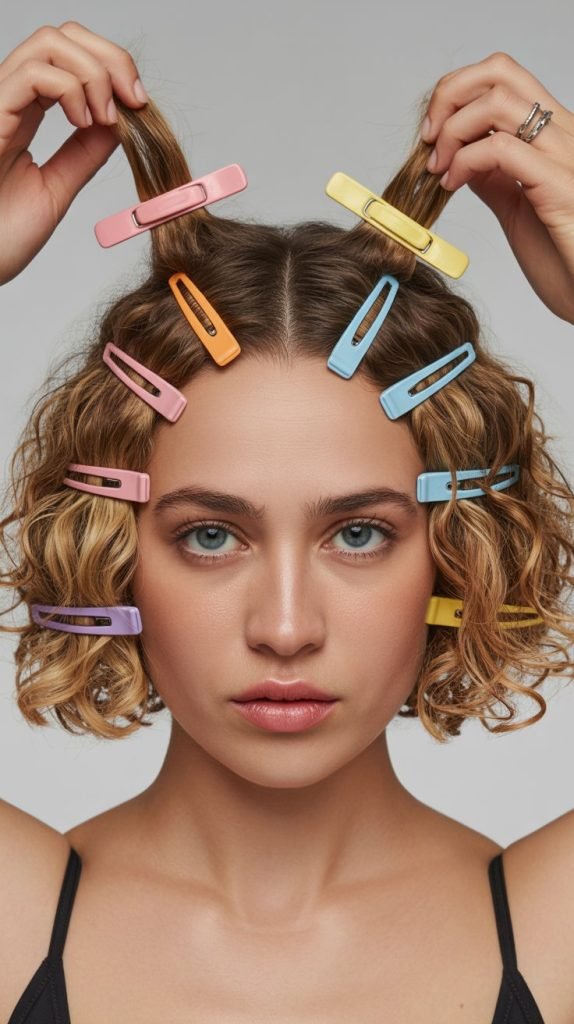
Strategic sectioning is the secret to achieving balanced, even layers that frame your face beautifully and create movement throughout your entire head.
Poor sectioning leads to uneven results, missed spots, and layers that don’t blend seamlessly together.
Basic Sectioning Technique
- Start by creating a center part from your forehead to the nape of your neck, dividing your hair into left and right halves.
- Create a horizontal section from ear to ear across the top of your head, separating the crown area from the lower sections.
- Divide the crown section into two or three smaller sections depending on your hair’s thickness and density.
- Section the lower back area horizontally into two to three layers, with the bottom section being the area from your hairline at the neck up to approximately ear level.
- The side sections should be divided into front (face-framing) and back portions for more precise control.
- Secure each section with a large clip, ensuring the hair is twisted or held firmly so it doesn’t fall out during cutting.
- Work with one section at a time, keeping all other sections clipped away to maintain organization and prevent accidentally cutting the wrong area.
Advanced Sectioning for Layers
- For face-framing layers, create a triangular section starting from the crown and pointing toward your face, isolating the hair that naturally falls around your face.
- The horseshoe section technique involves creating a U-shape from temple to temple across the top of the head, perfect for creating volume at the crown.
- Diagonal sections work well for creating seamless layers that blend naturally without obvious demarcation lines.
- Consider your hair’s natural growth pattern when sectioning, as some people have cowlicks or directional growth that affects how sections should be divided.
- Take smaller sections (1-2 inches wide) in areas where you want more precision, such as around the face or at the crown.
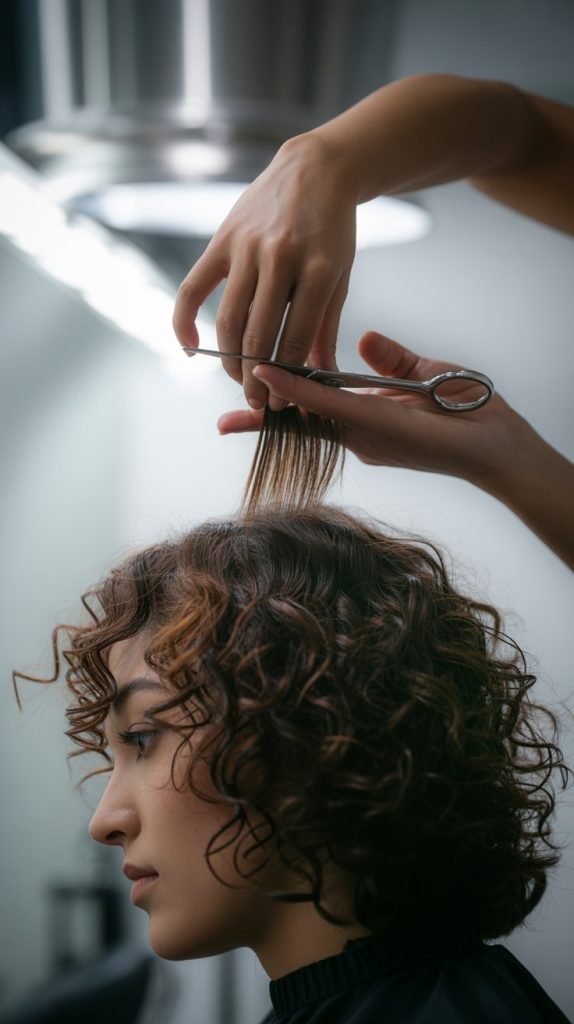
5. The DevaCut Technique for Curly Hair
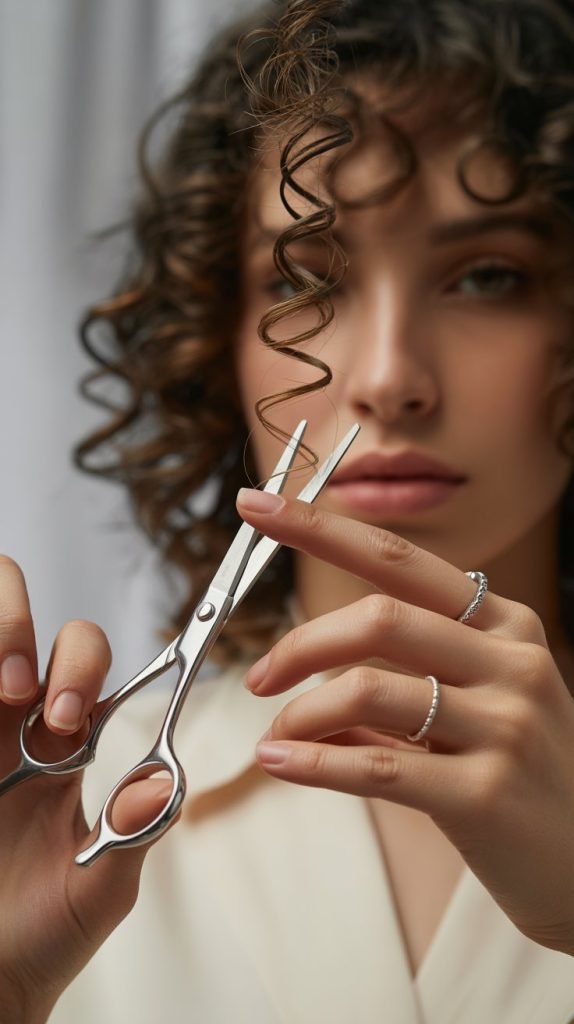
The DevaCut is a revolutionary dry-cutting technique specifically designed for curly and wavy hair that works with your natural curl pattern rather than against it.
This method has become the gold standard for cutting curly hair because it accounts for how each individual curl spirals and falls.
Understanding the DevaCut Method
- The DevaCut technique involves cutting each curl individually while the hair is completely dry and in its natural state.
- This method allows you to see exactly how each curl will spring and where each layer will land after the cut is complete.
- The stylist (or you) cuts curl by curl, following the natural shape and direction of each ringlet or wave.
- By cutting dry, you eliminate the guesswork associated with shrinkage and can make precise adjustments based on how the hair actually behaves.
- The technique focuses on removing weight and creating shape without disrupting the integrity of individual curl clumps.
How to Apply DevaCut Principles at Home
- Start with completely dry hair styled in its natural curl pattern using your regular products and routine.
- Identify problem areas such as excessive bulk, pieces that stick out, or curls that are noticeably longer than their neighbors.
- Hold individual curls or small curl clumps between your fingers and examine where the curl naturally ends.
- Cut each curl at a slight angle following the spiral direction, removing only the very end or the amount needed to achieve your desired length.
- Step back frequently to assess the overall shape and balance, as cutting curl by curl can make it easy to lose perspective on the bigger picture.
- Focus on creating a rounded or triangular shape rather than a blunt line, as this complements the natural volume and texture of curly hair.
- The goal is to enhance your natural curl pattern and remove weight strategically rather than creating perfectly uniform layers.
6. Face-Framing Layers: Step-by-Step Guide
Face-framing layers are transformative for curly hair because they draw attention to your features, soften your overall look, and add dimension that makes your curls appear more intentional and styled.
These strategic shorter pieces around your face create movement and prevent the “triangle” shape that curly hair often develops.
Preparing Face-Framing Sections
- Stand directly in front of a mirror where you can see your entire face and hair clearly from the front.
- Create a triangular section starting at the crown of your head and pointing down toward your face, following the natural hairline.
- This section should be approximately 2-3 inches wide at the top and taper as it comes down the sides of your face.
- Clip away all other hair sections to ensure you’re only working with the face-framing pieces.
- Decide where you want your shortest layer to fall (typically between chin and collarbone for most face shapes).
- Consider your face shape: round faces benefit from layers starting at the jawline, square faces look great with layers beginning at the chin, and long faces can handle shorter layers starting at cheekbone level.
Cutting the Face-Framing Layers
- Pull the face-framing section forward and hold it between your fingers at the desired length for your shortest layer.
- Point your scissors slightly downward (point cutting) rather than cutting straight across to create soft, feathered ends that blend naturally.
- Cut gradually, removing only half an inch to one inch at a time, as you can always cut more but cannot add length back.
- Let the section fall naturally and check how the curl bounces and where it lands on your face.
- Create additional layers by taking horizontal sections within the face-framing area and cutting each one slightly longer than the previous layer (approximately one inch difference).
- Alternate sides frequently to ensure both sides are even and symmetrical as you work.
- Twist individual curls and snip any straggly ends that extend beyond the curl’s natural spiral pattern.
- Test your work by shaking your head and moving naturally to see how the layers fall and frame your face from different angles.
7. Creating Mid-Length and Back Layers
Mid-length and back layers are crucial for removing bulk, creating movement throughout your hair, and preventing the dreaded pyramid shape that occurs when curly hair lacks proper layering.
These interior layers add dimension and allow your curls to cascade beautifully rather than sitting in one heavy mass.
Planning Your Layer Structure
- The key to successful layering is creating a gradual transition from shortest to longest layers without obvious lines of demarcation.
- Typically, the shortest layers are at the crown for volume, with progressively longer layers as you move down the head.
- The difference between each layer should be approximately 1-2 inches, depending on your hair’s texture and desired final look.
- Consider your hair’s density: thick hair benefits from more dramatic layering to remove weight, while fine curly hair needs subtler layers to maintain fullness.
- Map out your desired layer lengths before cutting by holding sections at different lengths and visualizing the final shape.
Cutting Interior Layers
- Start with the bottom section at the nape of your neck, as this will be your longest layer and guide layer.
- Hold a horizontal section of hair perpendicular to the head and cut to your desired length, creating your baseline.
- Move to the section directly above and pull it straight out from the head at a 90-degree angle.
- Cut this section slightly shorter than the previous section (about 1 inch shorter) to create elevation and layering.
- Continue working upward section by section, making each layer progressively shorter to build volume and movement.
- Use the previously cut section as your guide by holding it together with the new section to maintain consistency.
- For the crown area, cut the shortest layers while being conservative, as this area has the most shrinkage and spring.
- Check your work by letting sections fall naturally and observing how the layers blend and create the desired shape.
8. Point Cutting and Texturizing Techniques
Point cutting and texturizing are advanced techniques that soften the edges of your cut, remove additional bulk without sacrificing length, and create seamless blending between layers.
These finishing techniques transform a basic haircut into a polished, professional-looking style that enhances your natural curl pattern.
Point Cutting for Soft Edges
- Point cutting involves holding your scissors vertically and cutting into the hair at an angle rather than cutting straight across horizontally.
- This technique creates soft, feathered ends that blend naturally and prevent harsh lines that look unnatural on curly hair.
- Hold a small section of hair (about 1 inch wide) between your fingers at the desired length.
- Point your scissors upward or downward at approximately a 45-degree angle and make small snips into the ends of the hair.
- Cut only about 1/4 to 1/2 inch into the hair with each snip to maintain length while creating texture.
- This technique is especially effective on face-framing layers and the perimeter of your cut where the hair is most visible.
- Point cutting also helps reduce bulk at the ends without creating that blunt, freshly-cut appearance.
Texturizing and Thinning
- Texturizing removes weight from the interior of your hair without affecting the overall length or shape.
- Regular thinning shears should be used sparingly on curly hair as they can create frizz and disrupt curl patterns if overused.
- Instead of thinning shears, use your regular cutting shears to point cut into the interior of thick sections, removing some hair strands while leaving others intact.
- Focus texturizing on the thickest areas of your hair, typically the lower and middle sections where curly hair tends to accumulate the most weight.
- Slide cutting is another texturizing method where you close the scissors and gently slide them down the hair shaft, removing small amounts of hair along the length.
- Always texturize conservatively, as removing too much weight can make curly hair appear thin, stringy, or damaged.
- Step back after every few snips to assess whether you’re creating the desired effect or removing too much density.
9. Common Mistakes to Avoid

Even experienced home hair cutters can fall into traps that result in unflattering cuts, damaged hair, or layers that don’t work with their curl pattern.
Learning what not to do is just as important as mastering proper cutting techniques, and awareness of common pitfalls helps you achieve better results.
Cutting Too Much at Once
- The most frequent mistake is cutting too aggressively, especially when accounting for shrinkage, which causes hair to appear much shorter than anticipated.
- Always follow the “less is more” principle by cutting conservatively and trimming more if needed rather than removing too much initially.
- Curly hair springs up significantly when dry, so what looks like a modest cut on stretched hair can result in dramatic length loss.
- Cut in small increments of no more than half an inch at a time, checking the results before proceeding.
- Remember that you can always schedule another cutting session in a few days or weeks if you want shorter layers, but you cannot reattach cut hair.
Using the Wrong Tools
- Dull scissors or regular household scissors create ragged cuts that lead to split ends, frizz, and damaged hair that won’t curl properly.
- Non-professional scissors pull and tear hair rather than creating clean cuts, which compromises hair health and curl definition.
- Thinning shears used improperly or too frequently can create a halo of frizz and disrupt the natural curl pattern by removing too much internal structure.
- Cutting with wet hair when you should be cutting dry (or vice versa) results in unexpected length and shape issues.
Ignoring Your Natural Curl Pattern
- Attempting to create layers that fight against your hair’s natural growth direction and curl pattern results in pieces that stick out awkwardly or don’t blend.
- Cutting all curls to the same length without considering that each curl spirals differently creates an uneven, choppy appearance.
- Failing to account for density variations throughout your head leads to imbalanced layers that look intentional in some areas and accidental in others.
- Copying someone else’s layered curly hairstyle without considering your unique curl type, density, and face shape often leads to disappointing results.
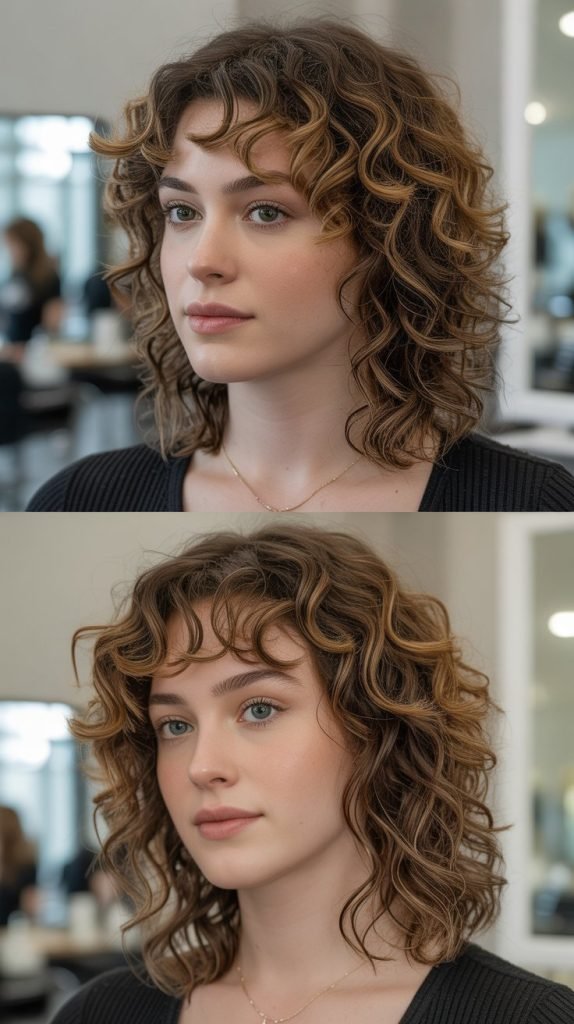
10. Styling and Maintaining Your New Layers

After investing time and effort into cutting beautiful layers, proper styling and maintenance ensure your hard work looks its best and lasts as long as possible.
Layered curly hair requires specific care techniques that enhance the dimensional effect and keep each layer defined and healthy.
Post-Cut Styling Tips
- Immediately after cutting, refresh your curls by lightly misting with water and applying your favorite curl cream or gel using the scrunching method.
- Diffuse your hair on low heat and low speed or air-dry to see your layers’ true shape and how they fall naturally.
- Use the “pineapple” method for sleeping (loosely gather hair at the top of your head) to preserve your layers and prevent flattening.
- Experiment with different parting positions as layers often look dramatically different depending on whether you part your hair in the center, on the side, or without a defined part.
- Apply lightweight oil or serum to the ends of your layers to enhance shine and prevent the cut ends from appearing dry or frizzy.
- Style your layers away from your face by directing curls with your fingers while they’re still wet to maximize the face-framing effect.
Adjusting Layers Over Time
- As your hair grows, layers will naturally shift and the overall shape may require adjustment to maintain the desired look.
- Keep track of which areas tend to grow faster or become bulkier as this information helps you focus your maintenance cuts.
- Don’t feel obligated to maintain the exact same layer lengths forever; your preferences and hair needs may change seasonally or over time.
- Some people prefer to slightly adjust layer lengths with each maintenance cut, gradually moving toward longer or shorter overall styles.
- Take photos of your hair from multiple angles when you love how it looks to provide reference for future cuts.
- If you notice certain layers aren’t working as you hoped, gradually adjust them during maintenance cuts rather than making drastic changes all at once.
Conclusion
Mastering How to Cut Curly Hair at Home with Layers empowers you to take control of your hair journey, save money, and achieve a personalized look that celebrates your unique curl pattern.
Throughout this guide, you’ve learned the fundamental importance of understanding your specific curl type, gathering professional-quality tools, and preparing your hair properly before making that first cut.
You’ve discovered detailed techniques from the revolutionary DevaCut method to strategic face-framing layers and interior layering that removes bulk while enhancing movement and dimension.
The advanced finishing techniques like point cutting and texturizing, combined with awareness of common mistakes to avoid, equip you with the knowledge to create salon-worthy results in your own bathroom.
Remember that cutting curly hair is both an art and a skill that improves with practice, patience, and observation of how your individual curls respond to different techniques.
Start conservatively, work methodically through each section, and trust the process as you transform your curly hair into a beautifully layered masterpiece that makes you feel confident and beautiful every single day.