Cutting curly hair at home can feel intimidating, but with the right techniques and tools, you can achieve salon-quality results in your own bathroom.
Whether you’re looking to save money, maintain your curls between professional appointments, or simply take control of your hair care routine, learning how to cut curly hair at home opens up a world of possibilities.
This comprehensive guide walks you through everything from understanding your curl pattern and gathering the essential tools to mastering dry cutting techniques and troubleshooting common mistakes.
You’ll discover the unique characteristics that make curly hair different from straight hair, learn the step-by-step process for cutting your own curls, and gain confidence in maintaining your beautiful texture.
By the end of this article, you’ll have the knowledge and skills needed to trim, shape, and refresh your curls whenever you need, transforming what once seemed like a daunting task into an empowering self-care ritual.
1. Understanding Curly Hair Structure

Before you pick up scissors, understanding the unique structure of curly hair is essential for achieving the best results
. Curly hair behaves differently than straight hair due to its elliptical follicle shape, which creates the natural spiral pattern.
Each curl has its own personality, spring factor, and shrinkage rate, which means what you see when the hair is wet or stretched will look dramatically different when it dries and bounces back into its natural form.
- Curly hair grows at an angle from the scalp rather than straight out, creating volume and dimension that requires special cutting considerations.
- The hair shaft is typically more porous and prone to dryness because natural oils from the scalp have difficulty traveling down the curved hair strand.
- Each curl has a different shrinkage rate, with some curls retracting up to 75% of their stretched length when dry, making it crucial to account for this when cutting.
- The cuticle layer of curly hair is often raised and more fragile, making it more susceptible to breakage and split ends that need regular maintenance.
- Curly hair naturally forms ringlets, waves, or coils depending on the curl pattern, and understanding your specific pattern helps determine the best cutting approach.
2. Identifying Your Curl Pattern Type

Knowing your specific curl pattern helps you choose the right cutting technique and styling approach for your unique texture.
The widely-used curl typing system ranges from Type 2 (wavy) to Type 4 (coily), with subcategories that provide even more specific classifications.
Identifying where your hair falls on this spectrum allows you to customize your cutting strategy and set realistic expectations for your results.
Curl pattern breakdown:
- Type 2A, 2B, and 2C represent wavy hair patterns that have a gentle S-shape, with 2A being loose waves and 2C having more defined S-curves with some frizz.
- Type 3A, 3B, and 3C indicate curly hair with well-defined ringlets, ranging from loose corkscrews (3A) to tight spiral curls (3C) that have more volume.
- Type 4A, 4B, and 4C describe coily and kinky textures with tightly packed curl patterns that have significant shrinkage and require extra moisture and care.
- Many people have multiple curl patterns on different parts of their head, so you may need to adjust your cutting technique for different sections.
- Understanding your curl pattern helps you anticipate how much hair will spring up after cutting, preventing the common mistake of cutting too much length.
3. Essential Tools for Cutting Curly Hair

Having the right tools makes the difference between a successful home haircut and a frustrating experience that leaves you reaching for a hat. Professional-grade tools designed specifically for hair cutting ensure clean cuts that prevent split ends and damage.
Investing in quality equipment pays off in better results and tools that last for years of home haircuts.
Additional tool considerations:
- Thinning shears can help remove bulk from thick curly hair, but should be used sparingly and only if you’re experienced, as improper use creates frizz.
- A fine-mist spray bottle filled with water or a water-conditioner mix keeps curls hydrated and manageable during the cutting process.
- Hair cutting shears should be sharpened regularly, typically once a year with moderate use, to maintain clean cuts that prevent split ends.
- Avoid using regular household scissors, kitchen shears, or dull blades that create jagged cuts and damage the hair cuticle, leading to frizziness.
- Store your hair cutting scissors in a protective case and use them only for hair to maintain their sharpness and longevity.
4. Preparing Your Hair Before Cutting

Proper preparation sets the foundation for a successful curly haircut and ensures your cuts are accurate and even.
The debate between cutting curly hair wet versus dry is ongoing among professionals, but most curl specialists recommend the dry cutting method for curly textures.
Preparing your hair correctly allows you to see exactly how each curl falls naturally and make precise decisions about where to trim.
Preparation steps:
- Wash your hair 1-2 days before cutting so your curls have their natural texture and oils, which helps you see how they naturally fall and behave.
- Deep condition your hair before cutting to ensure your curls are hydrated and healthy, making them easier to work with and preventing excessive breakage.
- Detangle your hair gently using a wide-tooth comb or your fingers, starting from the ends and working up to the roots to minimize breakage.
- Style your hair exactly as you normally would, using your regular products and techniques, so you can cut based on how you’ll actually wear your hair daily.
- Allow your hair to dry completely in its natural curl pattern before cutting, which shows the true length and shape of each curl when it’s in its natural state.
- Section your hair into manageable parts using clips, typically dividing it into four to eight sections depending on thickness and density.
- Ensure you have proper lighting from multiple angles so you can clearly see each curl and avoid cutting unevenly in shadowy areas.
5. The Dry Cutting Method for Curls

The dry cutting method, also known as the “Ouidad Method” or “DevaCut approach,” is the gold standard for cutting curly hair because it respects the unique nature of each curl.
This technique involves cutting the hair when it’s completely dry and styled in its natural curl pattern, allowing you to see exactly where each curl falls and how much length to remove.
By working with dry hair, you eliminate the guesswork caused by shrinkage and can create a customized shape that enhances your natural texture.
Step-by-step dry cutting process:
- Start with completely dry, styled hair that’s been detangled and sectioned, ensuring each curl is defined and hanging in its natural position.
- Begin with the front sections or framing pieces around your face, as these are the most visible and set the tone for the overall shape.
- Hold individual curls or small curl clusters between your fingers at the desired length, pulling gently without stretching to maintain natural tension.
- Cut each curl at a slight angle rather than straight across, which creates softer edges and helps curls blend seamlessly into the overall style.
- Work on one small section at a time, cutting curl by curl rather than making broad horizontal cuts that can create bulky layers or uneven results.
- Step back frequently to assess your progress from multiple angles, checking for symmetry and balance before continuing to cut more hair.
- Trim conservatively, removing only small amounts at a time, because you can always cut more but you cannot put hair back once it’s cut.
- Focus on removing damaged ends and creating shape rather than removing significant length, especially if this is your first time cutting your own curls.
- Pay attention to how each curl springs back after cutting, as the curl will naturally retract and appear shorter than where you made the cut.
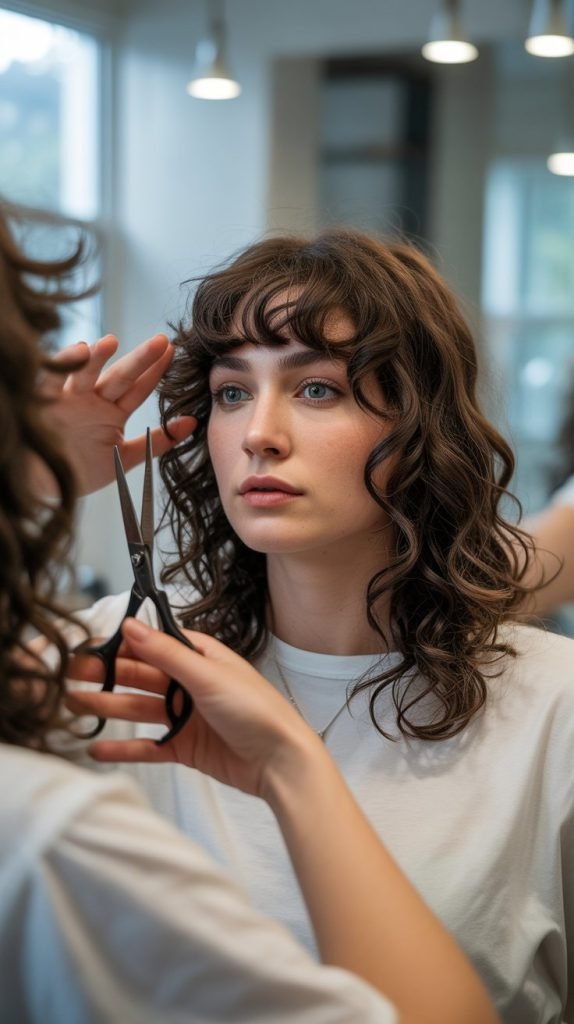
6. Face-Framing Layer Techniques

Face-framing layers enhance your features, add dimension to your curls, and create a polished, intentional look that flatters your face shape.
These strategic layers around the face are often the most noticeable part of your haircut and require special attention to detail.
Cutting face-framing layers yourself requires understanding how your curl pattern affects the final length and being conservative with your cuts until you gain more experience
.
Creating face-framing layers:
- Determine your desired shortest layer by considering where you want curls to hit on your face, typically around the cheekbone, jawline, or collarbone.
- Section out a small triangular section from your part to just behind your ear, isolating the hair that frames your face on each side.
- Pull the section forward and down naturally without stretching, allowing the curls to maintain their spring and show their true length.
- Cut at a slight diagonal angle moving from shorter in front to longer toward the back, creating a gradual transition that looks natural and intentional.
- Check both sides frequently for symmetry by bringing equivalent curls from each side to the center of your face and comparing their length.
- Consider your face shape when deciding on layer placement: longer faces benefit from layers at cheekbone level, while round faces look great with layers below the jawline.
- Remember that curly hair will appear 1-3 inches shorter when dry due to shrinkage, so cut conservatively and adjust as needed after seeing the results.
7. Removing Bulk and Creating Shape
Managing bulk in thick curly hair while maintaining curl definition requires strategic cutting techniques that thin out density without destroying curl patterns.
Creating shape involves removing weight from specific areas to enhance your natural curl pattern and create a more balanced, flattering silhouette.
This process requires patience and understanding of how removing interior weight affects the overall curl structure.
Bulk removal techniques:
- Use the point-cutting technique by positioning scissors vertically into the curl and making small, careful snips that remove bulk without creating blunt lines.
- Focus on removing weight from the interior of the hair rather than the perimeter, which maintains length while reducing heaviness that weighs down curls.
- Avoid over-thinning the hair, which can create a frizzy, stringy appearance and disrupt curl clumps, making hair look sparse rather than shapely.
- Work on mid-lengths and interior sections where bulk tends to accumulate, rather than thinning the ends which need density for curl formation.
- Twist individual curl sections and carefully trim the ends of the twist to remove damaged ends while maintaining the curl integrity.
- Create subtle layers throughout the hair by cutting curls at slightly different lengths, which prevents the triangular or pyramid shape common with one-length curly haircuts.
- Check your work by shaking out your curls and seeing how they settle naturally, then making small adjustments to areas that need more shape or less weight.
8. Trimming Split Ends and Damage

Regular split end trimming is essential for maintaining healthy curls that are defined, shiny, and frizz-free.
Split ends, also called trichoptilosis, occur when the protective cuticle layer of the hair strand wears away, causing the hair to split into two or more strands.
If left untrimmed, splits travel up the hair shaft causing more damage, breakage, and the frizzy appearance that plagues many curly-haired individuals.
Split end identification and removal:
- Examine your hair in bright, natural light where split ends are most visible, looking for white dots at the ends or obvious splitting of the hair strand.
- Single strand knots, also called fairy knots, are common in curly hair and should be carefully trimmed away as they cause tangles and breakage.
- Search and destroy method involves going through your hair curl by curl, identifying damaged ends, and trimming only those specific pieces rather than cutting all hair.
- Cut at least 1/4 inch above the visible damage to ensure you’ve removed the compromised section and prevent the split from continuing up the shaft.
- Look for other signs of damage like mid-shaft splits, thinning ends, loss of curl pattern, or rough texture that indicates the hair needs trimming.
- Schedule split end trims every 8-12 weeks for most curl types, though some individuals with very healthy hair can extend this to 12-16 weeks.
- Use sharp, professional scissors for all trimming as dull blades create rough cuts that actually cause split ends rather than preventing them.
9. Cutting Bangs on Curly Hair

Curly bangs add personality, frame your face beautifully, and can completely transform your look, but they require special consideration due to shrinkage and curl pattern variation.
Cutting your own curly bangs is one of the trickier home haircut tasks because the margin for error is small and bangs are highly visible.
Understanding how your specific curl pattern will behave as bangs helps you make smart decisions about length and style.
Curly bang cutting guidelines:
- Section out your bang area by creating a triangular section from the highest point of your eyebrow arch on each side, meeting at a point on your crown.
- Cut curly bangs dry and in their natural curl pattern so you can see exactly where they’ll fall when you’re wearing them in your normal style.
- Always cut bangs longer than your target length initially, as you can gradually trim shorter but cannot add length back if you cut too much.
- For traditional bangs that hit at eyebrow level, cut to nose-length or slightly below when the curl is stretched, accounting for significant shrinkage.
- Consider curtain bangs or side-swept bangs if you’re nervous about commitment, as these styles are more forgiving and easier to grow out gracefully.
- Point-cut into the bangs at an angle rather than cutting straight across, which creates softer edges and prevents the blocky look that can occur with blunt cuts.
- Test your bangs by styling them as you normally would, then making small adjustments if needed before finalizing the cut.
- Remember that curly bangs require daily styling and maintenance, so consider whether you’re willing to commit to the extra effort before cutting.
10. Back Section Cutting Strategies

Cutting the back of your own curly hair presents unique challenges since you cannot see what you’re doing directly and must rely on mirrors, feel, and technique.
The back section often has different curl patterns and density than the front and sides, requiring adjusted cutting approaches.
With proper setup, patience, and the right strategies, you can successfully trim and shape the back of your hair at home.
Effective back section approaches:
- Set up a three-way mirror system or use a handheld mirror to view the back of your head while facing your main mirror, adjusting until you have a clear view.
- Section the back into smaller, manageable subsections using clips, working with one small section at a time to maintain control and accuracy.
- Use the ponytail cutting method for the back by pulling hair into a high ponytail at the crown, then cutting across the ponytail at your desired length for layered results.
- Feel each curl with your fingers to locate split ends and damage in the back sections, cutting conservatively based on touch when visual inspection is difficult.
- Consider the “flip and trim” method by flipping your head forward, allowing back curls to fall forward where you can see them, then carefully trimming ends.
- Ask a trusted friend or family member to help with the back sections if you’re uncomfortable cutting blindly, especially for your first few home haircuts.
- Take frequent breaks to check your progress from multiple angles, ensuring the back blends smoothly with the sides and front sections.
- Remember that back hair often has different shrinkage rates than front hair, so account for this variation when cutting to maintain balanced proportions.
11. Maintaining Curl Definition While Cutting

Preserving your natural curl clumps and definition during the cutting process ensures your hair looks its best after your home haircut is complete.
Every time you handle curly hair, you risk disrupting the natural curl pattern and creating frizz, which is why technique matters as much as the actual cuts you make.
Understanding how to work with your curls rather than against them results in a finished cut that enhances rather than diminishes your natural texture.
Curl definition preservation techniques:
- Avoid combing or brushing through your hair repeatedly during the cutting process, which breaks up curl clumps and creates frizz that makes accurate cutting difficult.
- Cut individual curls or small curl clusters rather than sectioning hair into large, unnatural sections that disrupt how your curls naturally group together.
- Keep a spray bottle handy to lightly mist sections that have lost definition during handling, reactivating curl patterns without fully re-wetting the hair.
- Use your fingers to separate and smooth curls rather than tools whenever possible, which maintains the natural curl structure and minimizes frizz.
- Work systematically through your head rather than randomly jumping between sections, which minimizes the total handling time and reduces disruption.
- Allow curls to spring back into place after each cut before moving to the next curl, giving you accurate feedback about the true length and shape.
- Consider applying a small amount of leave-in conditioner or curl cream to your hands while working to help smooth curls and maintain definition.
12. Common Mistakes to Avoid

Learning from common curly hair cutting mistakes helps you avoid frustration, bad haircuts, and the need for professional correction.
Many of these errors stem from treating curly hair like straight hair or cutting too aggressively without understanding how curls behave.
Being aware of these pitfalls before you start cutting puts you ahead of most first-time home hair cutters.
Critical mistakes and how to prevent them:
- Cutting hair while wet is the most common mistake, as wet curls appear much longer than dry curls, leading to cutting too much length and being shocked by extreme shrinkage.
- Using dull scissors or household scissors creates ragged cuts that damage the hair cuticle, leading to split ends, frizz, and unhealthy-looking hair.
- Cutting too much hair at once in the hopes of achieving dramatic results usually ends in regret, as conservative cutting allows for adjustments and prevents disaster.
- Ignoring your natural curl pattern and cutting in unnatural sections creates an unbalanced shape that fights against how your hair wants to naturally fall.
- Over-thinning curly hair with thinning shears removes too much density, destroying curl clumps and creating a frizzy, stringy appearance that lacks body.
- Cutting all curls to the same length creates a triangular or pyramid shape instead of the rounded, dimensional silhouette that flatters curly hair.
- Rushing through the cutting process without frequent checks leads to uneven results and asymmetry that may not be noticeable until it’s too late.
- Cutting hair when you’re tired, emotional, or rushed increases the likelihood of mistakes, so always cut your hair when you’re calm and have plenty of time.
13. Styling After Your Home Haircut
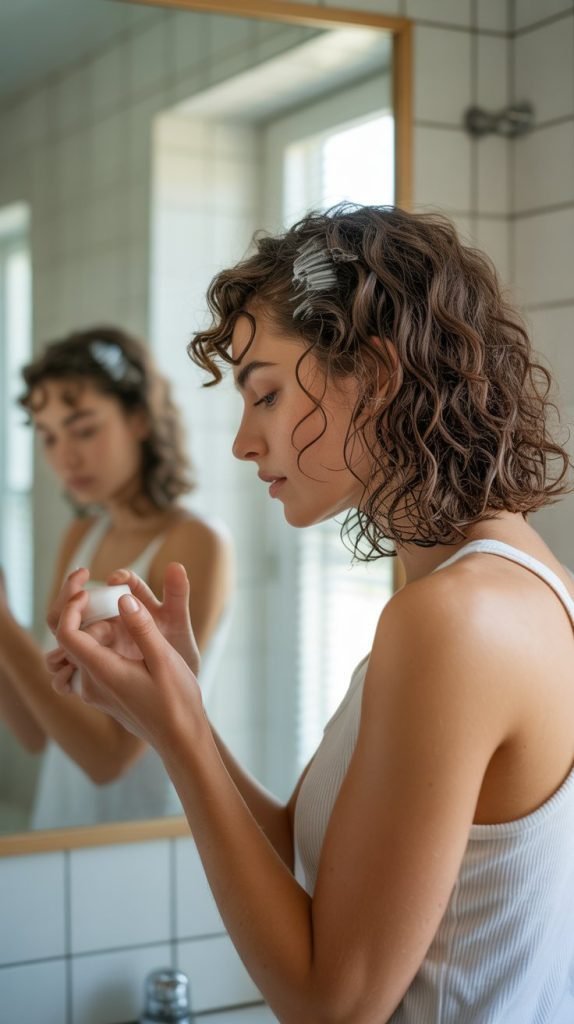
Properly styling your hair immediately after cutting reveals the true results of your work and helps you identify any areas that need adjustment.
The post-cut styling session is also the perfect time to assess whether you’ve achieved your desired shape and make small corrections before finalizing your haircut.
Using your regular styling routine ensures you see realistic, everyday results rather than a temporarily styled look.
Post-cut styling process:
- Gently shake out your hair and use your fingers to fluff and separate curls, removing any hair clippings that may be caught in your curls.
- Consider refreshing your curls with a water-based spray or leave-in conditioner to rehydrate any areas that became dry or frizzy during cutting.
- Apply your regular styling products using your normal technique, whether that’s the praying hands method, scrunching, raking, or another application style.
- Allow your hair to dry completely in its natural curl pattern, either air-drying or using a diffuser attachment on your hair dryer for faster results.
- Assess the overall shape, balance, and evenness of your haircut once completely dry, checking from all angles and in different lighting conditions.
- Make any small adjustments or corrections needed now that you can see the full results, trimming conservatively if you notice uneven areas or missed spots.
- Take photos of your finished haircut from multiple angles to document your results and track your progress as you continue cutting your hair at home.
14. Troubleshooting Uneven Results

Even experienced home hair cutters occasionally end up with uneven results that need correction.
Rather than panicking or rushing to a salon, many minor issues can be fixed at home with careful assessment and strategic trimming.
Understanding how to identify and correct common problems turns a potentially disappointing experience into a learning opportunity that improves your skills.
Fixing common unevenness issues:
- For hair that’s shorter on one side, identify the longer side and carefully trim small amounts until both sides match, checking frequently in the mirror.
- When layers are choppy or disconnected, use point-cutting to blend harsh lines and create smoother transitions between different lengths.
- If you’ve cut too short in one area, embrace the shorter length and gradually cut surrounding areas to blend, rather than cutting everything to match the shortest point.
- Bulky or heavy sections that lack shape can be addressed by removing interior weight through point-cutting or gentle thinning of mid-lengths.
- Asymmetrical face-framing pieces can be evened out by bringing equivalent curls from each side to the center of your face and trimming to match.
- Pyramid or triangular shapes can be corrected by cutting shorter layers on top and removing weight from the sides to create a more rounded silhouette.
- Step away from your hair for several hours or even a day before making corrections, as immediate post-cut assessment isn’t always accurate.
- If you’ve made a significant mistake that you cannot fix yourself, consult a professional curl specialist who can correct the cut without removing excessive length.
15. Maintaining Your Cut Between Sessions

Proper maintenance extends the life of your haircut, keeps your curls looking fresh and defined, and reduces the frequency of needed trims.
The work doesn’t end when you put down the scissors – ongoing care ensures your curls maintain their shape and health until your next cutting session.
Establishing a maintenance routine helps you get the most from each home haircut.
Maintenance strategies:
- Perform mini search-and-destroy missions every few weeks, trimming individual split ends and damaged pieces as you notice them rather than waiting for a full cutting session.
- Maintain a consistent hair care routine with regular deep conditioning treatments, which keeps curls hydrated and healthy, reducing breakage and split ends.
- Protect your curls while sleeping by using a silk or satin pillowcase or bonnet, which prevents friction that causes frizz and breakage.
- Refresh your curls between wash days using a water-based spray and light styling products, maintaining the shape and definition created by your haircut.
- Trim your hair every 8-12 weeks for most curl types, though this varies based on hair health, growth rate, and styling practices that may cause damage.
- Keep your hair cutting scissors clean, dry, and stored in a protective case, and have them professionally sharpened annually to maintain cutting performance.
- Take progress photos after each home haircut to track your improvement and document which techniques work best for your specific curl pattern.
Conclusion
Mastering how to cut curly hair at home transforms your relationship with your curls and empowers you to take control of your hair care journey.
Throughout this complete guide, you’ve learned the essential foundations including understanding your unique curl structure and pattern, gathering the right professional tools, and preparing your hair properly before cutting.
You’ve discovered the superior dry cutting method that respects your natural curl pattern, explored techniques for face-framing layers and bulk removal, and learned strategies for tackling challenging areas like the back sections and curly bangs.
By avoiding common mistakes, maintaining curl definition throughout the process, and knowing how to troubleshoot uneven results, you’re equipped to achieve beautiful, balanced haircuts from the comfort of your home.
Remember that cutting curly hair is a skill that improves with practice, so be patient with yourself during your first few attempts and celebrate the progress you make with each session.
With the comprehensive knowledge provided in this guide on how to cut curly hair at home, you can confidently maintain healthy, well-shaped curls that showcase your natural texture at its absolute best, saving money while enjoying the creative satisfaction of caring for your own beautiful curls.