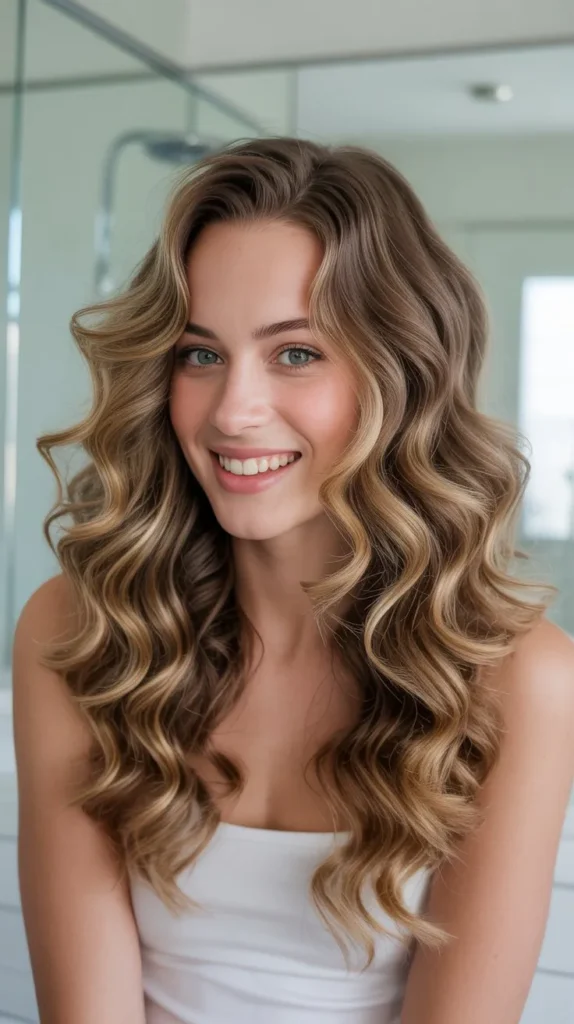
Want to curl your hair with a flat iron?It’s easier than you think.
In this guide, you will learn how to achieve beautiful curls in just seven simple steps.
Flat irons are not just for straightening hair.With the right technique, they can be used to create gorgeous curls.
This method is quick and efficient, making it perfect for busy mornings or last-minute plans.
No need to buy extra curling tools when you can do it all with one device.Ready to transform your straightener into a curling tool?
Let’s dive into these easy-to-follow steps and get those stunning curls you’ve always wanted.
Choosing The Right Flat Iron
Hey friends, if you’re wondering how to curl your hair with a flat iron, you’ve come to the right place.
But before we dive into the actual curling process, it’s important to choose the right flat iron.
The type of flat iron you use can make a big difference in the quality of your curls.
Let’s break it down into simple steps.
Plate Material
The material of the flat iron plates matters a lot.
It can affect how well the iron curls your hair and how healthy your hair stays.
Here are some common materials:
- Ceramic: Ceramic plates distribute heat evenly.
- They are good for most hair types.
- Titanium: Titanium plates heat up quickly and maintain a high temperature.
- They are great for thick or coarse hair.
- Tourmaline: Tourmaline plates produce negative ions, which reduce frizz.
- These are perfect if you want smooth curls.
For example, my friend Sarah has thick hair and swears by her titanium flat iron.
It heats up fast and gives her beautiful curls every time.
Temperature Settings
Temperature settings are crucial for achieving perfect curls
. Different hair types need different heat levels.
| Hair Type | Temperature Range |
|---|---|
| Fine or Damaged Hair | 250-300°F |
| Normal Hair | 300-350°F |
| Thick or Coarse Hair | 350-400°F |
It’s like cooking; you wouldn’t use high heat for delicate foods, right? Same goes for your hair.
Too much heat can damage fine hair, while thick hair needs more heat to hold curls.
My cousin once used a high-temperature setting on her fine hair, and it ended up looking frizzy and damaged.
So, always choose the right temperature for your hair type to avoid any mishaps.
Choosing the right flat iron is the first step to getting those gorgeous curls.
Next, we’ll go through the actual curling process in just 7 easy steps. Stay tuned!
Preparing Your Hair
Begin by washing and thoroughly drying your hair.
Apply a heat protectant spray to prevent damage.
Before you start curling your hair with a flat iron, proper preparation is essential.
It ensures your hair stays healthy and the curls look fantastic.
Let’s dive into the steps you need to take to get your hair ready.
Washing And Drying
First things first, clean hair is key.
Washing your hair removes any dirt and oils that can make styling more difficult.
Here’s a simple routine to follow:
1. Shampoo and Conditioner: Use a shampoo and conditioner that suits your hair type.
This keeps your hair hydrated and smooth.
2. Towel Dry: Gently pat your hair with a towel to remove excess water.
Avoid rubbing, as this can cause frizz.
3. Air Dry or Blow Dry: If you’re in a hurry, use a blow dryer on a low heat setting. Otherwise, let your hair air dry.
Personal tip: I prefer air drying to minimize heat damage.
But, if you’re pressed for time, a blow dryer works just fine.
Applying Heat Protectant
Next up, you’ll need to protect your hair from the heat of the flat iron.
This step is crucial to prevent damage and keep your hair looking healthy.
Choose the Right Product: Look for a heat protectant spray or serum.
They create a barrier between your hair and the heat.
Apply Evenly: Spray or apply the product evenly throughout your hair.
Focus on the ends, as they are more prone to damage.
–Comb Through: Use a wide-tooth comb to distribute the protectant evenly.
Why this step? Think of it as putting on sunscreen before going out in the sun.
Your hair needs that extra layer of protection.
Now that your hair is clean, dry, and protected, you’re ready to move on to the actual curling process.
Stay tuned for the next steps where I’ll guide you through creating those beautiful curls with your flat iron.
Sectioning Your Hair
Divide your hair into sections for better control and even curls.
This step helps in achieving consistent results.
Sectioning your hair is a crucial step in curling with a flat iron.
It ensures you curl every strand evenly.
This leads to a polished look.
Poor sectioning can result in uneven curls.
Follow these simple steps for perfect sections.
Creating Sections
Start by brushing your hair. This removes tangles.
Then, divide your hair into two parts.
Use a comb to create a straight line from your forehead to your neck.
Clip the top part out of the way. Next, split the bottom section into two more parts.
Again, use your comb.
Create a vertical line from your ear to the back of your head.
Now you have four sections.
This makes curling easier and faster.
Clipping Sections
Use hair clips to secure each section.
This keeps them separate.
Start with the bottom sections.
Clip the top sections last.
This helps you focus on one part at a time.
Choose large, sturdy clips.
They hold hair firmly.
Small clips may slip.
Plastic or metal clips work best.
Avoid rubber bands.
They can damage hair.
Ensure clips are tight but not too tight.
This avoids discomfort.
Now, your hair is ready for curling.
Remember, proper sectioning is key.
It makes the process smooth and efficient.
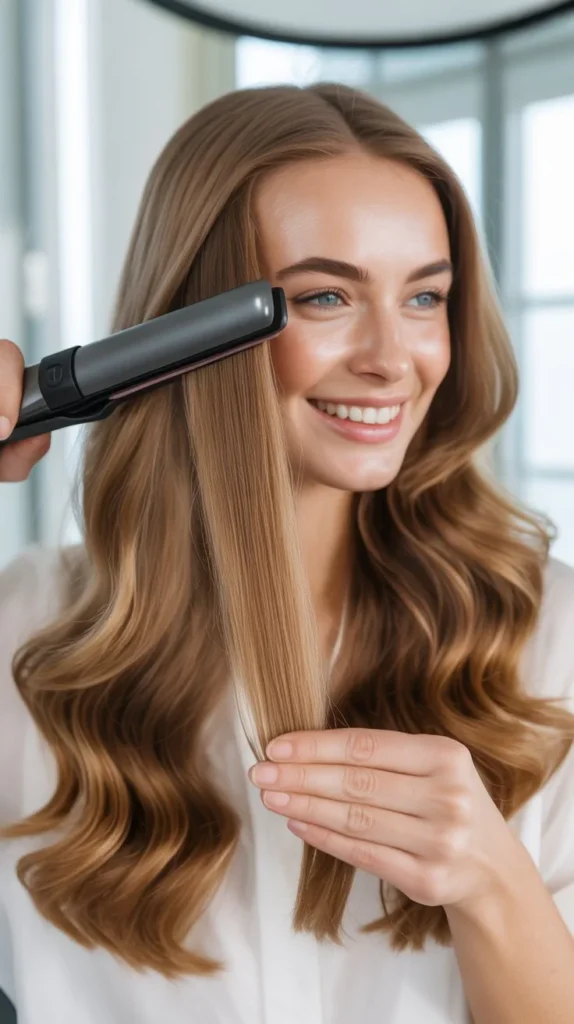
Holding The Flat Iron Correctly
Getting the perfect curls with a flat iron starts with holding it correctly.
This step is crucial for creating beautiful and consistent curls.
By mastering the proper grip and positioning, you can achieve salon-worthy curls at home with ease.
Grip And Angle
Hold the flat iron with a firm, but comfortable grip.
Keep your wrist relaxed.
The angle at which you hold the flat iron matters.
Hold it at a slight angle, not straight up or down.
This helps in creating smooth, even curls.
Positioning
Start by positioning the flat iron near your roots.
Make sure it is close but not touching the scalp to avoid burns.
Clamp the hair gently to avoid creating lines or damage.
Then, twist the flat iron away from your face.
This technique helps in forming natural-looking curls.
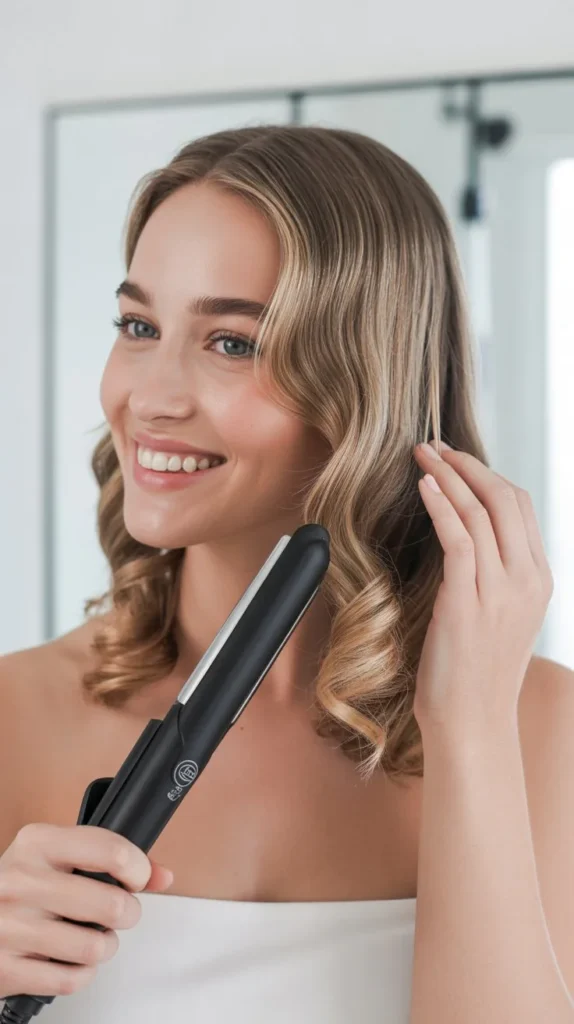
Creating The Curl
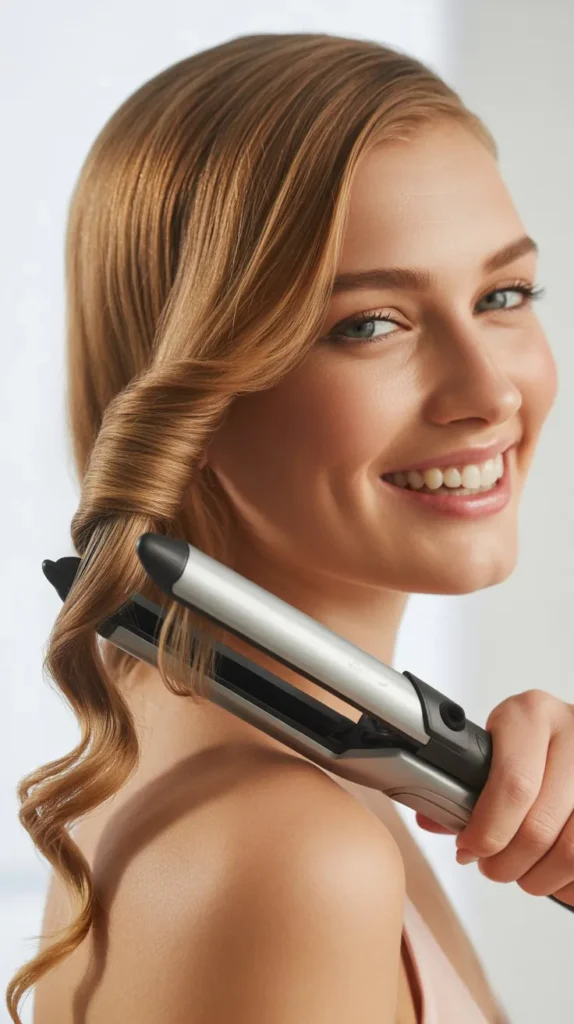
Learn how to curl hair with a flat iron in seven easy steps.
Achieve beautiful curls effortlessly with this simple guide.
Perfect for any hair type.
Hey there, ready to curl your hair with a flat iron?
It’s easier than you might think.
With the right technique, you can get those beautiful curls in no time.
Let’s dive into how to create the perfect curl step by step.
Starting Point
First things first, start with clean and dry hair.
I remember the first time I tried this, my hair was a little damp and, well, let’s just say it didn’t work out.
Trust me, dry hair is key.
Section your hair: Use clips to divide your hair into manageable sections.
Heat your flat iron: Set it to a medium temperature.
Too hot can damage your hair.
Apply heat protectant: This is important to keep your hair healthy.
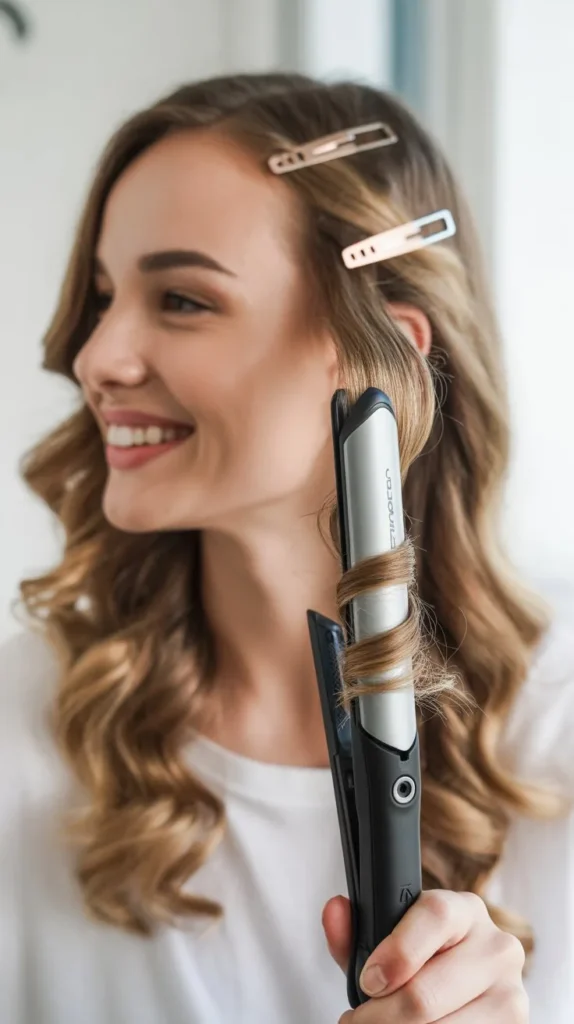
Twisting Technique

Now, here comes the fun part.
The twisting technique is what makes the magic happen.
1. Grab a section of hair: About 1-2 inches wide.
2. Place the flat iron: Clamp it at the root of the section.
3. Twist the iron: Here’s the trick.
Twist the flat iron away from your face as you slowly pull it down the hair.
4. Release the curl: Gently let go of the hair and voila, a curl is born!
When I first tried this, I was amazed at how easy it was.
Just like that, I had a head full of bouncy curls.
Repeat: Continue the process with the rest of your hair.
Alternate directions: For a more natural look, twist some sections towards your face and some away.
Pro Tip: If you want looser curls, pull the flat iron faster.
For tighter curls, go slower. And there you have it!
With a little practice, you’ll be curling your hair like a pro. Happy styling!
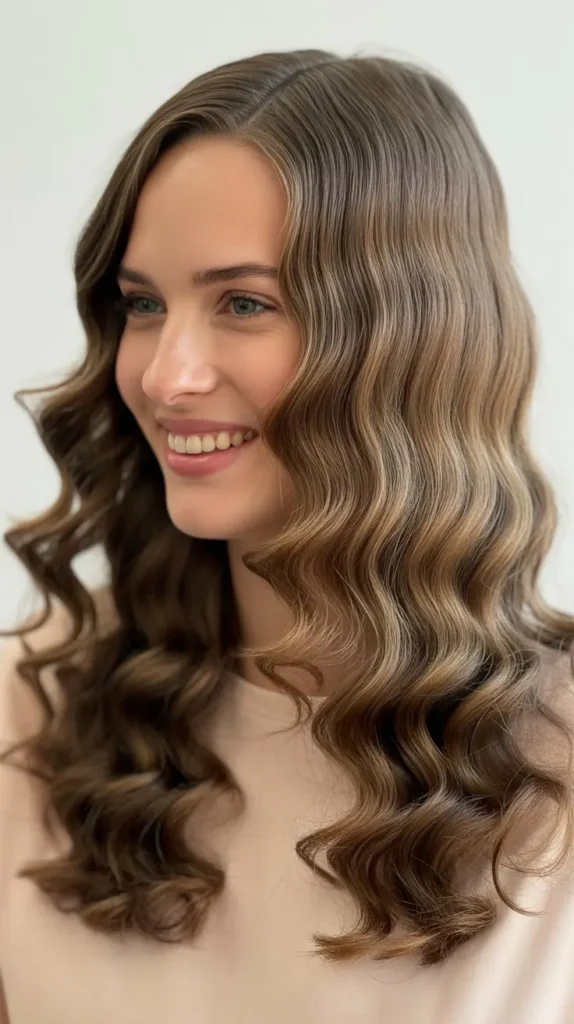
Setting The Curl
Setting the curl with a flat iron might seem daunting.
But with the right technique, you can achieve beautiful, long-lasting curls.
This section will guide you through the essential steps to ensure your curls stay defined and bouncy.
Holding Time
How long you hold the flat iron is crucial.
If you want tight curls, hold it longer.
For loose waves, a shorter holding time works.
Typically, hold the iron on your hair for 8-12 seconds.
Adjust based on your hair type.
Thicker hair may need a bit more time.
Fine hair requires less.
Always keep the iron moving to avoid heat damage.
Releasing The Iron
Releasing the iron properly is vital to maintaining the curl.
Slowly open the plates to release the hair.
Don’t pull it away quickly.
This helps the curl set better.
Let the curl cool in your hand for a few seconds.
This step locks in the shape.
Repeat for all sections of your hair.
Soon, you’ll have a head full of beautiful curls.
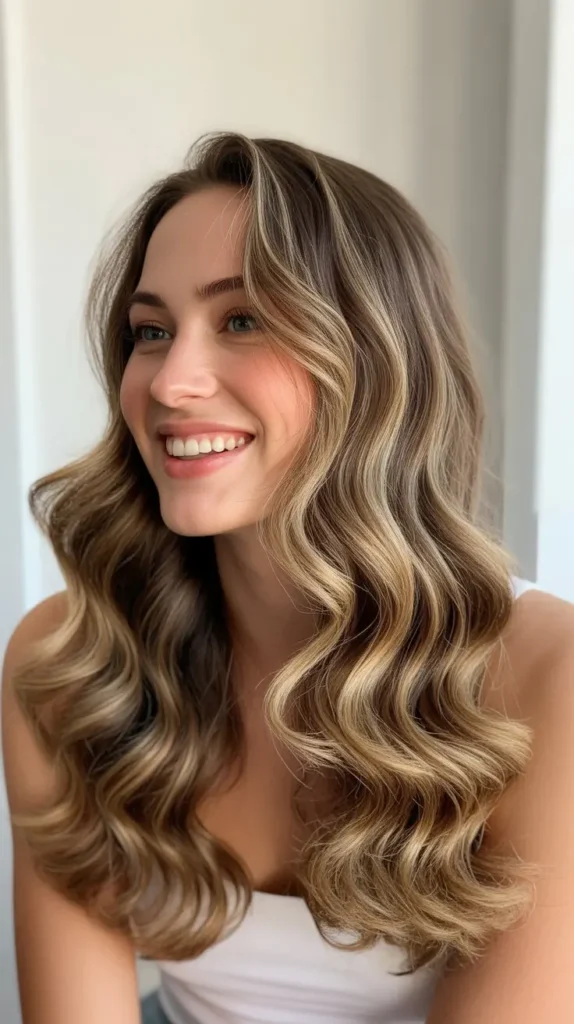
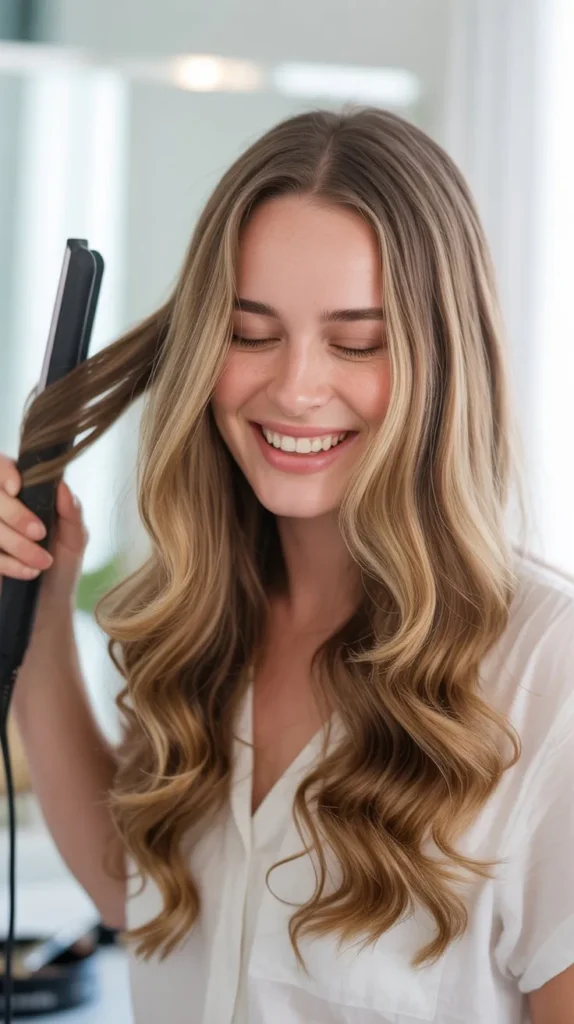
Finishing Touches
After curling your hair with a flat iron, it’s time for the finishing touches.
These steps ensure your curls look polished and stay in place all day.
Follow these simple tips for a flawless finish.
Brushing Out Curls
Start by gently brushing out your curls.
Use a wide-tooth comb or your fingers.
This helps to soften the curls and create a more natural look.
Be gentle to avoid frizz.
Applying Hairspray
Next, apply a light mist of hairspray.
Hold the can about 12 inches away.
This helps to set the curls without making them stiff.
Choose a flexible hold hairspray for a natural finish.
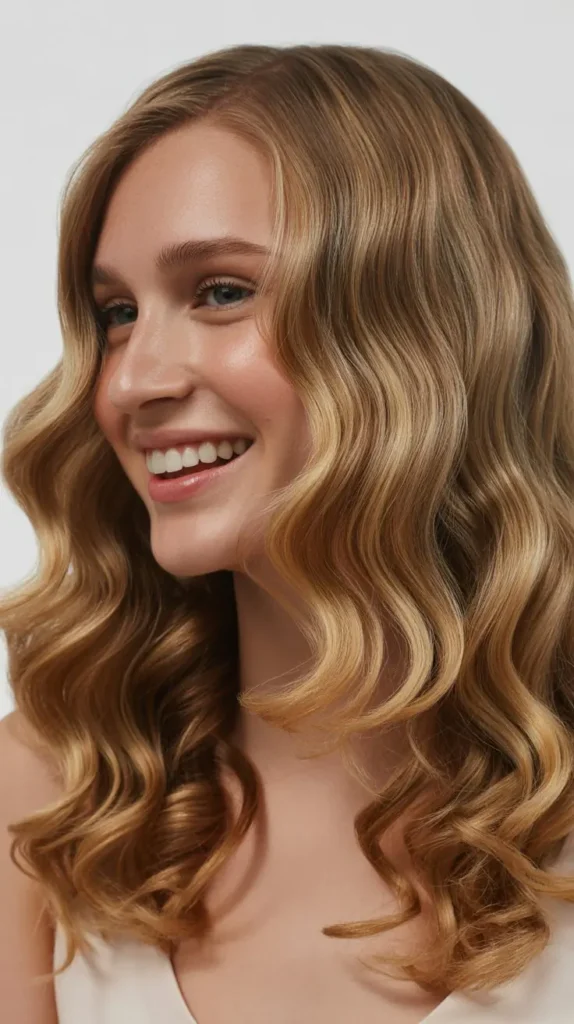
Maintaining Your Waves
Congratulations! You’ve learned how to curl your hair with a flat iron.
But the journey doesn’t end here. Keeping those beautiful waves intact is the next step.
Let’s dive into how you can maintain your waves effortlessly.
Nighttime Care
Taking care of your waves at night is crucial.
This will help you wake up with perfect waves, ready to go.
- Use a silk pillowcase: Silk pillowcases reduce friction.
- They help keep your waves smooth and frizz-free.
- Pineapple your hair: No, not the fruit! Gather your hair into a loose, high ponytail.
- This keeps your waves from getting squished while you sleep.
- Wrap it up: A silk scarf or bonnet can be your best friend.
- It protects your hair and keeps your waves in place.
Refresh Tips
Waking up with waves that need a little boost?
No worries.
Here are some easy tips to refresh your waves:
- Spritz with water: Lightly mist your hair with water.
- This helps to reshape any flattened waves.
- Use a styling cream: A small amount of styling cream can bring your waves back to life. Rub it between your hands and scrunch your hair gently.
- Heat touch-up: For stubborn waves, use your flat iron to quickly touch up.
- Just remember, less is more to avoid heat damage.
Maintaining your waves doesn’t have to be a chore.
With these simple steps, your waves will stay beautiful and bouncy, day and night.
| Care Tip | Why It’s Important |
|---|---|
| Silk Pillowcase | Reduces friction, keeps hair smooth |
| Pineapple Hair | Prevents waves from being squished |
| Wrap Hair | Protects waves overnight |
| Spritz with Water | Helps reshape flattened waves |
| Styling Cream | Revives and defines waves |
| Heat Touch-Up | Quick fix for stubborn waves |
Remember, little care can go a long way. Happy waving!
Frequently Asked Questions
How To Curl Your Hair With A Curling Iron For Beginners Step By Step?
Plug in and heat the curling iron.
Section your hair.
Wrap a section around the barrel.
Hold for 10 seconds.
Release and repeat.
How To Curl Hair With Flat Iron For Beginners?
Start with clean, dry hair.
Section your hair.
Clamp a section with the flat iron, twist it 180 degrees, and slowly glide down.
Repeat for all sections. Finish with hairspray.
How Do You Use A Straightener Step By Step?
1. Plug in the straightener and set the desired temperature.
2. Wash, dry, and brush your hair thoroughly.
3. Section your hair and start straightening from the bottom layers.
4. Glide the straightener slowly from root to tip.
5. Repeat for all sections until hair is smooth and straight.
What Is The Trick To Curling Hair?
Use a high-quality curling iron.
Section your hair.
Wrap small sections around the barrel.
Hold for 10 seconds. Release gently.
Conclusion
Achieving beautiful curls with a flat iron is simple.Follow the seven steps for stunning results.
Practice makes perfect, so don’t worry if it takes time. Remember, quality tools are essential for smooth curls.
Use a heat protectant to prevent damage.Be patient and gentle with your hair.
Soon, you’ll enjoy lovely, bouncy curls.Show off your new hairstyle with confidence. Happy styling!