Finding the perfect hairstyle for your little one can feel overwhelming with so many adorable options available.
Whether you’re preparing for a special occasion, school pictures, or simply want to keep your toddler’s hair neat and stylish throughout the day, the right hairstyle makes all the difference.
Black toddler girls have beautifully textured hair that opens up a world of creative styling possibilities, from protective styles that promote healthy hair growth to quick everyday looks that withstand active play.
This comprehensive guide to 27 Cute Toddler Hairstyles for Black Girls will walk you through classic favorites and trending styles, complete with styling tips, maintenance advice, and practical considerations for your busy lifestyle.
You’ll discover simple styles you can create in minutes on hectic mornings, elaborate designs for those picture-perfect moments, and protective options that keep your daughter’s delicate hair healthy while looking absolutely precious.
1. Classic Puff with Headband
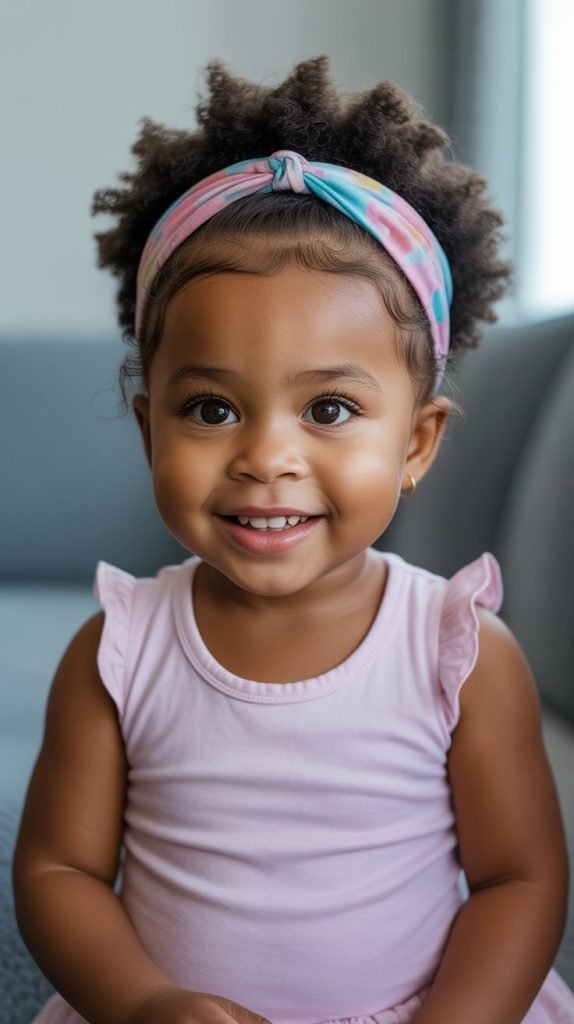
The puff is a timeless style that combines simplicity with undeniable cuteness, making it perfect for toddlers who are always on the move.
This style gathers all the hair into one high ponytail, creating a beautiful cloud-like puff on top while a colorful headband adds extra charm.
- Gather your toddler’s hair into a high ponytail using a soft, snag-free elastic band to avoid breakage.
- Fluff out the ponytail gently with your fingers to create volume and achieve that signature puff shape.
- Add a decorative headband in her favorite color or pattern to frame her face and complete the look.
- This style works beautifully on wash-and-go hair or stretched hair, depending on your preference.
- Apply a light leave-in conditioner before styling to keep the hair moisturized throughout the day.
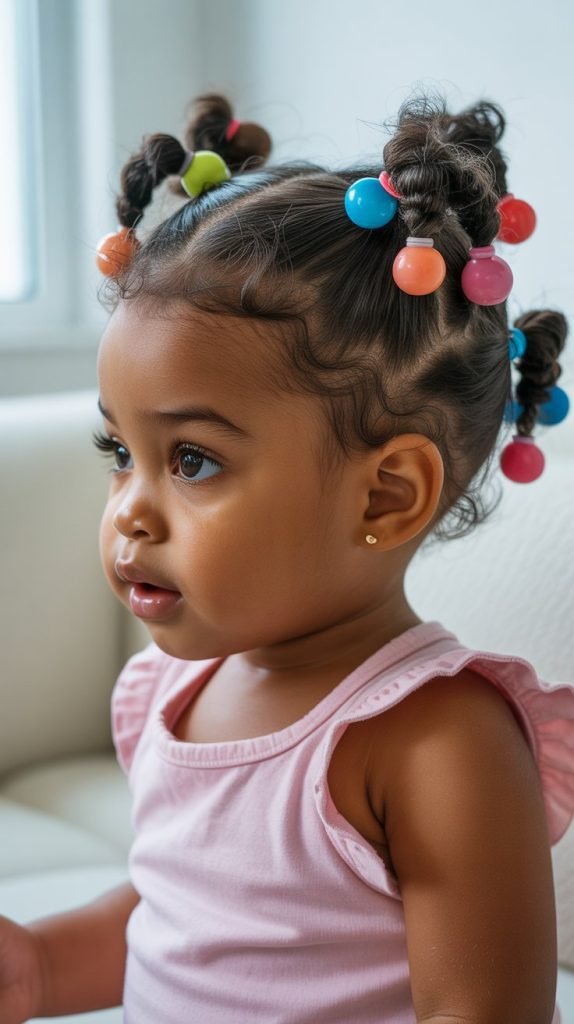
2. Two Ponytails with Beads
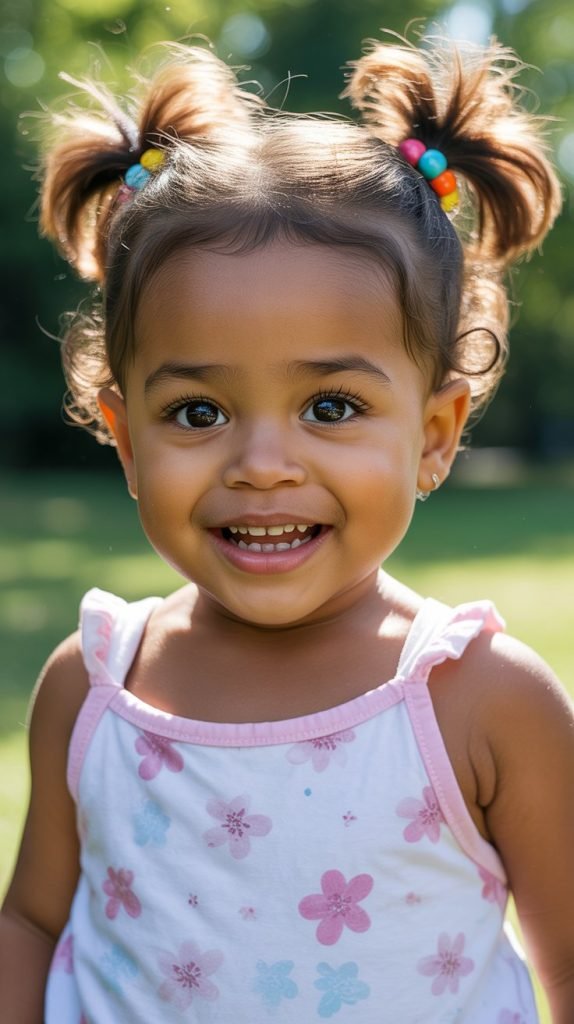
Two ponytails create an instantly playful look that toddlers absolutely love, especially when decorated with colorful beads that click together as they move.
This style divides the hair down the middle and secures each section into cute ponytails on either side of the head.
- Part your daughter’s hair straight down the middle from forehead to nape, creating two equal sections.
- Secure each section into a ponytail at whatever height you prefer—high for extra bounce or lower for a calmer look.
- Thread colorful beads onto the ponytails, securing them with small elastics at intervals to keep them in place.
- Choose lightweight plastic beads specifically designed for children’s hair to avoid pulling or discomfort.
- This style typically lasts 2-3 days with proper nighttime care using a satin bonnet or pillowcase.
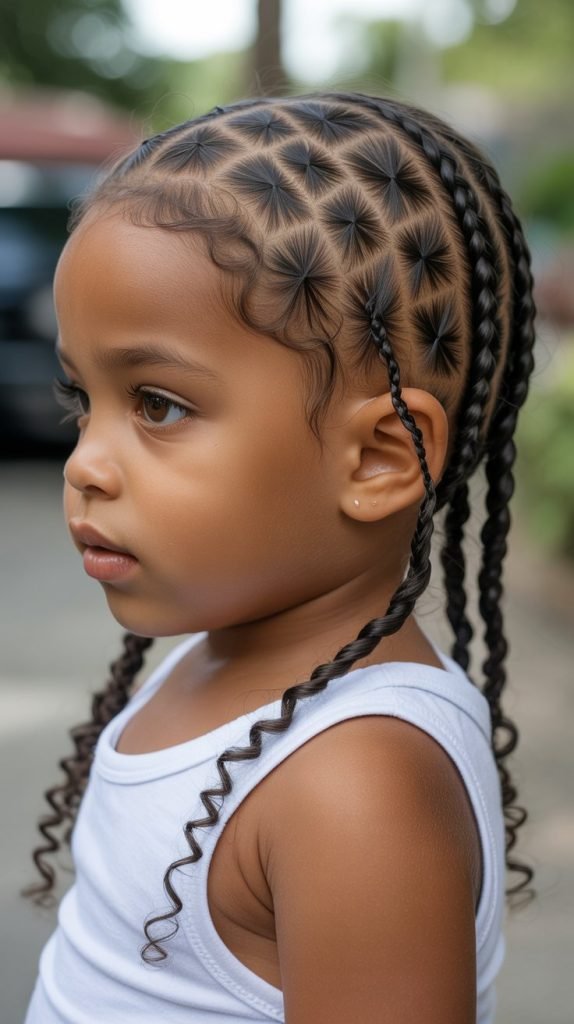
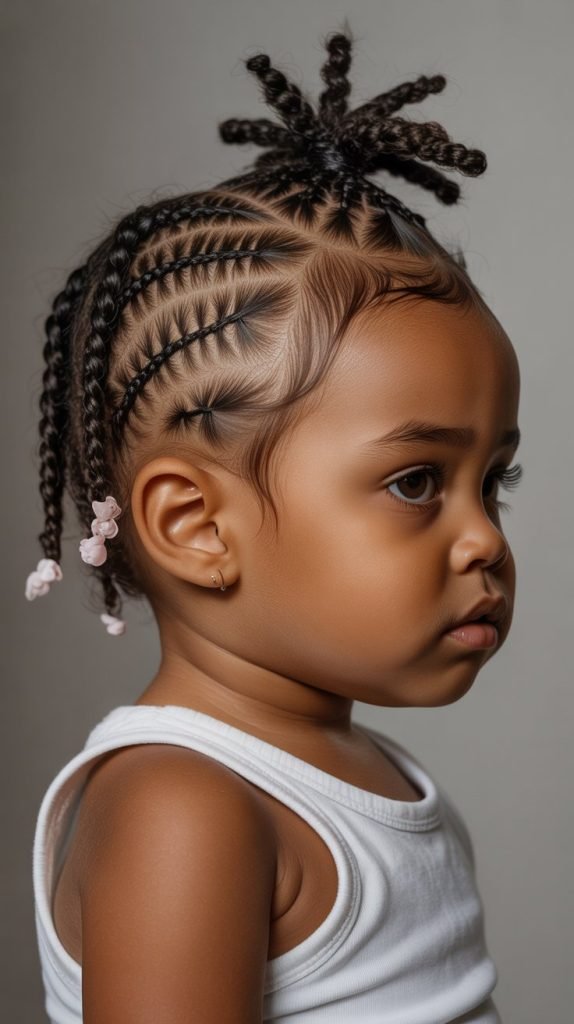
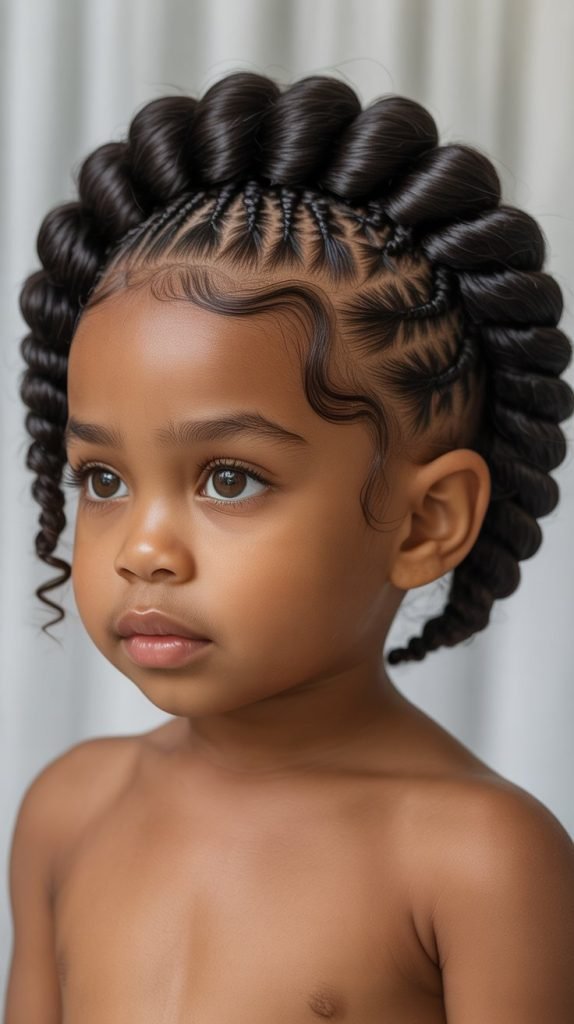
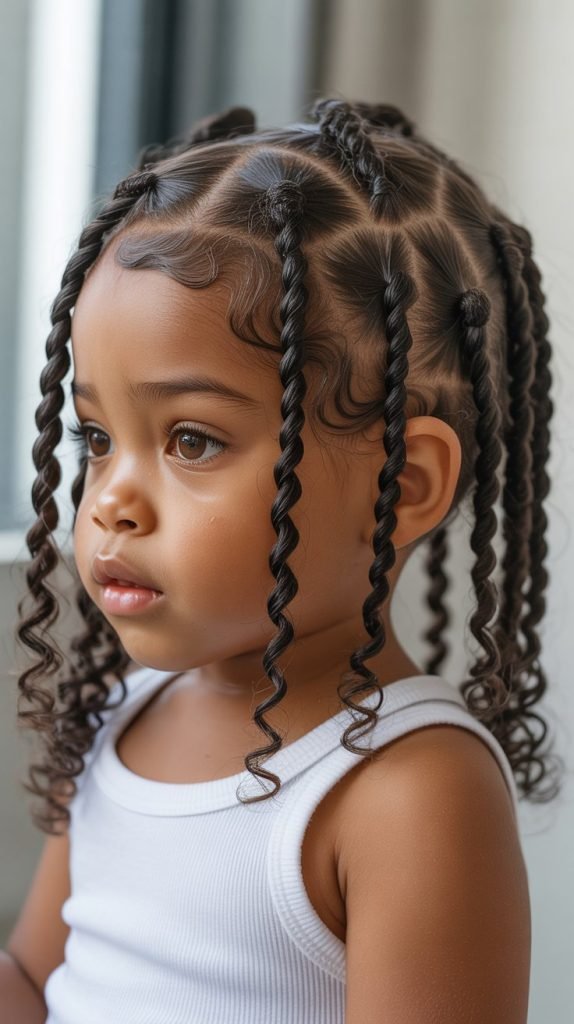
3. Mini Twists

Mini twists are an excellent protective style that can last for weeks while keeping your toddler’s hair healthy and manageable.
These small two-strand twists cover the entire head and can be worn down, styled into updos, or accessorized in countless ways.
- Work with freshly washed and conditioned hair, applying a moisturizing cream throughout for slip and definition.
- Section the hair into small squares across the entire head, using clips to keep unworked sections separated.
- Take each section and divide it into two strands, then twist them around each other from root to tip.
- Seal the ends by either threading a small bead or applying a bit of styling gel to prevent unraveling.
- Mini twists typically last 2-4 weeks and require nightly moisturizing with a light oil or water-based spray.
- This style protects the hair from manipulation and environmental damage while looking absolutely adorable.
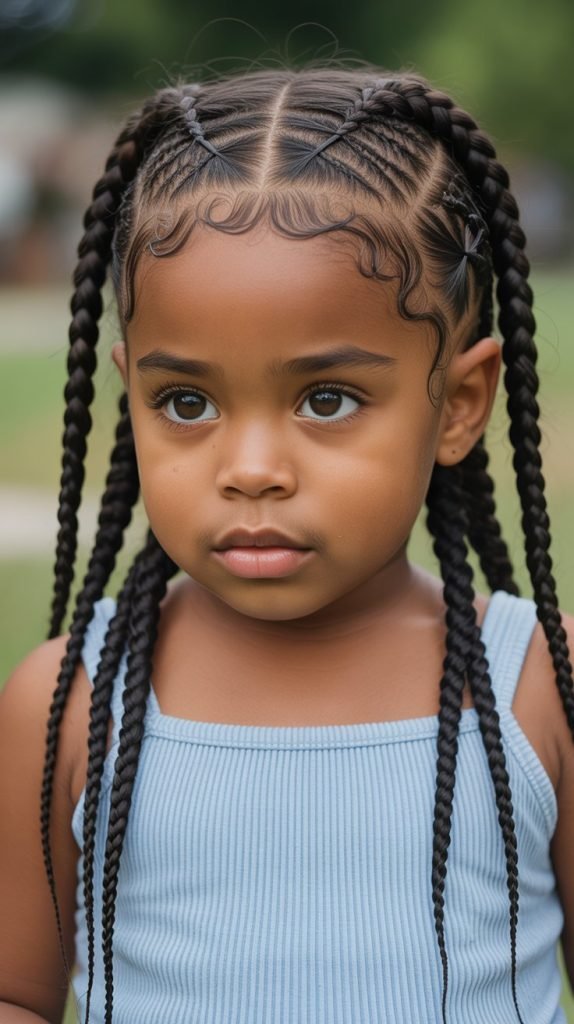
4. Cornrow Ponytail
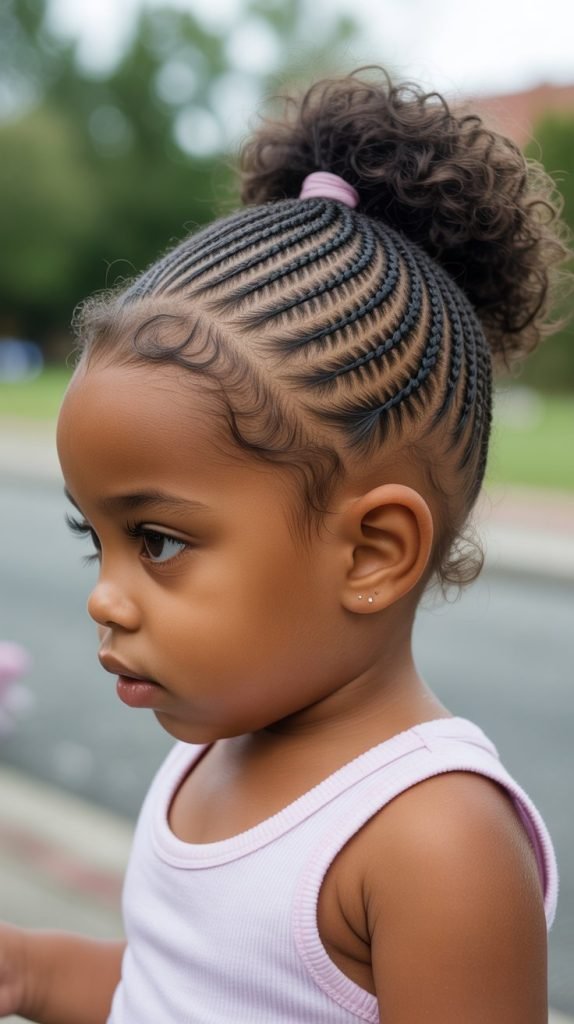
Combining cornrows with a ponytail creates a stunning style that’s both practical and beautiful, keeping hair secured away from the face while showcasing intricate braiding patterns.
The cornrows lead into a single ponytail that can be left natural, braided, or styled with curls.
- Create 3-5 cornrows starting from the hairline and braiding straight back toward the crown area.
- Gather all the cornrows together at the crown or mid-back area, securing them with a soft elastic band.
- The remaining hair forms a ponytail that can be styled as a puff, twisted, or left in its natural state.
- Apply edge control gel to the hairline before braiding to achieve smooth, neat cornrows that frame the face beautifully.
- This protective style typically lasts 1-2 weeks with proper maintenance and edge touch-ups as needed.
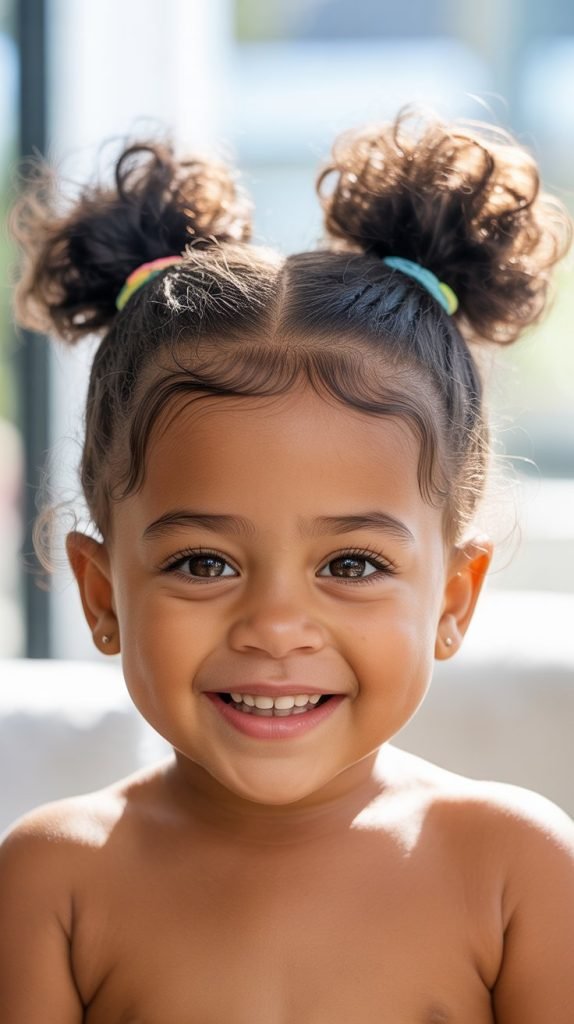
5. Afro Puffs

Double afro puffs bring twice the cuteness and create an iconic look that celebrates natural texture in its full glory.
This style sections the hair horizontally and creates two voluminous puffs that sit one above the other or side by side.
- Decide whether you want horizontal puffs (top and bottom) or vertical puffs (left and right sides).
- Part the hair accordingly and secure each section with a soft elastic band to create the puff base.
- Fluff each puff outward using a pick or your fingers to maximize volume and achieve that perfect round shape.
- Mist the hair lightly with water mixed with leave-in conditioner to refresh and define the curls.
- Afro puffs work best on hair that’s been stretched through braiding, banding, or twist-outs to reduce shrinkage.
- This style can be recreated daily and takes only 5-10 minutes once you master the technique.
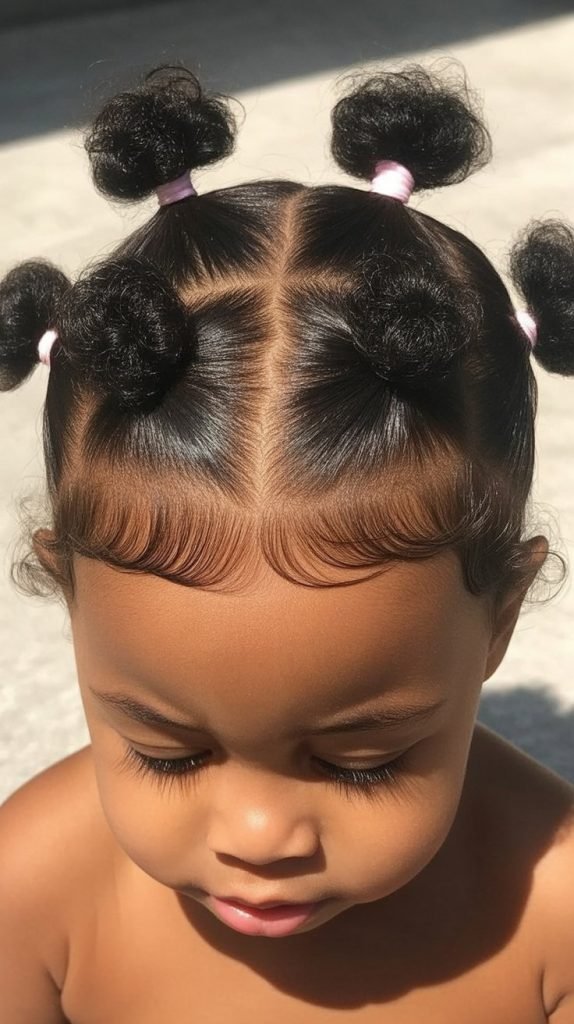
6. Bantu Knots
Bantu knots are both a protective style and a styling method that creates beautiful spiral curls when unraveled.
These small, coiled buns sit all over the head in neat rows and look absolutely precious on toddlers.
- Work with damp, conditioned hair that has been detangled thoroughly to make sectioning easier.
- Divide the hair into small to medium sections across the head, creating a grid pattern with your parts.
- Take each section and twist it tightly from root to tip, then coil the twisted hair around itself to form a small bun.
- Secure each knot by tucking the end underneath or using a small bobby pin designed for children’s hair.
- Bantu knots can be worn as a style for several days or unraveled after a few hours to reveal gorgeous spiral curls.
- Apply a styling cream before twisting each section to ensure definition and hold without crunchiness.
7. Side-Swept Cornrows
Side-swept cornrows create an elegant asymmetrical look that’s perfect for special occasions while remaining practical enough for everyday wear.
All the cornrows flow diagonally from one side to the other, creating beautiful movement and visual interest.
- Start by creating a deep side part that extends from the hairline to the crown area.
- Begin cornrowing from the smaller section, braiding diagonally across the head toward the opposite side.
- Create 4-6 cornrows that all follow the same diagonal direction, keeping them evenly spaced and uniform in size.
- The ends of the cornrows can hang freely, be tucked under and pinned, or gathered into a low side ponytail.
- This style showcases the natural beauty of cornrowing technique while keeping all hair neatly secured off the face.
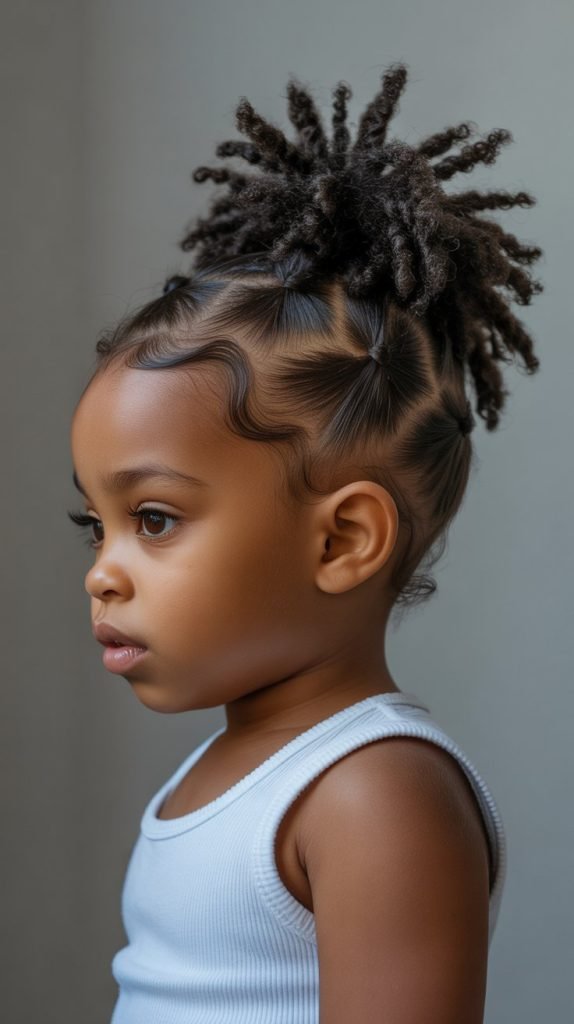
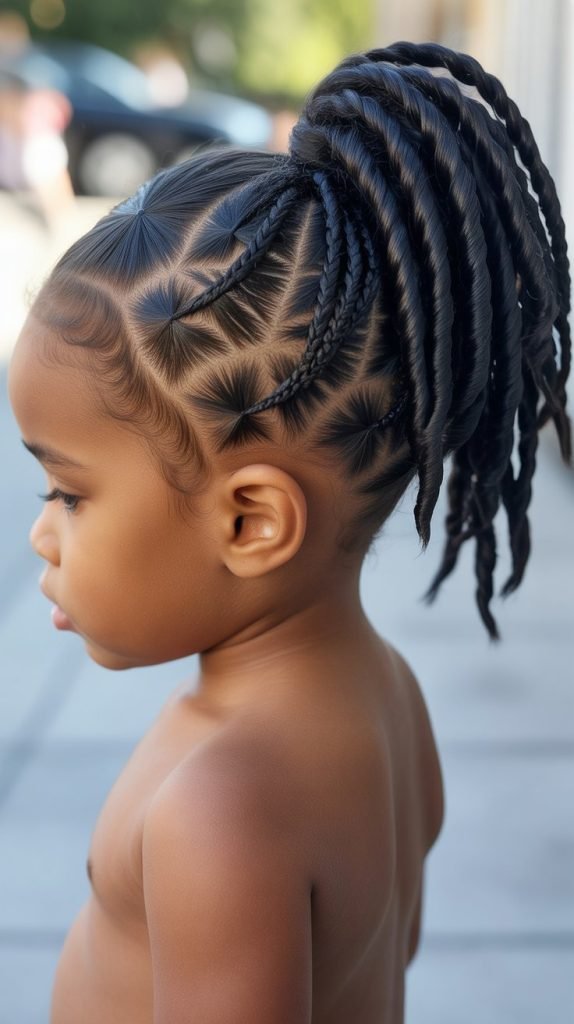
8. Twisted Top Knot
A twisted top knot combines elegance with practicality, gathering all the hair into beautiful twists that culminate in a bun positioned at the crown.
This style keeps hair completely secured while looking polished and put-together.
- Section the hair into four to six large sections radiating from the crown area toward the hairline.
- Create two-strand twists with each section, working from the hairline toward the crown where they’ll meet.
- Gather all the twists together at the crown and twist them around each other to form a bun.
- Secure the bun with bobby pins or a soft elastic band, ensuring it sits comfortably without pulling too tight.
- Leave a few face-framing twists loose in the front if desired for a softer, more romantic appearance.
- This style works wonderfully for formal events, family photos, or any occasion requiring a neater look.
9. Flat Twists with Free Ends
Flat twists combine the sleekness of cornrows with the softness of two-strand twists, creating a style that’s both protective and versatile.
The twists lay flat against the scalp while the ends hang freely, offering movement and texture.
- Divide the hair into sections based on your desired pattern—straight back, diagonal, or curved designs all work beautifully.
- Begin each flat twist at the hairline by taking a small section and dividing it into two strands.
- Add small amounts of hair to each strand as you twist them around each other, keeping the twist flat against the scalp.
- Once you reach the point where you want the twist to end (usually mid-head or crown area), continue twisting without adding hair.
- The free ends can be left natural, curled with flexi rods, or styled into puffs or ponytails for variety.
- Flat twists typically last 1-2 weeks and protect the hair from excessive manipulation and environmental stress.
10. Crown Braid
A crown braid encircles the head like a beautiful halo, creating a regal look perfect for flower girls, birthday celebrations, or any special occasion.
This style can be achieved with one continuous cornrow or multiple braids that connect.
- Start by creating a circular part around the crown area, separating the hair you’ll braid from the rest.
- Begin cornrowing from one side, working your way around the head in a circular motion.
- Add hair continuously from the outer edge as you braid around, keeping the braid at a consistent distance from the hairline.
- When you complete the circle, either tuck the end under and secure it with bobby pins or continue braiding and coil it into a bun.
- The center section can be styled as a puff, left with natural curls, or decorated with hair accessories.
- Apply edge control around the hairline and along the part to achieve a polished, finished appearance.
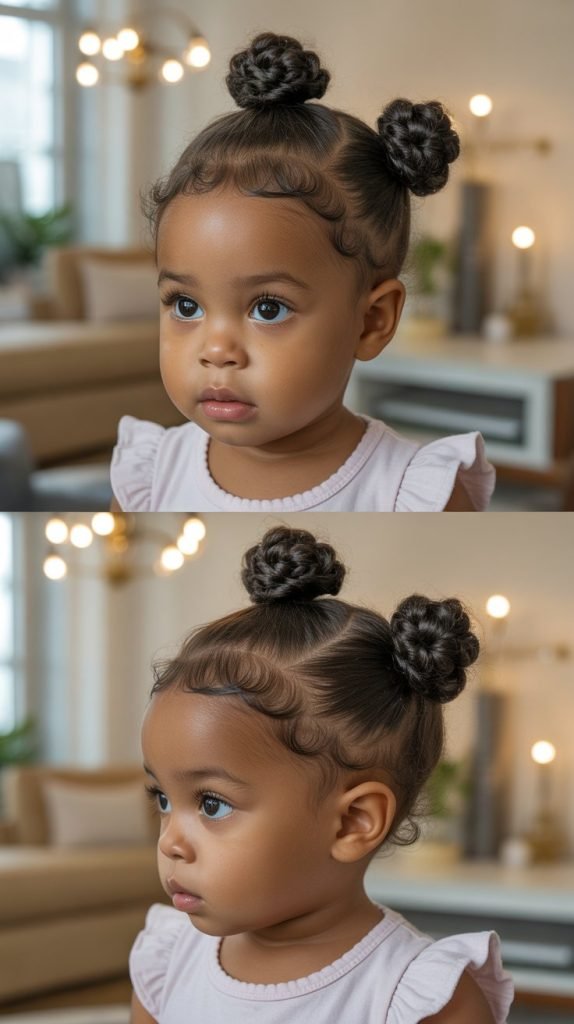
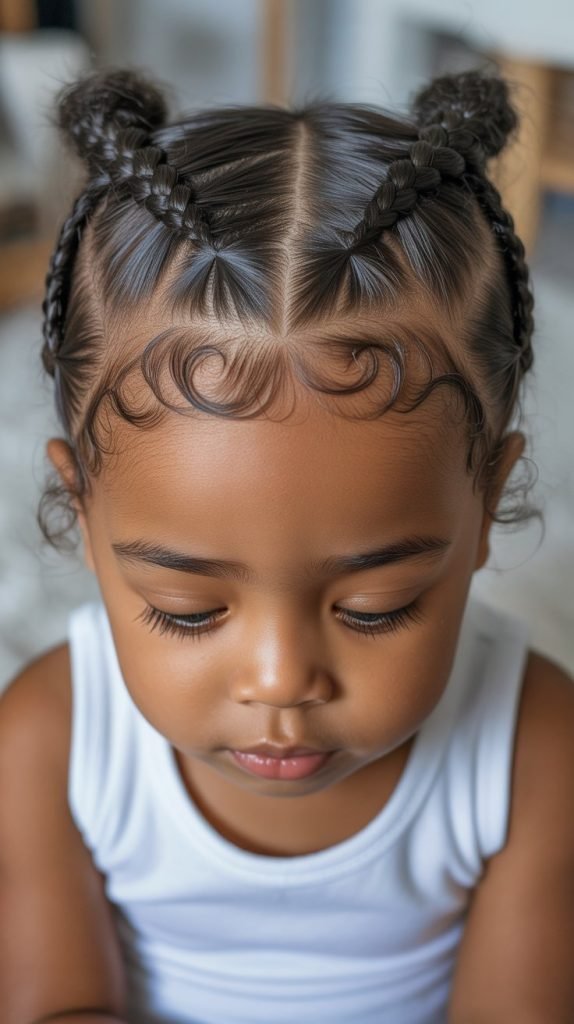
11. Space Buns
Space buns bring a fun, playful vibe that toddlers adore, featuring two buns positioned high on the head like adorable little spheres.
This trendy style can be created with natural hair, braids, or twists, depending on your preference.
- Part the hair down the middle from forehead to nape, creating two equal sections.
- Gather each section into a high ponytail on either side of the head, positioning them symmetrically.
- Twist each ponytail around itself and coil it into a bun shape, securing with bobby pins or small elastics.
- For added texture and interest, create twists or braids in each section before forming the buns.
- Accessorize with colorful scrunchies, ribbons, or decorative pins to make the style even more playful.
- Space buns work beautifully for themed parties, casual outings, or any day your little one wants to feel extra special.
12. Zigzag Parts with Ponytails
Creative parting transforms a simple ponytail style into something extraordinary, with zigzag parts adding visual interest and personality.
This style combines neat sectioning with the ease of ponytails that toddlers find comfortable.
- Use a rattail comb to create zigzag parts across the scalp, working in sections from front to back.
- Each zigzag section should be roughly the same size to maintain balance and symmetry in the overall look.
- Secure each section into a small ponytail, positioning them in rows across the head.
- Add beads, colorful elastics, or small hair accessories to each ponytail for extra flair and fun.
- This style typically creates 4-8 ponytails depending on hair density and the size of your sections.
- The zigzag pattern becomes more prominent as the hair grows, making this style visually dynamic over time.
13. Mohawk Style with Cornrows
A mohawk style creates an edgy yet adorable look by cornrowing the sides and leaving the center hair free or styled upward.
This bold style makes a statement while keeping hair protected on the sides.
- Create cornrows on both sides of the head, starting near the ears and braiding straight back toward the nape.
- Leave a wide strip of hair down the center from forehead to crown, which will form the mohawk section.
- The center section can be styled as twists, braids, puffs, or left with natural texture standing upward.
- Use a strong-hold gel or styling cream on the center section to encourage upward lift and definition.
- Typically 2-4 cornrows on each side are sufficient, but this can be adjusted based on hair density and desired look.
- The mohawk style is perfect for confident little ones who love standing out and expressing their personality through hair.
14. Crochet Braids
Crochet braids allow you to add length, volume, or different textures to your toddler’s hair using a protective cornrow base and pre-looped hair extensions.
This versatile method creates beautiful styles that last weeks while protecting the natural hair underneath.
- Begin by cornrowing your toddler’s natural hair in straight-back rows from hairline to nape, creating the foundation.
- Choose lightweight, soft crochet hair extensions specifically designed for children to ensure comfort and safety.
- Use a crochet needle to loop the extensions through the cornrows, securing them without tension or pulling.
- Various textures are available including curly, wavy, or straight depending on your desired final look.
- Crochet styles typically last 3-6 weeks and require minimal daily maintenance beyond moisturizing the scalp.
- Always ensure your toddler is comfortable and the style isn’t too heavy or causing any pulling sensation.
15. Bubble Ponytails
Bubble ponytails transform a regular ponytail into a playful, segmented style that looks complex but is surprisingly simple to create.
Multiple elastics section the ponytail into “bubbles” that can be accessorized with different colors.
- Start by gathering the hair into one or two ponytails at your desired height and position on the head.
- Secure the base ponytail with a strong elastic, ensuring it’s comfortable but firm enough to hold.
- Moving down the ponytail, place additional elastics at regular intervals (every 2-3 inches works well).
- Gently pull and fluff the hair between each elastic to create the bubble effect, working from top to bottom.
- Use different colored elastics at each section to create a rainbow effect or match an outfit.
- This style works on various hair lengths and textures, making it universally adaptable and fun.
16. Halo Twist
The halo twist creates a crown-like effect using two large twists that wrap around the head, meeting at the back to form a continuous ring.
This elegant style is perfect for special occasions while remaining comfortable for all-day wear.
- Part the hair horizontally from ear to ear, creating front and back sections of roughly equal size.
- Begin a large two-strand twist on one side near the temple, working horizontally across the head.
- Continue the twist around the back of the head, adding hair as you go to keep it secured to the scalp.
- Meet the ends at the back and tuck them under, securing with bobby pins to maintain the continuous halo effect.
- The center area can be left with natural texture, styled into curls, or kept as a puff depending on preference.
- Apply a light holding gel along the parts and twist lines to ensure neatness and definition throughout the day.
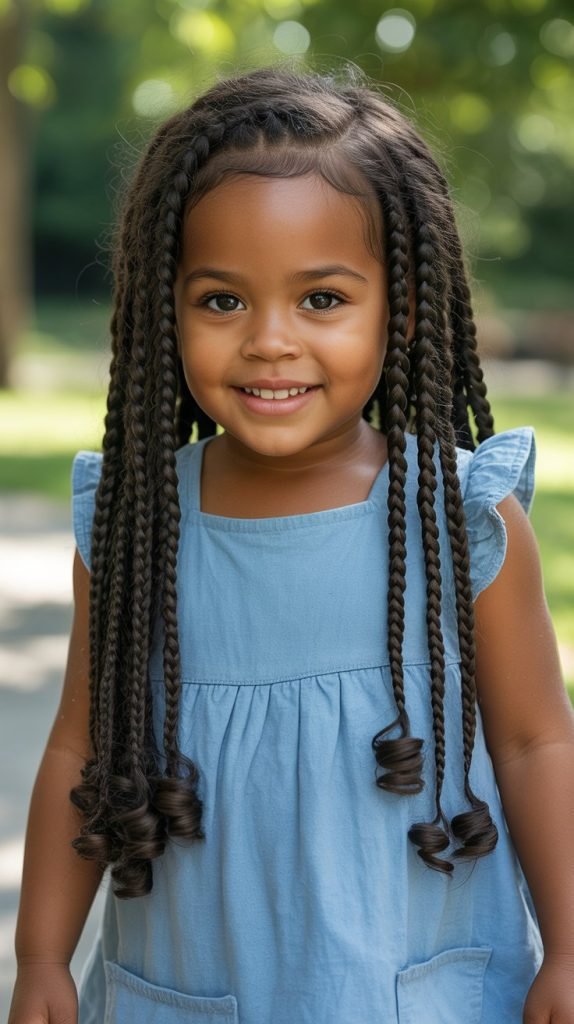
17. Chunky Braids
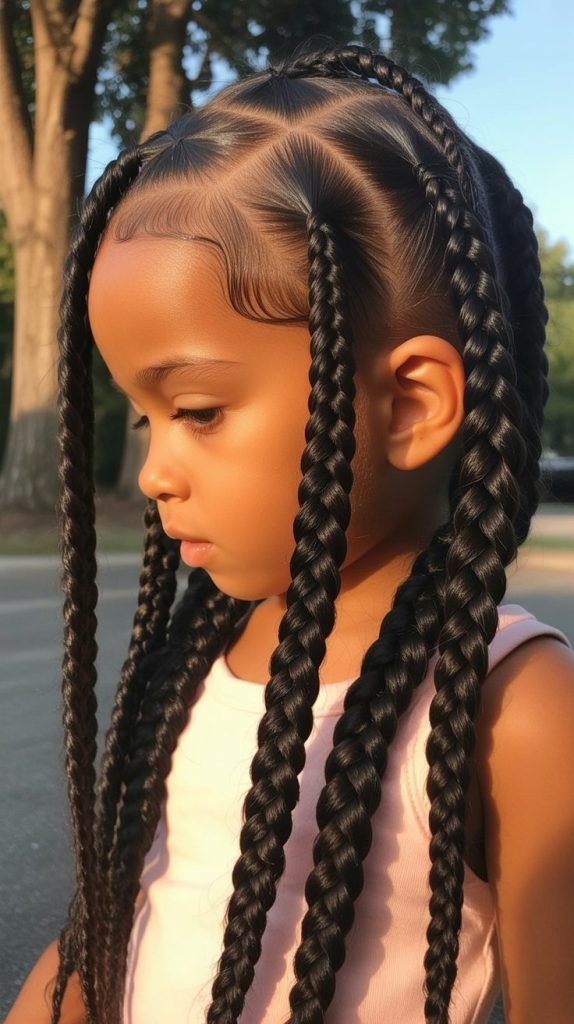
Large, chunky braids create a bold statement while taking less time to install than smaller braids, making them perfect for busy parents.
These substantial braids can be styled in various patterns and accessorized for different looks.
- Section the hair into larger squares or rectangles across the head, typically creating 8-16 total sections.
- Each section should be large enough that the resulting braid is thick and substantial, around 1-2 inches wide.
- Braid each section using the three-strand technique, working from root to tip and securing the end.
- Chunky braids can be left hanging, styled into updos, or accessorized with colorful beads or cuffs.
- This style typically lasts 1-2 weeks and provides good protection while being less time-intensive than micro braids.
- The larger size makes this style more comfortable for toddlers who might find smaller, tighter braids uncomfortable.
18. Braided Bun
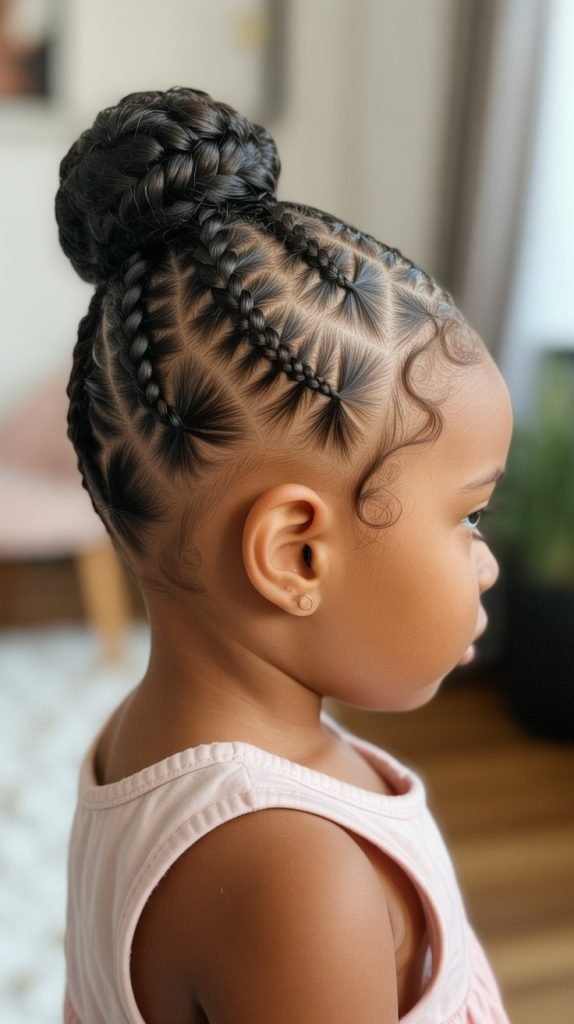
A braided bun combines the elegance of an updo with the intricate beauty of braiding, creating a sophisticated style suitable for formal occasions.
Multiple braids converge to form a neat bun positioned at the crown or nape.
- Create 4-8 cornrows or individual braids starting from around the hairline and directing them toward your chosen bun location.
- Gather all the braids together at the bun placement point, securing them with a soft elastic band.
- Wrap the braids around the elastic base in a circular motion, creating the bun shape and tucking ends underneath.
- Secure the bun with bobby pins placed strategically to hold everything in place without causing discomfort.
- Add a decorative hair accessory like a bow, flower, or jeweled pin to elevate the style for special events.
- This style keeps all hair secured and neat, making it perfect for weddings, portraits, or holiday celebrations.
19. Faux Hawk with Twists
The faux hawk with twists offers an edgy style without the commitment of shaving the sides, creating the mohawk illusion through creative styling.
Flat twists on the sides make the center section appear elevated and dramatic.
- Create flat twists on both sides of the head, working them downward and slightly backward toward the nape.
- The center section should be left free and styled with standing twists, puffs, or curls to create height.
- Use 3-5 flat twists on each side, keeping them close to the head to emphasize the center section’s volume.
- Apply a strong-hold styling product to the center section to maintain the upward lift throughout the day.
- This style combines protective benefits with a fashion-forward appearance that photographs beautifully.
- The faux hawk works for both casual daily wear and special occasions depending on how you style the center.
20. Waterfall Twists
Waterfall twists create a cascading effect where twists flow diagonally across the head like a waterfall, with some sections released to create a layered, dimensional look.
This style combines the structure of twisting with the softness of loose hair.
- Begin at the front hairline on one side, taking a section and dividing it into two strands for twisting.
- Twist the two strands around each other while moving diagonally across the head toward the opposite side.
- Periodically release one strand and pick up a new section of hair to continue the twist, creating the “waterfall” effect.
- The released sections hang naturally, creating beautiful texture and movement throughout the style.
- Continue the pattern across the head, creating 2-4 waterfall twists depending on hair density and desired coverage.
- This romantic style works beautifully for photos, parties, or any occasion where you want something special yet soft.
21. Cornrow Heart Design
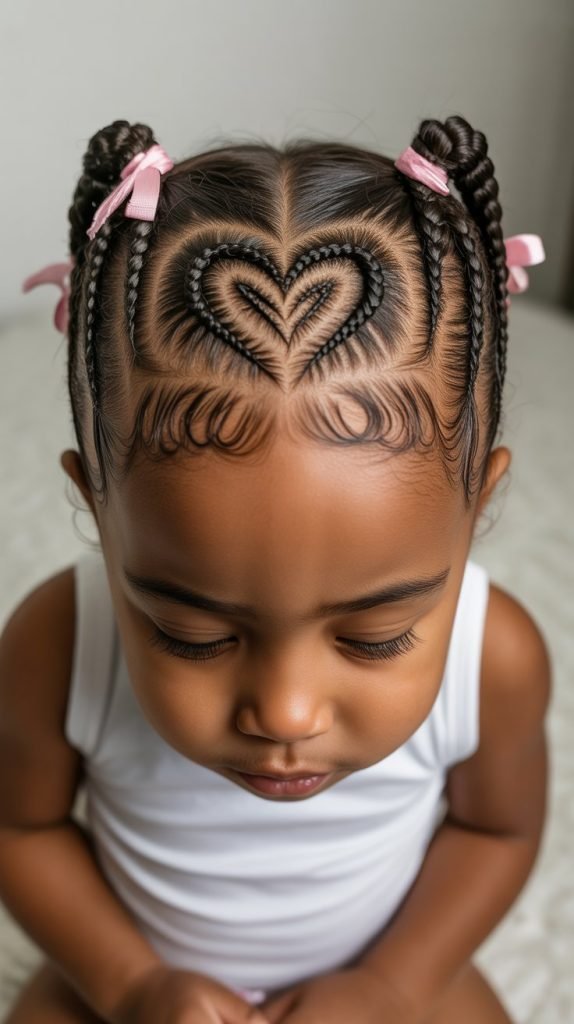
Cornrow heart designs use creative parting and directional braiding to form heart shapes on the scalp, resulting in an adorable style perfect for Valentine’s Day or any day.
This eye-catching design showcases advanced braiding skills and looks incredibly sweet on toddlers.
- Map out your heart design using a rattail comb, creating the heart outline with precise parting before beginning to braid.
- Start cornrowing from the bottom point of the heart, following the curved shape upward along one side.
- Create a matching cornrow on the other side of the heart, ensuring both sides are symmetrical and uniform.
- The remaining hair outside the heart design can be styled with additional cornrows, twists, or left natural.
- This intricate style works best when created by someone experienced with precision parting and curved cornrowing techniques.
- Take photos from above to fully capture and showcase the heart design’s beauty and symmetry.
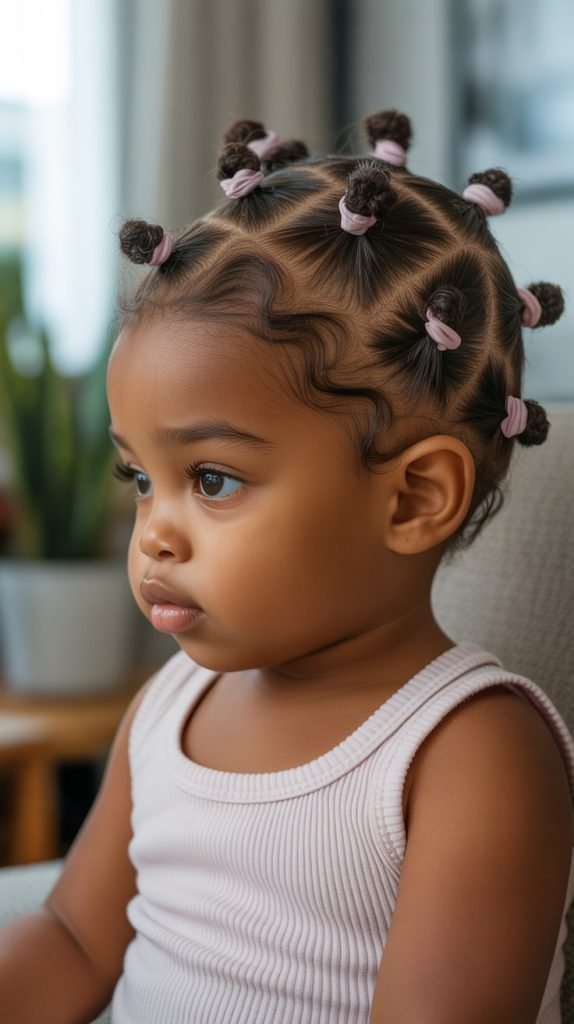
22. Mini Buns All Over
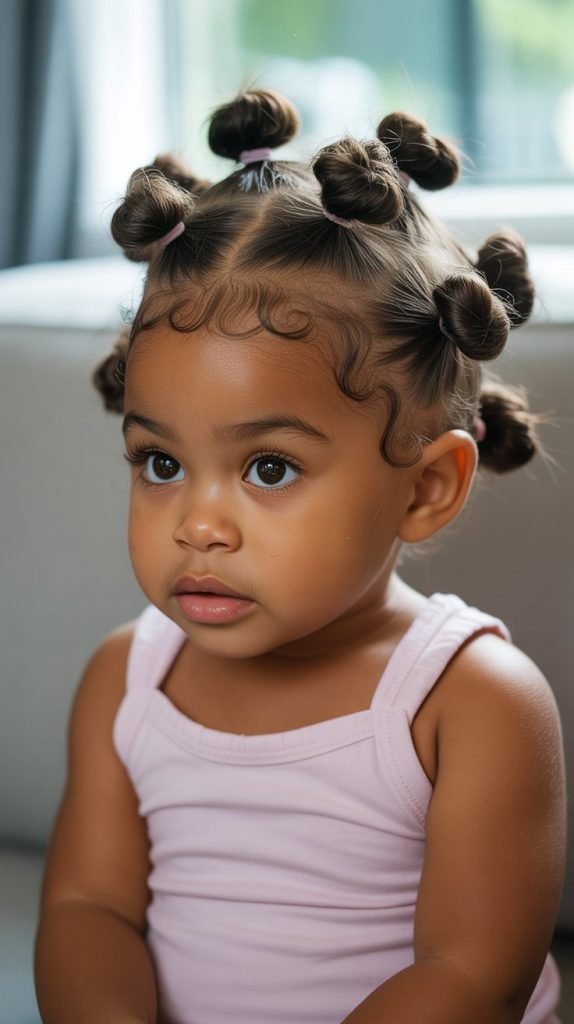
Multiple mini buns scattered across the head create an absolutely adorable style that’s both playful and practical.
This look sections the hair into small ponytails that are then twisted and coiled into tiny buns all over the scalp.
- Part the hair into small to medium sections across the entire head, creating a grid or brick-lay pattern.
- Secure each section into a small ponytail using soft elastics that won’t snag or damage the hair.
- Twist each ponytail and coil it around the base to form a small bun, securing with another elastic or bobby pins.
- Depending on hair density and section size, you’ll typically create 6-12 mini buns across the head.
- This style can last several days and is perfect for toddlers because it keeps hair completely secured away from the face.
- Add colorful accessories or ribbons around each bun for extra festivity and personalization.
23. Side Braid with Loose Curls

A single side braid combined with loose, flowing curls creates a romantic, princess-like style that toddlers often love.
This asymmetrical look offers the best of both worlds—structure from the braid and softness from the curls.
- Create a deep side part, taking a large section of hair from the heavier side for braiding.
- Begin a three-strand braid, cornrow, or Dutch braid from the hairline, working it back along the side of the head.
- The braid can travel along the side toward the back, where it meets and joins with the loose hair.
- The remaining hair on the lighter side and back stays free, showcasing natural curl pattern or styled curls.
- Enhance the loose curls with flexi rods, twist-outs, or braid-outs for defined, bouncy spirals.
- This style offers an elegant option for special events while remaining comfortable enough for extended wear.
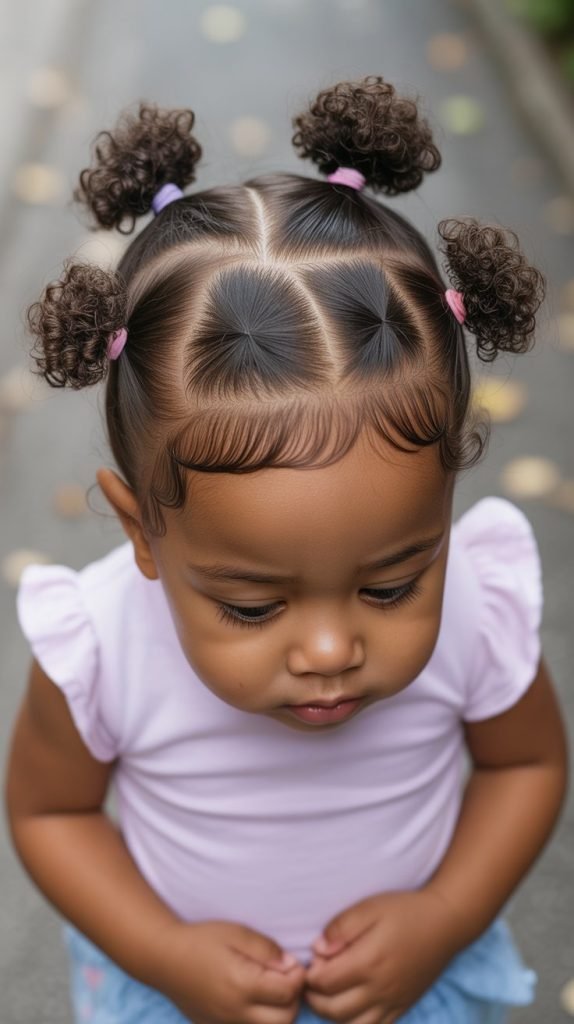
24. Triangle Parts with Puffs
Triangle parting adds geometric interest to the classic puff style, creating multiple small puffs across the head in a distinctive pattern.
This style combines neat sectioning with the texture and volume of natural hair puffs.
- Use a rattail comb to create triangle-shaped sections across the scalp, working in rows from front to back.
- Each triangle should be similar in size to maintain visual balance and symmetry across the head.
- Secure each triangle section at the base with a small elastic band, leaving the hair above to form a puff.
- Fluff each individual puff to maximize volume and create those adorable cloud-like shapes.
- Typically 6-12 triangular puffs work well depending on head size and hair density.
- Add beads or colorful elastics to each puff for additional decoration and personality.
25. Goddess Braids
Goddess braids are larger, thicker cornrows that create a bold, dramatic look with fewer braids than traditional cornrow styles.
These substantial braids lie flat against the scalp and can be styled in various patterns including straight back, curved, or swirled designs.
- Section the hair into 2-6 large parts depending on your desired pattern and final number of braids.
- Begin each goddess braid at the hairline, using the cornrowing technique but keeping sections much larger.
- The braids should be substantial and prominent, typically ranging from 1-3 inches in width.
- Continue each braid from hairline to nape, securing the ends with elastics or allowing them to hang as extensions if added.
- Goddess braids typically last 1-3 weeks depending on hair texture and how well they’re maintained at night.
- This style provides excellent protection while making a bold fashion statement that photographs beautifully.
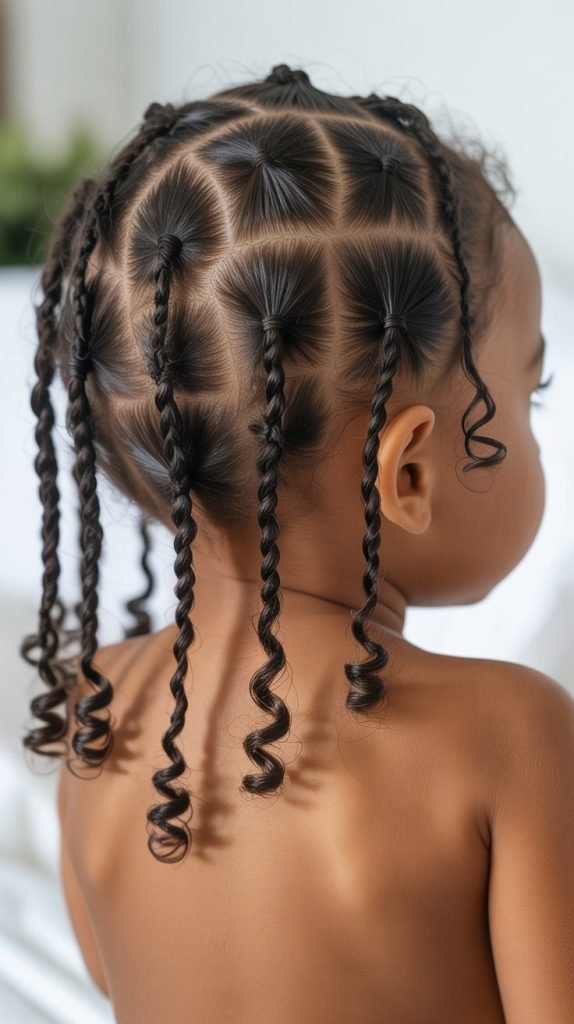
26. Twisted Ponytail
A twisted ponytail elevates the everyday ponytail by adding texture and visual interest through twisting techniques.
Multiple twists converge into a single ponytail, creating a style that’s both elegant and playful.
- Section the hair into 4-8 parts radiating from where you want the ponytail base to sit.
- Create two-strand twists with each section, working from the hairline toward the ponytail gathering point.
- Secure all the twists together at your chosen location with a soft elastic band to form the ponytail base.
- The ponytail itself can be left as loose twists, combined into one large twist, or styled into a puff.
- This style combines the security of twists with the classic appeal of a ponytail, lasting several days with care.
- Add ribbons, bows, or decorative ponytail holders to personalize the look for your toddler’s preferences.
27. Natural Wash and Go
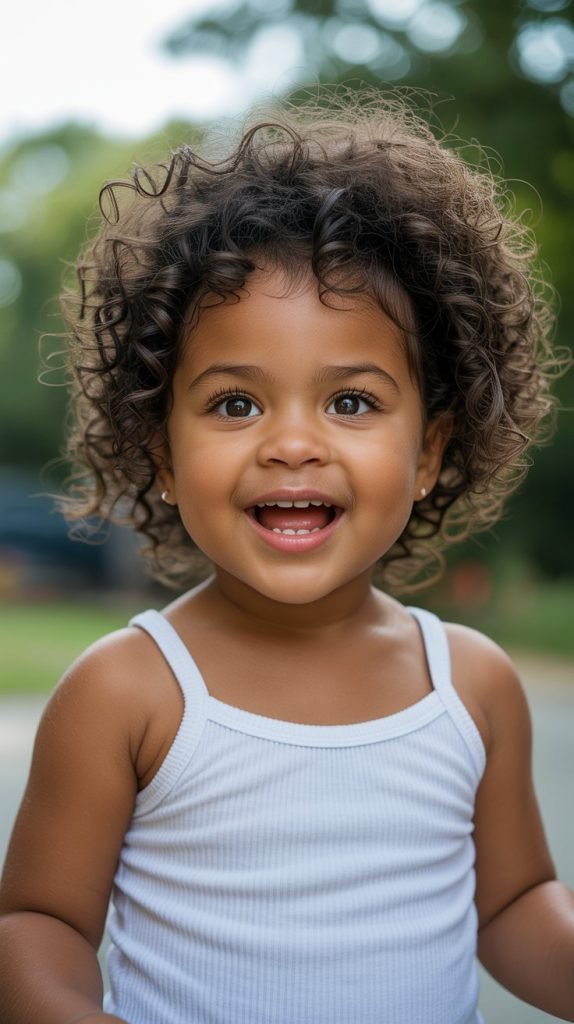
The wash and go celebrates your toddler’s natural curl pattern in its purest form, requiring minimal manipulation while showcasing beautiful texture.
This low-maintenance style focuses on proper moisturizing and curl definition rather than elaborate styling.
- Begin with freshly washed hair, using a gentle sulfate-free shampoo followed by a moisturizing conditioner.
- Apply a leave-in conditioner throughout the hair while it’s still soaking wet to lock in maximum moisture.
- Add a curl-defining cream or gel, working it through in sections using praying hands or raking motions.
- Allow the hair to air dry or use a diffuser attachment on low heat to speed up the process without causing frizz.
- The wash and go can be refreshed daily by spritzing with water and reapplying a small amount of product.
- This style works beautifully for toddlers who don’t tolerate extensive styling sessions and celebrates natural texture authentically.
Styling Product Recommendations
When styling your toddler’s hair, choosing gentle, child-appropriate products makes all the difference in maintaining healthy hair while achieving beautiful results.
- Always select products specifically formulated for children or those free from harsh chemicals like sulfates, parabens, and alcohol.
- Natural ingredients such as shea butter, coconut oil, jojoba oil, and aloe vera provide moisture without buildup or irritation.
- Lightweight leave-in conditioners work wonderfully for daily moisturizing without weighing down delicate toddler hair.
- Edge control gels with soft hold prevent the flaking and stiffness that can come from adult-strength products.
- Detangling sprays with slip make the combing process much easier and reduce breakage during styling sessions.
- Consider products with pleasant, mild scents rather than strong fragrances that might irritate sensitive skin or respiratory systems.
Important Styling Considerations
- Never style your toddler’s hair when it’s completely dry, as this increases breakage and discomfort during detangling.
- Watch for signs of tension or discomfort during styling—toddlers shouldn’t experience pain from hairstyles, which indicates the style is too tight.
- Protective styles should never be kept in longer than recommended, as extended wear without maintenance can lead to matting and breakage.
- Variety matters for hair health—rotating between different styling methods prevents stress on the same areas repeatedly.
- Consider your toddler’s activity level when choosing styles, opting for more secured looks during high-energy play periods.
- Consult with a professional pediatric stylist or dermatologist if you notice any scalp issues, breakage, or hair thinning.
Conclusion
Creating beautiful hairstyles for your little one should be an enjoyable bonding experience that celebrates her natural beauty while keeping her hair healthy and protected.
Throughout this guide to 27 Cute Toddler Hairstyles for Black Girls, you’ve discovered a diverse range of options from quick everyday styles to elaborate designs for those memorable occasions, each offering its own unique combination of practicality and charm.
Remember that the best hairstyle is one that makes your daughter feel comfortable, confident, and beautiful while fitting seamlessly into your family’s lifestyle and schedule.
As you explore these styling options, pay attention to what works best for your toddler’s hair texture, length, and personal preferences, adjusting techniques and products as needed.
With patience, practice, and the right approach, you’ll master these styles and create countless precious moments together while nurturing your daughter’s hair health and her growing sense of personal style.