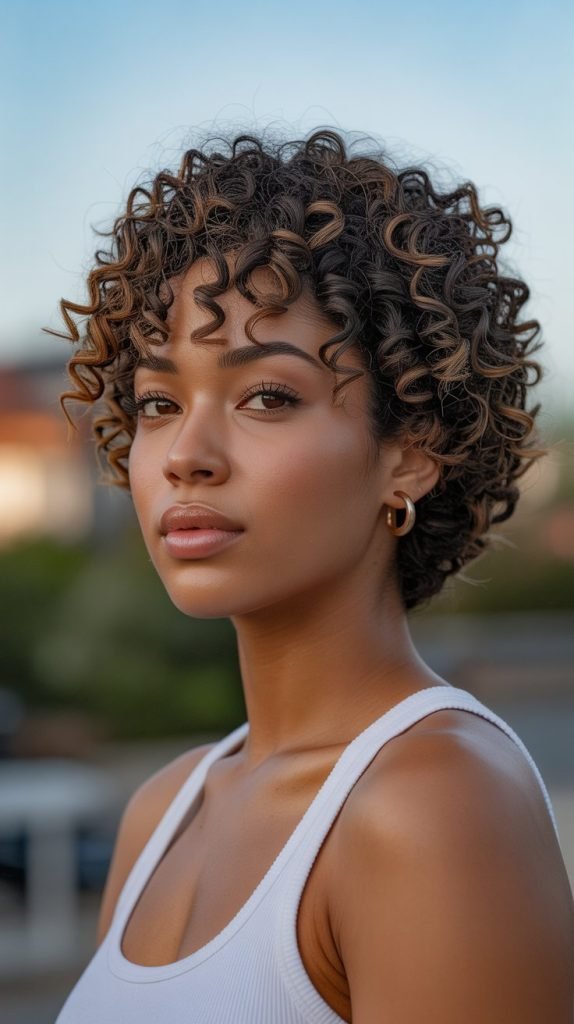
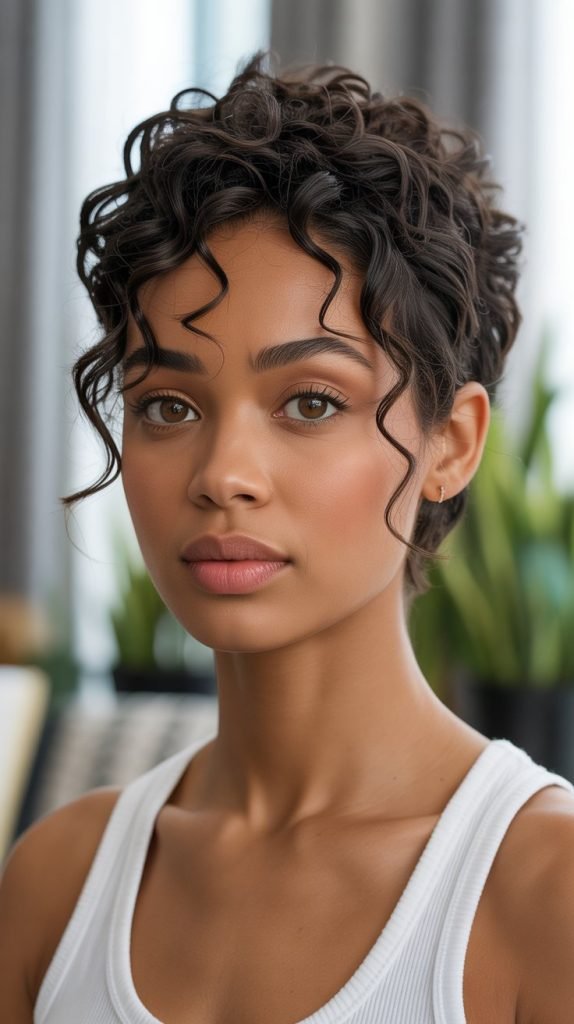
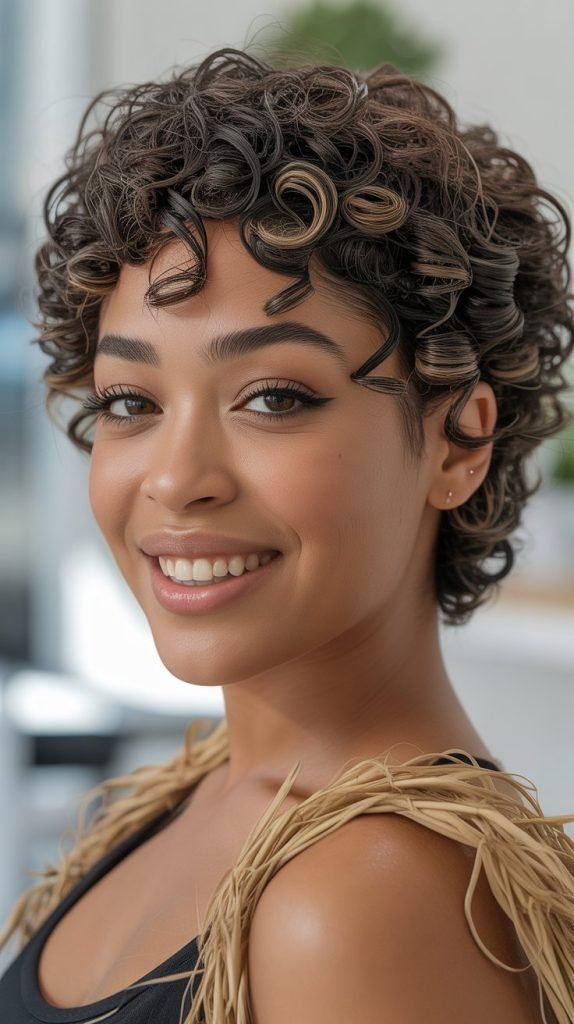
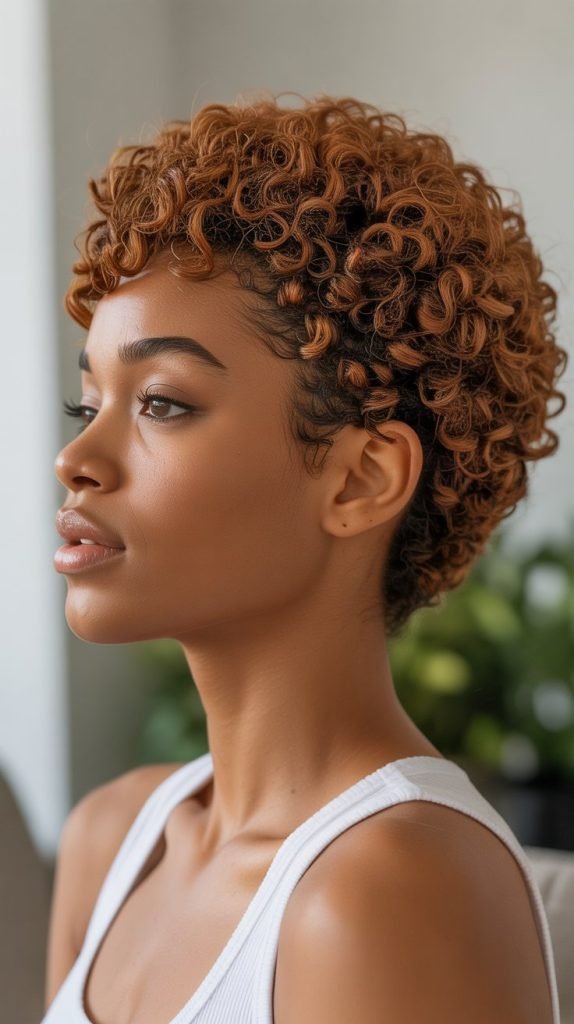
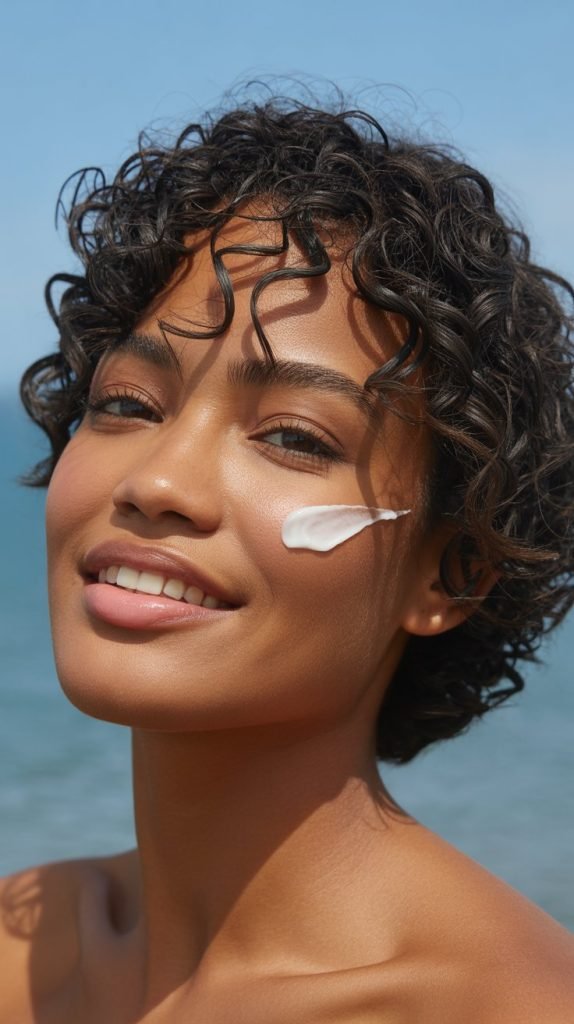
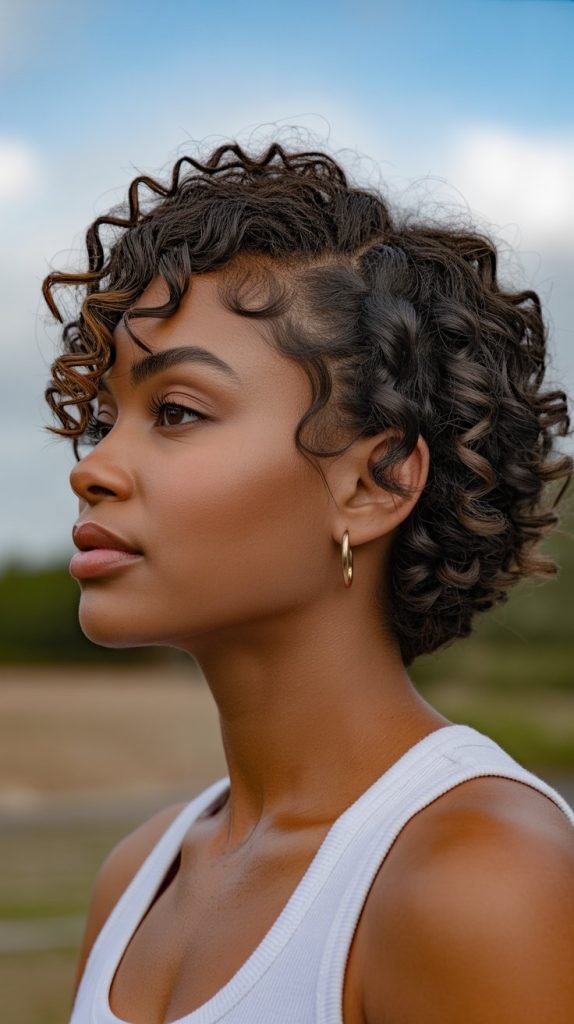
Finding the perfect hairstyle for 3C 4A hair texture can feel like searching for a hidden treasure, but when you have short hair, the possibilities become even more exciting and manageable.
The beauty of 3C 4A hair lies in its versatility—tight curls that spring with life and coils that create stunning volume and dimension.
Short hair with this texture offers a canvas for creativity, allowing you to embrace your natural pattern while experimenting with shapes, styles, and looks that celebrate your unique crown.
This comprehensive guide explores 33 stunning hairstyles specifically designed for short 3C 4A hair, covering everything from wash-and-go styles and twist-outs to protective options and bold cuts that will have you falling in love with your natural texture all over again.
Whether you’re transitioning to natural hair, embracing a big chop, or simply looking for fresh styling inspiration, these hairstyles will show you just how beautiful and versatile your short 3C 4A hair can be.
Get ready to discover styles that are not only gorgeous but also practical, healthy for your hair, and perfect for showcasing the natural beauty of your coils and curls in the “33 Best 3C 4A Hairstyles for Short Hair You’ll Love.”
In This Post......
- 1. The Classic Wash-and-Go
- 2. Tapered TWA (Teeny Weeny Afro)
- 3. Finger Coils
- 4. Bantu Knots
- 5. Twist-Out on Short Hair
- 6. High-Top Fade with Curls
- 7. Pineapple Updo
- 8. Straw Set Curls
- 9. Frohawk (Faux Mohawk)
- 10. Flat Twist Updo
- 11. Curly Pompadour
- 12. Wash-and-Go with Side Part
- 13. Mini Twists
- 14. Afro Puff
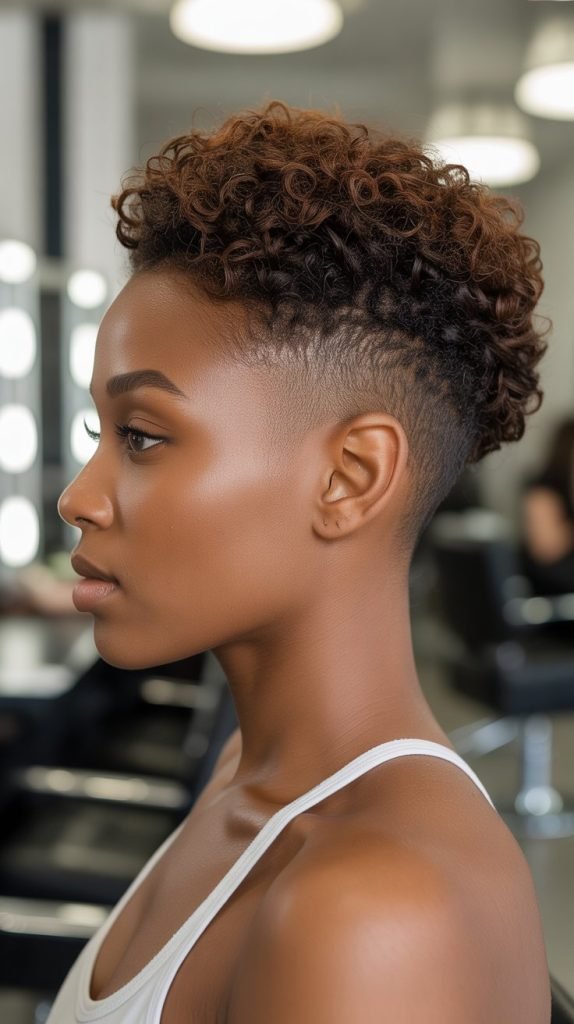
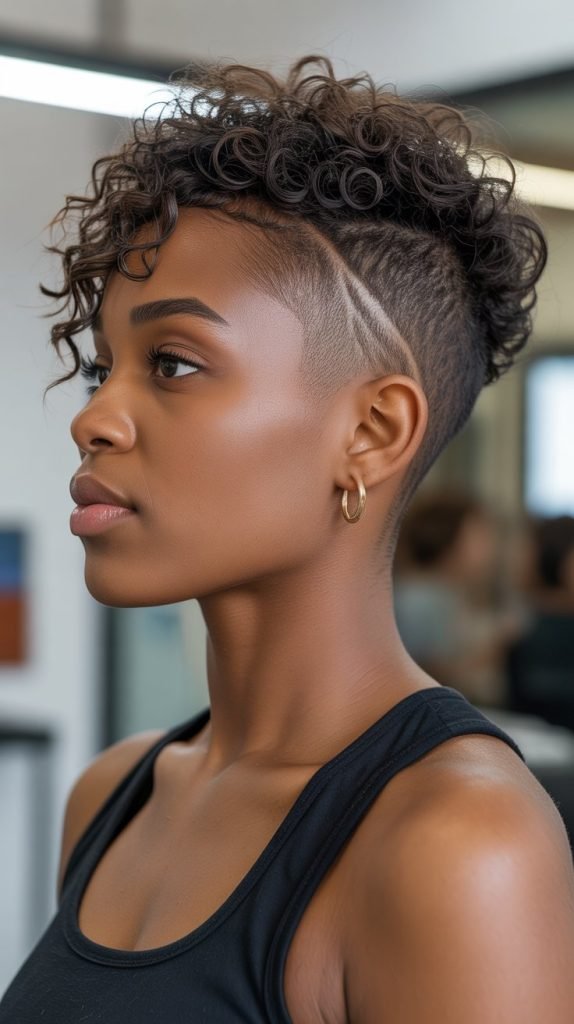
- 15. Curly Undercut
- 16. Pin Curls
- 17. Twist-and-Curl
- 18. Slicked-Back Style
- 19. Curly Mohawk
- 20. Halo Braid Crown
- 21. Curl-Defining Cream Style
- 22. Chunky Flat Twist-Out
- 23. Side-Swept Curls
- 24. Defined Curl Fro
- 25. Braided Headband with Curls
- 26. Wet-Look Curls
- 27. Twist-Out with Accessories
- 28. Low Manipulation Style with Oil
- 29. Curly Pixie Cut
- 30. Stretched Blow-Out Style
- 31. Roller Set Curls
- 32. Half-Up Half-Down Style
- 33. Natural Shrinkage Style
- Conclusion
1. The Classic Wash-and-Go
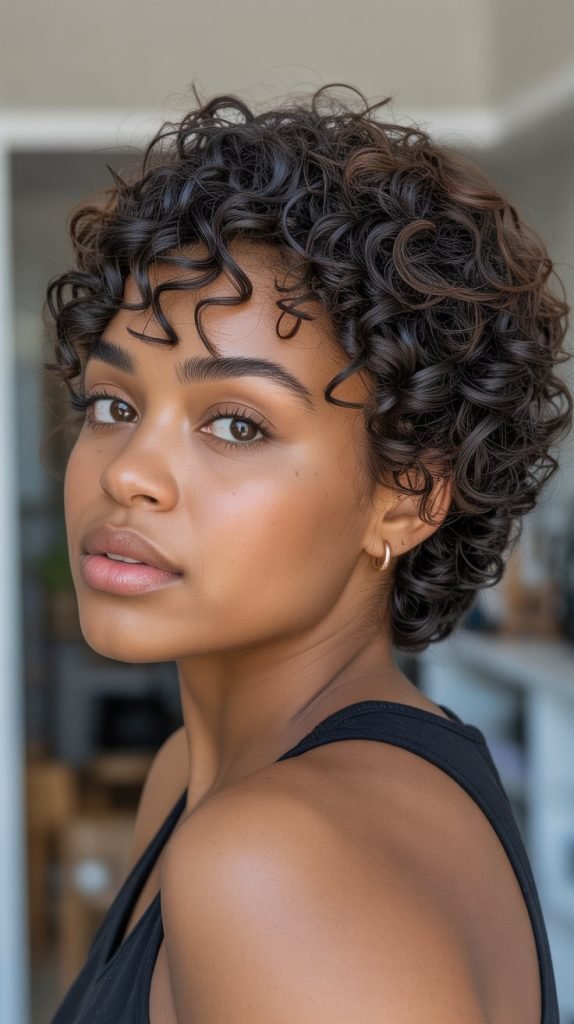
The wash-and-go remains one of the most beloved styles for 3C 4A hair because it celebrates your natural curl pattern while requiring minimal manipulation.
This style allows your coils to shine in their most authentic form, creating a beautiful halo of texture around your face.
- The foundation of a successful wash-and-go starts with freshly cleansed hair using a sulfate-free shampoo that won’t strip your natural oils.
- Apply a leave-in conditioner to soaking wet hair, using praying hands method to smooth the product down each section while maintaining your curl pattern.
- Layer a curl defining cream or gel on top of the leave-in, using the shingling method to coat each curl clump from root to tip for maximum definition.
- Diffuse your hair on low heat and low speed, or air dry for a softer finish, gently scrunching as you dry to encourage curl formation.
- Once completely dry, fluff your roots with your fingers or a pick to add volume and prevent your curls from appearing flat against your scalp.
- This style typically lasts 3-5 days with proper maintenance, including pineappling at night and refreshing with a water-based spray in the morning.
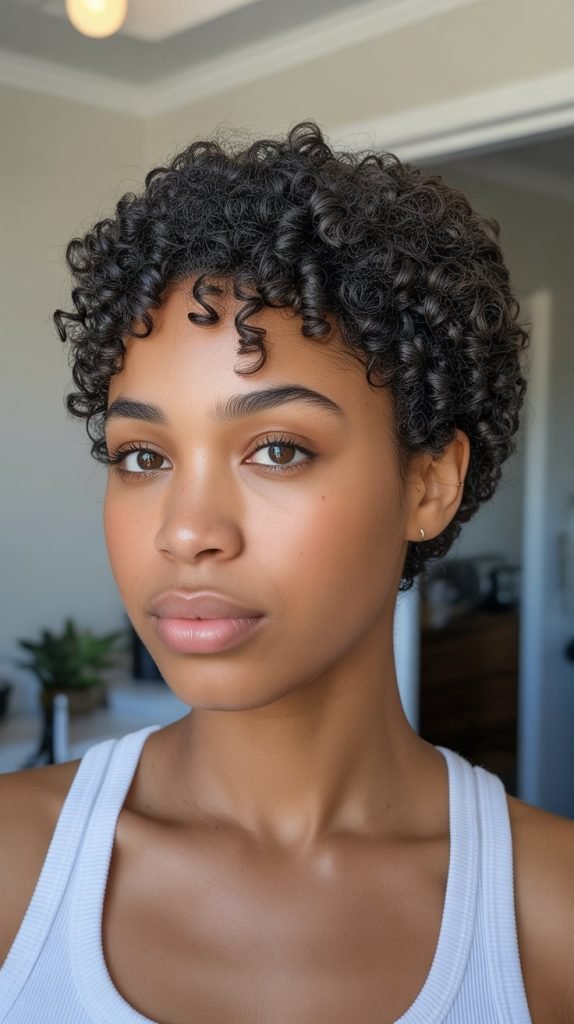
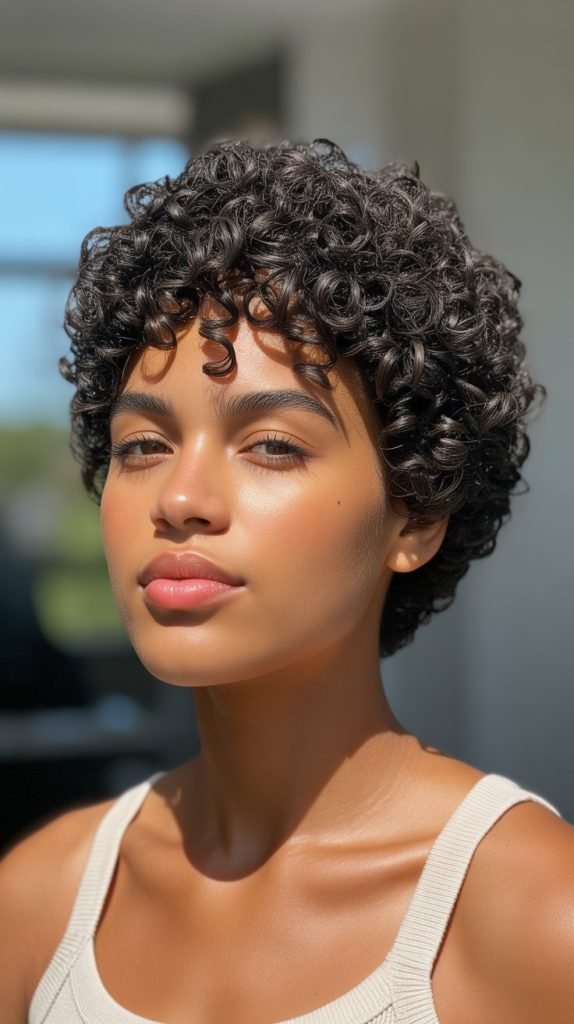
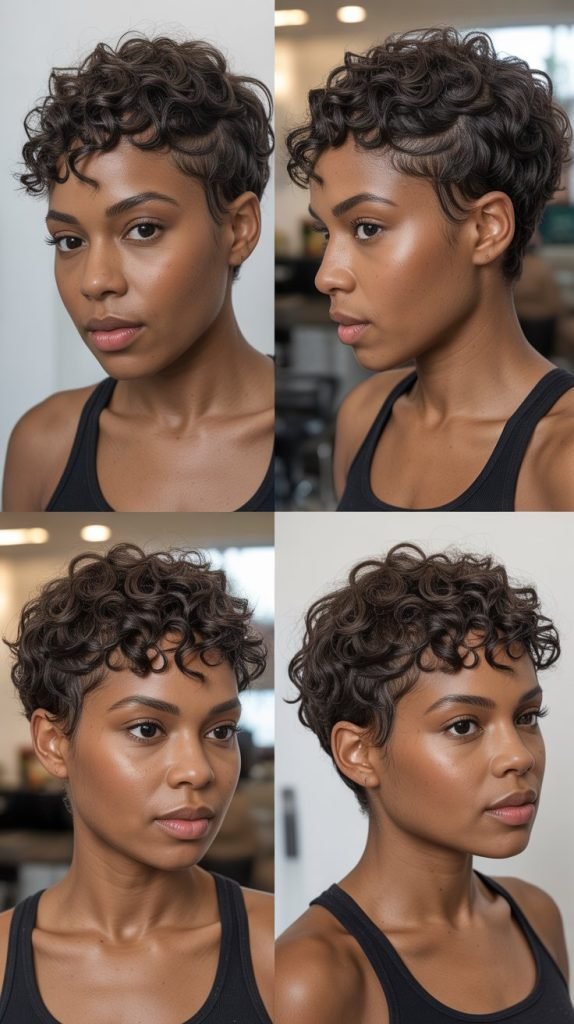
2. Tapered TWA (Teeny Weeny Afro)
The tapered TWA combines the boldness of a short cut with the sophistication of graduated sides, creating a modern and edgy look that’s become iconic in natural hair communities.
This cut emphasizes facial features while keeping maintenance relatively simple.
- The tapered cut features longer hair on top (usually 1-3 inches) that gradually shortens toward the nape and sides, creating a sculpted silhouette.
- This style works exceptionally well for 3C 4A textures because the tighter curl pattern creates beautiful volume on top while the tapered sides provide clean lines.
- Visit a barber or stylist experienced with natural hair textures to achieve the precise fade or taper that complements your face shape.
- Maintenance involves regular trims every 3-4 weeks to keep the taper sharp and the shape intact.
- Style the top section with a curl sponge, your fingers, or a small amount of styling cream to define and separate the curls.
- This versatile cut can be worn sleek and polished for professional settings or textured and voluminous for casual occasions.
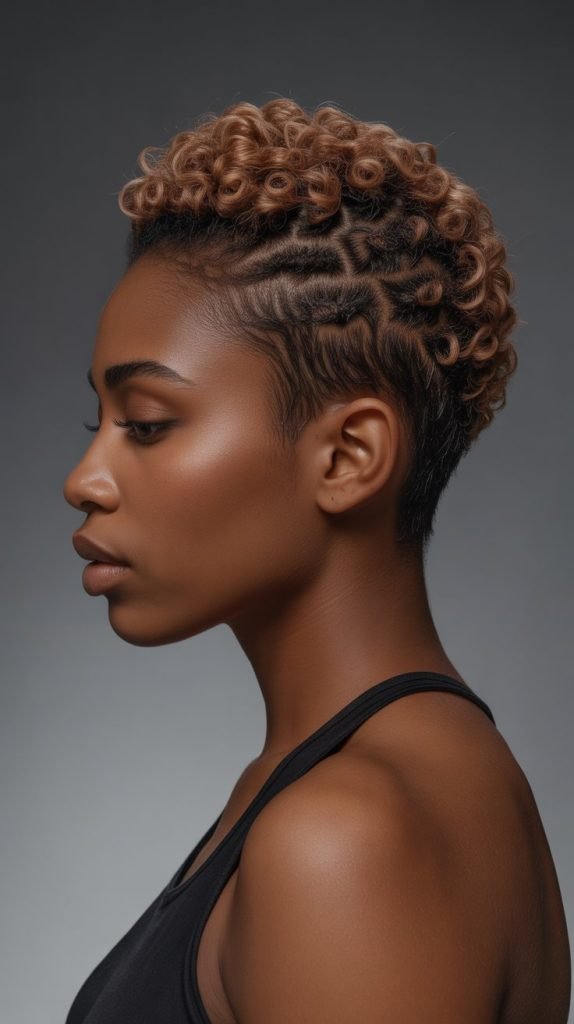
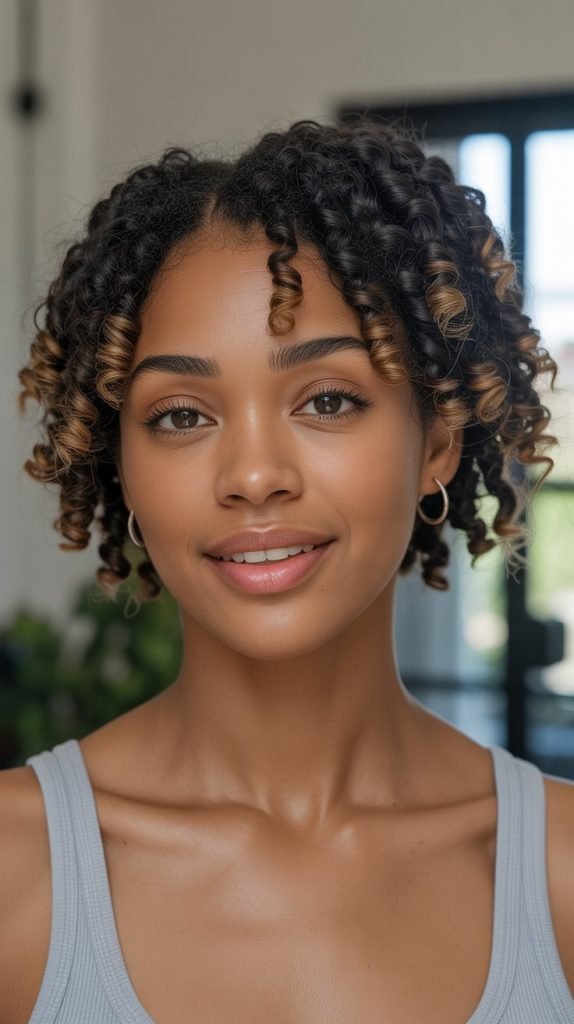
3. Finger Coils
Finger coils create uniform, defined spirals throughout your hair, offering a polished look that showcases the natural coiling ability of 3C 4A textures.
This style provides excellent definition and can last for over a week with proper care.
- Start with freshly washed and conditioned hair that’s still damp but not dripping wet for optimal product absorption and coil formation.
- Section your hair into small squares or rectangles using clips, working methodically from one area to another to ensure you don’t miss any sections.
- Apply a generous amount of curl defining gel or cream to each small section, then wrap the hair around your finger from root to tip, creating tight spirals.
- The size of your sections determines the thickness of your coils—smaller sections create tighter, more defined coils while larger sections produce chunkier spirals.
- Allow your coils to air dry completely, which may take 6-12 hours depending on your hair’s density and the climate conditions.
- Maintain finger coils by sleeping with a satin bonnet or scarf and refreshing with a light oil or curl refresher spray to prevent frizz.
- This style can transition beautifully into a coil-out after several days, giving you two distinct looks from one styling session.
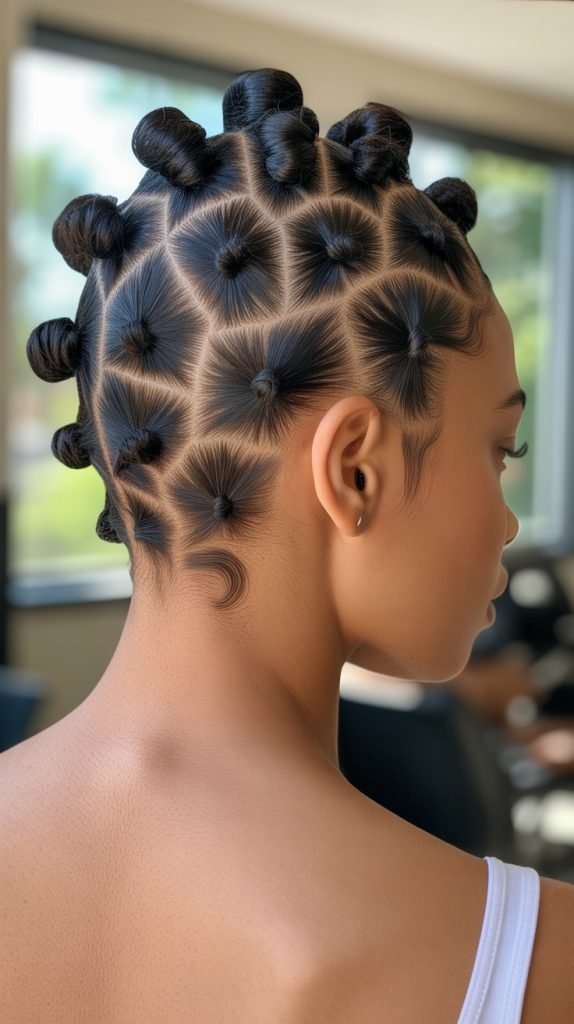
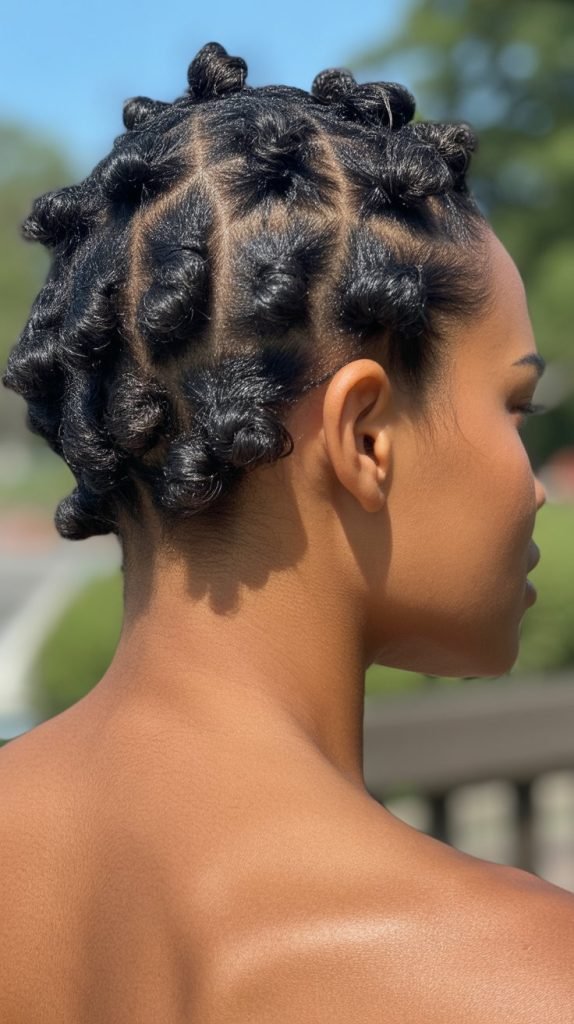
4. Bantu Knots
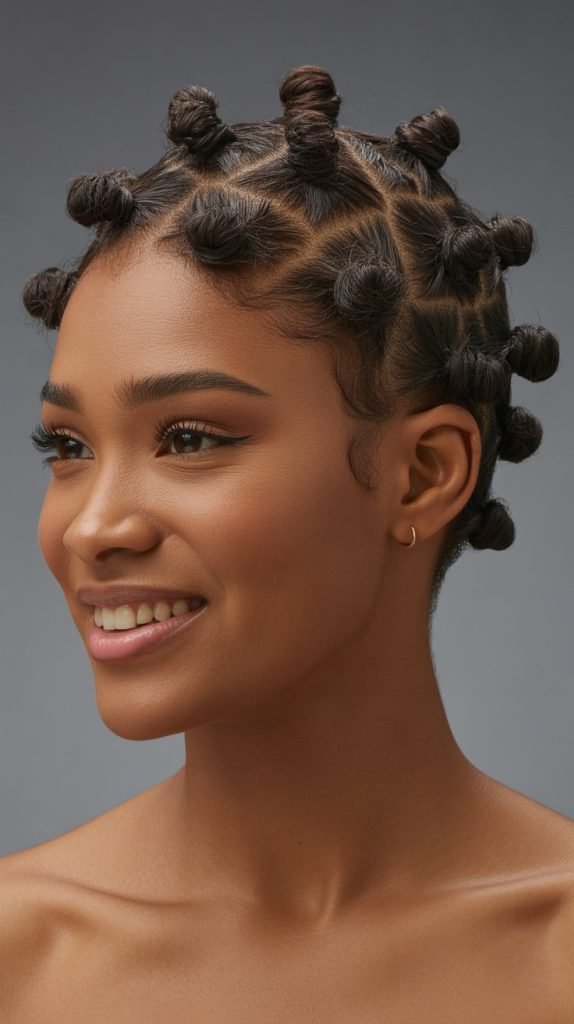
Bantu knots serve as both a protective style and a styling method that creates stunning curl definition when unraveled.
This traditional African hairstyle has gained popularity for its versatility and the beautiful results it produces on 3C 4A hair.
- Divide your clean, moisturized hair into multiple sections—the more sections you create, the smaller and more numerous your knots will be.
- Apply a styling cream or butter to each section before twisting, ensuring the hair is well-coated to reduce frizz and increase definition.
- Twist each section tightly from root to tip, then wrap the twisted hair around itself to create a small knot secured against your scalp.
- Secure each knot by tucking the ends under the base or using small bobby pins if needed for extra hold.
- The knots themselves create a striking geometric pattern that works as a standalone style for 1-3 days before unraveling.
- When you’re ready to create a Bantu knot-out, carefully unravel each knot without disrupting the curl pattern too much.
- Separate the curls gently with your fingers or a wide-tooth comb, fluffing at the roots for volume while maintaining the defined spiral pattern.
5. Twist-Out on Short Hair
The twist-out delivers gorgeous, stretched curls with enhanced definition and volume, making it one of the most popular styles for short 3C 4A hair.
This technique provides a beautiful balance between definition and fullness.
- Begin with damp, detangled hair that’s been freshly washed or thoroughly moisturized to ensure smooth twisting and optimal curl formation.
- Divide your hair into sections based on desired fullness—larger sections create bigger, more voluminous curls while smaller sections yield tighter definition.
- Apply your preferred styling product (cream, butter, or gel) to each section, distributing it evenly from root to tip using the praying hands method.
- Two-strand twist each section by dividing it into two parts and wrapping them around each other, maintaining consistent tension throughout.
- Allow your twists to dry completely overnight or under a hooded dryer to set the curl pattern properly and prevent frizz.
- Unravel each twist carefully in the morning, avoiding pulling or rough handling that could create unwanted frizz or disrupt the curl pattern.
- Fluff and shape your twist-out with your fingers, picking at the roots for added height and separating curls to create your desired volume and fullness.
6. High-Top Fade with Curls
The high-top fade brings a bold, retro-inspired look into contemporary styling, featuring closely cut sides and back with substantial length on top.
This dramatic style makes a powerful statement while celebrating your natural texture.
- This style requires precision cutting from a skilled barber who can create clean fades while preserving the desired length on top.
- The top section typically ranges from 2-4 inches in length, allowing your 3C 4A curls to create impressive height and volume.
- Maintain the fade by getting touch-ups every 2-3 weeks to keep the sides and back sharp and clean-looking.
- Style the top section by picking it out with an afro pick or using a curl sponge to create uniform texture and maximize height.
- Apply a lightweight mousse or styling cream to the top section to define curls while maintaining volume and preventing the style from looking weighed down.
- This versatile cut allows you to experiment with different heights and shapes, from rounded high-tops to more angular, geometric silhouettes.
- The high-top fade works particularly well for oval and heart-shaped faces, adding balanced proportions and drawing attention upward.
7. Pineapple Updo
The pineapple updo gathers your curls at the crown of your head, creating an effortlessly chic style that protects your ends while showcasing your curl pattern. This style works beautifully for short hair that’s at least 3-4 inches long.
- Flip your head forward and gather all your curls toward the very top of your head, positioning the ponytail at your crown area.
- Use a satin scrunchie or a loose hair tie to secure the ponytail, being careful not to pull too tight, which could cause tension headaches or damage.
- Leave the ends of your curls loose and flowing from the gathered point, allowing them to cascade naturally around your face and crown.
- This style serves dual purposes as both a daytime look and a nighttime preservation method that protects your curls while you sleep.
- Adjust the placement of your pineapple based on your face shape—higher placement elongates round faces while slightly lower positioning softens angular features.
- For extra polish, smooth your edges with a natural edge control product and a soft brush or your fingers.
- Add accessories like decorative hair pins, silk scarves wrapped around the base, or statement hair cuffs to elevate the look for special occasions.
8. Straw Set Curls
The straw set technique uses drinking straws to create uniform, defined curls with a distinctive pattern that stands out from typical curl styles.
This method works exceptionally well on short 3C 4A hair, producing long-lasting results.
- Gather flexible drinking straws, bobby pins, and your favorite curl setting product before beginning this time-intensive but rewarding process.
- Work with damp, detangled hair, dividing it into small sections approximately the width of the straw for consistent curl size.
- Apply setting lotion or curl cream to each section, then wrap the hair around the straw in a spiral pattern from root to tip.
- Secure the straw by bending it in half or using bobby pins to hold it in place against your scalp while the hair sets.
- Allow your hair to dry completely—this typically requires overnight drying or several hours under a hooded dryer for best results.
- Carefully remove the straws by unwrapping the hair in the opposite direction, maintaining the spiral integrity as you release each curl.
- The resulting curls have a distinctive, springy quality with impressive definition that can last 1-2 weeks with proper maintenance and nighttime protection.
9. Frohawk (Faux Mohawk)
The frohawk creates the edgy appearance of a mohawk without requiring you to shave the sides of your head, making it a versatile option for those who want a bold look with flexibility.
This style emphasizes the natural volume of 3C 4A hair.
- Start with moisturized, defined curls achieved through your preferred styling method—twist-out, wash-and-go, or finger coils all work well.
- Use bobby pins or small hair clips to pin the hair on both sides of your head flat against your scalp, creating a path down the center.
- The middle section should be picked out and shaped upward to create height and volume, forming the distinctive mohawk silhouette.
- Apply a strong-hold gel or edge control to the sides to keep them smooth and flat, providing maximum contrast with the voluminous center.
- This style offers incredible versatility because you can release the pins at any time to return to your regular style without any permanent changes.
- Accessorize the pinned sides with decorative bobby pins, hair jewelry, or glitter for added visual interest and personality.
- The frohawk works for various occasions—keep it subtle for work or amp up the height and drama for evening events and social gatherings.
10. Flat Twist Updo
Flat twists combine the sleekness of cornrows with the thickness of two-strand twists, creating elegant patterns that can be styled into sophisticated updos.
This protective style works beautifully on short 3C 4A hair while promoting length retention.
- Section your clean, moisturized hair according to your desired pattern—straight back, curved, or geometric designs all create striking effects.
- Apply a twisting cream or gel to each section to provide hold and reduce frizz throughout the twisting process.
- Create flat twists by dividing each section into two parts and twisting them together while adding hair from the section as you progress, similar to cornrowing.
- Keep your twists close to the scalp by maintaining consistent tension and picking up even amounts of hair as you add to each twist.
- Once all sections are twisted, gather the ends at the crown or nape of your neck and pin them into a tucked style or small bun.
- This style can last 1-2 weeks with proper nighttime care, including sleeping with a satin bonnet and refreshing your scalp with lightweight oil.
- When you’re ready for a new look, unravel the flat twists for a beautiful twist-out with stretched roots and defined curl ends.
11. Curly Pompadour
The curly pompadour brings vintage glamour to natural hair styling, sweeping the front section upward and backward to create height and drama.
This sophisticated style works wonderfully with the natural volume of 3C 4A textures.
- Create well-defined curls throughout your hair using your preferred method before attempting to shape the pompadour for better structure and hold.
- Section off the front portion of your hair from ear to ear, isolating the area that will form the pompadour itself.
- Apply strong-hold gel or mousse to the front section, then brush or comb it upward and slightly backward to create the characteristic lift.
- Use bobby pins hidden within the style to secure the pompadour at the desired height, creating a foundation that prevents collapsing.
- The sides and back can remain natural and textured or be smoothed down for contrast, depending on your preferred level of drama.
- Finish with a light mist of holding spray to lock the style in place while maintaining the natural texture and movement of your curls.
- This elegant style works beautifully for formal events, professional settings, or any occasion where you want to make a sophisticated impression.
12. Wash-and-Go with Side Part
Adding a defined side part to your wash-and-go creates instant polish and sophistication, transforming a casual style into something more refined.
This simple modification makes a significant visual impact with minimal extra effort.
- While your hair is still wet from washing, use a rat-tail comb to create a clean, precise part on your preferred side.
- Apply your styling products as usual, but be mindful of maintaining the part’s definition by avoiding product buildup along the part line.
- Style each side of the part separately, smoothing products in the direction the hair naturally falls from the part.
- The deeper you make your part, the more dramatic the asymmetrical effect will be—experiment to find what flatters your face shape best.
- As your hair dries, check the part periodically and re-define it with a comb if necessary to prevent it from closing or shifting.
- This style works particularly well for heart-shaped and oval faces, adding dimension and drawing attention to your best features.
- Change which side you part your hair on regularly to prevent the part from becoming permanent or causing tension in one area.
13. Mini Twists
Mini twists are exactly what they sound like—small, individual two-strand twists that cover your entire head, creating a uniform, rope-like texture.
This protective style offers versatility and low manipulation, making it ideal for promoting healthy hair growth.
- Set aside 4-6 hours for installation, as creating numerous small twists is time-consuming but worth the investment for the longevity of the style.
- Work with clean, deep-conditioned hair that’s been moisturized with a leave-in conditioner and sealed with an oil or butter.
- Section your hair into small squares across your entire head, clipping away sections you’re not currently working on to stay organized.
- Each twist should be pencil-width or smaller, twisted tightly from root to tip to ensure the style lasts without unraveling prematurely.
- Dip the ends in hot water (not boiling) for 3-5 seconds to seal them, or simply twist the ends around your finger tightly and allow them to dry completely.
- Mini twists can last 3-6 weeks with proper care, including nightly moisturizing, wearing a satin bonnet, and avoiding excessive manipulation.
- Style your mini twists in various updos, ponytails, or leave them loose for a versatile protective style that promotes length retention and gives your hair a break from daily styling.
14. Afro Puff
The afro puff is a timeless classic that celebrates the natural volume and texture of 3C 4A hair, gathering your curls into a fluffy, rounded puff.
This style is both practical and stylish, perfect for active lifestyles while maintaining a polished appearance.
- Start with stretched hair—whether from a previous twist-out, braid-out, or blow-out—to maximize the fullness of your puff.
- Smooth your edges and the hair leading to the puff using a natural edge control gel and a soft brush or your fingertips.
- Gather your hair to your desired location (high crown, mid-crown, or low at the nape) using your hands or a soft brush to prevent disrupting your curl pattern.
- Secure the puff with a satin scrunchie or silk elastic that won’t cause breakage or leave creases in your hair.
- Use a pick to fluff and shape the puff into your desired silhouette—round, flat-topped, or anywhere in between.
- The positioning of your puff can dramatically change your look: high puffs appear youthful and energetic, while lower puffs feel more sophisticated and understated.
- Add accessories like headbands, silk scarves, or decorative hair ties around the base of the puff for personalized flair.
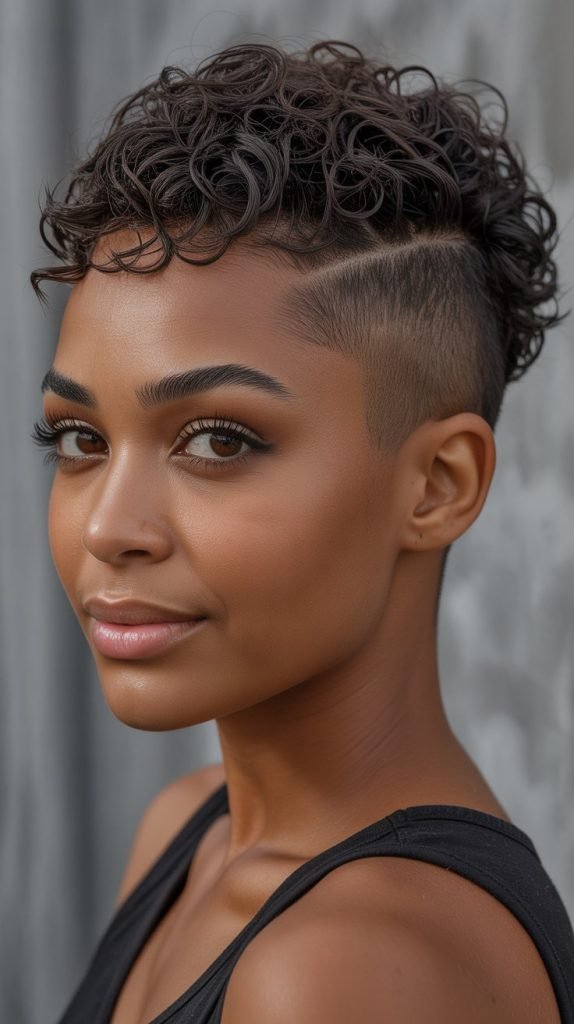
15. Curly Undercut
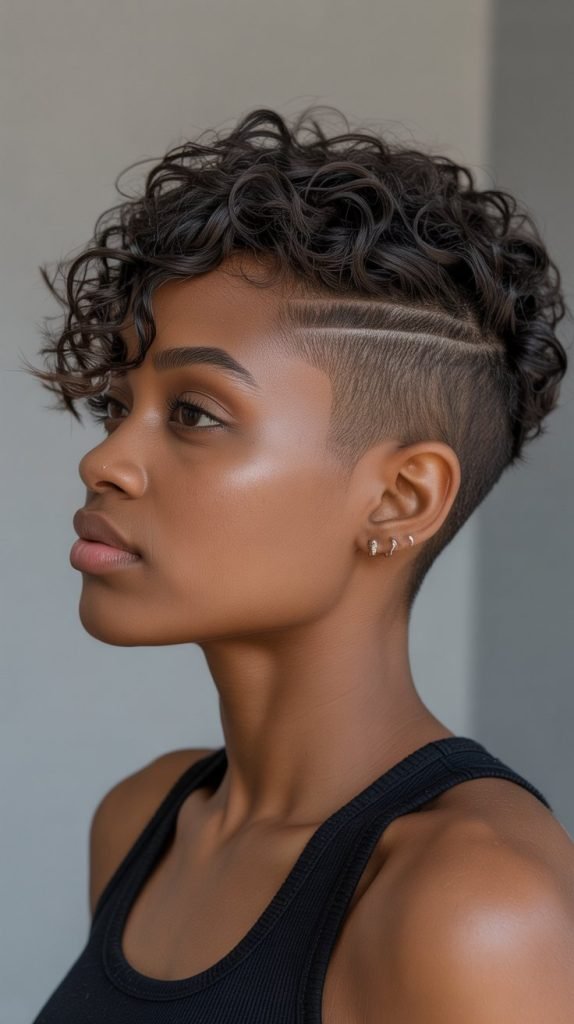
The curly undercut makes a bold statement by shaving or cutting one or both sides very short while leaving length on top, creating striking contrast.
This edgy style highlights the beauty of your 3C 4A curls while reducing bulk and styling time.
- Consult with an experienced stylist or barber to determine the placement and extent of your undercut based on your face shape and personal style.
- The undercut can be subtle (just the nape area) or dramatic (entire sides shaved), giving you control over how bold you want the look to be.
- Maintain the shaved portions with regular trims every 2-3 weeks to keep the lines clean and the contrast sharp against your curly top section.
- Style the longer section normally using your preferred methods—wash-and-go, twist-out, or finger coils all work beautifully with this cut.
- The undercut significantly reduces drying time and product usage since you’re working with less hair overall.
- This style grows out relatively quickly, so be prepared for regular maintenance or be willing to embrace the grow-out phase as part of the style evolution.
- Consider starting with a less dramatic undercut to test whether you enjoy the look before committing to more extensive shaving.
16. Pin Curls
Pin curls create vintage-inspired waves and curls by setting damp hair in coiled patterns secured with bobby pins. This old-school technique produces stunning results on short 3C 4A hair, offering smooth definition with a retro aesthetic.
- Work with damp, freshly washed hair that’s been treated with leave-in conditioner and a setting lotion for maximum hold and shine.
- Section your hair into squares or rectangles approximately 1-2 inches in size, depending on how tight you want the resulting curls.
- Take each section and wrap it around your finger in a circular motion, creating a flat coil against your scalp that resembles a cinnamon roll.
- Secure each pin curl with two bobby pins crossed over the center of the curl, holding it firmly against your scalp until it dries.
- Allow the pin curls to dry completely, which may take several hours air-drying or 45-60 minutes under a hooded dryer on low heat.
- Once fully dry, carefully remove the bobby pins and gently separate the curls with your fingers, avoiding brushing which would disrupt the defined pattern.
- The result is smooth, uniform waves or curls with a polished finish that lasts several days with proper nighttime maintenance.
17. Twist-and-Curl
The twist-and-curl technique combines two-strand twists with perm rods or flexi-rods at the ends, creating a style with stretched roots and spiraled ends. This hybrid approach offers the best of both worlds for 3C 4A hair textures.
- Begin with damp, moisturized hair divided into sections appropriate for your desired fullness—typically 20-40 twists depending on hair density.
- Create two-strand twists from root to about midway down each section, maintaining consistent tension for uniform results.
- Once you reach the point where you want curls to begin, wrap the remaining hair around a perm rod or flexi-rod, rolling it up toward the twist.
- Secure the rod by bending it (for flexi-rods) or using the attached fastener (for perm rods), ensuring it’s tight enough to stay put but not causing discomfort.
- Allow your hair to dry completely overnight or under a hooded dryer before removing the rods to reveal the curled ends.
- Unravel the twists carefully, leaving the curled ends intact to create a beautiful contrast between the stretched twist pattern and bouncy curls.
- This style combines the longevity of twists with the playfulness of curls, lasting 5-7 days with proper maintenance and nighttime protection.
18. Slicked-Back Style
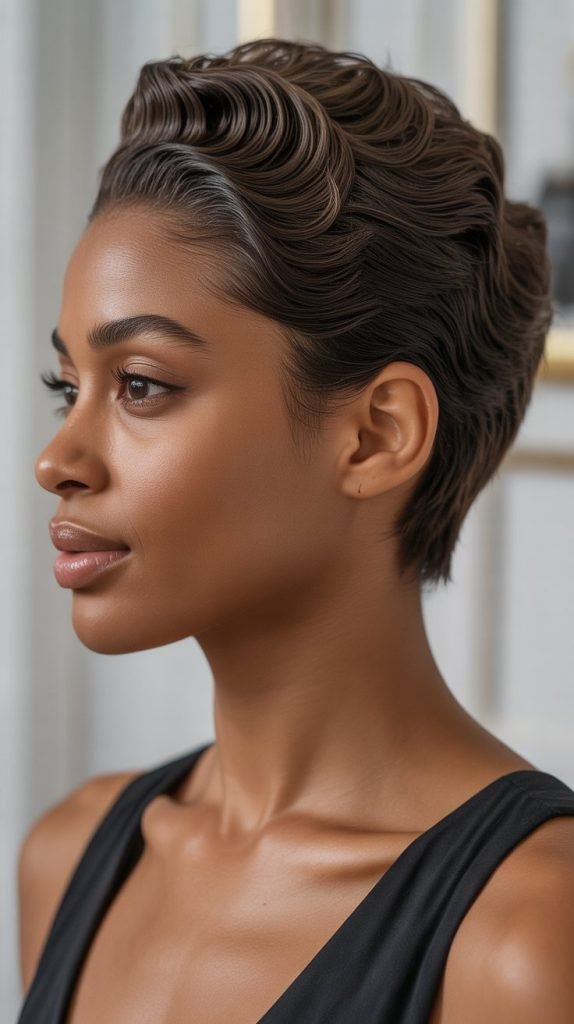
The slicked-back look brings sleek sophistication to natural hair, smoothing your curls back from your face while maintaining volume and texture in the back.
This polished style works perfectly for formal occasions or professional environments.
- Apply a generous amount of strong-hold gel or edge control to your edges and the front portion of your hair while it’s still damp.
- Use a soft brush or your hands to smooth the hair backward from your hairline toward your crown, creating a sleek surface without flyaways.
- Tie a silk or satin scarf around your edges and smoothed sections to lay them flat while they dry, typically 30-60 minutes depending on product and hair density.
- Once the front is smooth and dry, remove the scarf and allow the back portion to maintain its natural texture or style it with additional definition.
- This style creates a beautiful contrast between the sleek, controlled front and the textured, voluminous back section.
- For extra shine and hold, apply a small amount of hair oil or shine serum to the slicked portions once completely dry.
- Be cautious with this style to avoid excessive tension on your hairline, which can lead to traction alopecia over time—make sure smoothing is firm but not painfully tight.
19. Curly Mohawk
The curly mohawk takes the frohawk concept one step further by actually cutting the sides shorter, creating a permanent mohawk shape that showcases your natural curl pattern.
This bold cut makes a statement while celebrating your 3C 4A texture.
- This style requires commitment since it involves actually cutting the sides short rather than pinning them down temporarily like a frohawk.
- Work with a skilled stylist who can create the right proportions for your face shape, determining the width of the mohawk strip and the length of the sides.
- The center strip typically ranges from 2-4 inches wide and retains 2-4 inches of length, allowing your curls to create impressive height when picked out.
- Maintain the cut by getting the sides trimmed every 3-4 weeks to keep the contrast sharp and the mohawk shape well-defined.
- Style the center strip by picking it upward with an afro pick, using curl sponges for texture, or defining individual curls with finger coils or twists.
- This versatile cut allows you to style the mohawk in different heights and shapes depending on the occasion—subtle for work, dramatic for events.
- The curly mohawk pairs beautifully with shaved designs or patterns on the sides for additional creative expression and personalization.
20. Halo Braid Crown
The halo braid creates a crown-like effect by braiding around the perimeter of your head, leaving the center free to showcase your natural curls.
This romantic style works beautifully for special occasions while being gentler on your hair than all-over braiding.
- Start with stretched, defined curls achieved through your preferred method to ensure the loose curls in the center have shape and definition.
- Section off a band of hair around your entire head, approximately 1-2 inches wide, from your hairline back toward the center.
- Create a Dutch or French braid along this band, working your way around the entire circumference of your head to form the halo.
- As you braid, maintain consistent tension and pick up even sections to create a smooth, uniform braid that sits neatly against your head.
- Secure the end of your braid with a small elastic and tuck it under the beginning of the braid, pinning it in place with bobby pins that match your hair color.
- The center section remains loose and can be styled with extra definition, picked out for volume, or adorned with accessories like flowers or jeweled pins.
- This style beautifully frames your face while protecting your edges and the outer portions of your hair from manipulation and environmental stress.
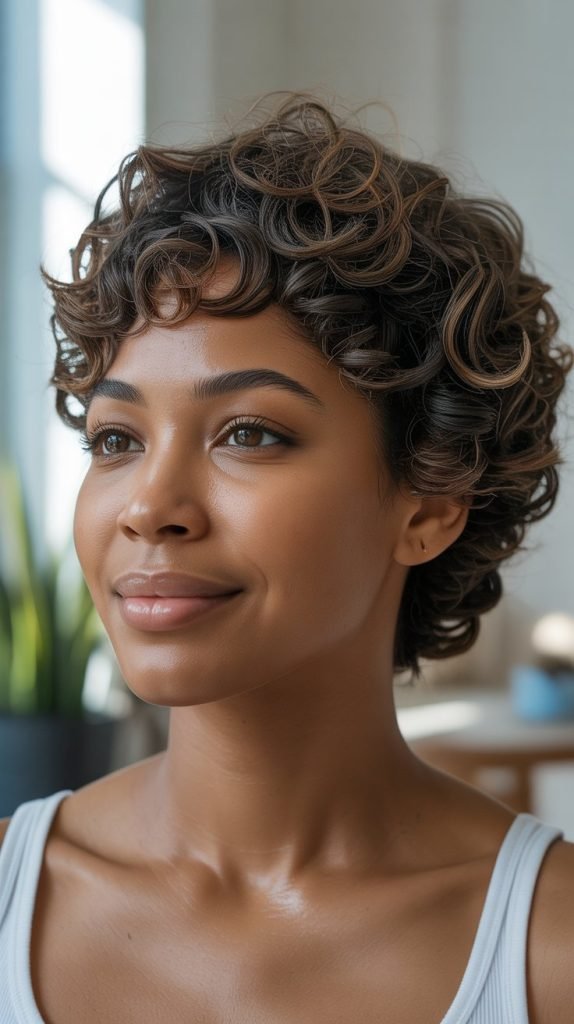
21. Curl-Defining Cream Style
Focusing on a curl-defining cream as your primary styling product creates soft, touchable curls with natural movement and shine.
This minimalist approach lets your 3C 4A texture shine without the crunch of gels or the weight of heavy butters.
- Choose a curl-defining cream with moisturizing ingredients like shea butter, coconut oil, or aloe vera that provide hold without stiffness.
- Apply the cream to soaking wet hair immediately after washing, using the praying hands method to coat each section thoroughly from root to tip.
- Use the shingling technique on small sections, smoothing the cream down each curl clump with your fingers to encourage definition and clumping.
- Scrunch your curls gently upward after applying the cream to encourage curl formation and remove excess water that could weigh down your pattern.
- Air dry for the softest, most natural finish, or diffuse on low heat if you need faster drying times while maintaining curl definition.
- This technique creates a softer, more natural look compared to gel-based styles, with curls that move and bounce rather than staying rigidly in place.
- The style typically lasts 2-4 days before requiring a refresh, which can be done with a water-based spray and a small amount of additional cream.
22. Chunky Flat Twist-Out
Chunky flat twists create a bolder, more dramatic twist-out compared to smaller sections, resulting in fuller, more voluminous curls with elongated definition.
This style is perfect when you want maximum impact with less installation time.
- Section your clean, damp hair into 6-10 large sections depending on your hair’s density and your desired final volume.
- Apply a generous amount of twisting cream or butter to each section, ensuring complete coverage for smooth twisting and defined results.
- Create flat twists that are substantially thicker than standard flat twists, maintaining the flat-to-scalp technique but working with much larger sections.
- The larger sections mean faster installation time—typically 30-45 minutes compared to 1-2 hours for smaller flat twists.
- Allow the twists to dry completely before unraveling, as removing them while damp will create frizz and poorly defined results.
- Unravel each twist carefully, then separate the resulting curl into 2-3 sections for additional fullness without losing the curl definition.
- The final result features dramatic volume and movement with chunky, well-defined S-curl patterns that make a bold statement.
23. Side-Swept Curls
Side-swept curls create an elegant, romantic look by directing all your curls to flow toward one side of your head.
This asymmetrical style adds drama and sophistication to your natural texture, perfect for both casual and formal settings.
- Begin with well-defined curls created through your preferred styling method—wash-and-go, twist-out, or finger coils all work beautifully.
- Create a deep side part using a rat-tail comb, positioning it wherever creates the most flattering asymmetry for your face shape.
- Apply strong-hold gel to the smaller side (the side with less hair), smoothing it back toward the opposite side using a brush or your fingers.
- Use bobby pins to secure the smoothed side in place, positioning them discreetly behind your ear or along the side of your head.
- Arrange the larger side (where all the curls now flow) by finger-styling and positioning individual curl clumps for your desired shape.
- Finish with a light holding spray to maintain the style throughout the day or evening, reapplying as needed.
- For extra glamour, add decorative bobby pins or hair accessories on the smooth side to create visual interest and secure the style more firmly.
24. Defined Curl Fro
The defined curl fro combines the volume and shape of a traditional afro with enhanced curl definition throughoutRetry
, creating a style that’s both bold and beautifully textured. This look celebrates every coil while maintaining shape and structure.
- Start with freshly washed hair and apply a leave-in conditioner followed by a curl-defining gel or cream to ensure each curl is coated and defined.
- Use the shingling method on small sections throughout your entire head, smoothing product down each curl clump to maximize definition from root to tip.
- Allow your hair to dry completely—air drying preserves the most definition, while diffusing can add volume but may slightly soften the curl pattern.
- Once fully dry, use an afro pick to gently lift your roots without disrupting the curl definition at the ends, working from the base outward.
- Shape your fro into your desired silhouette—round, oval, or flat-topped—by picking selectively in areas that need more volume.
- The key to this style is balancing the fullness of an afro with the precision of defined curls, creating texture you can see from across the room.
- This style typically lasts 3-5 days with proper maintenance, including pineappling at night and fluffing the roots each morning while leaving the defined ends intact.
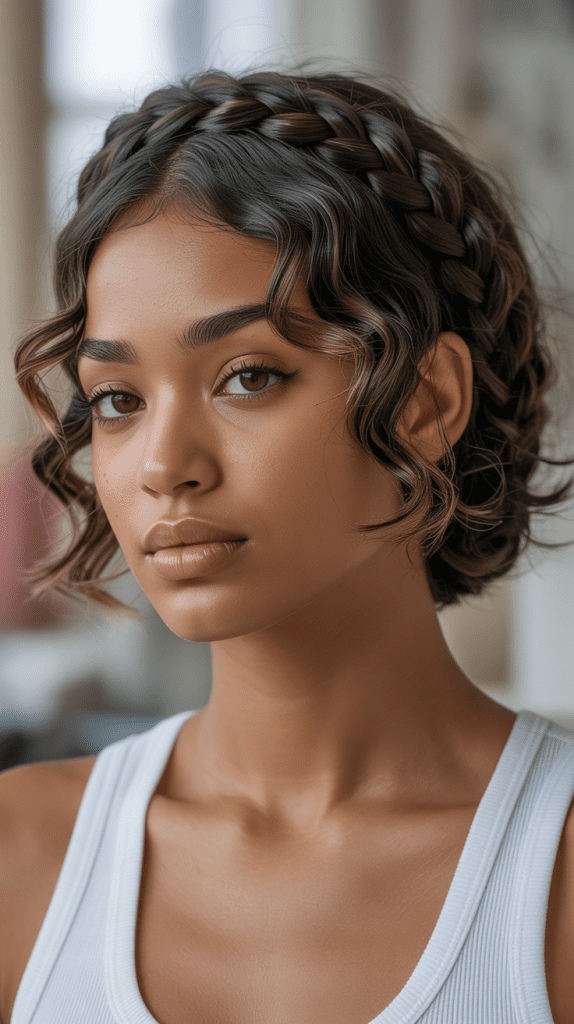
25. Braided Headband with Curls
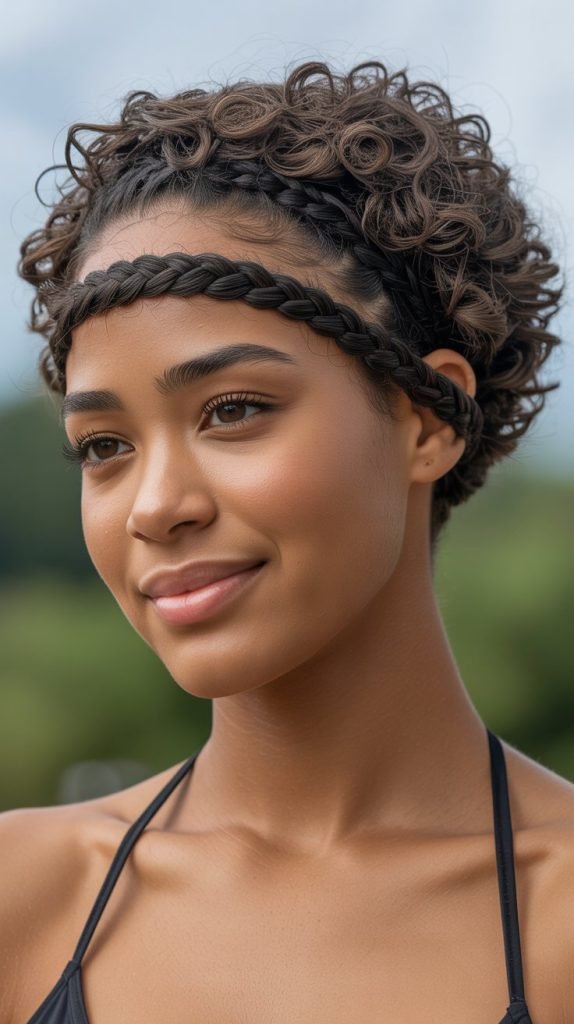
A braided headband frames your face beautifully while allowing your natural curls to flow freely behind it, combining the polish of a braid with the freedom of loose natural hair.
This style offers the best of both protective styling and curl showcasing.
- Section off a band of hair along your hairline from ear to ear, approximately 1-2 inches wide, leaving the rest of your hair free.
- Braid this front section using a Dutch, French, or regular three-strand braid technique, depending on your skill level and desired look.
- The braid should follow the curve of your hairline like a headband, creating a crown-like effect that frames your face beautifully.
- Secure the ends of your braid behind your ear with bobby pins that match your hair color, tucking them discreetly for a seamless appearance.
- Style the remaining loose curls behind the braided band using your preferred method—leave them natural, add extra definition, or pick them out for volume.
- This versatile style protects your fragile hairline while allowing you to show off your curl pattern and switch up your look easily.
- Add embellishments like beads woven into the braid, decorative pins along the band, or flowers tucked into the braid for special occasions.
26. Wet-Look Curls
The wet-look style uses generous amounts of gel to create glossy, ultra-defined curls that appear perpetually damp, giving a modern, editorial aesthetic.
This high-shine look makes a bold statement while providing excellent curl definition.
- Apply a strong-hold, high-shine gel to soaking wet hair, using significantly more product than you would for a traditional wash-and-go.
- Work the gel through your hair with praying hands and raking motions, ensuring every single curl is thoroughly coated with the product.
- Smooth additional gel over the surface of your hair after the initial application to enhance the glossy, wet appearance.
- Allow your hair to air dry completely without touching it—this prevents frizz and maintains the sleek, wet look throughout the drying process.
- Once dry, you can leave the gel cast intact for maximum shine and hold, or gently scrunch it out for softer curls with retained definition.
- This style works particularly well for fashion-forward looks, photoshoots, or evening events where you want to make a statement.
- Refresh the style by lightly misting with water and applying additional gel to sections that have lost their shine or definition.
27. Twist-Out with Accessories
Elevating a basic twist-out with carefully chosen accessories transforms it from everyday casual to special occasion worthy, adding personality and visual interest.
Accessories allow you to express your style while celebrating your natural texture.
- Create your twist-out as usual, ensuring you have well-defined, separated curls that provide a beautiful canvas for your accessories.
- Hair cuffs slide onto individual twists or curls, adding metallic or decorative elements without requiring pins or clips—choose sizes appropriate for your curl thickness.
- Decorative bobby pins in gold, silver, rose gold, or colored finishes can be placed strategically throughout your style to catch light and add sparkle.
- Silk or satin scarves can be tied as headbands, wrapped around ponytails, or woven through sections of hair for a pop of color and texture.
- Fresh or artificial flowers tucked into your curls create a romantic, bohemian aesthetic perfect for weddings, festivals, or outdoor events.
- Pearls, beads, or jeweled pins add elegance and sophistication, transforming your natural style into something red-carpet worthy.
- When using accessories, maintain balance—too many can overwhelm your natural beauty, while a few well-placed pieces create focal points that enhance your look.
28. Low Manipulation Style with Oil
Focusing on moisture and minimal styling creates a low manipulation routine that prioritizes hair health while still looking polished. This approach uses quality oils to seal in moisture and enhance shine naturally.
- This styling philosophy emphasizes gentle handling, avoiding excessive combing, brushing, or product application that can cause breakage and damage.
- After washing and conditioning, apply your leave-in conditioner to damp hair, then seal with a lightweight oil like jojoba, grapeseed, or argan oil.
- Use the LOC method (Liquid, Oil, Cream) or LCO method (Liquid, Cream, Oil) to layer moisture effectively, trapping hydration within your hair shaft.
- Style your hair using only your fingers to define curls and shape your style, avoiding tools that can disrupt your curl pattern or cause breakage.
- Allow your hair to air dry naturally, embracing your curl pattern as it forms without manipulation or intervention during the drying process.
- Throughout the week, refresh by misting with water or a water-based spray and reapplying a small amount of oil to seal and add shine.
- This approach promotes length retention, reduces breakage, and keeps your hair healthy while still looking intentional and well-maintained.
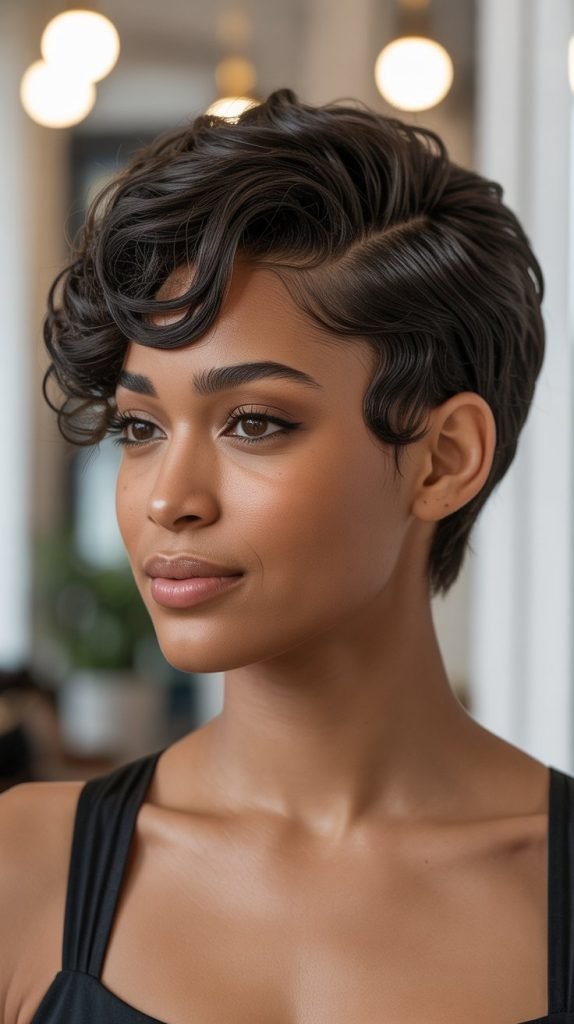
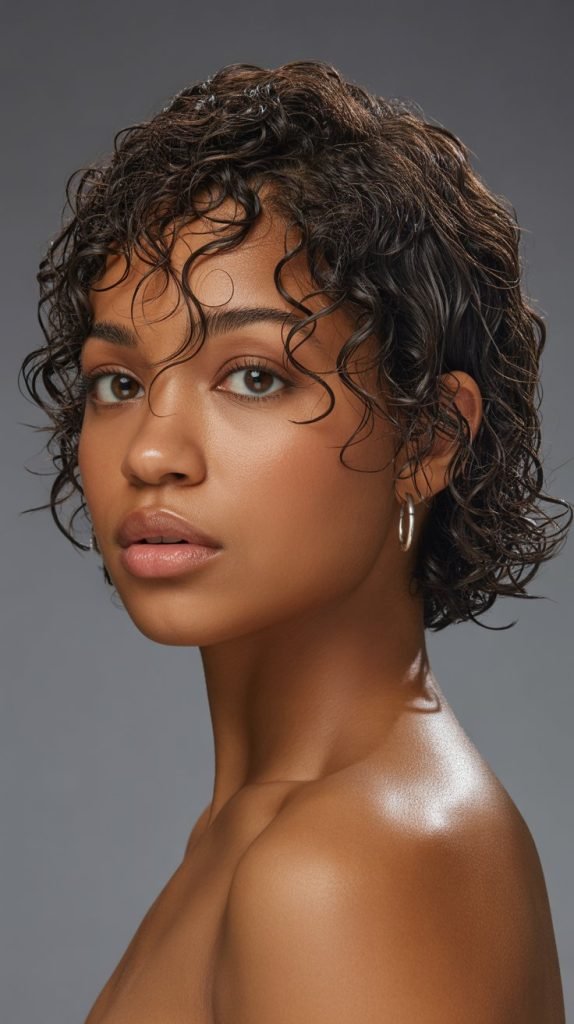
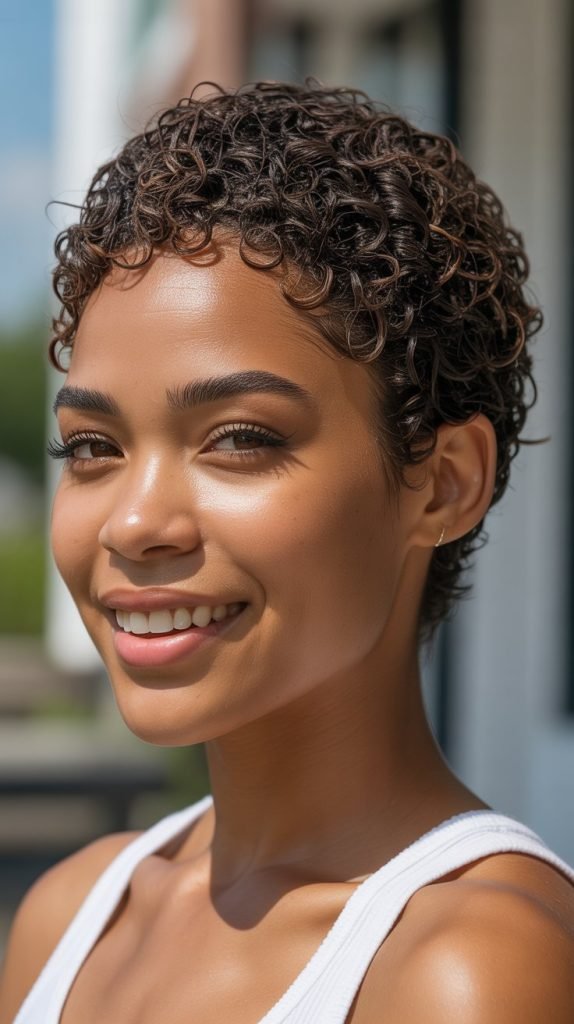
29. Curly Pixie Cut
The curly pixie cut is ultra-short on the sides and back with slightly more length on top, creating a chic, modern look that’s easy to maintain.
This bold cut celebrates your 3C 4A texture while minimizing styling time and product use.
- This dramatic cut requires confidence and the right stylist—find someone experienced with cutting natural, curly textures who understands how 3C 4A hair behaves.
- The top section typically ranges from 1-3 inches, just enough length for your curls to coil and create texture without excessive volume.
- The sides and back are cut very short, often using clippers, creating clean lines and a sculpted silhouette that emphasizes your facial features.
- Maintenance is minimal—simply apply a small amount of curl cream or oil to damp hair and let it air dry, with occasional picking for added height.
- Regular trims every 3-4 weeks keep the cut sharp and prevent the style from growing out of shape or losing its definition.
- The curly pixie is incredibly versatile, looking equally appropriate in professional settings, casual environments, and formal occasions with minimal styling changes.
- This cut is particularly liberating for those ready to embrace minimal styling, as it requires little time or product while maintaining a polished, fashion-forward appearance.
30. Stretched Blow-Out Style
The stretched blow-out uses heat tools to elongate your 3C 4A curls, creating length and a different texture while still maintaining some body and movement.
This technique offers versatility and a change from your natural shrunken curl pattern.
- Begin with freshly washed, deep-conditioned hair and apply a heat protectant spray or serum to every section before using any heat tools.
- Use a blow dryer with a comb attachment or diffuser on medium heat, stretching your hair as you dry by pulling sections gently with the comb or your fingers.
- Work in sections, ensuring each area is completely dry before moving to the next to maximize smoothness and prevent reversion from remaining moisture.
- For extra smoothness, follow up with a flat iron on low to medium heat, making single passes through small sections rather than repeated passes that cause damage.
- The result is hair that’s elongated and shows your hair’s true length while retaining some body and movement unlike a completely straightened style.
- This style requires careful heat management—always use heat protectant, avoid excessive heat, and limit heat styling to once every 1-2 weeks to prevent damage.
- Maintain the stretched style by wrapping your hair at night with a silk or satin scarf, and refreshing with a light oil or serum to maintain shine and smoothness.
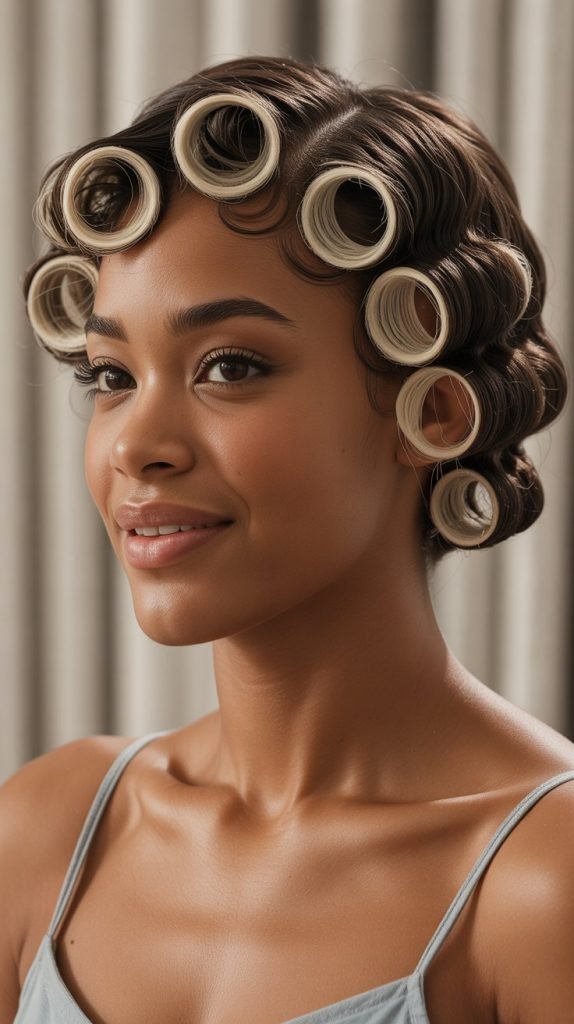
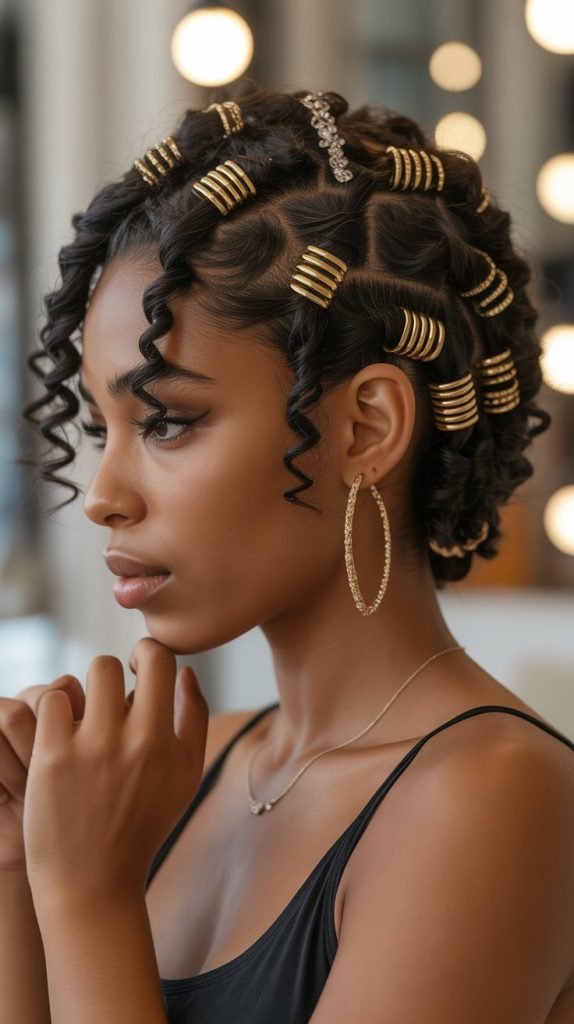
31. Roller Set Curls

Roller sets create smooth, uniform curls with a vintage aesthetic, using magnetic rollers or flexi-rods to set damp hair into defined curl patterns.
This heatless method produces long-lasting results with beautiful shine and bounce.
- Section your damp, product-laden hair into squares or rectangles sized according to your desired curl diameter—larger sections create bigger curls.
- Apply a setting lotion or styling foam to each section before rolling to ensure the curls set firmly and last multiple days.
- Roll each section of hair around the roller from ends to roots, keeping the tension consistent but not painful or excessively tight.
- Secure each roller using pins, clips, or the roller’s built-in fastener, ensuring it stays in place throughout the drying process.
- Sit under a hooded dryer for 45-90 minutes or allow your hair to air dry overnight for a completely heatless option that may take longer but avoids any heat damage.
- Once completely dry, carefully remove all rollers by unrolling them in the opposite direction of how you rolled them up.
- Separate the curls gently with your fingers or a wide-tooth comb, shaping them into your desired style with a light holding spray or oil for shine.
32. Half-Up Half-Down Style
The half-up half-down style offers perfect balance by securing the top portion of your hair while leaving the bottom free to showcase your curls. This versatile look works for virtually any occasion and face shape.
- Start with well-defined curls throughout your hair using your preferred styling method to ensure both the secured and loose sections look intentional.
- Section off the top half of your hair from temple to temple, creating a horizontal division across the crown of your head.
- Gather the top section and secure it with a satin scrunchie, hair tie, or bobby pins depending on whether you want a puff, twist, or pinned effect.
- Leave your edges and the bottom half of your hair loose and flowing, arranging the curls for optimal volume and definition.
- Pick out the secured top section if you’re creating a puff, or shape it according to your chosen style (twisted, braided, or simply pulled back).
- This style elegantly keeps hair away from your face while still showcasing your length and curl pattern, making it practical yet stylish.
- Adjust the placement of your half-up section based on your face shape—higher placement elongates round faces while lower placement softens angular features.
33. Natural Shrinkage Style
Embracing shrinkage rather than fighting it celebrates the true nature of 3C 4A hair, allowing your coils to shrink to their natural state.
This approach focuses on moisture, definition, and accepting your hair’s authentic texture and behavior.
- Apply moisturizing products to soaking wet hair, focusing on hydration rather than elongation or stretching techniques.
- Use techniques that encourage maximum coil formation—shingling, raking, or simply scrunching—without any pulling or stretching motions.
- Allow your hair to dry naturally without diffusing, picking, or manipulating, letting your coils shrink as much as they naturally want to.
- The result showcases the tightest, most condensed version of your curl pattern, demonstrating the remarkable coiling ability of 3C 4A textures.
- This style requires a mindset shift for those accustomed to stretching their hair, learning to appreciate the beauty of maximum shrinkage.
- Shrinkage is actually a sign of healthy, well-moisturized hair—dry, damaged hair often loses its ability to coil tightly.
- Embrace the versatility this offers: your hair can look dramatically different from day to day depending on whether you encourage or prevent shrinkage.
- This approach celebrates what makes 3C 4A hair unique rather than trying to make it behave like looser curl patterns or straighter textures.
Conclusion
The journey through these “33 Best 3C 4A Hairstyles for Short Hair You’ll Love” demonstrates that short natural hair is anything but limiting—it’s a celebration of versatility, creativity, and the unique beauty of tightly coiled textures.
From the effortless elegance of a wash-and-go to the bold statement of a curly mohawk, each style offers opportunities to express your personality while honoring your natural texture.
Whether you’re seeking protective styles that promote length retention, low-manipulation approaches that prioritize hair health, or fashion-forward looks that turn heads, this collection provides options for every lifestyle, skill level, and occasion.
Remember that the most important aspect of any hairstyle is how it makes you feel—confident, beautiful, and authentically yourself.
Embrace the learning process as you discover which products work best for your specific hair needs, which techniques give you the results you desire, and which styles align with your daily routine and aesthetic preferences.
Your 3C 4A hair is a crown that deserves celebration, and with these styling options, you’ll never run out of ways to showcase its natural magnificence.
The path to loving your natural hair begins with understanding its needs, respecting its characteristics, and exploring the endless possibilities it offers, all of which you’ve discovered throughout this comprehensive guide to the “33 Best 3C 4A Hairstyles for Short Hair You’ll Love.