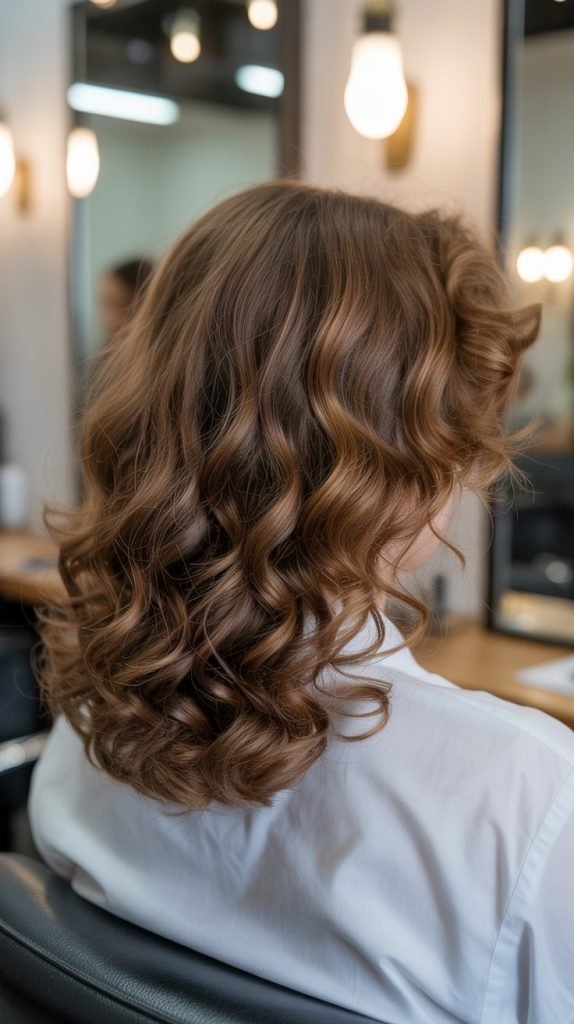
Cutting curly hair is an art that requires understanding the unique nature of curls, their patterns, and how they behave when dry versus wet.
Whether you’re a professional stylist or someone looking to trim your own curls at home, mastering the right techniques can mean the difference between bouncy, defined curls and a frizzy, uneven mess.
This comprehensive guide on “How to Cut Curly Hair: Expert Tips for Best Curls” will walk you through everything you need to know about cutting curly hair successfully.
From understanding different curl types to learning professional cutting techniques, preparing your hair properly, and maintaining those beautiful curls post-cut, you’ll discover the secrets that experienced hairstylists use to create stunning curly hairstyles.
We’ll explore the essential tools you need, common mistakes to avoid, and specific methods tailored to different curl patterns.
By the end of this article, you’ll have the confidence and knowledge to approach curly hair cutting with expertise, ensuring every curl falls perfectly into place and showcases its natural beauty.
In This Post......
- 1. Understanding Curly Hair Types Before Cutting
- 2. Essential Tools for Cutting Curly Hair
- 3. Wet Cutting vs. Dry Cutting Methods
- 4. Step-by-Step Guide to Cutting Your Own Curly Hair
- 5. Layering Techniques for Curly Hair
- 6. Dealing with Different Curl Patterns on One Head
- 7. Common Mistakes to Avoid When Cutting Curly Hair
- 8. Maintaining Your Curly Haircut
- 9. Professional vs. DIY Curly Hair Cutting
- 10. Special Considerations for Transitioning Hair
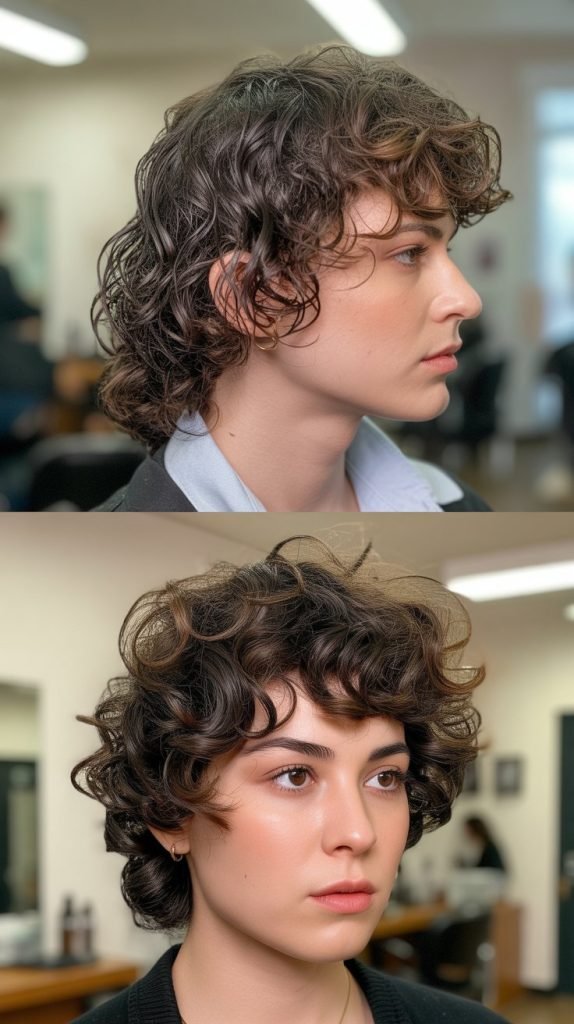
1. Understanding Curly Hair Types Before Cutting
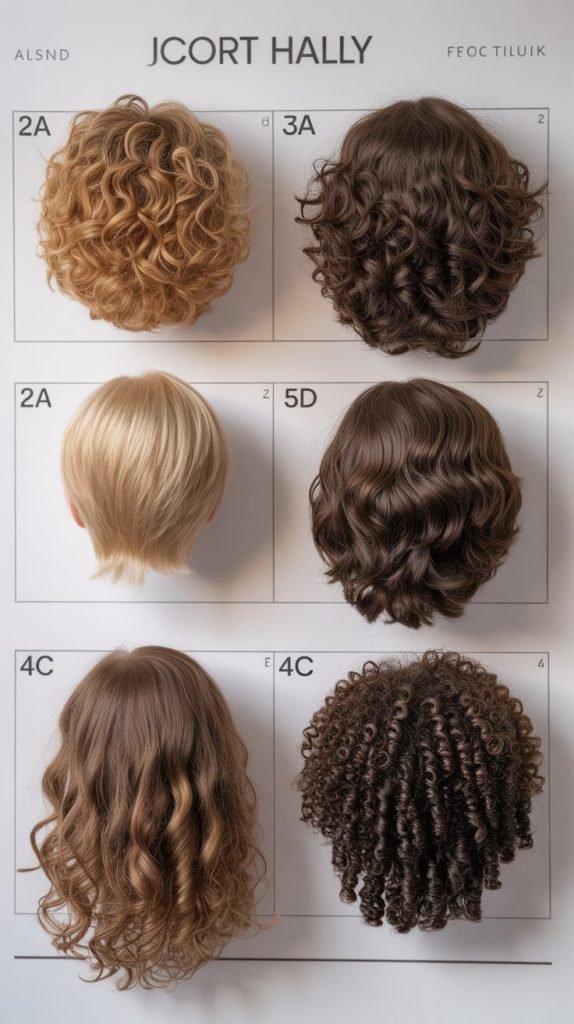
Before picking up scissors, you must understand that not all curls are created equal. Identifying your specific curl type will determine which cutting technique works best and how your hair will respond to different approaches.
The hair typing system ranges from wavy to coily textures, and each requires a customized cutting strategy.
- Curly hair is typically categorized into types 2 (wavy), 3 (curly), and 4 (coily), with subcategories A, B, and C indicating the tightness of the curl pattern.
- Type 2A-2C wavy hair has a loose S-pattern and tends to be flatter at the roots with more definition toward the ends.
- Type 3A-3C curly hair features well-defined spiral curls ranging from loose corkscrews to tight springy ringlets.
- Type 4A-4C coily hair has a tight zigzag or coil pattern with more fragility and shrinkage potential.
- Each curl type has different shrinkage rates when dry, with type 4 hair shrinking up to 75% of its actual length.
- Understanding your curl pattern helps determine whether to cut hair wet or dry and which cutting angle will enhance the natural texture.
- Mixed curl patterns on one head are common, requiring attention to different sections and customized cutting approaches for each area.
- The porosity of curly hair affects how it holds moisture and responds to cutting, with high porosity hair being more prone to damage during cutting.
2. Essential Tools for Cutting Curly Hair

Having the right tools is fundamental to achieving a professional curly haircut at home or in the salon. Quality equipment designed specifically for textured hair makes the cutting process smoother and delivers superior results. Investing in proper tools prevents damage and ensures clean, precise cuts.
- Professional hairdressing shears with sharp blades measuring 5.5 to 6.5 inches are ideal for cutting curly hair without causing split ends.
- A wide-tooth comb or detangling brush helps separate curls gently without disrupting the natural curl pattern or causing breakage.
- Sectioning clips in various sizes keep hair organized during the cutting process and ensure even, manageable sections.
- A spray bottle filled with water or a water-conditioner mixture maintains moisture during dry cutting or refreshes curls between sections.
- A handheld mirror or dual mirror setup allows you to see all angles of your head when cutting your own hair.
- Hair cutting razors or texturizing shears should be used sparingly on curly hair as they can create frizz and damage the curl structure.
- A styling cape or towel protects clothing and makes cleanup easier after the cutting session.
- Point cutting or slide cutting techniques require scissors with precision tips for creating texture without bulk removal.
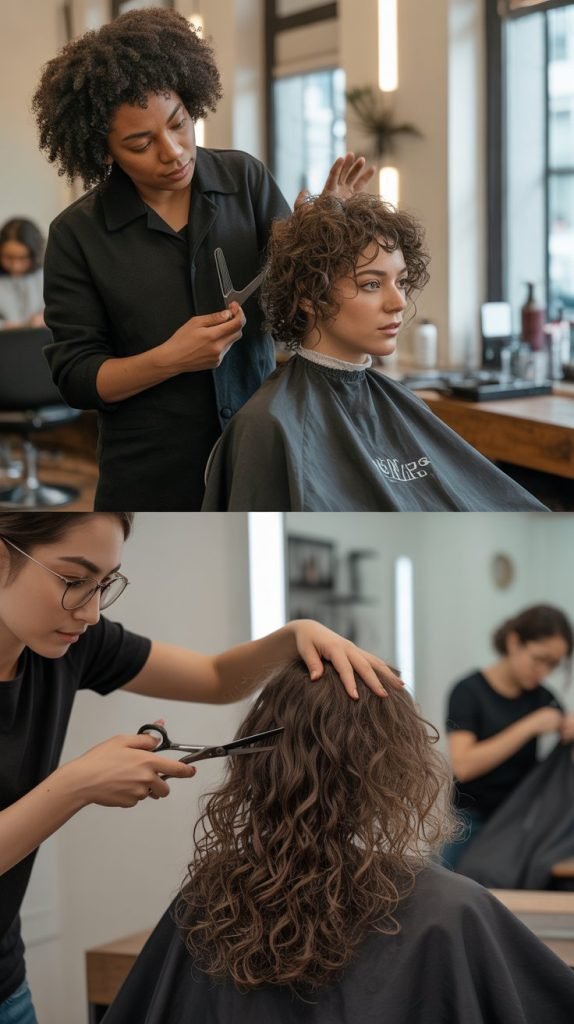
3. Wet Cutting vs. Dry Cutting Methods
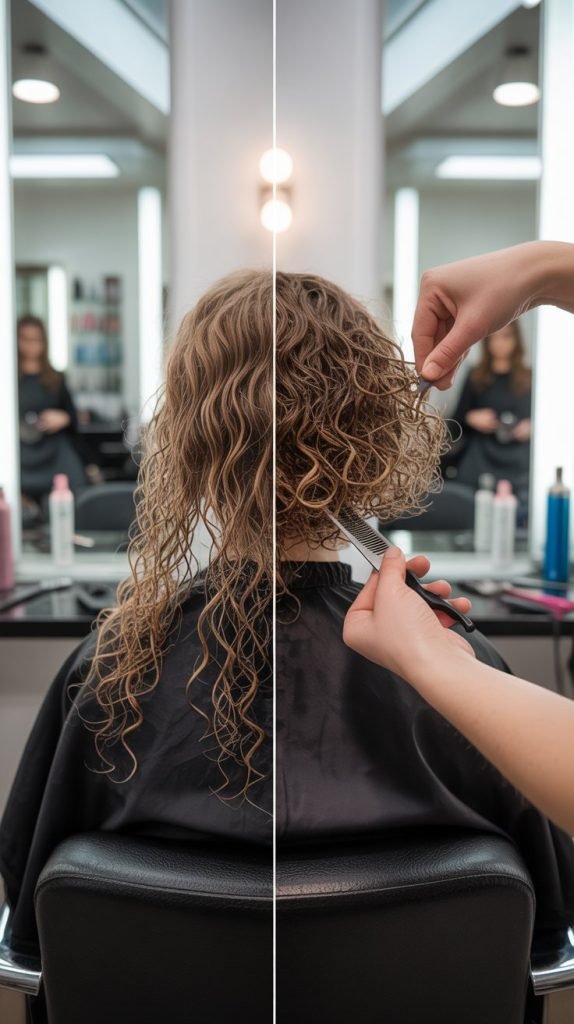
The debate between wet and dry cutting for curly hair has strong advocates on both sides, and understanding both methods helps you choose the best approach. Each technique offers distinct advantages depending on your curl type, desired outcome, and skill level. Many professional curl specialists now prefer dry cutting for its accuracy.
- Wet cutting involves shampooing, conditioning, and cutting hair while damp, which is the traditional method taught in most cosmetology schools.
- When hair is cut wet, curls are elongated and appear longer, making it difficult to predict the final length once hair dries and shrinks.
- Dry cutting allows you to see exactly how each curl will fall naturally and where the hair actually sits on the head.
- The Deva Cut is a popular dry cutting technique specifically designed for curly hair that cuts each curl individually in its natural state.
- Wet cutting works better for minor trims and when you want to remove significant length quickly and evenly across all sections.
- Dry cutting provides more precision for shaping, layering, and creating movement because you can see the curl pattern immediately.
- Combination approaches often work best, starting with a wet cut for bulk removal and finishing with dry refinement for shape and detail.
- Curly hair should always be cut when it’s in its most natural state possible, whether that’s freshly washed and dried or properly moisturized second-day hair.
4. Step-by-Step Guide to Cutting Your Own Curly Hair
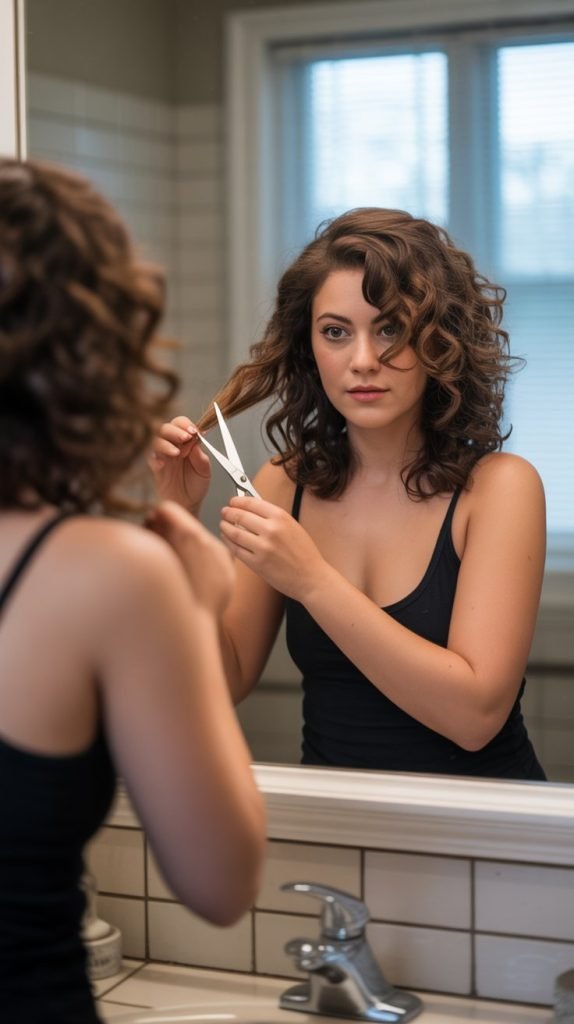
Cutting your own curly hair at home can be intimidating, but following a systematic approach ensures better results. Patience and proper preparation are essential for avoiding common mistakes that lead to uneven lengths or unwanted shapes.
This method works for basic maintenance trims and simple shape adjustments.
- Start with clean, detangled hair that has been styled in your normal routine so curls form their natural pattern.
- Section hair into four quadrants by parting down the middle from forehead to nape and from ear to ear across the crown.
- Secure each section with clips, leaving one section down to work on at a time for better control and visibility.
- Begin with the back sections first since they’re hardest to see, using a handheld mirror to check your progress frequently.
- Take small subsections of hair, about one to two inches wide, and identify individual curls or curl clumps to cut.
- Hold the curl gently at the length you want to cut, then snip the very end of the curl in a slight diagonal or point-cut motion.
- Avoid cutting straight across, which creates blunt ends that don’t blend well with the natural curl movement and texture.
- Work your way around the head systematically, constantly stepping back to assess the overall shape and symmetry.
- For face-framing pieces, pull the curl forward and cut at the desired length, remembering it will spring up shorter when released.
- Trim conservatively, removing only a quarter to half inch at a time, as you can always cut more but cannot add length back.
- After completing all sections, shake out your hair, let curls settle naturally, and make any final adjustments to individual curls that need refinement.
- Finish by misting hair lightly with water to refresh curls and apply your regular styling products to seal the cut ends.
5. Layering Techniques for Curly Hair
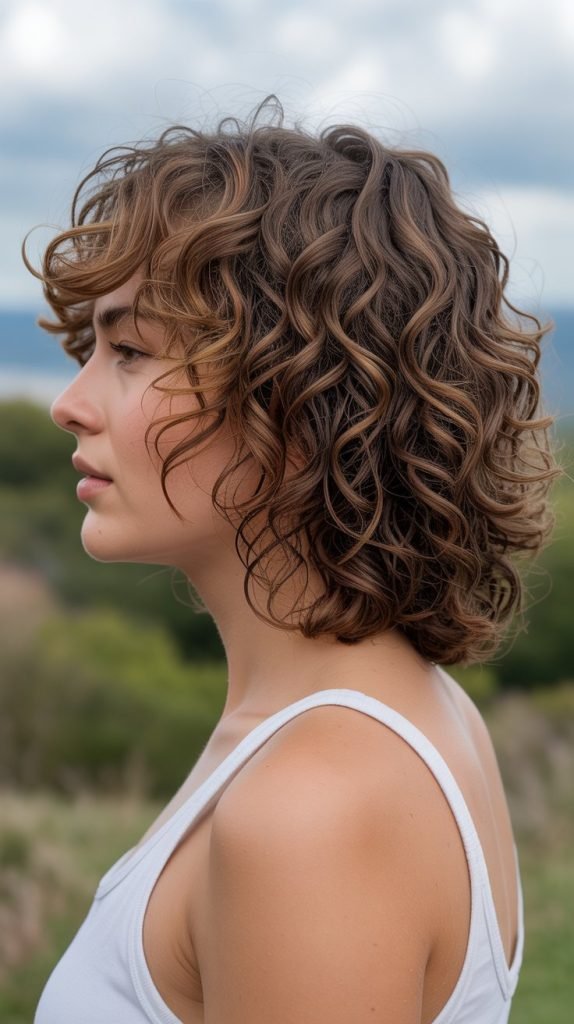
Strategic layering adds dimension, removes weight, and enhances curl definition by allowing curls to stack beautifully rather than weighing down on each other.
Proper layering can transform flat, triangular curly hair into a rounded, voluminous style with movement. However, incorrect layering creates the dreaded pyramid shape or excessive poofiness.
- Layering for curly hair differs significantly from layering straight hair because curls stack vertically rather than falling flat against the head.
- The goal of layering curls is to create internal weight removal without sacrificing too much length or creating disconnected sections.
- Long layers work best for most curl types, with the shortest layer no higher than chin-length to maintain curl weight and definition.
- Vertical cutting or cutting curls in their natural fall direction creates seamless layers that enhance rather than disrupt curl patterns.
- Avoid short choppy layers near the crown, which create a mushroom effect or excessive volume in the wrong places.
- Use the twist and cut method by twisting small sections of hair and cutting into the twist at an angle to create soft, blended layers.
- For tighter curl patterns, longer layers prevent shrinkage from making the hair appear too short or creating unwanted volume at the top.
- The unicorn cut method involves gathering all hair into a high ponytail at the forehead and cutting straight across, creating face-framing layers when released.
- Interior layering focuses on removing bulk from the inside of the hair while maintaining length on the perimeter for a cleaner outline.
- Consider your face shape when determining layer placement, with longer layers flattering round faces and shorter layers complementing longer face shapes.
6. Dealing with Different Curl Patterns on One Head
Most people with curly hair don’t have uniform curl patterns across their entire head, presenting unique challenges during cutting.
Understanding how to work with multiple textures ensures a cohesive, balanced haircut that looks intentional rather than uneven. Customizing your approach for each section creates harmony among different curl types.
- The nape area typically has tighter, finer curls that require less length removal and gentler handling during cutting.
- Crown and top sections often have looser curl patterns or even straighter hair near the roots due to the weight of hair above.
- Side sections around the ears may have different curl tightness than the back, requiring adjusted cutting angles and techniques.
- Identify the dominant curl pattern on your head and use that as your guide for overall length and shape decisions.
- Cut tighter curl sections slightly longer than looser sections to account for increased shrinkage and achieve uniform appearance when dry.
- Use individualized cutting techniques for each curl type rather than applying the same method uniformly across all sections.
- Transition zones between different curl patterns need special attention with gradual blending techniques to avoid visible demarcation lines.
- Environmental factors and hormonal changes can alter curl patterns over time, so reassess your hair texture regularly and adjust cutting approaches accordingly.
7. Common Mistakes to Avoid When Cutting Curly Hair
Even experienced individuals make errors when cutting curly hair, often resulting in unwanted shapes, excessive volume, or loss of curl definition.
Learning what not to do is just as important as mastering proper techniques. Awareness of these common pitfalls helps you achieve better results and avoid costly correction appointments.
- Cutting curly hair while wet and stretched leads to hair that’s much shorter than intended once it dries and shrinks back to its natural state.
- Removing too much length at once is irreversible and can be devastating, so always start conservatively with small trims.
- Using dull scissors creates ragged, damaged ends that fray and cause split ends to travel up the hair shaft faster.
- Cutting straight across creates blunt lines that look unnatural on curly hair and don’t allow curls to blend and stack properly.
- Over-thinning or excessive use of texturizing shears removes too much density, causing curls to lose definition and appear stringy.
- Ignoring the natural curl pattern and trying to force hair into a shape it doesn’t naturally want to take leads to constant styling frustration.
- Cutting too many short layers at the crown creates a pyramid or triangle shape with excessive volume on top and flat, stringy ends.
- Failing to account for shrinkage means hair ends up significantly shorter than anticipated, especially with type 3C and 4 curl patterns.
- Cutting all curls to the same length regardless of their individual spring factor creates an uneven, unbalanced appearance when curls settle naturally.
- Rushing through the cutting process without regularly stepping back to assess the overall shape results in asymmetry and choppy, disconnected sections.
8. Maintaining Your Curly Haircut

A great curly haircut requires ongoing maintenance to keep it looking fresh and shapely between salon visits or home trims.
Proper care extends the life of your cut and ensures your curls continue to look their best. Establishing a maintenance routine prevents your style from becoming overgrown or losing its intended shape.
- Schedule regular trims every 8-12 weeks to remove split ends and maintain the shape of your haircut, even if you’re growing out your hair.
- Perform “search and destroy” missions between trims by identifying and snipping individual split ends or knots with sharp scissors.
- Use sulfate-free shampoos and moisturizing conditioners specifically formulated for curly hair to prevent dryness and breakage that affects cut appearance.
- Deep condition weekly to maintain hair health, elasticity, and moisture balance, which helps curls hold their shape from your cut.
- Sleep on silk or satin pillowcases to reduce friction and prevent curls from becoming matted or losing their definition overnight.
- Refresh your curls on non-wash days using a spray bottle with water and leave-in conditioner to revive the cut’s shape without full washing.
- Avoid heat styling tools that damage curl structure and cause the carefully crafted layers and shape to lose definition.
- Protect your hair from environmental damage with UV-protectant products and by covering hair in chlorinated pools or salt water.
- Maintain proper hydration and nutrition, as healthy hair from the inside directly impacts how well your curls hold their cut shape.
- Document your haircut with photos from all angles immediately after cutting so you can replicate or communicate the style for future trims.
9. Professional vs. DIY Curly Hair Cutting
Deciding whether to cut your curly hair yourself or visit a professional depends on several factors including your skill level, hair goals, and budget.
Both approaches have merits, and understanding the differences helps you make informed decisions. Some situations absolutely require professional expertise while others are manageable at home.
- Professional curl specialists who are Deva-certified or trained in curly cutting techniques understand the nuances of different curl patterns and can create sophisticated shapes.
- For major haircuts, dramatic length changes, or complex layering, professional expertise prevents costly mistakes that take months to grow out.
- DIY cutting works well for regular maintenance trims, dusting ends, and minor shape adjustments between professional appointments.
- Learning to trim your own curls saves money over time and empowers you to maintain your style on your schedule without salon appointments.
- Some curly hair specialists offer virtual consultations where they guide you through cutting your own hair via video call, combining professional advice with DIY execution.
- Building a relationship with a trusted curl specialist who understands your hair’s unique needs creates consistency and better long-term results.
- Start with professional cuts to establish your desired shape, then maintain it yourself at home until you need another major reshape.
- Online communities and video tutorials have made DIY curly cutting more accessible, but discernment is needed to find quality, reliable information sources.
10. Special Considerations for Transitioning Hair

Transitioning from chemically treated to natural curly hair presents unique cutting challenges as you work with two different textures on the same head.
The demarcation line between processed and natural hair requires strategic cutting approaches. Managing this transition period successfully depends on patience and the right cutting techniques.
- Transitioning hair has a visible line where natural curly texture meets chemically straightened or relaxed hair, creating texture incompatibility.
- The big chop involves cutting off all chemically processed hair at once, revealing fully natural curls but dramatically reducing length immediately.
- Gradual transitioning involves trimming processed ends over months or years while growing out natural texture, maintaining more length during the process.
- Cutting transitioning hair requires working with the natural curl pattern near the roots while managing straighter ends that behave differently.
- Styling techniques like twist-outs, braid-outs, or roller sets help blend the two textures during transition until processed hair is completely removed.
- Regular dustings every 6-8 weeks remove small amounts of processed hair while allowing natural hair to gain length gradually.
- The natural texture may appear shorter than the processed ends due to shrinkage, requiring mental preparation for perceived length loss during transition.
- Protective styling during transition reduces manipulation and helps you avoid frustration with the temporary awkward phase between textures.
- Deep conditioning treatments strengthen the demarcation line where breakage is most likely to occur during the transition period.
- Patience is essential as healthy transitioning can take 1-3 years depending on your hair’s growth rate and how much length you want to maintain.
Mastering “How to Cut Curly Hair: Expert Tips for Best Curls” transforms your relationship with your curls and empowers you to maintain beautiful, healthy hair whether you choose professional services or DIY approaches.
Understanding your unique curl pattern, using proper tools and techniques, and avoiding common mistakes ensures your curls always look their best.
Remember that curly hair is dynamic and changes with seasons, hormones, and hair care routines, so stay flexible and adjust your cutting approach as needed.
With the knowledge gained from this comprehensive guide, you now have the confidence to approach curly hair cutting strategically, making informed decisions that enhance your natural texture rather than fighting against it.
Whether you’re trimming your own curls between salon visits or cutting someone else’s curly hair for the first time, these expert tips provide a solid foundation for success. Embrace your curls, cut them with intention and care, and enjoy the beautiful, bouncy results that come from respecting and working with your hair’s natural texture.