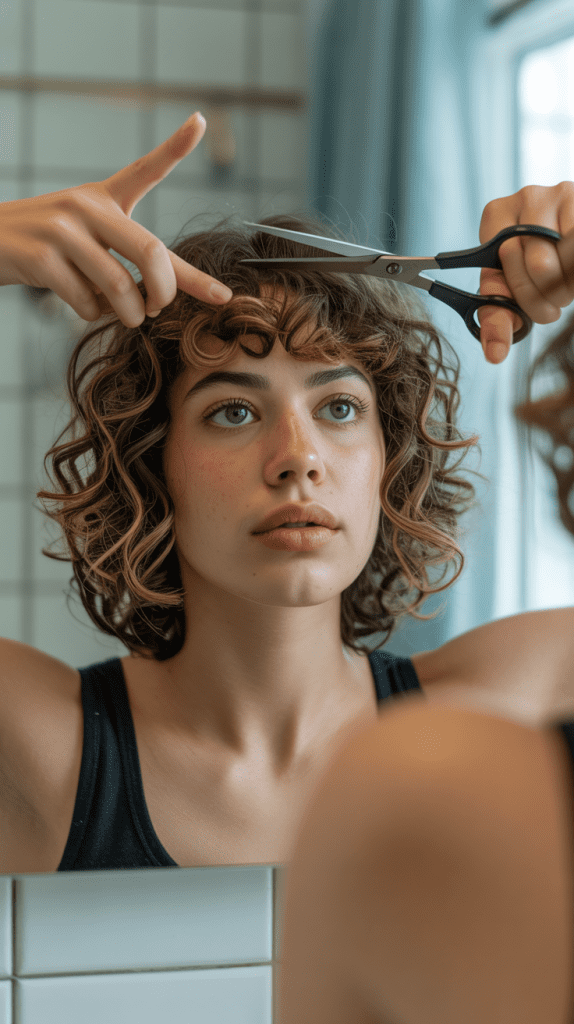
Cutting curly hair at home can feel intimidating, especially when you want to maintain a uniform, layerless look that showcases your natural texture beautifully.
Many people with curly hair struggle with finding the right cutting technique that doesn’t create unwanted layers or disrupt their curl pattern.
If you’ve ever wondered whether you can achieve a professional-looking, blunt cut on your curls without stepping into a salon, the answer is absolutely yes.
This complete guide on “How to Cut Curly Hair at Home Without Layers” will walk you through everything you need to know—from understanding your curl type and gathering the right tools, to mastering cutting techniques that preserve length uniformity and enhance your natural curl definition.
You’ll discover the benefits of layerless cuts for curly hair, learn step-by-step methods for achieving clean, even results, and understand how to maintain your new cut for long-lasting beauty.
Whether you have loose waves or tight coils, this guide empowers you to take control of your hair care routine and achieve salon-quality results from the comfort of your home.
In This Post......
- 1. Understanding Curly Hair Structure and Why Layerless Cuts Work
- 2. Essential Tools and Materials for Cutting Curly Hair at Home
- 3. Preparing Your Curly Hair for the Perfect Cut
- 4. The Curl-by-Curl Cutting Method for Uniform Length
- 5. The Ponytail Method for Quick, Layerless Trimming
- 6. Creating a Perfectly Blunt Baseline Cut
- 7. Managing Different Curl Patterns in One Head
- 8. Dealing with Shrinkage and Curl Spring Factor
- 9. Trimming Curly Bangs and Face-Framing Pieces Without Layers
- 10. Post-Cut Styling and Curl Reformation
- 11. Troubleshooting Common Problems and Uneven Results
- 12. Maintaining Hair Health Between Cuts
- Conclusion
1. Understanding Curly Hair Structure and Why Layerless Cuts Work
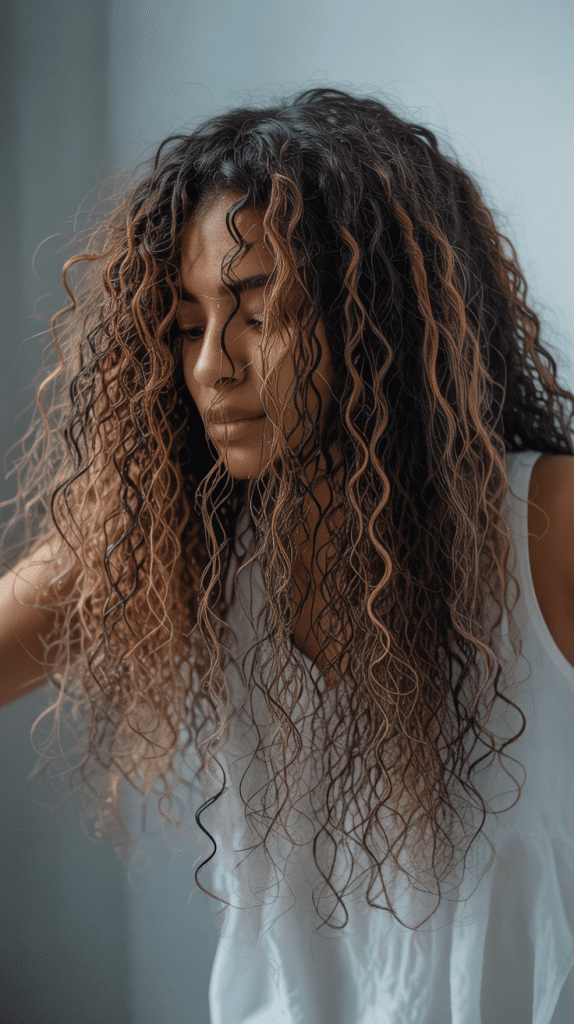
Before diving into the cutting process, understanding your curly hair’s unique structure is essential for achieving the best results.
Curly hair differs fundamentally from straight hair in its composition, growth pattern, and moisture distribution, which directly impacts how you should approach cutting it without layers.
Why Curly Hair Behaves Differently
- Curly hair grows in a spiral pattern from the follicle, which means each strand has a different length when stretched versus its natural curled state.
- The cuticle layer of curly hair is often more raised than straight hair, making it more prone to dryness and frizz.
- Natural oils from the scalp have difficulty traveling down the twisted hair shaft, resulting in drier ends that need special attention during cutting.
- Each curl has its own unique spring factor, meaning the hair will shrink up differently after cutting depending on the tightness of your curl pattern.
- Understanding shrinkage is crucial because curly hair can appear 2-4 inches shorter when dry compared to when it’s wet and stretched.
Benefits of Layerless Cuts for Curly Hair
- A blunt, layerless cut creates uniform weight distribution that helps curls hang together in a cohesive shape rather than separating into distinct sections.
- Without layers, you achieve maximum density and fullness, which is particularly flattering for those who want voluminous, bold curly styles.
- Layerless cuts reduce the risk of the dreaded “pyramid” or “triangle” shape that often occurs when curly hair is layered incorrectly.
- This cutting approach minimizes split ends and breakage at varying lengths, keeping your hair healthier overall.
- A blunt cut line creates a strong, defined perimeter that showcases the natural beauty of your curl pattern without interruption.
- For those growing out their curly hair, a layerless cut maintains consistent length, making the growing process more manageable and less awkward.
2. Essential Tools and Materials for Cutting Curly Hair at Home
Having the right tools makes the difference between a professional-looking cut and a disaster.
Investing in quality equipment specifically designed for hair cutting ensures precision, safety, and better overall results when learning “How to Cut Curly Hair at Home Without Layers.”
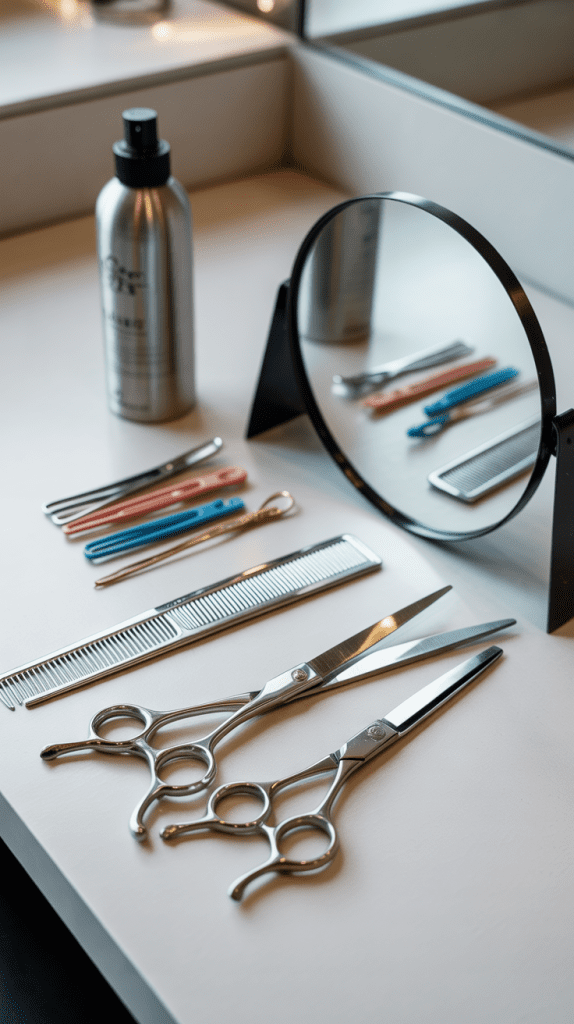
Must-Have Cutting Tools
- Professional haircutting scissors (6-7 inches): Regular household scissors will create ragged, uneven cuts and damage your hair cuticle; invest in sharp, stainless steel shears designed specifically for hair.
- Fine-tooth comb: Essential for sectioning hair precisely and ensuring even tension when cutting straight lines.
- Spray bottle filled with water: Keeps curls dampened throughout the cutting process for better control and accuracy.
- Hair clips or elastics: Necessary for sectioning hair and keeping uncut portions out of the way during the process.
- Large mirror and handheld mirror: Allows you to see all angles of your head, especially the back, ensuring an even cut all around.
- Cape or old towel: Protects your clothing from hair clippings and makes cleanup easier afterward.
Optional But Helpful Items
- Cutting comb with a straight edge: Helps create perfectly straight guide lines for blunt cutting.
- Hair cutting cape with neck closure: More professional and comfortable than a towel for extended cutting sessions.
- Point-cutting shears: Useful for softening the very ends without creating layers if you want a slightly textured finish.
- Timer or clock: Helps you track how long hair has been dampened to ensure consistent moisture levels throughout the cut.
Tool Maintenance and Safety
- Sharpen your haircutting scissors every 6-12 months or after approximately 500 cuts to maintain clean cutting edges.
- Never drop your scissors as this can misalign the blades and create uneven cuts.
- Store scissors in a protective case when not in use to prevent dulling and damage.
- Sanitize all tools with rubbing alcohol before and after each use to maintain hygiene.
- Test scissors on a small section of hair first to ensure they’re cutting cleanly without pulling or snagging.
3. Preparing Your Curly Hair for the Perfect Cut
Proper preparation is the foundation of a successful at-home haircut.
How you prepare your curls before cutting will significantly impact the final results and determine whether you achieve that clean, layerless look you’re aiming for.
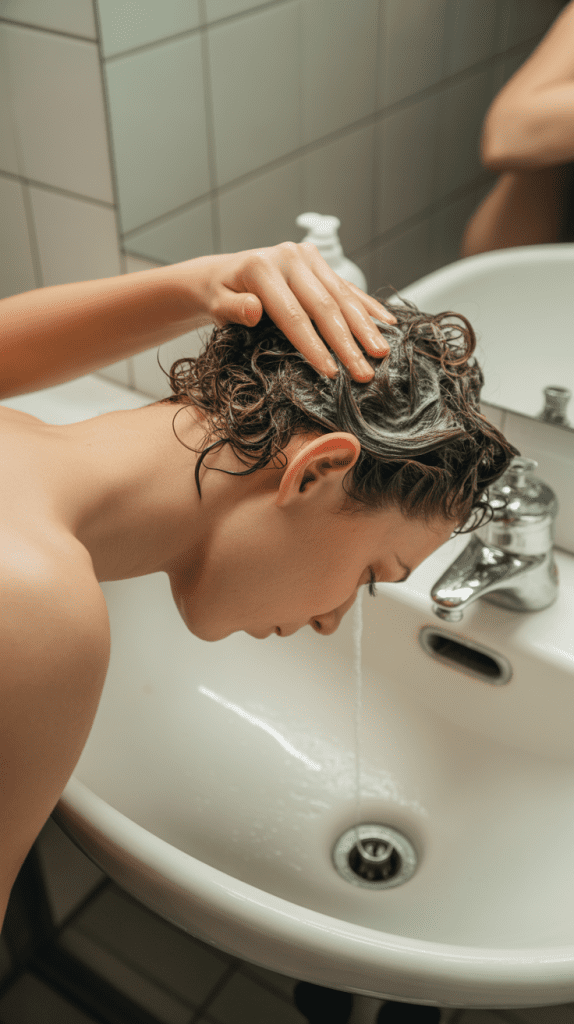
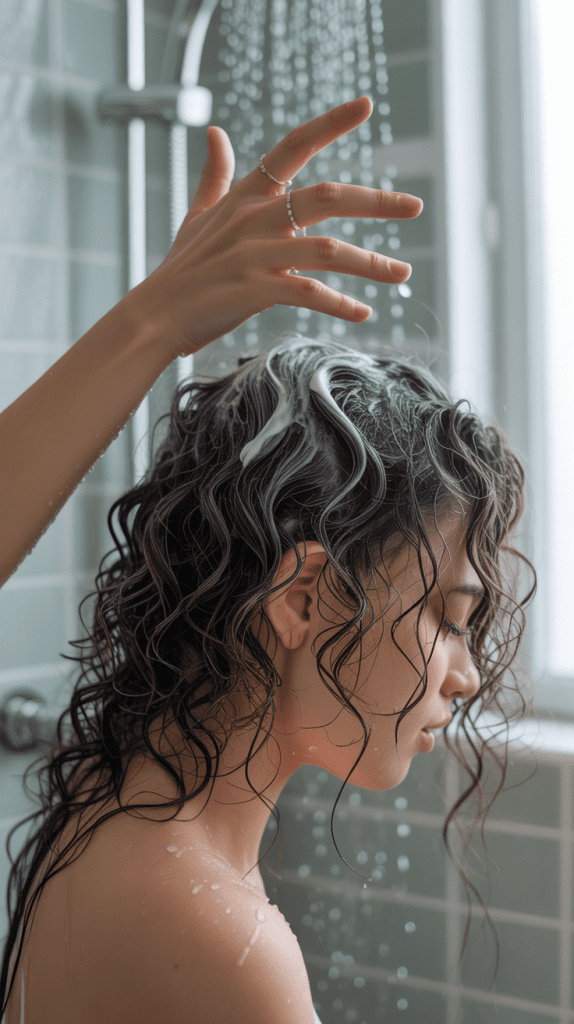
Washing and Conditioning Protocol
- Wash your hair with a sulfate-free, moisturizing shampoo the day of or day before cutting to remove product buildup without stripping natural oils.
- Apply a generous amount of conditioner and detangle completely with a wide-tooth comb or your fingers while the conditioner is still in your hair.
- Rinse with cool water to close the hair cuticle and enhance curl definition before cutting.
- For very thick or coarse curls, consider using a deep conditioning treatment 1-2 days before cutting to maximize manageability.
- Avoid applying heavy styling products before cutting, as they can weigh down curls and create an inaccurate picture of your natural curl pattern.
Detangling and Sectioning Strategy
- Begin detangling from the ends of your hair and gradually work your way up to the roots to minimize breakage.
- Use a wide-tooth comb or detangling brush specifically designed for curly hair to gently remove all knots and tangles.
- Divide your hair into 4-6 major sections depending on thickness: typically, parting down the middle from front to back, then horizontally from ear to ear.
- Secure each section with a clip or elastic, keeping them out of the way until you’re ready to cut that particular section.
- Ensure each section contains approximately equal amounts of hair for consistent cutting and uniform results.
Determining the Right Moisture Level
- Curly hair should be damp but not soaking wet when cutting to see the true curl pattern while maintaining control.
- If hair is too wet, it will appear longer and straighter, leading to an unexpectedly short result when it dries and shrinks.
- If hair is too dry, it becomes difficult to cut cleanly and evenly, and you won’t be able to see how the curls will lay.
- Keep your spray bottle handy throughout the cutting process to re-dampen sections that begin to dry out.
- Aim for a moisture level where curls are beginning to form their natural pattern but are still elongated enough to cut accurately.
4. The Curl-by-Curl Cutting Method for Uniform Length
The curl-by-curl technique, also known as the DevaCut-inspired method, is one of the most effective approaches for cutting curly hair without creating layers.
This method respects each curl’s individual pattern while maintaining overall length uniformity.
Understanding the Curl-by-Curl Approach
- This method involves cutting each individual curl or small curl section while it’s in its natural curled state, not stretched or pulled.
- By cutting curls individually, you honor their unique spiral pattern and ensure each curl contributes to the overall shape without creating unintentional layers.
- The technique works best on dry or slightly damp hair that has been allowed to form its natural curl pattern.
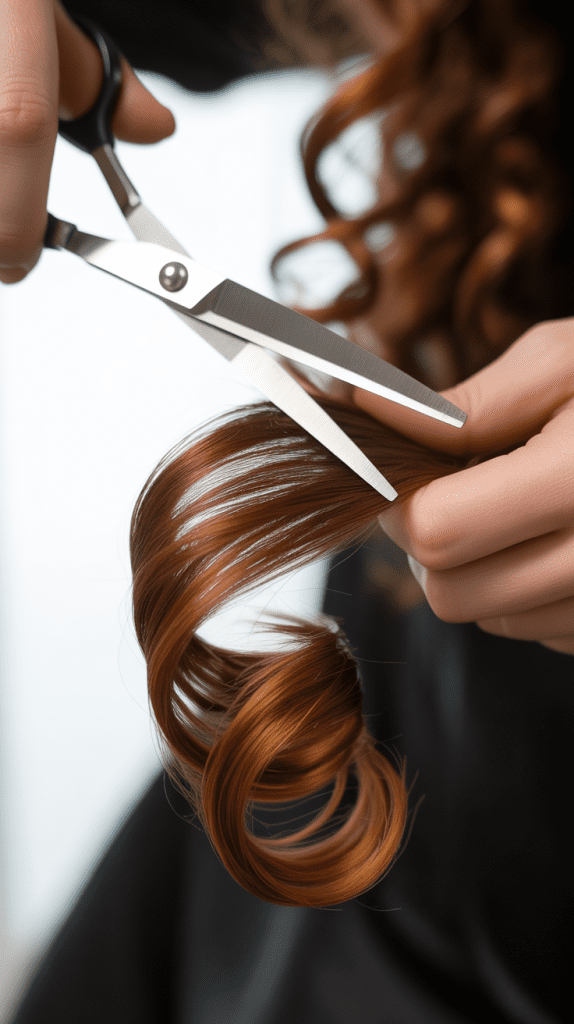
Step-by-Step Curl-by-Curl Cutting Process
- Start with completely detangled, damp hair that has been shaped into its natural curl pattern by scrunching or twisting.
- Allow hair to dry about 80-90% so curls have fully formed and you can see their true length and spring.
- Begin at the back of your head where you have the most hair and work your way forward to the more visible front sections.
- Isolate one curl or a small section of curls (about 5-10 curls) and hold them gently without stretching to see their natural length.
- Identify the curl or curls that are the longest in that section and use them as your guide for where to cut.
- Using your sharp scissors, cut straight across the bottom of the curl section at your desired length, creating a clean, blunt line.
- Move to the adjacent curl section and use the previously cut section as your guide to maintain consistent length throughout.
- Cut only the very ends initially (1/4 to 1/2 inch) if you’re nervous, as you can always cut more but cannot add length back.
- Work systematically around your entire head, checking frequently in the mirror to ensure you’re maintaining an even perimeter.
- For curls around your face, pull them forward and cut while you can see them directly rather than cutting from behind.
Common Mistakes to Avoid
- Never cut curls while pulling them straight or holding them taut, as this will result in uneven lengths when they spring back to their natural state.
- Avoid cutting too much at once; small, gradual trims are always safer than aggressive cutting.
- Don’t skip the detangling phase, as knots and tangles will create uneven curl formation and inaccurate cutting guides.
- Resist the urge to cut curls while they’re soaking wet, as the shrinkage factor will leave you with much shorter hair than intended.
- Never use the same cutting guide for all hair textures on your head—different areas may have different curl tightness and require individual assessment.
5. The Ponytail Method for Quick, Layerless Trimming
The ponytail method, also called the unicorn cut, is a simple yet effective technique for achieving a blunt, layerless cut on curly hair.
While it creates some subtle face-framing, when done correctly, it maintains overall uniform length without distinct layers.
How the Ponytail Method Works
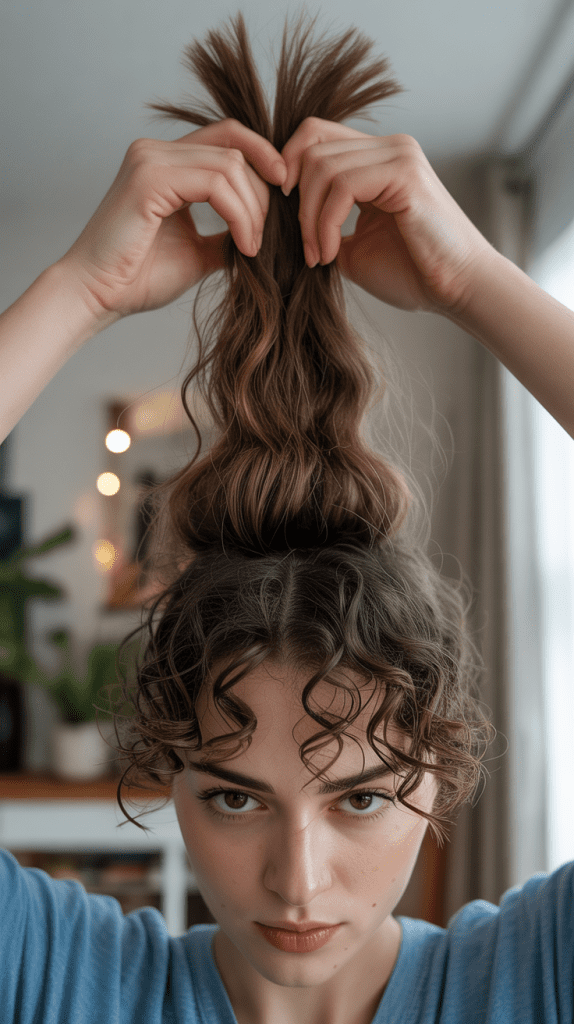
- This technique involves gathering all your hair into a single high ponytail at the top of your head and cutting the ends straight across.
- The method creates a very subtle, face-framing effect while maintaining a predominantly blunt, layerless shape throughout the bulk of your hair.
- It’s particularly effective for those who want a slight rounding at the front without dramatic layering in the back.
Step-by-Step Ponytail Cutting Instructions
- Start with clean, detangled, and completely dry hair so you can accurately assess shrinkage and final length.
- Flip your head upside down and brush or comb all hair forward toward your forehead, gathering it into one high ponytail directly at your forehead hairline.
- Secure the ponytail tightly with a hair elastic, positioning it exactly at the top center of your head where your forehead meets your hairline.
- Flip your head back upright and pull the ponytail straight up toward the ceiling, maintaining even tension on all hair.
- Slide a second elastic down the length of the ponytail to mark where you want to cut—this should be positioned about 1-2 inches from the ends for a subtle trim.
- Hold the ponytail firmly between your fingers just below the second elastic and cut straight across just above the marker elastic.
- Use sharp scissors and make one clean, straight cut rather than multiple small snips to ensure an even line.
- Remove both elastics carefully and shake out your hair, allowing curls to fall naturally into their usual pattern.
- Assess the results and make small adjustments to any uneven sections if needed by cutting individual curls.
Optimizing the Ponytail Method Results
- For the most uniform, layerless results, position the ponytail as close to your forehead as possible rather than at the crown.
- Ensure all hair is pulled with equal tension into the ponytail—loose sections will result in uneven cutting.
- If you have very thick hair, consider dividing it into two ponytails (left and right sides) and cutting them separately for better control.
- Always cut less than you think you need initially; you can always create a second ponytail and trim more afterward.
- For curly hair that’s particularly prone to shrinkage, let hair dry completely before attempting this method to avoid cutting too much.
6. Creating a Perfectly Blunt Baseline Cut
For those who want the most uniform, layerless result possible, the baseline cutting method provides maximum precision and control.
This technique creates a strong, even perimeter that showcases curly hair’s natural volume and texture beautifully.
Understanding the Baseline Technique
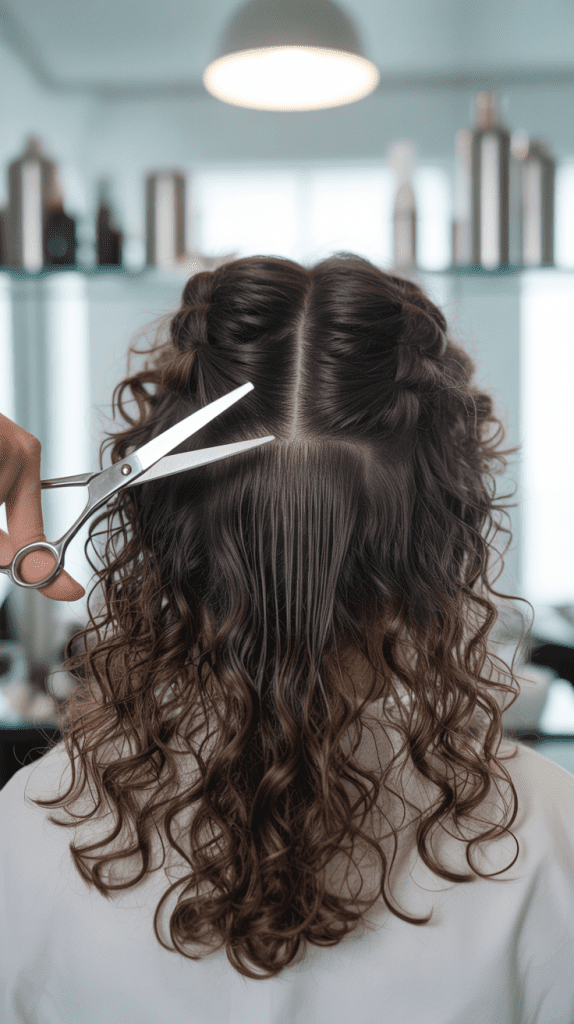
- The baseline method involves creating horizontal sections of hair and cutting each section straight across at the same length to create a uniform perimeter.
- This approach is the most precise method for achieving a truly layerless cut that maintains consistent length all around.
- The technique works best on damp (not wet) hair that has some curl formation but is still elongated enough to cut accurately.
Detailed Baseline Cutting Process
- Begin with freshly washed, conditioned, and detangled hair that is about 50-60% dry.
- Create a horizontal parting from ear to ear across the back of your head, clipping the top sections up and out of the way.
- Starting with the bottom section, comb the hair straight down with even tension to identify the natural fall of your curls.
- Determine your desired length on one side (start conservatively with just a trim) and cut straight across.
- Work your way across that horizontal section, using your first cut as a guide and maintaining the same length all the way across.
- Check that the baseline is even by combing the hair down and ensuring the bottom edge forms a straight, horizontal line.
- Release the next horizontal section above and cut it to match the length of the section below, using the previously cut hair as your guide.
- Continue working up the head in horizontal sections until all hair has been cut to the same length.
- For the sides and front, pull hair forward and check that the length matches the back, making adjustments as needed to maintain uniformity.
- Allow hair to dry completely, then assess the results and make small corrections to any curls that appear longer than others.
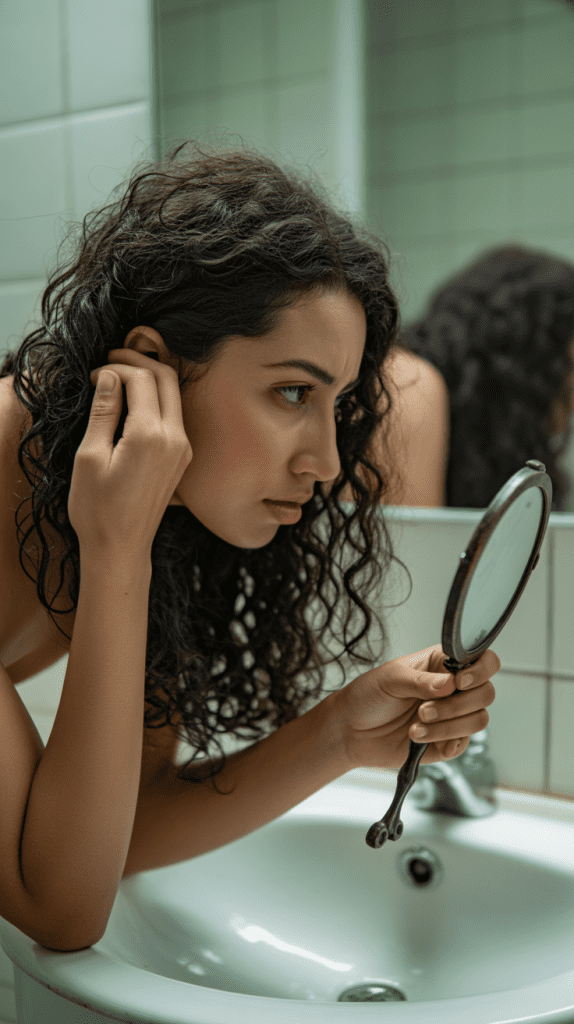
Ensuring Perfect Symmetry
- Continuously check both sides of your head in the mirror to ensure left and right are matching in length.
- Use your ears as natural reference points—hair should meet at approximately the same point relative to your ears on both sides.
- Cut small amounts repeatedly rather than large amounts at once to maintain control and avoid over-cutting.
- If working alone, use a three-way mirror system or take photos from different angles to see the back of your head clearly.
- Ask someone to check your work if possible, as it’s difficult to see the back of your own head accurately even with mirrors.
7. Managing Different Curl Patterns in One Head
Many people with curly hair have multiple curl patterns on different parts of their head, which requires special attention when cutting to maintain a layerless look.
Understanding how to work with varying textures ensures an even, cohesive result.
Identifying Your Multiple Curl Patterns
- Most curly-haired individuals have tighter curls at the nape of the neck and looser curls or waves around the face and crown.
- The back and underneath sections often have the tightest curl pattern, while the top and sides may be looser and more prone to frizz.
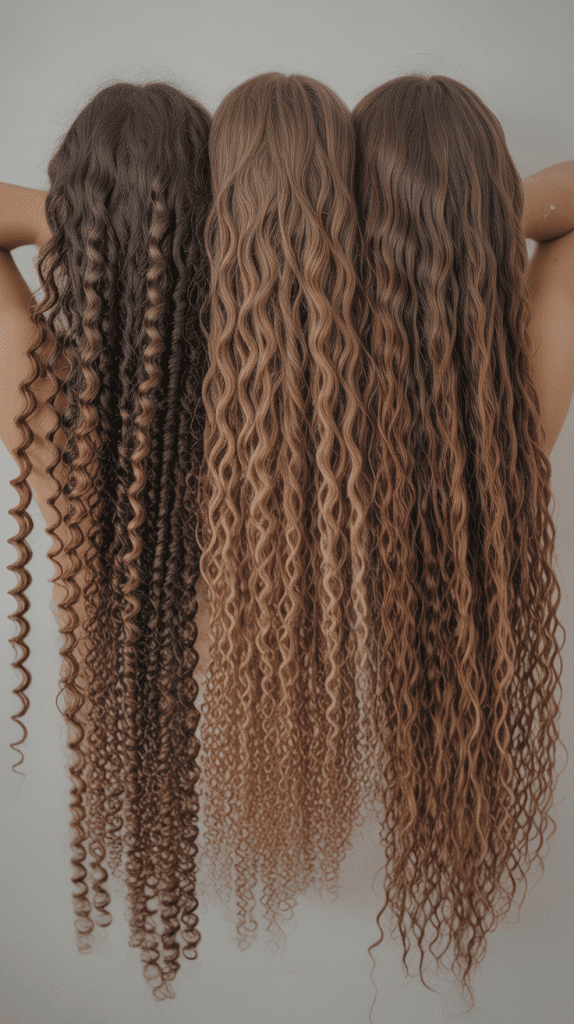
- Curl patterns can range from 2A (loose waves) to 4C (tight coils) on the same head, and each pattern has different shrinkage rates.
- Understanding your specific combination of curl patterns helps you anticipate how much each section will shrink after cutting.
Cutting Strategy for Mixed Curl Patterns
- Cut each section according to its own curl pattern rather than trying to force uniform techniques across all hair.
- For tighter curl sections that will shrink more dramatically, leave extra length when cutting to account for the greater spring factor.
- Looser curl sections near the face may need less length left during cutting since they shrink less when dry.
- Use the curl-by-curl method for areas with multiple patterns, as this respects each curl’s individual behavior.
- When creating a baseline cut with mixed patterns, dampen all sections equally and allow them to dry to about the same percentage before cutting.
- Cut tighter curl sections slightly longer than looser sections initially, then check the dry result and trim further if needed to create visual uniformity.
Creating Visual Harmony with Different Textures
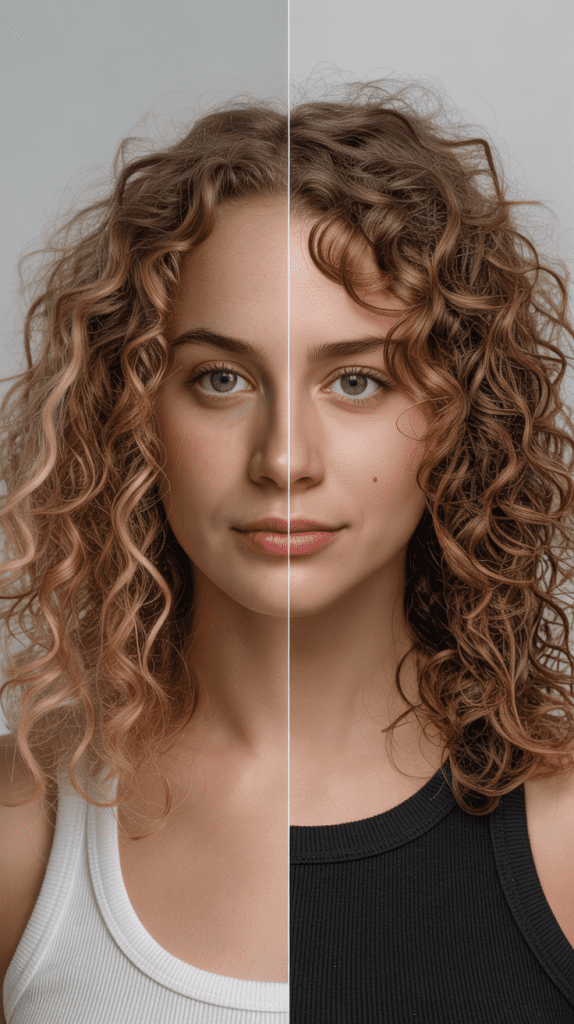
- The goal is for all sections to appear the same length when dry and styled, even if they’re technically different lengths when stretched.
- Focus on the visual weight and shape of your overall silhouette rather than exact measured length for each curl type.
- Tighter curls may need to be cut 1-2 inches longer than looser curls to achieve the same visual length when dry.
- Regularly step back from the mirror to assess the overall shape rather than fixating on individual curls.
- Remember that uniformity in curly hair is about consistent shape and silhouette, not identical curl length when measured.
8. Dealing with Shrinkage and Curl Spring Factor
Shrinkage is one of the most challenging aspects of cutting curly hair at home without layers.
Understanding and accounting for how much your curls will spring up after cutting is essential for avoiding the dreaded “too short” result.
Understanding Curl Shrinkage
- Shrinkage refers to the difference in length between hair when it’s stretched versus when it’s in its natural curled state.
- Looser curl patterns (2A-3A) typically experience 20-30% shrinkage.
- Medium curl patterns (3B-3C) usually shrink about 30-50% from their stretched length.
- Tight curl patterns (4A-4C) can experience 50-75% or more shrinkage, meaning hair that’s 10 inches stretched may appear only 2.5-5 inches long when curled.
- Environmental factors like humidity, moisture levels, and product use can affect how much hair shrinks on any given day.
Cutting Strategies to Account for Shrinkage
- Always cut curly hair when it’s at least 80-90% dry so you can see the true curl formation and shrinkage.
- If you must cut damp hair, leave at least 1-2 inches more length than your target to account for the shrinkage that will occur when fully dry.
- Test the shrinkage factor on a small section first—stretch a curl to measure its full length, then let it spring back and measure again to calculate your personal shrinkage percentage.
- For your first attempt at cutting curly hair at home, be extremely conservative and cut far less than you think you need; you can always cut more later.
- Remember that “fresh cut” shrinkage is often more dramatic than regular daily shrinkage because newly cut hair tends to spring up more tightly.
Managing Shrinkage Anxiety
- Accept that some trial and error is normal when learning to cut your own curly hair and account for shrinkage.
- Take progress photos from all angles before cutting so you can track exactly how much you removed and how much it shrank.
- If you’re nervous about shrinkage, start with a minimal trim of just 1/4 inch to see how your hair responds before committing to more length removal.
- Consider doing a test cut on a less visible section first, then waiting a day or two to see the final result before cutting the rest.
- Keep in mind that hair grows, and even if you cut slightly more than intended, it will recover over time.
9. Trimming Curly Bangs and Face-Framing Pieces Without Layers
Face-framing sections and bangs require special attention when cutting curly hair without layers.
These visible areas can make or break your overall look, so precision and understanding of curl behavior are crucial.
Approaching Face-Framing Curls
- Face-framing pieces are the most visible part of your haircut and should be cut with extra care and conservatism.
- These sections often have a looser curl pattern than the rest of your hair, so they may shrink less but also be more prone to showing uneven cutting.
- Always cut face-framing sections while looking directly at them in a mirror, pulling them forward so you can see exactly what you’re cutting.
Cutting Curly Bangs Step-by-Step
- Determine which curls will comprise your bangs by parting hair in an upside-down U-shape or triangular section from the crown toward your forehead.
- Isolate just the bang section with clips, leaving the rest of your hair secured away from your face.
- Allow the bang section to dry completely (or to about 90% dry) so you can see the true curl formation.
- Pull individual curls or small curl sections forward and cut them one at a time while they’re in their natural curled state.
- For curly bangs, start conservatively long—at least eyebrow length or longer—as they will shrink significantly when fully dry.
- Cut in a very slight arc shape rather than straight across if you want a softer, more blended look that still maintains uniformity.
- Step back from the mirror frequently to assess symmetry and overall shape rather than focusing too closely on individual curls.
- Remember that curly bangs should frame your face without obscuring your eyes when fully dry and styled.
Maintaining Face-Framing Without Creating Layers
- The key to keeping face-framing sections layerless is to ensure they’re the same length as or only slightly shorter than the rest of your hair.
- When cutting face-framing pieces, frequently compare them to the hair length at your temples and sides to maintain consistency.
- If you want slight face-framing without distinct layers, cut front sections no more than 1/2 to 1 inch shorter than the bulk of your hair.
- Avoid the temptation to cut face-framing pieces dramatically shorter, as this creates the layered effect you’re trying to avoid.
- Blend face-framing sections into the rest of your hair by taking small vertical sections and cutting at a very slight angle rather than blunt horizontal cuts.
10. Post-Cut Styling and Curl Reformation
After cutting your curly hair without layers, proper styling and curl reformation ensure you see the full benefits of your new cut.
How you style your hair immediately after cutting can significantly impact how the results appear.
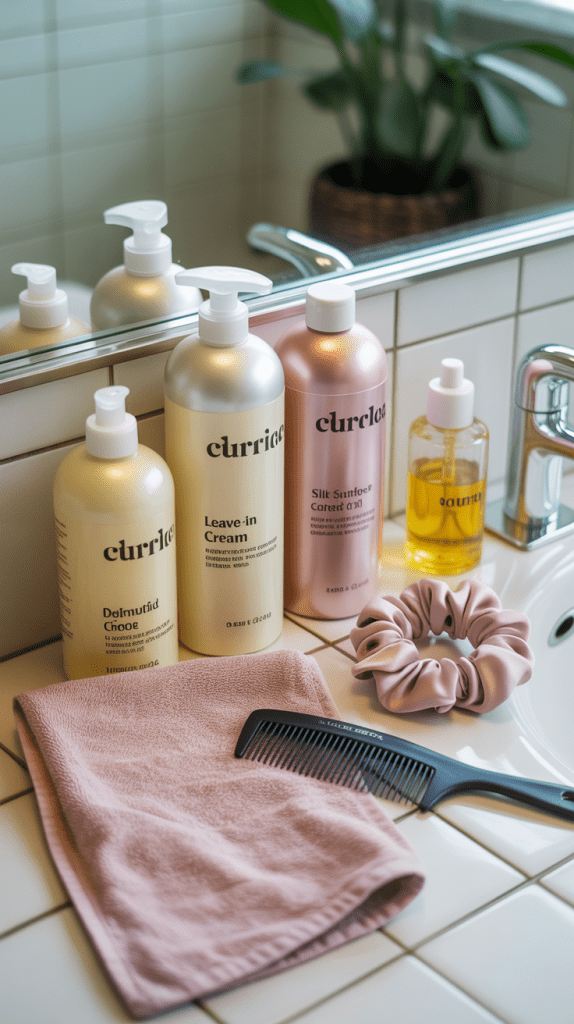
Immediate Post-Cut Care
- After cutting, gently dampen your hair with your spray bottle if it has dried out during the cutting process.
- Apply your regular leave-in conditioner or curl cream to rehydrate curls and help them reform properly.
- Use the “scrunch” method—gently cupping sections of hair in your palms and pushing upward toward your scalp—to encourage curls to spring into their natural pattern.
- Avoid combing or brushing your hair after cutting, as this can disrupt the curl pattern and create frizz.
- Allow hair to air dry completely or use a diffuser on low heat to see the true result of your cut.
Curl Reformation Techniques
- Use praying hands method—smoothing product between your palms and running them down sections of hair—to distribute product evenly without disrupting curls.
- For any sections that look uneven after drying, lightly mist with water, apply a small amount of gel or curl cream, and re-scrunch.
- Consider using the “plop” method—wrapping hair in a t-shirt or microfiber towel for 15-30 minutes after applying product—to enhance curl formation and reduce frizz.
- If you notice any individual curls that are still uneven after drying and styling, you can make small corrections by cutting those specific curls.
- Give your hair 1-2 days to “settle” into the new cut before making final judgments, as curls often look different immediately after cutting versus after a wash or two.
Maintaining Your Layerless Cut
- Schedule regular trims every 8-12 weeks to maintain the clean, blunt line and prevent split ends from traveling up the hair shaft.
- Between cuts, focus on deep conditioning treatments to keep ends healthy and minimize the need for frequent trimming.
- Protect your hair while sleeping by using a silk or satin pillowcase or wrapping hair in a silk scarf to prevent breakage.
- Avoid heat styling tools when possible, as they can damage curls and create uneven lengths over time.
- When you do trim between major cuts, use the same method you used for the original cut to maintain consistency.
11. Troubleshooting Common Problems and Uneven Results
Even with careful technique, you may encounter issues when cutting your curly hair at home without layers.
Knowing how to identify and fix common problems ensures you can salvage any imperfect results.
Identifying Unevenness
- The most common problem is one side appearing longer than the other due to inconsistent cutting guides or uneven sectioning.
- Another frequent issue is a “W” or “M” shape at the back where the center and sides don’t align properly.
- Sometimes individual curls or small sections appear noticeably longer than surrounding hair, creating a choppy appearance.
- In some cases, the entire cut may appear shorter than intended due to underestimating shrinkage.
Fixing Asymmetry
- If one side is longer than the other, identify the shorter side and use it as your new guide, then carefully trim the longer side to match.
- Work in small increments when correcting asymmetry—cut only 1/4 inch at a time and check frequently to avoid over-correcting.
- For sides that appear uneven, pull equivalent sections forward from both sides of your head and hold them together in front of your face to compare lengths directly.
- If you’re still having trouble achieving symmetry, consider using the ponytail method as a “reset” to create an even baseline you can work from.
Addressing Shape Issues
- If the back of your hair forms an unintended “V” shape, section the hair horizontally and use the sides as guides to fill in the center.
- For a “W” or “M” shape, identify the lowest point and gradually trim the surrounding areas to create a smooth, rounded perimeter.
- When individual curls stick out awkwardly, wait until hair is completely dry, isolate those specific curls, and trim them individually to match neighboring curls.
- If the overall shape appears too bulky or heavy in one area, you can carefully remove bulk by point-cutting (cutting into the ends at an angle) rather than cutting straight across.
When to Seek Professional Help
- If you’ve made multiple corrections and the cut continues to look uneven, it’s better to consult a professional curl specialist than to keep cutting.
- Significant asymmetry that you can’t identify or fix yourself may require a professional eye and technique to correct.
- If you’ve cut too much length and are unhappy with the result, a professional stylist can help shape what remains into a more flattering style while you grow it out.
- Consider visiting a curly hair specialist at least once a year even if you cut your own hair most of the time, as they can provide guidance and correct any accumulated errors.
12. Maintaining Hair Health Between Cuts
Keeping your curly hair healthy between cuts is essential for maintaining that clean, layerless look and minimizing the frequency of trims needed.
Healthy hair with minimal breakage and split ends will always look better and be easier to cut uniformly.
Essential Hair Health Practices
- Deep condition your curly hair at least once a week using a moisture-rich treatment to prevent dryness and breakage.
- Use a sulfate-free shampoo that cleanses without stripping your hair’s natural oils, preserving moisture balance.
- Apply a leave-in conditioner after every wash to provide ongoing hydration and protection throughout the day.
- Seal in moisture by using natural oils like argan, jojoba, or coconut oil on damp hair, focusing on the ends.
- Minimize heat styling and always use a heat protectant spray when you do use hot tools to prevent heat damage.
Protective Styling and Handling
- Handle your hair gently when wet, as this is when it’s most vulnerable to breakage and damage.
- Use a microfiber towel or t-shirt to dry hair instead of regular towels, which can cause friction and frizz.
- Detangle only when hair is saturated with conditioner, starting from the ends and working toward the roots.
- Sleep on silk or satin pillowcases to reduce friction that can cause breakage and frizz overnight.
- Avoid tight hairstyles that pull on your hair and scalp, which can cause breakage and traction alopecia over time.
Trimming Schedule for Optimal Health
- Plan to trim your curly hair every 8-12 weeks to remove split ends before they travel up the hair shaft.
- If you notice split ends or breakage appearing sooner, increase trim frequency to every 6-8 weeks.
- Between major cuts, do “search and destroy” missions where you examine individual curls and trim only the damaged ends you find.
- Keep track of your trim schedule in a calendar or note app to ensure you’re maintaining consistency.
- Pay special attention to the ends of your hair, which are the oldest and most prone to damage, requiring extra conditioning and protection.
Nutrition and Internal Hair Health
- Maintain a balanced diet rich in proteins, omega-3 fatty acids, and vitamins A, C, D, and E to support hair health from within.
- Stay hydrated by drinking plenty of water daily, as dehydration affects hair moisture levels and elasticity.
- Consider taking biotin, collagen, or hair-specific supplements if you’re experiencing unusual hair weakness or slow growth, after consulting with a healthcare provider.
- Manage stress levels, as chronic stress can impact hair health and growth cycles, leading to increased shedding.
- Protect your hair from environmental damage like sun exposure, chlorine, and hard water by wearing protective styles or using clarifying treatments when needed.
Conclusion
Mastering the art of cutting your curly hair at home without layers is an empowering skill that saves money, time, and gives you complete control over your appearance.
This complete guide on “How to Cut Curly Hair at Home Without Layers” has equipped you with the knowledge, techniques, and confidence to achieve professional-looking results from the comfort of your own home.
From understanding your unique curl structure and gathering the essential tools, to executing precise cutting methods like curl-by-curl trimming, the ponytail technique, and baseline cutting, you now have multiple approaches to choose from based on your comfort level and hair type.
Remember that working with curly hair requires patience, respect for your natural curl pattern, and a conservative approach to length removal—you can always cut more, but you cannot add length back.
