Step into a world where elegance meets artistry with 25 Effortless Renaissance Updo Hairstyles.
The Renaissance era gifted us with some of the most breathtaking hairstyles in history, characterized by intricate braids, delicate twists, and ornate accessories that transformed hair into living masterpieces.
These timeless updos aren’t just relics of the past—they’re experiencing a remarkable revival in modern fashion, gracing red carpets, weddings, and special occasions with their regal charm.
Whether you’re drawn to the romantic softness of loosely pinned curls or the structured sophistication of braided coronets, Renaissance-inspired hairstyles offer endless possibilities for creating stunning looks that command attention.
This comprehensive guide will walk you through 25 accessible variations of these historic styles, each adapted for contemporary wear while preserving the essence of Renaissance beauty.
From simple twisted buns that take minutes to create, to more elaborate arrangements perfect for formal events, you’ll discover techniques that work for various hair types, lengths, and skill levels.
Each style combines the opulence of the 15th and 16th centuries with practical modern styling methods, ensuring you can achieve that coveted old-world glamour without spending hours at your mirror.
Get ready to transform your everyday look with hairstyles that have captivated admirers for over five centuries.
In This Post......
- 1. The Classic Renaissance Bun
- 2. Braided Crown Updo
- 3. The Venetian Roll
- 4. Dual-Braided Side Buns
- 5. The Looped Chignon
- 6. Twisted Rope Crown
- 7. The French Hood Style
- 8. Cascading Braided Bun
- 9. The Italian Renaissance Wrap
- 10. Pinned Curl Updo
- 11. The Medallion Bun
- 12. Loose Romantic Updo
- 13. The Jeweled Net Bun
- 14. Braided Criss-Cross Updo
- 15. The Coiled Serpent Style
- 16. Twisted Temple Braids with Low Bun
- 17. The Pearl-Wrapped Chignon
- 18. Asymmetrical Renaissance Updo
- 19. The Woven Basket Bun
- 20. Flowered Side Sweep
- 21. The Tudor-Inspired Low Loop
- 22. Multi-Braided Updo Tower
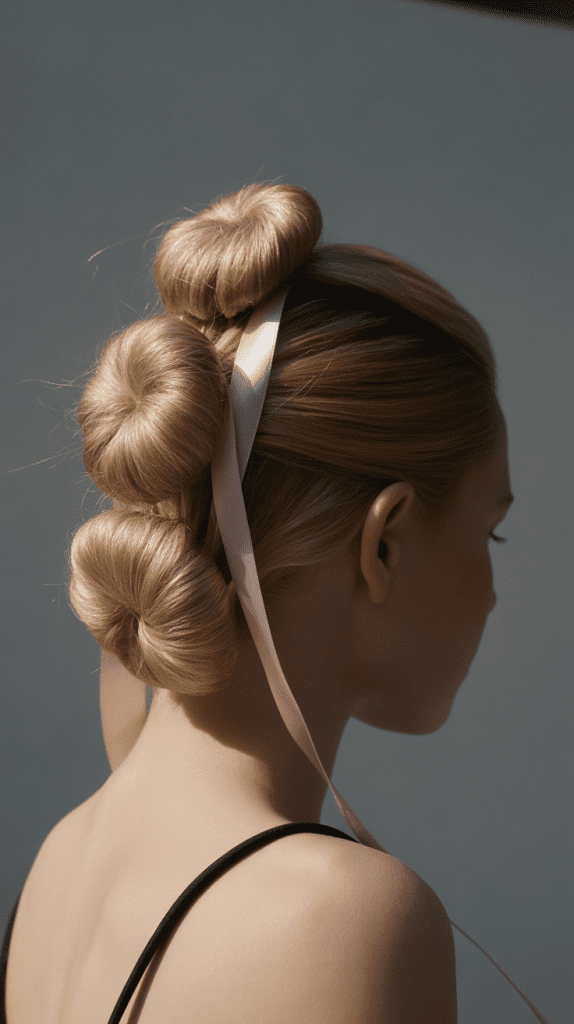
- 23. Wrapped Ribbon Coronet
- 24. The Milkmaid Braided Crown
- 25. The Elaborate Jeweled Crown Updo
- Essential Tools and Accessories for Renaissance Updos
- Tips for Maintaining Renaissance Updos Throughout Your Event
- Adapting Renaissance Styles for Modern Hair Types and Lengths
- Historical Context: Understanding Renaissance Hair Fashion
- Conclusion
1. The Classic Renaissance Bun
The Classic Renaissance Bun serves as the foundation for many period hairstyles, featuring a low-set, smoothly gathered arrangement at the nape of the neck.
This elegant style was favored by noblewomen across Europe and remains one of the most versatile Renaissance-inspired looks you can create today.
How to Create:
- Begin by brushing your hair thoroughly to eliminate all tangles and create a smooth base for styling.
- Apply a smoothing serum or light styling cream to control flyaways and add shine to your hair.
- Gather all your hair at the nape of your neck, positioning it slightly off-center for an authentic Renaissance asymmetry.
- Twist the gathered hair gently but firmly, creating a rope-like texture that adds visual interest.
- Wrap the twisted section around itself to form a circular bun shape, keeping the coil tight and controlled.
- Secure the bun with bobby pins inserted at multiple angles to ensure the style holds throughout the day.
- Use a decorative hair net or snood over the bun to add authentic Renaissance flair and extra security.
- Finish with a light mist of hairspray to maintain the polished, refined appearance.
Best For: This style works exceptionally well for formal events, historical reenactments, themed weddings, or any occasion requiring an understated yet sophisticated look.
2. Braided Crown Updo

The Braided Crown Updo encircles the head like a natural tiara, incorporating one or more braids that wrap around the crown area.
This style was particularly popular among young Renaissance women and creates an ethereal, romantic appearance.
Styling Steps:
- Part your hair down the center to create two equal sections for symmetrical braiding.
- Starting from behind one ear, create a standard three-strand braid or a more intricate four-strand braid for added texture.
- Continue braiding all the way to the ends, securing with a small elastic band that matches your hair color.
- Repeat the braiding process on the opposite side, ensuring both braids are approximately the same thickness.
- Bring the first braid across the top of your head like a headband, positioning it about an inch back from your hairline.
- Pin the braid securely at multiple points along its length using bobby pins that match your hair shade.
- Cross the second braid over the first, creating a layered crown effect that adds dimension.
- Tuck the ends of both braids underneath the opposite braid and pin them invisibly.
- Gently pull at the braid sections to create a fuller, more voluminous crown.
- Add small pearl pins or delicate flowers along the braided crown for authentic Renaissance embellishment.
Ideal Occasions: Perfect for outdoor weddings, Renaissance festivals, graduation ceremonies, or romantic date nights where you want to make a memorable impression.
3. The Venetian Roll

The Venetian Roll showcases a sophisticated horizontal roll of hair positioned at the back of the head, inspired by the elegant styles of Renaissance Venice.
This architectural updo creates height and drama while maintaining a refined silhouette.
Creation Process:
- Brush your hair back smoothly from your face, directing all strands toward the back of your head.
- Create a low horizontal ponytail at the nape, positioning it where you want the roll to sit.
- Tease the ponytail gently with a fine-tooth comb to create volume and texture within the roll.
- Hold the ponytail horizontally and begin rolling it upward toward your scalp, creating a tight cylinder.
- Keep the roll smooth on the outside while maintaining the teased volume inside for structure.
- Once rolled completely, secure the entire roll with U-shaped pins pushed through from top to bottom.
- Use additional bobby pins along the sides to ensure the roll stays firmly in place.
- Smooth any stray hairs with a small amount of pomade or gel, working them into the roll.
- Insert a decorative comb or jeweled hairpin at the top of the roll as a focal point.
Suitable For: Evening galas, opera performances, formal dinners, or any upscale event where sophisticated elegance is required.
4. Dual-Braided Side Buns

The Dual-Braided Side Buns create a balanced, symmetrical look with two buns positioned above and slightly behind the ears.
This distinctive style was favored by Germanic and Northern European Renaissance fashion and creates an instantly recognizable silhouette.
Instructions:
- Create a clean center part from your forehead to the nape of your neck, dividing hair into two equal sections.
- Clip one section away while you work on the first side to keep hair organized.
- Gather the loose section into a high side ponytail positioned just above and behind your ear.
- Braid the ponytail using your preferred technique—three-strand for simplicity or Dutch braid for texture.
- Wrap the braid around its base in a circular motion, creating a round bun shape.
- Secure with bobby pins inserted through the braid and into your scalp for maximum hold.
- Repeat the entire process on the opposite side, ensuring both buns are positioned at the same height.
- Check the symmetry from multiple angles and adjust as needed for perfect balance.
- Wrap decorative ribbon around each bun or add beaded pins for Renaissance-appropriate ornamentation.
Perfect For: Renaissance fairs, costume parties, theatrical performances, or creating an authentic historical look for educational presentations.
5. The Looped Chignon

The Looped Chignon features artfully arranged loops of hair that create texture and dimension, offering a softer alternative to tightly wound buns.
This style showcases the natural beauty of hair while maintaining the structure characteristic of Renaissance updos.
How to Style:
- Gather your hair into a low ponytail at the nape, leaving it slightly loose rather than pulling it tight.
- Divide the ponytail into three or four equal sections, depending on your hair thickness.
- Take the first section and create a large loop, folding it back on itself without pulling it through completely.
- Pin the loop securely at its base, allowing the curved portion to stand out from your head.
- Create similar loops with the remaining sections, positioning them around the central point.
- Arrange the loops in a circular or fan pattern, overlapping them slightly for fullness.
- Leave the ends of each section visible and curl them with a small iron for added softness.
- Use decorative pins to secure any loops that seem loose while adding ornamental detail.
- Finish by misting with flexible-hold hairspray that allows some movement.
Best Suited For: Garden parties, brunch events, bridesmaids’ hairstyles, or any occasion calling for romantic elegance without excessive formality.
6. Twisted Rope Crown

The Twisted Rope Crown utilizes hair twisted into rope-like sections that wrap around the head, creating a textured crown effect.
This style offers a simpler alternative to braiding while achieving a similar regal appearance.
Step-by-Step Guide:
- Create a deep side part on whichever side feels most natural and flattering for your face shape.
- Take a two-inch section of hair from the heavier side of the part near your hairline.
- Divide this section into two equal strands and begin twisting them around each other tightly.
- As you twist, gradually add small amounts of hair from below, incorporating it into the rope.
- Continue the twisting process along your hairline, moving from front to back like a headband.
- Once you reach behind your ear, continue twisting without adding more hair until you reach the ends.
- Wrap the twisted rope around the back of your head, following your natural head shape.
- Bring the twist up the opposite side and secure it with pins that hide beneath the twist.
- Repeat with another section if desired, creating multiple rope layers for added drama.
- Tuck any remaining loose hair into a low bun or leave it flowing for a half-up style.
Ideal Settings: Casual Renaissance-themed events, medieval banquets, outdoor concerts, or everyday wear when you want to feel particularly regal.
7. The French Hood Style

The French Hood Style mimics the iconic headdress worn by Renaissance women, using hair arranged to complement the characteristic horseshoe shape.
Even without an actual hood, this hairstyle creates the illusion of the period accessory through clever positioning and styling.
Styling Method:
- Brush all hair straight back from your face, creating a smooth surface without any part.
- Apply styling gel to your hairline and front sections for maximum control and shine.
- Use a fine-tooth comb to slick back the front portion, creating the flat front typical of French hood styles.
- Gather hair into a low ponytail positioned at the base of your skull.
- Twist the ponytail and coil it into a flat, horizontal bun shape rather than a round one.
- Pin the flattened bun securely, keeping it close to your head for an authentic silhouette.
- Create small loops of hair at the temples if desired, pinning them to soften the severe front line.
- Add a decorative band or jeweled circlet across your hairline to simulate the hood’s front edge.
- Secure any wispy hairs with small amounts of pomade for a polished, period-accurate finish.
Appropriate For: Historical fashion events, Tudor-themed parties, museum galas, or any occasion celebrating Renaissance culture and style.
8. Cascading Braided Bun

The Cascading Braided Bun combines the structure of a traditional bun with the intricate beauty of multiple braids that appear to flow into the main arrangement.
This style offers impressive visual impact while remaining surprisingly wearable.
Construction Steps:
- Divide your hair horizontally into three sections: top, middle, and bottom layers.
- Clip the top and middle sections up and away while you work on the bottom layer first.
- Create a standard bun with the bottom section at your desired height—low for classic, mid-level for modern.
- Release the middle section and divide it into two or three smaller segments.
- Braid each segment separately, securing the ends with small elastic bands.
- Drape the first braid over the bun, pinning it so it appears to cascade down one side.
- Arrange the remaining braids similarly, creating a waterfall effect over and around the bun.
- Release the top section and smooth it back, integrating it into the existing bun structure.
- Pull gently at the braids to loosen them slightly, creating a fuller, more romantic appearance.
- Add small floral accents or jeweled pins where the braids meet the bun for decorative interest.
Perfect Scenarios: Wedding ceremonies, prom, formal portraits, or milestone celebrations where you want a hairstyle that photographs beautifully from every angle.
9. The Italian Renaissance Wrap

The Italian Renaissance Wrap features hair wound around the head in horizontal bands, creating the distinctive look favored in Renaissance Italy.
This style emphasizes symmetry and creates an elongated, elegant appearance.
How to Achieve:
- Start by creating a middle part and combing all hair smoothly down on both sides.
- Take a one-inch horizontal section from the front hairline on one side.
- Wrap this section around your head like a headband, keeping it smooth and flat against your scalp.
- Pin it securely on the opposite side, tucking the end underneath to hide it.
- Take another horizontal section directly below the first and wrap it similarly.
- Continue this process, creating parallel bands of hair that wrap around your head.
- As you work toward the back, the sections can be slightly thicker since they’re less visible.
- Gather any remaining hair at the nape into a small bun or twist it and tuck it under the wrapped sections.
- Use a decorative comb or jeweled hairpins at strategic points where the wraps meet.
- Apply a shine serum to enhance the glossy, polished appearance characteristic of Italian Renaissance style.
Suited For: Art gallery openings, classical music performances, Italian cultural festivals, or any event celebrating Renaissance Italian heritage.
10. Pinned Curl Updo
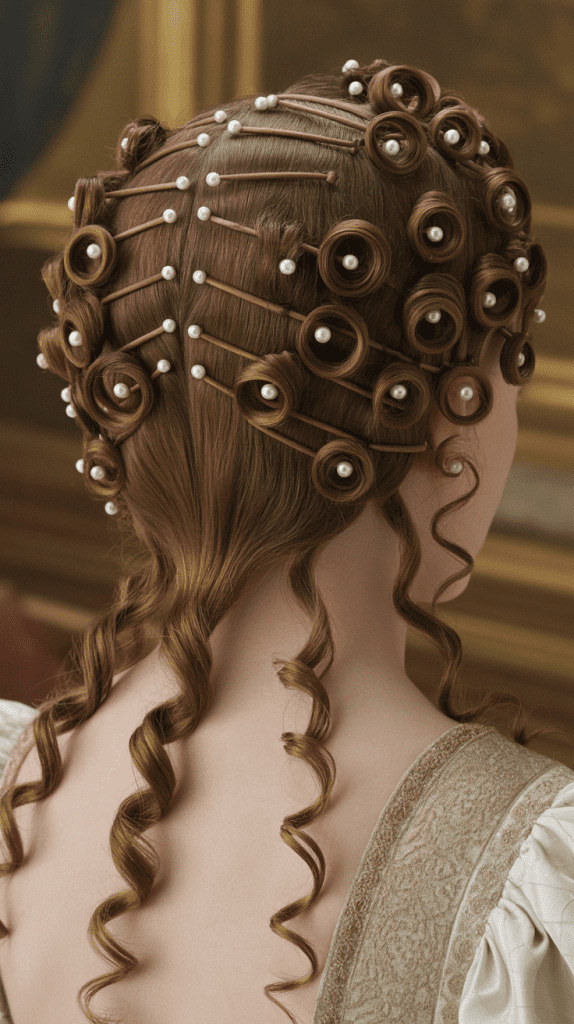
The Pinned Curl Updo arranges individual curls in artful patterns across the head, creating a sculptural effect that was highly prized during the Renaissance.
This style allows for tremendous creativity and personalization in how the curls are positioned.
Detailed Instructions:
- Begin with clean, dry hair and section it into workable portions using clips.
- Heat your curling iron to the appropriate temperature for your hair type.
- Take small one-inch sections and wrap them around the curling iron, creating tight ringlet curls.
- Allow each curl to cool completely in your hand before releasing it to set the shape.
- Continue curling until your entire head is covered with individual ringlets.
- Starting from the nape, take one curl and coil it flat against your head in a circular shape.
- Pin the coiled curl securely with bobby pins, creating a flower-like rosette.
- Continue coiling and pinning curls in a pattern, working from the bottom up.
- Create symmetrical arrangements on both sides for a balanced classical look.
- Leave a few curls loose around your face to soften the overall effect and frame your features.
- Mist the finished style with light hairspray, avoiding over-spraying which can make curls stiff.
Best Applications: Balls, quinceañeras, sweet sixteen parties, or any formal occasion where you want to showcase an elaborate hairstyle that demonstrates skill and attention to detail.
11. The Medallion Bun

The Medallion Bun creates a circular, coin-like arrangement of hair that sits flat against the head, reminiscent of decorative medallions worn during the Renaissance.
This geometric style offers a bold, architectural statement.
Creating the Style:
- Pull all hair back into a high or mid-level ponytail, positioning it where you want the medallion to appear.
- Divide the ponytail into four equal sections, separating them clearly.
- Take the first section and create a flat loop by folding it back against your head.
- Pin the loop at both its base and tip, creating a petal or leaf shape.
- Repeat with the remaining three sections, arranging them in a cross or star pattern.
- The result should resemble a four-petaled flower or medallion shape when viewed from behind.
- Fill any gaps between the loops with smaller twisted pieces or decorative accessories.
- Ensure all pins are hidden within the folds and loops for a clean, professional finish.
- Add a central jeweled pin or brooch at the meeting point of all sections to create a focal point.
Ideal Uses: Costume balls, theatrical productions set in the Renaissance period, or fashion-forward events where you want to make a bold style statement.
12. Loose Romantic Updo

The Loose Romantic Updo offers a softer interpretation of Renaissance styling, featuring loosely gathered curls and wispy tendrils that create an ethereal, approachable beauty.
This style balances historical inspiration with contemporary wearability.
Styling Process:
- Start by curling your hair with a large-barrel curling iron, creating soft waves rather than tight ringlets.
- Apply texturizing spray throughout to add grip and volume to your hair.
- Gently tease the crown area to create lift and height characteristic of Renaissance styles.
- Gather hair loosely at the nape or crown, depending on your preferred placement.
- Twist sections gently without pulling tight, maintaining the soft texture of the waves.
- Pin sections randomly rather than in a structured pattern, allowing curls to overlap naturally.
- Pull a few face-framing pieces free to soften the overall look and add romantic appeal.
- Use your fingers to gently separate and fluff the pinned sections for a fuller appearance.
- Add small flowers, baby’s breath, or delicate pins throughout the updo for whimsical decoration.
- Finish with a light, flexible-hold hairspray that allows natural movement.
Perfect Occasions: Garden weddings, baby showers, spring luncheons, or any daytime event with a romantic, feminine aesthetic.
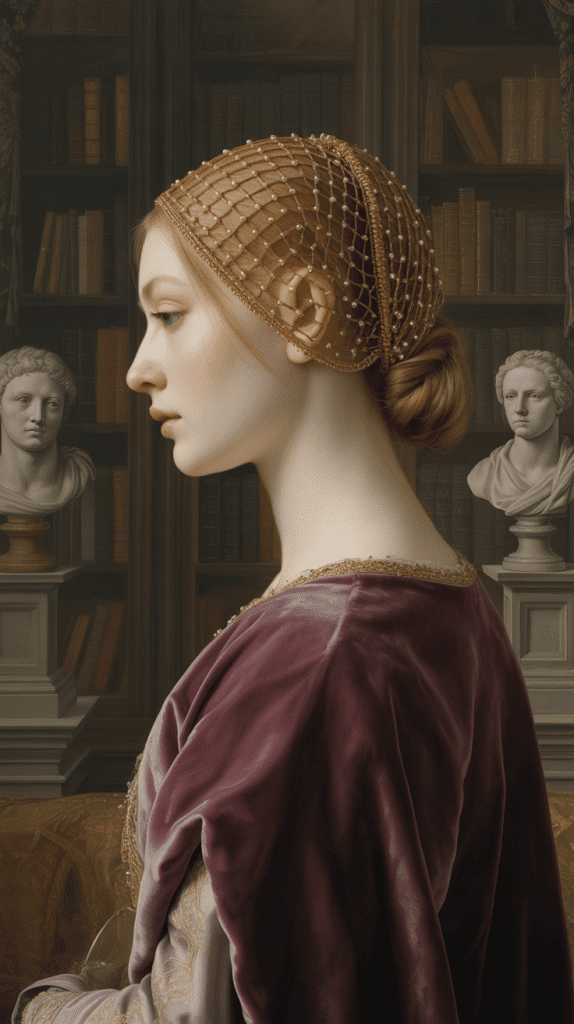
13. The Jeweled Net Bun

The Jeweled Net Bun encases a classic bun within an ornamental hair net adorned with beads, jewels, or metalwork, directly replicating one of the most iconic Renaissance accessories.
This style instantly elevates any simple bun into a regal statement.
Implementation Guide:
- Create a smooth, classic bun at your preferred height using your standard technique.
- Ensure the bun is securely pinned and will hold its shape under the weight of the net.
- Select a decorative hair net appropriate to your outfit and occasion—gold for formal, pearl for romantic.
- Position the net over the bun, ensuring it covers the entire structure evenly.
- Secure the net with small pins pushed through the mesh and into the bun beneath.
- Adjust the net so that jeweled or beaded portions are prominently displayed.
- Pin at multiple points around the perimeter to prevent slipping throughout the event.
- Smooth any stray hairs around the edges of the net with a small amount of gel or pomade.
- The net should appear as an intentional ornamental element rather than a practical covering.
Suitable Settings: Formal balls, black-tie weddings, opera nights, or any occasion where opulent accessories are appropriate and expected.
14. Braided Criss-Cross Updo

The Braided Criss-Cross Updo weaves multiple braids together in an intersecting pattern that creates visual complexity and texture.
This style demonstrates the intricate craftsmanship valued during the Renaissance while remaining achievable with practice.
Step-by-Step Creation:
- Section hair into four quadrants: two in front and two in back, dividing at the ears.
- Begin with one front section, creating a standard three-strand braid from hairline to ends.
- Repeat with the other front section, ensuring both braids are approximately the same thickness.
- Create similar braids with both back sections, working from the crown downward.
- Take one front braid and cross it diagonally toward the opposite back section.
- Pin it securely where it meets the back braid on that side.
- Take the opposite front braid and cross it diagonally in the other direction, creating an X pattern.
- Pin it securely, creating the first layer of the criss-cross design.
- Continue crossing the back braids over each other or tuck them underneath for a cleaner finish.
- Wrap any remaining braid ends into a small bun at the nape or tuck them under existing braids.
- Pull gently at the braid sections to create fuller, more prominent crossings.
Best For: Renaissance festivals, medieval-themed weddings, historical costume competitions, or showcasing braiding skills at beauty events.
15. The Coiled Serpent Style
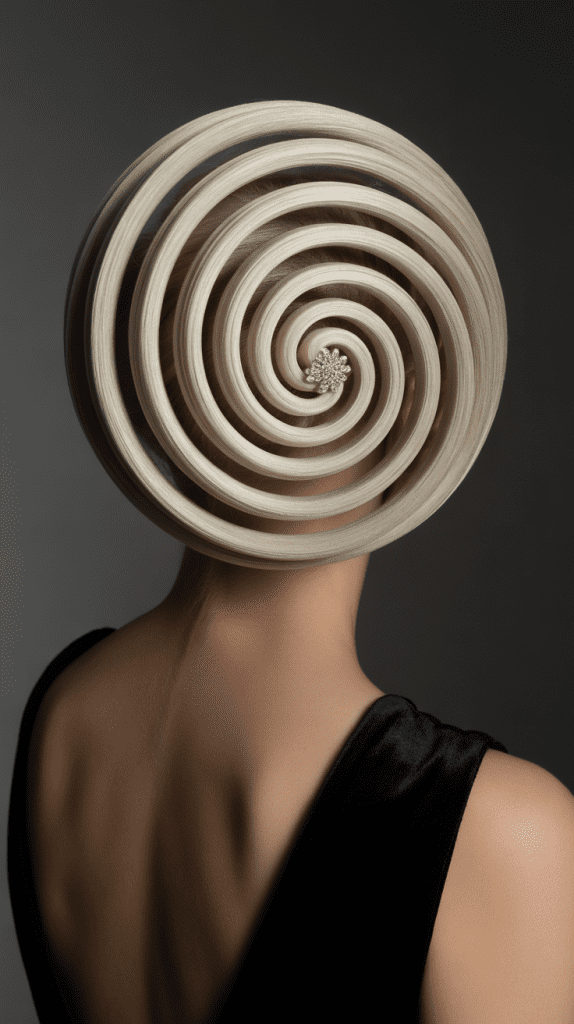
The Coiled Serpent Style arranges hair in a spiral pattern that resembles a coiled snake or nautilus shell, creating a mesmerizing geometric effect.
This architectural style was particularly popular in late Renaissance period and demonstrates mathematical precision in hairstyling.
Construction Method:
- Gather all hair into a high ponytail positioned at the crown of your head.
- Divide the ponytail into two equal sections for easier manipulation.
- Begin twisting one section tightly from base to ends, creating a rope-like texture.
- Starting at the center of the ponytail base, coil the twisted section in a tight spiral outward.
- Pin the coil at regular intervals as you work outward, maintaining the circular shape.
- Once the first section is completely coiled and pinned, repeat with the second section.
- Continue the spiral pattern, coiling the second section around the first for added fullness.
- The finished coil should sit flat against your head with a clear spiral pattern visible.
- Use a strong-hold gel or pomade to slick down any flyaways and emphasize the geometric design.
- Add a decorative pin at the center of the coil as a starting point for the spiral pattern.
Appropriate For: Avant-garde fashion events, art exhibitions, architectural society galas, or any occasion celebrating geometric design and Renaissance mathematical influence.
16. Twisted Temple Braids with Low Bun
The Twisted Temple Braids with Low Bun combines decorative front sections with a practical low bun, offering both visual interest and secure hold.
This style frames the face beautifully while maintaining the elegant restraint characteristic of Renaissance fashion.
Detailed Steps:
- Part your hair in the center and separate the front sections from temple to temple.
- Clip the back section away while focusing on the front decorative elements.
- Take a two-inch section at one temple and divide it into two strands.
- Twist the strands around each other, working back toward the crown area.
- Pin the twist temporarily while you create a matching twist on the opposite side.
- Ensure both twists are symmetrical in thickness and positioning for a balanced look.
- Release the back section and gather all remaining hair into a low ponytail at the nape.
- Create a classic twisted or rolled bun with the ponytail, pinning it securely.
- Incorporate the ends of the temple twists into the bun, hiding them within the structure.
- Pull a few small wisps free around your hairline for a softer, less severe appearance.
Perfect For: Professional events, business dinners with historical flair, museum fundraisers, or adding Renaissance elegance to workplace attire.
17. The Pearl-Wrapped Chignon

The Pearl-Wrapped Chignon elevates a simple chignon by weaving pearl strands through the hair or wrapping them around the bun.
This luxurious style directly references the Renaissance obsession with pearls as symbols of purity and wealth.
How to Create:
- Form a low chignon at the nape using your preferred technique—twisted, rolled, or pinned.
- Ensure the chignon is tightly secured before adding the pearl embellishments.
- Take a long strand of artificial or real pearls and pin one end securely inside the chignon.
- Wrap the pearl strand around the chignon in a spiral pattern, spacing the wraps evenly.
- Pin the strand periodically to keep it from slipping, hiding pins beneath the pearls.
- Continue wrapping until the entire chignon is decorated or the pearl strand is exhausted.
- For a more integrated look, weave the pearls through sections of hair before forming the chignon.
- Add additional pearl pins or decorative combs around the chignon for extra opulence.
- Ensure all pins and attachments are secure enough to last throughout your event.
Ideal Occasions: Weddings, anniversary celebrations, formal portraits, or any event where luxurious accessories are appropriate and appreciated.
18. Asymmetrical Renaissance Updo

The Asymmetrical Renaissance Updo breaks from traditional symmetry, featuring deliberately unbalanced elements that create modern visual interest while maintaining period authenticity.
Renaissance portraits often show asymmetrical styling, making this approach historically accurate.
Styling Instructions:
- Create a deep side part, placing it about two inches from your natural center part.
- Sweep all hair on the heavier side back toward one shoulder, leaving it loose temporarily.
- On the lighter side, create a small French braid starting from the hairline.
- Continue the braid back toward the crown, keeping it tight against your head.
- Gather all remaining hair to one side at approximately ear level.
- Twist and coil the gathered hair into a side bun, positioning it behind and below the ear.
- Pin the bun securely while allowing some pieces to escape for a romantic, imperfect finish.
- Wrap the French braid around the base of the bun or pin it decoratively across the top.
- Leave a few curled tendrils loose on the braided side to soften the asymmetry.
- Add decorative pins or flowers concentrated on one side to emphasize the asymmetrical design.
Best Settings: Fashion-forward events, artistic gatherings, modern weddings with historical touches, or any occasion where you want to blend Renaissance inspiration with contemporary styling trends.
19. The Woven Basket Bun
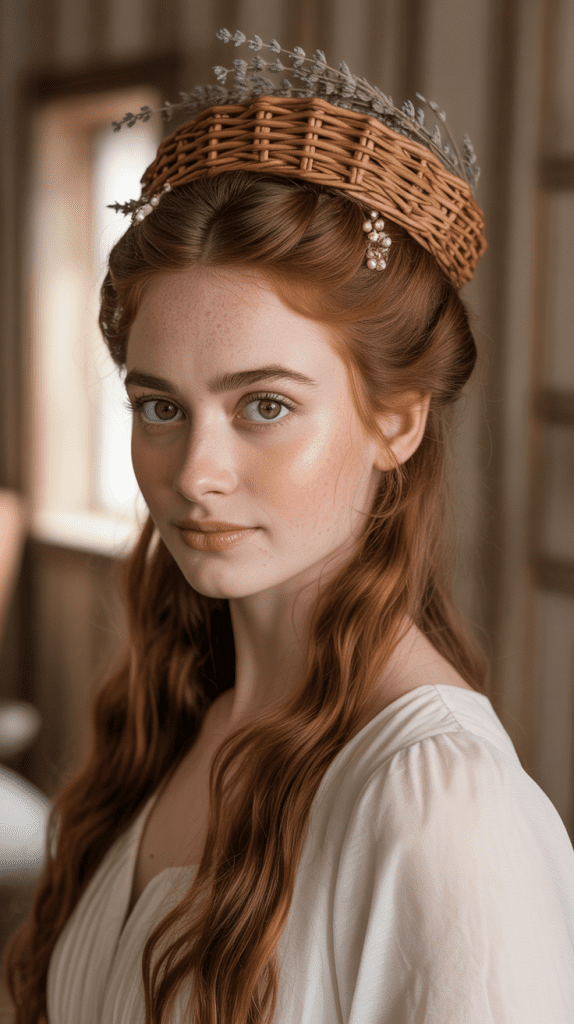
The Woven Basket Bun creates the appearance of woven hair strands similar to basketwork, demonstrating impressive technique and attention to detail.
This style showcases the Renaissance appreciation for craftsmanship and skilled handiwork in all areas of life.
Creation Process:
- Pull hair into a high ponytail and secure it with a strong elastic band.
- Divide the ponytail into four equal sections, keeping them clearly separated.
- Take two adjacent sections and cross them over each other once, like starting a braid.
- Hold them in place with one hand while you cross the next two sections.
- Continue alternating which pairs you cross, creating a woven pattern rather than a braid.
- Work slowly and deliberately to maintain clear, visible weaving throughout.
- Once you’ve woven to the ends, secure with an elastic band temporarily.
- Coil the woven ponytail around its base, keeping the woven pattern visible on the outside.
- Pin the coiled bun securely, ensuring the basketweave texture remains prominent.
- Remove the end elastic and tuck the tail ends underneath the bun invisibly.
- Use hairspray to set the weave pattern and prevent individual strands from slipping.
Suitable For: Craft fairs with historical themes, textile museum events, demonstrations of historical hairstyling techniques, or showcasing advanced styling skills.
20. Flowered Side Sweep
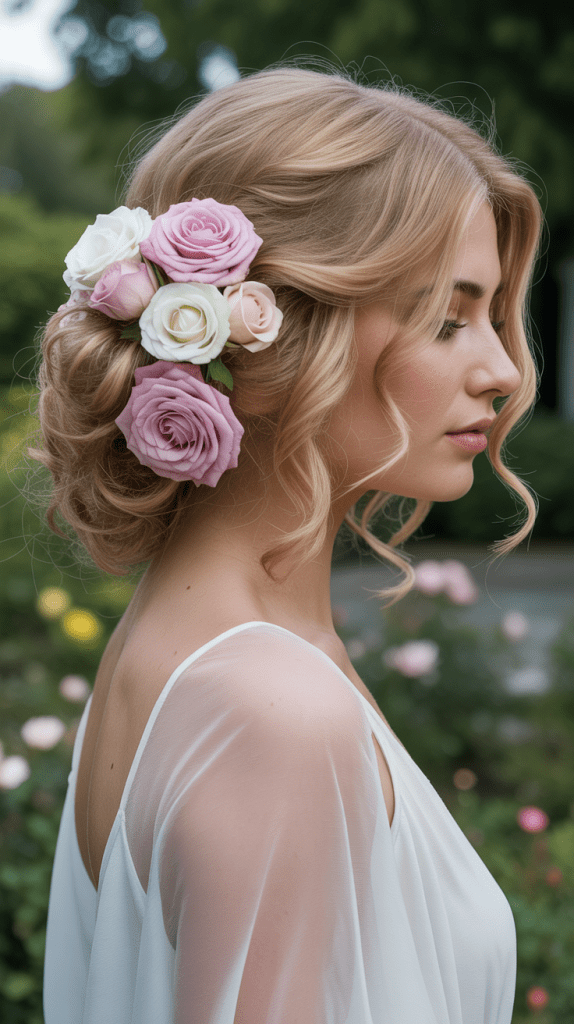
The Flowered Side Sweep gathers hair to one side in a loose, romantic arrangement adorned with fresh or silk flowers.
This style captures the Renaissance love of nature and botanical beauty while remaining accessible for various skill levels.
How to Style:
- Curl all of your hair with a medium-barrel curling iron for soft, romantic waves.
- Apply volumizing mousse at the roots and gently tease the crown for added height.
- Sweep all hair to one side, gathering it over one shoulder.
- Begin pinning sections loosely at the back of your head, working from top to bottom.
- Create a cascading effect where each pinned section sits slightly below the previous one.
- Allow curls to remain loose and flowing rather than forming a tight structure.
- Leave the bottom portion unpinned, letting curls drape over your shoulder.
- Insert fresh flowers or high-quality silk flowers throughout the pinned sections.
- Concentrate flowers near the face and at the shoulder for maximum visual impact.
- Use small, clear pins to secure flowers so the pins remain invisible.
- Finish with a light mist of flexible-hold hairspray to maintain the soft texture.
Perfect For: Spring and summer weddings, garden parties, outdoor portraits, or any romantic occasion in natural settings.
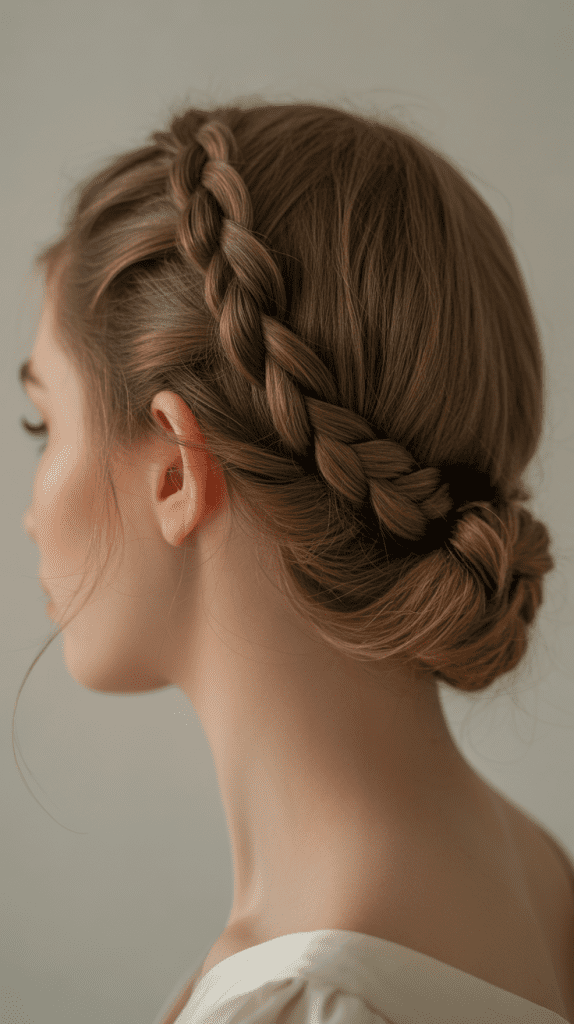
21. The Tudor-Inspired Low Loop
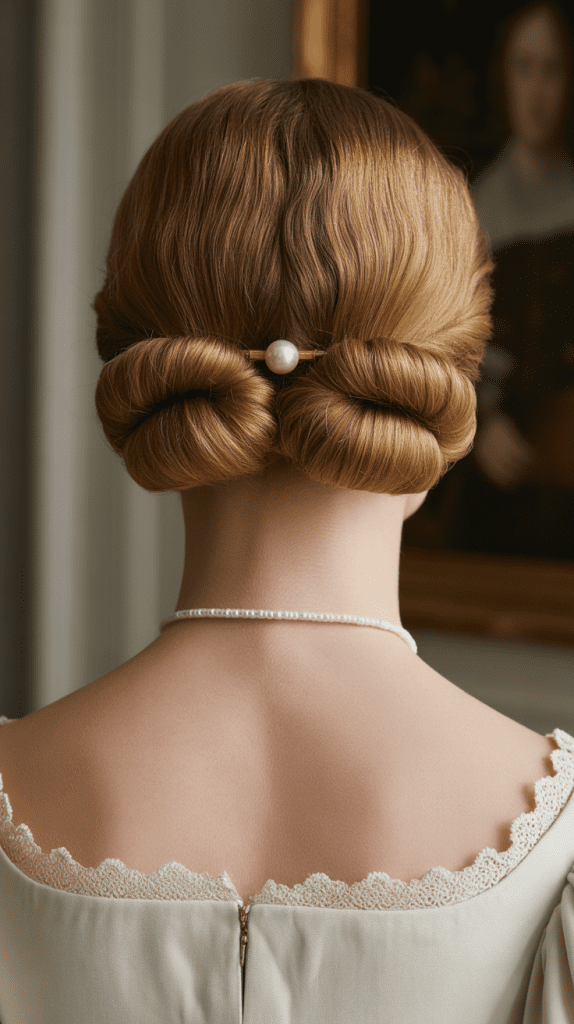
The Tudor-Inspired Low Loop creates a horizontal figure-eight or loop shape at the nape of the neck, reminiscent of hairstyles worn during the Tudor period of the English Renaissance.
This understated style offers historical accuracy with modern wearability.
Step-by-Step Guide:
- Brush all hair straight back from your face and gather it at the nape.
- Create a low horizontal ponytail, keeping it loose rather than tight against your head.
- Divide the ponytail into two equal sections, separating them clearly.
- Take the first section and fold it upward, creating a loop above the ponytail base.
- Pin the loop at its top, creating a half-circle or arch shape.
- Take the second section and fold it downward, creating a loop below the ponytail base.
- Pin this loop at its bottom, completing the figure-eight or double-loop shape.
- Adjust both loops so they’re approximately the same size and shape.
- Tuck the remaining ends underneath the loops and pin them invisibly.
- Add a decorative pin or brooch at the center where the two loops meet.
Appropriate For: Tudor historical society meetings, English Renaissance festivals, period drama themed events, or adding subtle historical flair to professional attire.
22. Multi-Braided Updo Tower
The Multi-Braided Updo Tower stacks multiple braids vertically to create height and drama, embodying the Renaissance fascination with architectural elements in fashion.
This ambitious style makes a powerful statement and showcases advanced braiding skills.
Construction Instructions:
- Section hair horizontally into three layers: bottom, middle, and top.
- Begin with the bottom section, creating a standard three-strand braid.
- Coil this braid into a flat bun at the nape and pin it securely as your base.
- Release the middle section and create another braid, similar in thickness to the first.
- Position this braid in a bun directly above the first one, stacking them vertically.
- Pin the second bun thoroughly, ensuring it’s secure on top of the first layer.
- Release the top section and create a third braid with the remaining hair.
- Form this final braid into a bun at the very top, completing the tower structure.
- Ensure all three layers are aligned vertically and firmly attached to each other.
- Insert decorative pins, ribbons, or small flowers between the layers to highlight the stacked structure.
- Use strong-hold hairspray to maintain the tower’s height throughout your event.
Best For: High-fashion events, editorial photoshoots, costume competitions, or any occasion where dramatic, architectural hairstyles are celebrated.
23. Wrapped Ribbon Coronet
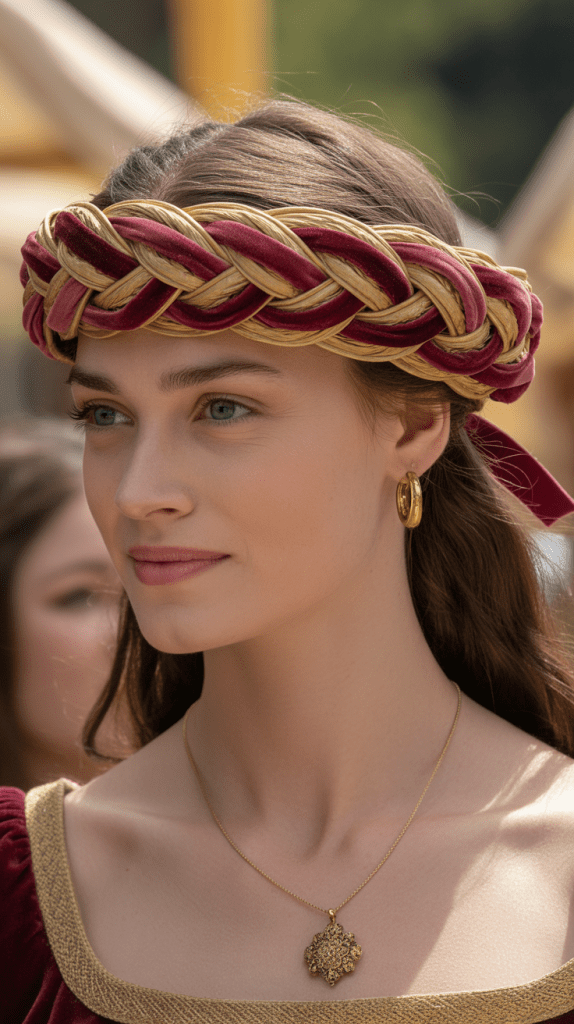
The Wrapped Ribbon Coronet incorporates fabric ribbons woven through braided or twisted hair that encircles the head like a crown.
This style directly references Renaissance fashion where ribbons were essential accessories that signified status and added color to hairstyles.
Styling Method:
- Select a ribbon that complements your outfit—silk or velvet in rich jewel tones works best for authenticity.
- Create a center part and divide your hair into two equal sections.
- Begin a Dutch braid on one side, starting from the hairline near your part.
- As you braid, weave the ribbon through each section, incorporating it as a fourth strand.
- Continue braiding and weaving the ribbon all the way around your head like a halo.
- When you reach the starting point, continue braiding any remaining hair without adding new sections.
- Wrap the remaining braid and ribbon around the coronet to thicken it and hide the ends.
- Pin the braid securely where it meets the beginning, tucking ends underneath invisibly.
- Tie the ribbon ends into a small bow at the back or side, allowing the tails to hang decoratively.
- Adjust the ribbon throughout the braid so it remains visible and evenly distributed.
- Pull gently at the braid sections to create a fuller, more substantial coronet appearance.
Ideal For: Holiday celebrations, Renaissance-themed birthday parties, cultural heritage festivals, or adding a touch of historical elegance to special occasions.
24. The Milkmaid Braided Crown

The Milkmaid Braided Crown wraps two braids over the top of the head from ear to ear, creating a simple yet charming style inspired by working-class Renaissance women.
This accessible style offers historical authenticity with practical, all-day wearability.
How to Achieve:
- Part your hair down the center, creating two equal sections that hang over your shoulders.
- Braid one section completely from roots to ends using a traditional three-strand technique.
- Secure the end with a small elastic band that matches your hair color.
- Repeat the braiding process on the opposite side, ensuring both braids are similar in thickness.
- Bring the first braid up and over the top of your head like a headband.
- Position it about two inches back from your hairline for the most flattering placement.
- Pin the braid securely along its length, using bobby pins every few inches.
- Tuck the end of the braid behind your opposite ear and pin it invisibly.
- Bring the second braid over the top, positioning it directly next to or slightly overlapping the first.
- Pin the second braid thoroughly and tuck its end behind the opposite ear.
- Gently pull at both braids to loosen them slightly for a softer, more romantic appearance.
- Add small flowers, decorative pins, or leave it simple depending on your occasion.
Perfect Scenarios: Casual Renaissance events, outdoor activities, farmers markets, country weddings, or everyday wear when you want a touch of historical charm.
25. The Elaborate Jeweled Crown Updo

The Elaborate Jeweled Crown Updo combines multiple techniques—braiding, twisting, looping, and coiling—into one magnificent style adorned with jewels, pearls, and ornamental pins.
This masterpiece represents the pinnacle of Renaissance hairstyling artistry and requires time, patience, and skill to execute.
Comprehensive Instructions:
- Begin by sectioning hair into multiple zones: front, sides, crown, and nape areas.
- Start with the front section, creating small braids or twists that frame your face elegantly.
- Work on the side sections next, creating rope twists that will wrap around toward the back.
- Curl the crown and nape sections with a curling iron to add texture and volume.
- Begin assembling the updo by pinning the front braids back and across the crown area.
- Bring the side twists around and pin them to create the foundation of your crown structure.
- Take curled sections from the crown and begin pinning them in loops and coils.
- Layer the loops at different heights to create dimension and architectural interest.
- Continue adding pinned curls, building up the crown structure gradually.
- Insert jeweled pins, pearl clusters, and ornamental combs throughout the style as you build.
- Focus the most elaborate decorations at the crown and sides where they’re most visible.
- Ensure each section is thoroughly pinned before adding the next layer.
- Step back frequently to assess symmetry and balance from multiple angles.
- Use any remaining hair at the nape to create small tucked curls or a concealed base bun.
- Finish with firm-hold hairspray to preserve the style throughout your event.
- Add a final check of all pins and decorations to ensure security before your appearance.
Best Suited For: Royal balls, coronation ceremonies, the most formal weddings, theatrical performances requiring period accuracy, or once-in-a-lifetime milestone celebrations.
Essential Tools and Accessories for Renaissance Updos
Creating authentic Renaissance-inspired hairstyles requires specific tools and accessories that help achieve the polished, ornate looks characteristic of the period.
Basic Styling Tools:
- Bobby pins in multiple colors matching various hair shades ensure invisible hold throughout your style.
- U-shaped hairpins provide stronger grip for heavier sections and architectural elements.
- Fine-tooth combs help create the smooth, sleek surfaces seen in many Renaissance portraits.
- Tail combs assist with precise sectioning and creating clean parts throughout your styling process.
- Curling irons in various barrel sizes allow you to create everything from tight ringlets to soft waves.
- Hair elastics in neutral colors secure ponytails and sections without being visible in the finished style.
Decorative Accessories:
- Hair nets or snoods in gold, silver, or pearl-encrusted versions add authentic Renaissance detail.
- Jeweled pins, combs, and hair ornaments replicate the opulent accessories worn by nobility.
- Fresh or silk flowers provide natural beauty that softens structured styles.
- Ribbons in silk or velvet can be woven through braids or wrapped around buns.
- Pearl strands add luxurious detail when wrapped around chignons or woven through hair.
- Decorative circlets or tiaras complete the regal appearance of more elaborate styles.
Styling Products:
- Strong-hold hairspray maintains architectural styles throughout long events without becoming stiff.
- Smoothing serums eliminate frizz and add the glossy shine seen in Renaissance paintings.
- Texturizing spray adds grip to fine hair, making it easier to manipulate into intricate styles.
- Hair gel or pomade slicks back front sections for styles requiring smooth, flat hairlines.
- Volumizing mousse creates the lift and fullness that makes Renaissance updos so impressive.
Tips for Maintaining Renaissance Updos Throughout Your Event
Renaissance hairstyles are designed to last through balls, banquets, and extended celebrations, but modern wearers can benefit from specific maintenance strategies.
Preparation Tips:
- Start with second-day hair or use dry shampoo to create texture that holds pins better than freshly washed hair.
- Apply styling products before creating the updo rather than after to ensure even distribution and maximum hold.
- Use more pins than you think necessary—Renaissance hairstyles rely on thorough pinning for security.
- Insert bobby pins in opposing directions to create tension that locks them in place.
- Allow curled sections to cool completely before pinning them to ensure the curl holds its shape.
During-Event Maintenance:
- Carry extra bobby pins in a small pouch to quickly secure any sections that work loose.
- Bring a travel-sized hairspray to touch up areas that lose hold throughout the event.
- Avoid touching or adjusting your hairstyle unnecessarily, as this can loosen carefully placed pins.
- If decorative elements shift, step away to a mirror to reposition them rather than trying to fix them blindly.
- Keep a small comb handy to smooth any flyaways that appear as the evening progresses.
Removal and Hair Care:
- Remove decorative accessories first before attempting to take down the updo to avoid tangling.
- Work slowly and gently when removing pins to minimize hair breakage and discomfort.
- Use a detangling spray or conditioner before combing through hair that has been heavily styled.
- Deep condition hair after wearing elaborate updos to restore moisture and prevent damage.
- Give your hair a break between elaborate styles to maintain its health and strength.
Adapting Renaissance Styles for Modern Hair Types and Lengths
Renaissance hairstyles were originally created for specific hair types common in Europe, but modern adaptations make these styles accessible to everyone.
For Fine or Thin Hair:
- Use volumizing products at the roots before styling to create the appearance of thicker hair.
- Tease sections gently before pinning them to add fullness to updos that might otherwise appear flat.
- Consider using hair extensions or padding underneath to create more substantial buns and rolls.
- Focus on looped and layered styles that create visual fullness even with less hair density.
- Avoid pulling hair too tight, which can make fine hair appear even thinner and cause breakage.
For Thick or Coarse Hair:
- Section hair into smaller portions to maintain control while styling elaborate updos.
- Use strong-hold products and professional-grade pins that can manage heavier hair weight.
- Embrace styles that showcase volume and fullness, which thick hair naturally provides.
- Allow extra time for styling, as thick hair requires more manipulation to achieve smooth results.
- Consider smoothing serums to manage texture and create the sleek appearance of many Renaissance styles.
For Textured or Curly Hair:
- Embrace natural texture in loose romantic updos rather than fighting against curl patterns.
- Use twist-out or braid-out techniques to create uniform curl patterns before styling.
- Consider stretched styles that honor natural texture while creating Renaissance silhouettes.
- Focus on styles featuring visible braids and twists, which showcase textured hair beautifully.
- Use edge control and smoothing products on hairline areas while celebrating texture elsewhere.
For Shorter Hair Lengths:
- Concentrate on styles that focus on the crown and sides, such as twisted coronets and braided headbands.
- Use clip-in extensions to add length for buns and chignons while keeping the front natural.
- Create the illusion of updos by pinning shorter hair up and back strategically.
- Focus on braided elements around the hairline and crown where you have the most length.
- Consider half-up Renaissance styles that work beautifully with shoulder-length hair.
Historical Context: Understanding Renaissance Hair Fashion
Learning about the historical significance of Renaissance hairstyles deepens appreciation for these beautiful styles and their cultural importance.
Social Significance:
- Hairstyles during the Renaissance indicated social status, with elaborate updos reserved for nobility and wealthy merchants.
- Married women typically covered or completely contained their hair, while unmarried women could display more hair.
- Regional variations reflected different cultural values across European kingdoms and city-states.
- Hair color preferences varied by region, with blonde hair especially prized in Venice and auburn popular in England.
- The complexity of a hairstyle often indicated the wearer’s access to ladies’ maids and personal servants.
Evolution Throughout the Period:
- Early Renaissance styles (1400s) featured simple center parts with hair smoothly pulled back into low buns.
- Mid-Renaissance (1500s) saw increasing elaboration with braids, loops, and decorative accessories becoming more prominent.
- Late Renaissance (late 1600s) began transitioning toward the even more elaborate styles of the Baroque period.
- Italian Renaissance styles emphasized smooth, architectural arrangements while Northern European styles featured more visible braiding.
- The Protestant Reformation influenced hair fashion toward more modest, restrained styles in some regions.
Materials and Methods:
- Women used natural substances like rosewater, herbs, and oils to condition and perfume their hair.
- Hair was often washed infrequently, with dry powders used to absorb oil between washings.
- Pins were made from materials including bone, wood, and precious metals depending on social status.
- Hair padding and false hairpieces helped create fuller styles, especially for women with naturally fine hair.
- Decorative nets, called cauls or snoods, were functional accessories that also displayed wealth through precious metal threads and jewels.
For more detailed historical information about Renaissance fashion and culture, explore resources from institutions like The Metropolitan Museum of Art and The Victoria and Albert Museum, which maintain extensive collections of period portraits and accessories.
Conclusion
The timeless beauty of 25 Effortless Renaissance Updo Hairstyles continues to inspire modern fashion and personal style with its perfect blend of artistry, elegance, and romantic sophistication.
These historically rooted styles offer something for everyone, from the beginner seeking a simple braided crown to the advanced stylist ready to tackle an elaborate jeweled masterpiece.
The Renaissance period’s emphasis on beauty as an art form translates beautifully into today’s world, where we can appreciate both the historical significance and contemporary wearability of these stunning updos.
Each style presented in this guide brings with it centuries of tradition while remaining remarkably adaptable to modern hair types, lengths, and occasions.
Whether you’re preparing for a wedding, attending a Renaissance festival, or simply want to add historical elegance to your everyday look, these 25 styles provide endless inspiration and practical guidance.
The beauty of Renaissance updos lies not just in their visual appeal but in their ability to make the wearer feel regal, confident, and connected to a rich artistic heritage.
With practice, patience, and the right tools, anyone can master these techniques and bring a touch of Renaissance magnificence into their personal style repertoire.
As you experiment with these styles, remember that the Renaissance celebrated individual beauty and creativity—feel free to adapt, modify, and personalize these updos to reflect your unique taste and the timeless elegance that first made them legendary over five hundred years ago.