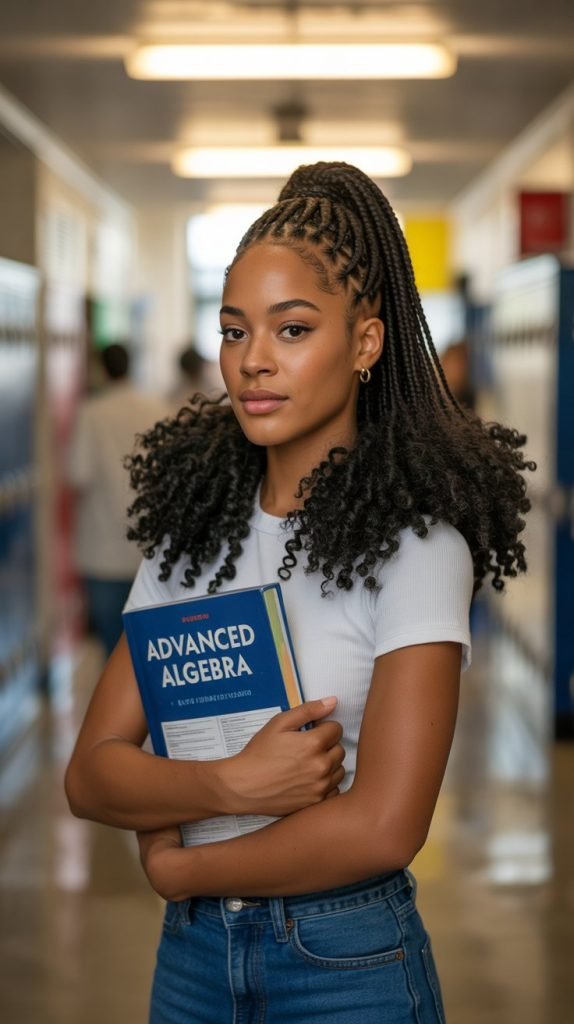
Finding the perfect hairstyle for 4C hair can transform your entire school experience from stressful morning routines into confident self-expression.
The beauty of 4C hair lies in its versatility, texture, and endless styling possibilities that celebrate natural beauty while meeting school dress codes.
Whether you’re looking for protective styles that last all week, quick morning solutions, or statement looks for special school events, this comprehensive guide delivers 30 creative and practical hairstyle ideas specifically designed for 4C hair textures.
From classic twists and braids to modern updos and accessorized styles, each option balances style, hair health, and the demands of an active school day.
These hairstyles honor the unique shrinkage, density, and coil pattern of 4C hair while providing solutions that work for every skill level, time constraint, and personal aesthetic.
This article on 30 Stylish Curly Hair Ideas for School 4C Hair That Inspire will guide you through detailed styling techniques, maintenance tips, and creative variations that make embracing your natural texture easier and more exciting than ever before.
In This Post......
- 1. Two-Strand Twists with Beads
- 2. High Puff with Headband
- 3. Flat Twist Updo
- 4. Bantu Knots
- 5. Cornrows with Extensions
- 6. Twist Out with Defined Curls
- 7. Space Buns with 4C Texture
- 8. Faux Hawk with Flat Twists
- 9. Halo Braid Crown
- 10. Mini Twists
- 11. Side-Swept Twist Style
- 12. Pineapple Updo
- 13. Braided Ponytail with Curly Ends
- 14. Twist and Pin Style
- 15. Chunky Flat Twist Out
- 16. Braided Bun with Textured Edges
- 17. Goddess Braids
- 18. Afro Puff with Twist Front
- 19. Cornrow Mohawk Design
- 20. Twisted Crown with Down Curls
- 21. Box Braids in Various Lengths
- 22. Twisted Bangs with Slicked Back Style
- 23. Jumbo Senegalese Twists
- 24. Natural Wash and Go with Gel Definition
- 25. Crochet Braids with Curly Hair
- 26. Asymmetrical Flat Twist Style
- 27. Bubble Ponytail with 4C Texture
- 28. Frohawk with Twists
- 29. Low Twisted Bun with Accessories
- 30. Finger Coils All Over
- Conclusion
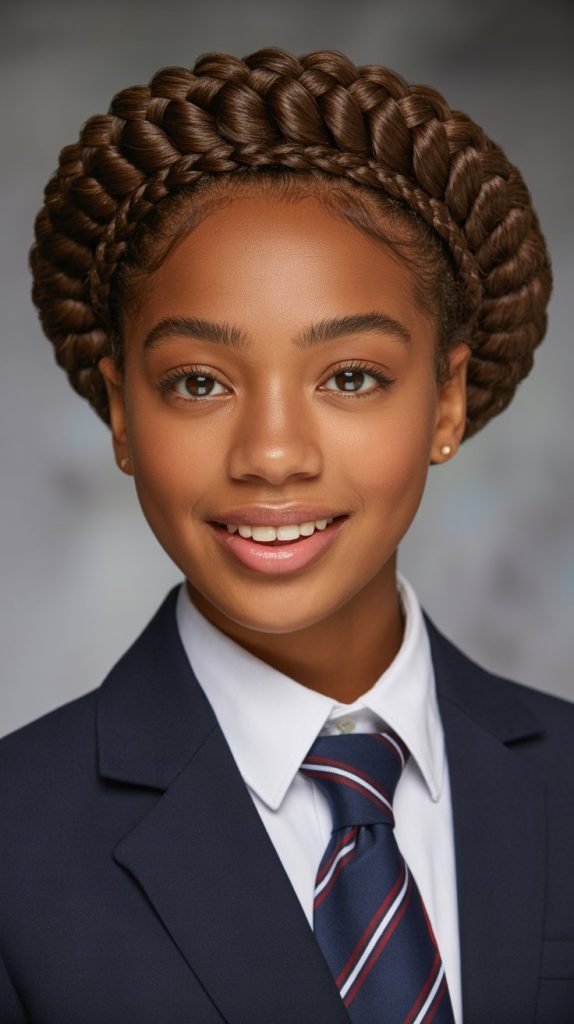
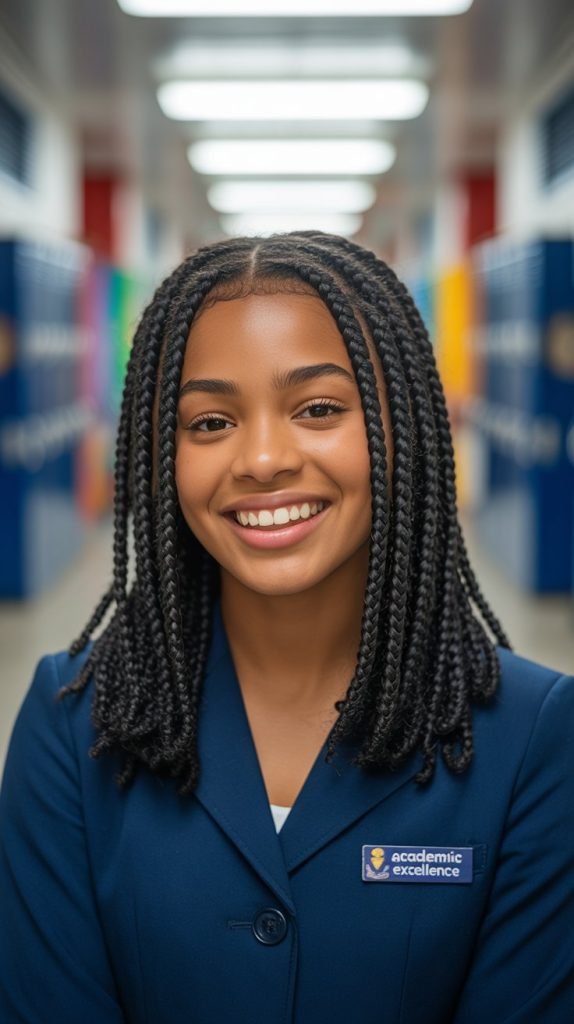
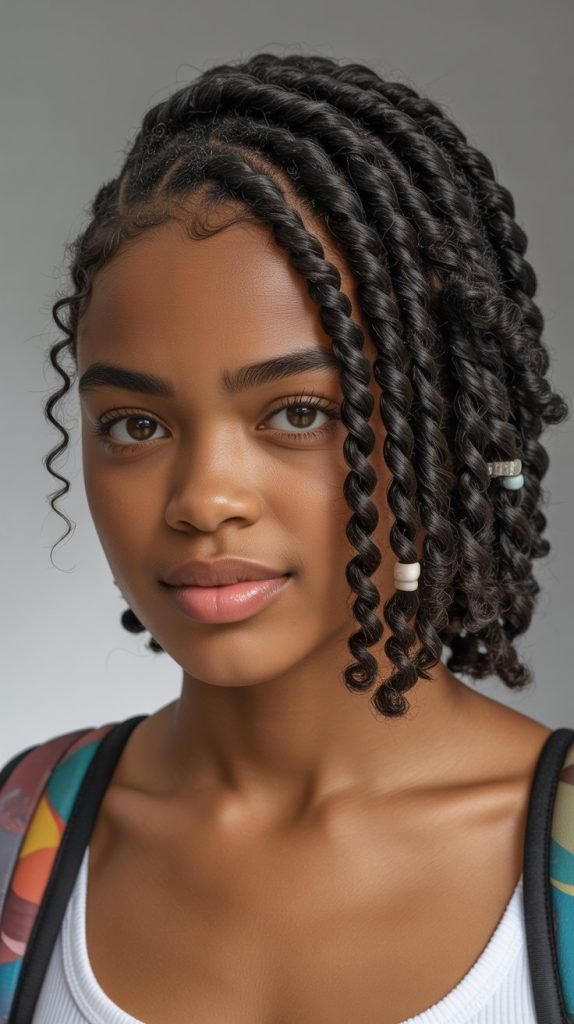
1. Two-Strand Twists with Beads
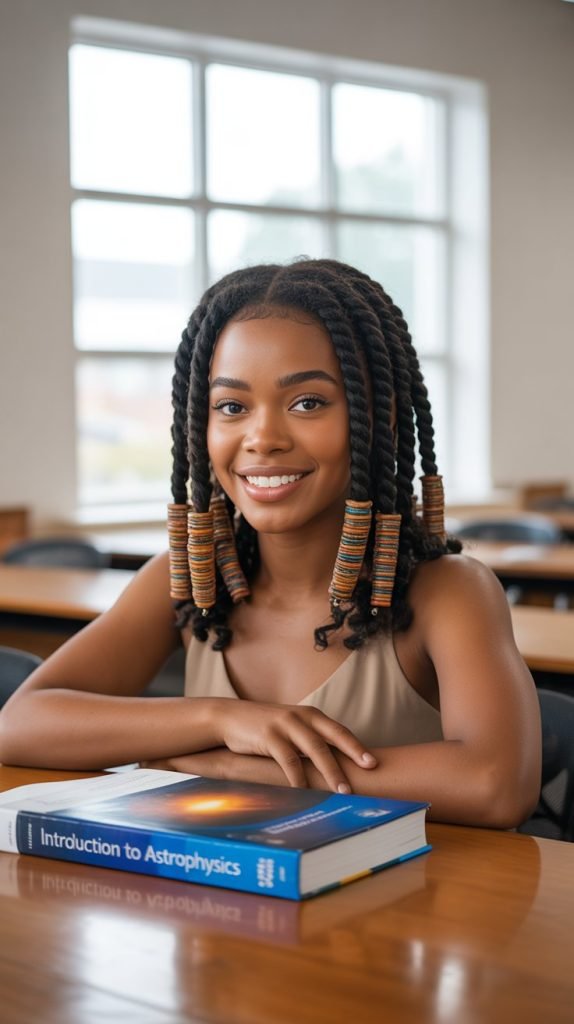
Two-strand twists remain one of the most versatile and protective styling options for 4C hair in school settings.
This classic technique creates defined, rope-like sections that can last for weeks with proper maintenance. Adding colorful beads brings personality and cultural connection to this timeless style.
Styling Process:
- Divide freshly washed and conditioned hair into small to medium sections depending on desired thickness.
- Apply a generous amount of moisturizing cream or butter to each section for slip and definition.
- Split each section into two equal parts and twist them around each other from root to tip.
- Secure the ends by threading beads onto the twists or using small rubber bands.
- Sleep with a satin bonnet or pillowcase to maintain the style throughout the week.
Maintenance Tips:
- Refresh the style by applying light oil to the scalp and smoothing down any frizz with edge control.
- Retwist the front sections every few days to keep the style looking fresh.
- The average wear time ranges from 2-4 weeks with proper care and nighttime protection.
2. High Puff with Headband
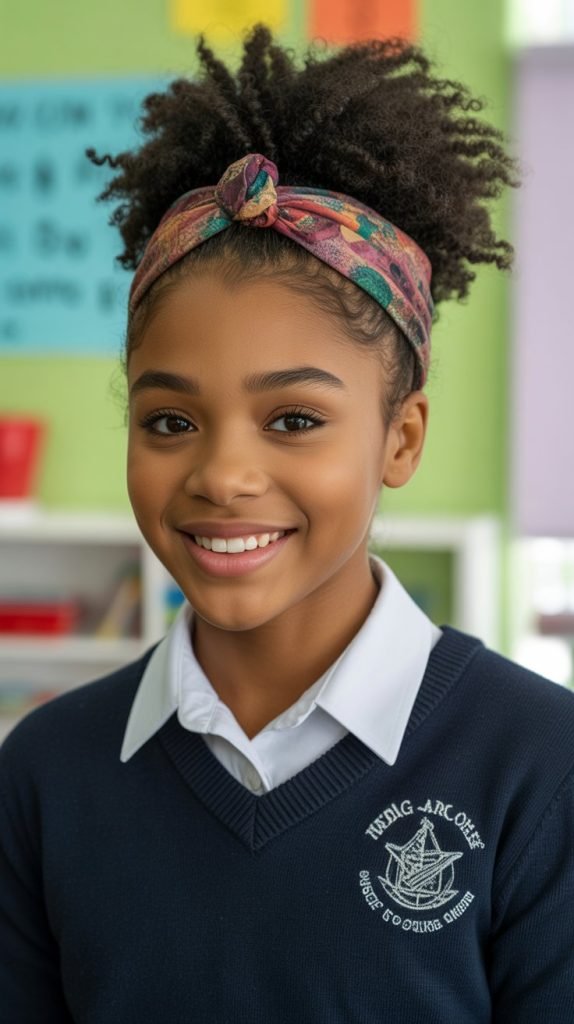
The high puff represents one of the quickest and most elegant solutions for busy school mornings while showcasing natural texture.
This style works exceptionally well for 4C hair because it embraces the hair’s natural volume and creates a polished silhouette.
The addition of a decorative headband elevates the look from casual to sophisticated.
Creating the Perfect Puff:
- Begin with stretched hair from a previous twist-out or braid-out for easier manipulation.
- Smooth the edges with a natural gel or edge control product for a sleek finish.
- Gather all hair at the crown using a soft, fabric-covered elastic band to prevent breakage.
- Fluff the puff with fingers or a wide-tooth comb to achieve desired volume and shape.
- Position a coordinating headband along the hairline to add color and secure any shorter strands.
Styling Variations:
- Create a side puff by positioning the gathering point near one ear for asymmetrical interest.
- Use multiple colored headbands stacked together for a trendy, layered accessory look.
- The style typically lasts one to two days before requiring reshaping and edge smoothing.
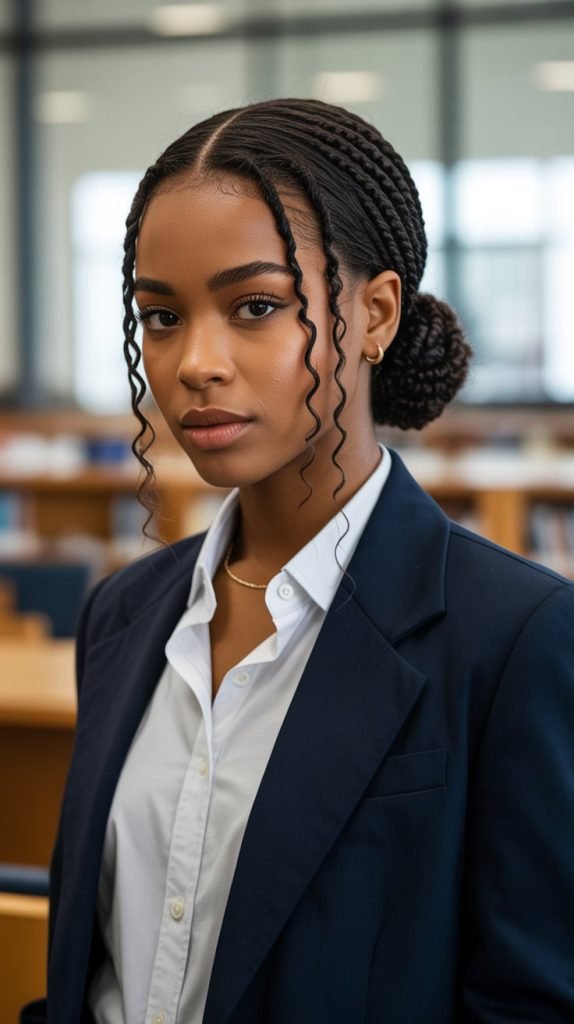
3. Flat Twist Updo
Flat twists create a sophisticated foundation for various updo styles that work perfectly in academic environments.
This technique lies flat against the scalp similar to cornrows but uses a two-strand twisting method. The resulting style offers protection, elegance, and versatility for school days.
Installation Steps:
- Section the hair into desired patterns such as straight back, curved, or geometric designs.
- Start each flat twist at the hairline by taking a small section and dividing it into two parts.
- Add small amounts of hair to each section as you twist, similar to the cornrowing technique.
- Continue twisting until reaching the crown area, then gather all loose ends into a bun or tucked style.
- Secure the updo with bobby pins that match your hair color for a seamless appearance.
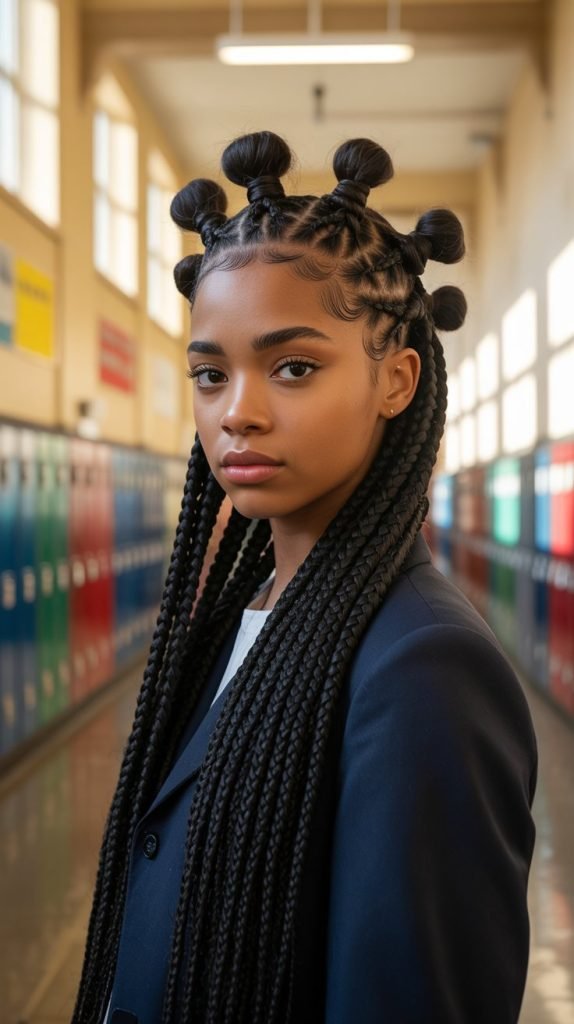
4. Bantu Knots
Bantu knots serve double duty as both a striking standalone style and a setting technique for beautiful curls.
This traditional African hairstyle creates small, coiled buns across the scalp that look polished and intentional.
For school settings, this style showcases cultural heritage while remaining practical and long-lasting.
Creating Bantu Knots:
- Work with freshly moisturized hair that has been detangled completely to prevent breakage.
- Divide hair into square or triangular sections using a rattail comb for clean parts.
- Apply a styling cream or gel to each section before twisting it tightly from root to tip.
- Coil the twisted section around itself to form a small knot at the base.
- Secure each knot by tucking the end underneath or using a small bobby pin.
Versatility Factor:
- Wear the knots as a complete style for 3-5 days with proper nighttime protection.
- Unravel the knots after a few days to reveal defined spiral curls for a completely different look.
- Smaller sections create tighter curls while larger sections produce looser waves when unraveled.
5. Cornrows with Extensions
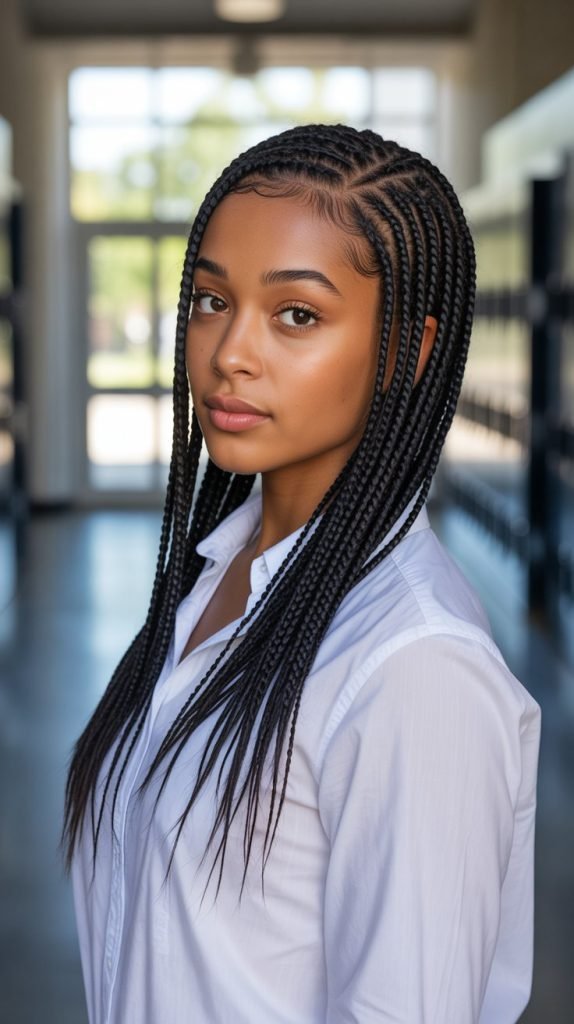
Cornrows with added extensions provide one of the longest-lasting protective styles perfect for students with demanding schedules.
This technique involves braiding hair close to the scalp while incorporating synthetic hair for added length, thickness, and styling possibilities.
The result offers weeks of carefree hair management.
Installation Process:
- Choose high-quality braiding hair that matches your natural texture and desired color.
- Section the hair into straight lines or creative patterns depending on your preferred design.
- Begin each cornrow at the hairline, feeding in the extension hair gradually for a natural appearance.
- Braid tightly enough to ensure longevity but not so tight that it causes tension or headaches.
- Seal the ends by dipping them in hot water or using a lighter carefully to prevent unraveling.
Pattern Ideas:
- Straight-back cornrows create a classic, timeless look suitable for any school environment.
- Side-swept designs add dimension and modern flair while keeping hair off the face.
- Tribal patterns incorporating curves and geometric shapes showcase artistic expression and cultural pride.
Care Instructions:
- Maintain the style by wrapping hair with a silk scarf each night to prevent frizz.
- Apply light oil to the scalp weekly to prevent dryness and itching.
- The style typically lasts 4-6 weeks before requiring removal and reinstallation.
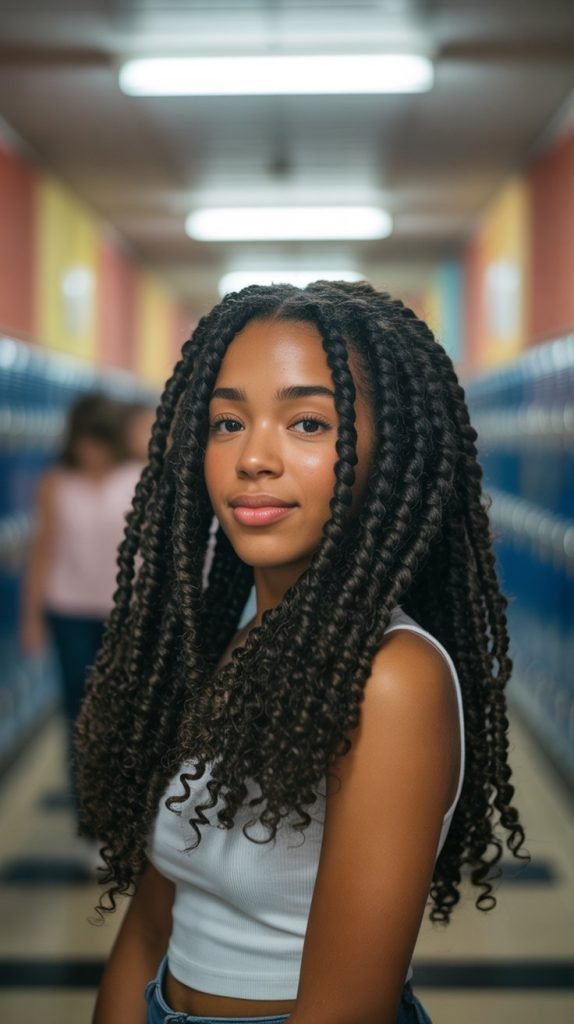
6. Twist Out with Defined Curls
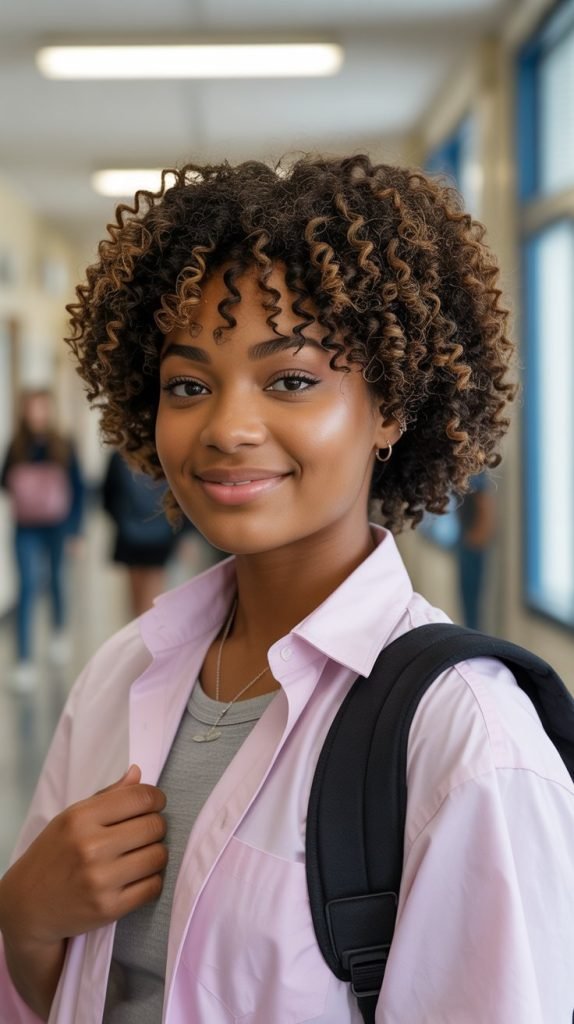
The twist-out technique transforms two-strand twists into voluminous, defined curls that celebrate 4C texture.
This style works beautifully for school because it looks polished and intentional while allowing your natural hair to shine.
The resulting curl pattern offers bounce, movement, and versatility.
Achieving the Perfect Twist-Out:
- Start with clean, conditioned hair that has been thoroughly detangled using a wide-tooth comb.
- Apply a leave-in conditioner followed by a curl-defining cream for maximum definition and hold.
- Create small to medium two-strand twists throughout the entire head, ensuring even product distribution.
- Allow twists to dry completely overnight or for at least 8-12 hours before unraveling.
- Gently separate each twist into 2-3 smaller sections for increased volume and definition.
Styling Enhancements:
- Use a diffuser attachment on low heat to speed up the drying process on busy mornings.
- Add a shine serum or light oil to the finished style for increased luster without heaviness.
- Refresh the style on day two or three by misting with water and applying more curl cream to selected sections.
Longevity Tips:
- The style typically maintains its definition for 3-5 days with proper nighttime maintenance.
- Pineapple the hair at night by gathering it loosely at the crown to preserve curl pattern.
- Use a satin bonnet or pillowcase to minimize friction and frizz while sleeping.
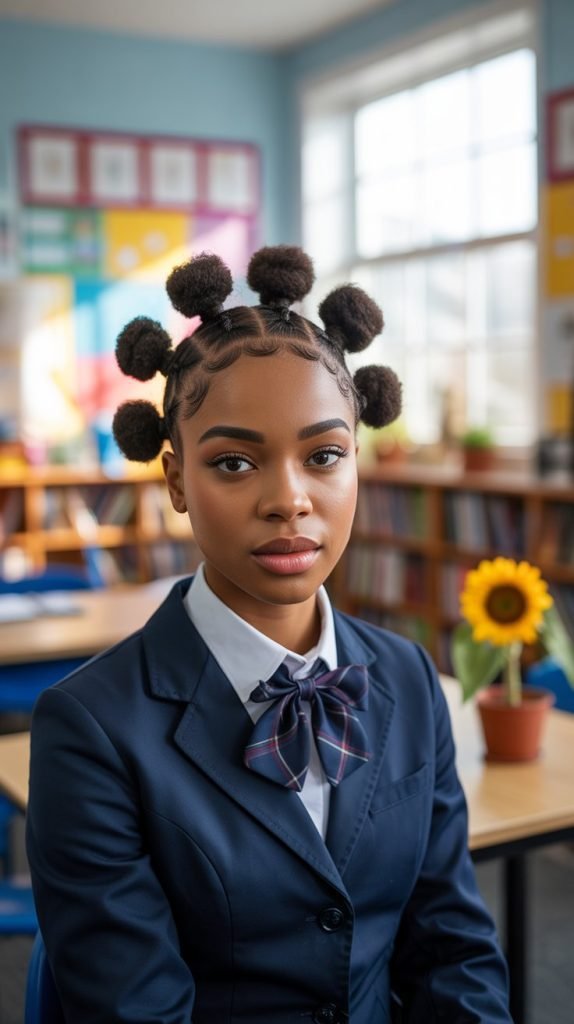
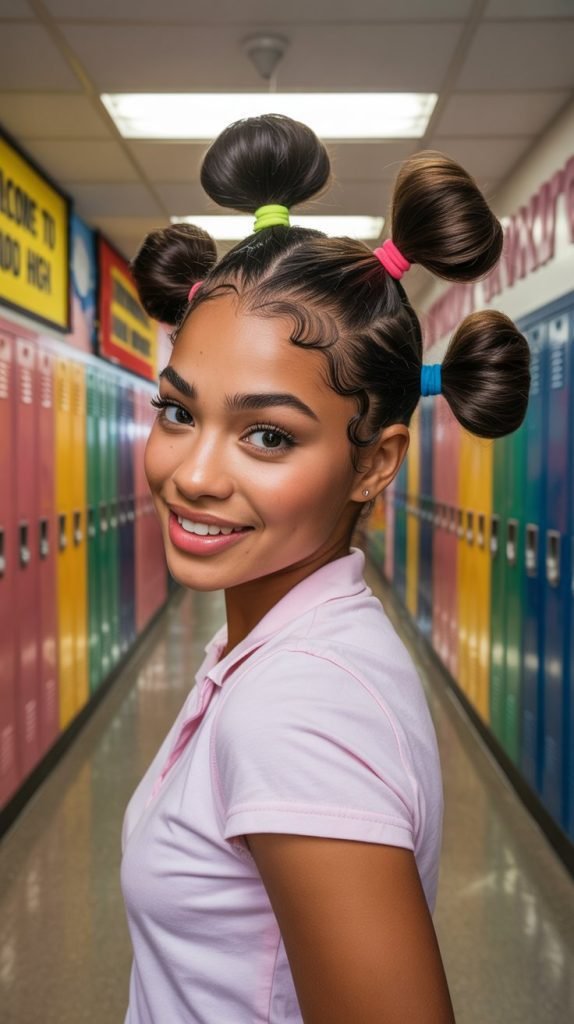
7. Space Buns with 4C Texture
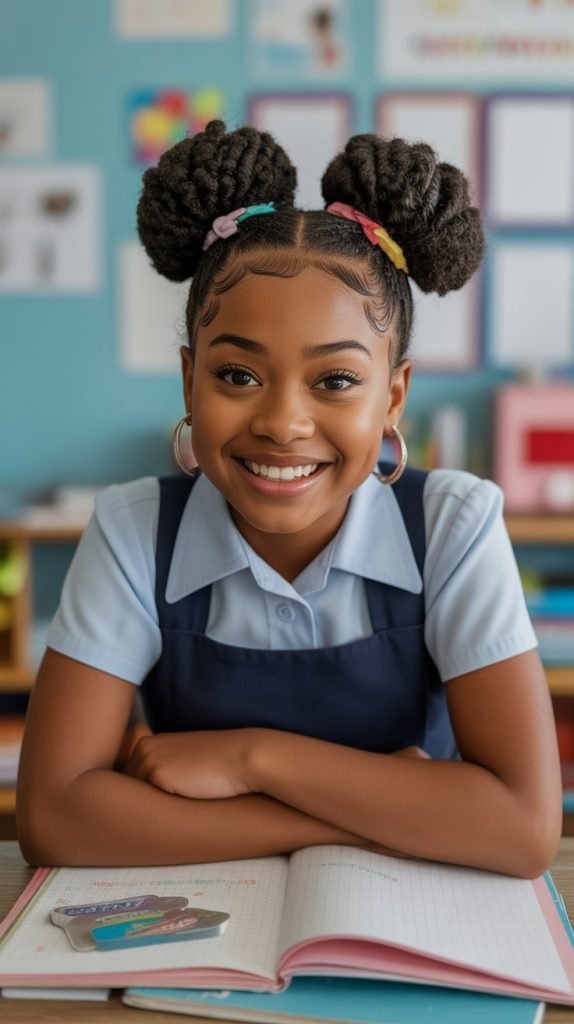
Space buns bring a playful, youthful energy to school hairstyles while working exceptionally well with 4C hair’s natural volume.
This style involves creating two buns positioned high on the head, offering a trendy look that’s both practical and expressive. The style keeps hair secured while making a fashion statement.
Creating Space Buns:
- Part hair down the middle from forehead to nape, creating two equal sections.
- Smooth each section with gel or edge control, gathering them into high pigtails on either side.
- Twist each pigtail section before wrapping it around the base to form a bun shape.
- Secure each bun with bobby pins and elastic bands that match your hair color.
- Pull out a few face-framing pieces or edges for a softer, more relaxed appearance.
8. Faux Hawk with Flat Twists
The faux hawk combines edgy modern styling with traditional flat twist techniques for a bold school-appropriate statement.
This style creates the illusion of a mohawk without requiring shaved sides, making it perfect for students who want dramatic flair while maintaining versatility.
The raised center section showcases volume and creativity.
Building the Faux Hawk:
- Create flat twists on both sides of the head, angling them toward the center to create the “shaved” appearance.
- Leave the center section free, stretching it upward to form the mohawk ridge.
- Use strong-hold gel or mousse to slick down the flat-twisted sides for maximum contrast.
- Style the center section by twisting it, braiding it, or leaving it in a voluminous natural state.
- Secure the center with bobby pins arranged strategically to maintain the upward height.
Height and Volume Techniques:
- Backcomb or tease the center section gently to increase height without causing damage.
- Use a firm-hold gel to sculpt the center into dramatic peaks or waves.
- Consider adding a decorative hair cuff or accessory along the center ridge for extra impact.
Duration and Maintenance:
- The style typically lasts 5-7 days with the flat-twisted sides maintaining their sleekness.
- Touch up the center section daily by applying water and styling product for refreshed definition.
- Sleep with a satin scarf wrapped carefully to preserve the shape without flattening the center.
9. Halo Braid Crown
The halo braid creates an elegant, crown-like appearance that works beautifully for special school events and everyday wear.
This style involves braiding hair around the perimeter of the head, creating a regal silhouette that keeps hair secured and protected.
The technique flatters all face shapes and showcases skillful styling.
Creating the Halo:
- Start with stretched or slightly damp hair for easier manipulation and smoother braiding.
- Begin the braid at one point near the ear, taking a small section and dividing it into three parts.
- Braid around the head in a circular pattern, adding hair from the outer edge as you progress.
- Continue braiding until you complete the full circle, tucking the end underneath the starting point.
- Secure with bobby pins and apply edge control to smooth any flyaways along the hairline.
Styling Enhancements:
- Weave a colorful ribbon or thin scarf through the braid for added visual interest and school spirit.
- Create a double halo by making two parallel braids instead of one for increased dimension.
- Pull the braid slightly to create a fuller, more voluminous appearance against the head.
10. Mini Twists
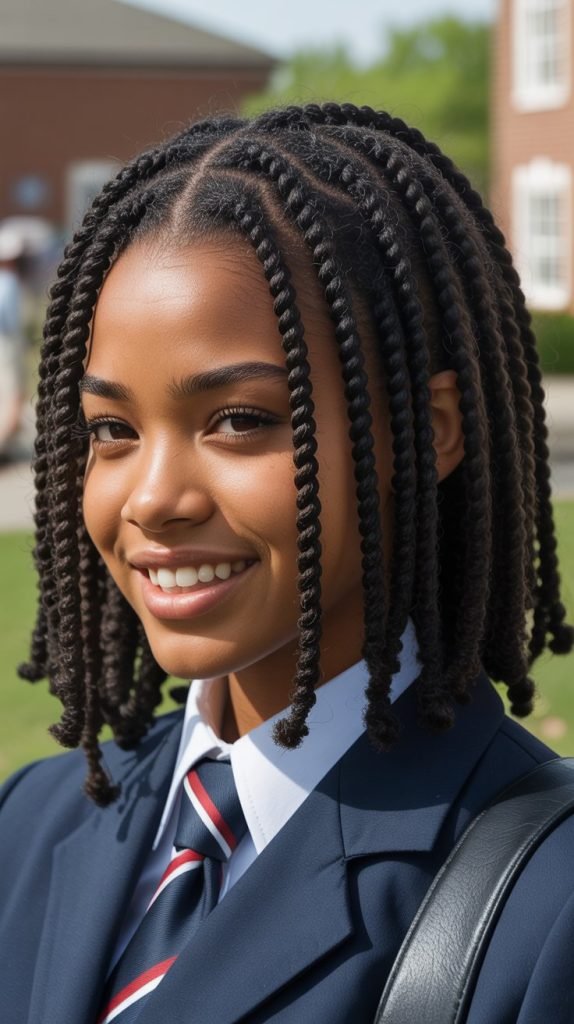
Mini twists represent the ultimate protective style for 4C hair, offering maximum versatility and extended wear time.
These tiny two-strand twists may require significant installation time but provide weeks of styling options with minimal daily manipulation.
The small size creates a fuller appearance and allows for countless styling possibilities.
Installation Guidelines:
- Set aside 4-8 hours for installation depending on hair length, density, and desired twist size.
- Work with clean, deep-conditioned hair that has been detangled section by section.
- Create very small sections no larger than a pencil width for true mini twists.
- Apply a light cream or butter to each section before twisting for definition and moisture retention.
- Twist from root to tip, ensuring even tension throughout to prevent weak spots or unraveling.
Styling Versatility:
- Wear the twists down in their full length for a classic, elegant everyday school look.
- Pull them into high ponytails, buns, or half-up styles for variety throughout the weeks.
- Create twist-outs by unraveling individual twists for special occasions, then re-twisting for continued protection.
Maintenance Schedule:
- The style can last 6-8 weeks with proper care and regular moisturizing.
- Apply a light oil or water-based spray every 3-4 days to maintain moisture levels.
- Focus on keeping the scalp clean and healthy by using a diluted shampoo or cleansing spray weekly.
11. Side-Swept Twist Style
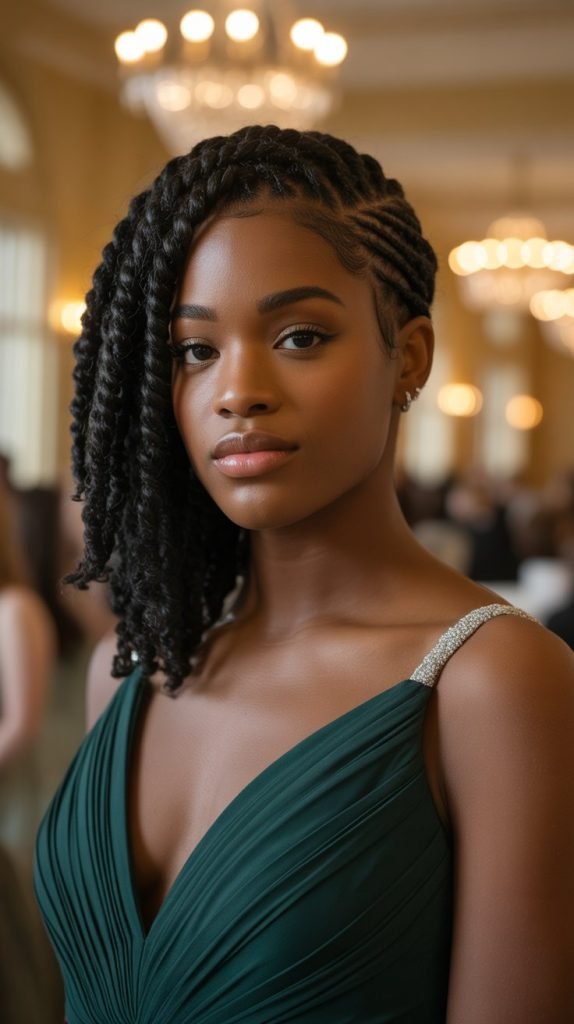
The side-swept twist style combines elegance with asymmetry, creating a sophisticated look perfect for school presentations or special events.
This technique involves gathering twisted hair to one side, showcasing both the styling and the natural beauty of 4C texture.
The dramatic side placement draws attention while keeping hair manageable.
Achieving the Side Sweep:
- Create two-strand twists or flat twists throughout the entire head using your preferred technique.
- Gather all twists to one side of the head, positioning them over one shoulder.
- Secure the gathered twists with bobby pins along the opposite side to maintain the sweep.
- Smooth down the side without twists using edge control for a sleek, polished contrast.
- Arrange the hanging twists artfully over the shoulder, separating them slightly for increased volume.
Occasion Suitability:
- Perfect for school photos, presentations, and performances where a polished appearance matters.
- Works equally well for casual school days by adjusting the tightness and formality of the sweep.
- Easily transitions from day to night by adding decorative pins or hair jewelry.
12. Pineapple Updo
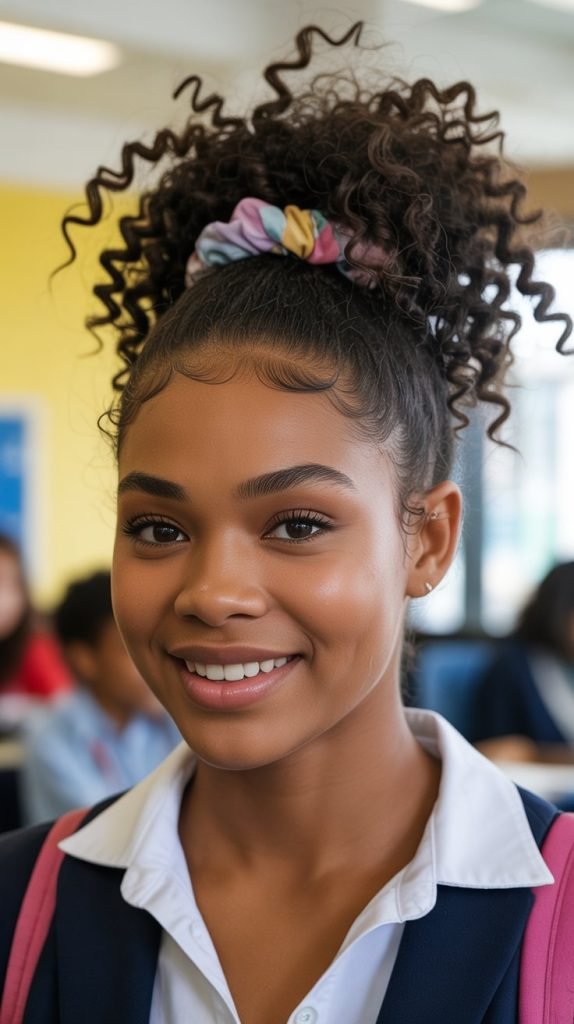
The pineapple updo serves as both a protective nighttime technique and a stylish daytime look for 4C hair.
This method involves gathering hair at the crown in a high, loose ponytail that resembles the top of a pineapple.
The style protects curls and coils while creating an effortlessly chic appearance.
Creating the Pineapple:
- Flip head upside down and gather all hair at the highest point of the head.
- Use a loose fabric scrunchie or satin elastic to secure without creating dents or tension.
- Allow the gathered hair to fall naturally around the elastic, creating a fountain-like cascade.
- Smooth edges with a light gel or edge control for a neater appearance if desired.
- Adjust individual sections within the pineapple to ensure even distribution and maximum volume.
Daytime Variations:
- Add a colorful scarf or headband around the base for a pop of color and personality.
- Create multiple smaller pineapples across the head for a playful, segmented look.
- Pull out face-framing pieces to soften the overall appearance and showcase curl pattern.
Protection Benefits:
- Preserves curl definition between wash days by minimizing friction and manipulation.
- Reduces tangling and breakage during sleep when used as a nighttime protective style.
- Requires only 2-3 minutes to create, making it ideal for rushed morning routines.
13. Braided Ponytail with Curly Ends
The braided ponytail combines structure and texture by featuring neat braids that transition into free-flowing curly ends.
This style offers the security and polish of a ponytail while showcasing the natural beauty of 4C curl pattern.
The combination creates visual interest and practical functionality for active school days.
Construction Method:
- Gather hair into a ponytail at desired height using a strong elastic band.
- Divide the ponytail into sections and create individual braids within the gathered hair.
- Stop braiding 2-3 inches from the ends, leaving the remaining hair unbraided and curly.
- Fluff and separate the curly ends to increase volume and showcase texture.
- Wrap a small section of hair around the elastic base to conceal it for a polished finish.
14. Twist and Pin Style
The twist and pin technique creates an elegant updo by twisting sections of hair and securing them with decorative pins.
This versatile style works beautifully for 4C hair texture, offering sophistication suitable for both daily wear and special school occasions.
The method allows for creativity while maintaining security throughout busy school days.
Step-by-Step Process:
- Work with stretched or blown-out 4C hair for easier manipulation and smoother twisting.
- Divide hair into 4-6 large sections depending on hair density and desired final appearance.
- Twist each section individually from root to tip, maintaining even tension throughout.
- Wrap each twist around itself or pin it flat against the head in an artistic pattern.
- Secure each twist with color-matched bobby pins, crossing them in an X formation for maximum hold.
Design Possibilities:
- Create a low twisted bun by gathering all twists at the nape and pinning them in a circular pattern.
- Arrange twists in a criss-cross pattern across the back of the head for geometric interest.
- Pin twists vertically or horizontally depending on the shape and volume you want to achieve.
Decorative Elements:
- Use decorative bobby pins with pearls or rhinestones for special school events like dances or ceremonies.
- Add small flower clips between the pinned sections for a romantic, feminine touch.
- Choose metallic pins in gold or silver to add subtle glamour without overwhelming the style.
15. Chunky Flat Twist Out
The chunky flat twist out offers maximum volume and definition by using larger sections during the flat twisting process.
This style creates dramatic, bold waves and curls perfect for making a statement at school.
The larger twist size reduces installation time while still providing the benefits of a protective style and defined curl pattern.
Creating Chunky Definition:
- Section hair into 6-10 large sections depending on desired wave size and hair density.
- Create flat twists using the larger sections, ensuring smooth technique despite the increased hair amount.
- Allow twists to set completely overnight or for at least 8 hours for maximum definition.
- Carefully unravel each flat twist by unwinding from the ends toward the roots.
- Separate each unraveled twist into 2-3 sections for increased fullness without losing definition.
Volume Maximization:
- Lift roots gently while fluffing to create height and prevent the style from lying flat.
- Use a pick or wide-tooth comb at the roots only to increase lift without disturbing curl pattern.
- Apply a light oil or shine spray to enhance luster and reduce any frizz from separation.
Style Longevity:
- The chunky flat twist out typically maintains definition for 3-5 days with proper nighttime care.
- Refresh by misting with water mixed with leave-in conditioner on subsequent days.
- Transition the style into a pineapple or bun on later days when definition begins to fade.
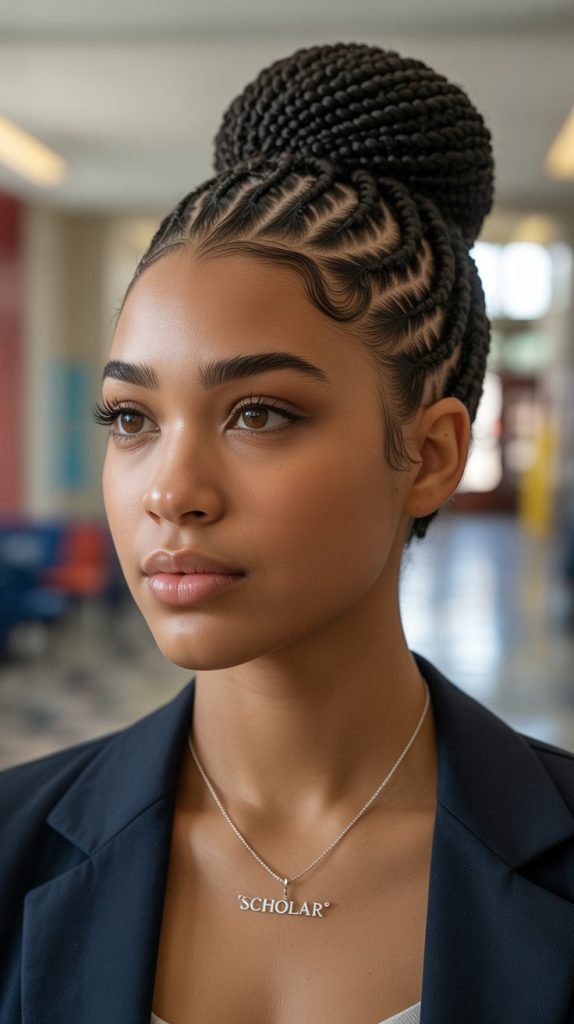
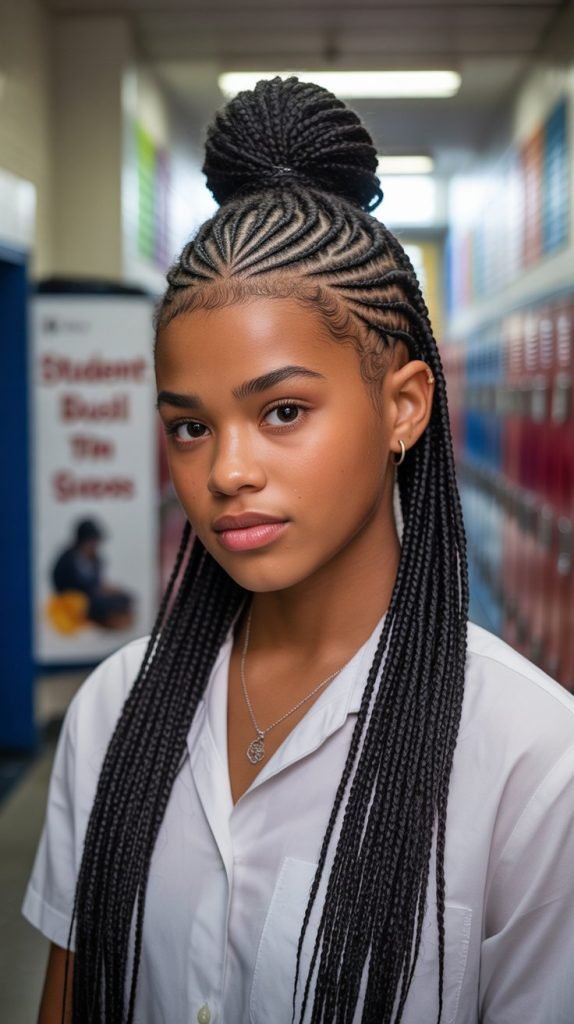
16. Braided Bun with Textured Edges
The braided bun combines the elegance of an updo with the intricate detail of braiding for a refined school-appropriate style.
This technique involves braiding the hair and securing it in a bun shape while allowing edges to remain textured and natural.
The contrast between sleek braids and textured edges creates visual interest.
Construction Technique:
- Start by sectioning hair and creating multiple cornrows or individual braids throughout the head.
- Gather all braided sections at a chosen position such as crown, nape, or side of head.
- Wrap the braids around themselves in a circular or spiral pattern to form a bun shape.
- Secure the bun with bobby pins inserted at various angles for stability.
- Leave edges and baby hairs in their natural textured state or define them with edge control.
Bun Position Impact:
- High buns create an elongated silhouette and work well for athletic activities.
- Low buns offer classic sophistication perfect for formal school presentations or events.
- Side buns provide asymmetrical interest and showcase creativity while remaining professional.
Texture Balance:
- The smoothness of the braids contrasts beautifully with the natural texture of left-out edges.
- Consider the amount of edge hair to leave out based on personal preference and hair growth pattern.
- Use a natural gel to enhance edge texture without causing stiffness or flaking.
17. Goddess Braids
Goddess braids feature thick, chunky cornrows that create a bold, statement-making style perfect for school wear.
This protective style typically uses extensions to add length and thickness, resulting in larger braids that install faster than traditional cornrows.
The dramatic size showcases intricate parting patterns and offers weeks of low-maintenance styling.
Installation Process:
- Choose quality braiding hair that matches or complements your natural hair color.
- Create larger sections than traditional cornrows, typically 4-8 braids total depending on desired thickness.
- Feed extension hair into the cornrow as you braid, creating uniform thickness from root to tip.
- Braid with moderate tension to ensure longevity without causing discomfort or traction alopecia.
- Seal ends using the hot water dipping method for a neat, secure finish.
Popular Patterns:
- Straight-back goddess braids create clean, vertical lines that elongate the face and head.
- Curved patterns add artistic flair and softer lines compared to straight geometric designs.
- Side-swept goddess braids create asymmetry and can be styled into side buns or ponytails.
Styling Flexibility:
- Wear the braids down for a flowing, dramatic everyday school look.
- Pull them into a high ponytail or bun for athletic activities or formal events.
- Wrap them into various updo configurations for different looks throughout the 4-6 week wear period.
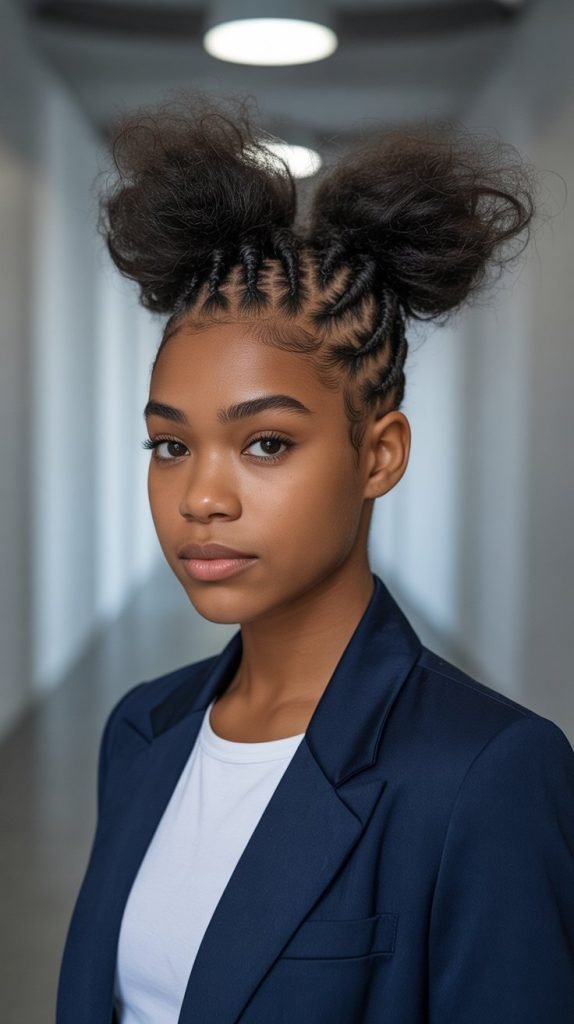
18. Afro Puff with Twist Front
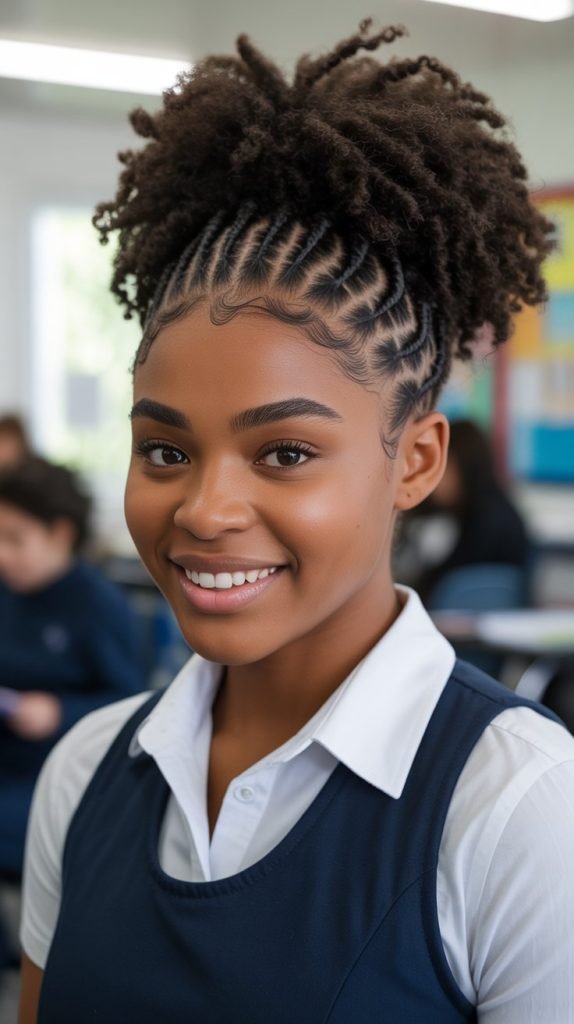
This style celebrates natural 4C texture by combining a voluminous afro puff with defined twists at the hairline.
The contrast between the structured front and the free-form puff creates dimension and visual interest.
This look works exceptionally well for school because it’s quick to achieve while making a bold natural hair statement.
Styling Steps:
- Create 2-4 flat twists or two-strand twists along the front hairline from temple to temple.
- Apply edge control and curl cream to the twisted sections for maximum definition and hold.
- Gather the remaining hair at the crown or desired height using a fabric-covered elastic.
- Pick out the puff section to achieve maximum volume and desired shape.
- Smooth any edges or stray hairs while maintaining the natural texture of the puff.
Front Twist Variations:
- Create thin flat twists for subtle definition that doesn’t overpower the puff volume.
- Make thicker two-strand twists for more dramatic contrast and visual weight at the hairline.
- Experiment with twist direction by angling them toward the center or sweeping them to one side.
Volume Enhancement:
- Use a hair pick or wide-tooth comb to lift the puff from the roots for maximum height.
- Shape the puff into a rounded, uniform shape or leave it naturally irregular for organic texture.
- Apply a light oil or anti-humidity spray to enhance shine and reduce frizz throughout the day.
19. Cornrow Mohawk Design
The cornrow mohawk creates an edgy, fashion-forward look by braiding the sides flat while leaving the center section raised or styled differently.
This modern interpretation of traditional cornrows offers bold visual impact while remaining school-appropriate.
The style combines protective benefits with creative expression.
Creating the Mohawk Effect:
- Part hair to create a wide center section running from forehead to nape approximately 3-4 inches wide.
- Cornrow the side sections tightly, braiding toward the center strip to create the shaved illusion.
- Style the center section by leaving it loose, braiding it, twisting it, or creating decorative patterns.
- Use strong-hold gel on the cornrowed sides for maximum sleekness and contrast.
- Experiment with different center treatments based on hair length and desired final appearance.
20. Twisted Crown with Down Curls
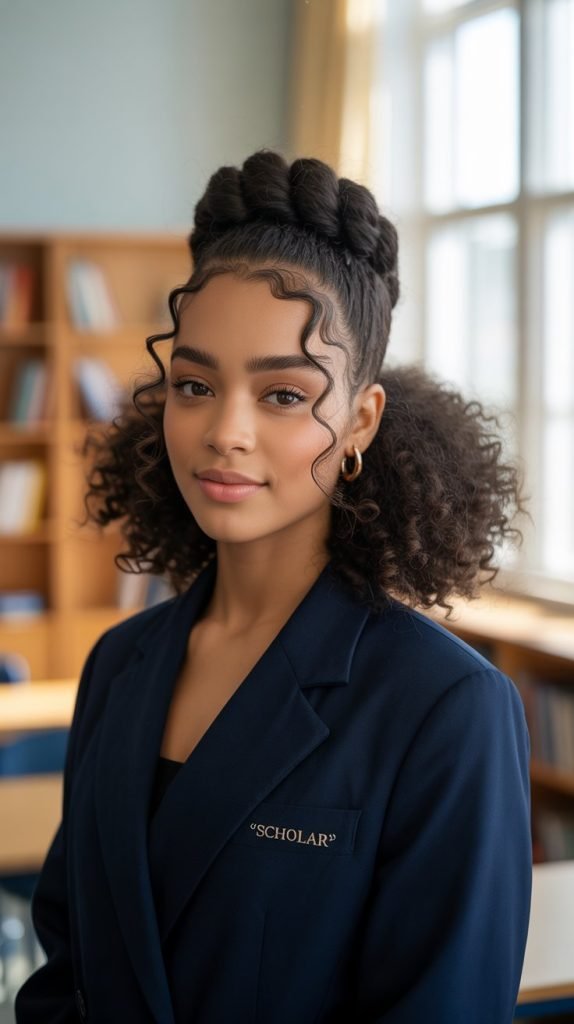
This romantic style features twisted sections forming a crown around the head while the remaining hair flows freely in natural curls.
The combination offers the best of both worlds: structured elegance at the top and free-flowing texture below.
This versatile style transitions seamlessly from classroom to special school events.
Construction Method:
- Part a horizontal section of hair from ear to ear across the top of the head.
- Create flat twists or two-strand twists within this section, working them around the head like a crown.
- Leave the remaining bottom section loose in its natural curl pattern or define it with styling products.
- Connect the crown twists at the back by pinning them together or allowing them to merge naturally.
- Fluff and separate the down curls to achieve desired volume and curl definition.
Crown Pattern Ideas:
- Create a single thick twist that wraps around the head for simplicity and bold definition.
- Make multiple thinner twists in the crown section for increased texture and intricate detail.
- Incorporate a zigzag or curved pattern instead of following the natural hairline for creative expression.
Curl Enhancement:
- Apply curl-defining cream to the down section before allowing it to air dry or diffuse.
- Use the shingling method on individual curl clumps for maximum definition and separation.
- Refresh second and third-day curls with a water-based spray and light oil mixture.
21. Box Braids in Various Lengths
Box braids represent one of the most iconic and versatile protective styles for 4C hair in school settings.
These individual plaits can be customized in length, thickness, and color to reflect personal style while providing weeks of protective styling.
The square or triangular parting pattern creates a neat, organized appearance.
Installation Guidelines:
- Decide on desired braid size ranging from micro (very thin) to jumbo (thick) based on preference and time availability.
- Choose extension hair quality carefully, opting for pre-stretched or braiding hair that minimizes tension.
- Create clean, geometric parts in square or diamond patterns for the signature box braid appearance.
- Braid each section from root to tip, feeding in extension hair gradually for seamless integration.
- Seal ends by dipping in hot water or using a lighter to prevent unraveling during the wear period.
Length Considerations:
- Shoulder-length box braids offer versatility without excessive weight or maintenance challenges.
- Waist-length braids make a dramatic statement but require careful nighttime wrapping to prevent tangling.
- Bob-length box braids provide a trendy, manageable option perfect for active students and athletes.
Styling Versatility:
- Wear box braids down for classic elegance suitable for any school occasion.
- Pull them into ponytails, buns, half-up styles, or braided updos for variety throughout the 6-8 week period.
- Experiment with accessories like beads, cuffs, or colored extensions for personalized flair.
22. Twisted Bangs with Slicked Back Style
This sleek, sophisticated style features twisted sections at the front that serve as bangs while the remaining hair is smoothed back into a bun or ponytail.
The design creates a polished, professional appearance perfect for school presentations, interviews, or formal events while celebrating natural texture through the twisted elements.
Creating Twisted Bangs:
- Section out the front hairline area from temple to temple, approximately 2-3 inches deep.
- Create 3-5 individual two-strand twists within this section, allowing them to frame the face.
- Apply strong-hold gel to the remaining hair, smoothing it back toward the crown or nape.
- Use a brush or edge brush to achieve maximum sleekness in the slicked-back portions.
- Secure the back section in a bun, ponytail, or tucked style depending on hair length.
Bang Twist Variations:
- Create thin, delicate twists for a subtle feminine framing effect around the face.
- Make thicker, chunkier twists for bold statement bangs that command attention.
- Experiment with twist length, allowing some to reach eyebrows while others extend to cheekbones.
Hold and Finish:
- Choose alcohol-free gels to avoid drying out hair while maintaining strong hold.
- Apply edge control specifically along the hairline for extra smoothness and definition.
23. Jumbo Senegalese Twists
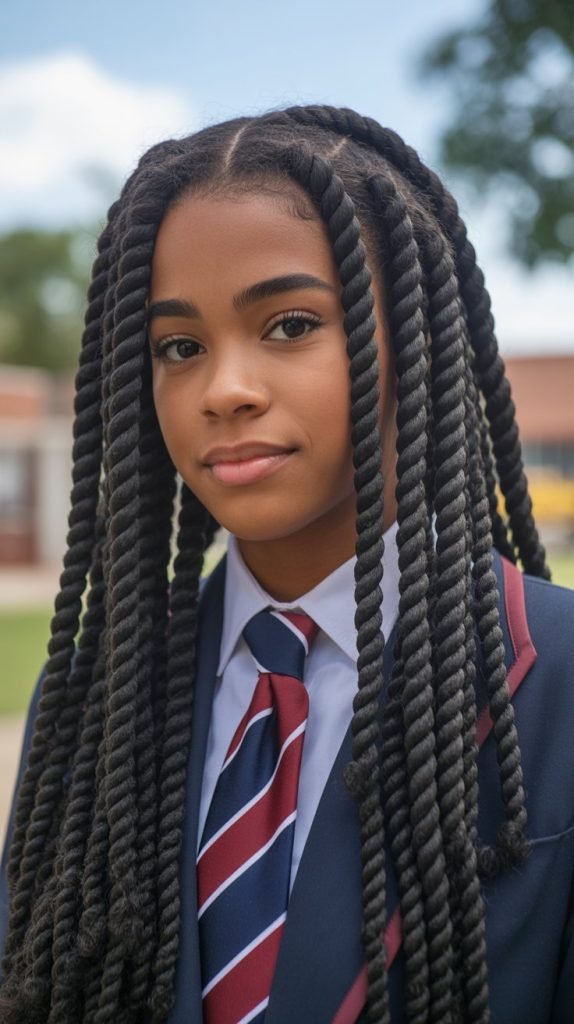
Jumbo Senegalese twists offer a faster installation alternative to traditional smaller twists while providing the same protective benefits.
These rope-like twists use two strands of extension hair twisted together with natural hair, creating smooth, uniform sections.
The larger size makes a bold statement perfect for confident students embracing protective styling.
Installation Process:
- Select smooth Kanekalon or Xpression hair for the characteristic silky appearance of Senegalese twists.
- Divide hair into large square sections, typically creating 20-40 twists total for jumbo sizing.
- Split the extension hair into two sections and twist them together with the natural hair.
- Continue twisting with consistent tension from root to tip for uniform thickness throughout.
- Seal ends by dipping in hot water, which creates a curled finish and prevents unraveling.
Size Benefits:
- Jumbo sizing reduces installation time to 3-5 hours compared to 6-10 hours for medium twists.
- The larger diameter creates less tension on the scalp and edges, promoting healthier hair growth.
- Despite their size, jumbo twists remain lightweight and comfortable for extended wear periods.
24. Natural Wash and Go with Gel Definition

The wash and go celebrates 4C hair in its most natural state by defining curls with styling products and allowing them to air dry or diffuse.
This technique showcases authentic texture while providing definition, shine, and manageability for school days.
The style emphasizes embracing natural shrinkage and curl pattern.
Wash and Go Technique:
- Begin with freshly washed hair using a sulfate-free shampoo and deep conditioner for maximum moisture.
- Apply products to soaking wet hair while still in the shower for best absorption and definition.
- Use the praying hands method to smooth a leave-in conditioner through each section from root to tip.
- Follow with a curl-defining gel, applying generously and using the raking or shingling method for curl clumps.
- Allow hair to air dry completely or use a diffuser on low heat to speed the process without causing frizz.
Product Layering:
- Start with a water-based leave-in conditioner as the foundation layer for moisture retention.
- Add a curl cream or butter in the middle for enhanced definition and softness.
- Finish with a strong-hold gel as the final layer to lock in definition and reduce frizz.
Drying Methods:
- Air drying produces the softest results but requires 4-8 hours depending on hair density and length.
- Diffusing on low heat reduces drying time to 1-2 hours while maintaining curl definition.
- Hooded dryers offer hands-free drying and can enhance shine when used on low to medium heat.
Maintenance Between Wash Days:
- The style typically lasts 3-5 days before requiring a complete refresh or re-wash.
- Revive curls on day two and beyond using a water-based spray mixed with leave-in conditioner.
- Focus on preserving the style at night using the pineapple method or a satin bonnet.
25. Crochet Braids with Curly Hair
Crochet braids provide versatile protective styling by cornrowing the natural hair and attaching pre-made curly hair extensions using a crochet needle.
This method offers the appearance of a full, voluminous twist-out or braid-out without the time investment of individual styling.
The technique works beautifully for students seeking low-maintenance curly styles.
Installation Steps:
- Create a cornrow base pattern across the entire head, typically using straight-back or circular patterns.
- Choose crochet hair that matches 4C texture such as Freetress Water Wave, Jamaican Bounce, or Soft Dread.
- Use a crochet needle to loop the pre-curled hair through the cornrow base at regular intervals.
- Continue attaching hair throughout the entire head until achieving desired fullness and coverage.
- Style the perimeter by leaving out some natural hair for seamless blending with the extensions.
Hair Selection:
- Water wave patterns create loose, flowing curls perfect for a beachy, relaxed school look.
- Kinky curly textures most closely match natural 4C hair for authentic-looking volume.
- Spring twist or passion twist styles offer defined, uniform curls with a polished appearance.
Maintenance Requirements:
- The style lasts 4-6 weeks with proper nighttime wrapping and minimal manipulation.
- Maintain the curls by misting with water and applying mousse or curl refresher spray every 2-3 days.
- Access the cornrowed base for scalp care by gently parting the crochet hair to apply oil or cleansing spray.
26. Asymmetrical Flat Twist Style
The asymmetrical flat twist style creates visual interest through intentional imbalance, featuring different patterns, sizes, or directions on each side of the head.
This modern approach to traditional flat twisting allows for creative expression while maintaining the protective and practical benefits.
The style works perfectly for students who want to showcase individuality.
Creating Asymmetry:
- Plan the design by deciding which elements will differ between the two sides of the head.
- Consider varying the twist size, with thin twists on one side and thick twists on the other.
- Experiment with directional changes such as diagonal twists on one side and curved patterns opposite.
- Work with contrasting patterns like straight-back on one side and geometric designs on the other.
- Maintain balance despite asymmetry by ensuring both sides have intentional, polished execution.
Design Inspiration:
- Create an undercut illusion on one side using very thin, tightly spaced flat twists.
- Feature decorative swirls or spiral patterns on one side while keeping the other sleek and simple.
- Sweep all twists to one side for dramatic asymmetrical weight and visual impact.
Styling the Ends:
- Gather twist ends into a side bun, ponytail, or tucked style depending on desired finish.
- Leave ends loose for a softer, more flowing appearance that highlights the asymmetrical base.
- Add beads or cuffs to the ends on one side only to emphasize the intentional imbalance.
27. Bubble Ponytail with 4C Texture
The bubble ponytail adds playful dimension to a classic style by creating segmented “bubbles” along the length of a ponytail.
This trendy look works beautifully with 4C hair’s natural volume, creating bold, statement-making spheres.
The style offers visual interest while keeping hair secured and manageable throughout school days.
Creating Bubble Sections:
- Start by pulling hair into a high, mid, or low ponytail using a strong elastic band.
- Place additional elastic bands down the length of the ponytail at 2-3 inch intervals.
- Gently pull and tease the hair between each elastic to create rounded bubble shapes.
- Continue adding elastics and creating bubbles until reaching the end of the ponytail length.
- Adjust each bubble by pulling sections outward for uniform size and maximum volume.
Bubble Enhancement:
- Use colorful elastics that match school colors or personal style preferences for added visual interest.
- Vary bubble sizes by changing the distance between elastics for a more organic, playful appearance.
- Add small decorative clips or pins to each elastic band for extra embellishment on special days.
Texture Consideration:
- 4C hair’s natural density creates fuller, more dramatic bubbles compared to looser curl patterns.
- Pre-stretch hair using a blow dryer or banding method for easier bubble creation and more defined shapes.
- The style works with various hair lengths, though longer hair creates more bubble opportunities.
28. Frohawk with Twists
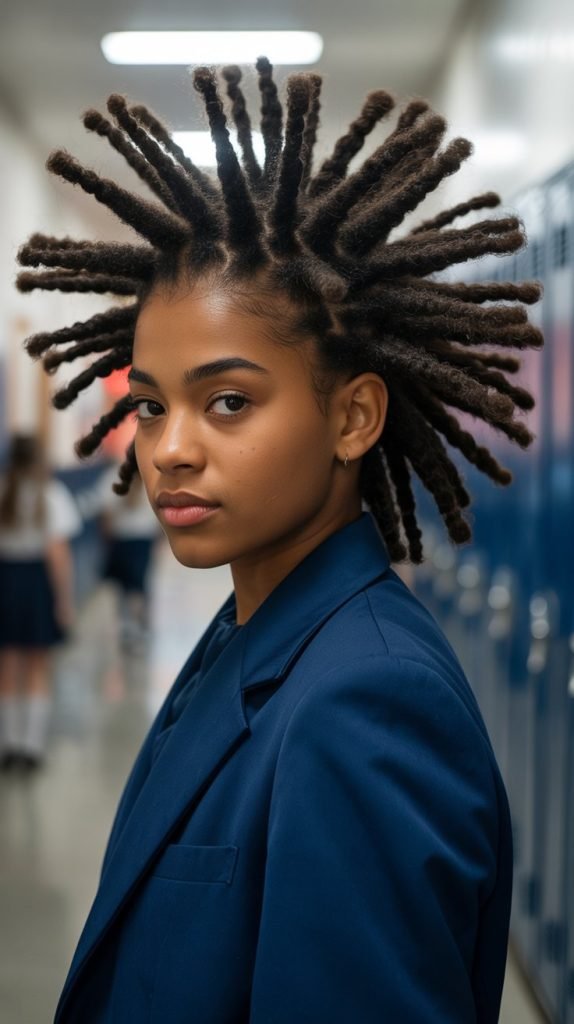
The frohawk combines the volume of a natural afro with the structure of a mohawk silhouette, enhanced by twist details on the sides.
This style creates dramatic height at the center while keeping sides secured, perfect for students who want bold natural hair statements.
The twists add texture and detail to the overall sculptural effect.
Building the Frohawk:
- Create flat twists or two-strand twists on both sides of the head, working them toward the back or downward.
- Leave a wide center section running from forehead to nape completely free and untwisted.
- Pick out the center section to create maximum height and volume using a wide-tooth comb or pick.
- Shape the center into a mohawk ridge by directing hair upward and slightly forward.
- Secure the shape with strong-hold gel, mousse, or hairspray for extended hold throughout the day.
Height Techniques:
- Backcomb the roots gently at the center section to create a foundation for increased height.
- Use bobby pins strategically underneath to provide structural support for the lifted center.
- Apply products while hair is damp for easier molding and stronger hold as it dries.
Width Variations:
- Create a narrow center strip for a dramatic, punk-inspired interpretation of the style.
- Make a wider center section for a softer, more voluminous and wearable everyday look.
- Adjust the twist density on the sides based on hair thickness and desired contrast level.
29. Low Twisted Bun with Accessories
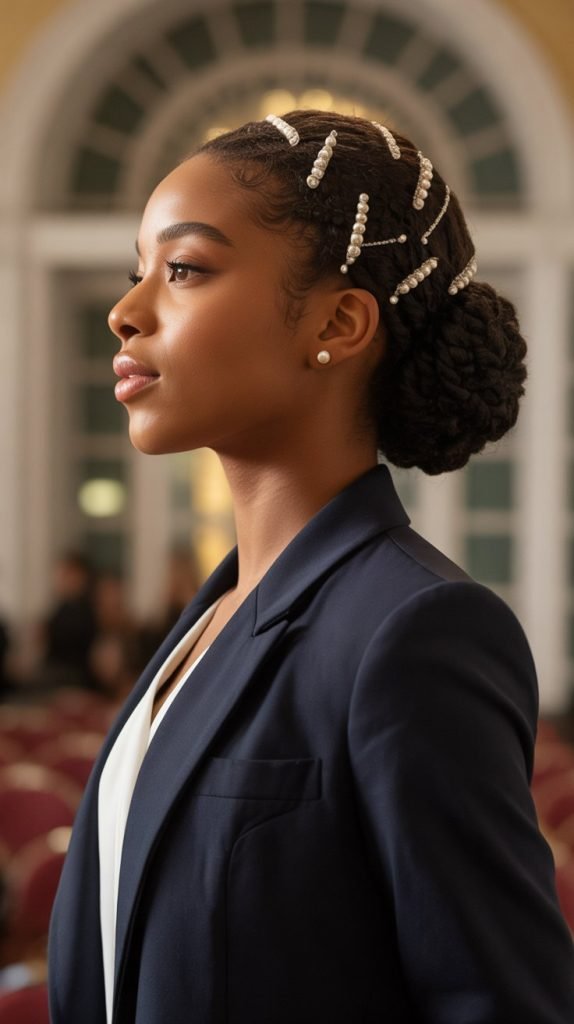
The low twisted bun offers classic elegance enhanced by decorative accessories that add personality and flair.
This sophisticated style positions the bun at the nape of the neck, creating a refined silhouette perfect for school presentations, performances, or formal events.
The addition of accessories transforms a simple updo into a personalized statement.
Creating the Base:
- Divide hair into 4-6 large sections and create two-strand twists throughout the entire head.
- Gather all twists at the nape of the neck using a fabric-covered elastic band.
- Wrap the gathered twists around the base in a circular pattern to form the bun shape.
- Secure the bun with bobby pins inserted at various angles for stability and security.
- Smooth any edges or flyaways using edge control for a polished, finished appearance.
30. Finger Coils All Over
Finger coils create uniform, spring-like curls throughout the hair by wrapping small sections around the finger.
This technique produces defined, consistent coils that showcase 4C texture while providing a polished, intentional appearance.
The style works beautifully for school by offering long-lasting definition with minimal daily maintenance.
Coiling Technique:
- Work with freshly washed, conditioned, and thoroughly detangled hair for easiest coil formation.
- Divide hair into small sections no larger than a pencil width for tight, defined coils.
- Apply curl-defining cream or gel to each section before coiling for enhanced definition and hold.
- Wrap each section tightly around your finger from root to tip, sliding finger out once coiled.
- Allow coils to air dry completely or sit under a hooded dryer for faster, thorough drying.
Installation Time:
- Expect 2-4 hours for full-head finger coils depending on hair length, density, and section size.
- Consider installing coils in sections over multiple days if time is limited.
- The significant time investment is balanced by 5-7 days of wear with minimal daily styling needed.
Maintenance and Longevity:
- Preserve coils at night using the pineapple method or by carefully wrapping in a satin bonnet.
- Refresh individual coils by misting with water and reapplying product to frizzy sections.
- The coils gradually loosen over days, transitioning into a softer coil-out style that still looks intentional.
Styling Flexibility:
- Wear coils down in their full glory for maximum texture showcase and volume.
- Pull coiled hair into ponytails, puffs, or half-up styles without losing the coil definition.
- Add headbands, scarves, or clips to create variety throughout the week-long wear period.
Conclusion
Celebrating and styling 4C hair for school becomes an empowering journey of self-expression when you have the right techniques, knowledge, and inspiration.
These 30 Stylish Curly Hair Ideas for School 4C Hair That Inspire offer diverse options that honor natural texture while meeting the practical demands of student life.
From protective styles that last for weeks to quick daily options that showcase your curls, each hairstyle provides an opportunity to embrace your authentic beauty with confidence.
The versatility of 4C hair allows for endless creativity through twists, braids, coils, and natural styling that works within school guidelines while expressing individuality.
By implementing proper maintenance routines, selecting quality products designed for your hair type, and managing time effectively, these styles become sustainable parts of your regular routine rather than occasional experiments.
Remember that your hair journey is personal and unique—what works for others may need adjustment for your specific texture, density, and lifestyle.
Whether you choose elaborate protective styles that minimize daily manipulation or prefer to showcase your natural curl pattern through wash-and-go techniques, the key is finding what makes you feel beautiful, confident, and authentically yourself.
These hairstyles prove that 4C hair deserves celebration, not alteration, and that school is the perfect environment to learn, grow, and express your natural beauty proudly while focusing on academic success and personal development.