Do you dream of voluminous, face-framing layers that effortlessly blend with your long locks, giving you that coveted “butterfly” effect?
How to Cut a Butterfly Haircut for Long Hair is a question many with lengthy tresses ask, hoping to achieve a salon-quality look at home.
This article will guide you through the process, making a seemingly complex haircut achievable with clear, step-by-step instructions.
We’ll cover everything from preparing your hair and gathering the right tools to executing the cuts and styling your new ‘do, ensuring you feel confident and excited about transforming your hair.
In This Post......
- 1. Gathering Your Tools: Preparing for a Precise Cut
- 2. Prepping Your Hair: The Foundation for a Flawless Cut
- 3. Understanding the Butterfly Haircut: What Makes it Unique?
- 4. Sectioning Your Hair: Creating the Guide for Your Layers
- 5. Cutting the Front Layers: Shaping the “Butterfly” Effect
- 6. Cutting the Back Layers: Blending for Seamless Flow
- 7. Refining and Blending: The Art of a Seamless Finish
- 8. Styling Your Butterfly Haircut: Embracing the Volume
1. Gathering Your Tools: Preparing for a Precise Cut
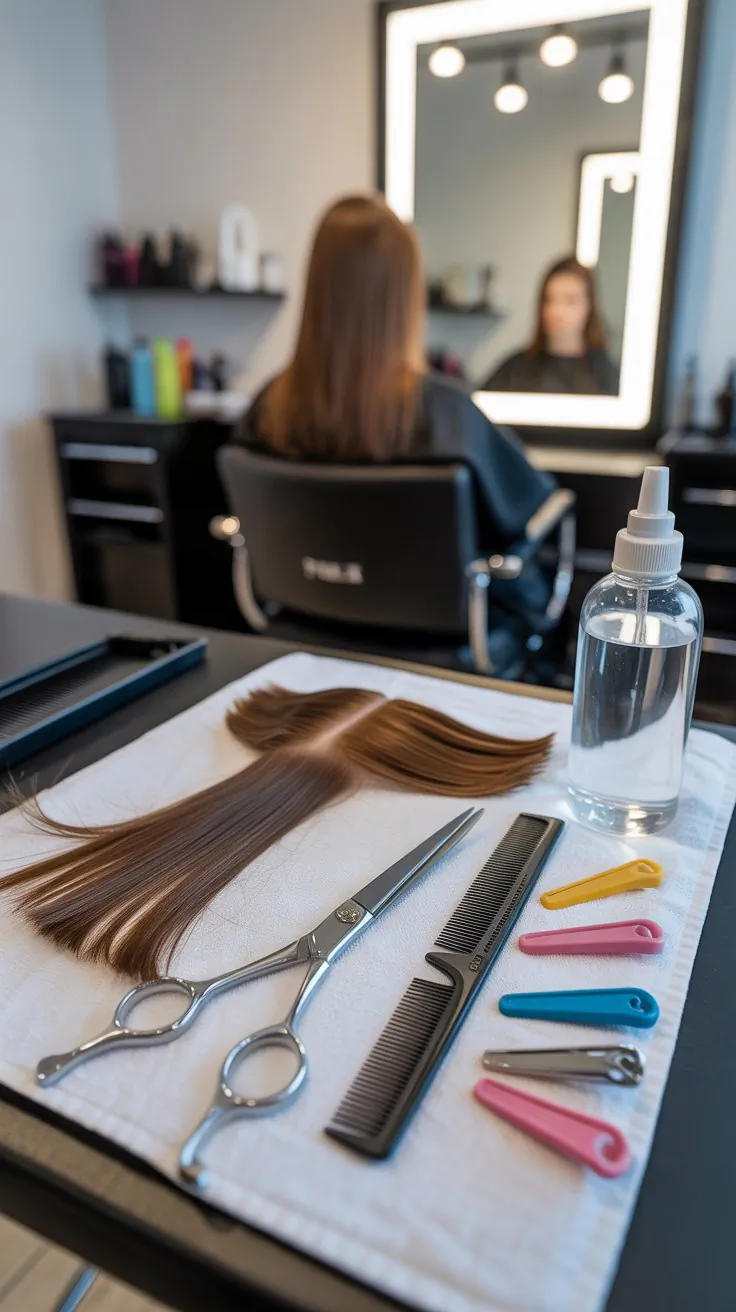
Before you embark on your hair-cutting journey, it’s crucial to have all the necessary tools readily available. Having the right equipment ensures a smooth and precise cut, contributing to a professional-looking result.
Using dull or incorrect tools can lead to uneven layers and frustration, so investing a little time in preparation will pay off.
- You’ll need a sharp pair of hair-cutting shears; kitchen scissors just won’t cut it (pun intended!).
- A fine-tooth comb is essential for precise sectioning and smoothing.
- Hair clips or elastics will help you secure sections of hair out of your way.
- A spray bottle filled with water will keep your hair damp throughout the cutting process.
- Finally, a hand mirror or a second mirror will be invaluable for checking the back of your head.
2. Prepping Your Hair: The Foundation for a Flawless Cut
Proper hair preparation is the unsung hero of any successful haircut. Starting with clean, detangled, and slightly damp hair provides the ideal canvas for achieving even and precise layers.
Skipping this step can lead to an uneven cut and make the process much more challenging.
- Start by washing your hair with your favorite shampoo and conditioner.
- Gently towel-dry your hair until it’s damp but not dripping wet.
- Thoroughly detangle your hair with a wide-tooth comb, ensuring there are no knots or snags.
- For best results, your hair should be smooth and free of any product buildup.
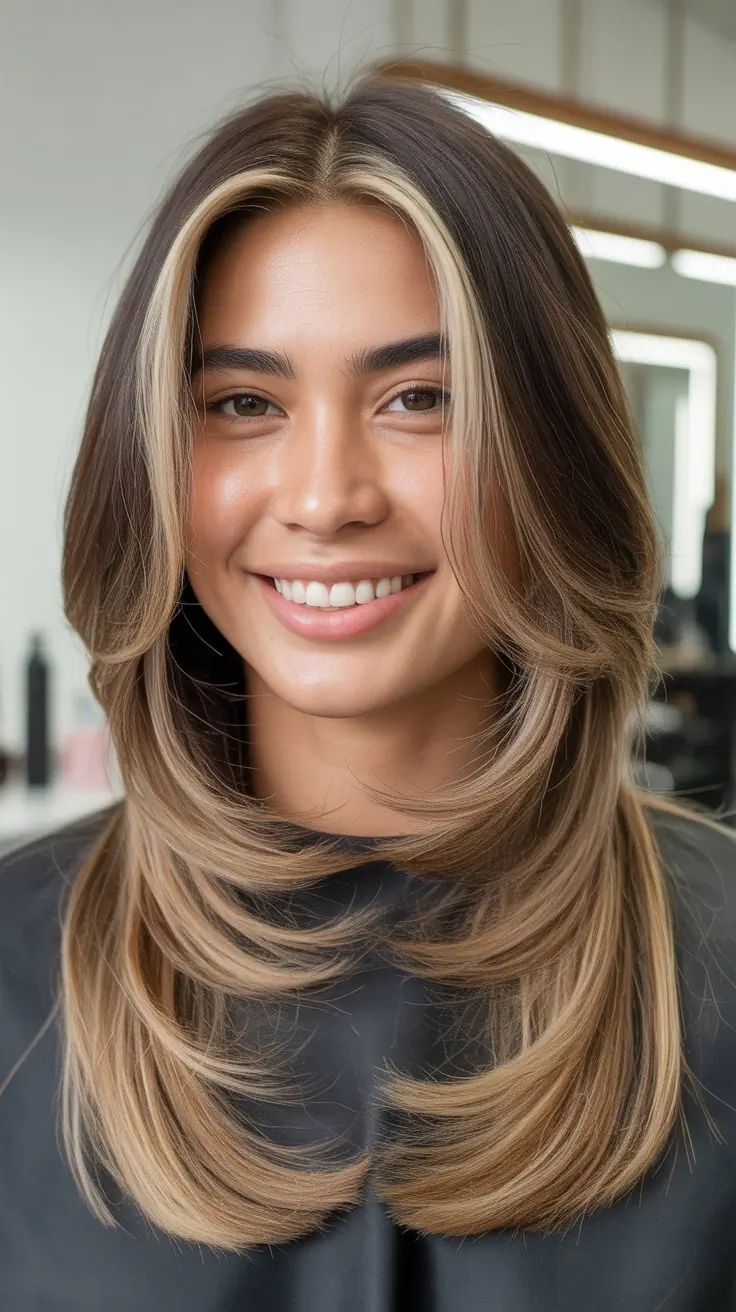
3. Understanding the Butterfly Haircut: What Makes it Unique?
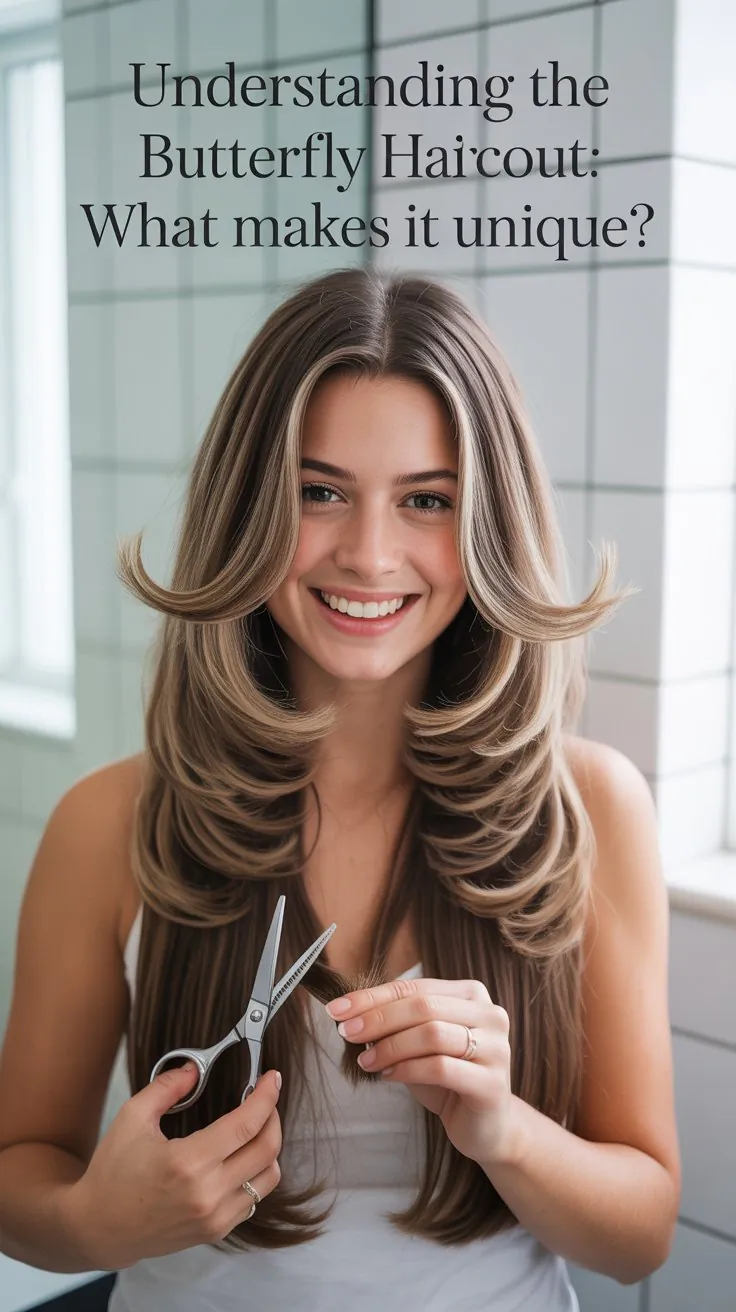
The butterfly haircut is all about creating beautiful, face-framing layers that resemble the wings of a butterfly—shorter around the face and gradually getting longer towards the back.
This style adds incredible volume and movement, giving the illusion of shorter hair around the face while maintaining the length in the back. Understanding this unique layering technique is key to achieving the desired effect.
- The essence of the butterfly cut lies in its strategic layering.
- It combines shorter, face-framing layers with longer layers throughout the rest of the hair.
- This creates a soft, feathered look that adds significant volume and bounce.
- The versatility of this cut allows for various styling options, from sleek and straight to bouncy and voluminous.
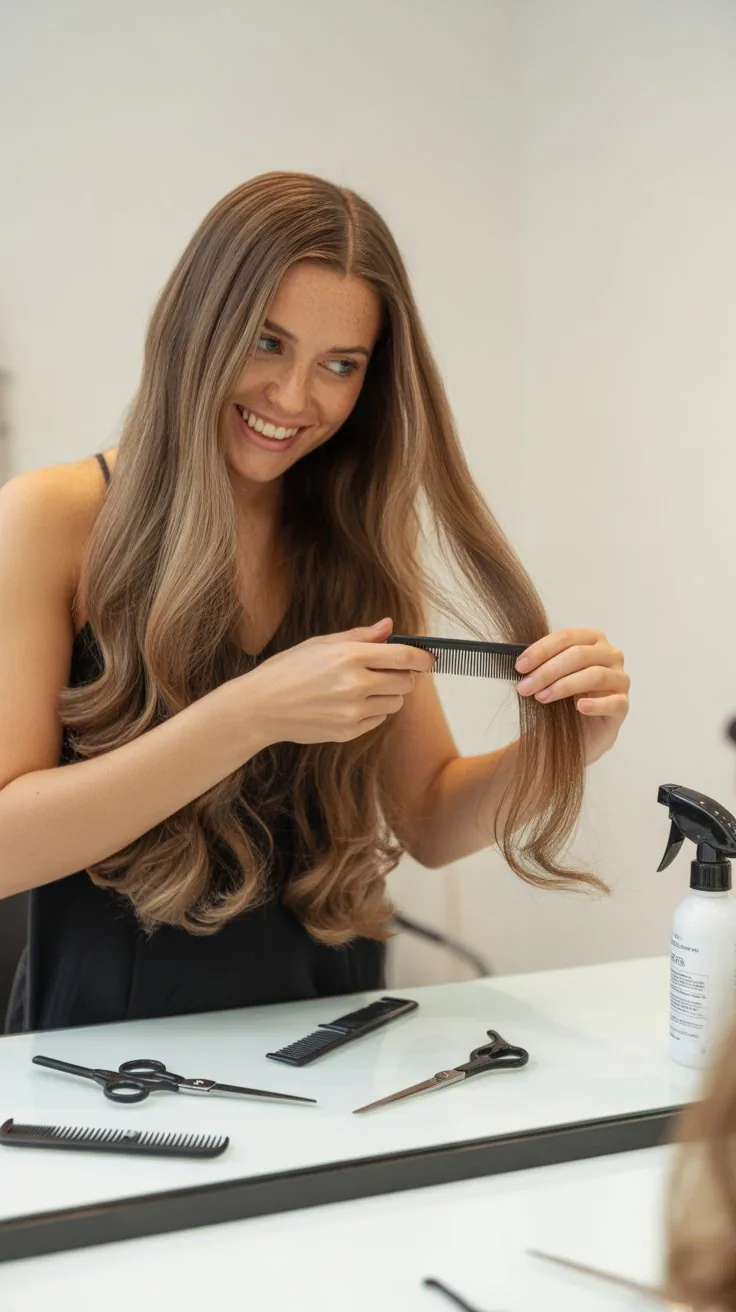
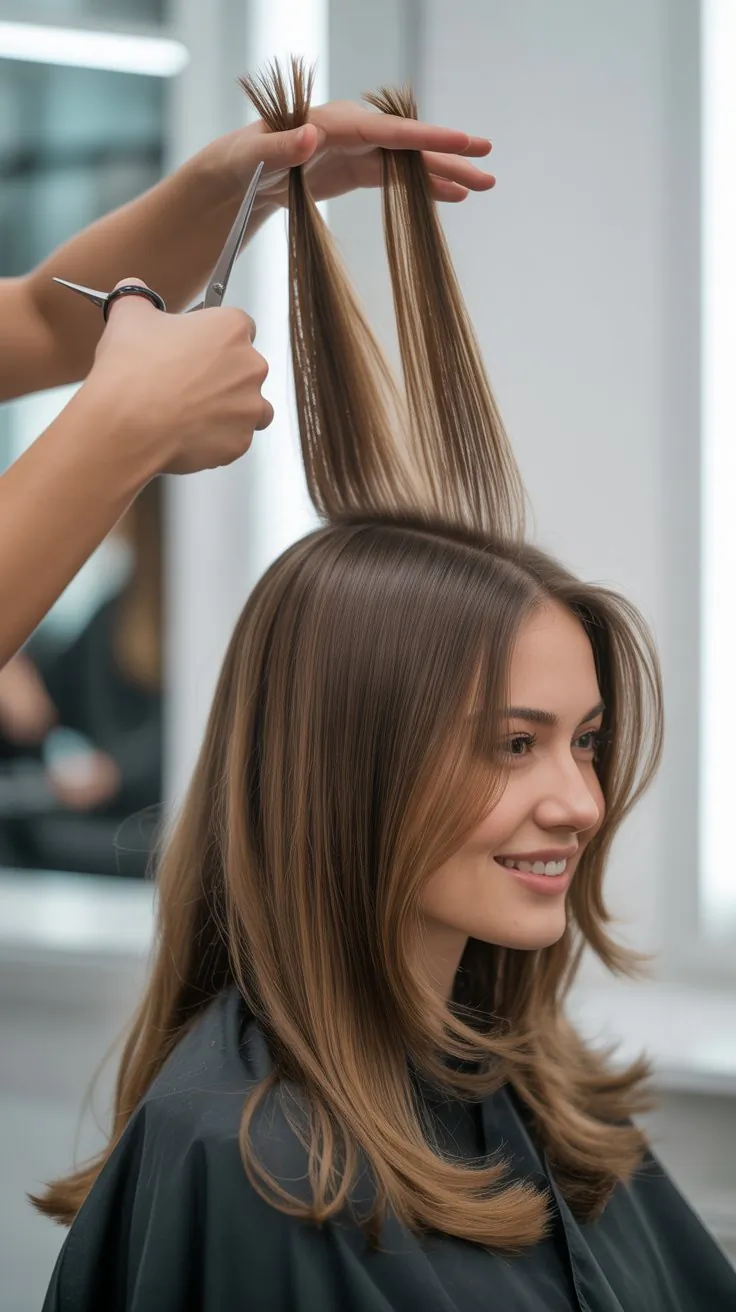
4. Sectioning Your Hair: Creating the Guide for Your Layers
Correctly sectioning your hair is perhaps the most critical step in achieving an even and symmetrical butterfly haircut.
This method typically involves dividing your hair into specific sections to control where your layers will fall. Precise sectioning ensures that your layers are balanced and blend seamlessly.
- Part your hair down the middle, from your forehead to your nape.
- Create a “half-up, half-down” section by gathering the top half of your hair into a ponytail on top of your head, right at your crown. This will be your guide for the shortest face-framing layers.
- Secure the bottom half of your hair with a clip or elastic to keep it out of the way for now.
- Some advanced techniques might involve further dividing the top section into two ponytails—one directly in front of the face for even shorter layers and another at the crown. Opens in a new window www.youtube.com hair sectioned for a butterfly haircut
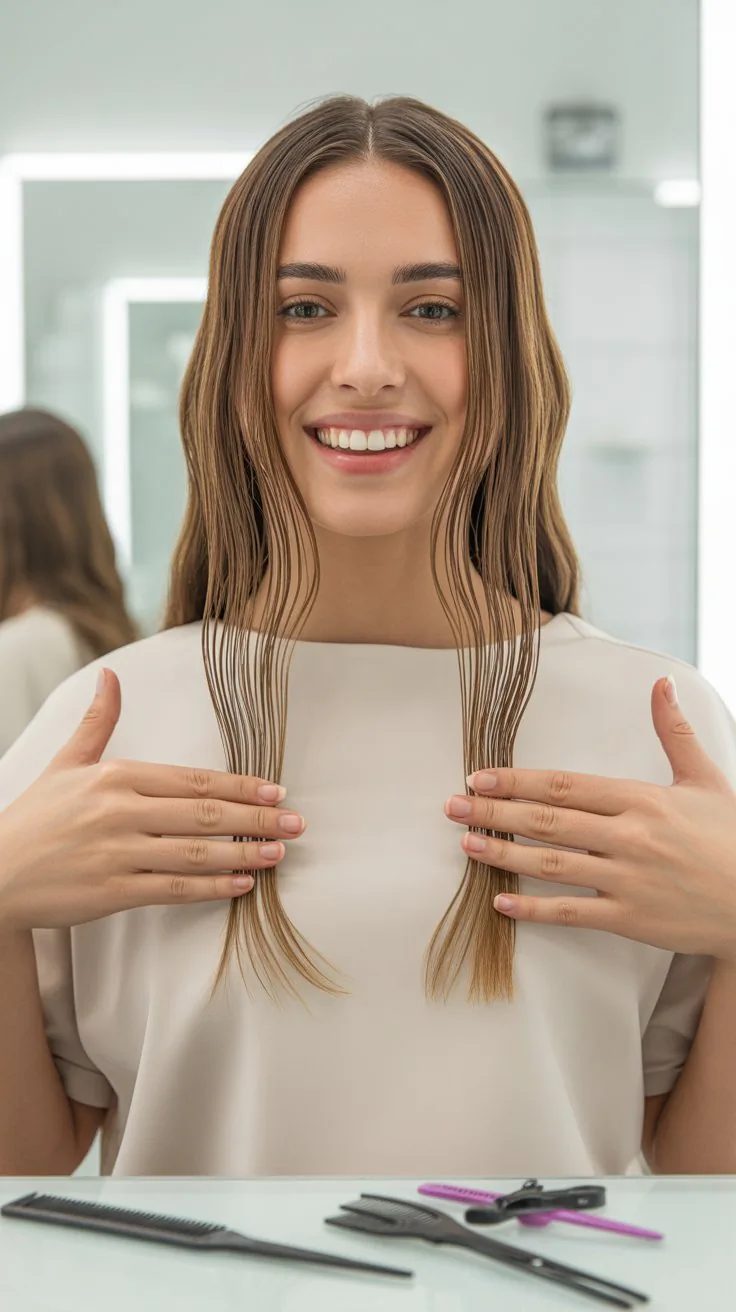
5. Cutting the Front Layers: Shaping the “Butterfly” Effect
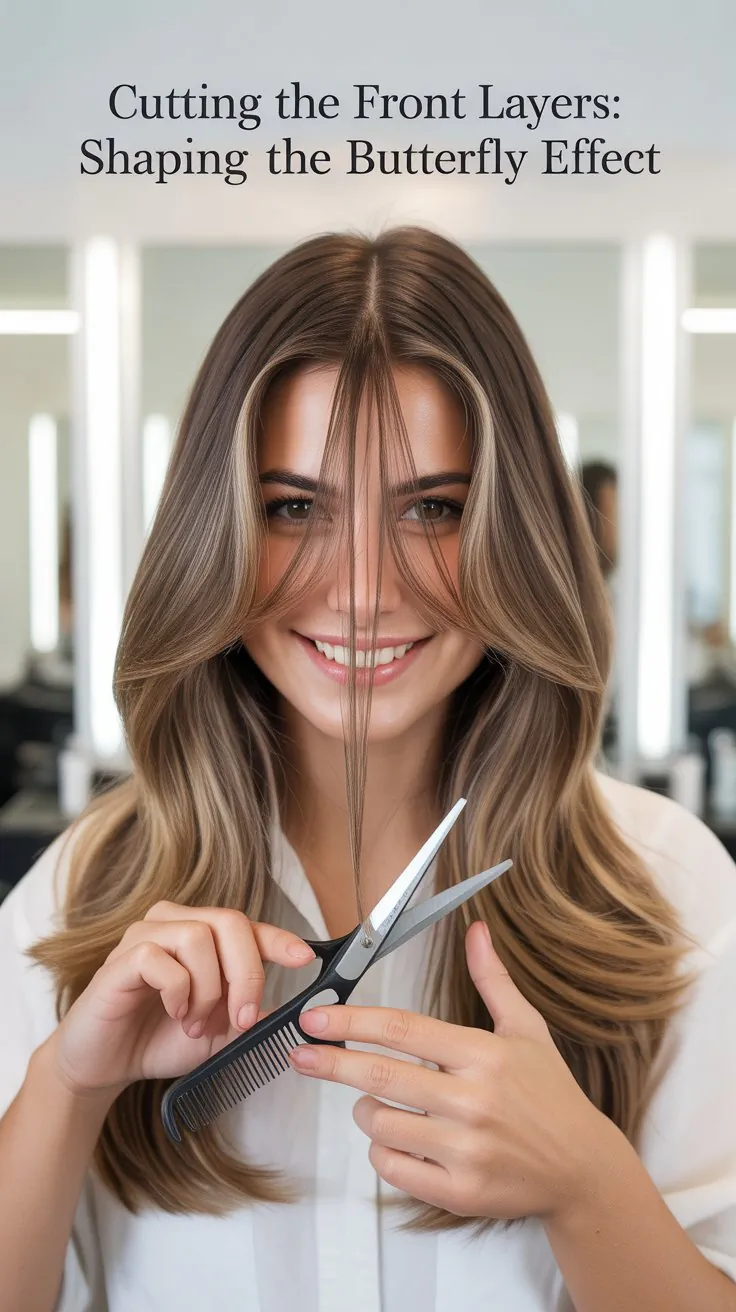
The front layers are what truly define the butterfly haircut, providing that beautiful, face-framing effect.
This step involves carefully cutting the hair in your top ponytail to create the shortest layers that will frame your face.
Precision here is crucial for a flattering result.
- Bring your top ponytail directly in front of your face.
- Decide on the desired length for your shortest face-framing layers. This is usually around your chin or collarbone, but you can adjust it based on your preference.
- Hold the hair taut between your fingers and cut straight across.
- You can also point-cut into the ends to create a softer, more blended look.
- Remember, you can always cut more, but you can’t add it back! Start longer if you’re unsure.
6. Cutting the Back Layers: Blending for Seamless Flow
Once your front layers are established, it’s time to address the back sections of your hair to create the longer layers that blend seamlessly with the front.
This step adds movement and volume throughout your long hair while maintaining overall length. The goal is to create a harmonious flow from the shortest to the longest layers.
- Release the bottom half of your hair that you previously secured.
- Divide this section into two more manageable sections, one on each side of your head.
- Bring one of these sections forward over your shoulder.
- Using your previously cut front layers as a guide, carefully cut the back section, angling your scissors to create a gradual, flowing layer.
- Repeat on the other side, ensuring symmetry.
- You can also bring all of your hair, excluding the very top section you already cut, into a low ponytail at the nape of your neck and cut straight across.
- This can create a more subtle layering effect.
7. Refining and Blending: The Art of a Seamless Finish
After the initial cuts, it’s time to refine and blend your layers to ensure a smooth and natural transition between them.
This step is about perfecting the cut, making sure there are no harsh lines and that the layers beautifully frame your face. Take your time with this stage to achieve a polished look.
- Comb all your hair down and check for any uneven spots or harsh lines.
- Point-cut into the ends of your layers to soften them and encourage movement.
- You can also use a technique called “slide cutting” for a more seamless blend, gently sliding your open shears down the hair shaft.
- Ensure that the front and back layers blend harmoniously, creating the signature butterfly effect.
8. Styling Your Butterfly Haircut: Embracing the Volume
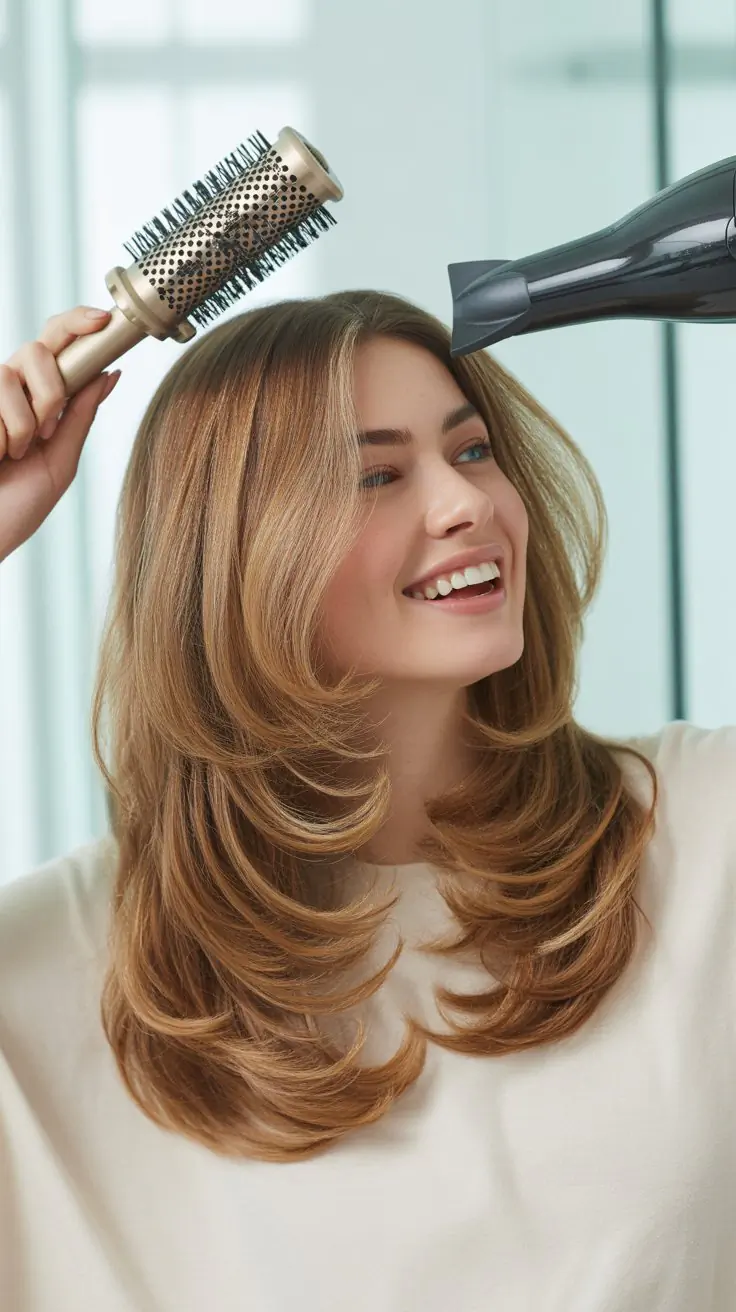
Now that you’ve mastered How to Cut a Butterfly Haircut for Long Hair, it’s time to style it and truly bring out its beautiful volume and movement.
The butterfly cut is incredibly versatile and looks stunning with various styling techniques, from bouncy blowouts to natural waves. Experiment to find what works best for you and your hair type.
- For maximum volume, blow-dry your hair using a round brush, lifting the roots and curling the ends under or away from your face.
- Use a curling iron or hot rollers to create soft, voluminous waves that enhance the layers.
- Apply a texturizing spray or volumizing mousse for added body and hold.
- Embrace the natural movement of your new layers by scrunching with a little product and letting it air dry.
| Tool | Purpose |
|---|---|
| Hair-cutting shears | For precise and clean cuts. |
| Fine-tooth comb | For accurate sectioning and smoothing. |
| Hair clips/elastics | To secure sections of hair. |
| Spray bottle with water | To keep hair damp for easier cutting. |
| Hand mirror | For checking the back of your head. |
| Round brush | For blow-drying and adding volume. |
| Curling iron/hot rollers | For creating waves and enhancing layers. |
| Texturizing spray | For added body and hold. |
| Volumizing mousse | For boosting volume at the roots. |
Cutting your own hair can be a rewarding experience, and with the right approach, achieving a beautiful butterfly haircut for long hair is entirely within reach.
By following these detailed steps, you’ve not only learned the technical aspects but also gained the confidence to transform your look.
Remember, practice makes perfect, and with each attempt, you’ll become more adept at mastering this elegant style. So, go forth and confidently rock your stunning new butterfly haircut!