Chalkboard paint has revolutionized the DIY world, offering a blend of functionality and creativity.
Whether you’re aiming to craft a rustic kitchen menu board, a children’s art station, or personalized home décor, chalkboard paint on wood provides endless possibilities.
In this article, How to Use Chalkboard Paint on Wood DIY Projects , we’ll delve into the step-by-step process, from selecting the right materials to applying the finishing touches.
By the end, you’ll be ready to embark on your own chalkboard paint adventures with confidence.
In This Post......
1. Understanding Chalkboard Paint
Before diving into the application process, it’s essential to grasp what chalkboard paint is and its benefits.
- Composition: Chalkboard paint is a specially formulated paint that dries to a matte finish, allowing chalk to adhere and be easily erased.
- Versatility: It’s suitable for various surfaces, including wood, metal, and drywall, making it a favorite among DIY enthusiasts.
- Color Options: While traditional chalkboard paint is black or green, modern versions come in a spectrum of colors, offering aesthetic flexibility.
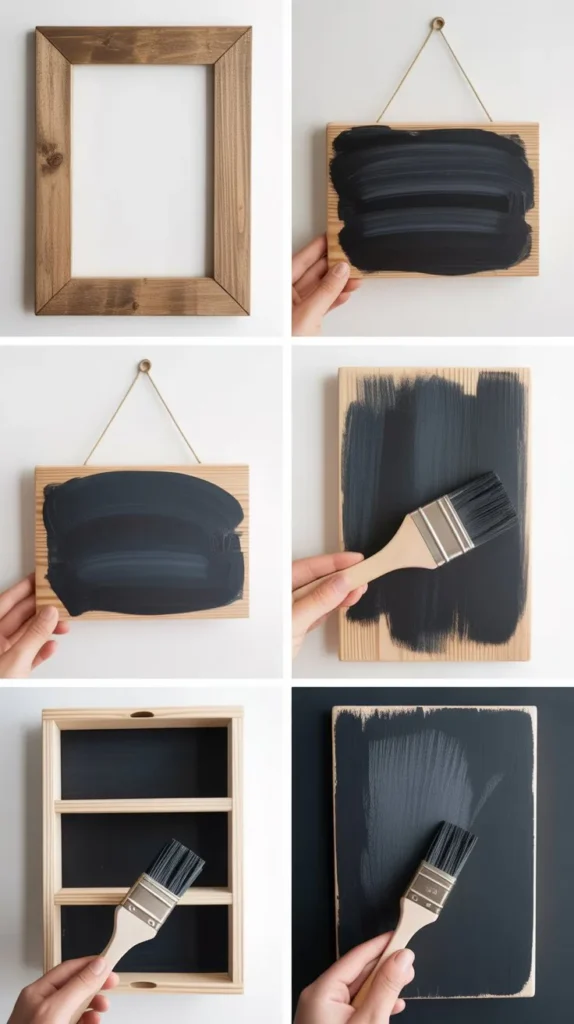
2. Selecting the Right Wood
Choosing the appropriate wood ensures a smooth application and longevity of your chalkboard surface.
- Type of Wood: Opt for hardwoods like birch, oak, or maple for durability. Softwoods like pine can also work but may require additional preparation.
- Surface Condition: Ensure the wood is free from knots, cracks, and imperfections. A smooth surface guarantees better paint adhesion.
- Size and Shape: Depending on your project—be it a wall-mounted board or a tabletop—select wood dimensions that fit your intended use.
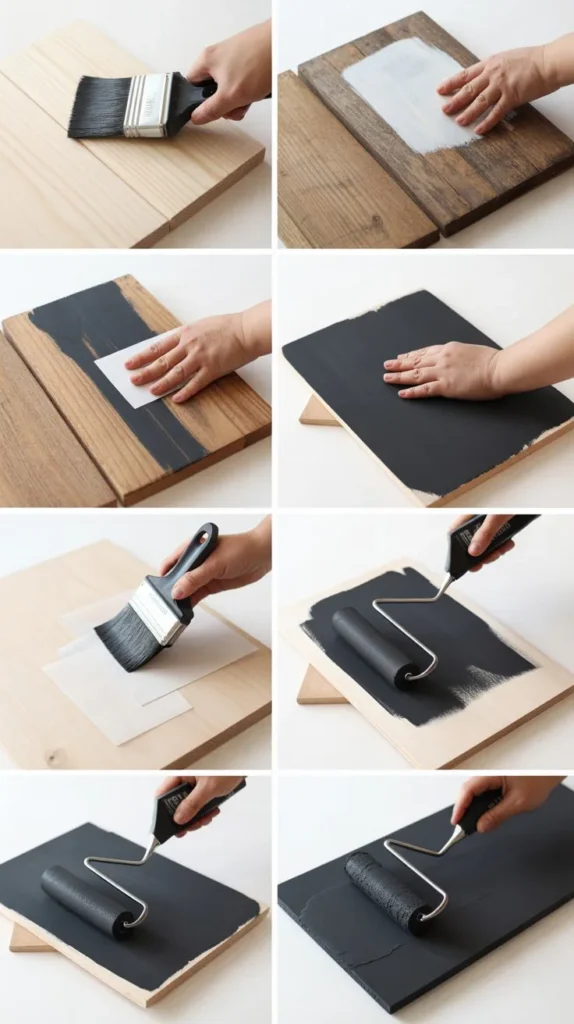
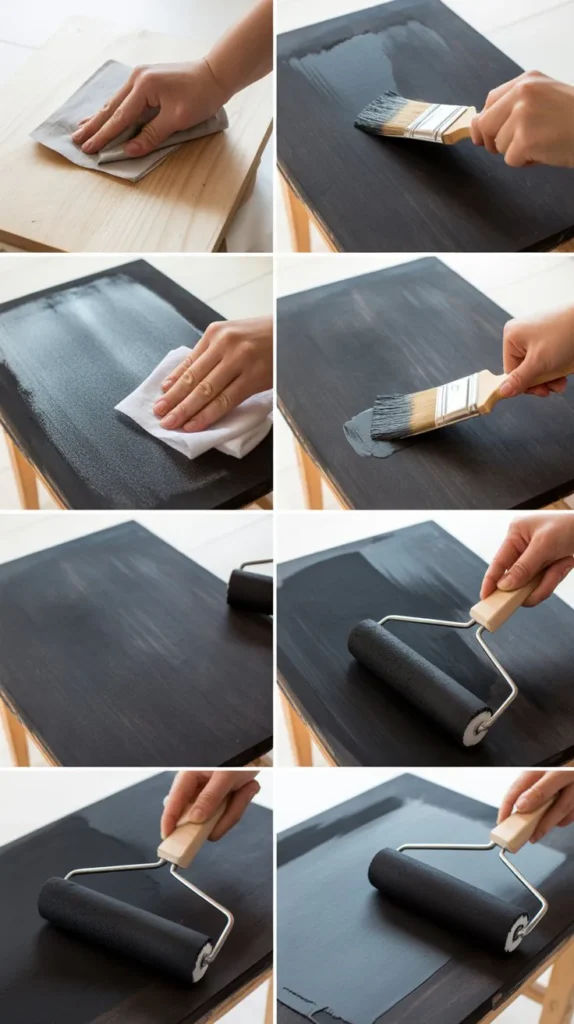
3. Preparing the Wood Surface
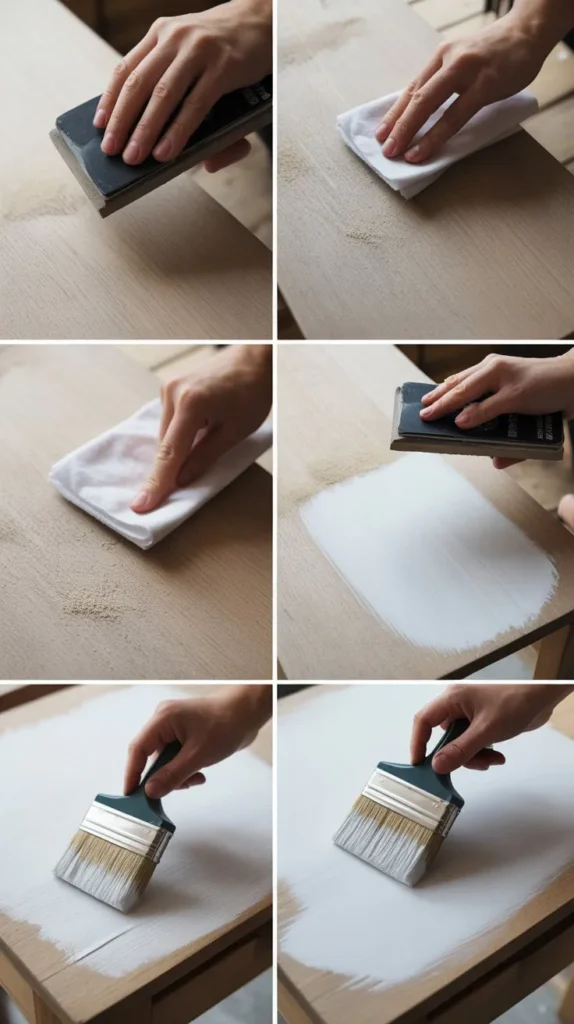
Proper preparation is crucial for a flawless chalkboard finish.
- Cleaning: Wipe the wood with a damp cloth to remove dust and debris.
- Sanding: Use fine-grit sandpaper (220-grit) to smooth the surface, always sanding in the direction of the grain.
- Priming: Apply a primer suitable for wood surfaces. This step enhances paint adhesion and durability.
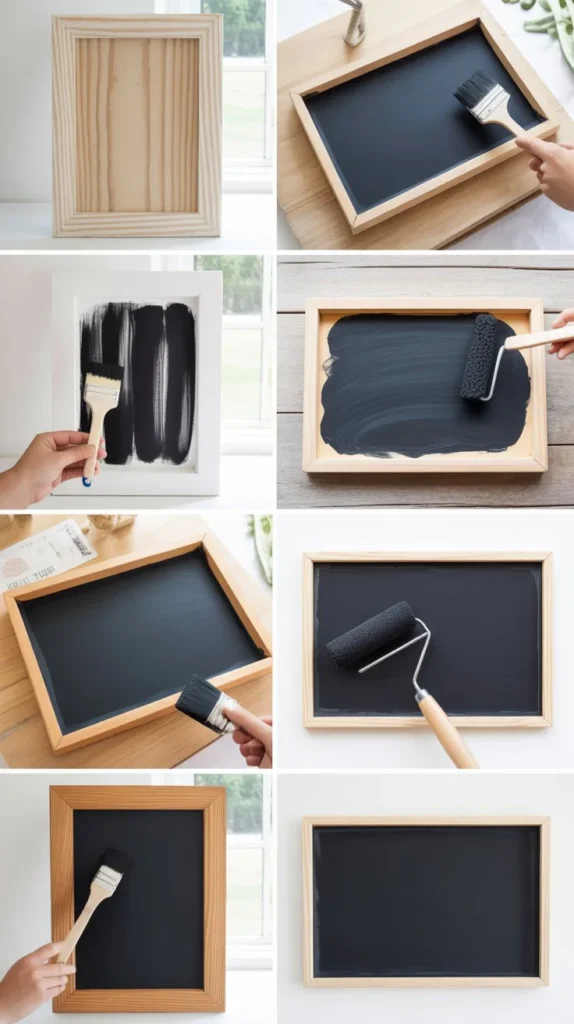
4. Applying Chalkboard Paint
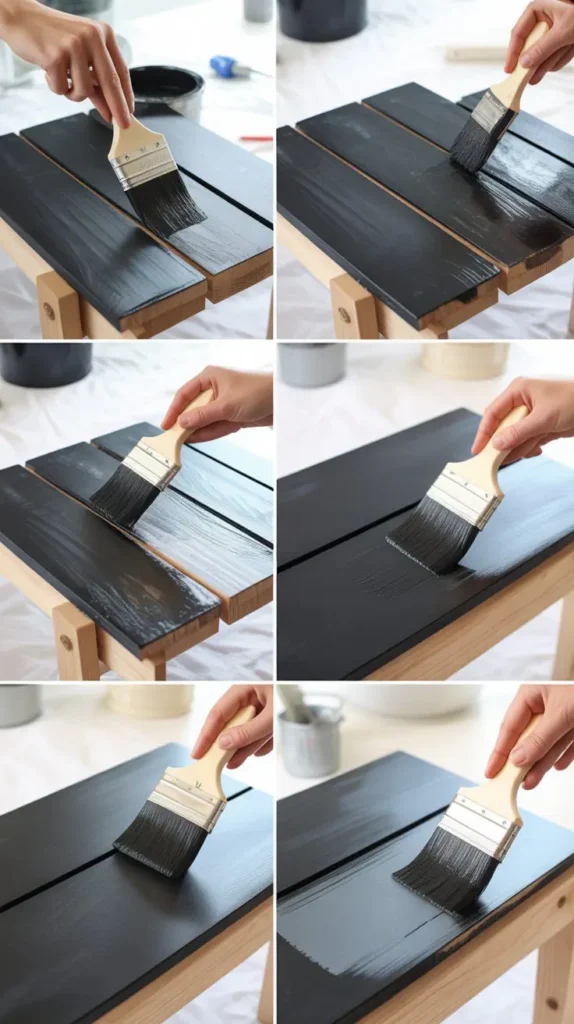
With your wood prepped, it’s time to apply the chalkboard paint.
- Stirring: Thoroughly mix the paint to ensure consistency.
- Application Tools: Use a high-density foam roller for even coverage. Brushes can leave streaks, so they’re best for edges and corners.
- Coating: Apply the first coat evenly and let it dry as per the manufacturer’s instructions. Typically, two to three coats are recommended for optimal results.
- Drying Time: Allow each coat to dry completely before applying the next.
5. Curing and Conditioning the Surface
Before using your chalkboard, it’s essential to cure and condition it.
- Curing: Let the painted surface cure for 72 hours to ensure it’s fully dry and hardened.
- Conditioning: Rub the side of a piece of chalk over the entire surface, then erase it. This step prevents the first drawings from leaving permanent marks.The DIY Mommy
6. Maintenance and Care
To keep your chalkboard in top condition:
- Cleaning: Use a damp cloth or chalkboard eraser to clean the surface. Avoid abrasive materials that can damage the paint.
- Reconditioning: Periodically recondition the surface by repeating the chalk rubbing process.
- Touch-ups: For scratches or worn areas, lightly sand and reapply chalkboard paint as needed.
7. Creative Project Ideas
Chalkboard paint on wood opens up a world of creative possibilities:
- Kitchen Menu Boards: Keep track of weekly meals or grocery lists.
- Children’s Art Stations: Provide a reusable canvas for kids to draw and learn.
- Event Signage: Craft customizable signs for weddings, parties, or gatherings.
- Home Décor: Design personalized wall art, calendars, or inspirational quote boards.
Conclusion
Transforming wood surfaces with chalkboard paint is a rewarding DIY project that combines functionality with creativity.
By following the steps outlined in How to Use Chalkboard Paint on Wood DIY Projects , you can craft personalized pieces that enhance your living space.
Embrace the process, experiment with designs, and enjoy the versatility that chalkboard paint brings to your woodworking endeavors.
Feel free to reach out if you’d like more detailed guides on specific chalkboard paint projects or techniques!