If you have thin hair, you already know how frustrating it can be to achieve styles that look full, bouncy, and effortlessly voluminous.
But here is the good news — 37 Thin Hair Dirty Styles That Add Volume is your ultimate guide to transforming flat, lifeless locks into stunning, texture-rich hairstyles without washing your hair every single day.
Dirty hair, or second and third-day hair, actually holds styles better than freshly washed hair because natural oils and product buildup create grip and body that clean hair simply cannot replicate.
In this article, you will discover 37 creative, easy-to-follow hairstyles specifically designed for thin hair that benefit from a little natural texture and oil.
From voluminous ponytails and braided updos to tousled waves and teased roots, every style here is chosen to give your fine hair the lift and dimension it deserves.
Whether you are heading to work, a casual outing, or a special event, these styles will save you time, protect your hair from over-washing, and most importantly, make your hair look incredibly full and beautiful.
1. Teased Crown Ponytail
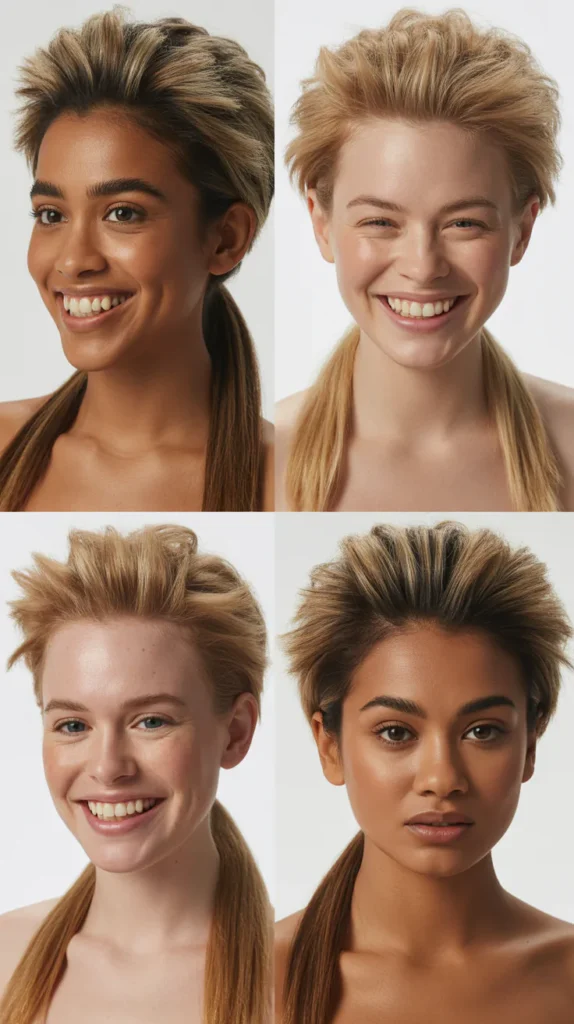
The teased crown ponytail is one of the most effective go-to styles for thin hair on dirty days. By backcombing the roots at the crown, you instantly create the illusion of thick, full hair.
This style works brilliantly on second or third-day hair when natural oils add extra grip to the tease.
- Start by sectioning off the top crown area of your hair from ear to ear.
- Use a fine-tooth comb to backcomb each section gently toward the roots, working in small layers.
- Smooth the top layer lightly with a soft brush to create a polished look over the teased base.
- Gather the rest of your hair into a mid or high ponytail and secure with an elastic band.
- Pull out a few face-framing pieces for a softer, more flattering finish.
- Spritz with a light-hold hairspray to lock the volume in place throughout the day.
- Dirty hair grips the tease far better than clean hair, making this style last longer with minimal effort.
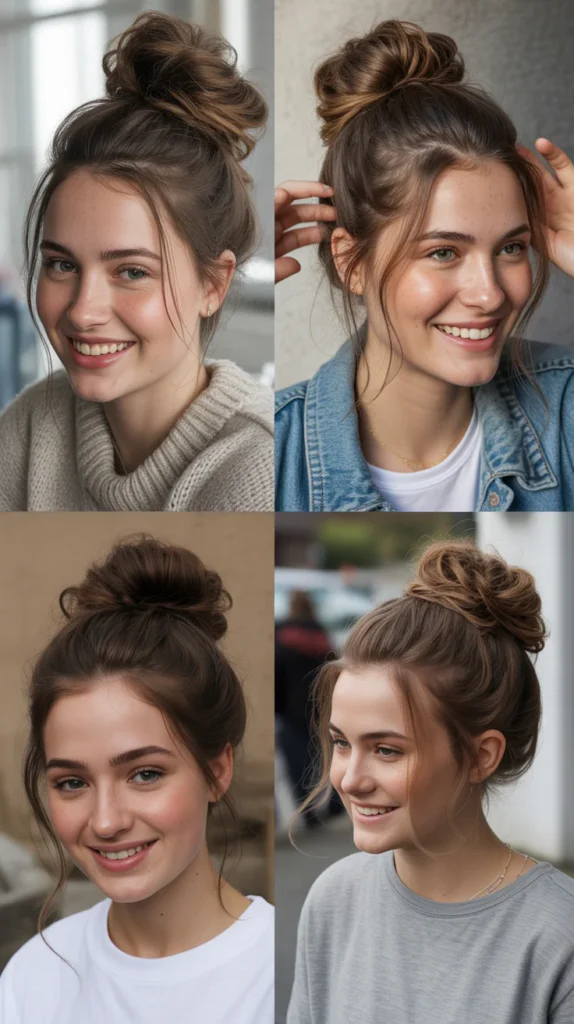
2. Messy Bun with Volumizing Pins
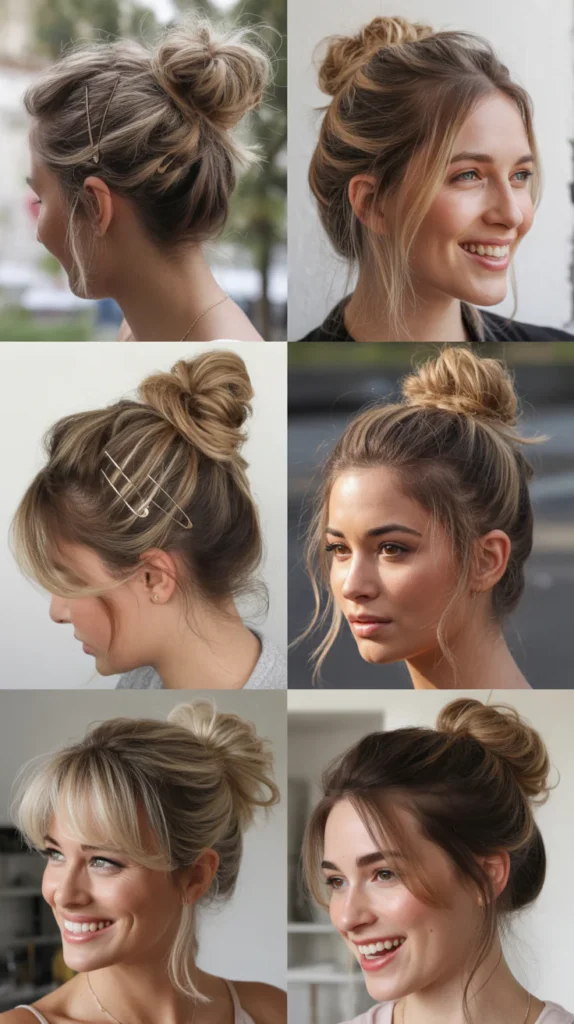
The messy bun is a classic dirty-hair savior that looks intentionally effortless and chic. For thin hair, the key is in how you build the bun to fake fullness.
Strategic pinning and pulling techniques transform even the finest hair into a voluminous updo.
- Flip your head upside down and gather all your hair into a loose, high ponytail at the crown.
- Twist the ponytail loosely and wrap it around the base without pulling it tight.
- Instead of tucking the ends in neatly, pull them out in random directions to create fullness.
- Use bobby pins to secure sections while intentionally leaving loops and bumps visible.
- Gently pull pieces from the bun outward using your fingertips to expand its overall size.
- Apply a texturizing spray or dry shampoo before styling to add extra grip and bulk.
- Leave a few strands loose around the face and nape to balance the voluminous bun.
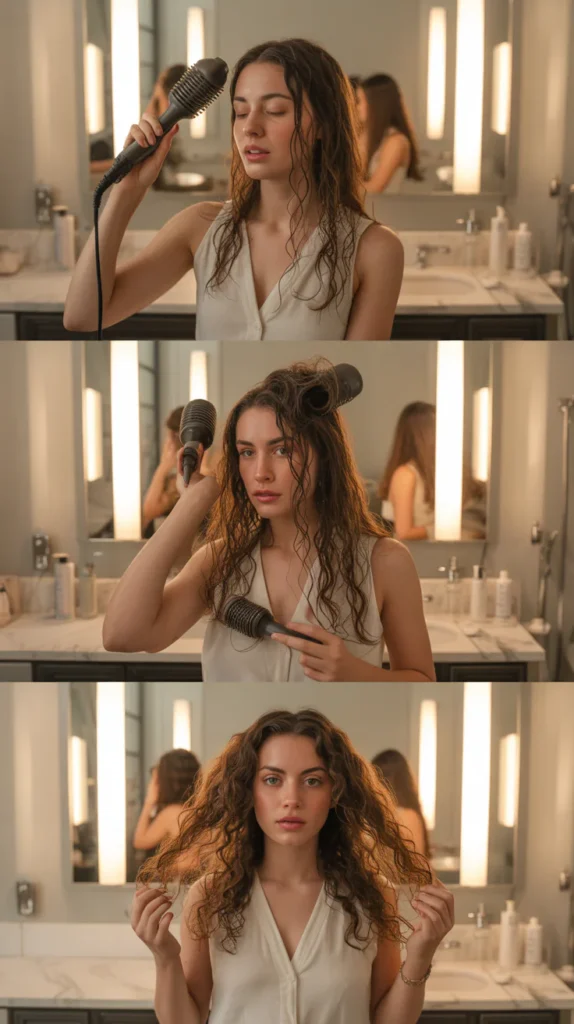
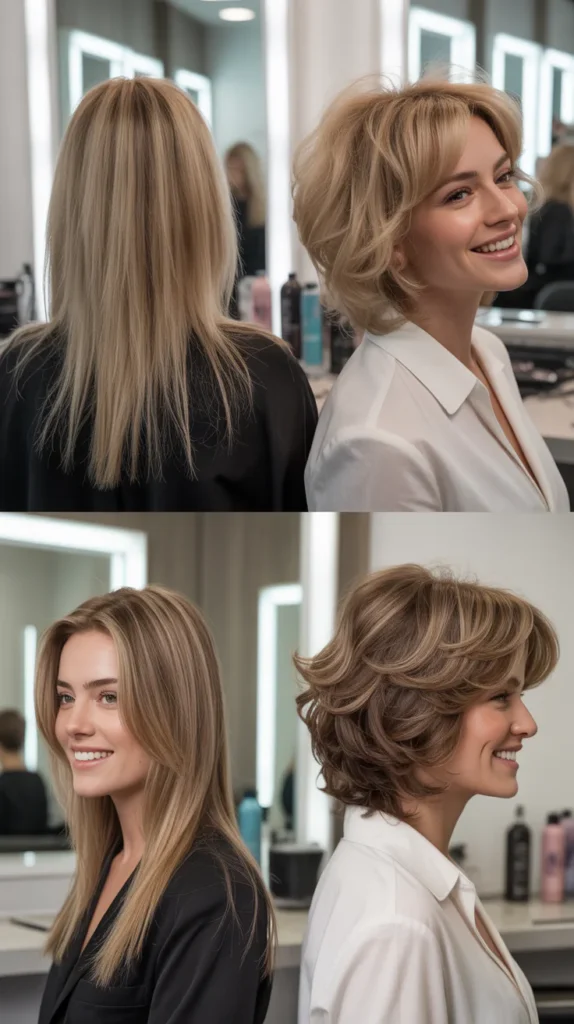
3. Dry Shampoo Blowout Style
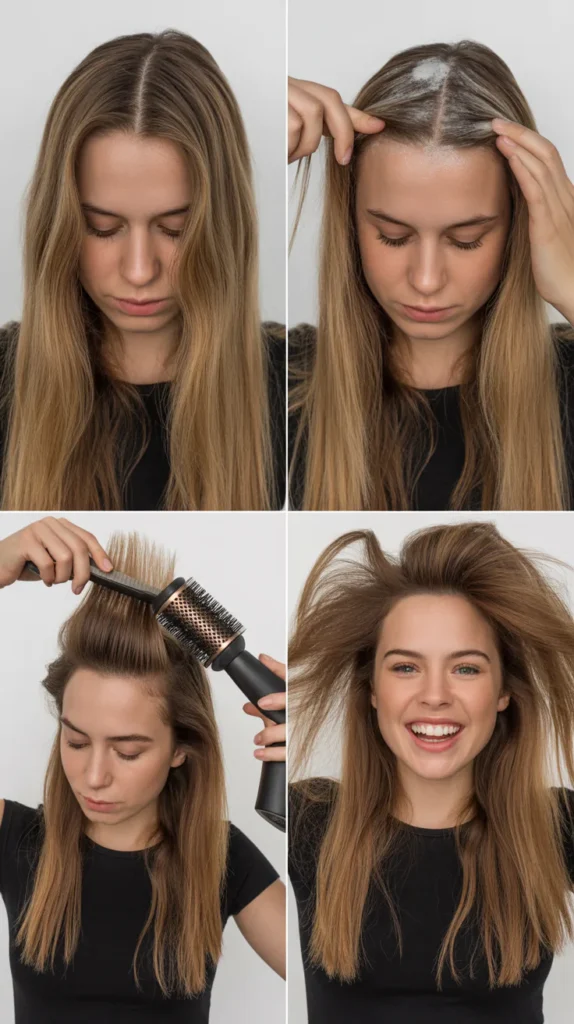
Dry shampoo is arguably the best friend of anyone with thin, oily hair. A proper dry shampoo blowout can make second-day hair look better than a fresh wash.
This technique adds incredible volume at the roots and creates a bouncy, full-bodied style in minutes.
- Apply dry shampoo generously at the roots, focusing on the crown and temples where flatness appears first.
- Allow the product to sit for at least two to three minutes so it fully absorbs oil and moisture.
- Flip your head upside down and use a round brush to blow-dry the roots on medium heat.
- Lift sections at the root with the brush while directing airflow upward toward the scalp.
- Once the roots are lifted, use the cool shot button on your dryer to set the volume firmly.
- Finish by running your fingers through the hair and lightly scrunching the ends for texture.
- Mist with a flexible-hold hairspray to maintain the lifted, voluminous finish all day.
4. Half-Up Twisted Knot
The half-up twisted knot is a perfect balance of casual and polished for thin-haired individuals.
It lifts the top section of hair away from the face while leaving the rest down to add perceived fullness. Dirty hair textures make the twist hold better and stay in place without slipping.
- Section off the top half of your hair from temple to temple, clipping the bottom away.
- Divide the top section into two equal parts and twist each one away from your face.
- Cross the two twisted sections over each other at the back of the crown and twist them together.
- Coil the combined twist into a small knot and secure with a clear or matching elastic.
- Gently tug the sides of the knot outward to loosen it and give it a fuller, more relaxed look.
- Pull a few strands from the knot to create a deliberately undone, voluminous texture.
- Use a texturizing spray on the remaining loose hair below for consistent texture throughout.
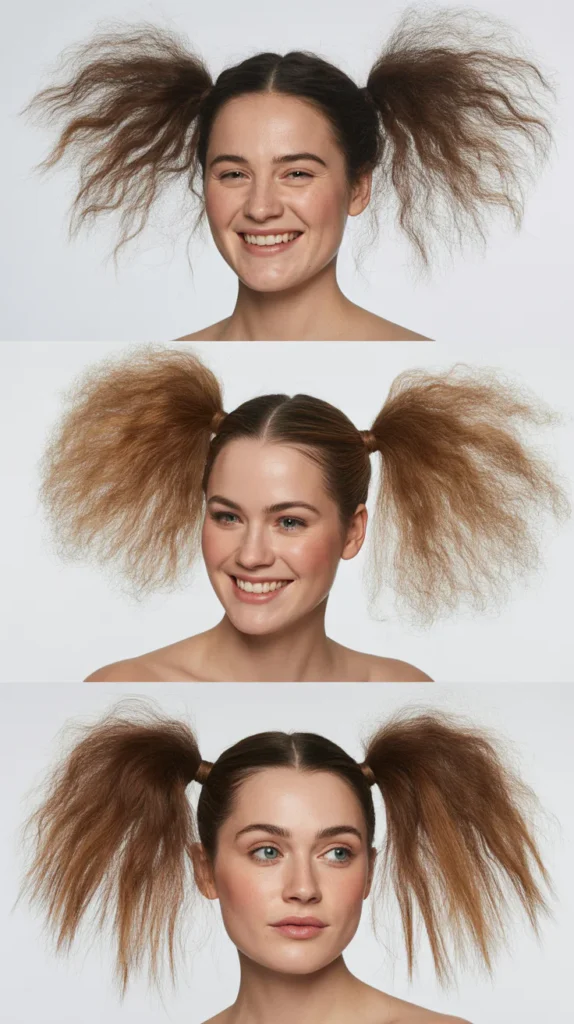
5. Space Buns for Fine Hair
Space buns are not just a fun trend — they are surprisingly flattering for thin hair. Splitting the hair into two sections naturally doubles the perceived volume of each bun.
Dirty, textured hair makes each bun easier to build up and maintain throughout the day.
- Part your hair straight down the middle from forehead to nape for an even foundation.
- Gather each side into a high ponytail and secure loosely with elastic bands.
- Twist each ponytail loosely and wrap it around the base to form individual buns.
- Pull the bun apart gently with your fingers to increase its size and add visual fullness.
- Secure with bobby pins while deliberately leaving loops and wisps sticking out.
- Apply a small amount of texturizing paste to your fingertips before pulling the buns apart for added grip.
- Leave short baby hairs and face-framing pieces out to soften the look and frame the face.
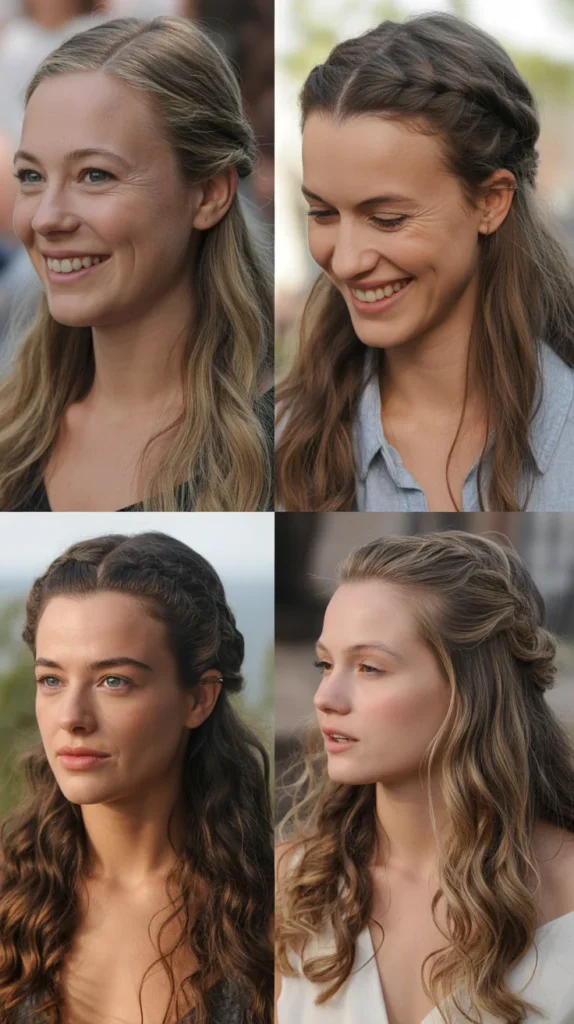
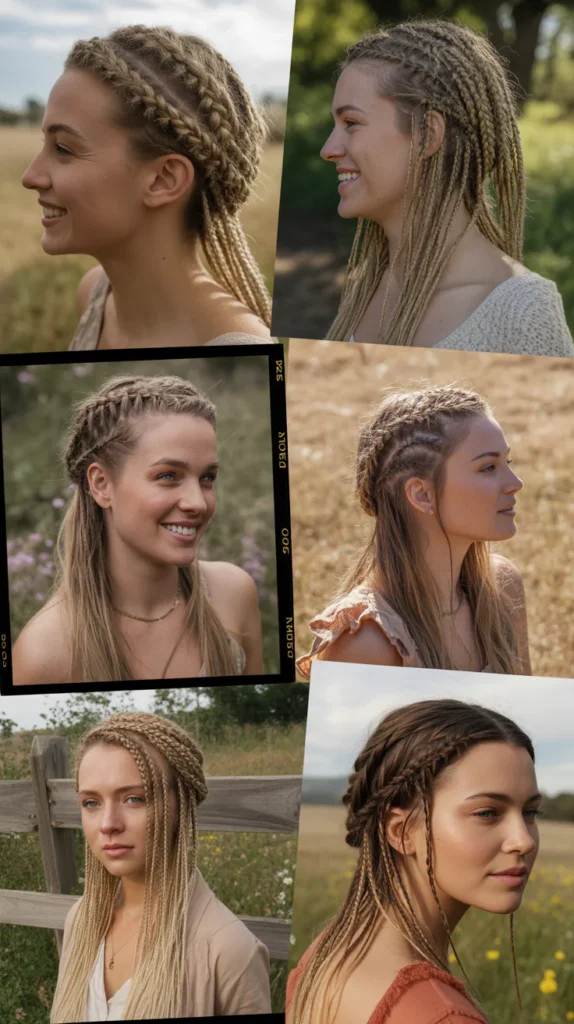
6. Boho Braided Crown

The boho braided crown is a romantic, feminine style that disguises thin hair beautifully. By wrapping braids around the head, you create the illusion of a thick, layered style.
Natural oils in unwashed hair help the braid stay structured and prevent flyaways throughout the day.
- Begin by parting your hair slightly off-center to create asymmetry and natural volume.
- Take a section of hair from one side near the ear and create a loose three-strand braid.
- Gently pancake the braid by pulling each loop outward to make it appear wider and fuller.
- Bring the braid across the top of your head and pin it near the opposite ear with bobby pins.
- Repeat on the other side, overlapping the second braid over the first for layered depth.
- Tuck the ends of each braid beneath the other and secure tightly with pins.
- Spray with light-hold hairspray and gently tug individual loops for a romantically undone effect.
7. Volumizing Side Part Waves
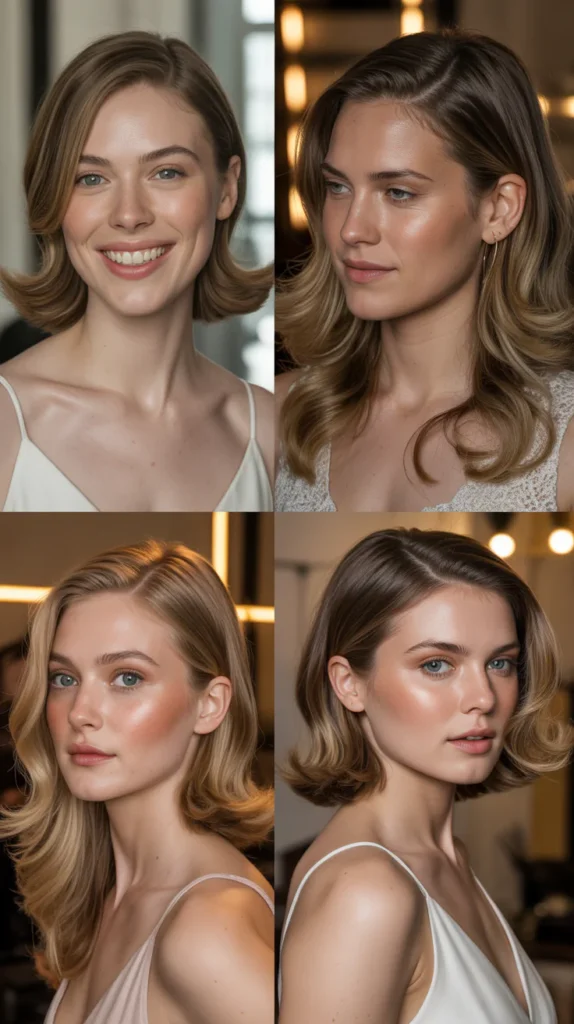
A deep side part combined with loose waves is one of the most classic volume tricks for fine hair.
This technique shifts hair mass to one side, immediately making it appear significantly thicker. Dirty hair holds wave patterns far longer than freshly cleaned strands.
- Create a deep side part using the end of a rat-tail comb, placing it above one eyebrow.
- Apply a light volumizing mousse through the mid-lengths and ends before curling.
- Use a medium barrel curling wand to create loose, irregular waves in alternating directions.
- Once all the hair is curled, allow it to cool completely before touching it.
- Flip all the hair to the heavy side of the part and shake it gently with your fingers.
- Use a wide-tooth comb or your fingers to loosely separate the waves for more body.
- Finish with a light-hold spray and gently press the crown down on the lighter side to emphasize the dramatic part.
8. Textured French Twist
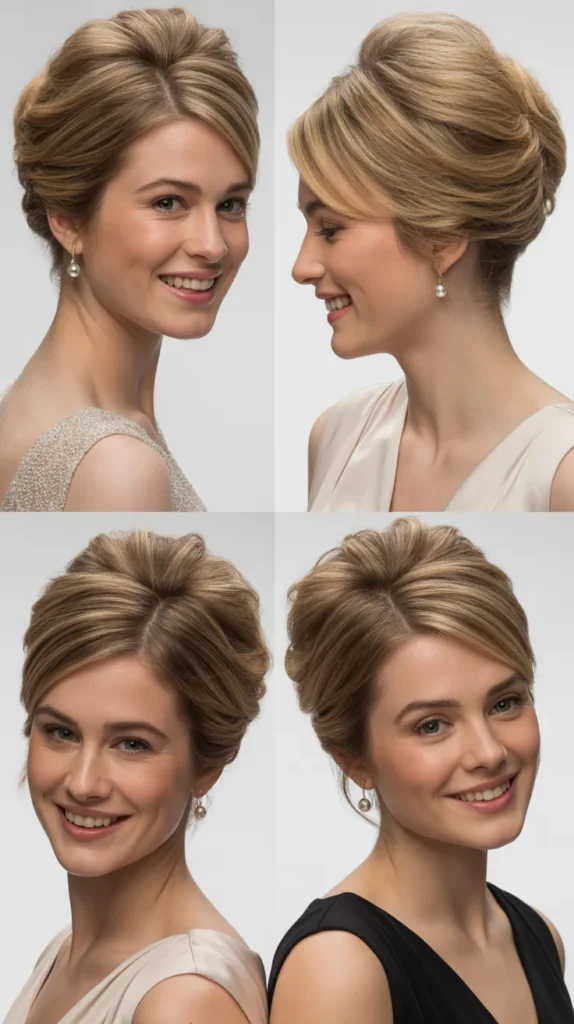
The French twist is a timeless updo that can be adapted beautifully for thin hair.
When built with texture and volume in mind, it gives the appearance of a thick, luxurious updo. Dirty hair with natural oils and existing product buildup is ideal for keeping this style locked in place.
- Backcomb the entire length of your hair gently for added grip and volume before styling.
- Gather all the hair to one side and begin rolling it upward and inward against the back of the head.
- As you roll, maintain loose tension so the twist sits slightly away from the skull for volume.
- Tuck the ends into the roll and secure the twist with long U-pins inserted vertically.
- Gently pull sections of the twist outward to loosen it and increase its visual size.
- Add a decorative clip or pin at the top for a polished and intentional finishing touch.
- Mist the completed style with medium-hold spray to keep it secure without stiffening it.
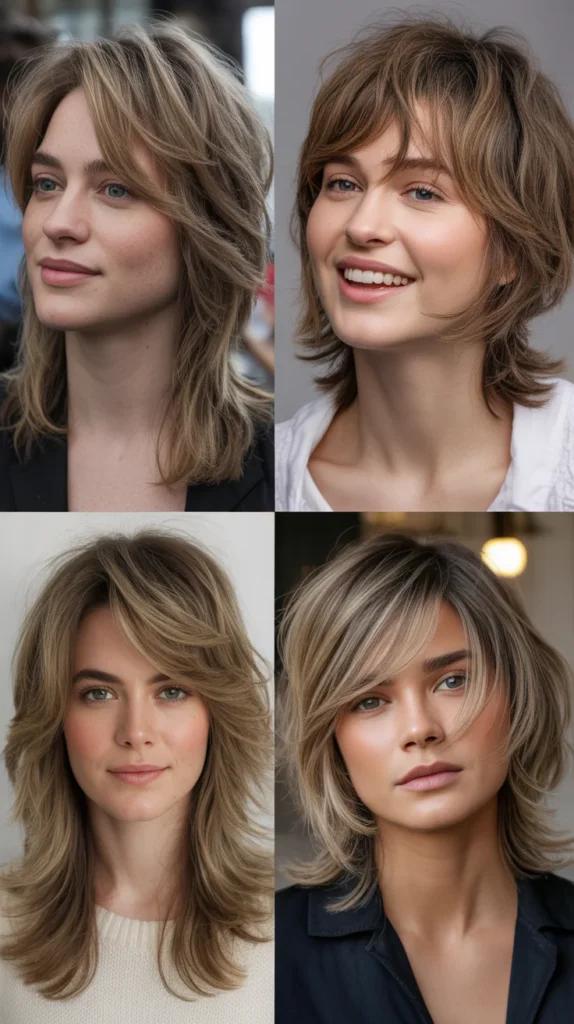
9. Tousled Curtain Bang Style
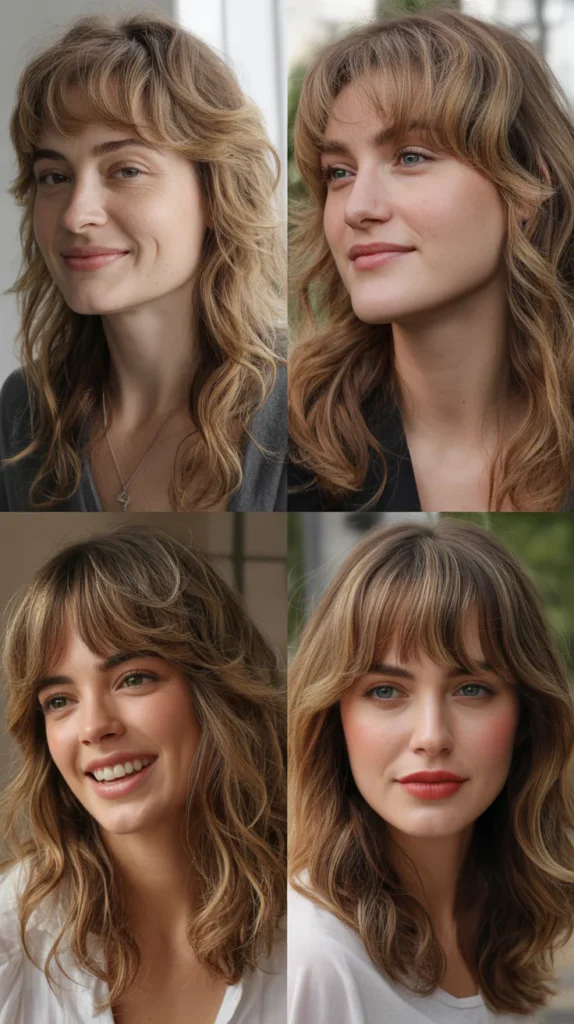
Curtain bangs paired with a tousled finish are incredibly flattering for fine, thin hair.
The bangs frame the face while the tousled body of the hair creates a deliberately undone, voluminous look. This style is especially effective on day-two or day-three hair when natural texture is already present.
- Use a flat iron or small curling wand to bend the curtain bangs gently outward from the center.
- Apply a pea-sized amount of light styling cream through the mid-lengths for workable texture.
- Scrunch the main body of the hair with your hands to encourage natural wave and volume.
- Use a diffuser on low heat to enhance existing texture without adding frizz or flatness.
- Part the bangs in the center and sweep each side outward to frame the face symmetrically.
- Tousle the crown gently with your fingertips to build height at the roots.
- Finish with a texture spray or sea salt spray for a lived-in, effortlessly voluminous effect.
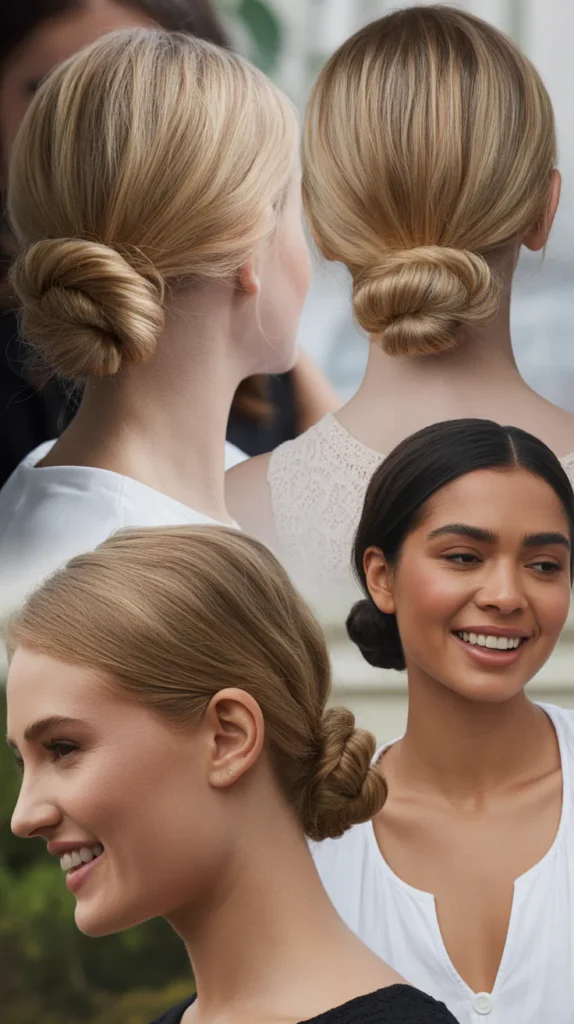
10. The Gibson Tuck
The Gibson tuck is an elegant, quick style that works beautifully for thin hair on busy days. It creates the look of a full, voluminous updo without requiring a lot of hair thickness. The natural texture of dirty hair makes the tuck hold firmly without needing excessive product or pins.
- Begin by creating a low ponytail at the nape of your neck and securing it loosely.
- Split the hair above the elastic band to create a small opening between the hair and scalp.
- Flip the ponytail up and feed it through the opening, tucking it inside and downward.
- Pull the tuck gently so that it sits smoothly but not too tight against the head.
- Loosen pieces around the crown and sides by tugging them gently with fingertips for volume.
- Leave a few strands free around the face and neck for a softer, more romantic silhouette.
- Secure any loose sections with small bobby pins hidden within the body of the tuck.
11. Root-Lift Blowout with Round Brush
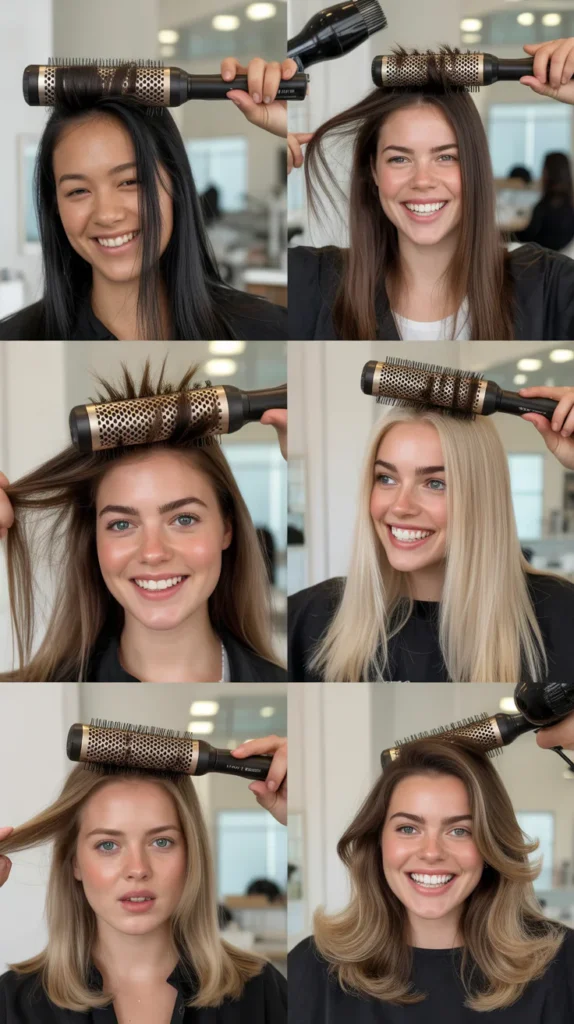
A root-lift blowout is one of the most transformative styles for fine, thin hair.
It focuses heat and tension precisely at the roots to physically lift flat hair away from the scalp. Dirty hair responds exceptionally well to this technique because product buildup and oils add natural friction.
| Blowout Step | Key Tip |
|---|---|
| Section hair into four quadrants | Work systematically for even lift |
| Apply volumizing spray at roots | Enhances heat styling effect |
| Use round brush pointing upward | Creates lift and tension at scalp |
| Blast with cool air at each section | Sets the volume in place |
| Finish with light-hold spray | Maintains lift without stiffness |
- Divide hair into four sections: two at the back and two at the front, clipping each away.
- Spray a volumizing spray at the roots before blow-drying each section individually.
- Wrap each section around a medium round brush and roll it toward the scalp while applying heat.
- Direct the airflow of the dryer parallel to the hair shaft to reduce frizz and increase shine.
- Finish each section with a blast of cool air while the brush is still rolled at the roots.
- Release the brush slowly and allow each section to cool in a lifted position before touching.
- Complete all sections and finish with a light-hold hairspray for long-lasting root volume.
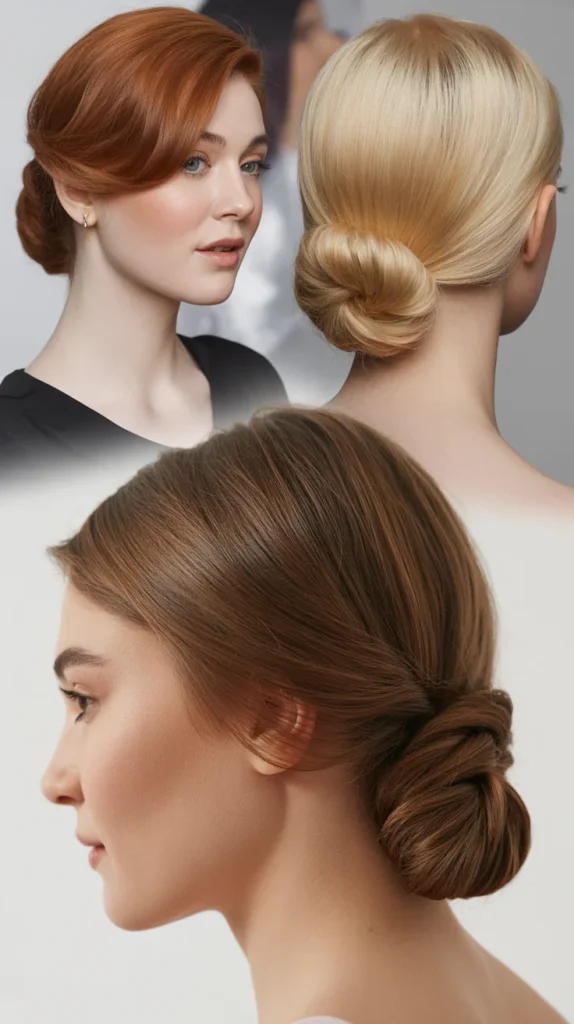
12. Knotted Low Bun
The knotted low bun is a chic, architectural style that creates fullness through deliberate structure.
For fine hair, knotting the ponytail before forming the bun adds texture and bulk that would otherwise be absent. This works especially well on dirty hair, which has more natural grip and staying power.
- Pull all hair into a low ponytail at the nape and secure it with a snag-free elastic.
- Divide the ponytail into two even sections and tie them together once in a loose knot.
- Wrap the knotted section around the base of the ponytail to form the body of the bun.
- Tuck the ends underneath and secure them with bobby pins inserted toward the scalp.
- Gently tug the outer layers of the bun apart to increase its size and add dimension.
- Pull a few strands loose from the front for a deliberately casual and face-softening finish.
- Apply a small amount of shine serum to the top layer only to add polish without weighing down the style.
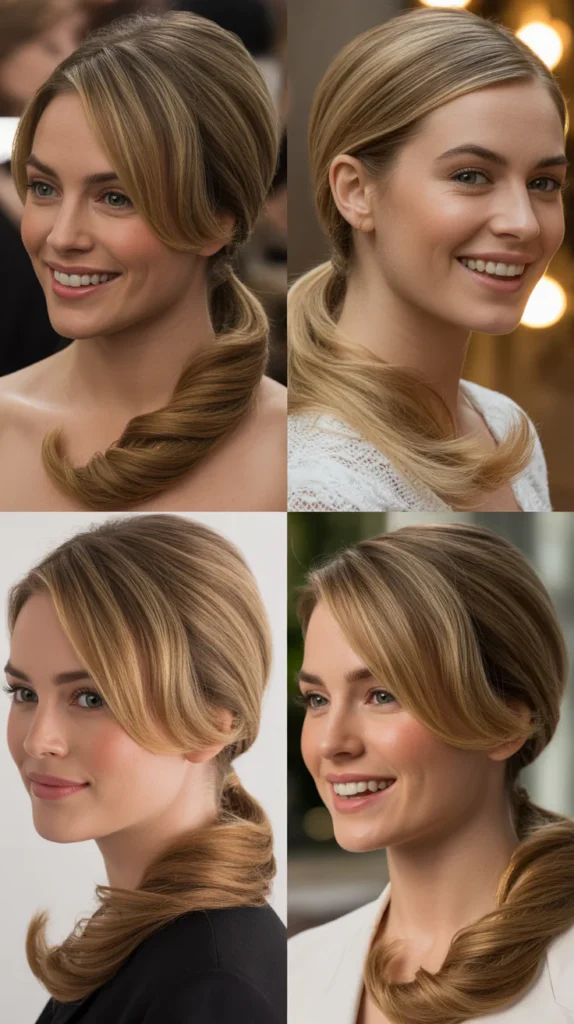
13. Effortless Twisted Ponytail
A twisted ponytail takes a basic style and turns it into something with visible texture and dimension.
Twisting before securing the ponytail creates visual bulk that makes thin hair appear significantly thicker. Dirty hair is ideal because the natural oils make each twist hold without flyaways.
- Start with hair that has been lightly brushed to remove tangles but retains its natural texture.
- Apply a light dry texturizing spray through the lengths to build grip and definition.
- Divide the hair into two sections and twist each one tightly in the same direction.
- Hold both twisted sections together and secure them with an elastic at your preferred height.
- Gently pull individual sections of the twist apart for a fuller, more textured result.
- Wrap a small piece of hair from the ponytail around the elastic to conceal it for a polished look.
- Finish by misting with light hairspray and gently loosening the crown with fingertips.
14. Piecey Textured Layers Style
Piecey texture is a highly effective technique for making thin hair look fuller and more dimensional.
By separating styled pieces deliberately, you create the visual effect of multiple layers and added thickness. This style thrives on dirty hair where light oil coating makes each strand easier to sculpt.
- Apply a small amount of light pomade or styling paste to your fingertips before touching the hair.
- Work through the mid-lengths and ends, separating pieces in a deliberate and random pattern.
- Use the tip of a comb or your fingers to pull individual strands slightly away from the others.
- Focus on creating separation near the face and crown for maximum visual volume impact.
- Pinch small groups of strands together at the tips to create natural-looking piecey ends.
- Avoid over-smoothing the surface, as the deliberate messiness creates the illusion of thickness.
- Seal the style with a light texturizing spray to keep the pieces separated and defined all day.
15. High Sleek Ponytail with Volume Base
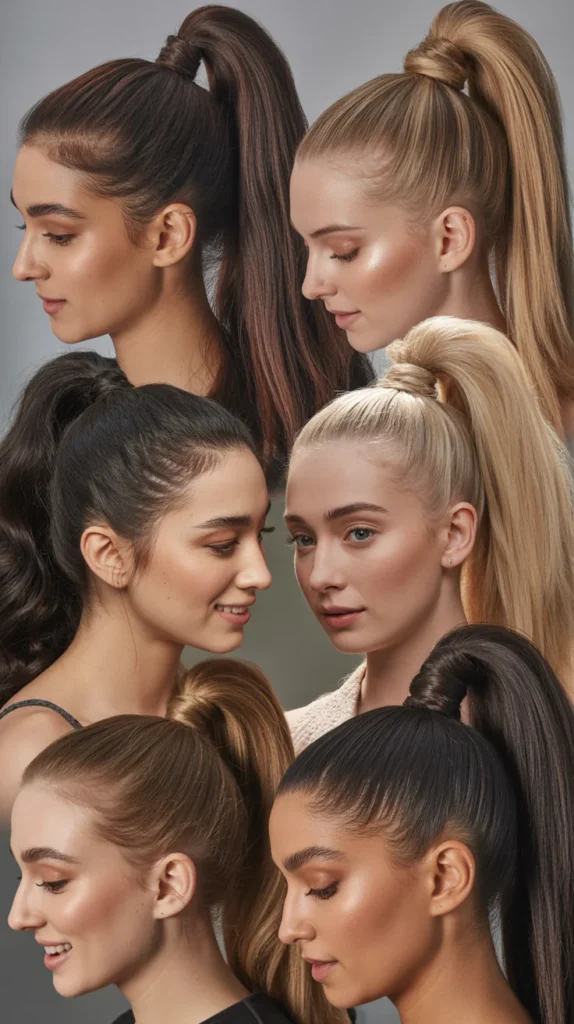
A high ponytail can look flat on thin hair unless you use the right volumizing base technique.
Building volume at the crown before securing the ponytail creates the lifted, full look associated with thick hair. Dirty hair with product buildup provides the natural friction needed to keep the base elevated.
- Backcomb the crown section generously before pulling the hair into a ponytail position.
- Gather all hair high on the head, just above the occipital bone for maximum elevation.
- Secure the ponytail tightly with two or three stacked elastics for long-lasting hold.
- Wrap a section of the ponytail hair tightly around all the elastics to disguise them.
- Pull the crown section slightly forward and upward before pinning it to exaggerate the volume.
- Tease the ponytail itself lightly to add body to the hanging length as well.
- Mist generously with medium-hold spray for a polished, long-wearing high volume ponytail.
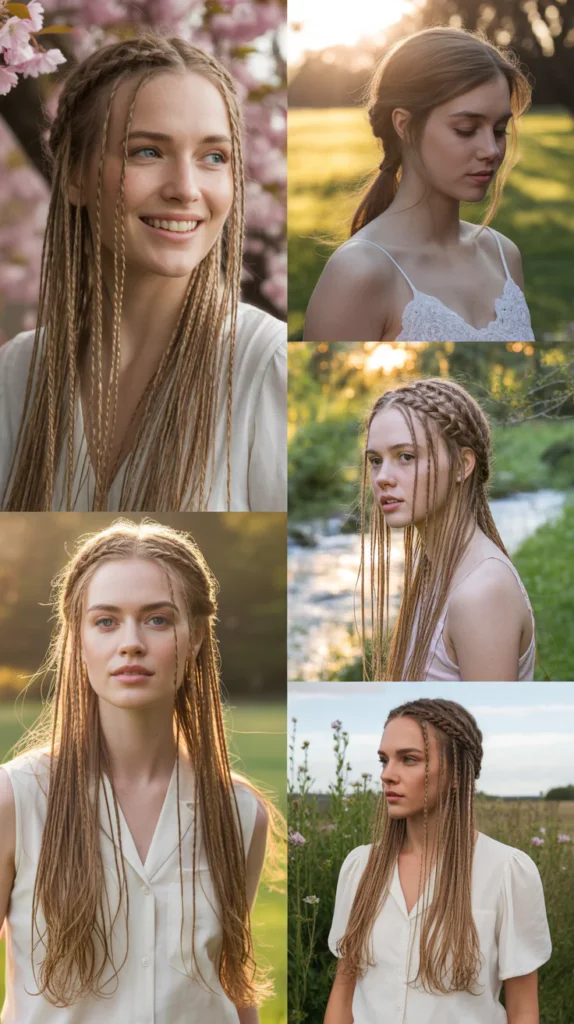
16. Fishtail Braid for Thin Hair

The fishtail braid is one of the most flattering braids for thin hair because pancaking the braid dramatically exaggerates its size.
What starts as a thin braid can be manipulated into something that looks incredibly thick and full. Dirty hair with texture and grip is the best foundation for a lasting, voluminous fishtail.
- Apply a texturizing spray or light dry shampoo through all layers before braiding for grip.
- Divide the hair into two equal sections rather than the usual three used in a regular braid.
- Take a small piece from the outer edge of the left section and cross it to the right section.
- Repeat on the right side, alternating these small crossover pieces as you move downward.
- Keep tension consistent but not tight, allowing natural fullness to develop as you go.
- Once secured at the end, begin pancaking by gently pulling each loop outward with fingertips.
- Continue pancaking until the braid appears double its natural size, then seal with light spray.
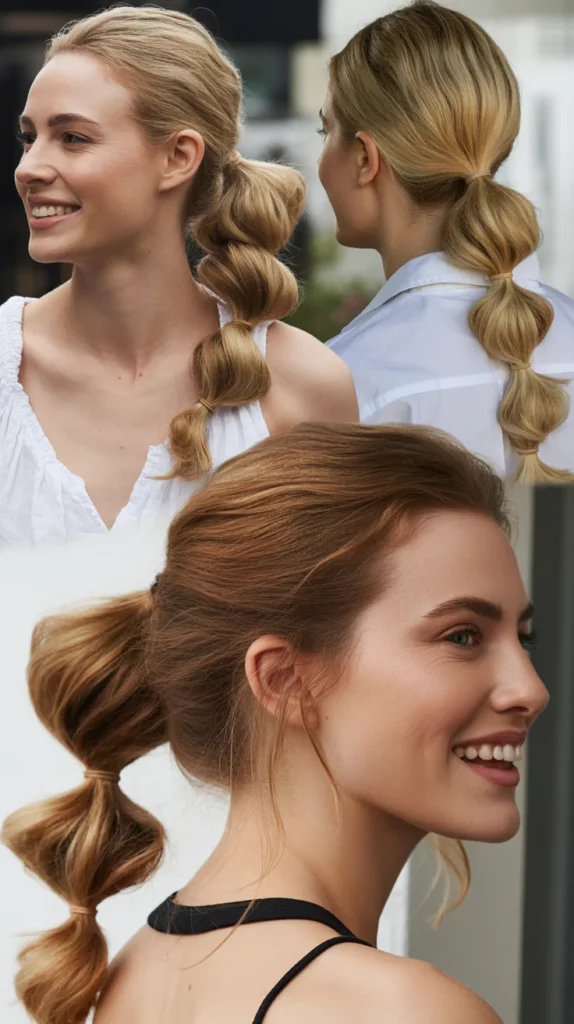
17. Voluminous Bubble Ponytail
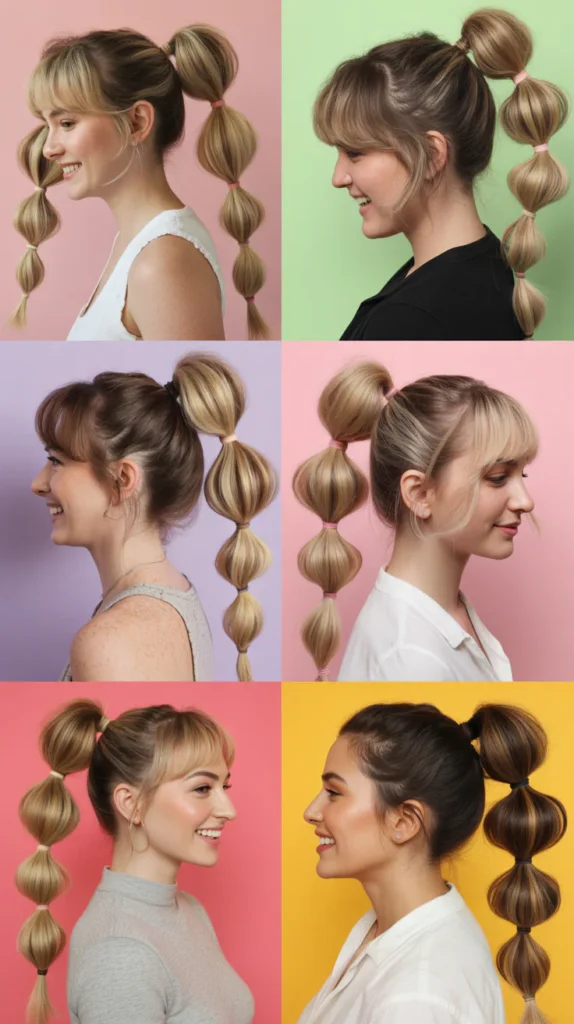
The bubble ponytail is a trendy style that is specifically designed to add visual volume to thin hair.
Multiple elastics spaced along the ponytail create the signature bubble effect that makes each section appear full and rounded. This style benefits enormously from dirty hair, which puffs up between each elastic beautifully.
- Pull hair into a high or mid-height ponytail and secure with the first elastic.
- Add a second elastic approximately two inches below the first and puff the hair between them.
- Continue adding elastics every two inches down the length, puffing between each section.
- At each puff, gently pull the hair outward from all sides to maximize the bubble effect.
- Backcomb inside each bubble section slightly before puffing for even more dramatic volume.
- Leave the final tips of the ponytail loose or curl them slightly for a polished ending.
- Spray the entire style with flexible-hold hairspray to maintain each bubble’s shape.
18. Tousled Beach Waves
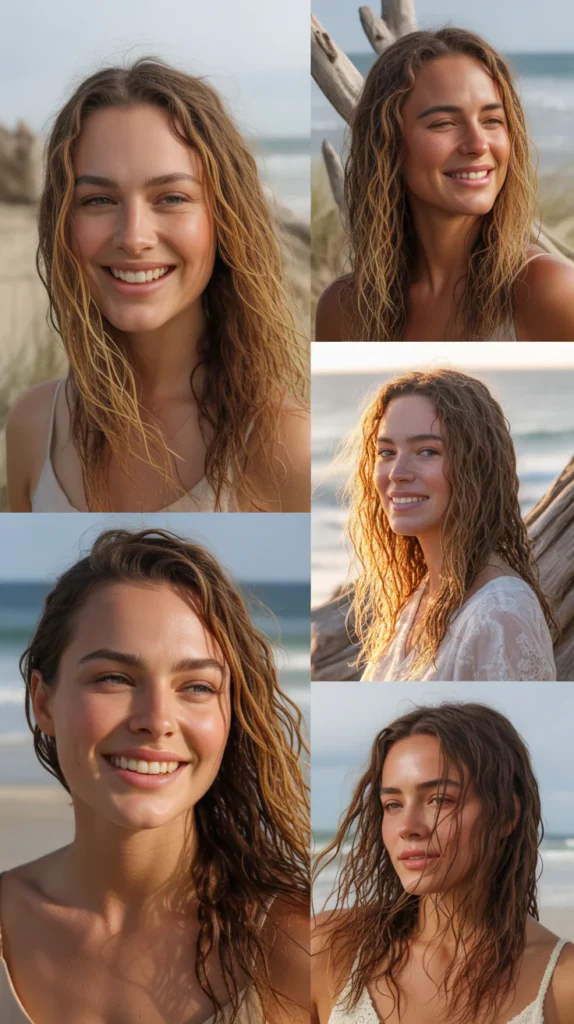
Beach waves are universally flattering and particularly effective for making thin hair appear dramatically fuller.
The strategic placement of waves and texture creates depth and dimension that smooth, flat hair completely lacks. Dirty hair is the perfect canvas because it naturally holds wave shapes better than freshly washed strands.
- Spritz a sea salt spray or beach wave spray generously through the mid-lengths and ends.
- Take one-inch sections and wrap them loosely around a medium curling wand, leaving the ends out.
- Alternate the direction of each curl — some toward the face, others away — for a natural, random look.
- Allow each curl to cool before releasing and dropping it into your hand.
- Once all sections are curled and cooled, flip your hair forward and scrunch it firmly.
- Apply a small amount of light hair oil to your palms and run them gently through the waves.
- Finish with a flexible-hold spray and tousle the roots with fingertips for added root lift.
19. Voluminous Blowout with Diffuser
A diffuser blowout works differently from a traditional blowout and is incredibly beneficial for thin hair.
Instead of brushing and stretching the hair, the diffuser enhances natural texture and curl for maximum organic volume.
Dirty hair with natural oils responds to the diffuser with more definition and body.
- Apply a curl-enhancing or volumizing foam to damp or slightly damp sections of dirty hair.
- Flip your head upside down and place sections of hair into the diffuser bowl.
- Use the low heat and low speed setting to gently dry each section without disturbing the texture.
- Scrunch hair upward into the diffuser while drying for maximum volume and curl definition.
- Work around the entire head, spending extra time at the roots for elevated crown volume.
- Once fully dry, flip your head upright and gently separate the roots with your fingertips.
- Finish with a light-hold spray or curl cream to define the texture without flattening the volume.
20. Pinned Half-Up Style with Volume
The pinned half-up style is deceptively simple but incredibly effective at adding volume to fine hair.
By pinning the top half of the hair back in a specific way, you lift the crown and create the illusion of greater thickness. Dirty hair provides the texture and grip necessary for pins to stay secure without sliding.
- Section off the top half of the hair from ear to ear, leaving the bottom layer loose.
- Backcomb the crown section gently before pulling it back for elevated root volume.
- Gather the backcombed section and twist it loosely twice before pinning it at the back.
- Use criss-crossed bobby pins beneath the twist to secure it firmly in place.
- Pull the pinned section slightly upward with your fingertips to elevate and expand it.
- Allow a few face-framing pieces to fall free on each side for a soft, romantic effect.
- Finish with a flexible spray misted from below, directing the product upward to the roots.
21. Root Clipping Technique
Root clipping is a little-known technique that dramatically increases volume in thin hair with minimal effort.
By clipping sections of hair at the roots while drying, you train the hair to sit away from the scalp instead of lying flat. Dirty hair holds the clipped volume in place even after the clips are removed.
- Apply a lightweight volumizing spray to the roots before beginning the clipping process.
- Lift sections of hair at the crown and mid-scalp and clip them upward against the head.
- Use duckbill clips or alligator clips at the base of each lifted section close to the scalp.
- Allow the hair to air dry completely or blow-dry on low heat with clips in position.
- Remove clips only once the hair is fully dry and cooled to preserve the lifted shape.
- Gently finger-style the lifted sections to blend them naturally with the rest of the hair.
- Spray lightly with a flexible-hold spray to maintain the elevated root position all day.
22. Chic Scarf-Wrapped Updo
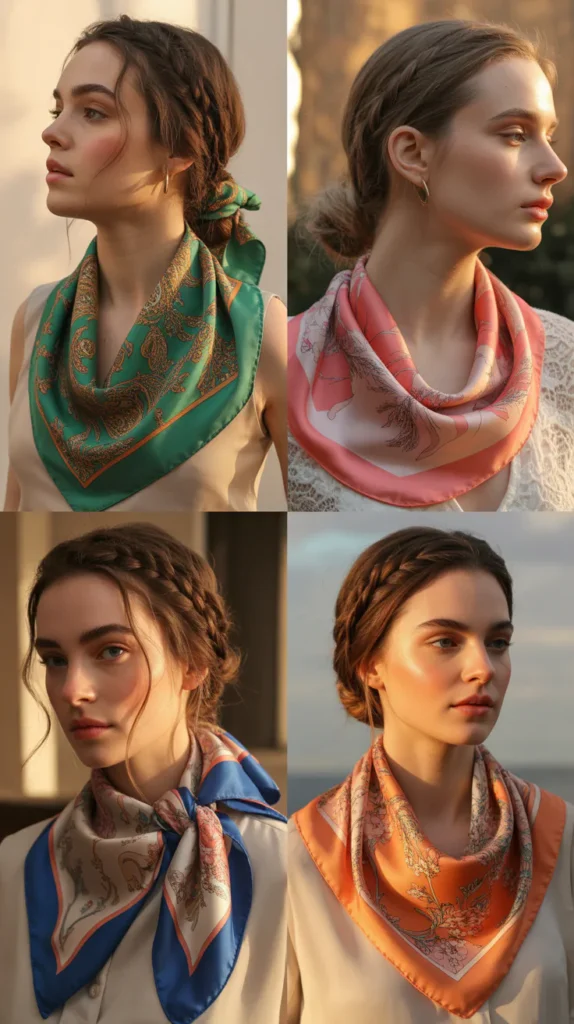
A scarf-wrapped updo is a stylish way to disguise flat thin hair while creating a fashion-forward look.
The scarf adds bulk, color, and texture to a simple updo, making thin hair appear far fuller than it actually is. Dirty hair works particularly well here because the scarf anchors itself more firmly to textured strands.
- Choose a lightweight silk or satin scarf that coordinates with your outfit for a cohesive look.
- Pull your hair into a loose low bun or ponytail and intentionally leave it slightly messy.
- Place the center of the scarf at the nape of the neck and bring both ends upward.
- Weave the scarf through the bun or ponytail, wrapping it around the base as you go.
- Tie the scarf ends into a bow or knot at the top of the bun for a fashion-forward finish.
- Pull a few strands loose around the face to prevent the style from looking too severe.
- Adjust the scarf so it is slightly puffed and dimensional rather than flat and tight.
23. Reverse French Braid
The reverse French braid, also known as the Dutch braid, sits on top of the hair rather than sinking into it.
This raised position makes the braid appear thicker and more dramatic than a traditional French braid. Dirty hair grips the braid’s panels more securely, resulting in a neater and longer-lasting style.
- Begin by taking a small section at the crown and dividing it into three equal strands.
- Cross the right strand under the center strand, then the left strand under the center.
- As you move downward, incorporate new pieces of hair from each side into the under-cross pattern.
- Keep the braid sitting raised on top of the scalp by pulling upward as you incorporate hair.
- Pancake each section gently as you go to widen the braid and add visual bulk immediately.
- Secure the tail with a small elastic and continue pancaking the rest of the braid after completion.
- Finish with a texturizing spray and lightly pull the outer loops for a fuller finished look.
24. Waterfall Braid with Volume
The waterfall braid is a breathtakingly beautiful style that creates the appearance of lush, thick hair.
Its cascading sections give the visual impression of a full, flowing mane, even on fine hair. Dirty hair makes the cascading sections sit with more body and natural wave as they fall free.
- Begin a regular French braid along the hairline on one side of the head, starting at the temple.
- After the first complete stitch, release the bottom strand from the braid and let it fall freely.
- Pick up a new strand of hair from below to replace the dropped one and continue braiding.
- Continue dropping and replacing the bottom strand every stitch as you work toward the ear.
- At the ear, transition into a regular three-strand braid and secure with a small elastic.
- Tuck the tail behind the ear and pin it discreetly so only the cascading waterfall is visible.
- Gently stretch and expand all braided sections with fingertips for a wider, more voluminous look.
25. Stacked Teased Layers Style
Stacking and teasing works by building volume layer by layer throughout the entire head of hair.
This technique is highly effective for those with particularly limp or ultra-fine strands. Dirty hair provides the natural friction needed to keep each teased layer elevated without collapsing.
- Divide all hair into four horizontal layers using clips, starting from the nape and working upward.
- Begin with the bottom layer, backcombing each small section gently from mid-length toward the root.
- Release the next layer and repeat the backcombing process, slightly more aggressively than the previous.
- Continue through all layers, backcombing each one progressively more toward the crown.
- Smooth only the very top surface layer lightly with a paddle brush to conceal the teasing beneath.
- Shape the overall silhouette by pressing gently at the sides while leaving the top rounded.
- Lock the entire style with a firm-hold hairspray for a voluminous, long-lasting result.
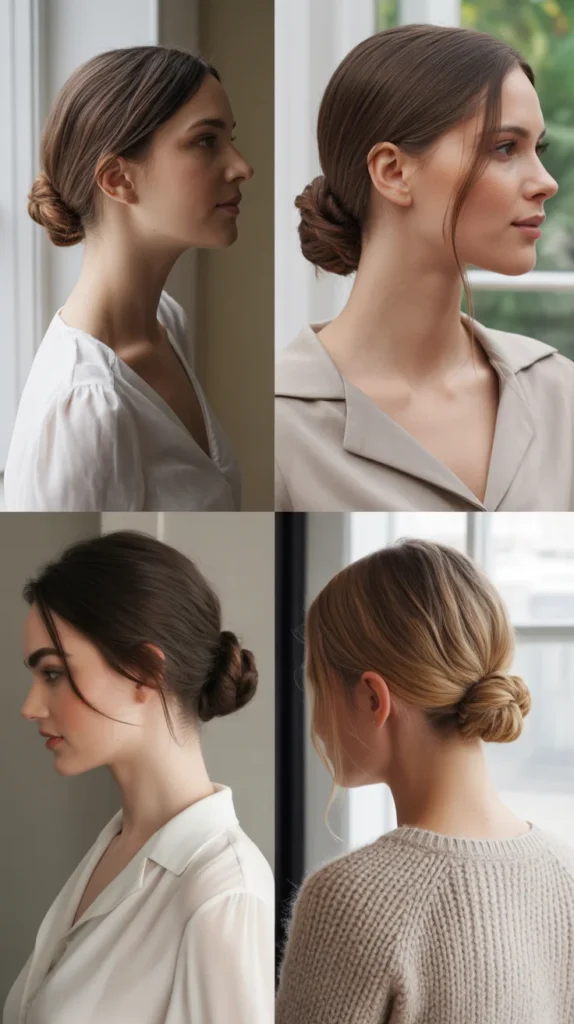
26. Low Looped Bun

The low looped bun is a deceptively voluminous style that creates fullness through looping rather than tight wrapping. Each loop adds layers of visual bulk to a style that would otherwise look flat on thin hair. Dirty hair naturally clings to itself during looping, making this style hold longer and appear larger.
- Create a low ponytail at the nape and secure it loosely with an elastic band.
- Divide the ponytail into two sections for a simple two-loop version of this style.
- Take the first section and loop it once, pinning the loop flat against the base of the ponytail.
- Repeat with the second section, overlapping it partially over the first for layered depth.
- Add additional loops from any remaining length, building outward and upward for maximum size.
- Tug each loop gently once pinned to increase its size and make the bun appear fuller.
- Finish with bobby pins to secure any loose sections and a light mist of flexible-hold spray.
27. Side Swept Low Pony
The side swept low ponytail is a glamorous style that appears effortlessly full even on fine hair.
Sweeping all the hair dramatically to one side multiplies the visual volume on that side.
Dirty hair holds this asymmetric style beautifully, resisting the slip and flatness that can occur with clean strands.
- Create a deep side part and brush all the hair toward the heavier side of the part.
- Backcomb the crown section very gently before gathering to maintain elevated volume.
- Gather all the hair loosely to one side at the nape or slightly below the ear.
- Secure with a silk-wrapped elastic or a statement hair tie to elevate the overall look.
- Wrap a strand of hair from the ponytail around the elastic and pin to polish the finish.
- Gently pull the top section of the ponytail upward to create loose, flowing volume.
- Leave a few soft strands free at the front and behind the ear for a romantic, effortless feel.
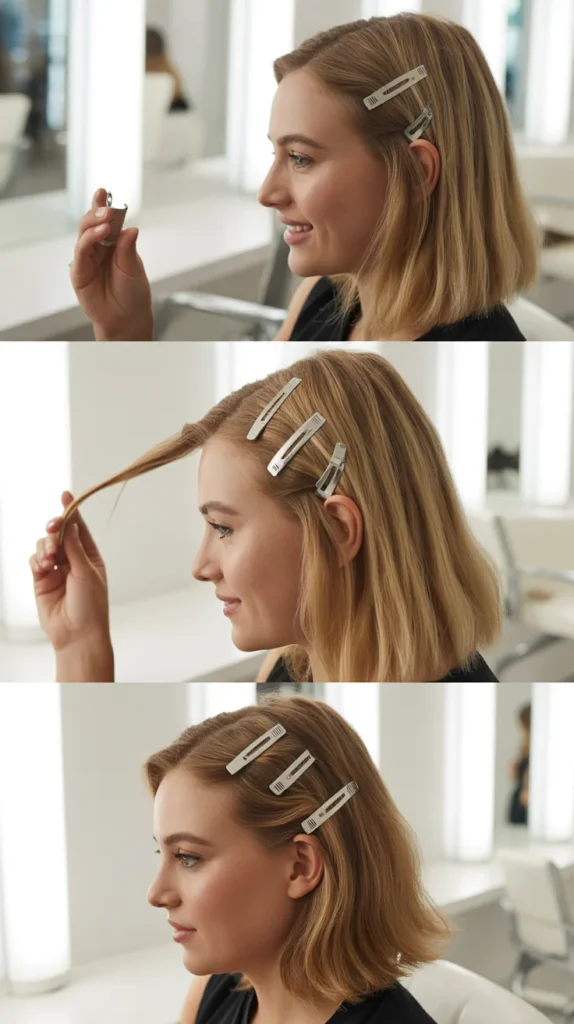
28. Clip-Enhanced Volume Style
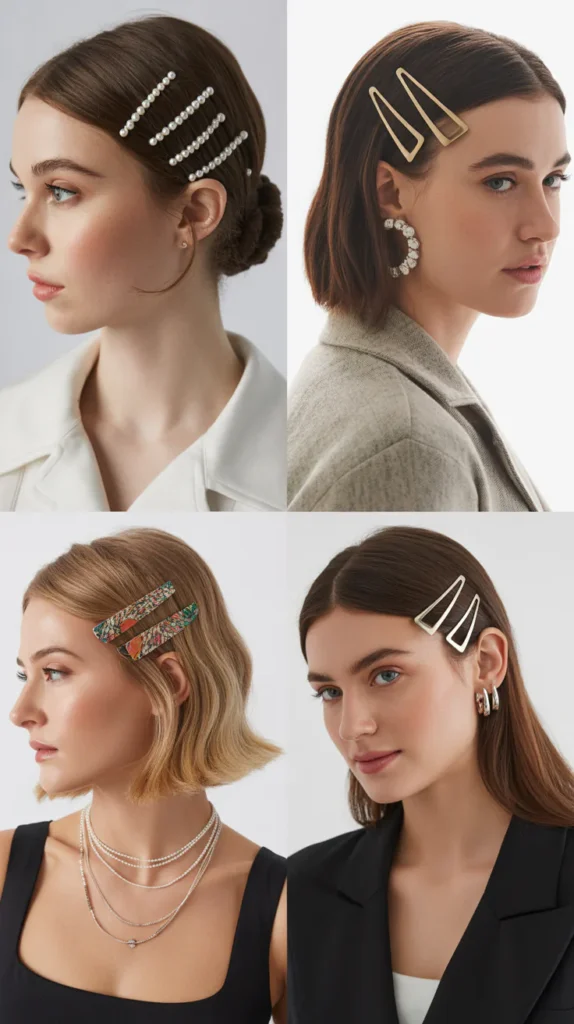
Hair clips have become one of the most fashionable accessories and a great tool for adding volume simultaneously.
Strategically placed clips at the roots or sides can physically lift sections of thin hair for a fuller, more elevated look.
Dirty hair with natural grip holds decorative clips in place all day without slipping.
- Choose structured or elevated clips like claw clips, crab clips, or architectural barrettes for maximum impact.
- Place a claw clip at the crown with hair loosely gathered inside for an instant elevated look.
- Use smaller barrettes near the temples to pin back sections and create side volume.
- Secure clips slightly away from the scalp rather than flush against it to encourage lift.
- Layer multiple clips at varying heights along the back of the head for a dimensional effect.
- Let the hair inside or behind each clip remain loose and slightly tousled for volume.
- Mix different clip styles and sizes for an intentionally eclectic yet voluminous look.
29. Velvet Headband Updo
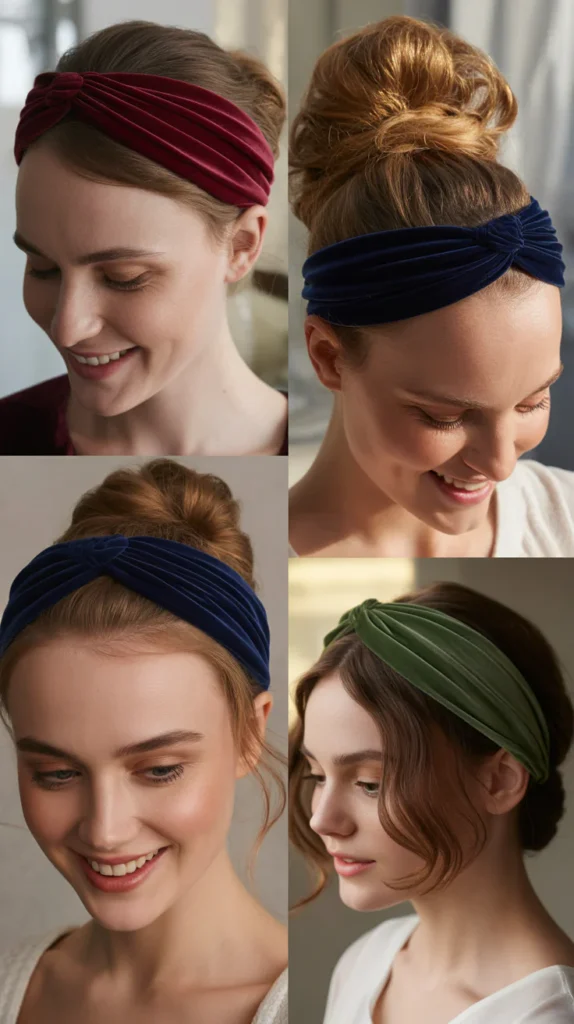
A velvet headband can transform a simple updo into a voluminous, stylish look for thin hair.
The texture of the velvet grips fine hair effectively, preventing slipping while adding a luxurious fashion element.
This style works best on dirty hair where the natural oils help the hair stay in position around the band.
- Place a thick velvet headband around the crown of the head, positioning it just behind the hairline.
- Tuck small sections of hair behind and under the headband, starting from the sides.
- Roll and tuck each section into the headband rather than just pushing hair under loosely.
- Work your way toward the back, tucking all remaining hair in a way that creates fullness at the nape.
- Pull each tucked section out slightly after tucking to create a puffier, more voluminous silhouette.
- Leave a few face-framing pieces out in front of the headband for a soft, approachable look.
- Pin any stubborn sections with small bobby pins hidden within the tucked hair.
30. Pinned Back Romantic Curls
Pinned back romantic curls combine the volume of curled hair with the elegance of a partially pinned style.
The curls create natural fullness and body while selective pinning directs attention to the most voluminous areas.
Dirty hair curls more easily and holds the curl shape far longer than freshly washed fine hair.
- Apply a lightweight curl primer or heat protectant through the lengths before curling.
- Use a small barrel curling iron to create tight ringlets throughout the entire head.
- Once all curls are fully cooled, loosen them gently by running fingers through once.
- Take sections from the front and sides and pin them back toward the crown with bobby pins.
- Layer the pinned sections on top of each other to build height and interest at the back.
- Allow the remaining curls to fall freely around the shoulders and back for romantic volume.
- Finish with a curl-hold spray to maintain definition and prevent the curls from dropping.
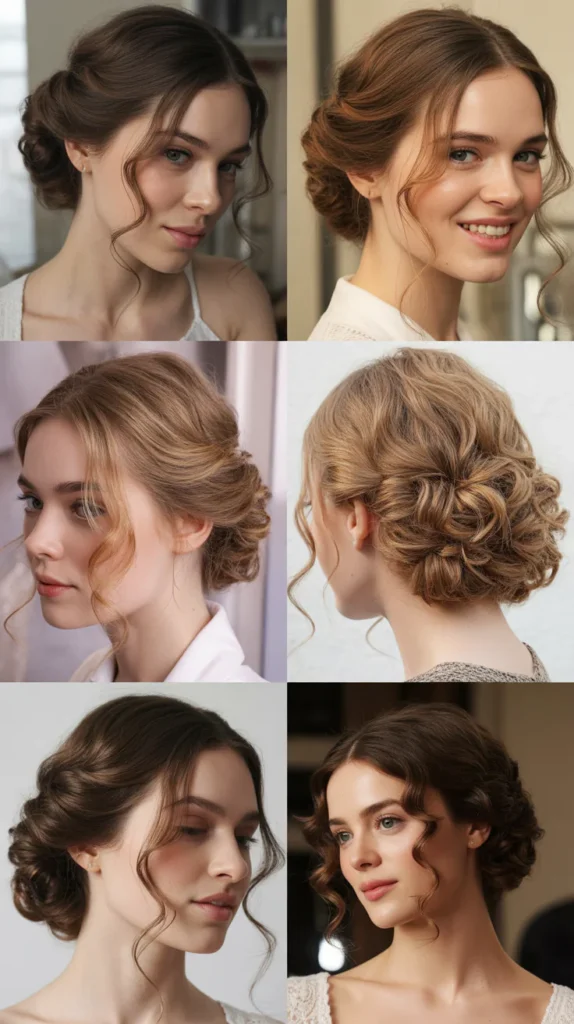
31. Undone Chignon
The undone chignon is the perfectly imperfect updo that looks luxuriously full on thin hair when constructed correctly.
Its loose, undone quality creates a style that appears to have significant mass and body.
Dirty hair is absolutely ideal because the natural texture and oils allow the chignon to maintain its loose, textured shape.
- Gather all the hair loosely at the nape without brushing it too smooth.
- Twist the gathered hair twice and then loosely fold it upward against the back of the head.
- Secure the fold with U-shaped pins, inserting them in multiple directions for maximum hold.
- Immediately begin pulling sections outward from the chignon to loosen and expand it.
- Pull sections from the crown forward slightly to create volume above the chignon.
- Allow several strands to escape around the face, nape, and sides for a deliberately undone look.
- Finish with a light mist of texturizing spray to maintain the romantic, undone quality.
32. Puff Ponytail
The puff ponytail is a bold and voluminous style that creates dramatic height at the crown for thin hair.
By backcombing and shaping a rounded puff before securing the ponytail, you fake the look of a thick, full mane.
Dirty hair with product memory holds the puff shape without collapsing, making it the ideal base.
- Section off a generous portion of the crown from ear to ear, clipping the rest away.
- Backcomb the crown section aggressively from roots to mid-lengths for maximum lift.
- Shape the backcombed section into a rounded puff and pin it firmly at the back of the crown.
- Release the remaining hair and gather it into a ponytail just below the pinned puff.
- Blend the ponytail naturally with the base of the puff for a seamless finish.
- Tug the puff gently from the sides to widen it and increase its dramatic volume further.
- Lock the puff in place with a firm-hold spray and smooth only the very top surface lightly.
33. Feathered Blowout
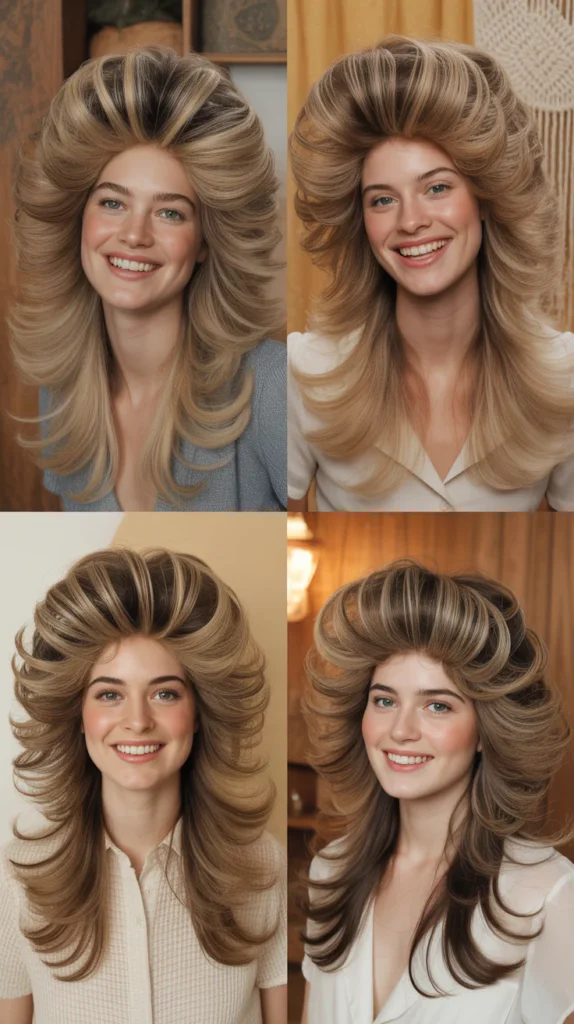
The feathered blowout is a classic 70s-inspired style that creates beautiful movement and volume for thin hair.
The outward-flicked ends create the visual impression of significantly more hair mass and body.
Dirty hair with existing product memory takes on the feathered shape easily and maintains it throughout the day.
- Apply a volumizing mousse from roots to ends before beginning the blowout process.
- Divide hair into sections and use a round brush to blow-dry each one while rolling the ends outward.
- Flip the ends of each section outward as the brush reaches the tips for the signature feathered effect.
- Use medium heat throughout to prevent moisture loss and maintain the hair’s natural body.
- Work in a C-shaped motion with the brush at the ends to create a consistent outward flick.
- Blast with cool air while the brush is still rolled at the ends to set the feathered shape firmly.
- Finish with a light-hold spray and run a wide-tooth comb through once for a polished, full look.
34. Braided Halo Updo

The braided halo updo wraps braided sections around the entire head to create the appearance of an impressively full crown.
This encircling technique gives thin hair a regal, voluminous quality that looks far more complex than it actually is to achieve.
Natural oils in dirty hair act as a styling agent that holds the braids smoothly against the head.
- Create a center or side part and divide the hair into two equal sections from front to back.
- Braid each section loosely from nape to tip and pancake both braids generously.
- Take one braid and wrap it around the front of the head like a headband, pinning it in place.
- Bring the second braid from the opposite direction and overlap it with the first.
- Tuck both tails beneath the opposing braids and pin them firmly against the scalp.
- Tug individual loops of both braids outward to create maximum width and volume.
- Finish with a light hold spray and adjust any sections that appear flat or tight.
35. Sleek Top Knot with Volume Base
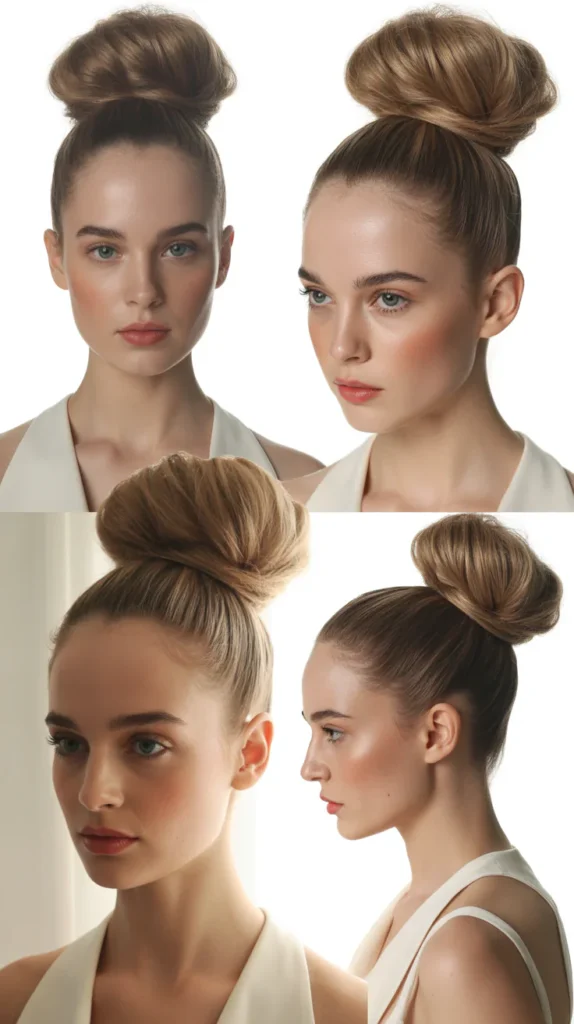
The sleek top knot gets a volume upgrade for thin hair through a strategic volumized base beneath it.
The contrast between the sleek surface and the lifted base creates a dramatic, fashion-forward look.
Dirty hair is key here because the scalp’s natural oils keep the sleek top smooth while the teased interior holds the shape.
- Begin by backcombing only the under-section of the hair at the top of the head generously.
- Smooth the very surface layer over the teased base using a soft bristle brush.
- Gather the entire top into a high ponytail while preserving the volume beneath.
- Twist the ponytail tightly and wrap it into a sleek knot at the crown.
- Secure the knot with multiple bobby pins and a strong elastic for long-lasting hold.
- Apply a small amount of edge control or hair wax to smooth any flyaways at the hairline.
- Finish with a shine spray on the top surface only for a polished, high-fashion finish.
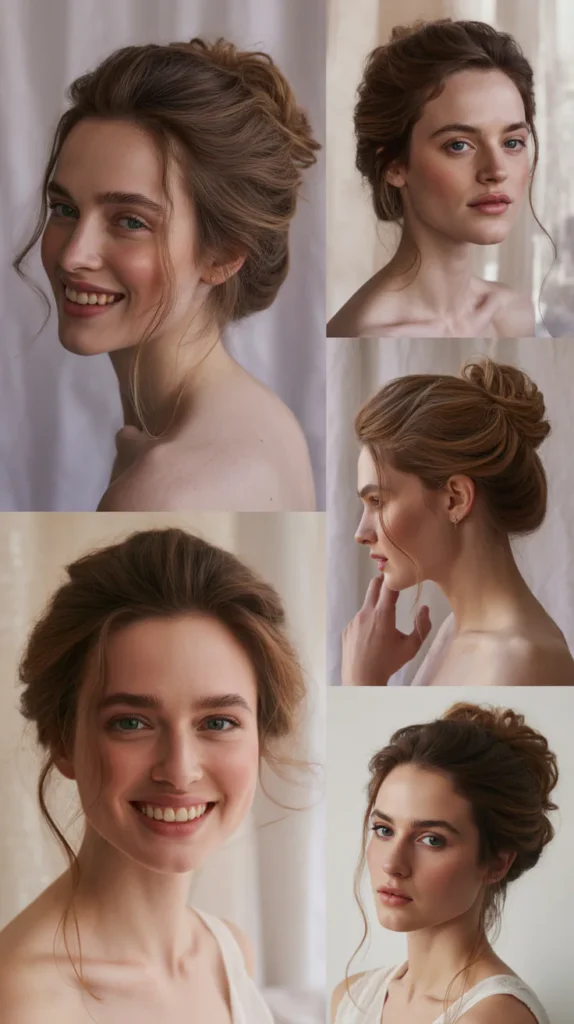
36. Layered Loose Updo

The layered loose updo is a versatile style that builds volume through the strategic placement of multiple loose sections.
Each layer adds perceived thickness, creating an updo that looks incredibly full from all angles.
Dirty hair is perfect for this style because each layer stays in its placed position without needing heavy product.
- Divide all hair into three horizontal sections: nape, mid-head, and crown, clipping each away.
- Begin with the nape section, gathering it loosely and pinning it into a casual swirl near the base.
- Release the mid section and loosely swirl it over the first pinned section, pinning it slightly higher.
- Release the crown section and fold it loosely over the other two sections, creating the top layer.
- Tug each layer outward generously after pinning to create an expanded, full silhouette.
- Leave the ends of each section slightly loose and visible for added texture and dimension.
- Finish with a light texturizing spray misted from multiple angles to maintain the layered volume.
37. Barely-There Waves with Volume Spray
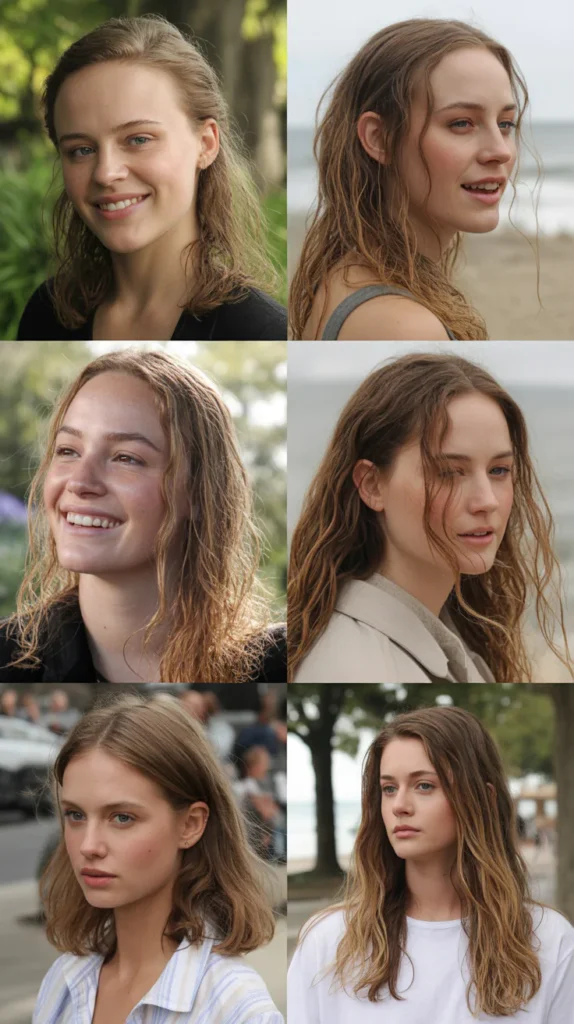
Barely-there waves are the ultimate everyday style for thin hair, creating effortless, natural-looking volume without appearing overdone.
This technique focuses on the subtlest wave pattern to enhance the hair’s natural movement and body.
Dirty hair is the absolute best base for barely-there waves because the natural oils give the waves weight and authentic-looking texture.
- Spray a volumizing spray generously through the hair, focusing heavily on the roots.
- Use a large barrel curling wand or flat iron with a slight curve to create very loose, open waves.
- Alternate the direction of each wave section for a natural, undone appearance throughout.
- Keep the waves starting mid-length rather than at the root for a believably natural result.
- Once all waves are cool, shake the head gently and run fingers through just once.
- Apply a small amount of light hair oil to the palms and press gently over the surface for shine.
- Finish with a flexible-hold spray misted from underneath the hair to boost root volume upward.
Conclusion
Thin hair should never hold you back from achieving stunning, full-bodied hairstyles that make you feel confident and beautiful every single day.
As this complete guide to 37 Thin Hair Dirty Styles That Add Volume has shown, you do not need a fresh blowout or thick locks to create styles with incredible dimension, texture, and fullness.
From simple root-lifting techniques to romantic braided updos and tousled waves, every one of these styles is designed to work with what thin hair naturally offers, especially on those second and third days when natural oils become your greatest styling asset.
The key takeaway from 37 Thin Hair Dirty Styles That Add Volume is that dirty hair is not a hair problem — it is actually your most powerful styling tool.
Embrace the texture, lean into the techniques, and let these 37 styles transform the way you see and style your beautiful thin hair every single week.