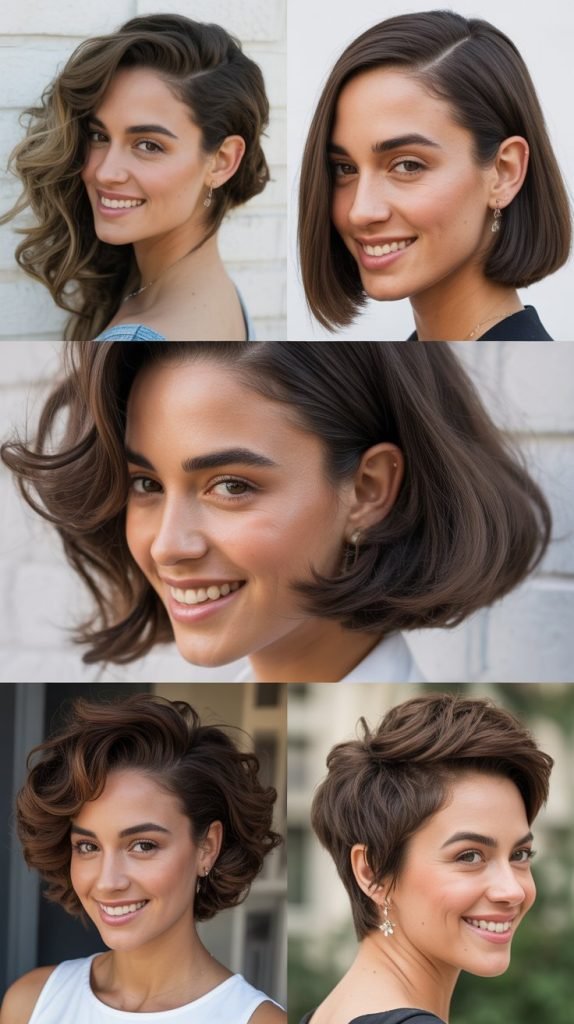
If you’re blessed with thick wavy hair, you know the struggle of finding hairstyles that look effortlessly chic without demanding hours of your morning routine.
Your gorgeous waves have a mind of their own, often refusing to cooperate when you’re running late or fighting against humidity throughout the day.
The good news is that your hair type is actually one of the most versatile textures when you know which styles work with your natural pattern rather than against it.
In this comprehensive guide to 37 Low-Effort Hairstyles for Thick Wavy Hair That Stay All Day, you’ll discover practical styling techniques that embrace your waves, require minimal tools, and hold up from breakfast meetings to evening dinners.
Whether you’re heading to the office, hitting the gym, or attending a special event, these low-maintenance styles will transform your hair routine from frustrating to fabulous.
Get ready to unlock the secrets that professional hairstylists use to make thick wavy hair look intentionally styled with just minutes of effort.
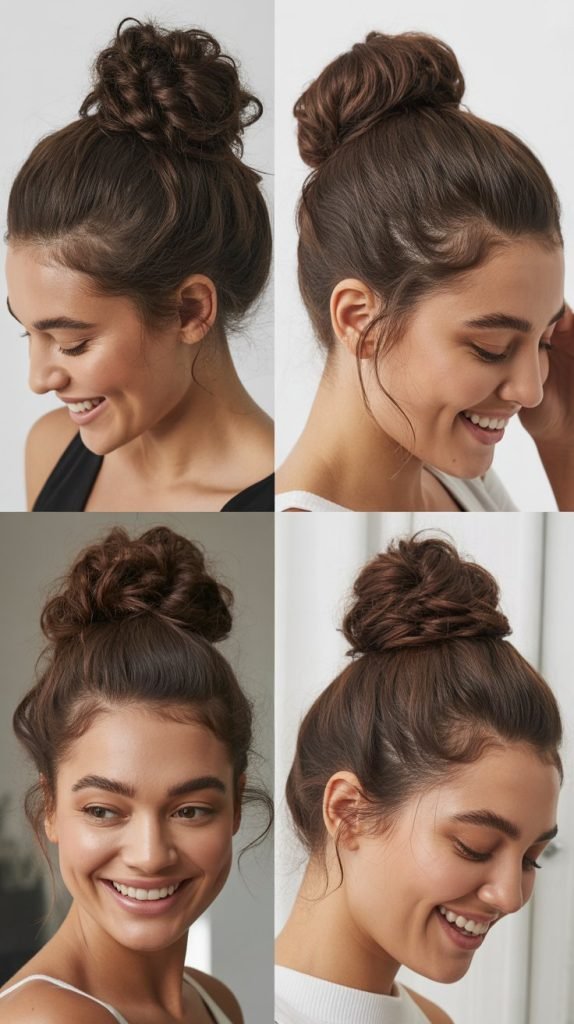
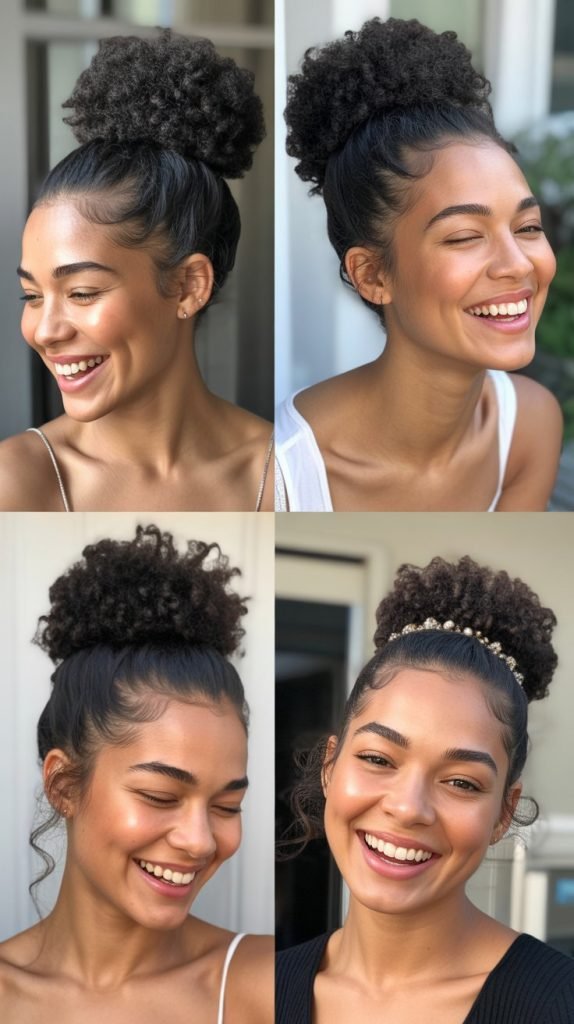
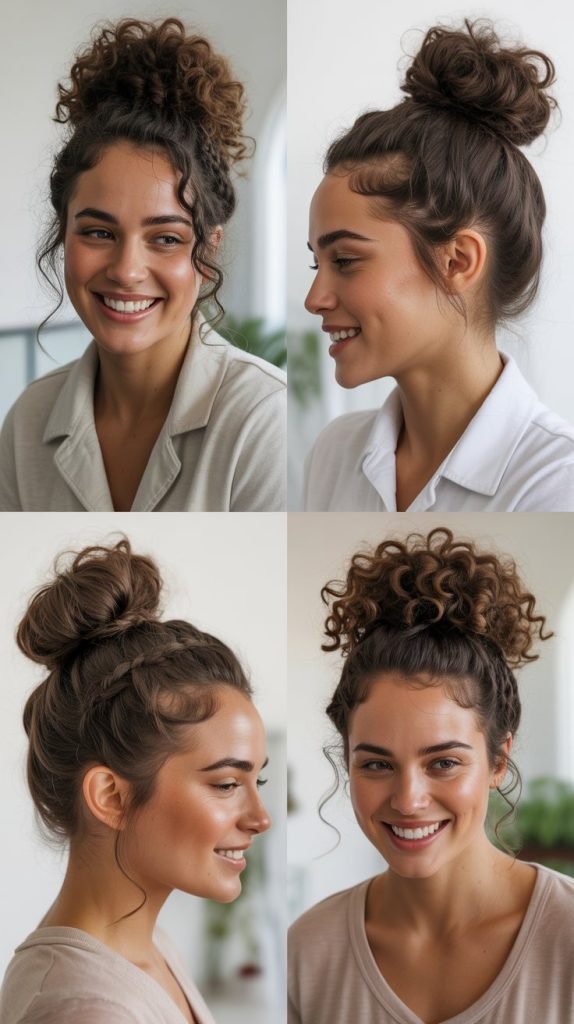
1. The Classic Messy Bun
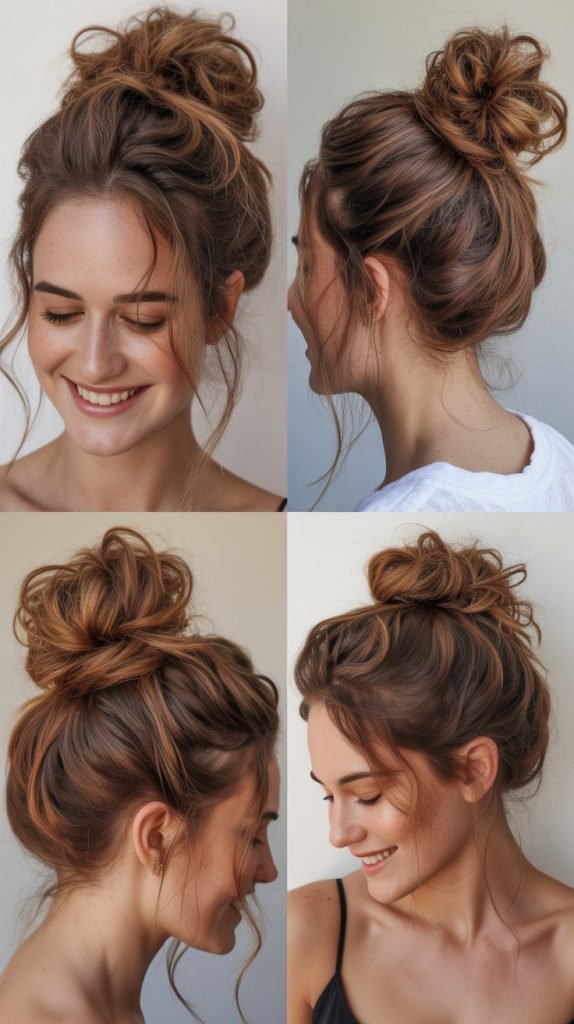
The messy bun remains a timeless favorite because it genuinely works with thick wavy hair’s natural texture rather than fighting it.
This style takes advantage of your hair’s volume and creates an effortlessly elegant look in under two minutes.
- Flip your head upside down and gather all your hair at the crown of your head using your fingers rather than a brush to maintain texture.
- Twist the ponytail loosely without pulling it tight, allowing some waves to remain visible throughout the twist.
- Wrap the twisted section around the base of the ponytail in a circular motion, securing with a hair tie or bobby pins.
- Pull out a few face-framing pieces and gently tug at the bun to create more volume and a relaxed appearance.
- Finish with a light-hold hairspray or texturizing spray to keep flyaways in place without making the style stiff.
- For extra security that lasts all day, use a second hair tie around the base or add U-shaped pins through the center of the bun.
2. Half-Up Top Knot
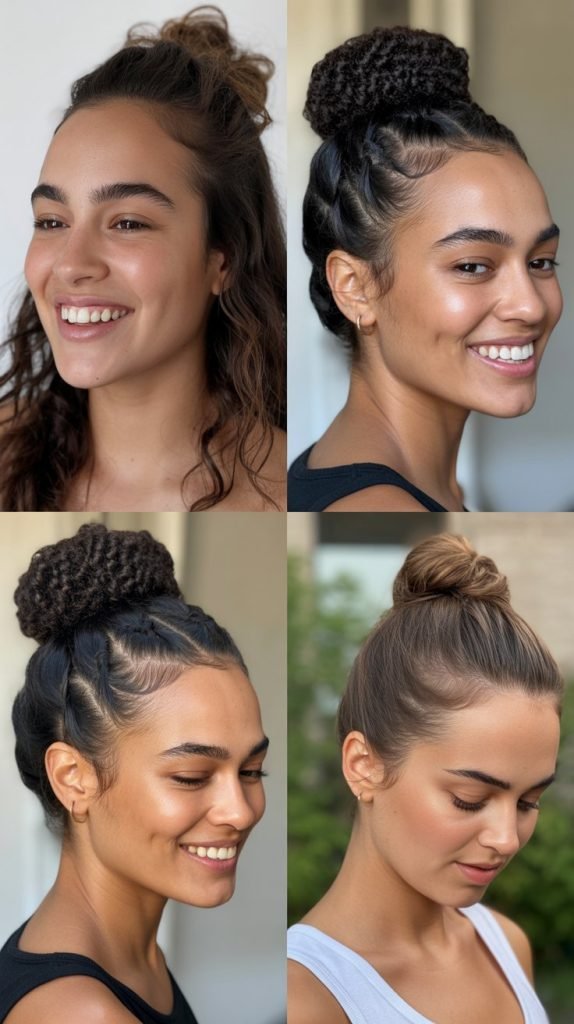
The half-up top knot strikes the perfect balance between keeping hair off your face while showcasing your beautiful waves.
This style works exceptionally well for thick wavy hair because the weight of the bottom section helps anchor the entire look.
- Section off the top third of your hair from ear to ear, leaving the rest of your waves flowing down.
- Gather the top section at the crown and secure it with a hair tie, creating a small ponytail.
- Twist the ponytail and wrap it around itself to form a compact knot, securing with another hair tie or pins.
- Gently pull at the knot to make it fuller and more relaxed, matching the casual vibe of your natural waves.
- Use your fingers to slightly mess up the part line so it doesn’t look too perfect or severe.
- Apply a small amount of lightweight oil or serum to the flowing bottom waves to enhance their definition and shine.
3. Low Twisted Ponytail
A low twisted ponytail adds sophistication to your look while being incredibly simple to execute. The twist detail makes this style appear far more intricate than the minimal effort it actually requires.
- Create a deep side part or center part depending on your preference and face shape.
- Divide your hair into two equal sections down the middle of your head.
- Take each section and twist it loosely toward the back of your head, securing both temporarily with clips.
- Combine both twisted sections at the nape of your neck and secure with a hair tie.
- Remove the temporary clips and gently pull at the twists to add volume and create a softer appearance.
- Wrap a small section of hair around the hair tie to conceal it for a more polished finish.
- Secure the wrapped section with a bobby pin tucked underneath the ponytail where it won’t be visible.
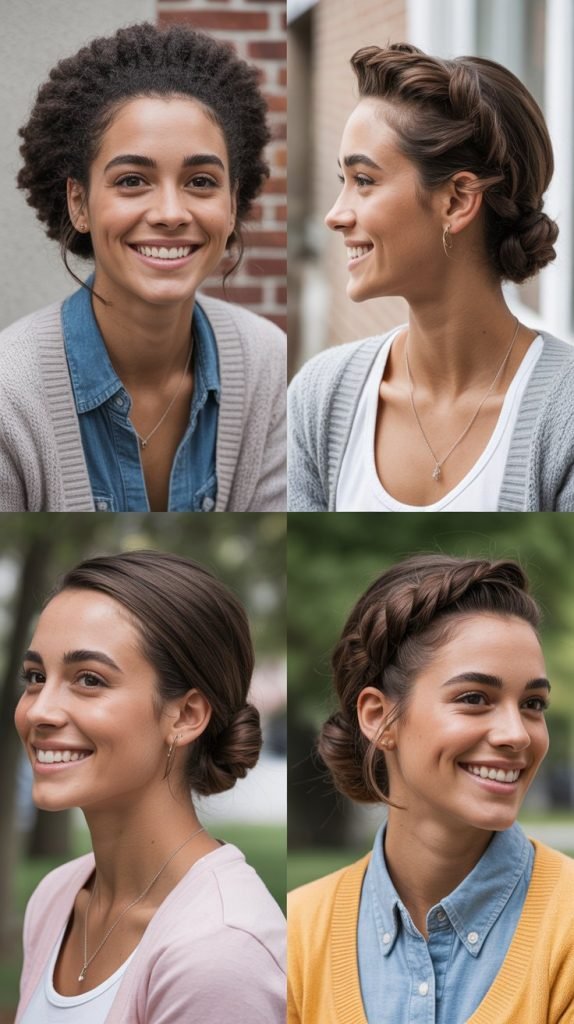
4. Braided Headband with Loose Waves
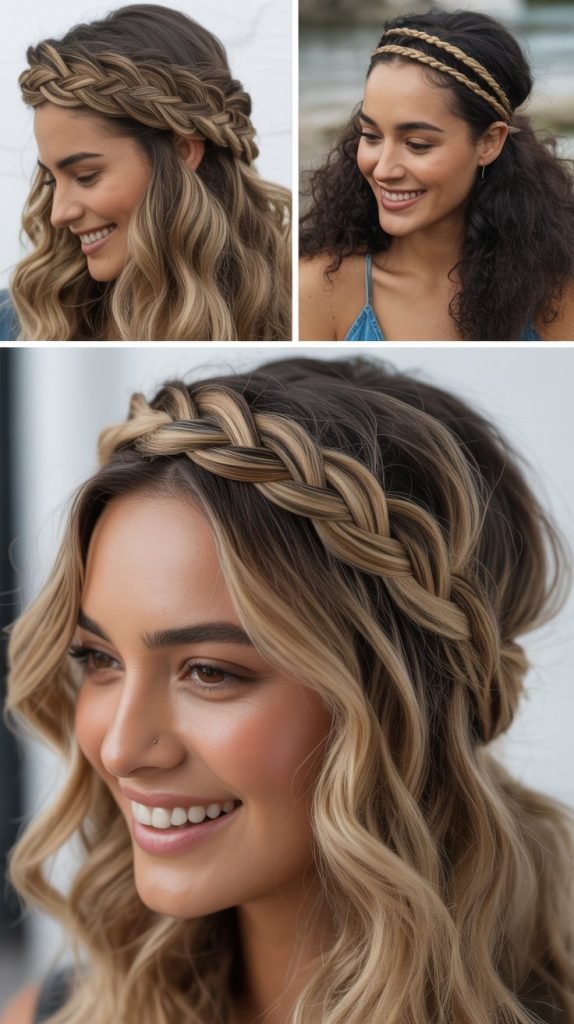
This romantic style keeps hair off your face while letting your thick waves cascade beautifully down your back.
The braided headband adds a bohemian touch that looks intricate but takes just minutes to create.
- Take a two-inch section of hair from behind your ear on one side of your head.
- Create a simple three-strand braid with this section, braiding toward the front of your face.
- Bring the braid across your forehead like a headband, securing it behind your opposite ear with bobby pins.
- Allow the rest of your waves to fall naturally, enhancing them with a curl-enhancing cream if desired.
- Pin the braid securely with at least three bobby pins in an X-pattern to ensure it stays put all day.
- For added interest, you can braid sections from both sides and pin them at the back of your head.
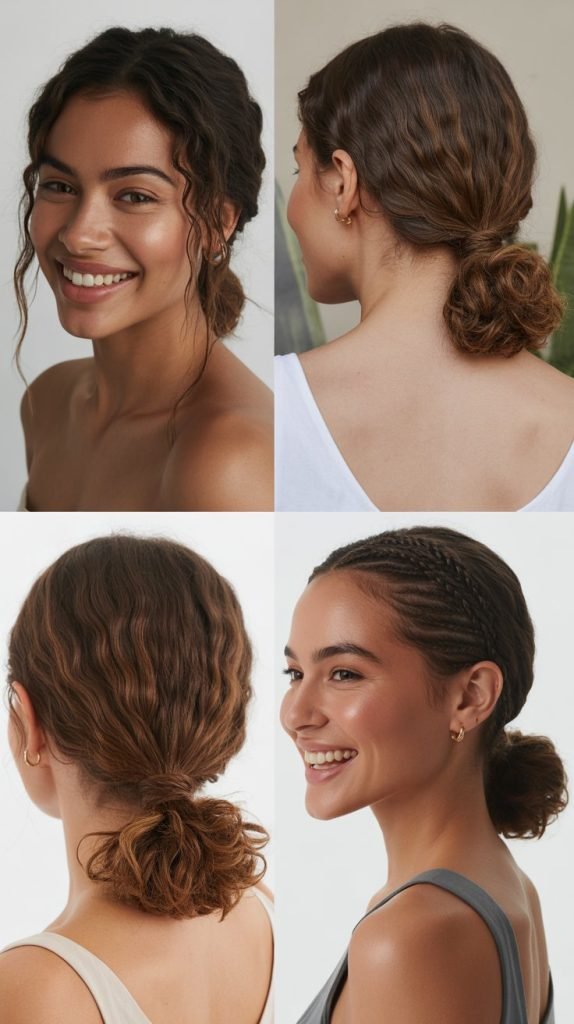
5. The Effortless Low Bun
The low bun sits at the nape of your neck and works beautifully for both professional settings and casual weekends.
Thick wavy hair creates the perfect amount of volume for this classic style without needing additional teasing or padding.
- Gather all your hair at the nape of your neck, keeping it relatively loose rather than pulling it tight against your scalp.
- Twist the gathered hair gently until it naturally starts to coil on itself.
- Wrap the twisted section around its base, forming a bun shape at the nape.
- Tuck the ends underneath the bun and secure with U-shaped pins or a hair tie.
- Pull out a few wispy pieces around your face and neck to soften the overall look.
- Use bobby pins in a color matching your hair to secure any loose sections that might fall during the day.
- Finish with a flexible-hold hairspray that allows some movement while maintaining the shape.
6. Side-Swept Waves with Bobby Pins
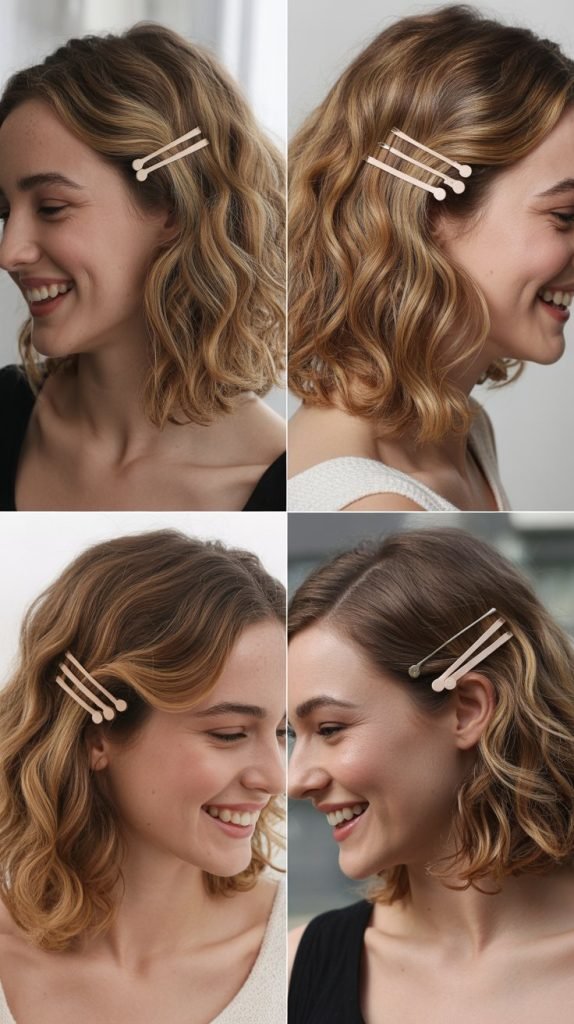
This glamorous yet simple style showcases your thick waves while adding Old Hollywood elegance. The strategic placement of bobby pins keeps everything secure without complicated braiding or twisting.
- Create a deep side part on your preferred side, using the arch of your eyebrow as a guide for placement.
- Sweep all your hair to one side, allowing your natural waves to fall over your shoulder.
- Take small sections from the opposite side (the side with less hair) and pin them behind your ear with bobby pins in an X-formation.
- Layer three to five bobby pins vertically along the side of your head for maximum hold.
- Apply a volumizing spray at the roots on the heavier side to maintain lift throughout the day.
- Finish the ends with a light curl-defining cream to keep your waves looking fresh and bouncy.
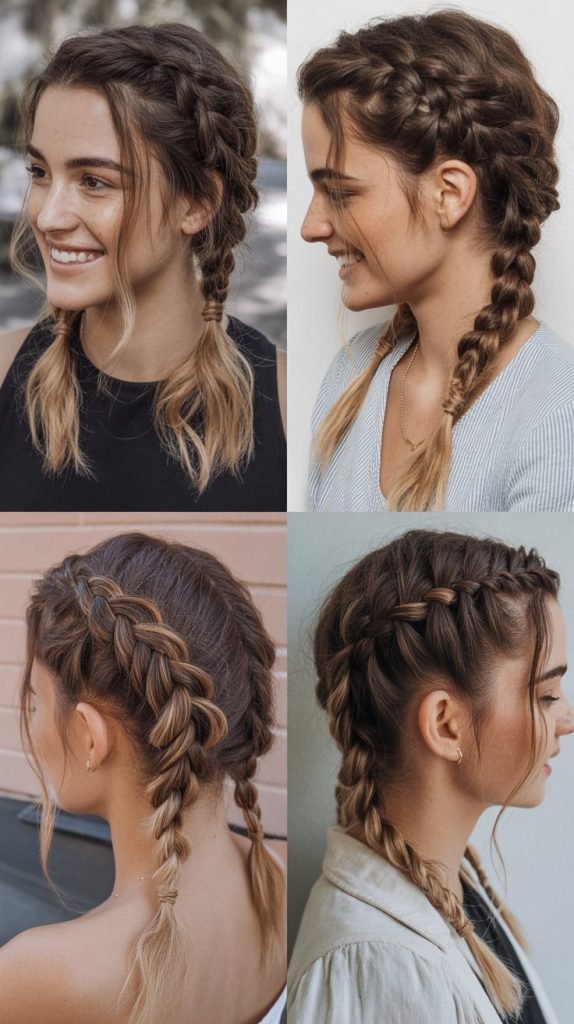
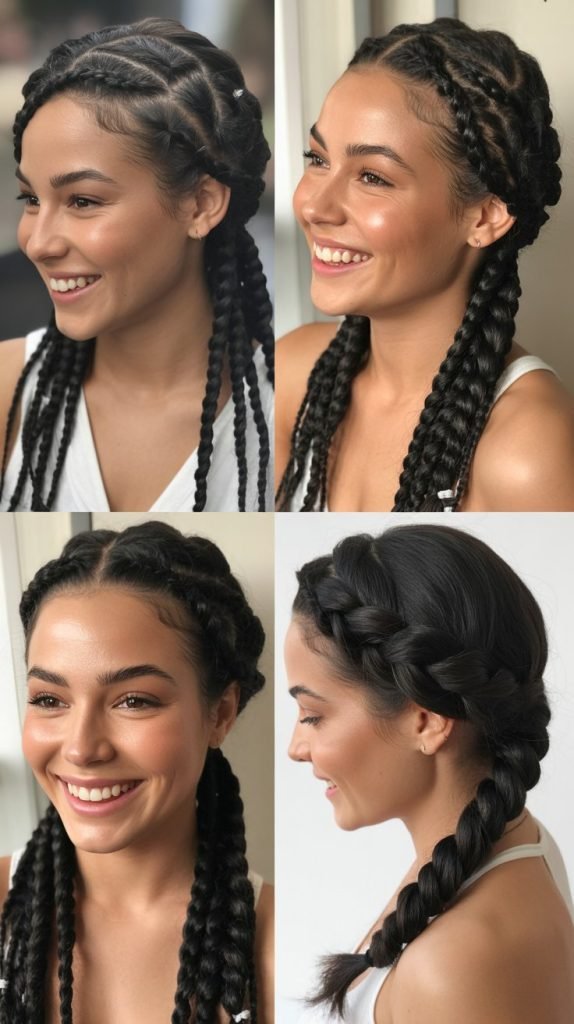
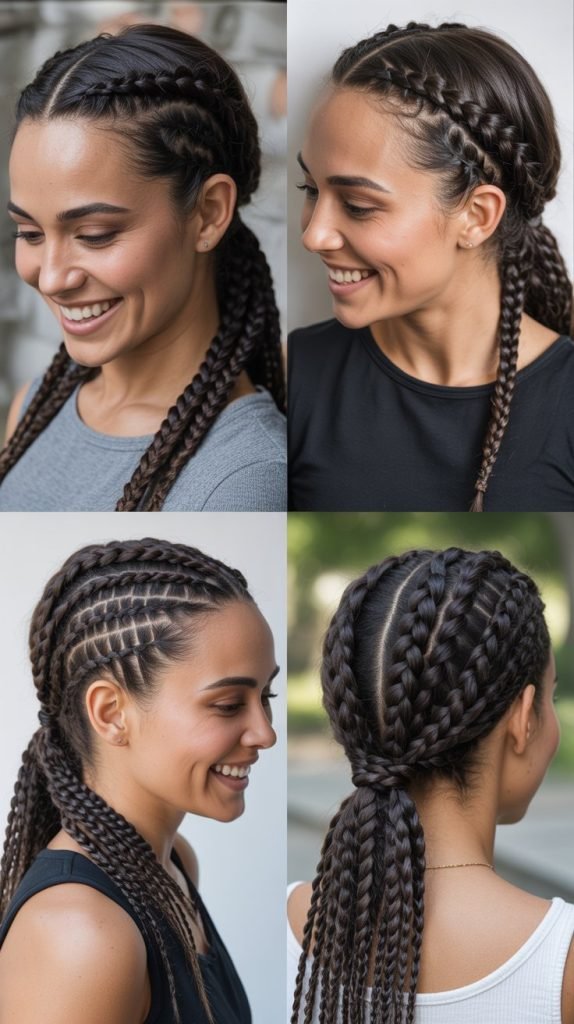
7. Double Dutch Braids
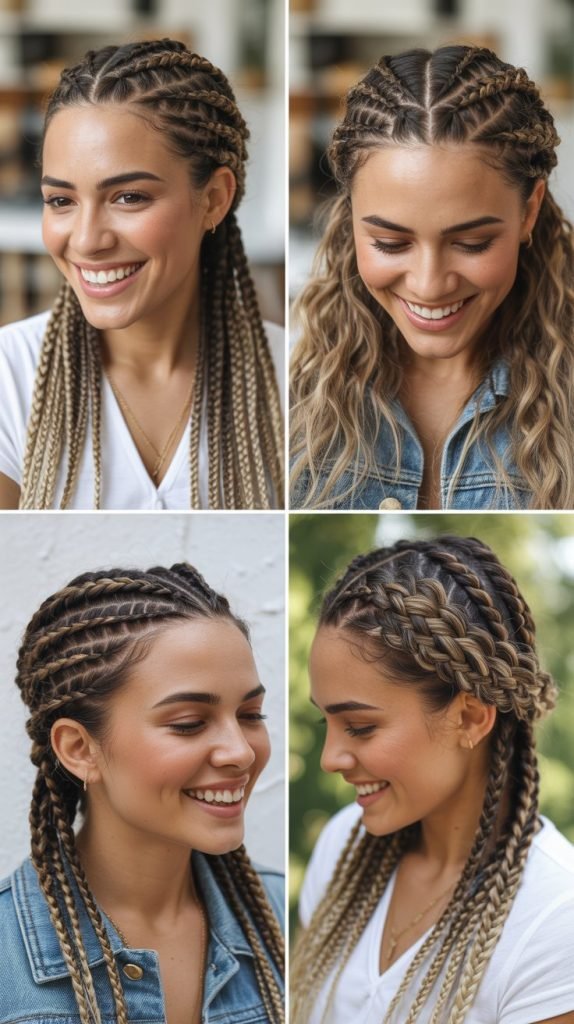
Double Dutch braids work exceptionally well with thick wavy hair because your natural texture adds beautiful dimension to the braids.
This athletic-chic style keeps hair completely off your face and neck while looking intentionally styled.
- Part your hair down the center from your forehead to the nape of your neck, creating two equal sections.
- Starting on one side, take a section near your hairline and divide it into three strands.
- Begin a Dutch braid by crossing the outer strands under the middle strand instead of over, adding hair as you go.
- Continue braiding tightly down the length of your hair, securing the end with a small elastic.
- Repeat the exact process on the other side, ensuring both braids sit at the same height.
- Gently pull at the edges of each braid to make them appear fuller and more relaxed.
- Secure any flyaways with a light mist of hairspray or smoothing serum applied with your fingertips.
8. The Twisted Crown
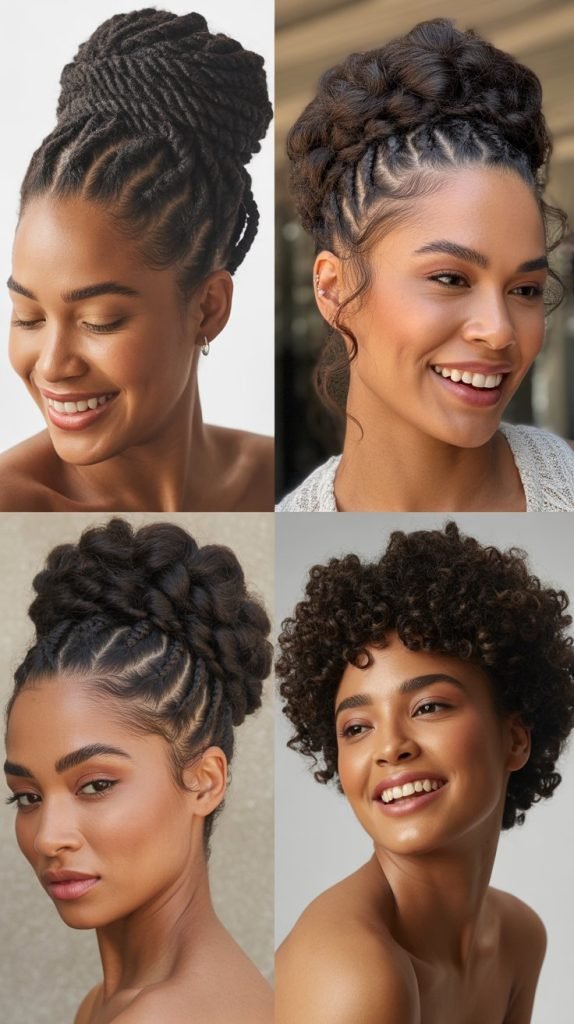
The twisted crown creates an ethereal, goddess-like appearance while being remarkably simple to achieve.
This style works particularly well for thick wavy hair because your natural texture adds romance and softness to the twists.
- Take a two-inch section of hair from behind your ear on each side of your head.
- Twist each section away from your face toward the back of your head, keeping the twists relatively loose.
- Cross both twisted sections at the back of your head, pinning them securely with bobby pins.
- Allow the ends to blend with the rest of your loose waves for a seamless appearance.
- Gently pull at the twists to add volume and create a softer, more romantic effect.
- Pin the twists in multiple places to ensure they hold throughout the day, especially if you have heavy hair.
9. Quick Fishtail Braid
The fishtail braid looks intricate and detailed but is actually one of the easiest braids to master. Your thick wavy hair will make this braid appear fuller and more textured than it would on straight or fine hair.
- Gather all your hair into a low ponytail at the nape of your neck and secure with an elastic.
- Divide the ponytail into two equal sections, holding one section in each hand.
- Take a small piece from the outer edge of the left section and cross it over to join the right section.
- Take a small piece from the outer edge of the right section and cross it over to join the left section.
- Continue this alternating pattern all the way down the length of your hair, securing the end with an elastic.
- Gently pull at the edges of the braid to make it wider and more voluminous, creating a relaxed bohemian look.
- Remove the elastic at the top if you prefer the braid to start without a visible ponytail base.
10. Sleek Low Ponytail with Wrapped Detail
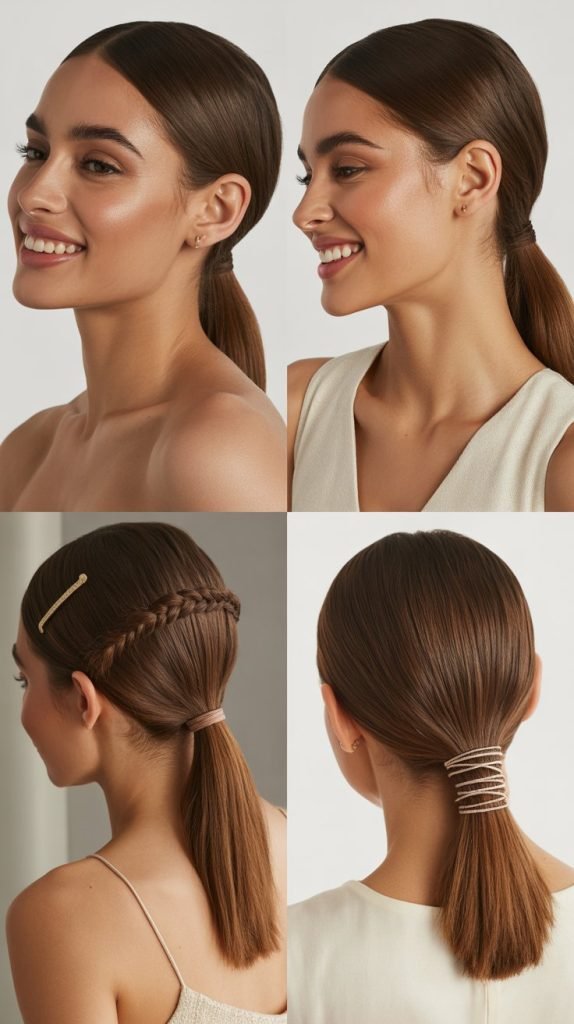
This polished style balances your hair’s natural texture with a sleek, put-together appearance. The wrapped detail around the hair tie adds a professional touch that makes this simple ponytail feel elevated.
- Apply a smoothing cream or serum to the top section of your hair from roots to mid-lengths.
- Brush your hair back into a low ponytail at the nape of your neck, ensuring the crown area is smooth.
- Secure the ponytail with a hair tie that matches your hair color.
- Take a one-inch section of hair from the underside of the ponytail and wrap it around the hair tie.
- Secure the wrapped section with a bobby pin tucked underneath the ponytail where it won’t be visible.
- Allow your natural waves to remain in the length of the ponytail for an interesting contrast between sleek and textured.
- Apply a light-hold hairspray to the smooth sections while leaving the wavy ends natural and touchable.
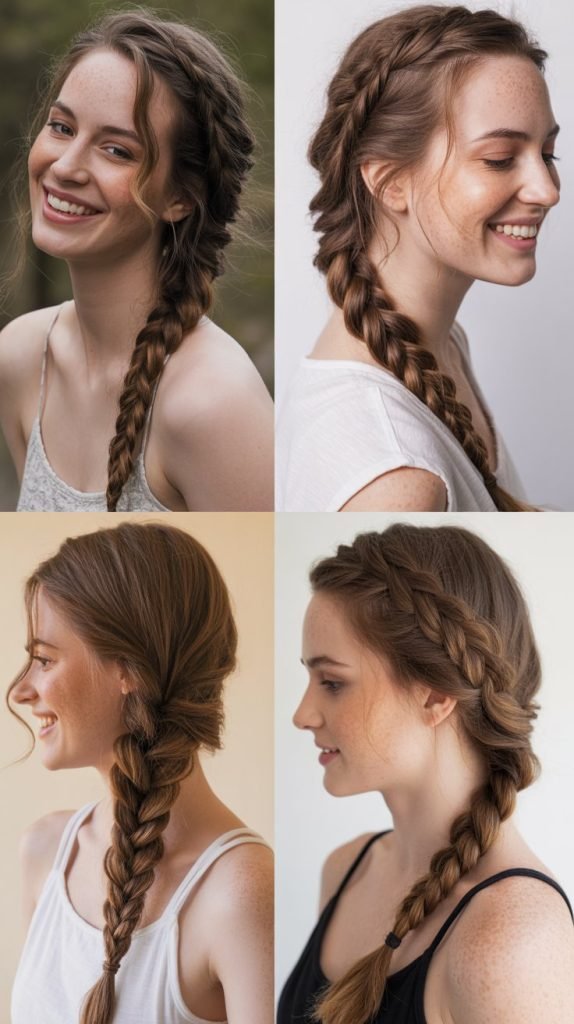
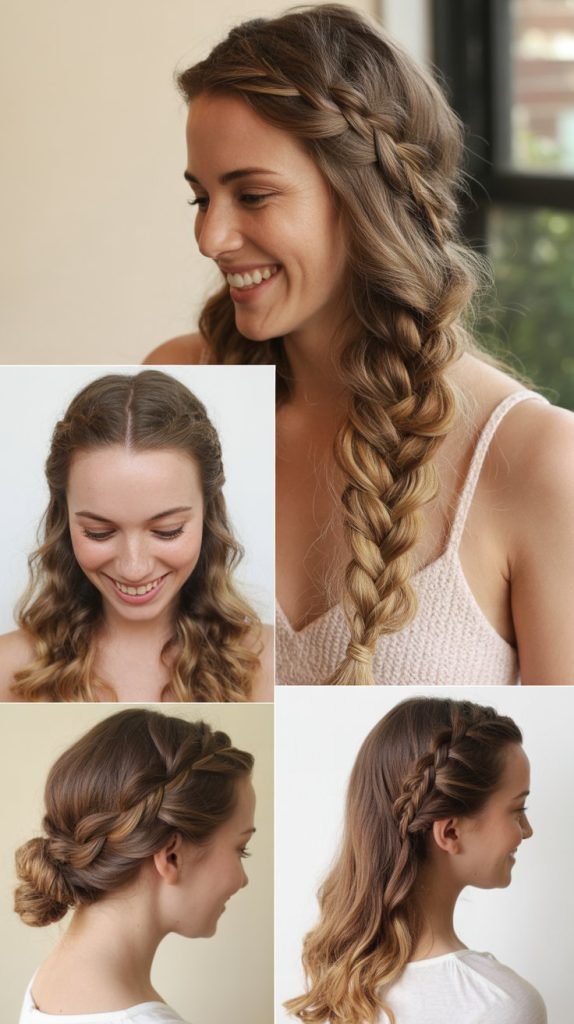
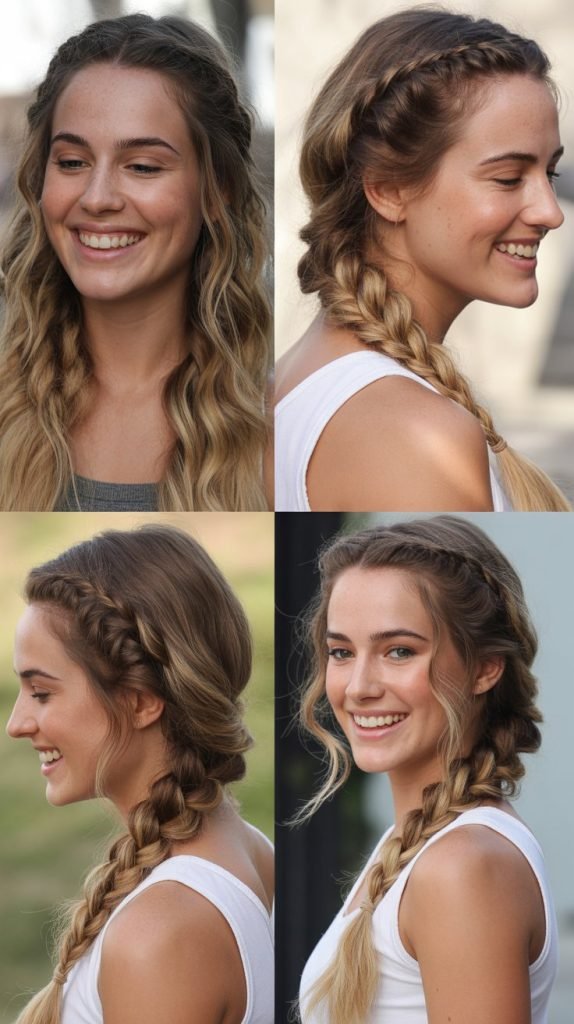
11. Messy Side Braid
The messy side braid embraces your hair’s natural texture and creates a relaxed, beachy vibe. This style is perfect for days when you want to look put-together without appearing too formal or styled.
- Sweep all your hair over one shoulder, choosing your preferred side based on face shape or comfort.
- Create a loose three-strand braid without pulling the sections tight, allowing your natural wave pattern to remain visible.
- Secure the end of the braid with a clear elastic or one that matches your hair color.
- Gently pull at the braid sections with your fingers, stretching it horizontally to create width and texture.
- Pull out small pieces around your face to frame your features and soften the overall look.
- Leave some waves loose at the bottom instead of braiding all the way to the ends for a more relaxed finish.
12. High Ponytail with Volume
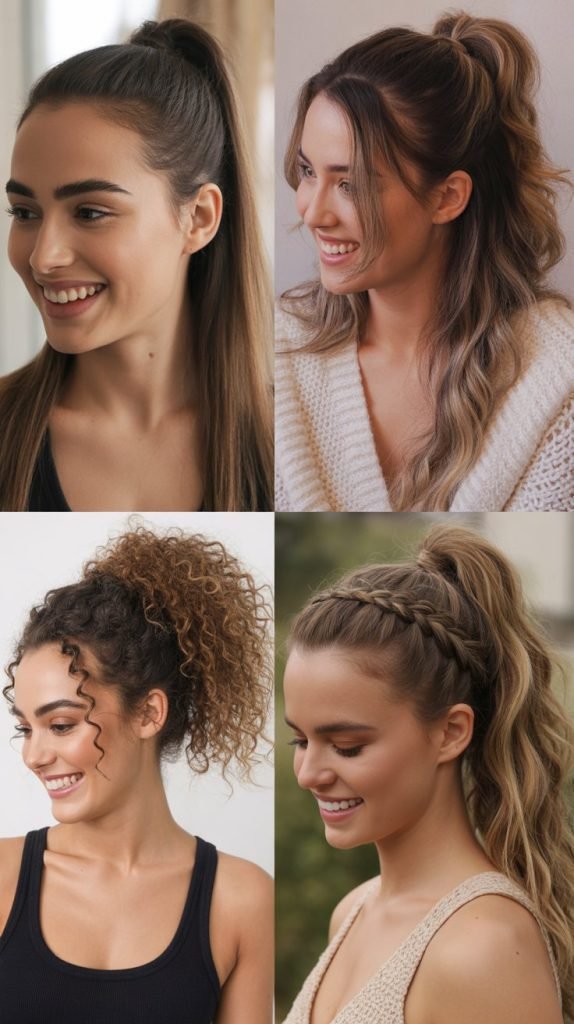
The high ponytail showcases your thick wavy hair’s natural body while keeping everything off your face and neck.
Adding strategic volume at the crown prevents this style from falling flat throughout the day.
- Flip your head upside down and gather all your hair at the crown of your head for maximum height.
- Before securing, gently tease the hair at your crown with a comb to create lasting volume.
- Secure the ponytail with a strong elastic, making sure it’s tight enough to hold but not so tight it causes discomfort.
- Smooth the surface layer of hair with a brush while leaving the teased volume underneath intact.
- Take a small section from the ponytail and wrap it around the elastic to hide it.
- Apply dry shampoo or volumizing powder at the roots if your hair tends to fall flat during the day.
- Allow your natural waves to bounce freely in the ponytail length, enhancing them with a texturizing spray.
13. Loose Rope Braid
The rope braid offers a beautiful alternative to traditional braiding and works exceptionally well with thick wavy hair.
This style takes only minutes to create while looking sophisticated and intentional.
- Gather your hair into a low ponytail and secure it with an elastic at the nape of your neck.
- Divide the ponytail into two equal sections, holding one in each hand.
- Twist the right section clockwise several times until it’s tightly twisted from base to end.
- Twist the left section clockwise in the same direction until it matches the tightness of the right section.
- Wrap the two twisted sections around each other in a counterclockwise direction, creating a rope effect.
- Secure the end with an elastic and gently pull at the rope to make it fuller and more relaxed.
- Remove the elastic at the top if you want the rope braid to start from your natural hairline.
14. Pinned-Back Bangs with Flowing Waves
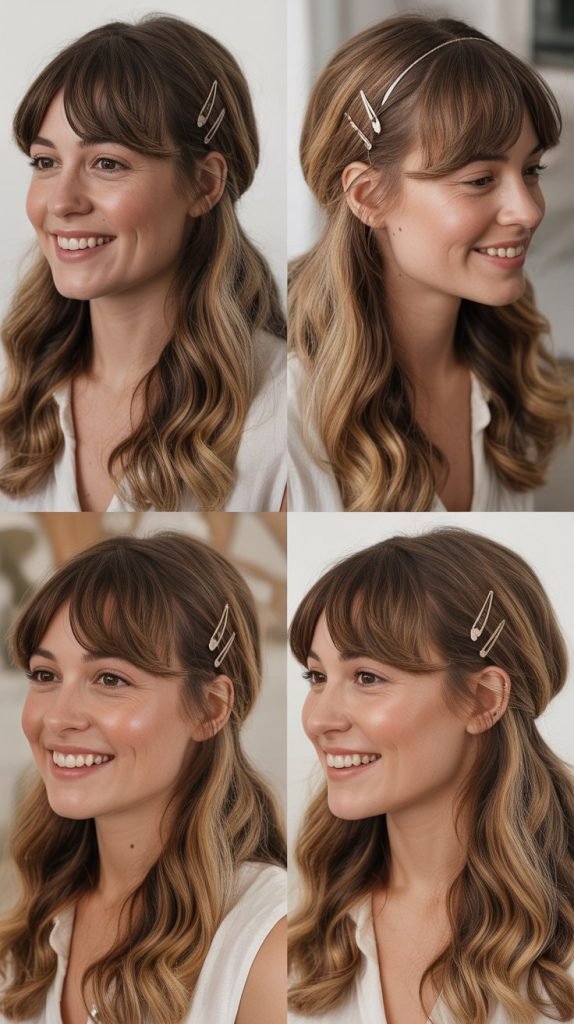
This simple styling trick keeps your face visible while letting your beautiful thick waves take center stage.
The pinned-back section adds interest without requiring any braiding or complicated techniques.
- Section off the front portion of your hair from temple to temple, leaving the rest of your waves down.
- Pull this front section back toward your crown, smoothing it slightly with your fingers or a brush.
- Secure the section with two bobby pins crossed in an X-shape for maximum hold.
- Position the pins slightly behind your crown so they’re less visible but still secure.
- Add a decorative clip or barrette over the bobby pins if you want to make the style more intentional and stylish.
- Apply a light texturizing spray to the flowing waves to enhance their natural pattern and add movement.
15. The Ballerina Bun
The ballerina bun sits high on your head and creates an elegant, polished appearance. Thick wavy hair naturally creates the full, rounded bun shape that this classic style requires.
- Gather all your hair into a high ponytail at the crown of your head, securing it tightly with an elastic.
- Twist the entire ponytail tightly until it naturally wants to coil on itself.
- Wrap the twisted ponytail around the base in a circular motion, forming a neat bun shape.
- Tuck the ends underneath the bun and secure with bobby pins pushed through the bun into your hair underneath.
- Use at least five to seven bobby pins to ensure the bun stays secure all day, especially with heavy thick hair.
- Smooth any flyaways with a small amount of gel or hairspray on your fingertips.
- Add a hair net over the bun if you need extra security for athletic activities or long days.
16. Waterfall Braid
The waterfall braid creates a stunning cascading effect that beautifully showcases your thick wavy hair. This style looks complex but follows a simple pattern once you understand the technique.
- Start with a small section of hair near your temple on one side of your head.
- Begin a regular three-strand braid by crossing the strands over each other once.
- When you cross the top strand over, instead of continuing with it, drop it and let it fall.
- Pick up a new section of hair from above to replace the dropped strand and continue braiding.
- Repeat this pattern of dropping the top strand and picking up a new section as you braid across your head.
- Continue the waterfall braid pattern until you reach behind your opposite ear, then secure with a small elastic or bobby pins.
- The dropped strands will cascade through the braid, blending beautifully with your natural waves below.
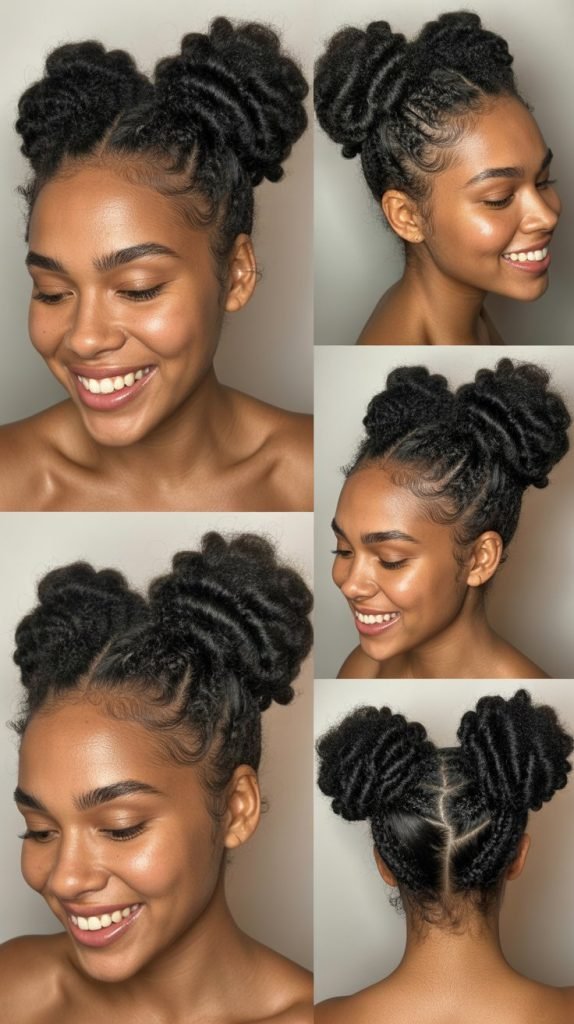
17. Low Space Buns
Low space buns offer a playful, youthful alternative to a single bun while still being practical and secure.
This style works wonderfully with thick wavy hair because your natural texture adds interest to each bun.
- Part your hair down the center from your forehead to the nape of your neck, creating two equal sections.
- Gather each section into a low ponytail behind each ear at the same height.
- Take one ponytail and twist it loosely, then wrap it around its base to form a bun.
- Secure the first bun with bobby pins or a second hair tie, tucking the ends underneath.
- Repeat the exact process on the other side, ensuring both buns are the same size.
- Pull out a few face-framing pieces around your hairline to soften the look.
- Gently pull at each bun to make them appear fuller and more textured, embracing your natural wave pattern.
18. The Gibson Tuck
The Gibson tuck creates a sophisticated rolled updo that looks vintage-inspired and elegant.
This style is particularly flattering with thick wavy hair because the texture adds depth and dimension to the tuck.
- Gather your hair into a very loose, low ponytail at the nape of your neck.
- Create a small opening in the hair just above the elastic by separating it with your fingers.
- Take the ponytail and tuck it upward through this opening, rolling it inward.
- Continue tucking the ends of the ponytail upward into the opening until all the hair is tucked and rolled.
- Secure the rolled section with bobby pins placed horizontally through the tuck.
- Gently pull at the rolled section to make it wider and more voluminous for a relaxed vintage look.
- Pull out a few wispy pieces around your face to frame your features and soften the structured style.
19. Twisted Half-Up with Loose Ends

This romantic style combines the elegance of twisted sections with the beauty of your natural waves flowing free.
The twisted details add structure while the loose ends keep the overall look soft and approachable.
- Take a two-inch section of hair from each temple area, leaving the rest of your hair down.
- Twist each section away from your face toward the back of your head, keeping the twists loose and relaxed.
- Bring both twisted sections to meet at the back of your head at crown level.
- Cross the twists over each other and secure them together with bobby pins in an X-pattern.
- Allow the twisted sections to remain slightly loose and textured rather than pulled tight against your scalp.
- Leave the rest of your thick waves flowing freely down your back, enhancing them with a curl cream if desired.
- Pull out a few small pieces from the twists to create a softer, more lived-in appearance.
20. Braided Low Ponytail
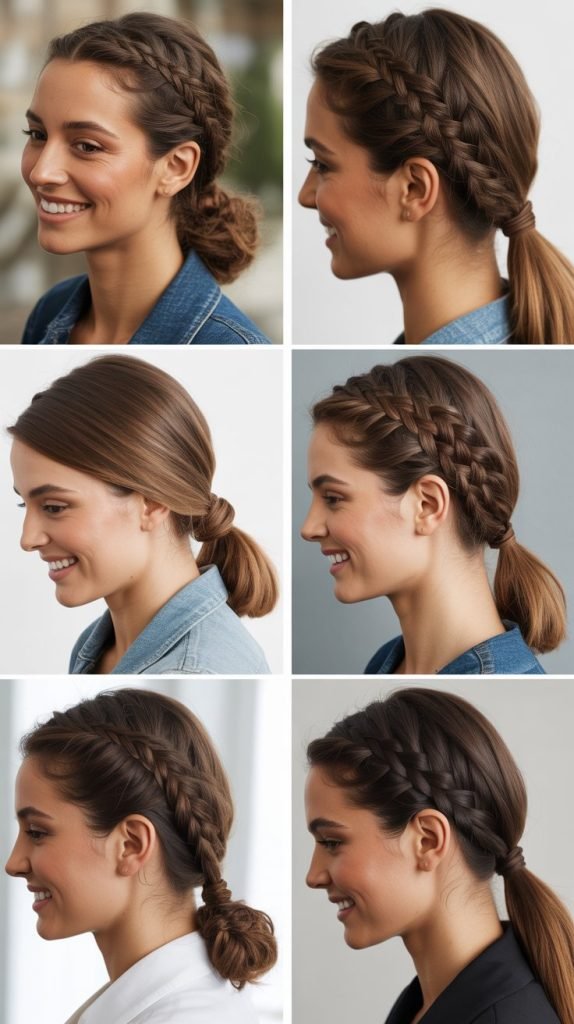
The braided low ponytail combines the security of a ponytail with the decorative element of a braid. This style keeps your thick wavy hair contained while still showcasing its beautiful texture.
- Gather all your hair into a low ponytail at the nape of your neck and secure with an elastic.
- Divide the ponytail into three equal sections for a traditional three-strand braid.
- Braid the entire length of the ponytail loosely, allowing your natural wave pattern to show through.
- Secure the end of the braid with a clear elastic or one matching your hair color.
- Gently pull at the braid sections to make it appear wider and more voluminous.
- Wrap a small section of hair around the elastic at the base of the ponytail to hide it for a polished finish.
- Pull out a few face-framing pieces at the front to soften your face shape.
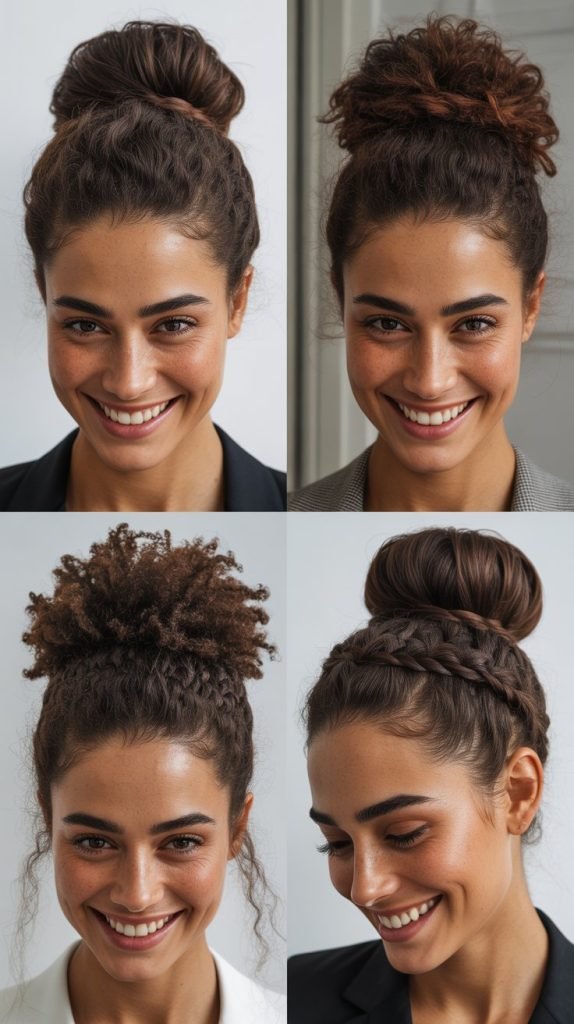
21. The Top Knot Bun
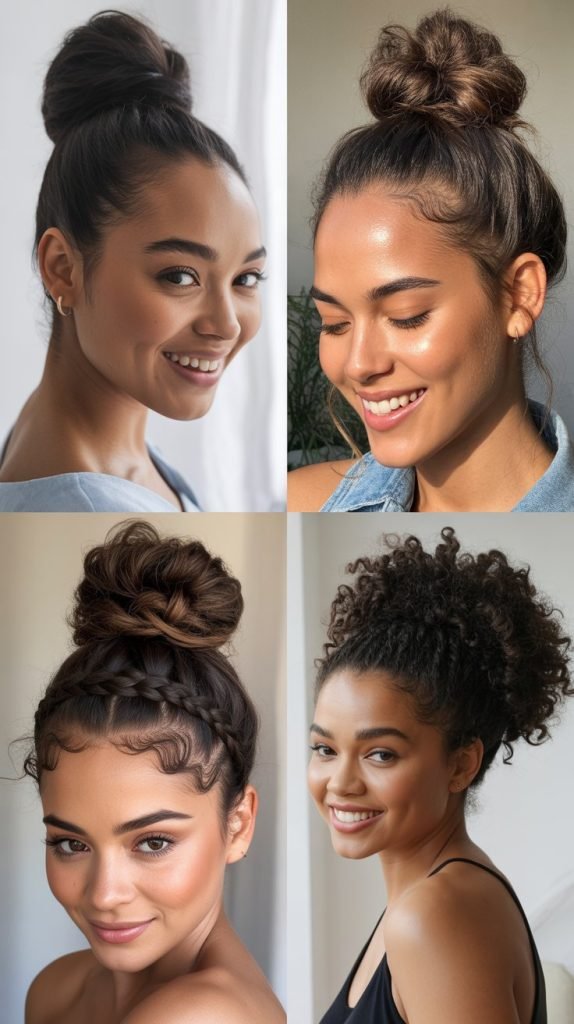
The top knot bun sits at the highest point of your head and creates a casual, effortless vibe. Thick wavy hair creates a naturally full top knot without needing any padding or teasing.
- Flip your head upside down and gather all your hair at the very top of your head where it naturally wants to fall.
- Secure the hair with a strong elastic, creating a high ponytail at the crown point.
- Twist the ponytail loosely and wrap it around the base of the elastic.
- Secure the wrapped hair with bobby pins or a second elastic, tucking any loose ends underneath.
- Pull at the bun gently to make it appear fuller and more relaxed rather than tight and perfect.
- Leave a few pieces loose around your face or pull them out after securing the bun.
- Use a texturizing spray on the bun itself to add grip and help it hold its shape throughout the day.
22. Side Part with Tucked Ear
This minimalist styling technique requires just seconds but dramatically changes your appearance.
The tucked ear and deep side part create asymmetry that flatters most face shapes while showcasing your waves.
- Create a deep side part using your eyebrow arch as a guide for where to place the part.
- Sweep the smaller section of hair behind your ear on the side with less hair.
- Secure the tucked section with two or three bobby pins placed vertically behind your ear.
- Allow the larger section of hair to fall naturally over your opposite shoulder, showcasing your waves.
- Apply a light-hold hairspray to the smooth section near your part to keep it sleek.
- Add a decorative hair clip or pin where you’ve tucked the hair for an extra stylish detail.
23. Loose French Braid
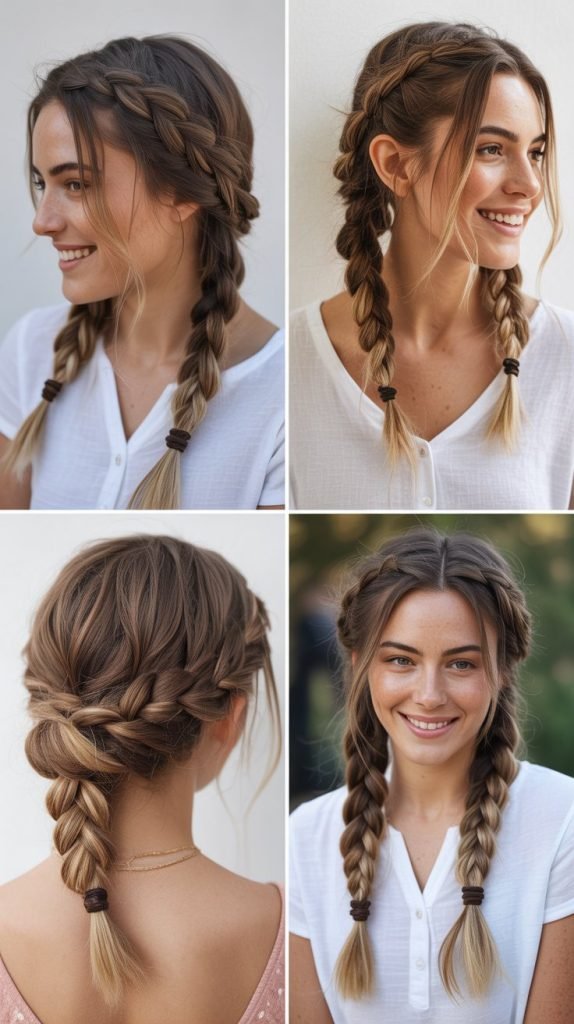
The loose French braid works beautifully with thick wavy hair by incorporating your natural texture into a classic style.
Keeping the braid loose rather than tight makes it appear more relaxed and modern.
- Take a section of hair at your crown and divide it into three strands to begin the braid.
- Cross the right strand over the middle strand, then cross the left strand over the new middle strand.
- Before making the next cross, add a small section of hair from the right side to the right strand.
- Continue this pattern of adding hair from each side before crossing the strands over the middle.
- Keep your tension loose throughout the braiding process to maintain a relaxed, bohemian appearance.
- Secure the end with an elastic and gently pull at the braid edges to make it wider and fuller.
- Pull out a few small pieces around your hairline to frame your face and soften the overall style.
24. Twisted Low Bun

The twisted low bun offers elegance with minimal effort and works exceptionally well for thick wavy hair. The twisted detail adds visual interest to this classic professional style.
- Gather your hair into a low ponytail at the nape of your neck without securing it yet.
- Divide the gathered hair into two equal sections, holding one in each hand.
- Twist both sections individually in the same direction until they’re moderately tight.
- Wrap the two twisted sections around each other while simultaneously wrapping them around the base.
- Secure the twisted bun with bobby pins placed through the twists into your hair underneath.
- Tuck any loose ends into the bun and add extra pins wherever the bun feels loose.
- Finish with a light-hold hairspray that maintains the shape without making it stiff or crunchy.
25. Half-Up Braid Crown
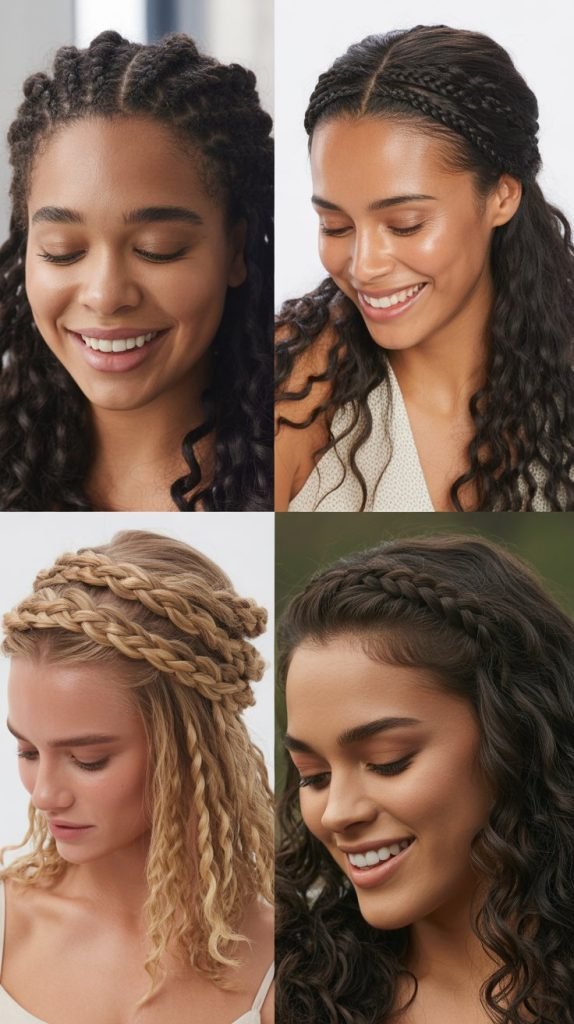
The half-up braid crown creates a romantic, ethereal look that’s perfect for special occasions or everyday elegance. Your thick wavy hair provides the perfect volume for this dimensional style.
- Take a two-inch section of hair from just above your temple on one side and create a simple three-strand braid.
- Braid this section toward the back of your head, keeping it at approximately ear level.
- Repeat the braiding process on the opposite side, creating a matching braid at the same height.
- Bring both braids to meet at the back center of your head and secure them together with bobby pins.
- Cross the braids over each other for added detail, or simply pin them side by side.
- Allow the rest of your thick waves to flow freely below the braided crown for a romantic cascading effect.
- Gently pull at the braids to make them appear fuller and more relaxed, matching the softness of your natural waves.
26. The Sock Bun
The sock bun creates a perfectly round, full bun that’s ideal for thick wavy hair. This technique uses a sock or bun maker to achieve a professional-looking result with minimal skill required.
- Gather your hair into a high or mid-height ponytail depending on where you want the bun to sit.
- Cut the toe off a clean sock and roll it into a donut shape, or use a store-bought bun maker.
- Pull your ponytail through the center of the sock donut and position it at the base of your ponytail.
- Spread your hair evenly around the donut, covering it completely from all angles.
- Take a second elastic and place it around the base of the bun, securing all the hair over the donut form.
- Tuck any remaining ends around the base of the bun and secure with bobby pins.
- The sock provides structure that helps your bun maintain its perfect round shape throughout the day.
27. Braided Ponytail Wrap
The braided ponytail wrap adds a decorative element to a simple ponytail without much additional effort. This style looks intricate but only requires basic braiding skills.
- Gather your hair into a ponytail at your desired height and secure with an elastic.
- Take a thin section from the underside of the ponytail, about one inch wide.
- Create a simple three-strand braid with this small section, braiding down about four to six inches.
- Wrap the braided section around the base of the ponytail, covering the elastic completely.
- Secure the end of the braid underneath the ponytail with a bobby pin pushed upward into the hair above.
- The rest of your thick wavy ponytail will remain loose and natural, creating a beautiful contrast with the braided detail.
- Pull gently at the braid wrap to make it slightly wider and more prominent around the ponytail base.
28. Loose Waves with Headband
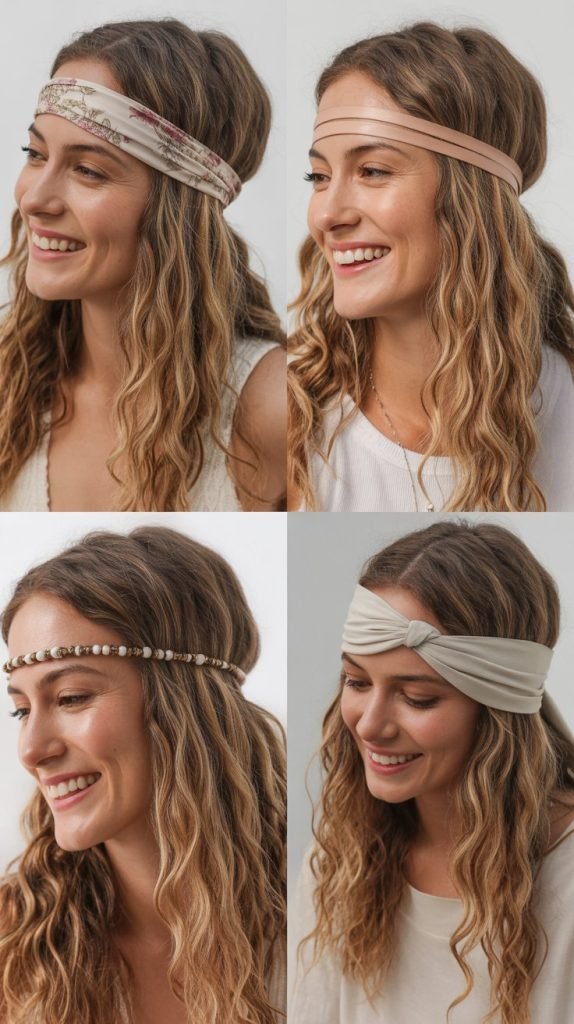
Adding a headband to your natural waves creates an instantly polished look with zero heat styling required.
This accessory-based style works perfectly when you’re short on time but want to look put-together.
- Choose a headband that complements your hair color and personal style, from simple elastic bands to decorative ones.
- Place the headband over your hair about two to three inches back from your hairline.
- Push the headband back slightly so it sits comfortably without causing pressure or sliding forward.
- Arrange your natural waves around and over the headband, ensuring even distribution on both sides.
- Pull out a few face-framing pieces in front of the headband to soften your face shape.
- Apply a light curl-enhancing cream to your waves to define them and add shine.
- Adjust the headband throughout the day if needed, but the right fit should stay secure for hours.
29. The Pretzel Bun
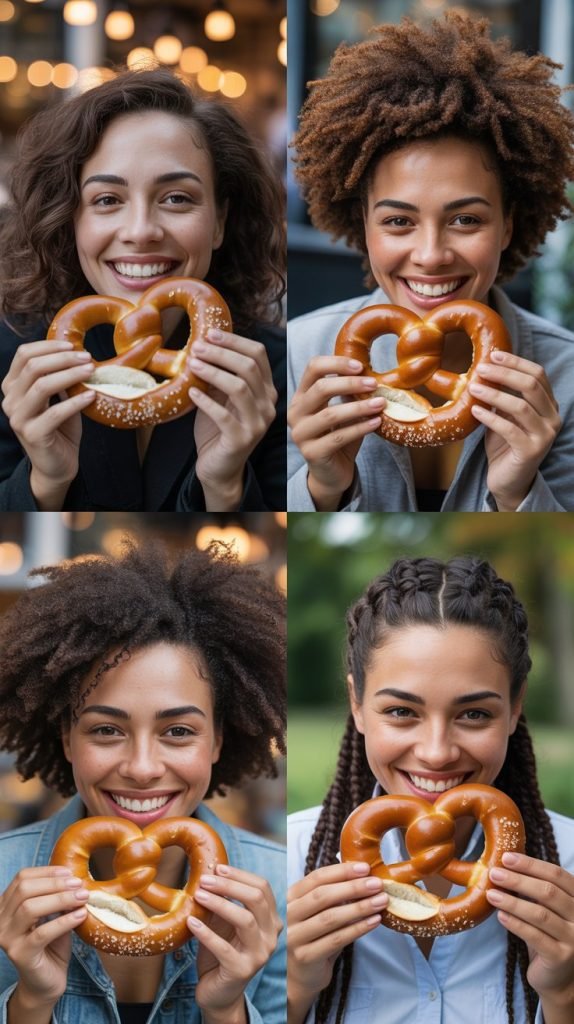
The pretzel bun creates an interesting twisted shape that looks complex but is surprisingly simple to achieve. Thick wavy hair holds this shape beautifully without requiring excessive pinning.
- Gather your hair into a high ponytail at the crown of your head and secure with an elastic.
- Divide the ponytail into two equal sections, holding one in each hand.
- Cross the right section over the left to form an X shape, then bring each section around and through the opposite loop.
- Continue wrapping the sections in a pretzel-like pattern until you’ve used most of the length.
- Tuck the remaining ends into the pretzel shape and secure with bobby pins placed throughout the design.
- Pin through the crossover points and the loops to ensure the pretzel holds its shape all day.
- This style looks especially beautiful when slightly messy, so don’t worry about making it too perfect.
30. Side Fishtail with Ribbon
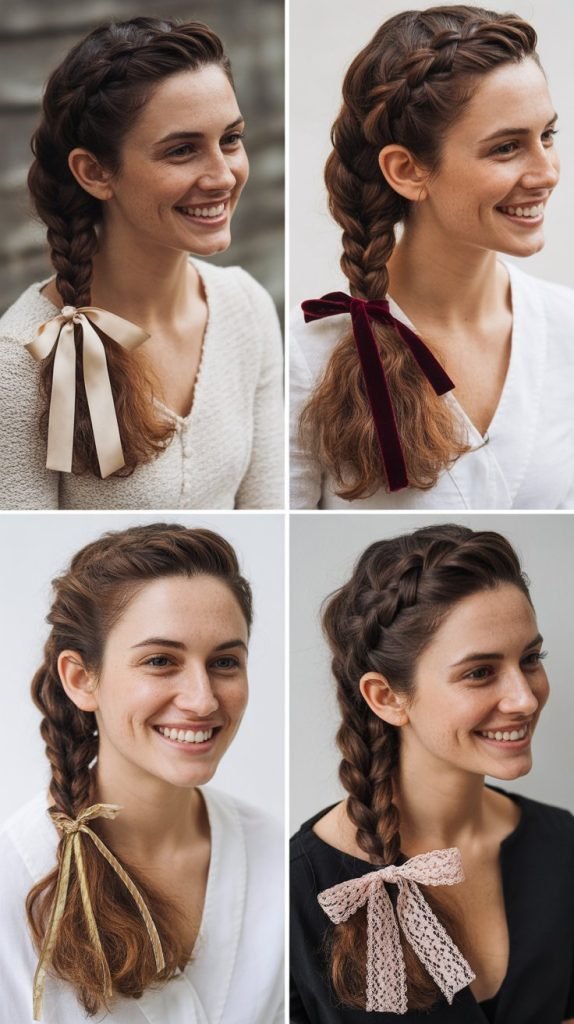
Adding a ribbon to a side fishtail braid creates a feminine, romantic look that’s perfect for special occasions.
The ribbon adds color and structure while the fishtail showcases your thick wavy texture.
- Sweep all your hair over one shoulder and divide it into two equal sections.
- Place a thin ribbon between the two sections, leavina few inches at the top to tie later.
- Begin the fishtail braid technique, taking small pieces from the outer edges and crossing them over.
- Incorporate the ribbon by treating it as part of one section, weaving it through the braid as you work down.
- Continue the fishtail pattern all the way to the ends of your hair, keeping the ribbon visible throughout.
- Secure the end with an elastic, then tie the ribbon around it in a bow for a decorative finish.
- Gently pull at the braid to make it wider and more voluminous, being careful not to pull the ribbon loose.
31. Double Twisted Buns
Double twisted buns offer a playful alternative to traditional buns while keeping your thick wavy hair completely secure.
The twisted detail adds dimension and makes this style appear more intricate than it actually is.
- Part your hair down the center from forehead to nape, dividing it into two equal sections.
- Gather one section into a ponytail at your desired height and secure with an elastic.
- Twist the ponytail tightly until it naturally wants to coil on itself, then wrap it around the base to form a bun.
- Secure the first twisted bun with bobby pins, making sure it feels tight and secure.
- Repeat the exact process on the other side, creating a matching twisted bun at the same height.
- Make sure both buns are the same size by adjusting how tightly you twist each section.
- Pull out a few face-framing pieces if desired, or keep everything tucked in for a sleeker appearance.
32. The Pulled-Through Braid
The pulled-through braid creates the illusion of a complex braid without any actual braiding required.
This innovative technique works beautifully with thick wavy hair because each section has plenty of volume.
- Create a small ponytail at the crown of your head and secure it with a clear elastic.
- Create a second ponytail directly below the first one, leaving about two inches of space between them.
- Split the first ponytail in half and bring each half around the second ponytail, securing them together below it with another elastic.
- Create a third ponytail below the second, then split the combined sections from above and pull them around this new ponytail.
- Continue this pattern of creating new ponytails and pulling the sections from above around them.
- Once you’ve completed the pattern down the length of your hair, gently pull at each section to create width and volume.
- The result looks like an extremely full, dimensional braid even though you never actually braided anything.
33. Low Ponytail with Bubble Sections
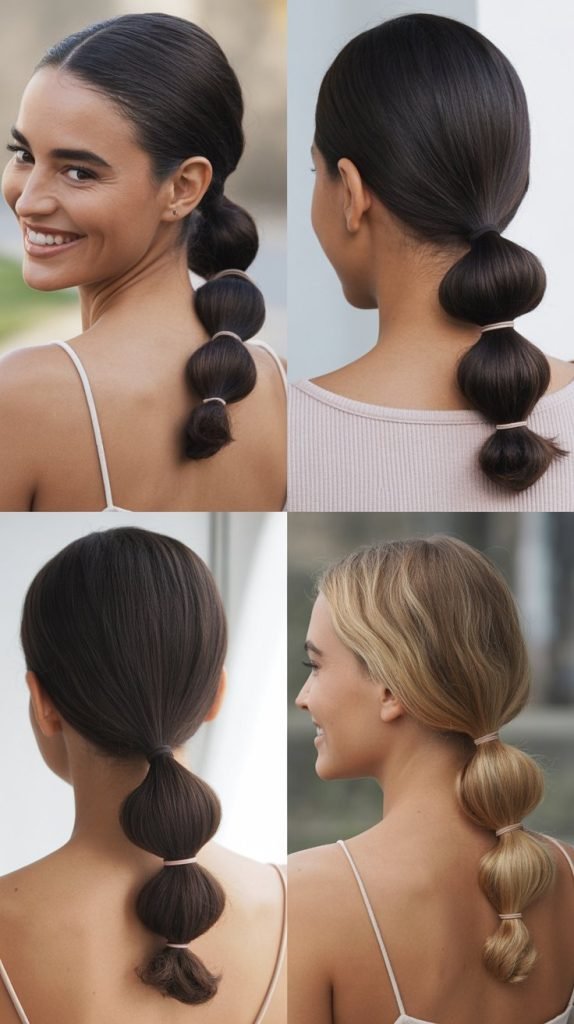
The bubble ponytail adds fun dimension to a basic ponytail by creating rounded sections throughout its length.
Thick wavy hair creates naturally full bubbles without needing teasing or padding.
- Gather all your hair into a low ponytail at the nape of your neck and secure with an elastic.
- Place another elastic about three to four inches down from the first elastic.
- Gently pull at the hair between the two elastics, tugging it outward to create a rounded bubble shape.
- Add another elastic three to four inches below the second one and repeat the pulling process.
- Continue adding elastics and creating bubbles down the entire length of your ponytail.
- Make sure each bubble is approximately the same size for a uniform appearance.
- Use clear elastics for a subtle look or colorful ones to make the bubbles more prominent and playful.
34. The Twisted Halo

The twisted halo creates an angelic crown effect around your head while allowing your thick waves to flow freely. This style requires no braiding and takes just minutes to complete.
- Create a deep side part on your preferred side, then take a two-inch section from the side with more hair.
- Twist this section away from your face while gradually adding more hair into the twist as you work around your head.
- Continue twisting and adding hair, following your hairline like a crown or halo.
- Work the twist all the way around to behind your opposite ear, keeping it at approximately the same height.
- Secure the end of the twist with bobby pins, tucking them underneath so they’re not visible.
- Allow the rest of your thick waves to flow naturally down your back beneath the twisted halo.
- Pull gently at the twist to make it appear fuller and more relaxed, matching the softness of your natural waves.
35. Knotted Half-Up
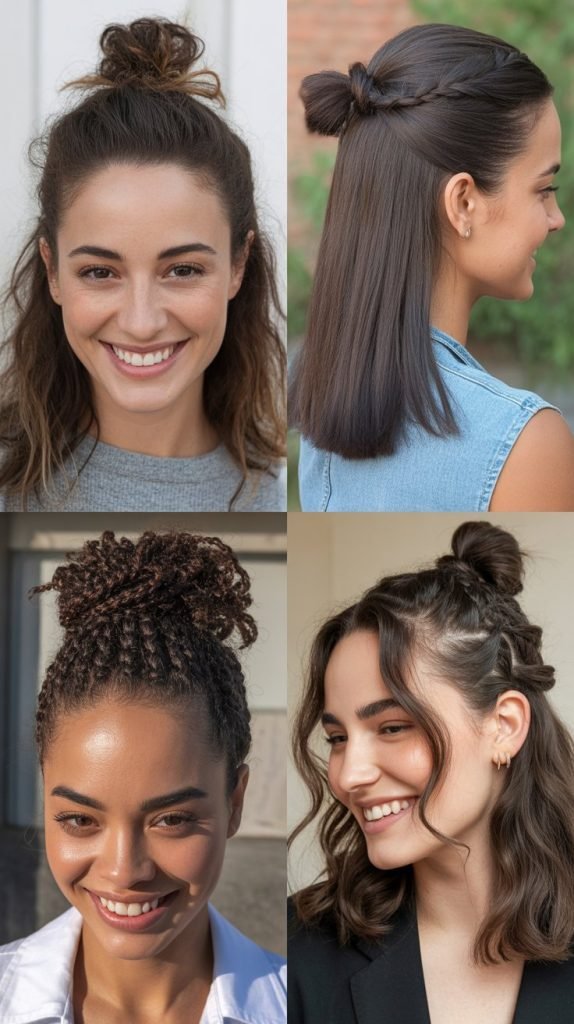
The knotted half-up style replaces traditional ponytails or pins with an actual knot, creating a unique detail that’s surprisingly secure.
This technique works especially well with thick wavy hair because the texture helps the knot hold without slipping.
- Section off the top third of your hair from temple to temple, leaving the rest of your waves flowing down.
- Divide this top section into two equal parts, holding one in each hand.
- Tie these two sections together in a simple overhand knot, just like tying a shoelace.
- Pull the knot relatively tight so it sits securely against your head without slipping.
- Secure the knot with a bobby pin pushed through the center for extra hold throughout the day.
- Allow the ends of the knotted sections to blend with the rest of your loose waves.
- Apply a small amount of texturizing spray to the flowing waves to enhance their natural pattern.
36. The Faux Bob Tuck
The faux bob tuck allows you to experiment with a shorter look without cutting your thick wavy hair. This vintage-inspired style is surprisingly secure and can last through an entire day or evening event.
- Apply a light styling cream to your hair to help it hold the tucked shape.
- Take all your hair and roll it under at approximately shoulder length, creating an internal roll.
- Pin the rolled section against your head using bobby pins placed horizontally through the roll.
- Work from one side to the other, adding pins every inch or so to ensure even, secure hold.
- Use at least eight to ten bobby pins for thick wavy hair to ensure the tuck doesn’t come loose.
- Smooth the outer layer of hair over the pinned section to conceal the pins and create a seamless appearance.
- Pull out a few face-framing pieces for a softer, more modern take on this vintage style.
37. Natural Waves with Strategic Clips
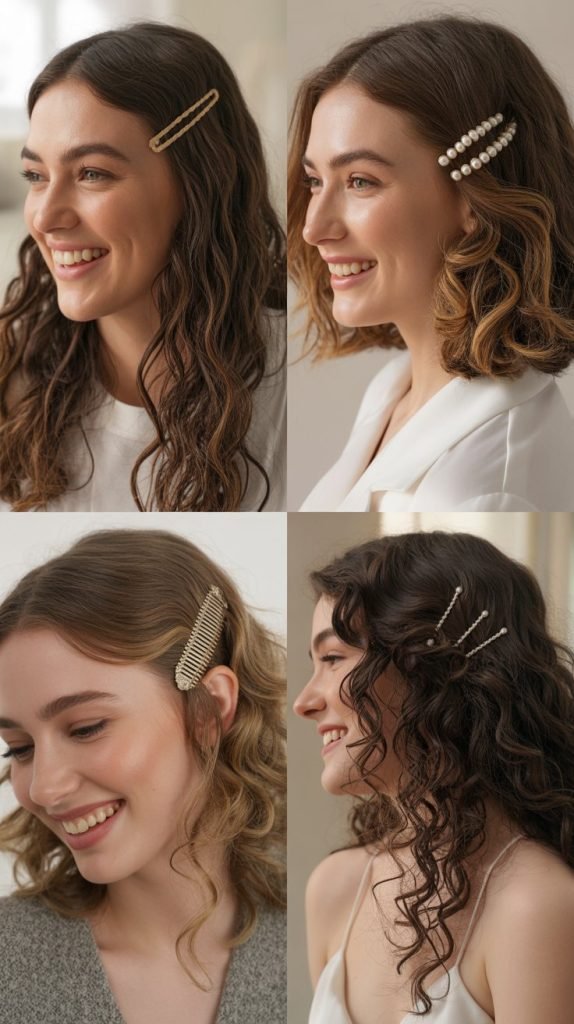
Sometimes the best hairstyle is embracing your natural thick waves with the help of decorative clips placed strategically
This minimal-effort approach lets your beautiful texture shine while keeping hair off your face.
- Start with your hair in its natural wavy state, applying a curl-enhancing cream if desired.
- Choose decorative hair clips that complement your style, from simple barrettes to elaborate statement pieces.
- Take a small section of hair from one temple area and secure it back with a clip positioned above your ear.
- Repeat on the other side with a matching clip at the same height for symmetry, or vary the placement for an asymmetric look.
- Use multiple smaller clips in a cluster for a trendy, modern appearance, or one larger statement clip on each side.
- The clips keep hair off your face while allowing your natural waves to cascade down your back and shoulders.
- This approach requires virtually no styling time but creates an intentional, polished appearance that lasts all day.
Conclusion
Finding the perfect hairstyle for thick wavy hair doesn’t have to mean spending hours in front of the mirror or mastering complicated techniques.
These 37 Low-Effort Hairstyles for Thick Wavy Hair That Stay All Day prove that your gorgeous texture is an asset that can be styled quickly and beautifully for any occasion.
From professional office looks to casual weekend vibes and special event elegance, you now have a comprehensive toolkit of styles that work with your natural waves rather than against them.
The key to success with these hairstyles is embracing your hair’s natural texture, using the right products sparingly, and securing styles properly with quality pins and elastics.
Remember that what makes these styles truly low-effort is that they’re designed specifically for your hair type, allowing you to look polished and put-together in just minutes.
Start experimenting with these techniques to discover which styles work best for your face shape, lifestyle, and personal aesthetic, and soon you’ll have a rotation of go-to looks that make your morning routine effortless and enjoyable.