Winter is the perfect season to experiment with cozy, stylish hairstyles that keep you looking fabulous while protecting your hair from the cold.
When temperatures drop and snow starts falling, your hair deserves special attention that combines fashion with function.
This comprehensive guide to 30 Adorable Cute Winter Hairstyles for Teens will walk you through trendy braids, elegant updos, playful ponytails, and warming protective styles that complement your winter wardrobe beautifully.
Whether you’re heading to school, hanging out with friends, or attending holiday parties, these hairstyles will keep you looking chic throughout the chilly months.
Each style is designed specifically for teens who want to express their personality while keeping their hair healthy and manageable during winter’s harsh conditions.
Get ready to discover your new signature winter look that will have everyone asking for your styling secrets.
In This Post......
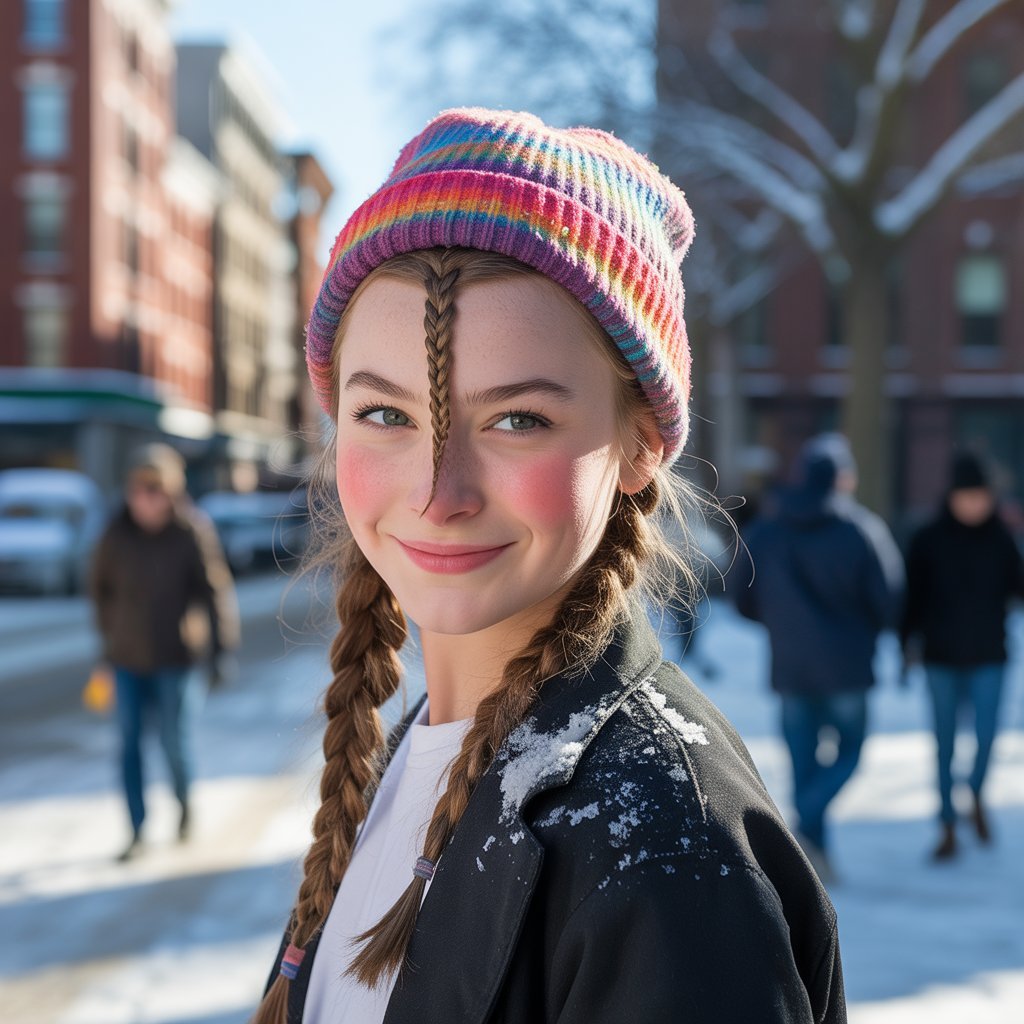
- 1. Classic Side Braid with Beanie
- 2. Messy Bun with Headband
- 3. Double Dutch Braids Under Earmuffs
- 4. Low Ponytail with Scarf Wrap
- 5. Half-Up Top Knot
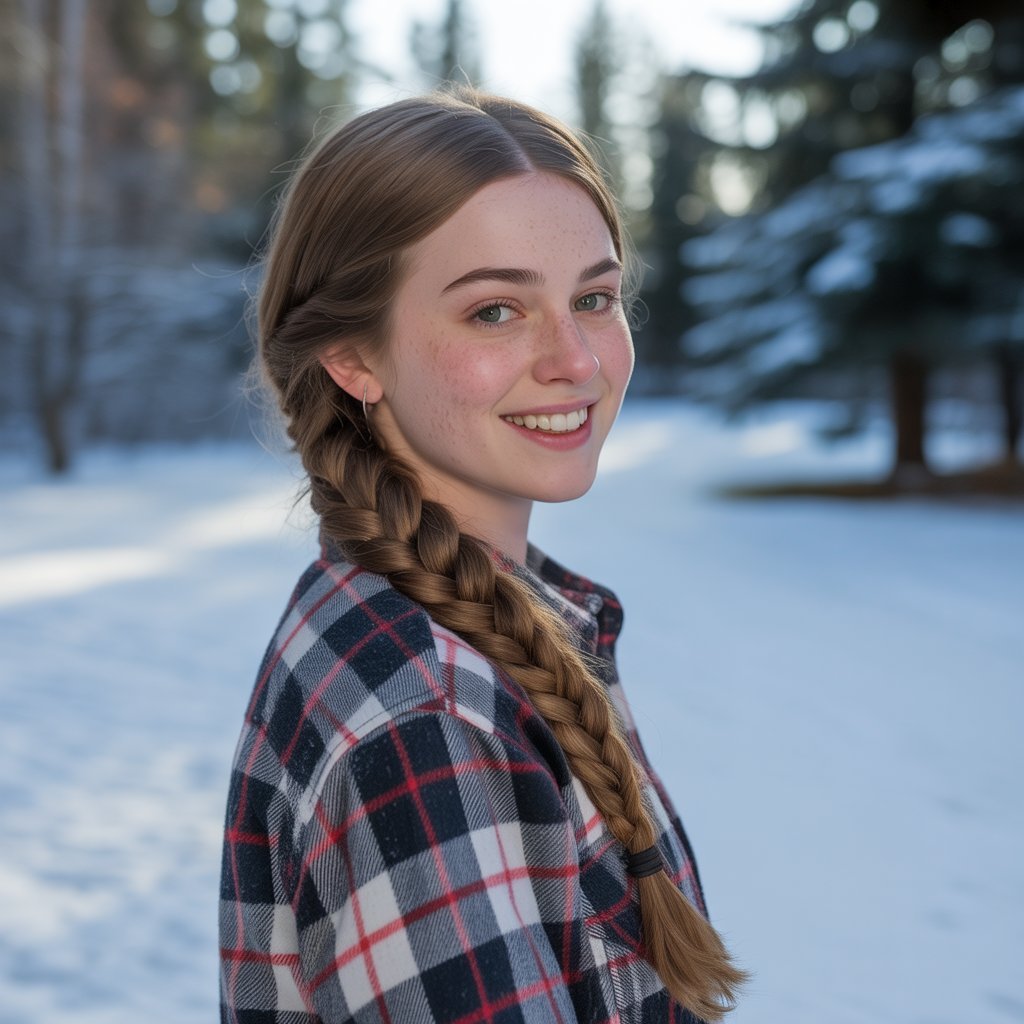
- 6. Fishtail Braid Over Shoulder
- 7. Space Buns with Winter Hat
- 8. Twisted Crown with Loose Curls
- 9. Sleek High Ponytail
- 10. Bubble Ponytail
- 11. French Twist Updo
- 12. Side-Swept Waves
- 13. Braided Bun
- 14. Crimped Hair with Headband
- 15. Low Braided Pigtails
- 16. Twisted Low Bun
- 17. High Bun with Scrunchy
- 18. Waterfall Braid
- 19. Rope Braid Ponytail
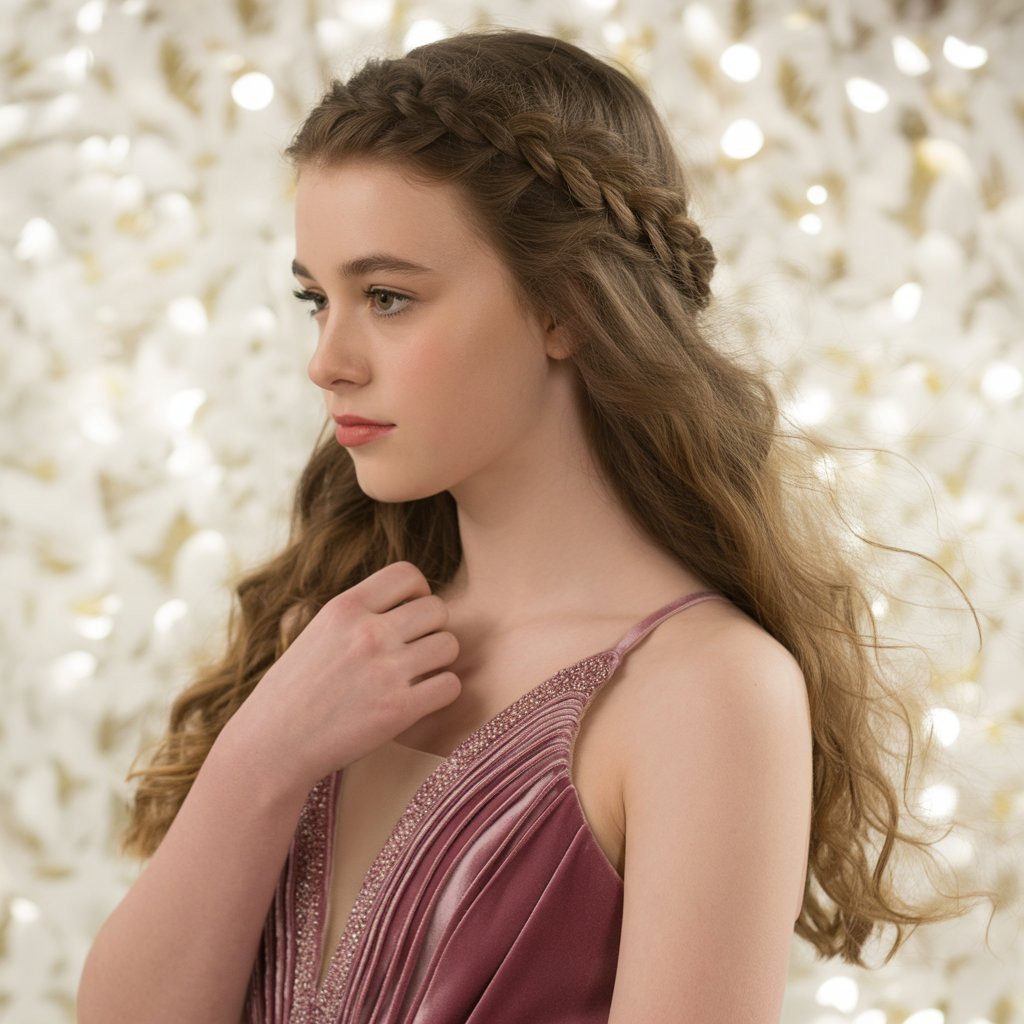
- 20. Crown Braid
- 21. Zigzag Part with Two Braids
- 22. Loose Waves with Bobby Pin Design
- 23. Braided Headband with Down Hair
- 24. Voluminous Curly Ponytail
- 25. Twisted Half-Up with Clips
- 26. Low Side Ponytail with Ribbon
- 27. Sock Bun
- 28. Braided Mohawk
- 29. Pulled-Through Braid
- 30. Vintage Victory Rolls
- Style Maintenance Tips for Winter Hair
- Conclusion
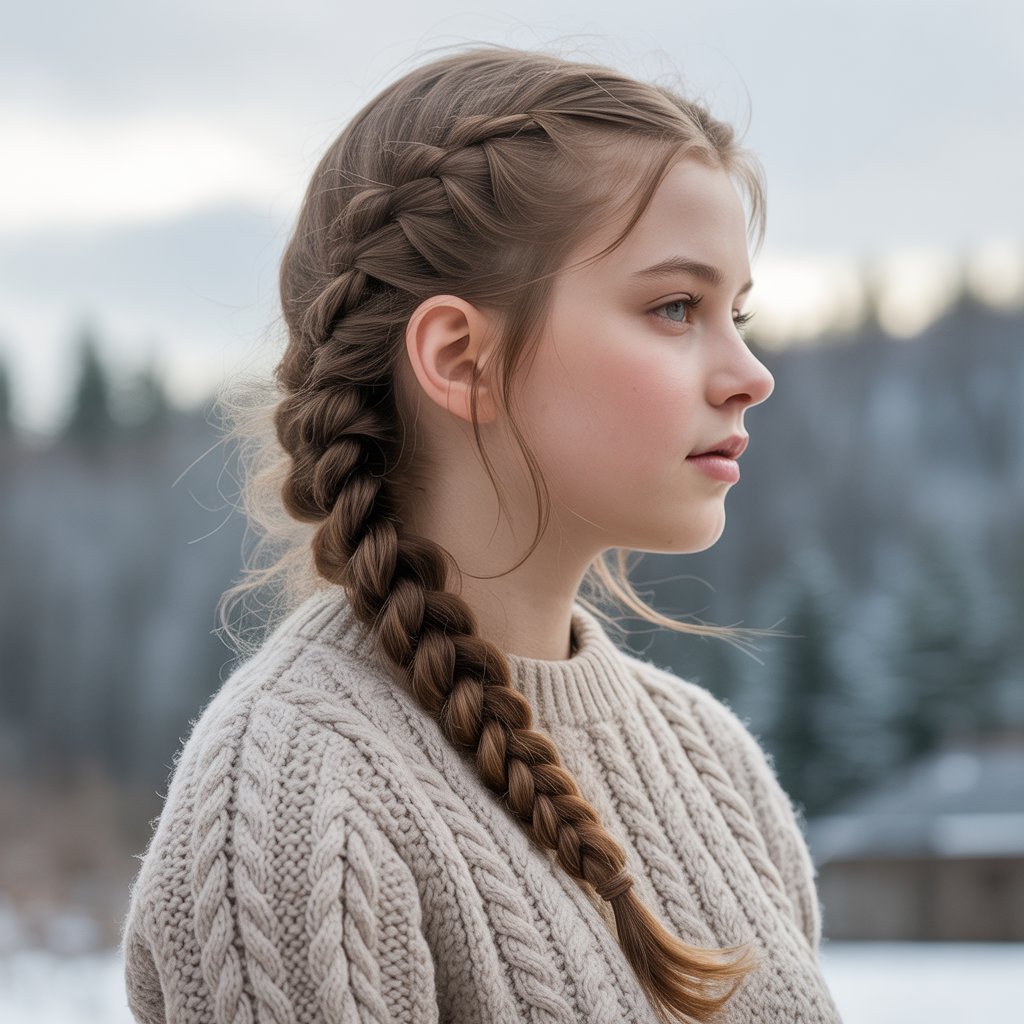
1. Classic Side Braid with Beanie
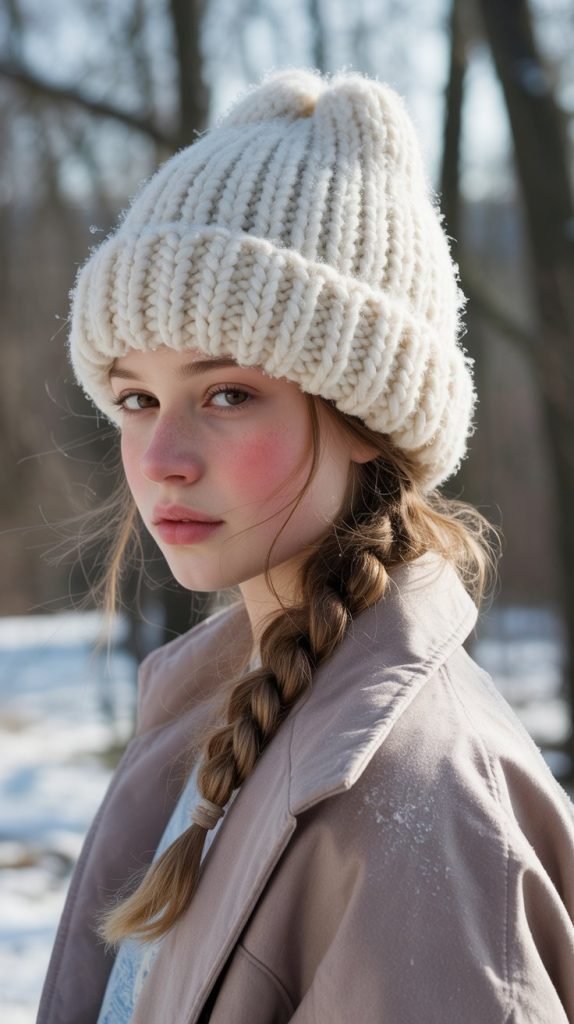
The side braid paired with a beanie creates an effortlessly cute winter look that has remained popular for years.
This style works wonderfully because it keeps your hair secure while allowing you to wear your favorite winter hat without ruining your hairstyle.
The combination offers both practicality and style, making it perfect for busy school days or weekend adventures.
- Start by brushing your hair thoroughly to remove all tangles and create a smooth base for braiding.
- Part your hair deeply to one side, choosing whichever side frames your face more attractively.
- Gather all your hair to the chosen side and divide it into three equal sections at the nape of your neck.
- Create a classic three-strand braid by crossing the right section over the middle, then the left section over the new middle.
- Continue braiding down to the ends, keeping the tension consistent but not too tight to maintain a relaxed appearance.
- Secure the braid with a clear elastic band or a decorative hair tie that matches your outfit.
- Gently pull apart the braid sections slightly to create a fuller, more voluminous look.
- Place your beanie on your head, allowing the braid to fall naturally over your shoulder for maximum visual impact.
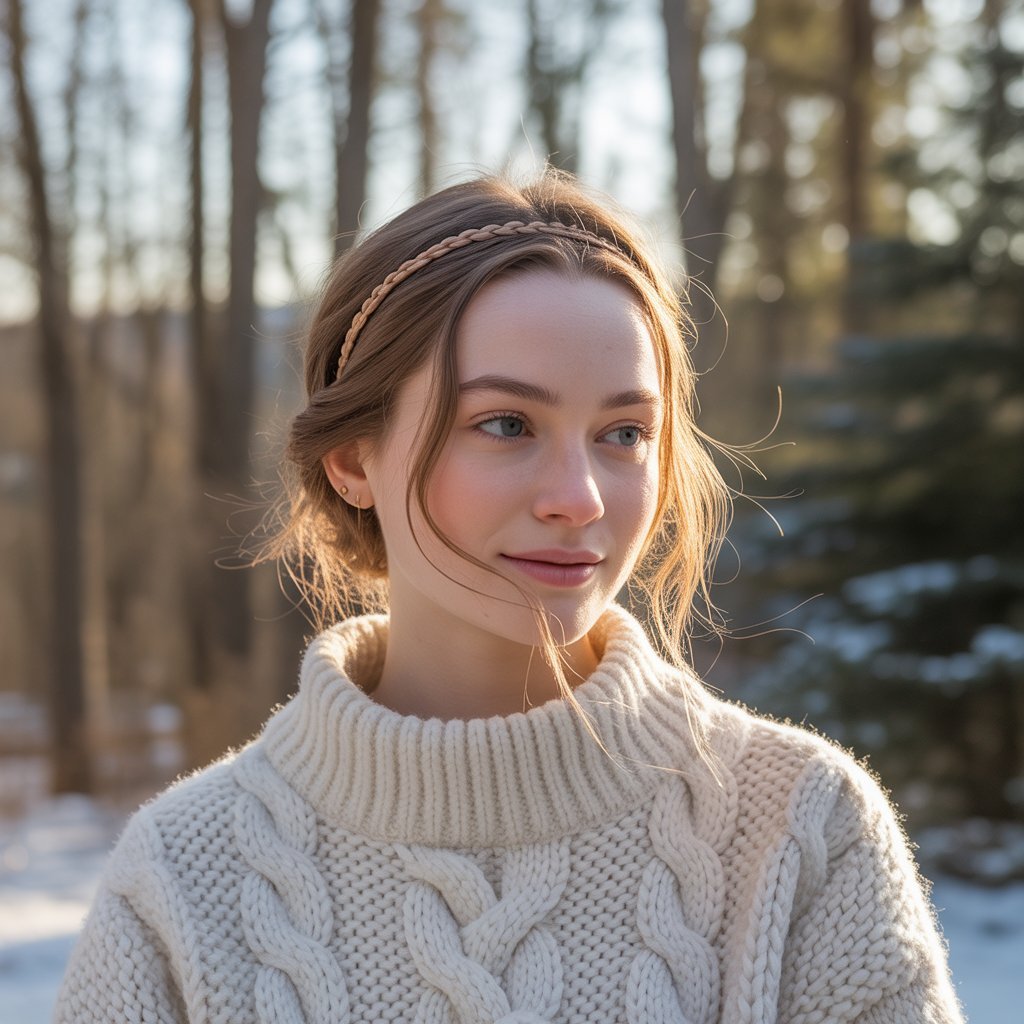
2. Messy Bun with Headband

The messy bun with headband combination delivers a casual yet polished appearance that works for virtually any winter occasion.
This hairstyle takes minutes to create but looks like you spent much more time perfecting it.
The addition of a headband adds a pop of color or texture while keeping flyaways at bay during windy winter days.
- Flip your head upside down and gather all your hair at the crown of your head using your fingers.
- Twist your hair loosely around itself to create a coiled rope effect that forms the base of your bun.
- Wrap the twisted hair around the base in a circular motion, creating a rounded bun shape.
- Secure the bun with bobby pins, inserting them at different angles to ensure maximum hold throughout the day.
- Pull out small sections of hair around your face and at the bun to create that perfectly imperfect messy texture.
- Slide a thick knitted or velvet headband over your head, positioning it about an inch back from your hairline.
- Adjust the headband to cover any unflattering bumps while keeping the messy aesthetic intact.
- Finish with a light mist of texturizing spray to enhance the relaxed, undone appearance.
3. Double Dutch Braids Under Earmuffs

Double Dutch braids provide exceptional hair protection during winter while looking incredibly stylish under earmuffs or winter headbands.
These inside-out braids lie flat against your head, making them comfortable to wear with winter accessories.
The sporty yet feminine style has become a favorite among active teens who refuse to compromise style for functionality.
- Create a center part from your forehead straight back to the nape of your neck, dividing hair into two equal sections.
- Clip one section away while you work on the first Dutch braid to keep hair separated and manageable.
- Take a small section of hair at your hairline and divide it into three strands to begin the braiding process.
- Cross the right strand under the middle strand, then cross the left strand under the new middle strand.
- Add small sections of hair from the sides as you continue braiding down, always crossing strands underneath rather than over.
- Keep the braid tight against your scalp by maintaining consistent tension as you incorporate new hair sections.
- Secure the first braid at the nape with a small elastic band, then repeat the entire process on the other side.
- Slide your earmuffs over your ears, ensuring the braids sit comfortably beneath them without creating pressure points.
4. Low Ponytail with Scarf Wrap
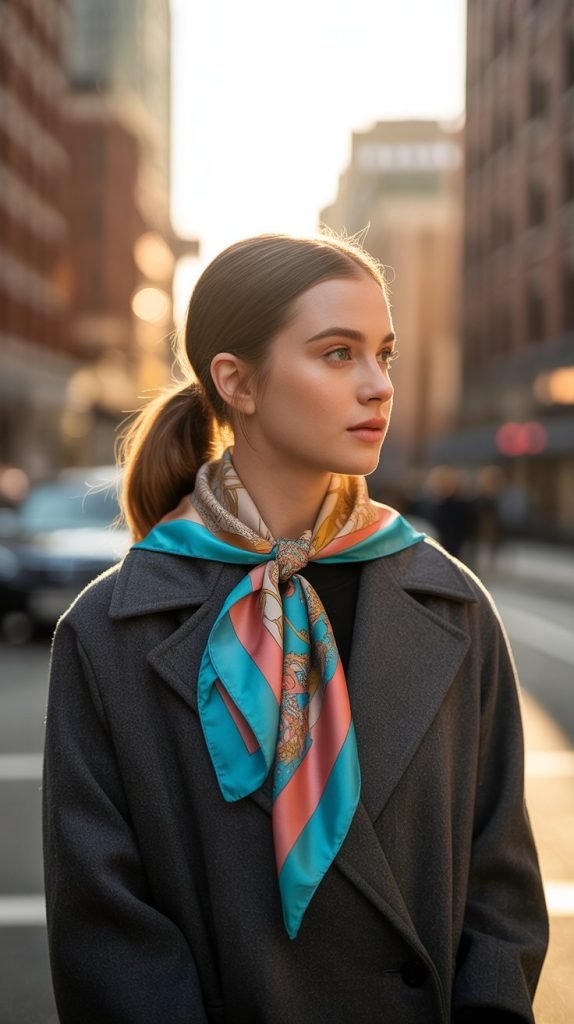
The low ponytail wrapped with a silk or satin scarf adds sophistication and vintage charm to your winter look.
This elegant style protects your hair from harsh winter elements while incorporating a fashionable accessory that complements your coat or jacket.
The scarf adds both visual interest and practical warmth to the nape of your neck.
- Brush your hair back smoothly using a paddle brush or boar bristle brush to eliminate all bumps and tangles.
- Gather your hair at the nape of your neck, positioning the ponytail slightly off-center if desired for added interest.
- Secure with a hair elastic that matches your hair color to create an invisible hold.
- Take a long silk or satin scarf and fold it lengthwise to create a band that is approximately two to three inches wide.
- Place the center of the scarf under your ponytail, bringing both ends up and around the base of the ponytail.
- Wrap the scarf around the ponytail base several times, covering the elastic completely and creating a decorative element.
- Tie the scarf ends in a bow or knot, allowing the remaining fabric to cascade down with your hair or trail elegantly to one side.
- Apply a small amount of smoothing serum to your ponytail to combat static electricity common in winter weather.
5. Half-Up Top Knot
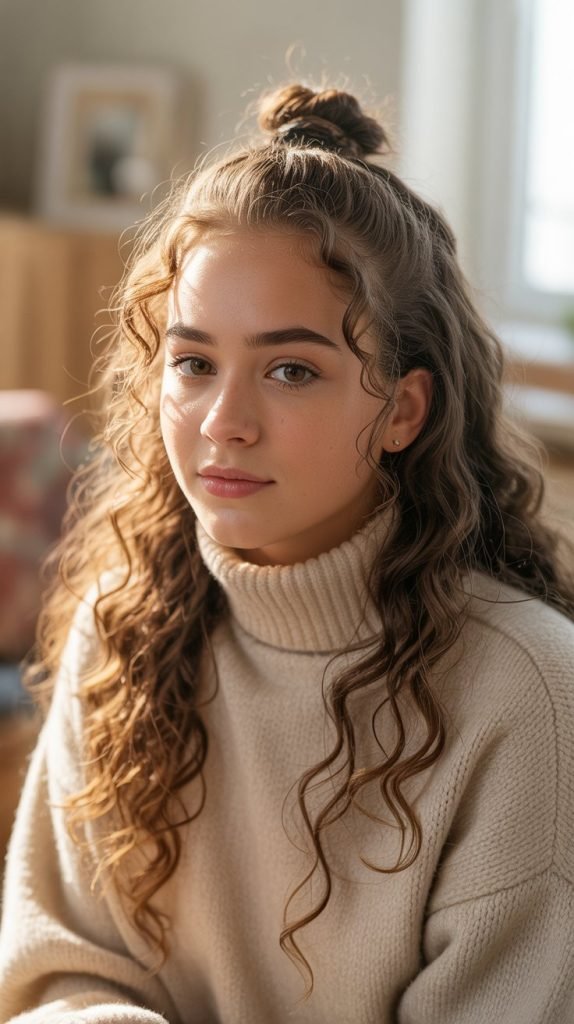
The half-up top knot strikes the perfect balance between wearing your hair down and keeping it off your face during winter activities.
This versatile style works beautifully for both casual and dressy occasions throughout the cold season.
The top knot adds height and dimension while allowing you to show off your hair’s length and texture.
- Section off the top half of your hair from ear to ear, creating a horizontal part across your head.
- Clip the bottom section away temporarily to prevent it from interfering with your styling process.
- Gather the top section into a high ponytail at the crown, securing it tightly with an elastic band.
- Twist the ponytail around itself to create a compact, rounded knot shape at the crown of your head.
- Secure the knot with bobby pins inserted in an X pattern for maximum stability throughout the day.
- Release the bottom section of your hair and use your fingers to blend where the two sections meet naturally.
- Pull out a few face-framing pieces around your temples to soften the overall look and add movement.
- Spray the top knot lightly with hairspray to ensure it stays in place despite hat wearing or outdoor winter wind.
6. Fishtail Braid Over Shoulder

The fishtail braid draped over your shoulder creates a romantic, intricate appearance that looks more complicated than it actually is.
This textured braid adds visual interest to your winter outfits while keeping your hair secure and tangle-free.
The unique weaving pattern catches light beautifully, making it perfect for holiday photos and special winter events.
- Brush your hair thoroughly and gather it all to one side, draping it over your preferred shoulder.
- Divide your hair into two large, equal sections rather than the traditional three sections used in regular braids.
- Take a thin strand from the outer edge of the right section and cross it over to join the left section.
- Take a thin strand from the outer edge of the left section and cross it over to join the right section.
- Continue this alternating pattern all the way down, taking small strands from the outer edges and crossing them to the opposite side.
- Keep the strands relatively thin and consistent in size to create the distinctive fishtail texture throughout the braid.
- Secure the end with a clear elastic band, leaving about two inches of hair unbraided for a softer finish.
- Gently pancake the braid by pulling apart the sections slightly to create width, fullness, and a more relaxed bohemian appearance.
7. Space Buns with Winter Hat
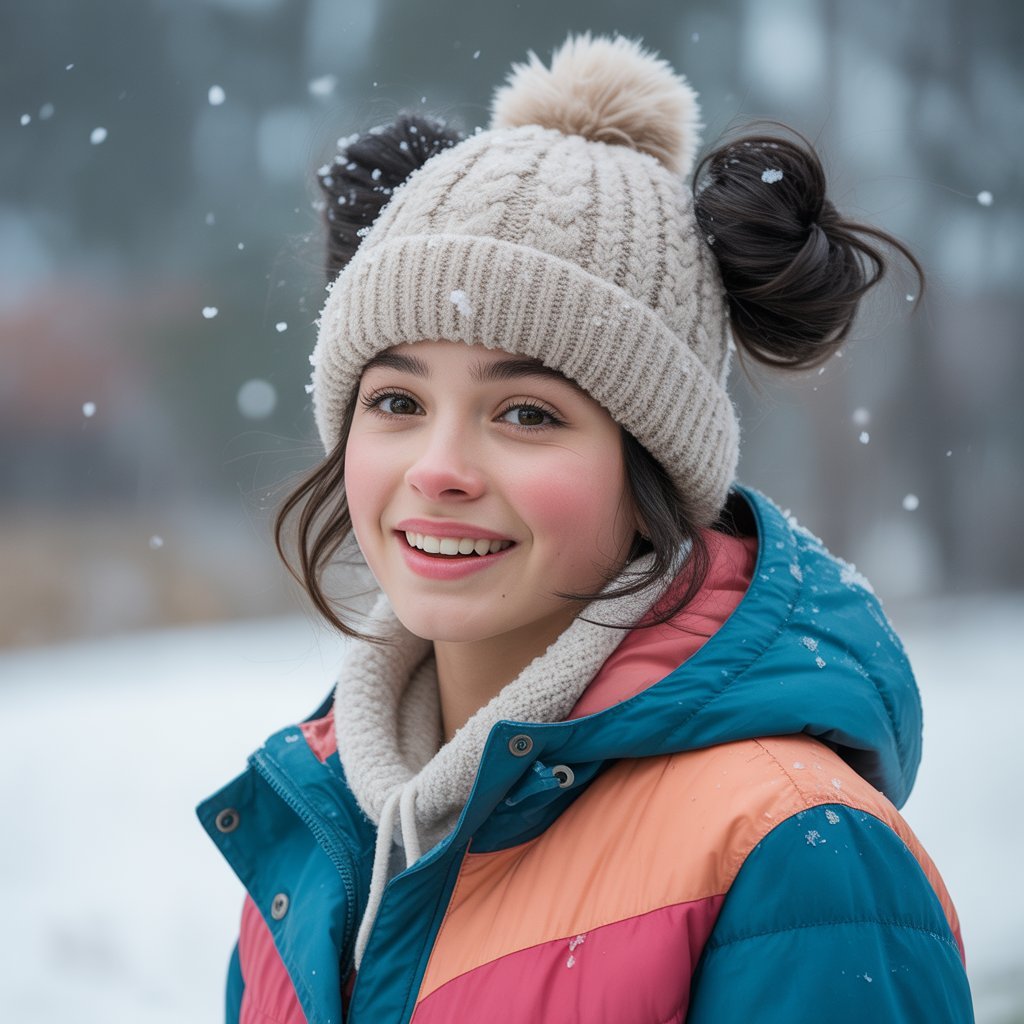
Space buns bring playful, youthful energy to your winter style while working surprisingly well underneath certain winter hats.
These dual buns positioned on top of your head have made a major comeback and offer a fun alternative to standard hairstyles.
The quirky style pairs perfectly with casual winter outfits and shows off your confident, trendy personality.
- Create a center part from your forehead to the nape of your neck, dividing your hair into two perfectly even sections.
- Gather one section high on your head where you want the first bun positioned, typically near the top corners of your head.
- Secure this section with a hair elastic, creating a high ponytail that stands upright from your scalp.
- Twist the ponytail tightly around itself, coiling it into a compact bun shape around the base of the elastic.
- Secure the bun with bobby pins, tucking in any loose ends to create a neat, rounded appearance.
- Repeat the exact same process on the other side, ensuring both buns are positioned symmetrically at equal heights.
- Pull out small wisps of hair around your face and neck to soften the look and prevent it from appearing too severe.
- Place a beanie or winter hat slightly back on your head so the buns peek out adorably from underneath the hat’s edge.
8. Twisted Crown with Loose Curls

The twisted crown with loose curls combines elegance with effortless beauty, perfect for winter formal events or holiday gatherings.
This romantic hairstyle keeps hair away from your face while showcasing gorgeous curls that cascade down your back.
The twisted sections create a crown-like effect that adds a touch of sophistication to any winter outfit.
- Start by curling the bottom two-thirds of your hair using a curling iron or wand to create loose, bouncy waves.
- Take a two-inch section of hair from just above your right ear, twisting it tightly away from your face.
- Continue adding small sections of hair to the twist as you work toward the back of your head, similar to a French twist technique.
- Secure the twist temporarily at the back center of your head with a bobby pin while you work on the other side.
- Repeat the twisting process on the left side, gathering hair from above your left ear and working toward the center back.
- Join both twists at the back center of your head, pinning them together securely to create a complete crown effect.
- Allow the remaining curled hair to flow freely down your back, creating beautiful contrast with the structured crown.
- Finish with a flexible-hold hairspray that maintains the style while allowing natural movement in your curls.
9. Sleek High Ponytail
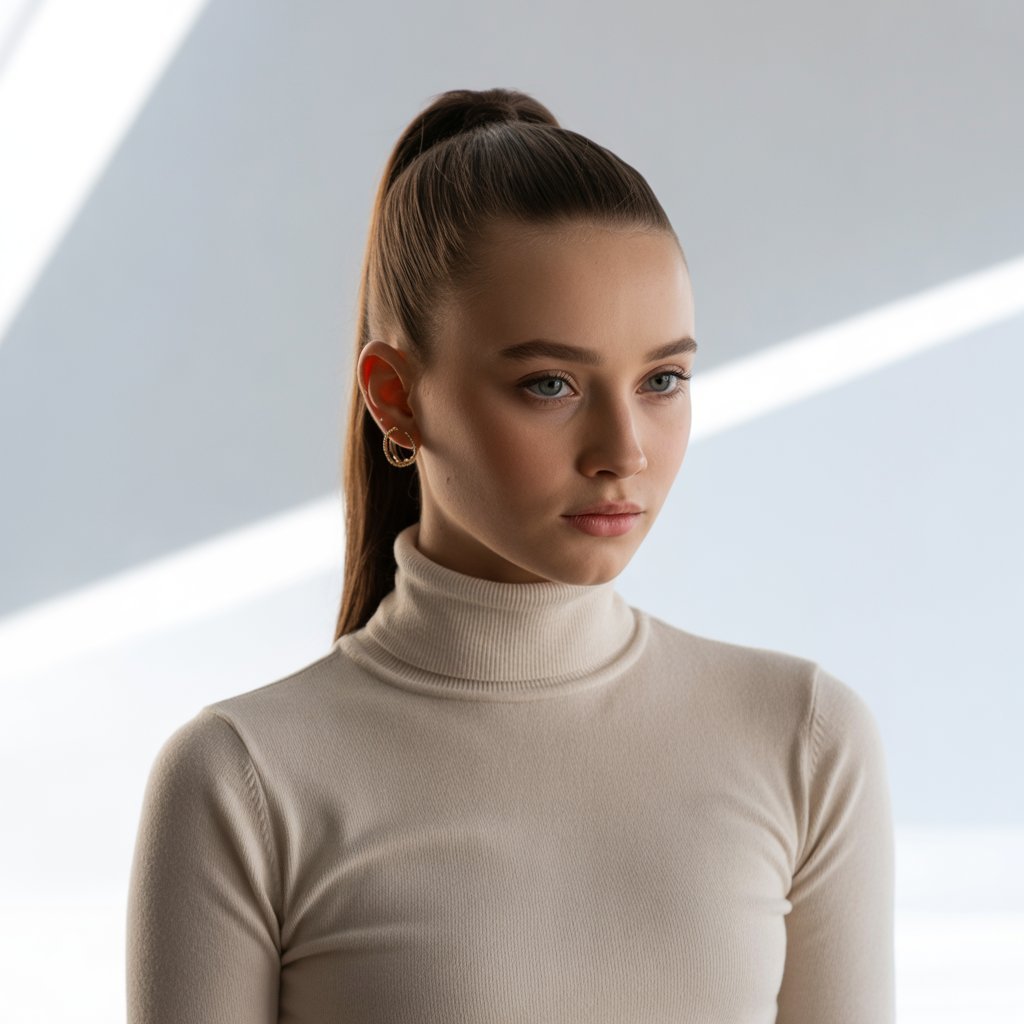
The sleek high ponytail exudes confidence and polish, making it ideal for teens who want a sophisticated winter look.
This timeless style elongates the neck and pulls focus to your facial features beautifully.
The high placement works wonderfully with scarves and high-collared winter coats while maintaining an elegant, put-together appearance.
- Begin with freshly washed and blown-out hair for the smoothest possible base that will hold the style all day.
- Apply a smoothing cream or gel to damp hair before blow-drying to eliminate any frizz or flyaways.
- Brush your hair upward toward the crown of your head using a fine-tooth comb for maximum smoothness.
- Gather all your hair at the highest point of your head where your hand naturally rests when you touch your crown.
- Secure the ponytail with a strong elastic band that can support the weight of your hair without slipping down.
- Take a small section from the ponytail and wrap it around the elastic band to conceal it and create a polished finish.
- Pin the wrapped section underneath the ponytail with a bobby pin that matches your hair color for invisibility.
- Apply a shine serum to your ponytail and use a soft brush to smooth down any baby hairs along your hairline.
10. Bubble Ponytail

The bubble ponytail brings fun, dimension, and texture to a classic ponytail style that teens absolutely love.
This Instagram-worthy hairstyle creates the illusion of fuller, thicker hair through strategic elastic placement.
The playful bubbles add visual interest and work beautifully for both casual winter days and special occasions.
- Create a regular high or mid-level ponytail at your desired height, securing it firmly with your first elastic band.
- Tease the ponytail gently at the base using a fine-tooth comb to add volume and fullness to the entire style.
- Place a second elastic band two to three inches below the first elastic, depending on how large you want your bubbles.
- Gently pull apart the hair between the two elastics, creating a rounded bubble shape by tugging outward on all sides.
- Continue adding elastic bands down the length of your ponytail at regular intervals, maintaining consistent spacing between each one.
- Create bubbles between each set of elastics by carefully pulling the hair outward to increase volume and roundness.
- Repeat this process until you reach near the end of your ponytail, typically creating four to six bubbles depending on hair length.
- Finish by securing the very end with a final elastic and applying light hairspray to maintain the bubble shapes throughout the day.
11. French Twist Updo

The French twist updo offers timeless elegance and sophistication perfect for winter formal events, holiday parties, or any special occasion.
This classic hairstyle keeps all your hair securely tucked away while creating a polished, mature appearance.
The vertical twist at the back creates beautiful lines and showcases the natural texture of your hair.
- Start by thoroughly brushing your hair to remove all tangles and create a smooth foundation for the twist.
- Gather your hair to one side at the back of your head, holding it firmly with one hand.
- Twist the gathered hair upward and inward, rolling it toward the center back of your head in a continuous motion.
- Continue twisting until all the hair is coiled into a vertical roll against the back of your head.
- Secure the twist by inserting bobby pins vertically along the length of the roll, pushing them into the twist itself.
- Tuck the ends of your hair into the top of the twist, concealing them completely for a seamless finish.
- Add additional bobby pins horizontally across the twist to ensure everything stays secure throughout your event.
- Finish with a generous application of strong-hold hairspray to prevent any pieces from falling out during winter activities.
12. Side-Swept Waves
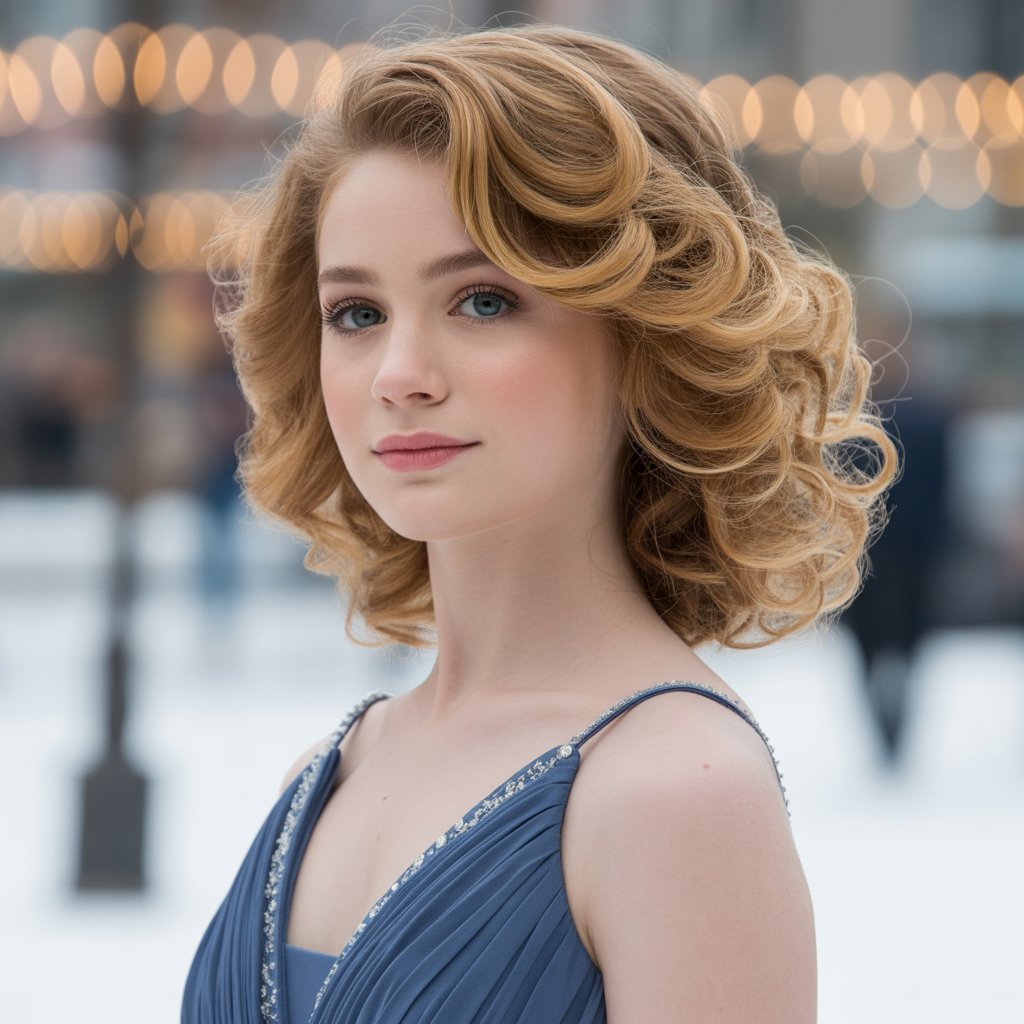
Side-swept waves create effortless glamour and romantic appeal perfect for winter dates, parties, or any time you want to feel extra beautiful.
This flowing hairstyle showcases the natural movement of your hair while keeping it styled and intentional.
The deep side part and cascading waves add drama and sophistication to your overall winter look.
- Create a deep side part, positioning it approximately two inches from your natural part for maximum dramatic effect.
- Section your hair into two-inch pieces and curl each section using a large-barrel curling iron or wand.
- Alternate the direction of your curls, wrapping some sections toward your face and others away from your face for natural-looking waves.
- Allow the curls to cool completely before touching them, which helps them set and last longer throughout the day.
- Brush through all the curls gently with a paddle brush or your fingers to soften them into flowing waves.
- Sweep all your hair to one side, allowing it to cascade over your shoulder in a romantic waterfall effect.
- Pin the hair behind your opposite ear with decorative bobby pins or small clips to keep it secured in place.
- Apply a light-hold hairspray to maintain the waves while allowing them to move naturally and catch the light beautifully.
13. Braided Bun
The braided bun combines two popular hairstyles into one stunning winter look that works for virtually any occasion.
This intricate style keeps your hair completely secured while showcasing your braiding skills beautifully.
The bun provides warmth at the nape of your neck while the braid adds texture and visual interest to an otherwise simple updo.
- Begin by creating a standard three-strand braid starting from the nape of your neck or mid-length down your ponytail.
- Braid all the way to the ends of your hair, securing with a small clear elastic band that won’t be visible.
- Pancake the braid by gently pulling apart each section to create width, fullness, and a more substantial appearance.
- Coil the braided hair around itself in a circular motion, creating a rounded bun shape at your desired position.
- Secure the bun by inserting bobby pins around the perimeter, angling them toward the center for maximum hold.
- Tuck any loose ends into the bun itself, hiding them within the coiled sections for a polished finish.
- Add decorative hairpins or small accessories to the bun if desired to elevate the style for special occasions.
- Finish with hairspray to ensure all the intricate braided details stay in place despite winter hats or wind.
14. Crimped Hair with Headband
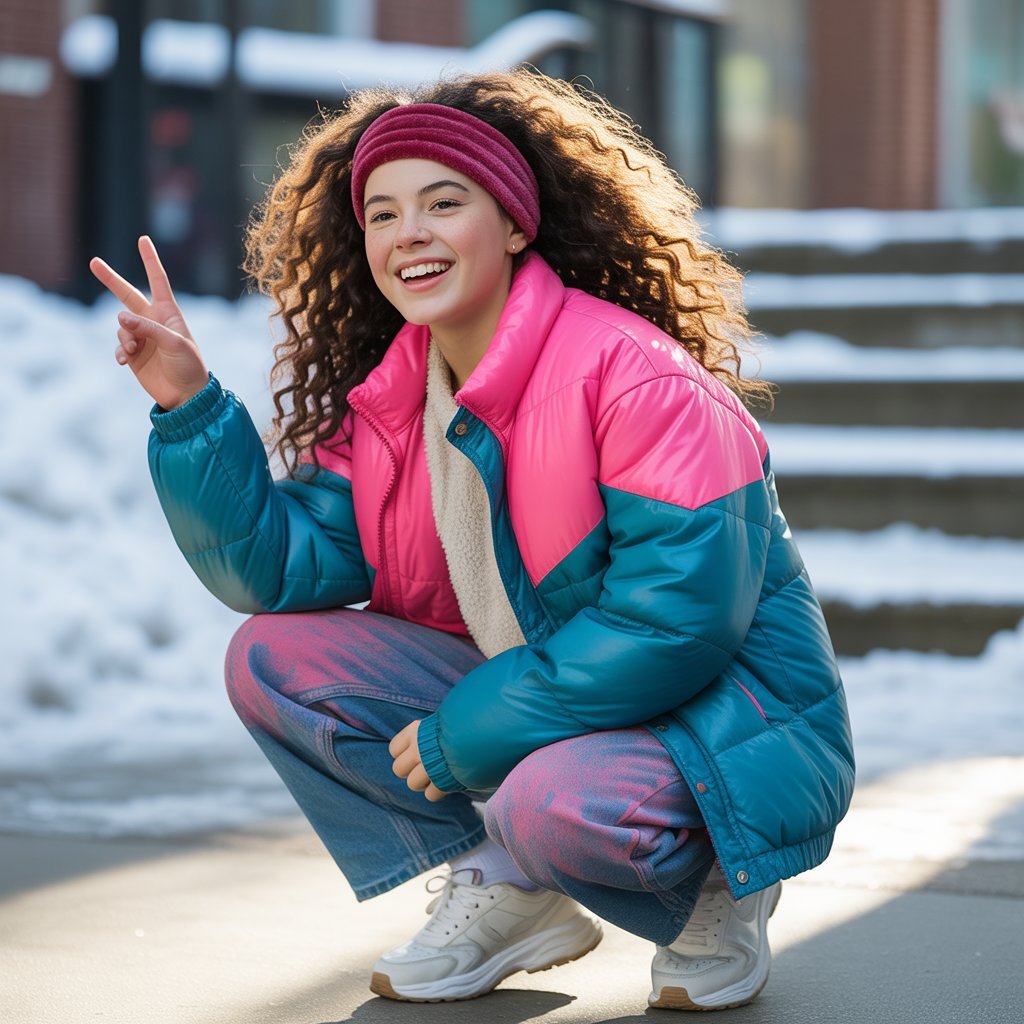
Crimped hair makes a bold retro statement that has resurged in popularity among fashion-forward teens.
This textured style adds incredible volume and dimension to your hair, making it perfect for winter when flatness from hats becomes problematic.
The addition of a headband helps control the volume while adding a coordinating accessory to your winter outfit.
- Start with clean, completely dry hair as damp hair will not crimp properly and may damage from heat.
- Section your hair into manageable one-inch pieces, working systematically from the bottom layers up to the top.
- Use a hair crimper tool on each section, clamping down firmly for five to ten seconds depending on your hair thickness.
- Work your way up each section from root to tip, slightly overlapping each crimped section for continuous texture.
- Continue crimping all sections of your hair until you achieve complete coverage with the zigzag pattern.
- Gently separate the crimped sections with your fingers to create maximum volume and fullness throughout your hair.
- Place a wide headband about an inch back from your hairline to help contain the volume while adding style.
- Finish with a volumizing hairspray to maintain the crimped texture and prevent it from falling flat during the day.
15. Low Braided Pigtails

Low braided pigtails offer a youthful, playful appearance that remains practical and comfortable for everyday winter wear.
This sweet style keeps your hair completely secured and protected from cold weather damage while looking adorable with casual winter outfits.
The symmetrical braids create a balanced, harmonious look that works well for active teens.
- Create a center part from your forehead straight down to the nape of your neck, dividing hair evenly into two sections.
- Secure one section with a hair tie while you work on braiding the first side to keep sections completely separate.
- Gather the working section into a low ponytail positioned just behind your ear at jaw level or slightly below.
- Divide this ponytail into three equal strands and create a classic three-strand braid down to the ends.
- Keep the braid relatively tight to prevent it from loosening throughout the day during winter activities.
- Secure the end with a decorative elastic or ribbon that adds a pop of color to your overall look.
- Repeat the entire braiding process on the other side, ensuring both braids are positioned at matching heights.
- Pull out a few small face-framing pieces at your hairline to soften the overall appearance and add gentle movement.
16. Twisted Low Bun

The twisted low bun delivers effortless elegance and sophistication perfect for winter events where you want to look polished but not overly formal.
This romantic style showcases the natural texture of your hair through strategic twisting before securing it into a bun.
The low placement sits comfortably against your neck and provides gentle warmth during cold weather.
- Gather your hair into a low ponytail at the nape of your neck, securing it loosely with a hair elastic.
- Divide the ponytail into two equal sections, holding one section in each hand firmly.
- Twist each section individually in the same direction, creating two tightly coiled rope-like pieces.
- Wrap the twisted sections around each other in the opposite direction to create a rope braid effect.
- Coil the twisted rope around the base of your ponytail in a circular motion to form a textured bun.
- Secure the bun with bobby pins inserted at various angles to ensure everything stays in place all day.
- Pull out a few small tendrils around your face and at the nape of your neck for a softer, romantic appearance.
- Apply a light mist of hairspray to set the style while maintaining the soft, touchable texture of the twists.
17. High Bun with Scrunchy
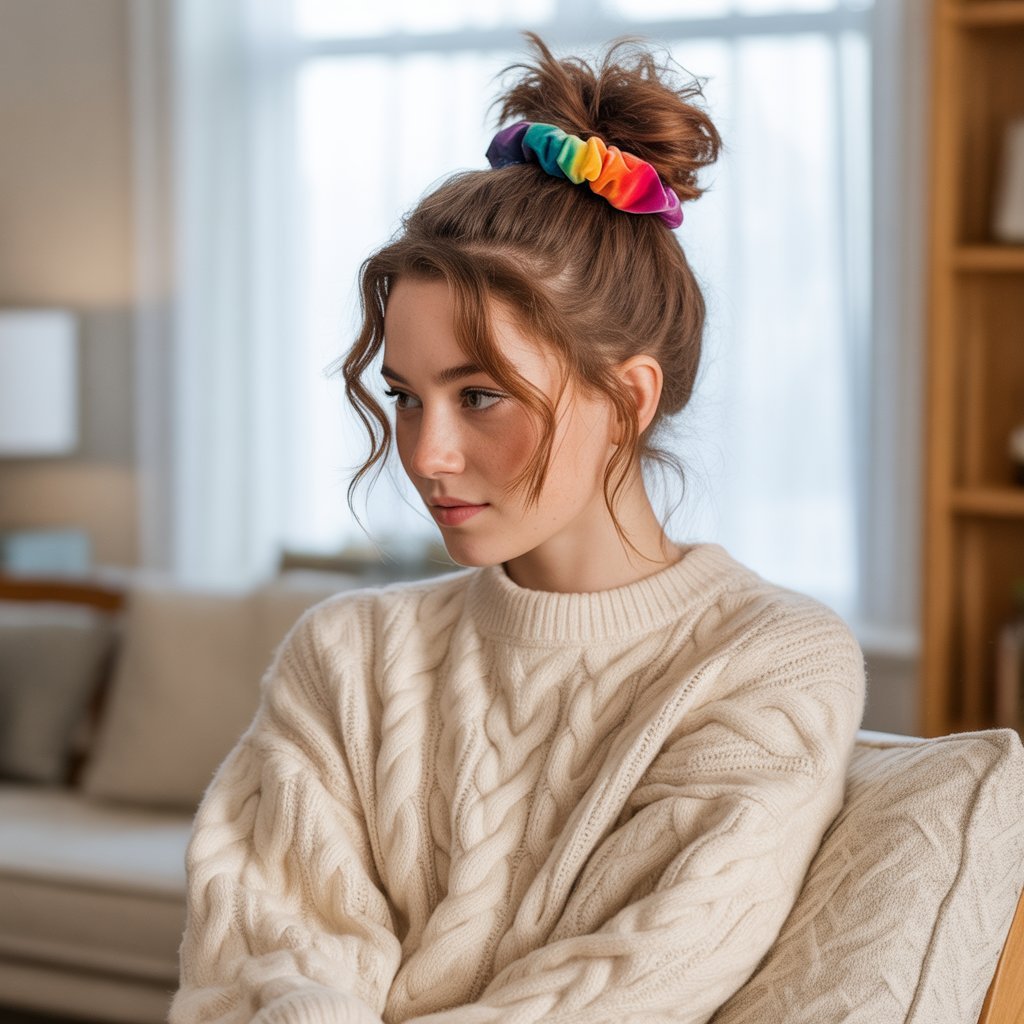
The high bun with scrunchie brings 90s nostalgia back in the best possible way while providing a practical, comfortable winter hairstyle.
This elevated bun keeps your hair completely off your neck and face, making it perfect for wearing under winter hats.
The scrunchie adds a fun pop of color or texture while being gentler on your hair than regular elastics.
- Flip your head upside down to gather all your hair at the crown, which helps create extra volume and height.
- Secure your hair into a high ponytail using a regular elastic band first for a strong foundation.
- Twist or wrap the ponytail around the base elastic, creating a rounded bun shape at the crown of your head.
- Secure the bun with bobby pins, inserting them through the bun and into your hair underneath for maximum stability.
- Slide a scrunchie over the bun and elastic, adjusting it to cover the base while allowing the bun to poof out attractively.
- Pull out small pieces of hair from the bun to create texture and a deliberately messy, undone appearance.
- Allow a few face-framing pieces to fall naturally around your temples and in front of your ears.
- Spray with texturizing spray if desired to enhance the casual, effortless vibe of this comfortable style.
18. Waterfall Braid
The waterfall braid creates a stunning cascading effect that looks intricate and special while being surprisingly achievable.
This showstopping hairstyle works beautifully for winter formals, holiday parties, or any time you want your hair to be the star of your outfit.
The flowing sections of hair create a waterfall illusion that captivates and impresses everyone who sees it.
- Begin by taking a three-inch section of hair near your temple, dividing it into three equal strands.
- Start with a basic three-strand braid for the first one or two crossovers to establish the foundation of your waterfall.
- As you cross the top strand over the middle, drop that strand completely and let it fall like a waterfall stream.
- Pick up a new section of hair from the top of your head to replace the dropped strand and incorporate it into the braid.
- Continue this pattern across your head, consistently dropping the top strand and replacing it with fresh hair from above.
- Keep the braid relatively horizontal as you work from one side to the other across the back of your head.
- Secure the braid behind your opposite ear with small bobby pins that match your hair color for invisible hold.
- Curl the dropped sections of hair and the remaining loose hair to create beautiful flowing waves that enhance the waterfall effect.
19. Rope Braid Ponytail
The rope braid ponytail offers a unique twist on the standard braid that creates stunning visual texture and dimension.
This simple yet eye-catching style requires only two sections instead of three, making it faster to create than traditional braids.
The rope-like appearance adds sophistication to casual ponytails, making them perfect for school, shopping, or hanging out with friends.
- Create a ponytail at your desired height, securing it firmly with an elastic band that can support your hair’s weight.
- Divide the ponytail into two perfectly equal sections, holding one section in each hand with firm grip.
- Twist the right section clockwise several times until it begins to coil upon itself from the tension.
- Twist the left section clockwise the same number of times, maintaining equal tension in both sections.
- Cross the right twisted section over the left section in a counterclockwise motion to begin creating the rope effect.
- Continue twisting each section clockwise individually, then crossing them counterclockwise around each other repeatedly.
- Maintain consistent tension throughout the entire rope braid to ensure it holds its distinctive twisted shape.
- Secure the end with an elastic band and gently tug on the rope sections to create fuller, more dimensional appearance.
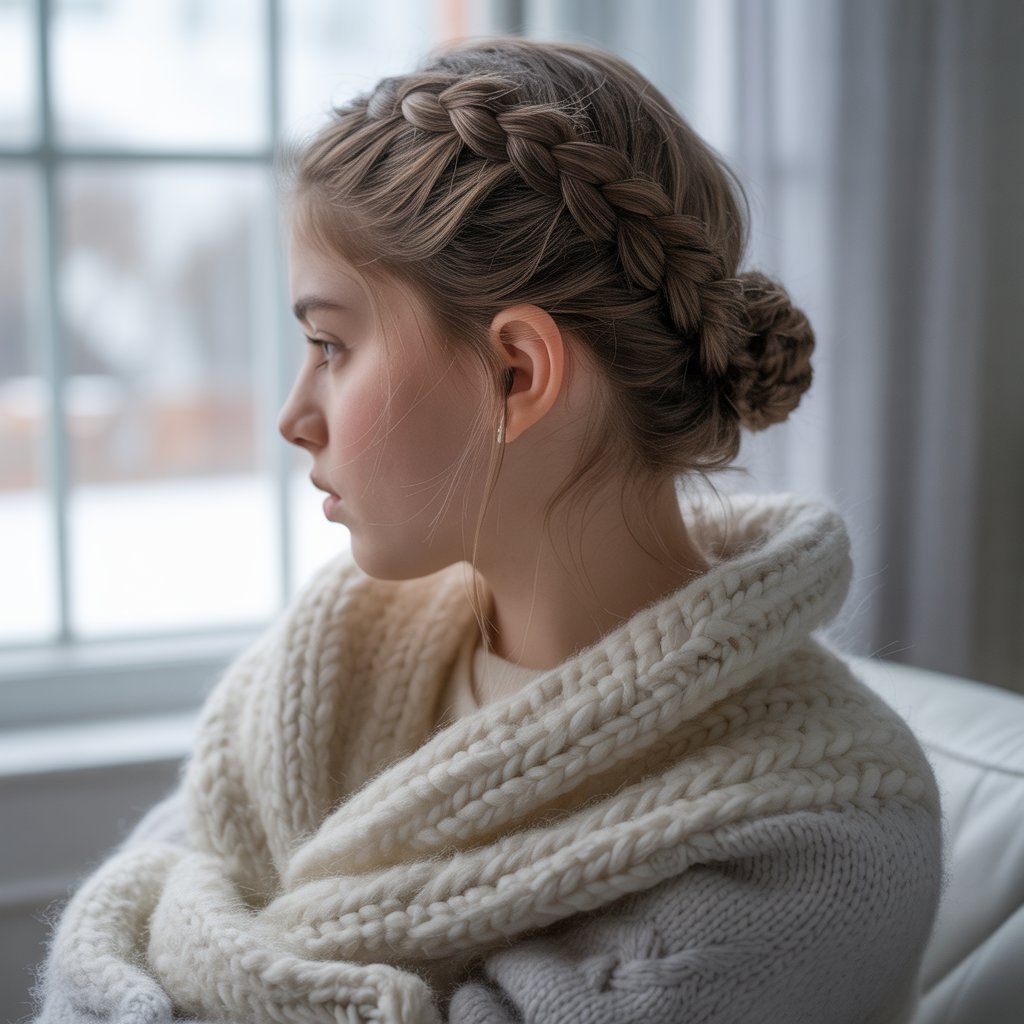
20. Crown Braid

The crown braid wraps around your entire head like a natural halo, creating a regal and feminine winter hairstyle.
This stunning style keeps all your hair secured and protected from winter weather while making you look like royalty.
The circlet of braided hair adds instant elegance to any outfit and works beautifully for both casual and formal winter occasions.
- Create a deep side part at your preferred location, typically positioning it about two inches off your natural center.
- Take a two-inch section of hair from the heavier side of your part near your hairline to begin braiding.
- Start a Dutch braid by crossing strands under rather than over, adding small sections of hair as you work around your head.
- Braid along your hairline from front to back, following the natural curve of your head toward your opposite ear.
- Continue braiding around the back of your head, maintaining even tension to keep the braid flat against your scalp.
- Work all the way around until you reach your starting point, incorporating all remaining hair into the braid.
- Secure the end of the braid with a small elastic band, then tuck it underneath the crown braid near your starting point.
- Pin the end section securely under the beginning of the braid using several bobby pins for invisible, seamless finishing.
21. Zigzag Part with Two Braids
The zigzag part with two braids brings playful creativity to traditional pigtails, making them feel fresh and modern.
This fun style draws attention to the unique parting pattern while keeping your hair neatly organized for winter activities.
The geometric part adds visual interest and shows off your styling skills in a simple yet effective way.
- Use the pointed end of a rat-tail comb to create a zigzag pattern instead of a straight part from forehead to nape.
- Move the comb diagonally one way about an inch, then switch directions diagonally the opposite way repeatedly.
- Continue the zigzag pattern all the way down your head until you reach the nape of your neck.
- Clip one section of hair away while you work on braiding the first side to keep sections cleanly separated.
- Create your preferred braid style on each side, whether classic three-strand, Dutch, or French braids work equally well.
- Ensure both braids are positioned at matching heights and have consistent tension for a balanced, symmetrical appearance.
- Secure each braid with elastic bands, choosing colors that either match your hair or coordinate with your outfit.
- Apply a small amount of edge control or gel along the zigzag part to keep it clean, defined, and visible throughout the day.
22. Loose Waves with Bobby Pin Design

Loose waves with bobby pin designs combine natural, flowing hair with creative accessorizing that showcases your artistic side.
This trendy style allows you to create patterns, words, or geometric shapes using decorative bobby pins as functional art.
The combination of soft waves and structured pin placement creates beautiful contrast perfect for winter selfies and special events.
- Curl your hair in large sections using a curling wand or iron to create loose, natural-looking waves throughout.
- Brush through the curls gently with your fingers or a wide-tooth comb to soften them into flowing waves.
- Decide which side of your head will showcase your bobby pin design and sweep hair slightly toward that side.
- Take a small section of hair from your temple area and pin it back using the first bobby pin in your design.
- Continue adding bobby pins in your chosen pattern, whether creating parallel lines, zigzags, stars, or even letters.
- Space the bobby pins evenly and ensure they follow a consistent pattern for maximum visual impact.
- Choose bobby pins in contrasting colors like gold against dark hair or colored pins against lighter shades for visibility.
- Set the style with light hairspray to ensure the waves maintain their shape and the bobby pins stay securely in place.
23. Braided Headband with Down Hair
The braided headband with down hair creates a boho-chic winter look that keeps hair out of your face while showcasing your length.
This romantic style works beautifully for teens who want the appearance of a headband without actually wearing an accessory.
The braid creates a natural crown that frames your face attractively while keeping your overall look soft and approachable.
- Take a two-inch section of hair from behind one ear, starting at the bottom of your hairline in that area.
- Create a tight three-strand braid with this section, braiding all the way down to the ends for maximum length.
- Secure the braid temporarily with a small elastic or clip to keep it out of the way while you create the second side.
- Repeat the braiding process behind your other ear, creating a matching braid of equal thickness and tightness.
- Bring the first braid across the top of your head like a headband, positioning it where a traditional headband would sit.
- Pin the braid securely on the opposite side using bobby pins that match your hair color for invisible securing.
- Bring the second braid across your head underneath the first braid, creating a layered headband effect if desired.
- Remove the elastic from the visible braid ends and allow them to blend naturally with your loose hair underneath.
24. Voluminous Curly Ponytail

The voluminous curly ponytail delivers maximum impact and glamour perfect for winter parties, special events, or when you simply want to feel extra fabulous.
This statement hairstyle showcases beautiful curl texture while keeping your hair secured and manageable.
The high placement and abundant volume create a youthful, energetic appearance that radiates confidence and style.
- Start by curling your entire head of hair in small to medium sections using a curling iron or wand for tight curls.
- Allow all the curls to cool completely, which helps them set properly and maintain their shape for hours.
- Flip your head upside down and spray the roots with volumizing spray or dry shampoo for added lift and texture.
- Gather all your hair into a high ponytail at the crown, smoothing the front and sides while keeping the back teased.
- Secure the ponytail with multiple elastic bands if your hair is thick or heavy to ensure it stays elevated.
- Separate the curls in the ponytail with your fingers to create maximum fullness and volume throughout the entire length.
- Tease the ponytail gently at the base to add even more height and prevent it from falling flat during your event.
- Finish with strong-hold hairspray applied generously to maintain the volume and curl definition throughout the evening.
25. Twisted Half-Up with Clips

The twisted half-up with clips combines elegant twisting techniques with trendy hair accessories that have dominated winter fashion.
This versatile style keeps hair out of your face while allowing you to show off your favorite decorative clips or barrettes.
The twisted sections add texture and dimension while the clips provide both function and fashionable flair to your overall winter look.
- Take a two-inch section of hair from above your right temple and twist it tightly backward toward the crown of your head.
- Continue twisting as you move toward the back center of your head, keeping consistent tension throughout the twist.
- Temporarily secure this twist with a small clip while you work on creating the matching twist on the left side.
- Repeat the twisting process with a two-inch section from above your left temple, twisting backward toward the center back.
- Bring both twists together at the back center of your head, crossing them over each other for added interest.
- Secure both twists together using decorative hair clips, positioning them to showcase the clip design while holding hair firmly.
- Arrange additional decorative clips along the twisted sections if desired to create a cluster effect that is very on-trend.
- Leave the remaining hair down in natural waves or curls, allowing it to flow freely and contrast with the structured top section.
26. Low Side Ponytail with Ribbon

The low side ponytail with ribbon exudes sweet, feminine charm perfect for winter date nights or casual weekend outings.
This romantic style positions the ponytail at an angle that creates visual interest while the ribbon adds a soft, delicate touch.
The combination of the asymmetrical placement and fabric accessory makes this simple style feel special and thoughtfully styled.
- Brush your hair smoothly to one side, gathering it at the base of your neck just behind and below your ear.
- Secure the ponytail with a clear elastic band that will be hidden by the ribbon you add later.
- Take a long piece of satin or velvet ribbon in your chosen color and fold it in half to find the center point.
- Place the center of the ribbon under the ponytail elastic, bringing both ribbon ends up and around the elastic base.
- Wrap the ribbon around the elastic several times to completely cover it and create a decorative foundation.
- Tie the ribbon ends into a bow, adjusting the loops and tails to your preferred size and proportion.
- Trim the ribbon ends at an angle or in a V-shape to prevent fraying and add a polished finishing touch.
- Curl or wave the ponytail itself to add body and movement that complements the soft, romantic ribbon detail.
27. Sock Bun

The sock bun creates a perfectly round, voluminous bun that looks professionally styled and polished.
This clever technique uses an actual sock to achieve a fuller bun shape, especially helpful for teens with finer or thinner hair.
The classic ballerina-inspired bun works beautifully for winter formal events, performances, or any occasion requiring an elegant, sophisticated hairstyle.
- Cut the toe section off a clean sock that matches your hair color, creating a tube shape with both ends open.
- Roll the sock from one end to the other, creating a donut shape that will serve as your bun form.
- Create a high ponytail at your desired bun placement, securing it tightly with an elastic band for a stable foundation.
- Thread the ponytail through the center hole of the sock donut, positioning the donut near the ends of your ponytail.
- Begin rolling the sock donut down toward the base of your ponytail, tucking your hair around it as you roll.
- Continue rolling and tucking until the sock reaches the ponytail base, ensuring hair is evenly distributed around the entire donut.
- Spread your hair out around the sock to completely cover it, creating a smooth, rounded bun appearance.
- Secure any loose sections with bobby pins and finish with hairspray to ensure the bun maintains its perfect shape all day.
28. Braided Mohawk

The braided mohawk delivers edgy, fashion-forward style that makes a bold statement during winter months.
This dramatic hairstyle combines multiple Dutch or French braids along the center of your head while keeping the sides sleek.
The punk-inspired look showcases confidence and creativity while remaining appropriate for school and most teen-friendly events.
- Create two side parts from your forehead to the nape of your neck, sectioning off a wide strip of hair down the center.
- Clip the side sections away and apply gel or pomade to slick them down flat against your head for the mohawk effect.
- Divide the center section into two or three horizontal subsections depending on your desired number of braids.
- Start with the front section and create a Dutch braid, crossing strands under rather than over for a raised appearance.
- Continue the Dutch braid straight back along your head, keeping it centered within the mohawk section and adding hair from the sides.
- Secure the first braid and repeat the process with the remaining center sections, creating parallel braids down your head.
- Ensure all braids are tight against your scalp and positioned symmetrically for a clean, intentional mohawk appearance.
- Set the slicked sides with strong-hold gel and spray the braids lightly to ensure everything stays in place throughout the day.
29. Pulled-Through Braid
The pulled-through braid creates the illusion of an intricate braid without any actual braiding skills required.
This innovative technique uses ponytails and strategic pulling to achieve a voluminous, textured look that appears far more complicated than it is.
The dimensional result works perfectly for winter events when you want a hairstyle that looks impressive and photograph-worthy.
- Create a half-up ponytail at the crown of your head, securing it with a clear elastic band to start the pulled-through process.
- Split this ponytail in half vertically, creating two equal sections that you temporarily clip to the sides.
- Gather a new section of hair from just below the first ponytail and create a second ponytail directly beneath it.
- Bring the two split sections from the first ponytail down around the second ponytail and secure them together below with an elastic.
- Split the ends of this combined section in half, clipping them temporarily to the sides while you work.
- Create another new ponytail below using hair that hasn’t been incorporated yet, threading it through the split sections above.
- Continue this pattern of splitting, pulling through, and securing down the length of your hair until you run out of new hair.
- Gently pull apart each section to create width and fullness, transforming the stacked ponytails into a dimensional faux braid.
30. Vintage Victory Rolls

The vintage victory rolls bring 1940s glamour to modern winter styling with dramatic rolled sections framing your face.
This retro hairstyle requires practice but creates stunning results perfect for themed parties, vintage photoshoots, or teens who love classic Hollywood style.
The sculptural rolls add height and drama while showcasing your dedication to mastering vintage beauty techniques.
- Section off the front portion of your hair from ear to ear, creating the area where your victory rolls will be positioned.
- Divide this front section into two equal parts using a center part or slightly off-center depending on your preference.
- Take one front section and backcomb it thoroughly at the roots to create volume and texture that will support the roll.
- Roll the section backward toward your head, creating a tube shape that curves upward and away from your face.
- Pin the roll securely to your head using bobby pins inserted horizontally through the roll and into your hair underneath.
- Repeat the rolling and pinning process on the other side, ensuring both rolls are positioned symmetrically at equal heights.
- Style the remaining hair in victory roll-appropriate ways such as soft curls, waves, or an elegant updo to complete the vintage look.
- Set the entire style with strong-hold hairspray and use a small amount of shine serum on the rolls for authentic vintage finish.
Style Maintenance Tips for Winter Hair
Winter weather presents unique challenges for maintaining beautiful hairstyles throughout the cold season. Understanding how to protect and preserve your carefully styled hair makes a significant difference in how long your looks last and how healthy your hair remains.
- Invest in a silk or satin pillowcase to reduce friction while you sleep and minimize morning styling time needed.
- Apply a weekly deep conditioning treatment to combat the drying effects of cold outdoor air and indoor heating systems.
- Avoid going outside with wet hair during winter as the cold can cause hair shaft damage and increased breakage.
- Keep a travel-size bottle of hair oil or serum in your bag for quick touch-ups throughout the day when static strikes.
- Trim your hair every six to eight weeks during winter to remove dry, split ends and maintain healthy hair overall.
- Choose hairstyles that protect your ends by tucking them away in buns, braids, or updos rather than leaving them exposed.
- Use a microfiber towel or t-shirt to dry hair instead of regular towels that can cause frizz and damage when hair is wet.
- Reduce washing frequency to two or three times per week to preserve natural oils that protect hair from winter damage.
Conclusion
Winter offers endless opportunities to experiment with beautiful, practical hairstyles that keep you looking fabulous while protecting your hair from harsh weather conditions.
These 30 Adorable Cute Winter Hairstyles for Teens provide options for every occasion, skill level, and personal style preference throughout the cold season.
From elegant updos perfect for holiday parties to casual braids ideal for school days, you now have a complete collection of winter styling inspiration at your fingertips.
Remember that the best hairstyle is one that makes you feel confident, comfortable, and authentically yourself regardless of current trends.
Take time to practice these techniques, adapt them to your unique hair texture and length, and make each style your own through personalized touches and accessories.
Embrace the winter season as a chance to showcase your creativity, protect your hair’s health, and discover new favorite looks that will carry you stylishly through the coldest months.
With these versatile styles in your repertoire, you will never have a bad hair day this winter season.