Getting creative with kids doesn’t have to be complicated or expensive.
37 Easy Scrap Wood Projects for Kids is your go-to list for fun, hands-on, and educational activities that turn leftover wood into mini masterpieces.
These projects are simple, safe, and ideal for curious young minds eager to build and decorate. You don’t need fancy tools—just basic materials, adult supervision, and a bit of imagination.
In this article, you’ll explore a variety of kid-friendly woodworking ideas from robot building and toy-making to home décor and outdoor crafts.
Each project helps develop problem-solving, fine motor skills, and creative confidence—all while reusing wood you probably already have.
Whether you’re a parent, teacher, or DIY enthusiast, this list is your blueprint for hours of meaningful fun.
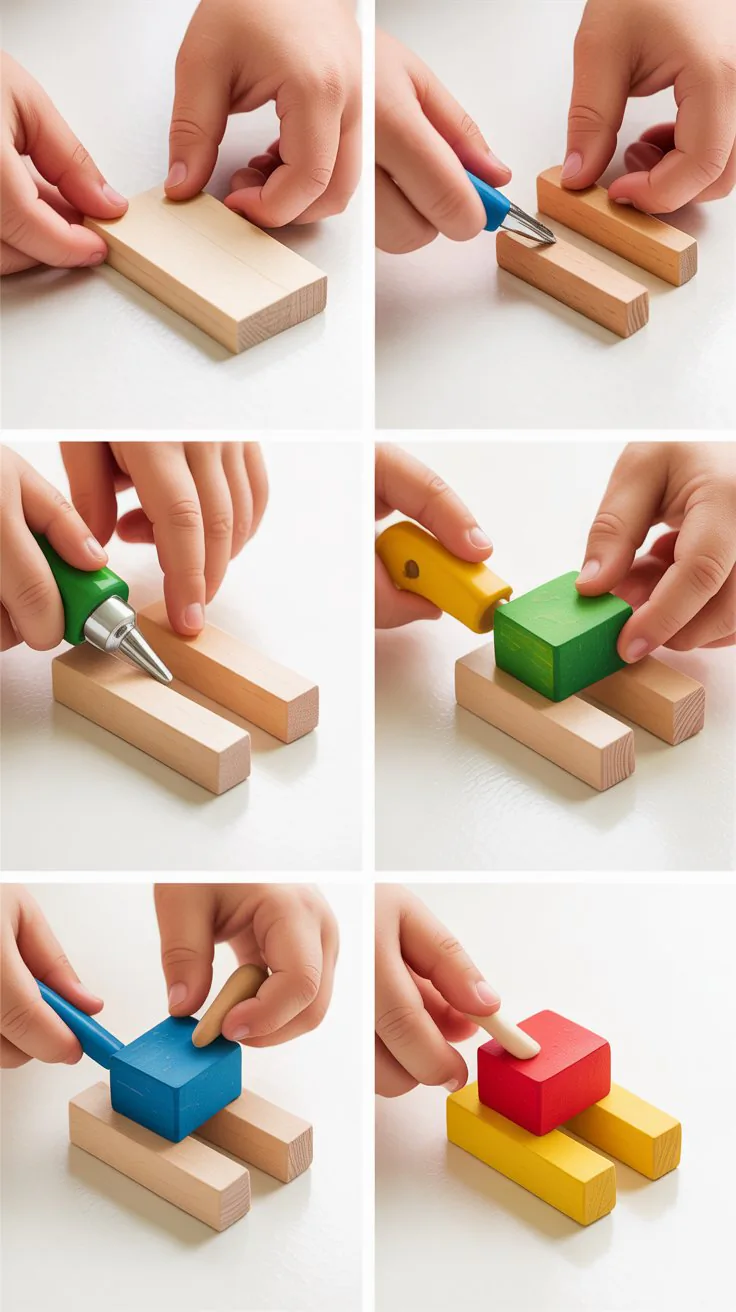
1. Wooden Robots
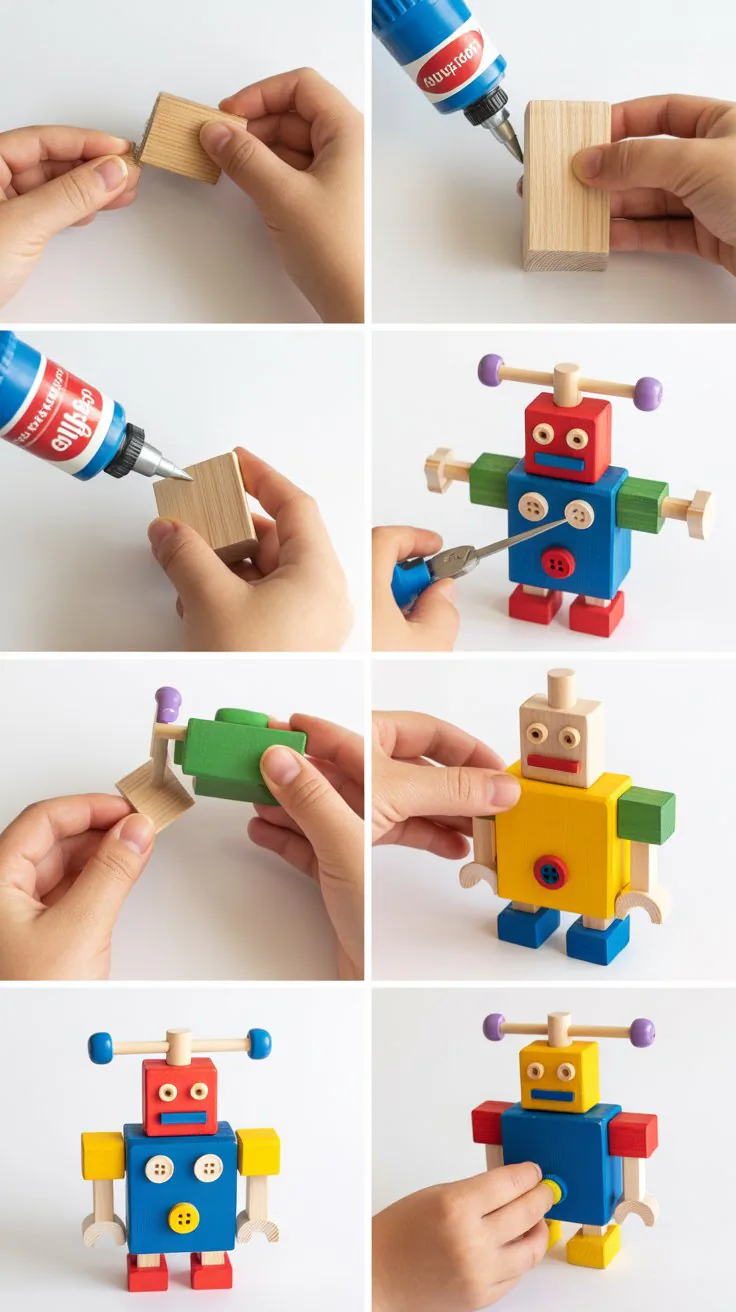
Wooden robots are a favorite among kids because they can be built, painted, and played with endlessly. This project sparks imagination and teaches basic assembling skills.
- Collect small wood scraps in various shapes—blocks for the head and body, thin pieces for arms and legs.
- Use sandpaper to smooth any rough edges for safety.
- Assemble the robot using wood glue or child-safe nails under supervision.
- Let kids paint their robot and decorate it with markers, stickers, buttons, or googly eyes.
- Once dry, display or use for pretend play.
2. Simple Birdhouses
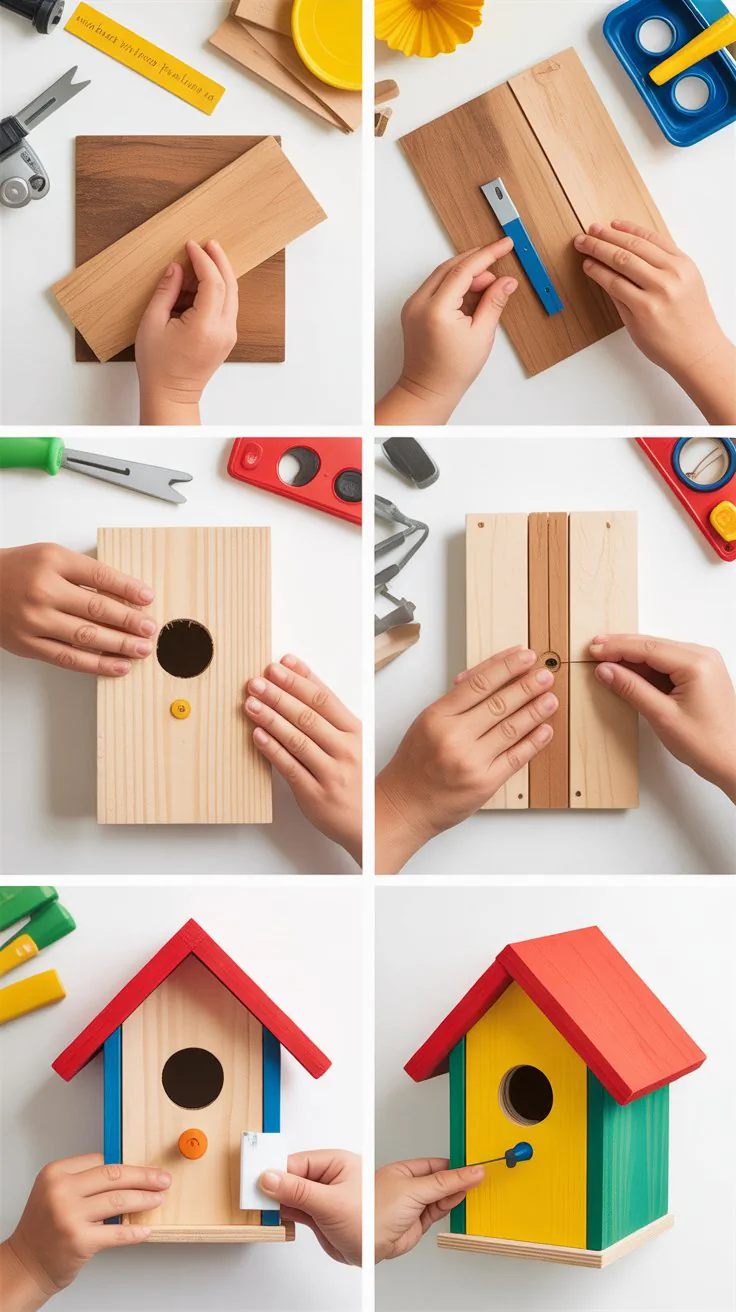
This project is a perfect blend of creativity and care for nature. Kids love to build birdhouses and watch birds visit them afterward.
- Cut 5–6 pieces of scrap wood: base, two side panels, front (with a hole), back, and roof.
- Sand edges gently and pre-drill small holes for nails or screws.
- Help children assemble the parts using glue or small nails.
- Allow kids to paint or decorate the birdhouse with weather-resistant paint.
- Hang it on a tree using rope or install on a pole in your backyard.
| Birdhouse Dimensions (Example) |
|---|
| Base – 5″ x 5″ |
| Sides – 5″ x 6″ |
| Roof – 6″ x 7″ |
| Front/Back – 5″ x 7″ |
Tip: Use a 1.5″ drill bit to make the entrance hole.
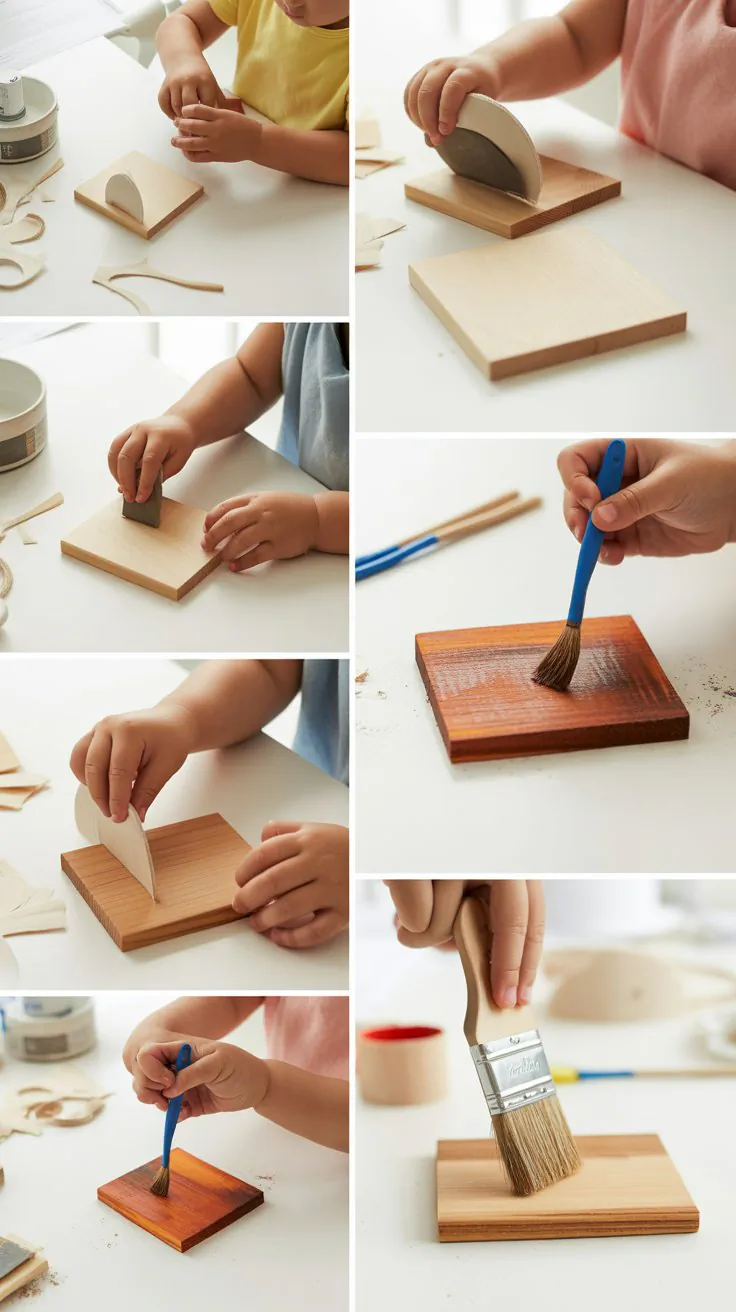
3. DIY Wooden Signs
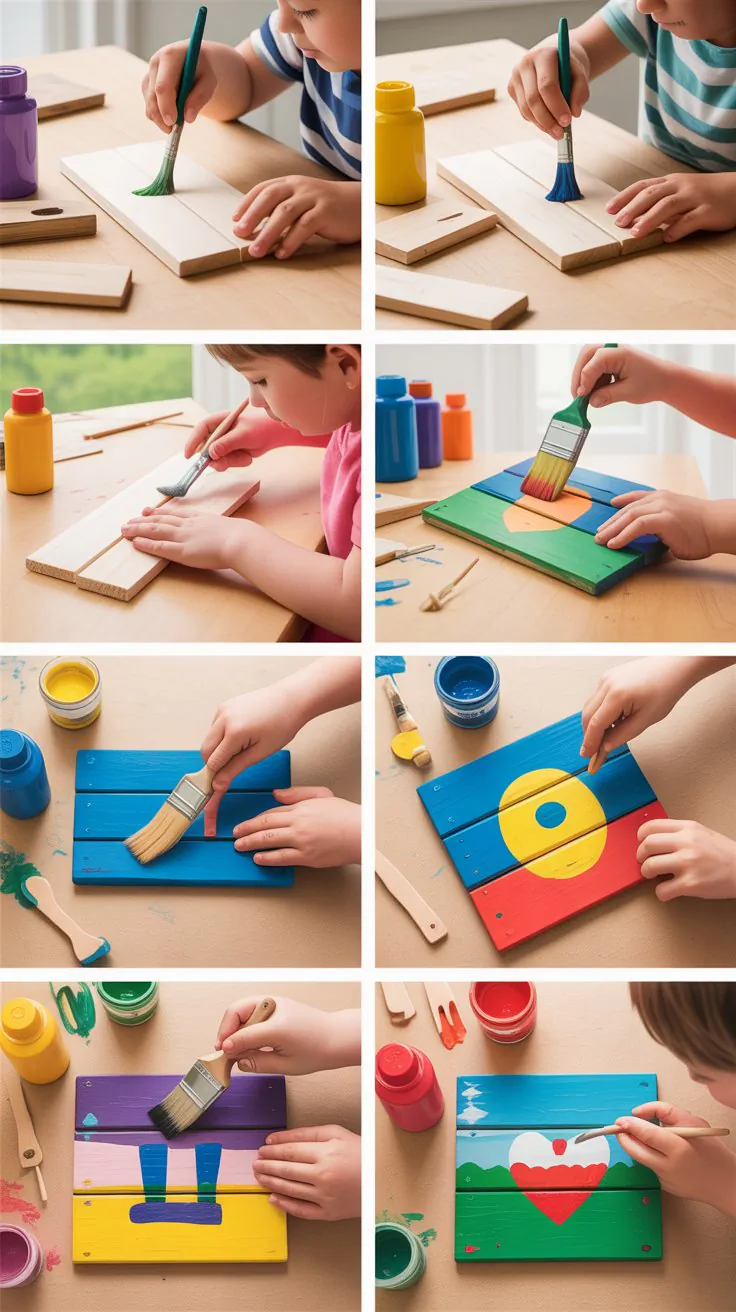
Wooden signs are an easy, expressive way for kids to explore lettering and decoration. These can be name signs, inspirational quotes, or fun room décor.
- Pick a flat wooden board or plank and sand it smooth.
- Let your child sketch out a design or quote in pencil.
- Use acrylic paint, stencils, or markers to complete the artwork.
- Allow it to dry, then attach string, ribbon, or a sawtooth hanger on the back for hanging.
Optional: Add extra embellishments like beads, shells, or glitter.
4. Block Animals

Block animals are a fantastic way to mix woodworking with storytelling. Kids can build their own toy animals using various wood block shapes.
- Choose wood scraps that can stack—squares, rectangles, or circles.
- Use a hot glue gun (with adult help) or strong wood glue to fix parts together.
- Paint or color the animal based on your child’s favorite pet or wild creature.
- Add ears or tails using felt, pipe cleaners, or more wood.
- Let it dry and introduce the animals to a homemade zoo!
5. Scrap Wood Puzzles
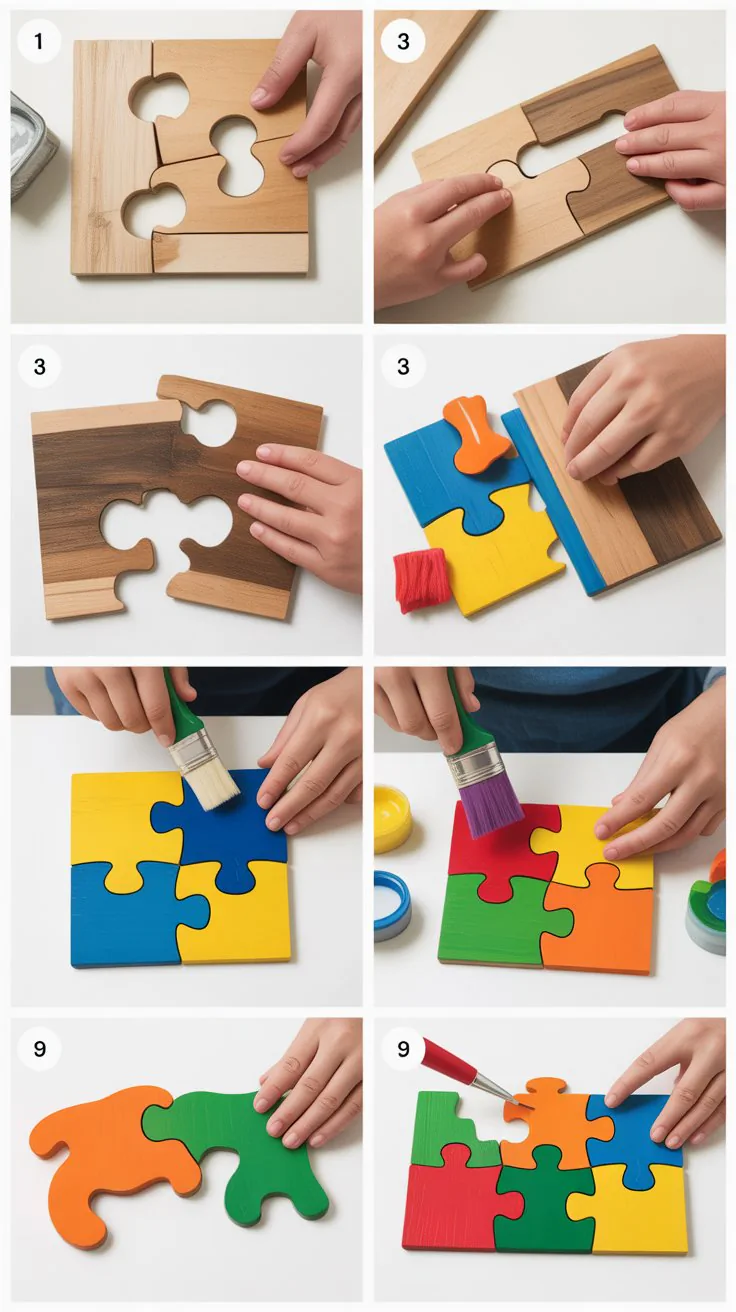
Wood puzzles are a fun, brain-boosting activity for kids. They’re easy to make, and no two puzzles are the same.
- Cut a flat square or rectangle piece of scrap wood.
- Let your child draw a picture on the surface using pencil.
- With adult assistance, use a scroll saw to cut the board into puzzle-like pieces.
- Sand the edges and allow the child to paint each piece uniquely.
- Once dry, mix the pieces and let the child solve their custom puzzle.
6. Mini Toolboxes
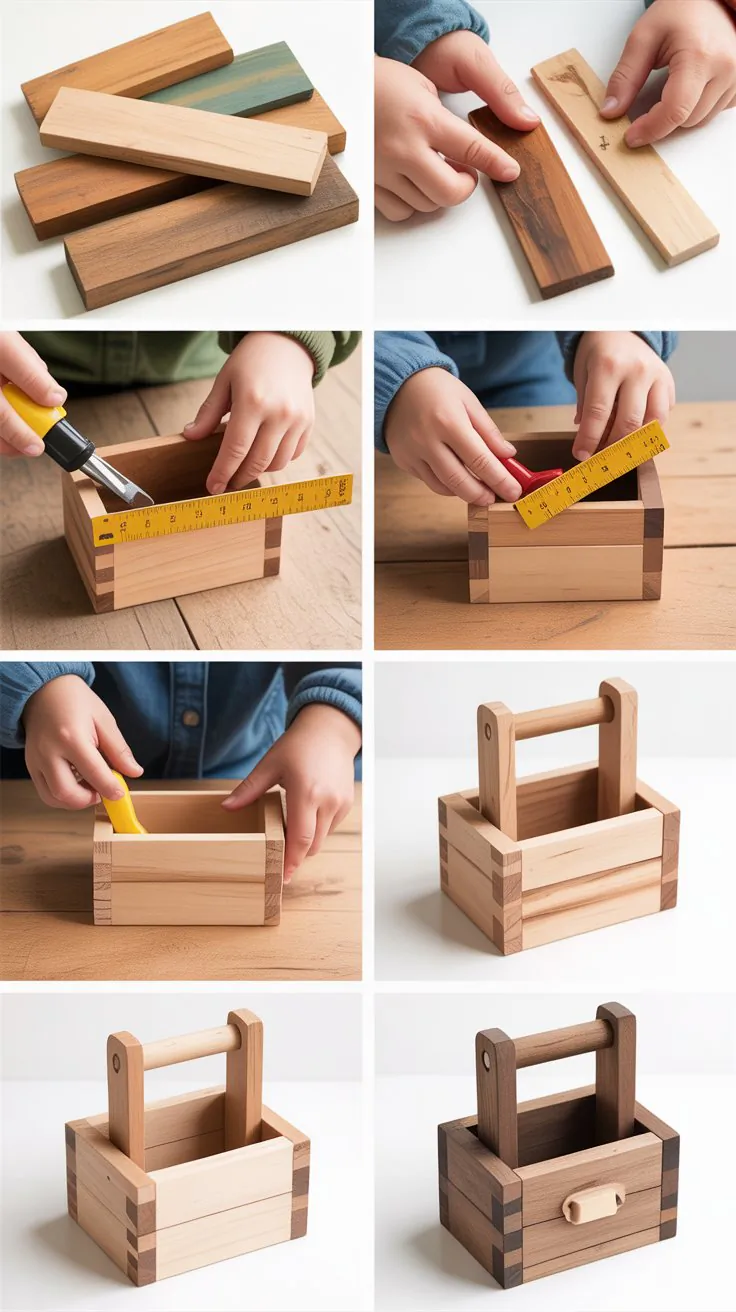
Mini toolboxes are a great beginner woodworking project that also gives kids something functional to use. Whether it’s for storing art supplies or small toys, this project builds pride and utility.
- Gather six small wood pieces: a base, two side panels, two end panels, and one handle (a dowel or slim wood strip).
- Sand each piece to remove rough edges.
- Assemble the base, sides, and ends using wood glue or small nails. Leave the top open.
- Drill holes in the end panels and insert the wooden dowel to form the handle.
- Let your child decorate with paint or stickers.
- Once dry, they can carry it around proudly!
7. Painted Name Plaques
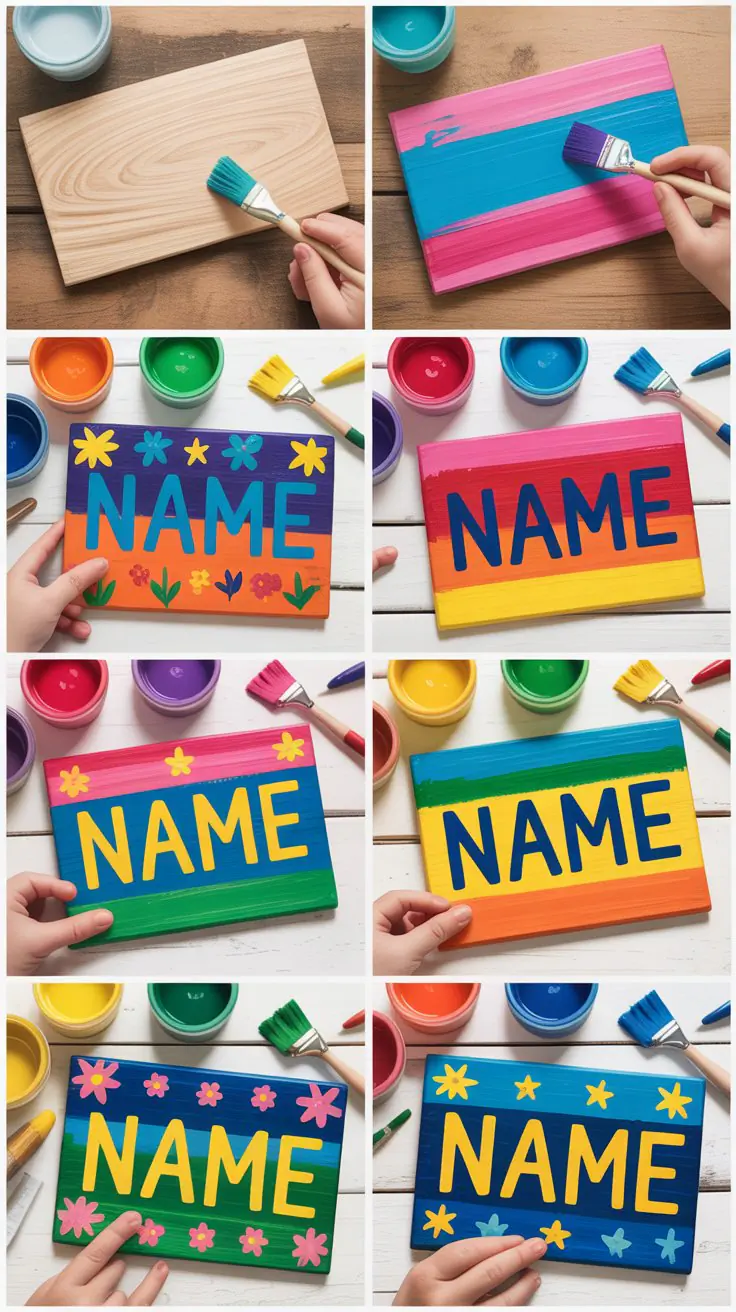
Name plaques let kids add a personal touch to their bedroom or creative space. It’s an easy project that helps with spelling and fine motor skills.
- Choose a flat, rectangular scrap wood piece and sand it smooth.
- Help your child write their name in pencil across the wood.
- Use paint or markers to fill in the letters. Add decorations like stars, hearts, or cartoon characters.
- Allow to dry fully before attaching string or hooks for hanging.
Creative tip: Add glitter glue or 3D letters using foam for a more tactile look.
8. Wooden Toy Cars

Let kids design, build, and race their own wooden toy cars. This project introduces simple construction while promoting play-based learning.
- Cut a small rectangular wood block for the car body.
- Use a drill to make axle holes on both ends.
- Insert dowels or skewers as axles and attach wooden wheels (available at craft stores).
- Secure wheels with glue or small caps.
- Let kids paint and decorate their cars with flames, numbers, or names.
- Create a ramp from a board to start your own race track!
9. Tiny Treasure Boxes
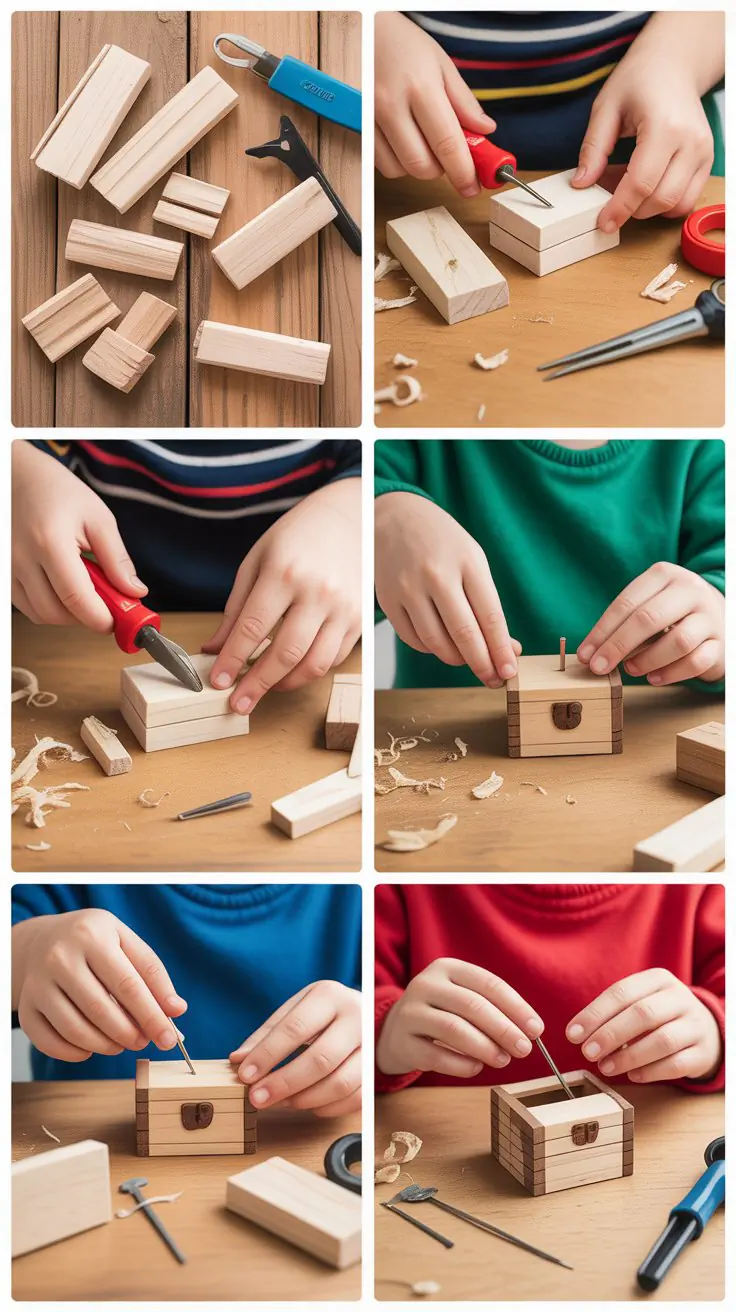
Treasure boxes give kids a place to keep their favorite little items. Building one teaches them how lids and hinges work.
- Cut 5 pieces of wood: base, two sides, front and back panels, and a lid.
- Assemble the box with wood glue, leaving the top open.
- Attach the lid using small hinges or simply rest it on top like a keepsake box.
- Paint or decorate the box with your child’s favorite colors or patterns.
- Fill it with marbles, shells, toy coins, or secret notes.
10. DIY Picture Frames
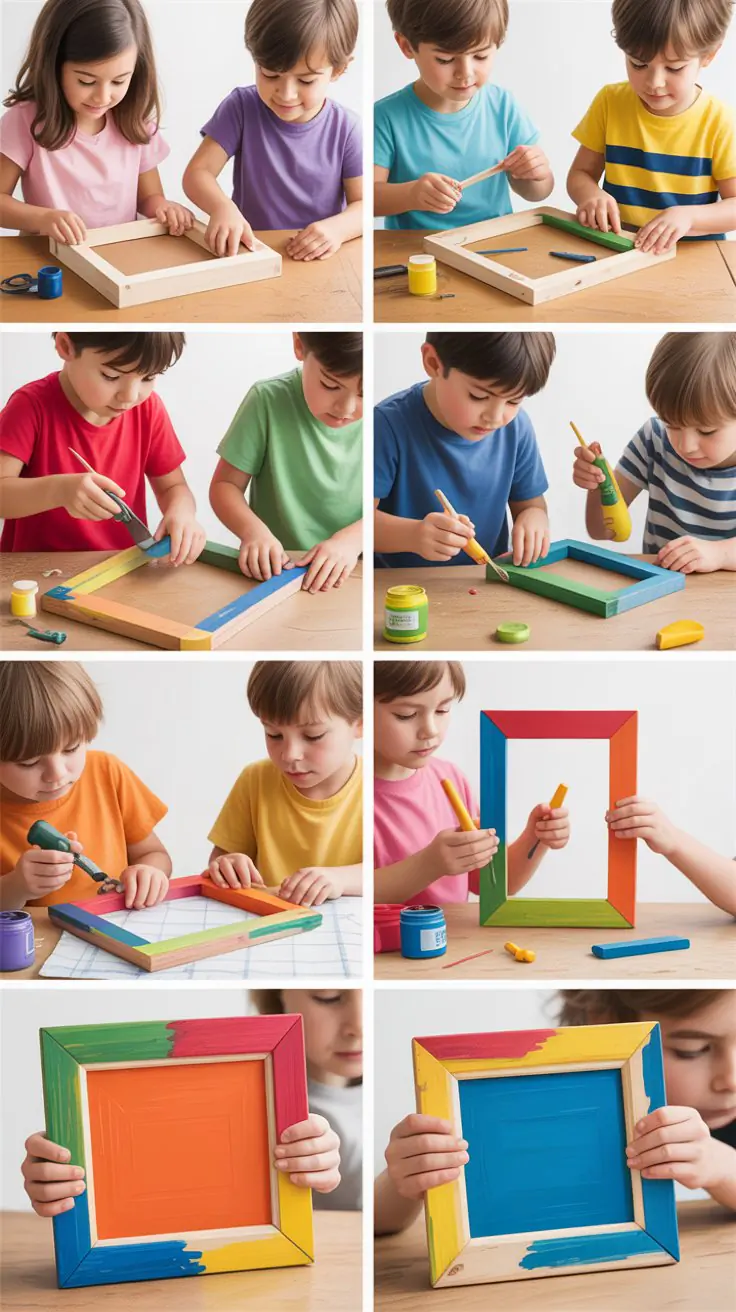
Let kids showcase their art or favorite photos in a handmade wooden frame. It’s an easy project with a lot of decorative potential.
- Cut four strips of wood for the frame border and glue them together in a rectangle.
- Sand smooth and decorate with paint, stickers, or glued-on shapes.
- Cut a backing from cardboard and glue it to the rear side.
- Insert artwork or a photo between the wood and the backing.
- Attach a clothespin or use string to hang.
Tip: Add a small wooden stand or magnet for display versatility.
11. Wooden Tic Tac Toe Boards
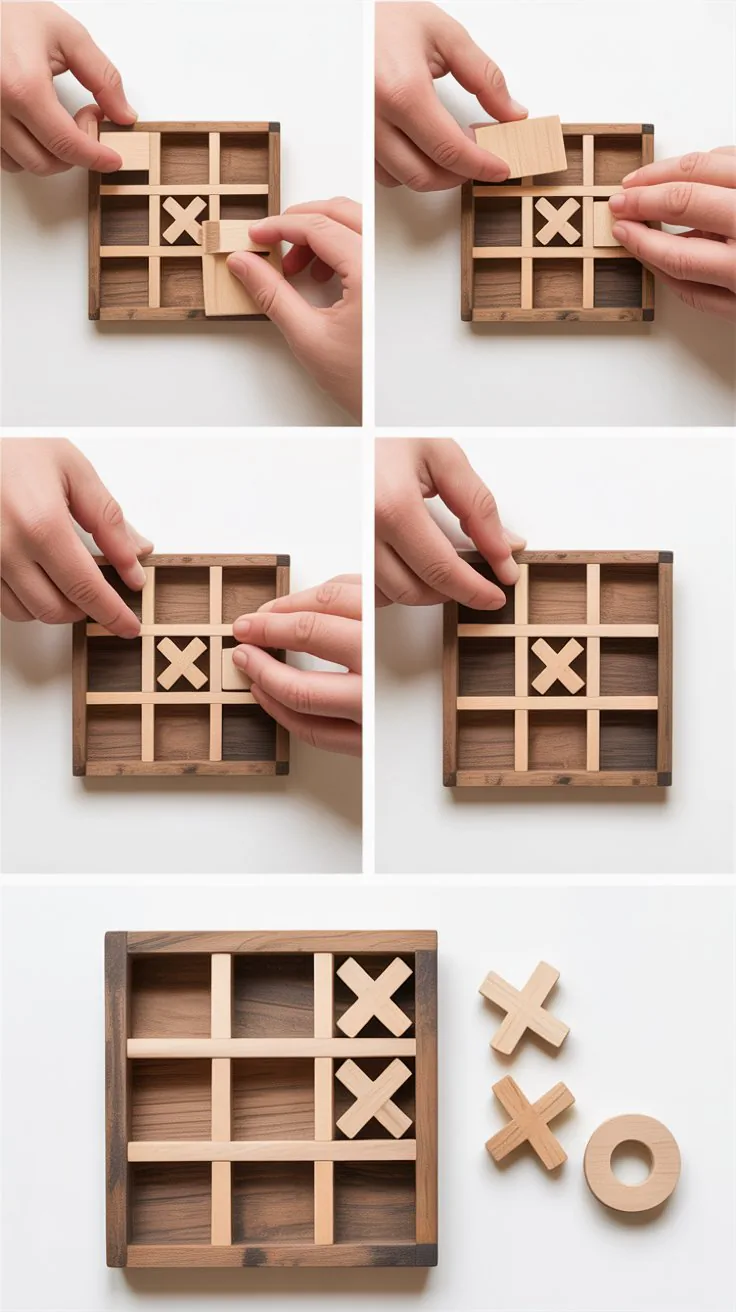
Turn this classic game into a reusable keepsake your child can play again and again. It’s also a great rainy-day craft.
- Cut a square piece of flat wood for the base.
- Use a ruler and pencil to draw a tic-tac-toe grid.
- Paint the lines and let them dry.
- Cut small round or square pieces (or use wood slices) to act as Xs and Os.
- Paint half the pieces with Xs and the other half with Os.
| Game Board Guide |
|---|
| Board Size: 6″ x 6″ |
| Pieces Needed: 10 total |
| Paint Colors: 2 |
12. Scrap Wood Robots (Version 2)
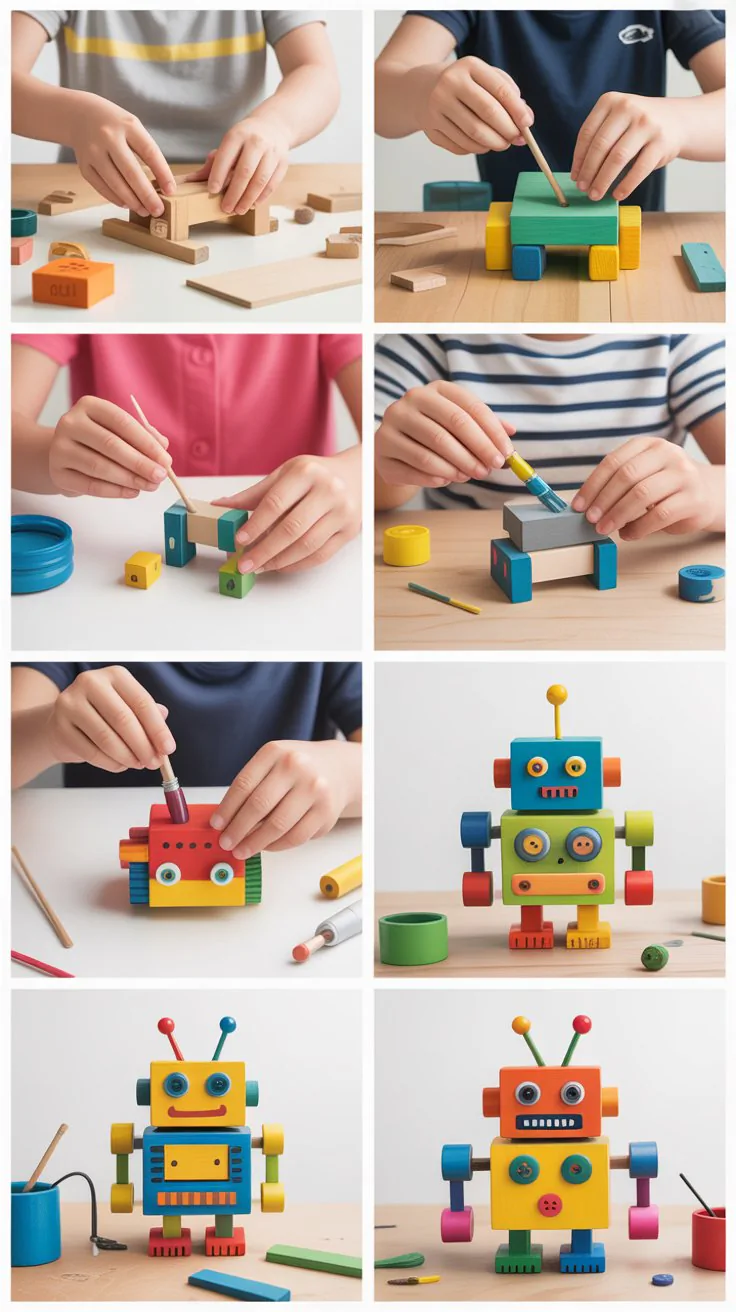
This variation on the earlier robot idea encourages more freestyle creativity using bolts, springs, and even bottle caps.
- Collect assorted wood scraps in various sizes and shapes.
- Let your child sketch a “blueprint” of their robot on paper.
- Use glue or nails to attach arms, legs, heads, and other parts.
- Decorate using paint, screws (under supervision), bottle caps, or other small items.
- Display or use as imaginative action figures.
13. Fairy Doors
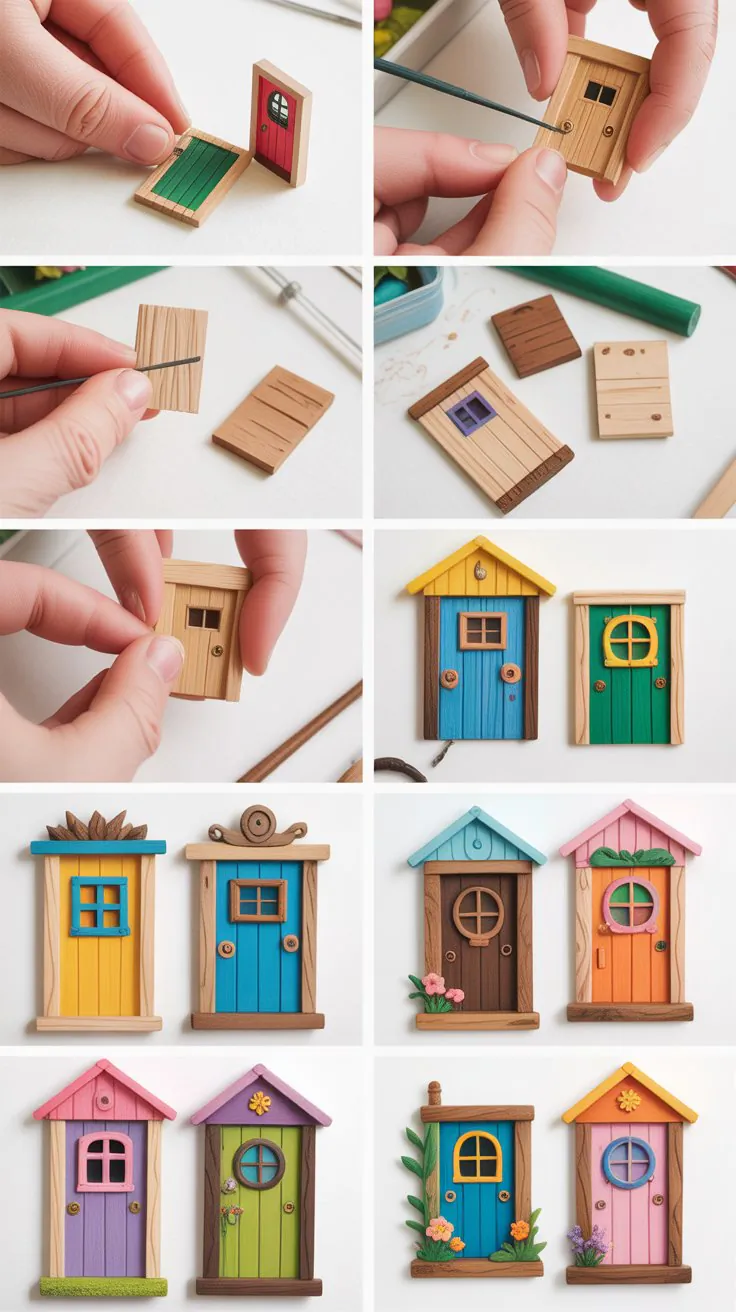
Encourage magical thinking with these delightful fairy doors. These can be used in gardens or even stuck to baseboards indoors.
- Use a curved or rectangular wood piece for the door.
- Paint with bright or pastel colors.
- Add details like windows, door knobs (beads or buttons), or miniature flowers.
- Glue onto a garden tree, wall, or near a bookshelf to “invite fairies in.”
- Seal with weatherproof spray if placing outdoors.
14. Mini Wooden Easels
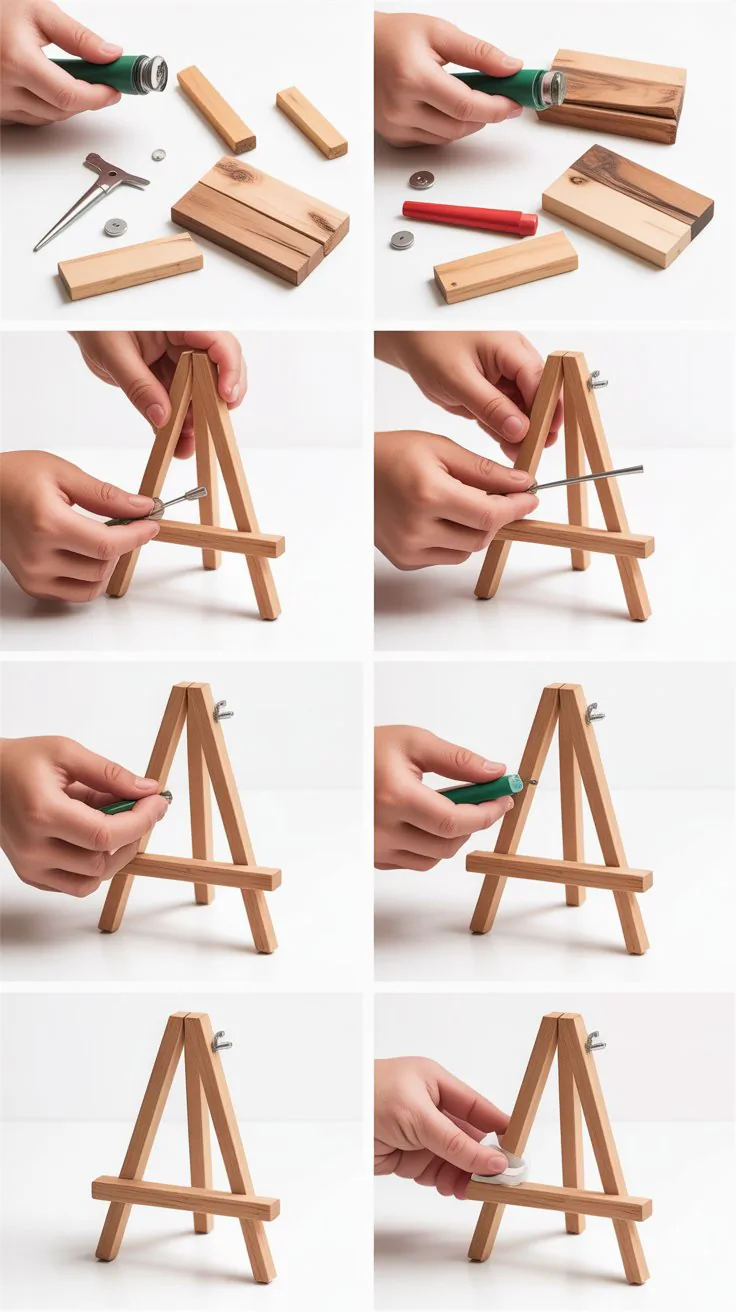
Mini easels are both decorative and functional. Kids can use them to display their small artwork or photos.
- Cut three equal lengths of thin wood (about 6” each) for the frame.
- Connect two pieces at the top with a screw or string to form a triangle.
- Attach the third piece horizontally to act as the bottom shelf.
- Decorate with paint and let dry.
- Use it to hold a small canvas, photo, or even a quote.
15. Wood Slice Magnets
This is a fast and fun project that transforms natural wood slices into colorful fridge magnets.
- Slice thin discs from small branches or use pre-cut wood slices.
- Let kids paint designs, initials, emojis, or animals on each slice.
- Once dry, glue a small magnet to the back.
- Stick them on the fridge to hold art or notes.
16. DIY Peg People
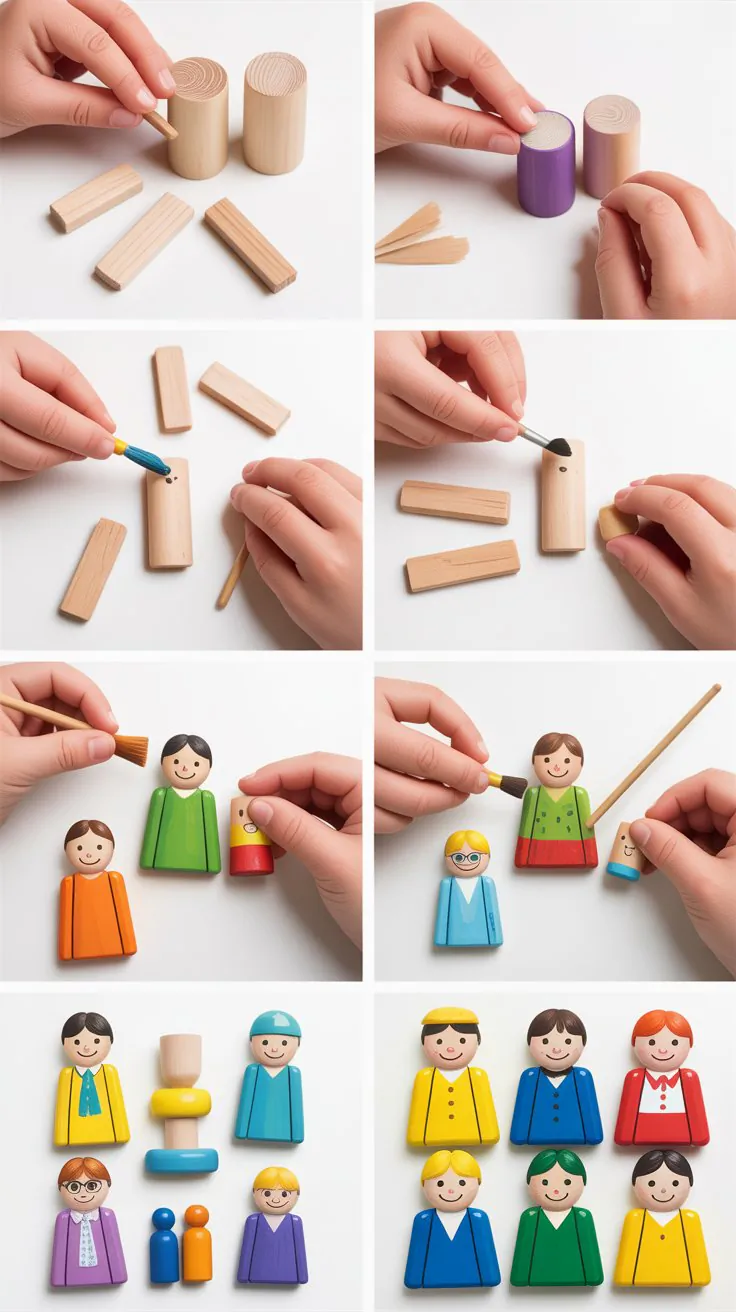
Peg people are small, adorable wooden figures that encourage storytelling and imaginative play. They’re easy to make and endlessly customizable.
- Use short wooden dowels or small cylindrical blocks for each character.
- Sand smooth and paint faces, clothes, and hairstyles with non-toxic acrylic paint.
- Add simple props like capes (felt), hats (buttons), or tiny accessories.
- Let dry completely before play.
- Store them in a small wooden box or bag for portability.
Educational bonus: Create themed sets like family, animals, or historical figures.
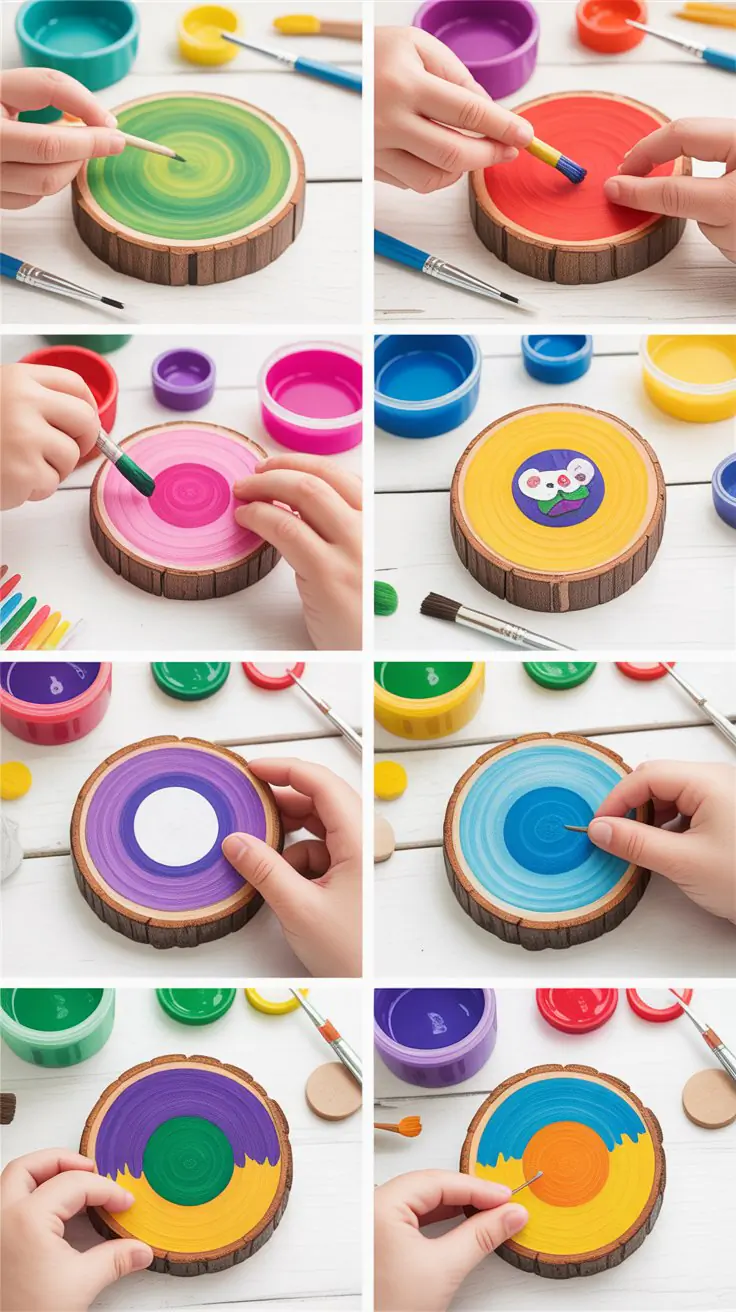
17. Wooden Coasters
Simple wood coasters are not only functional but also let kids design something useful for your home. Great for gift-giving too!
- Cut wood into uniform squares (around 4″ x 4″) or use round slices.
- Sand edges thoroughly.
- Let kids paint designs like rainbows, monograms, or patterns.
- Once dry, apply a layer of food-safe sealant or Mod Podge to protect the art.
- Add felt pads underneath to avoid surface scratches.
18. Scrap Wood Planes

This fun and fast airplane project lets kids “fly” their creativity. It introduces shape-cutting and basic construction.
- Cut one long thin strip for the plane’s body.
- Attach a flat rectangle for wings and a smaller one at the tail.
- Optional: Add a small circle on front to mimic a propeller.
- Sand and paint in bright colors.
- Launch by hand or display on a shelf.
19. Wooden Bracelets
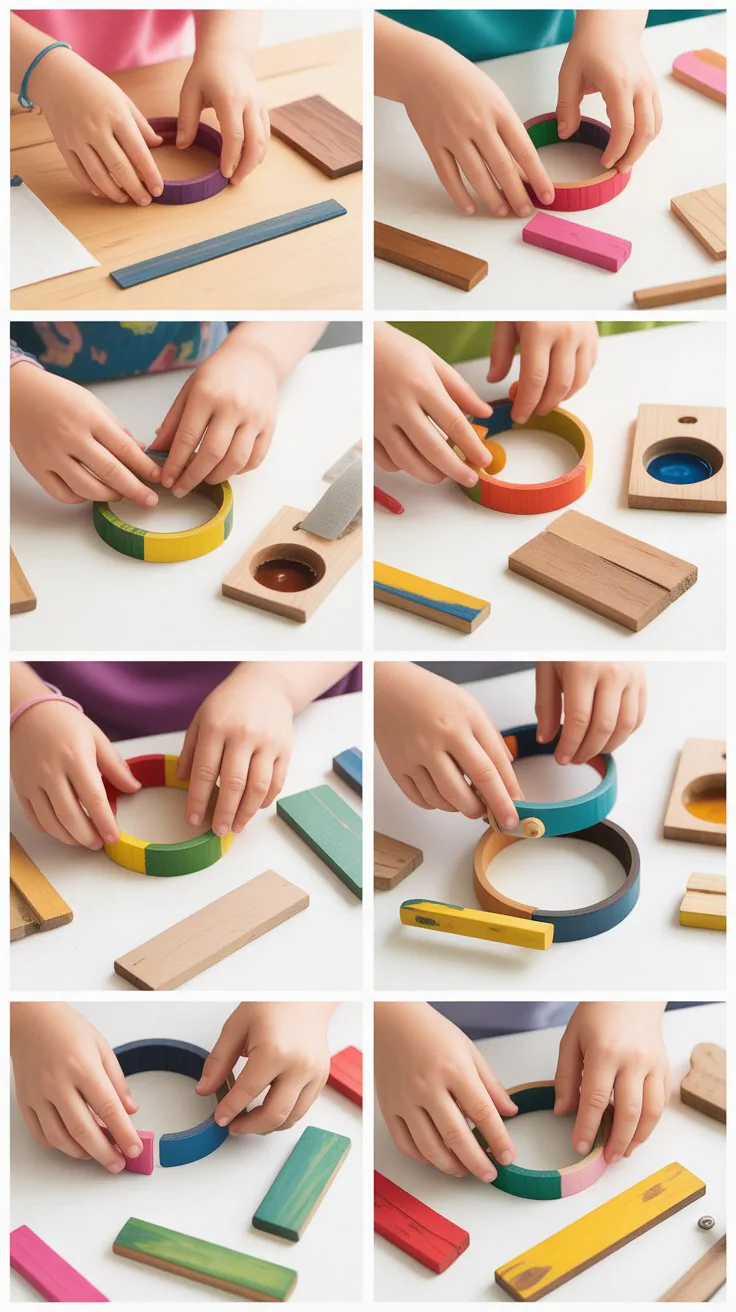
Who says jewelry can’t be made from wood? These bracelets are stylish, simple, and fun to decorate.
- Use thin, flexible wood veneer strips or cut small slats from scrap panels.
- Soak in hot water to make them bendable.
- Wrap around a round object (like a jar) and let dry to shape.
- Once set, decorate with paint, beads, or string wrapping.
- Add a clasp or leave open-ended for slip-on style.
20. Chalkboard Signs
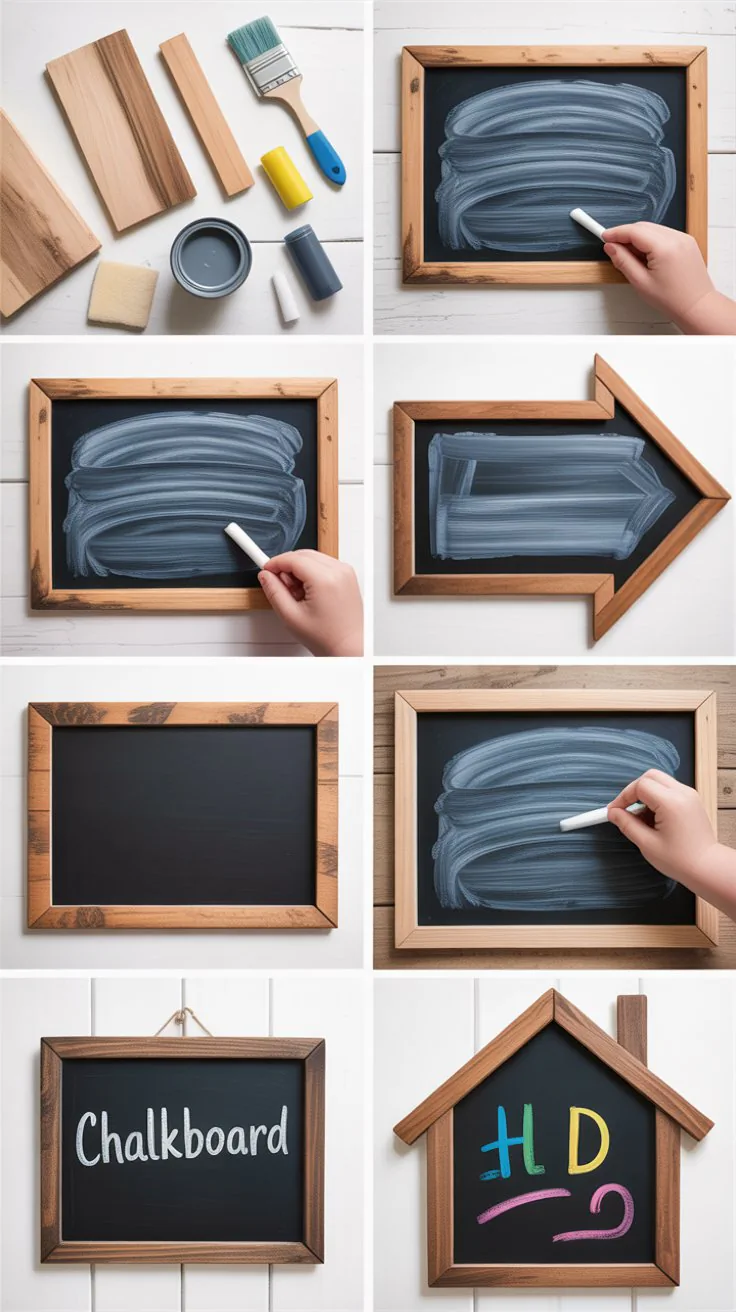
Turn scrap wood into a reusable message board with chalkboard paint. Kids love writing and erasing as much as they love decorating.
- Cut a smooth panel from flat scrap wood.
- Apply 2–3 coats of chalkboard paint, letting it dry between each layer.
- Decorate the border with painted designs or glued decorations.
- Add a string, hook, or small easel stand for display.
- Provide chalk and a cloth so kids can write messages or doodles.
21. Wooden Bookends
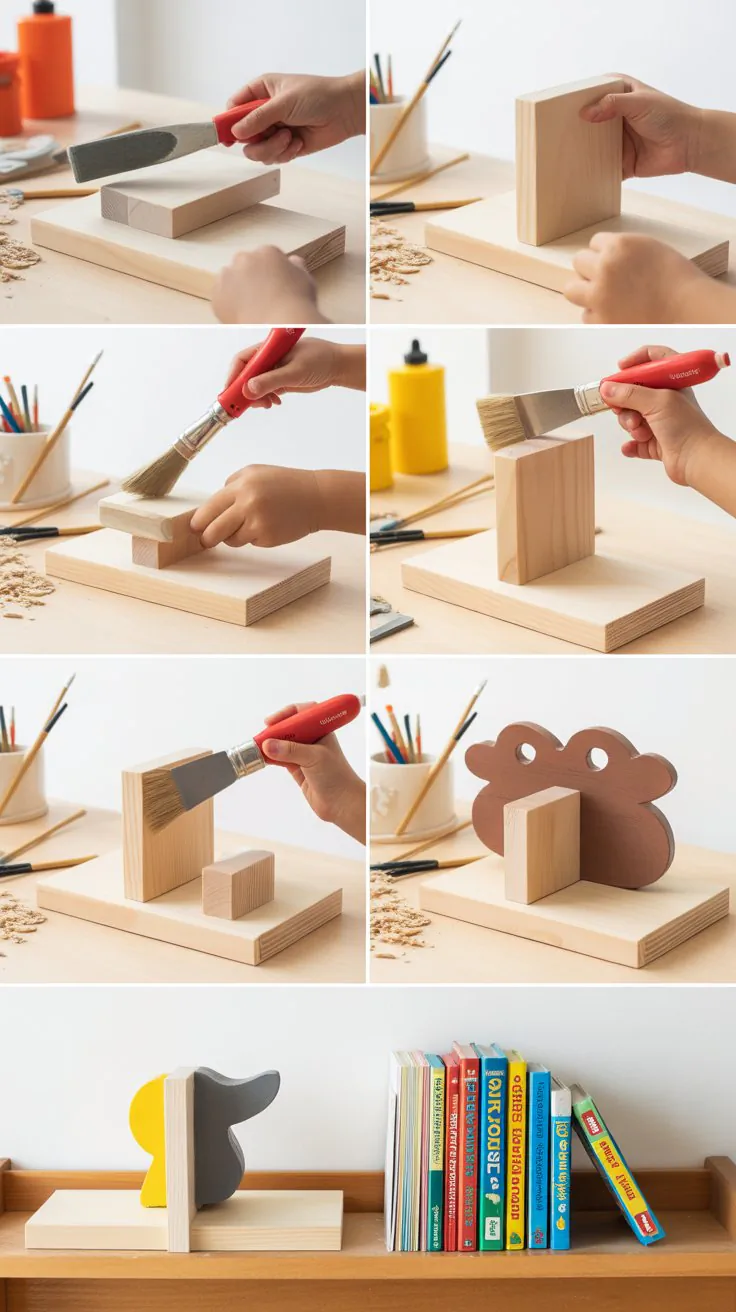
Help keep their bookshelf tidy with personalized wooden bookends they make themselves. This combines utility and art.
- Cut two L-shaped sets of wood: one base and one upright for each bookend.
- Glue or screw the pieces together to form a right angle.
- Let kids decorate with shapes, names, or themed characters.
- Paint and seal for durability.
- Place on shelves to hold books upright.
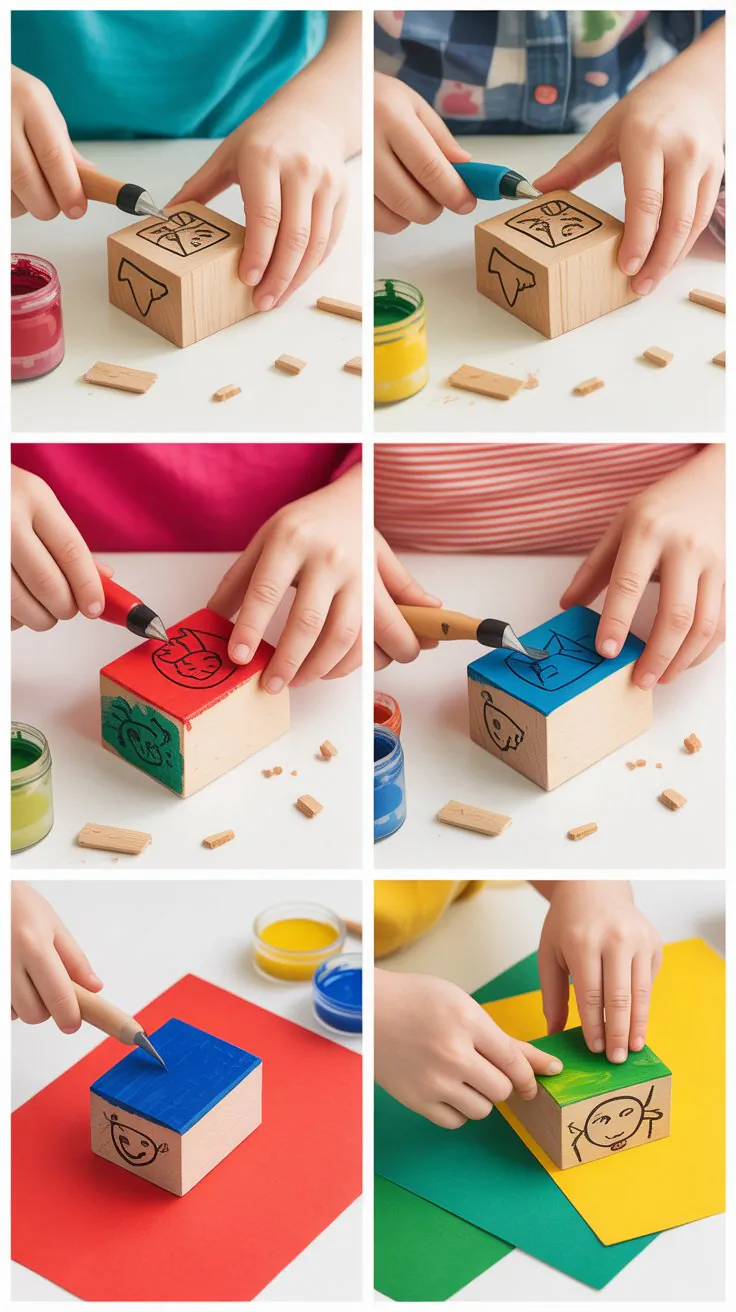
22. Block Stamps

Turn small wooden blocks into DIY stamps for use with paint or ink. Great for decorating paper or fabric.
- Cut wood blocks around 1.5″–2″ squares.
- Glue foam shapes, rubber cutouts, or carved linoleum onto one side.
- Let kids dip in paint and stamp onto paper.
- Clean after use and store in a container for future projects.
Tip: Use letter stamps for learning the alphabet or spelling games.
23. Mini Catapults
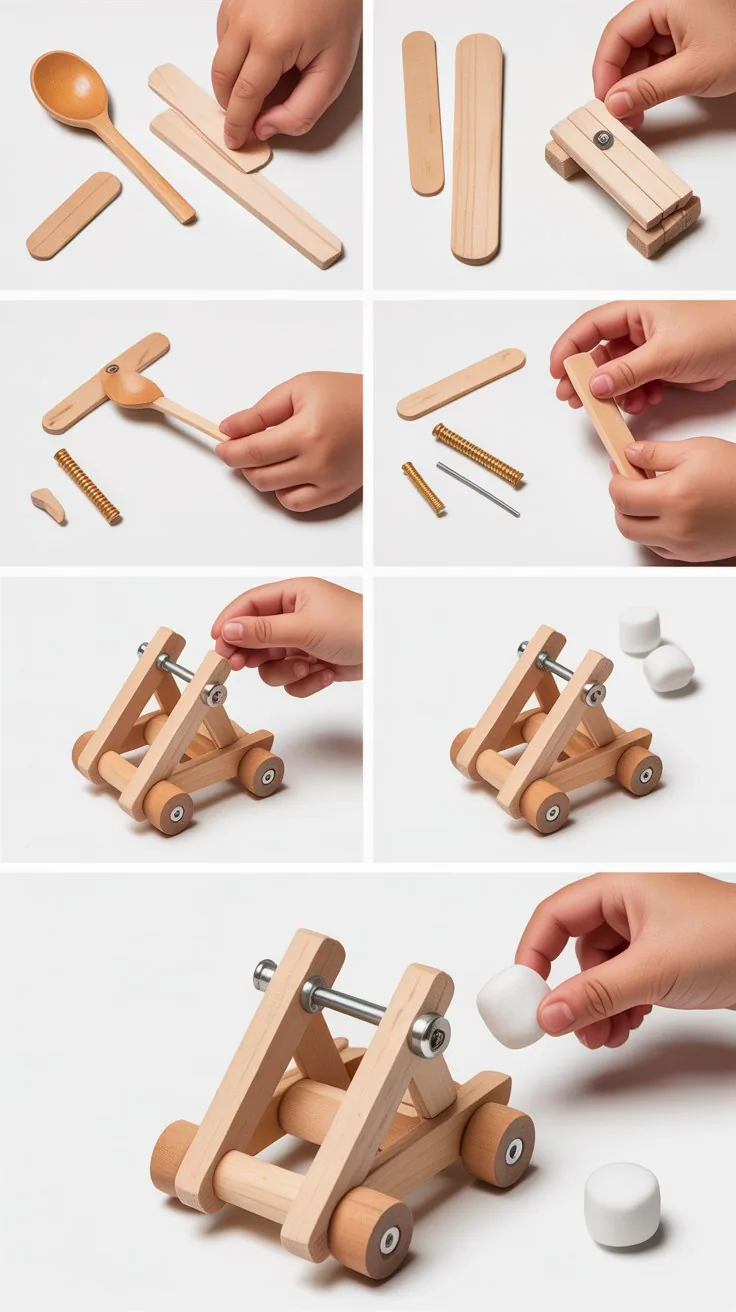
This playful project is perfect for a backyard STEM activity. Kids can learn about tension and force while launching small pom-poms.
- Cut a small wooden base and two upright support beams.
- Drill a small hole and insert a wooden dowel between the supports.
- Attach a plastic spoon or small slat of wood with a rubber band.
- Load with cotton balls or craft pom-poms and launch!
24. Puzzle Name Boards
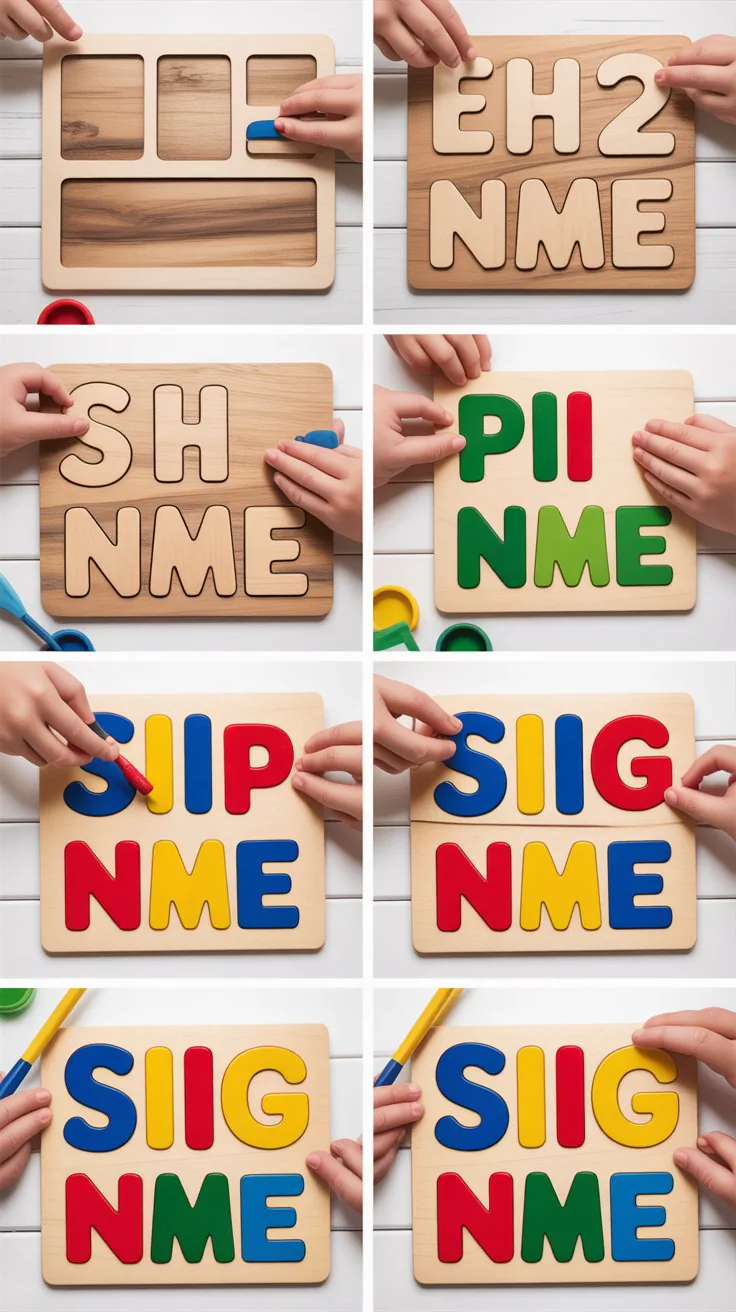
Make learning names fun by turning them into chunky, hand-painted wooden puzzles.
- Cut a base board long enough for your child’s name.
- Cut individual wood pieces to form each letter (or buy pre-cut letters).
- Sand and paint the letters in bright colors.
- Glue a thin outline of each letter onto the base so kids can match them.
- Let dry and enjoy a personalized learning tool.
25. Wooden Key Holders
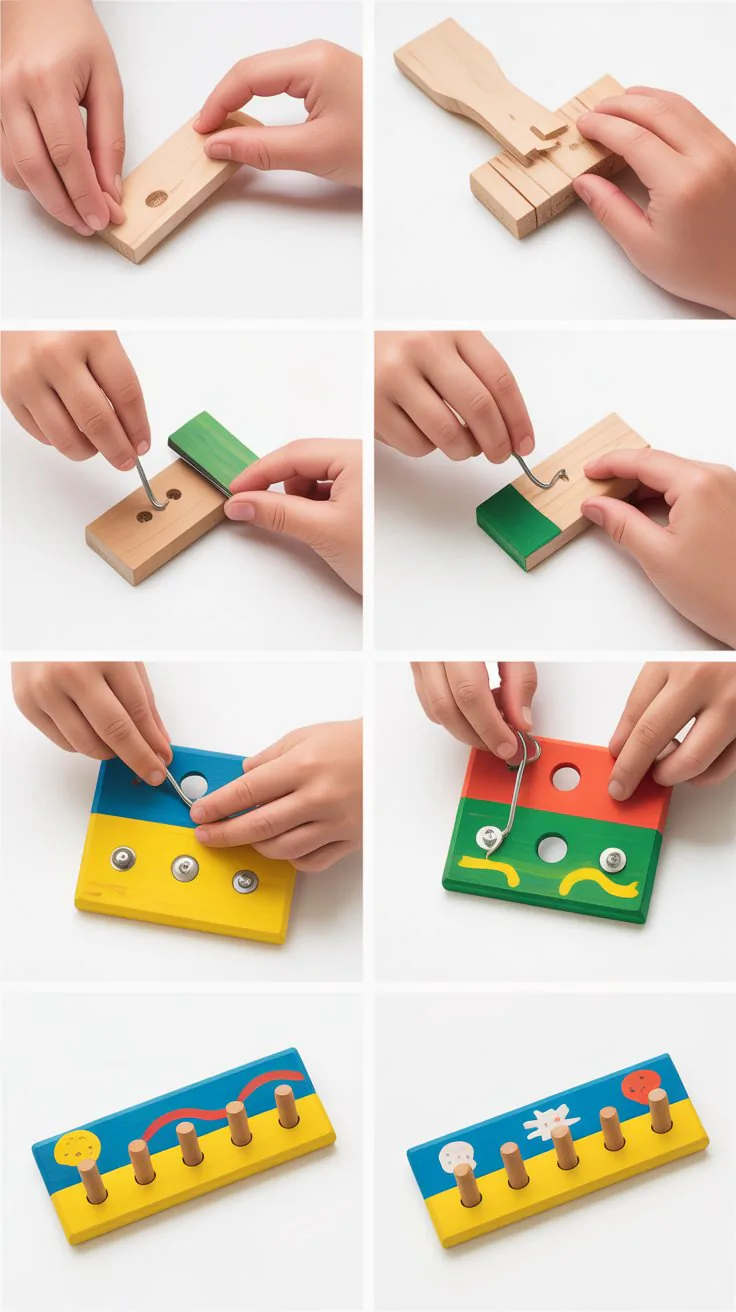
This practical project gives kids a way to help organize the home. Let them design and personalize it for the whole family.
- Cut a flat wood plank (approx. 10″–12″) and sand smooth.
- Attach small hooks or pegs evenly spaced along the bottom.
- Let kids decorate with names, shapes, or welcome messages.
- Screw into a wall by the front door or in a hallway.
26. Rustic Picture Hangers
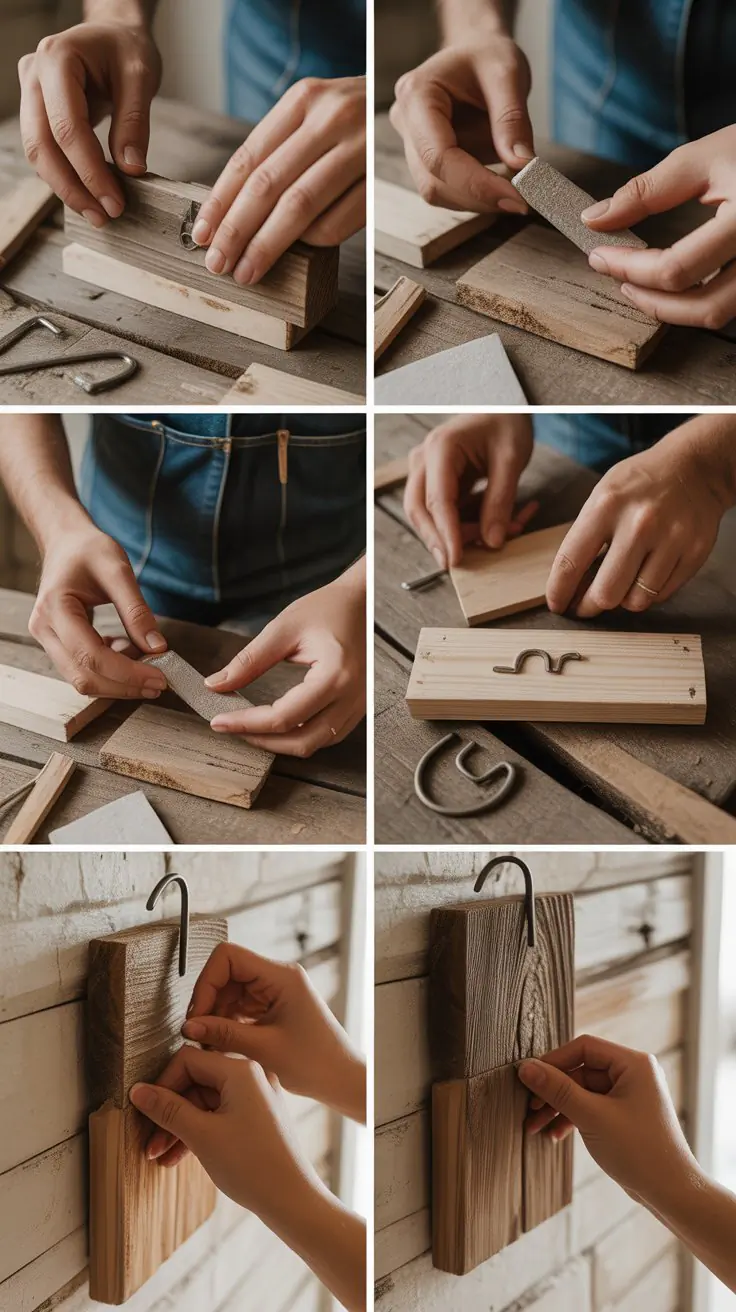
A charming and easy way for kids to display their artwork or photos.
- Cut a narrow wood plank (approx. 16″ long).
- Paint or stain the wood in your preferred style.
- Attach mini clothespins using glue or small tacks.
- Add string or wall hooks on the back.
- Clip on their favorite photos, drawings, or postcards.
27. Wooden Spinners (Tops)

Spinning tops are a timeless toy that can be easily made from wood and customized in countless ways.
- Cut small disc shapes (around 2″ diameter) from thin wood.
- Drill a small hole in the center and insert a short dowel.
- Sand and paint with spirals, stripes, or dots.
- Spin and watch the colors blend together!
28. Wooden Dominoes
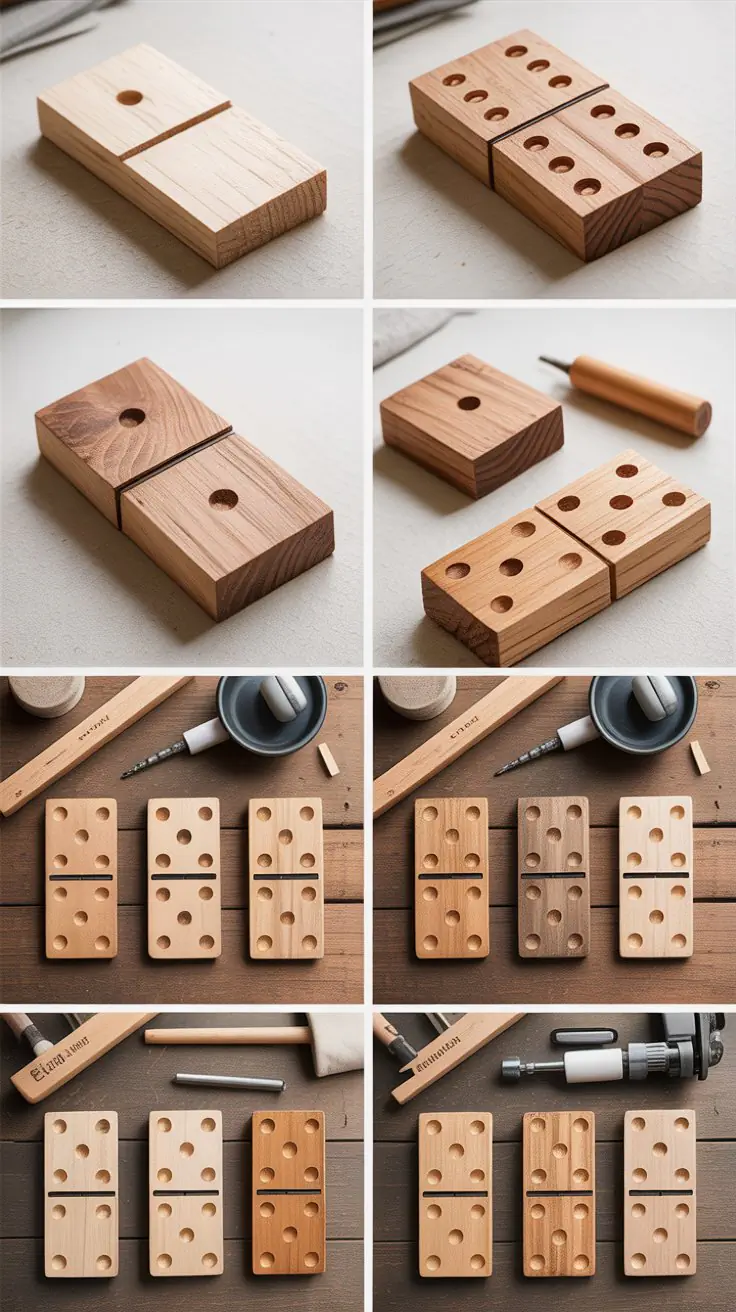
A classic game made more special when kids help make it themselves. These wooden dominoes are great for both play and learning math.
- Cut several rectangular wood pieces, approx. 1″ x 2″ in size.
- Sand all edges smooth.
- Use a pencil and ruler to mark a line across the center of each domino.
- Paint or draw dots on each side (1 to 6), just like traditional dominoes.
- Seal with a clear finish and store in a drawstring bag or box.
29. Wooden Spool Racers
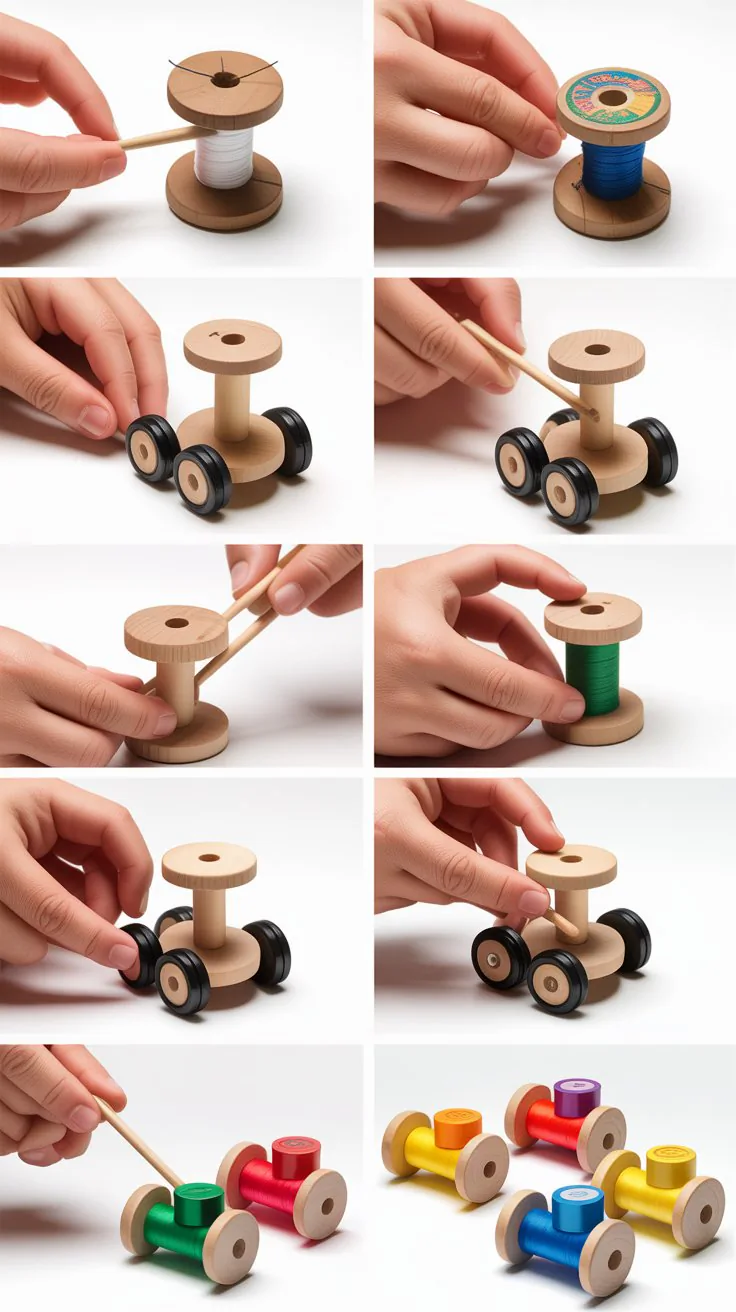
Lightweight and fun, these racers are a cool twist on scrap toys and offer some STEM insight into motion.
- Use a wooden spool as the base (or a round wood block with a hole).
- Thread a rubber band through the center and hook it onto a toothpick.
- Wind it up and release on a flat surface to watch it race!
- Decorate with stickers, stripes, or racing numbers.
Science connection: Great way to explain wind-up energy to kids.
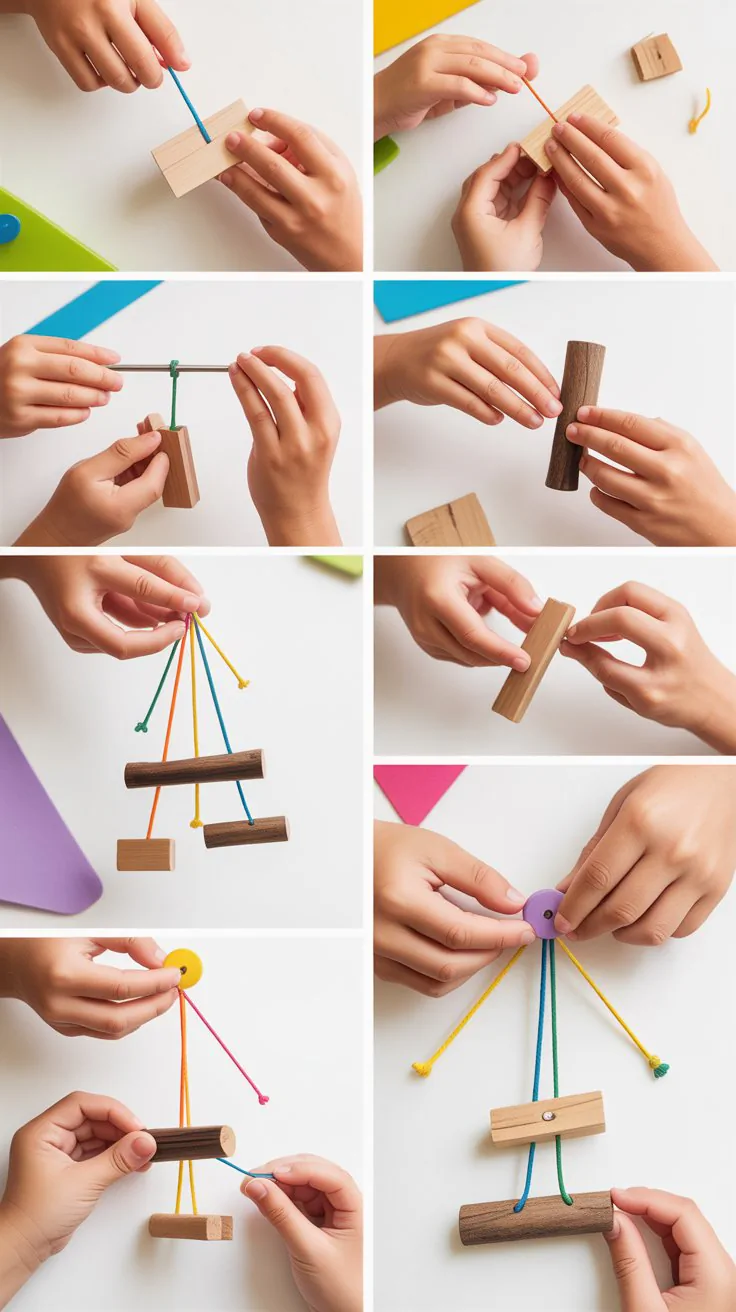
30. DIY Balance Scale
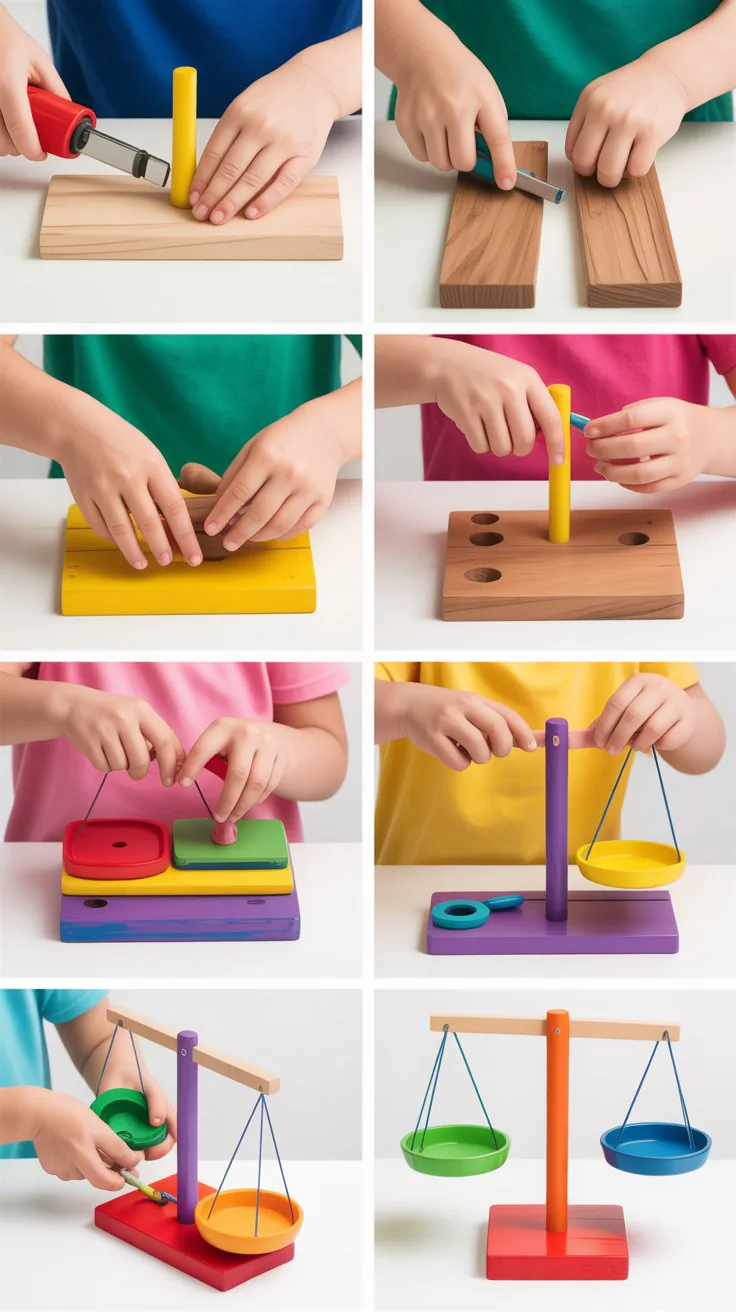
Build a simple wooden balance scale to teach your kids about weight and measurement in a hands-on way.
- Use a sturdy base and attach a vertical support beam in the center.
- Drill a hole in the top of the support and insert a dowel horizontally like a see-saw.
- Hang small cups or containers from each end of the dowel using string.
- Use coins, marbles, or beans to compare weights on each side.
- Decorate and label each part for a full STEM activity.
31. Animal Silhouettes
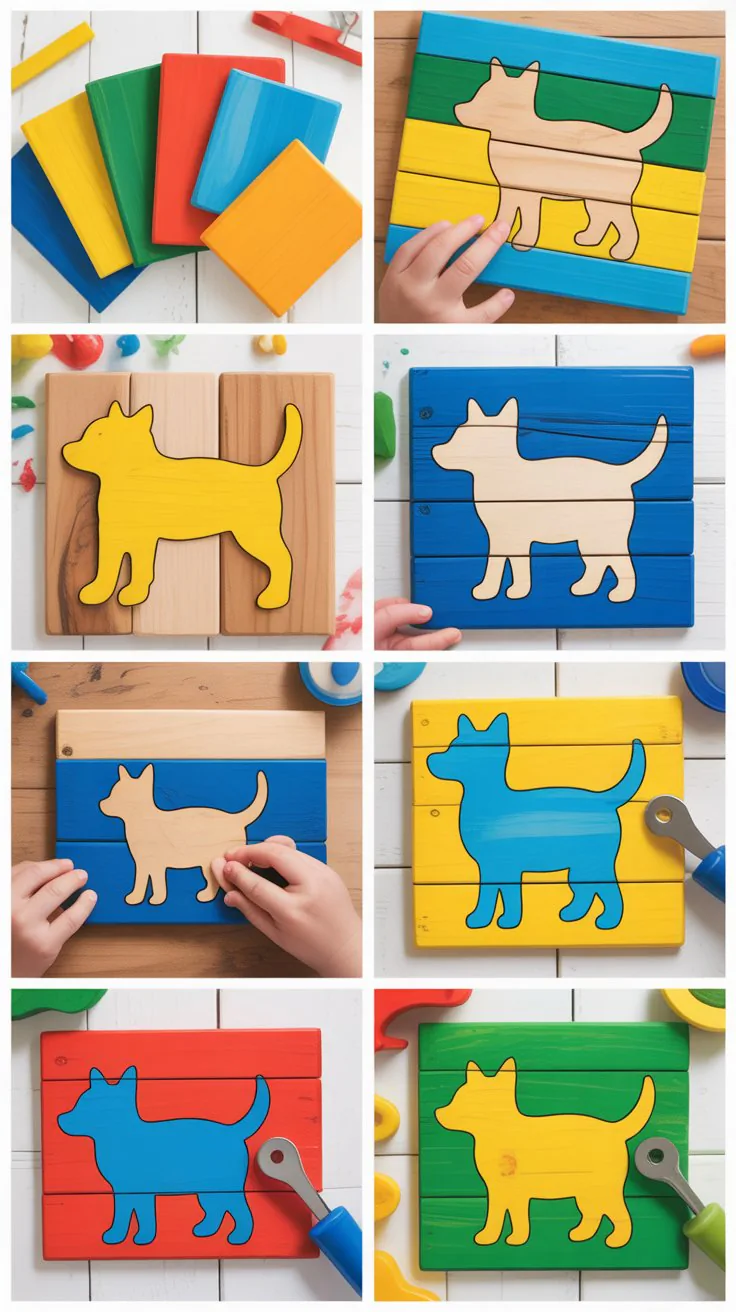
These flat wooden animal shapes make great decorations, learning tools, or playsets.
- Cut simple animal shapes (cats, elephants, dinosaurs) from flat wood panels.
- Sand edges and help your child paint them in fun, recognizable colors.
- Add details like eyes, spots, or tails with markers or extra wood parts.
- Optional: Mount on a base to turn into room decor.
32. Memory Matching Game

A wooden twist on the popular memory card game. Durable, colorful, and perfect for young learners.
- Cut small squares of wood (about 2″ x 2″) in even pairs.
- Paint matching symbols, letters, shapes, or animals on each pair.
- Let dry and shuffle face-down to play.
- Store in a tin or small box when not in use.
Tip: Use seasonal themes like Christmas, farm animals, or ocean creatures.
33. Wooden Marble Maze
Create a mini maze game that challenges fine motor skills and patience.
- Cut a rectangular base (about 8″ x 10″) and small scrap strips for the walls.
- Let your child plan a maze path with a pencil.
- Glue the strip “walls” onto the base to form paths.
- Drop a marble in and tilt the board to guide it through.
- Paint the start, finish, and path borders for fun visuals.
34. Wooden Rocket Ships
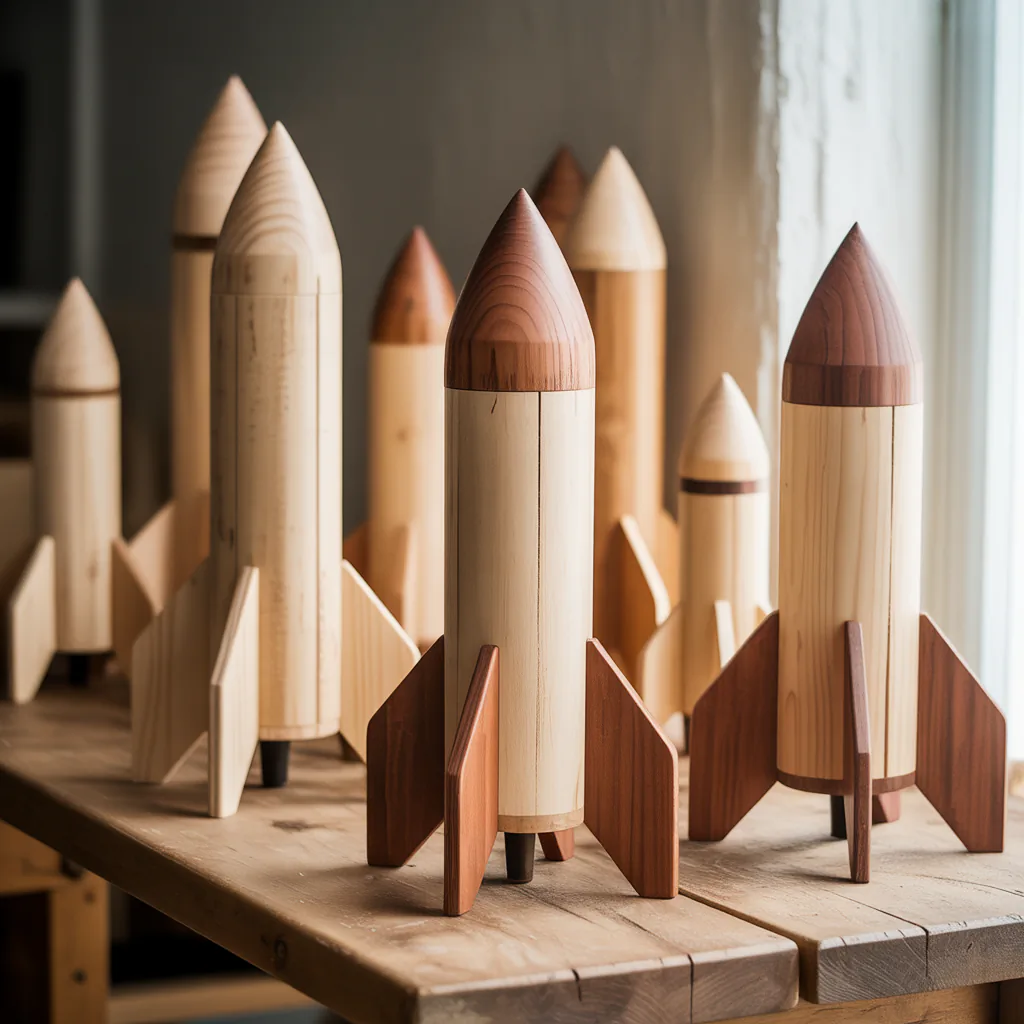
Launch kids into space-themed creativity with this simple rocket build.
- Use a long triangular block or dowel as the main body.
- Add small triangular wings and a rounded top.
- Sand and paint with red, white, and silver for a NASA-style look—or let kids go wild with colors.
- Use string to hang from ceilings as “floating rockets.”
35. Nature Press
Kids who love the outdoors will appreciate a press for saving leaves and flowers they collect.
- Cut two small rectangular wood panels of the same size.
- Drill holes in each corner and insert bolts or long screws with wing nuts.
- Add cardboard and paper sheets between the panels.
- Tighten the nuts to press the leaves flat.
- Paint or decorate the outer wood for a personal touch.
36. Wooden Tool Shapes
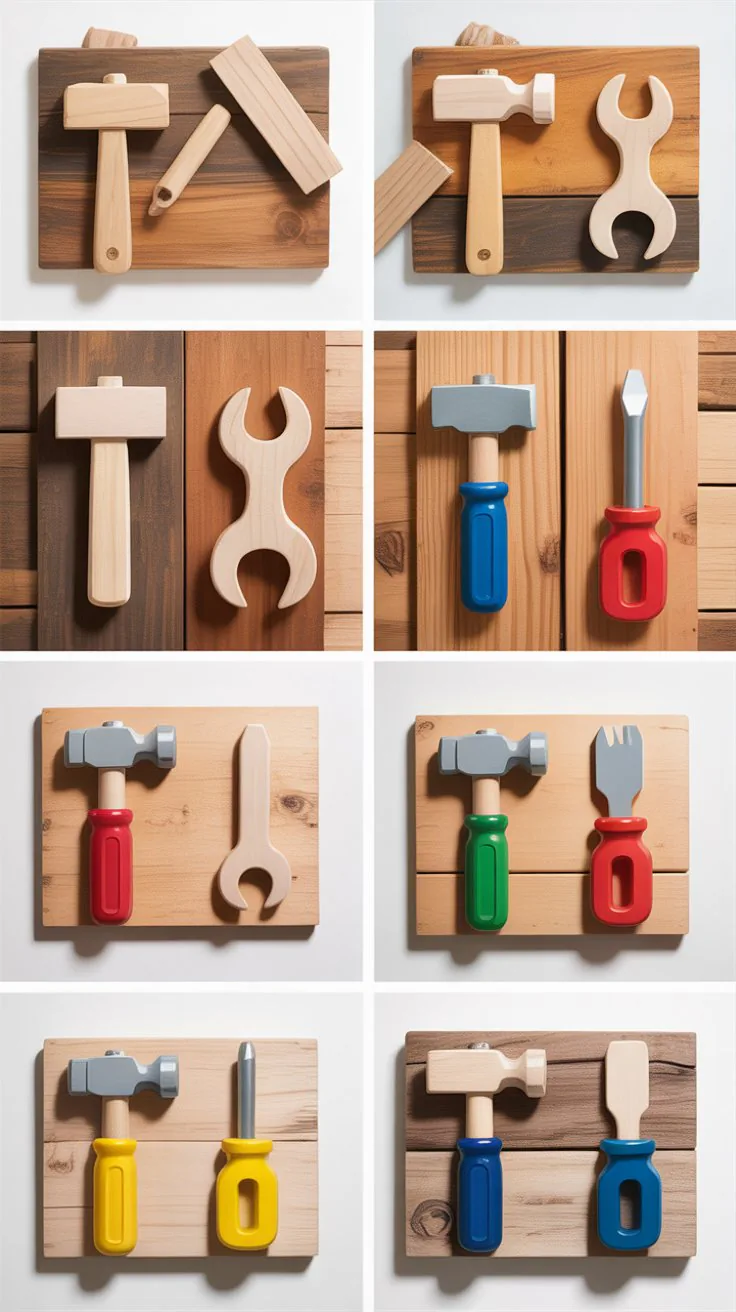
Introduce tool names and shapes to kids by helping them create their own wooden hammer, saw, or wrench toys.
- Cut basic tool shapes from scrap wood (keep edges rounded for safety).
- Sand carefully and paint with realistic or fun colors.
- Label each tool so kids can learn their names.
- Add to a mini toolbox or workbench for pretend play.
37. Wall Hanging Mobiles
Mobiles are perfect for room decoration, art display, or calming nursery décor. Kids will enjoy creating shapes and choosing colors.
- Use a long wooden dowel or stick as the top hanger.
- Cut out and paint small wood shapes (stars, hearts, animals).
- Attach the shapes using string or twine at different lengths.
- Tie all strings to the main stick and hang with ribbon or hook.
- Balance the weight evenly so it hangs flat.
Conclusion
There’s something magical about turning leftover wood into creative treasures.
Whether your child is building a robot, crafting a puzzle, or painting their name on a plaque, these hands-on activities teach far more than just how to build—they teach patience, independence, and joy.
37 Easy Scrap Wood Projects for Kids gives you a wide range of budget-friendly, beginner-friendly ideas that turn scrap into memories.
No fancy equipment needed—just imagination, supervision, and a few simple tools.
So gather up that pile of wood and start building something amazing together today!