Being a mom means juggling a million tasks at once, and finding time for elaborate hairstyles often feels impossible.
Whether you’re rushing to get the kids ready for school, managing household chores, or heading to work, your hair shouldn’t be another source of stress.
This article on 33 Easy Everyday Hairstyles for Moms Who Are Always Busy is your ultimate guide to looking polished and put-together in minutes.
From quick ponytails and messy buns to braided styles and no-heat waves, you’ll discover versatile options that work for any hair type, length, and occasion.
These hairstyles are designed to be practical, stylish, and effortless, so you can focus on what truly matters while still feeling confident and beautiful.
Get ready to transform your morning routine with these time-saving, mom-approved hairstyles that prove you don’t need hours in front of the mirror to look amazing.
1. The Classic Low Ponytail
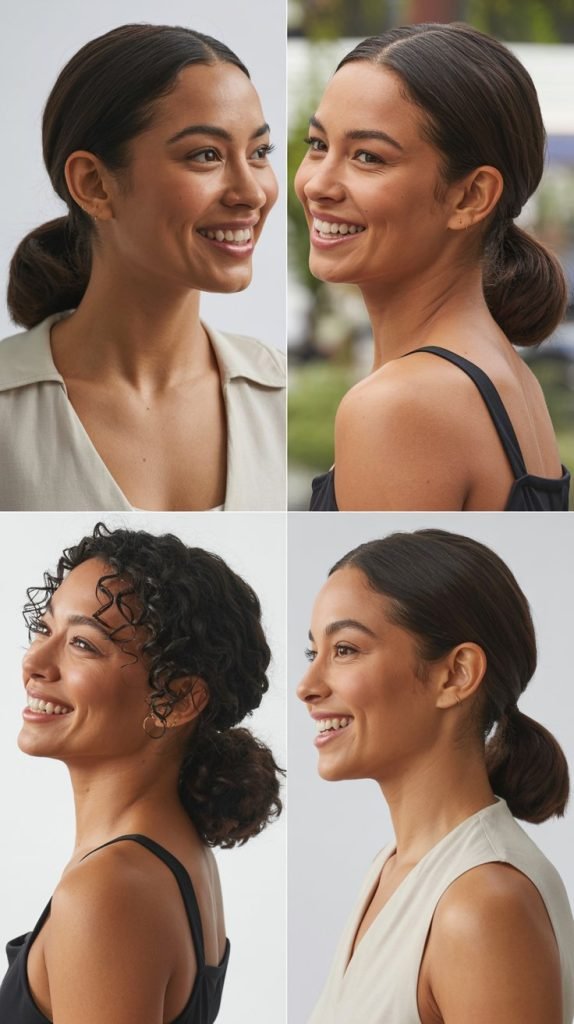
The classic low ponytail is a timeless hairstyle that never goes out of style and can be created in under two minutes.
This elegant yet simple look works perfectly for busy mornings when you need to look polished without spending much time on your hair.
- Brush your hair thoroughly to remove any tangles and create a smooth base for your ponytail.
- Gather all your hair at the nape of your neck, positioning it slightly off-center for a more relaxed appearance.
- Secure with a hair elastic that matches your hair color to keep the look seamless and professional.
- Take a small section of hair from the ponytail and wrap it around the elastic to hide it completely.
- Secure the wrapped section with a bobby pin underneath the ponytail for a polished finishing touch.
- Apply a small amount of hair oil or serum to smooth down any flyaways and add shine.
- For extra volume, gently tease the crown area before creating the ponytail.
2. The Messy Bun

The messy bun is the ultimate go-to hairstyle for moms who want to look effortlessly chic while getting things done.
This versatile style takes less than three minutes to create and works beautifully for both casual and slightly dressier occasions.
- Start by gathering your hair into a high ponytail without worrying about making it perfectly smooth.
- Twist the ponytail loosely around its base to create the bun shape naturally.
- Secure the bun with another elastic or use bobby pins to hold everything in place.
- Gently pull on sections of the bun to create volume and that intentionally undone texture.
- Pull out a few face-framing pieces around your hairline for a softer, more romantic look.
- Use your fingers to loosen the hair slightly at the crown for added height and dimension.
- Finish with a light-hold hairspray to keep flyaways under control while maintaining the messy aesthetic.
3. The Half-Up Half-Down Style

The half-up half-down hairstyle offers the perfect balance between keeping hair out of your face while showing off your length.
This versatile style is ideal for moms who want a polished look that transitions seamlessly from morning drop-offs to afternoon activities.
- Section off the top portion of your hair from temple to temple, leaving the bottom half down.
- Gather the top section and smooth it back with your hands or a brush for a neater appearance.
- Secure the top section with a hair elastic, clip, or decorative barrette depending on your style preference.
- For added texture, twist the sides before bringing them together at the back of your head.
- Gently tug at the crown area to create subtle volume and avoid a flat appearance.
- Curl or straighten the bottom section if you have an extra minute for added polish.
- This style works beautifully with both straight and wavy hair textures for different looks.
4. The Sleek High Ponytail

The sleek high ponytail is a powerful, confident hairstyle that instantly makes you look put-together and energized.
This style is perfect for workout sessions, busy workdays, or any time you need your hair completely off your face and neck.
- Brush your hair upward toward the crown of your head to gather all strands smoothly.
- Use a fine-tooth comb to slick back any bumps and create a perfectly smooth surface.
- Apply a smoothing gel or cream to your hairline to tame flyaways and baby hairs.
- Secure the ponytail at the crown with a strong elastic that can hold the weight.
- Wrap a section of hair around the elastic and pin it underneath for a refined finish.
- Spray with a firm-hold hairspray to maintain the sleek look throughout the day.
- For extra length and volume, consider using a ponytail extension that matches your hair color.
5. The Simple Side Braid

The simple side braid is a charming and practical hairstyle that keeps hair secured while adding a feminine touch to your look.
This effortless braid can be completed in minutes and works wonderfully for casual outings or running errands around town.
- Sweep all your hair over to one shoulder, choosing whichever side feels most comfortable.
- Divide your hair into three equal sections to begin the traditional braiding technique.
- Cross the right section over the middle, then cross the left section over the new middle.
- Continue braiding down the length of your hair, maintaining consistent tension throughout.
- Secure the end with a small elastic that won’t create too much bulk.
- Gently pull on the edges of the braid to create a fuller, more relaxed appearance.
- Leave a few pieces loose around your face for a softer, more romantic overall effect.
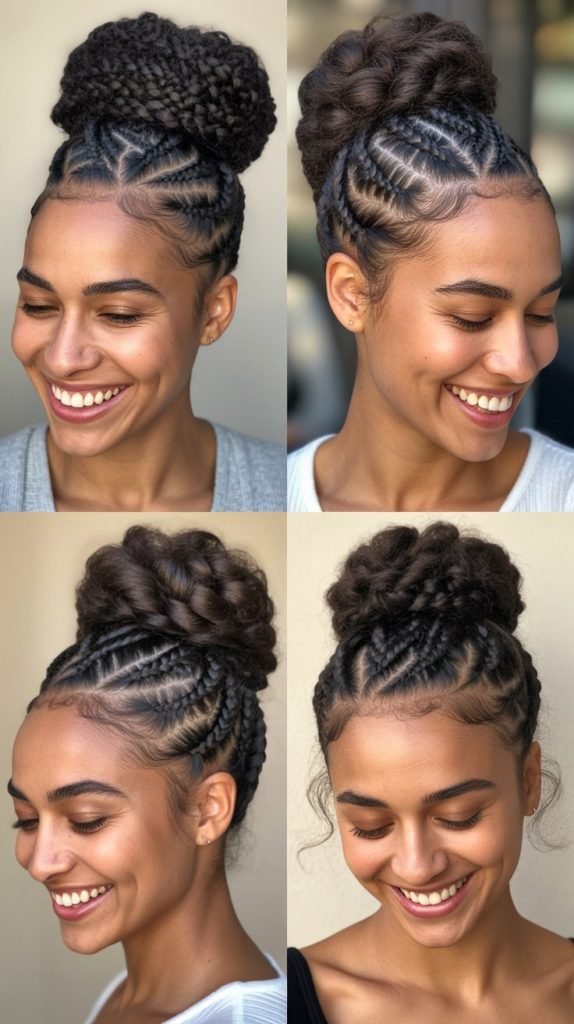
6. The Top Knot

The top knot is a practical and stylish updo that keeps your hair completely off your neck and out of your way.
This elevated bun sits high on your head and is perfect for hot days, intense workouts, or when you need to look polished in seconds.
- Flip your head upside down and gather all your hair at the very top of your head.
- Secure with an elastic to create a fountain-like ponytail at the crown.
- Twist the ponytail around its base in a circular motion to form the knot shape.
- Tuck the ends under the bun and secure with bobby pins placed strategically around the base.
- Use additional pins if needed to ensure the bun feels secure and won’t fall throughout the day.
- Pull out a few wisps around your hairline if you prefer a softer, less severe look.
- This style works especially well with second-day hair that has natural texture and grip.
7. The Twisted Crown
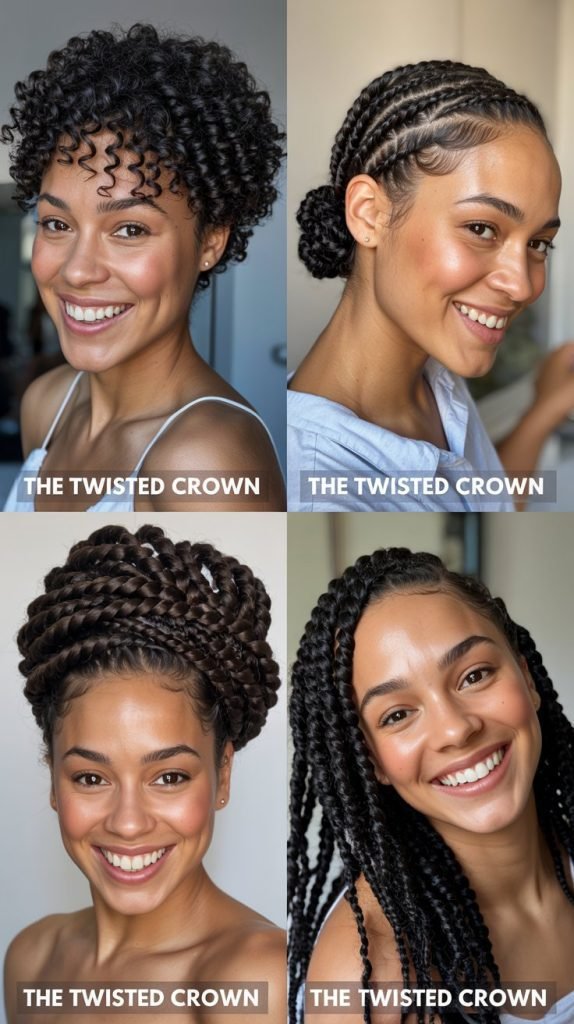
The twisted crown is an elegant hairstyle that looks intricate but is surprisingly simple to create.
This romantic style involves twisting sections of hair around your head like a halo, perfect for special occasions or when you want to feel extra feminine.
- Part your hair down the middle or on your preferred side to begin the sectioning process.
- Take a section of hair from one side near your temple and twist it away from your face.
- Bring the twisted section across the top of your head toward the opposite side.
- Secure the twist with bobby pins behind your opposite ear, tucking the ends neatly.
- Repeat the same process on the other side, creating a second twist that mirrors the first.
- Cross the second twist over or under the first one for added dimension and interest.
- Pin everything securely and finish with hairspray to hold the twists in place all day.
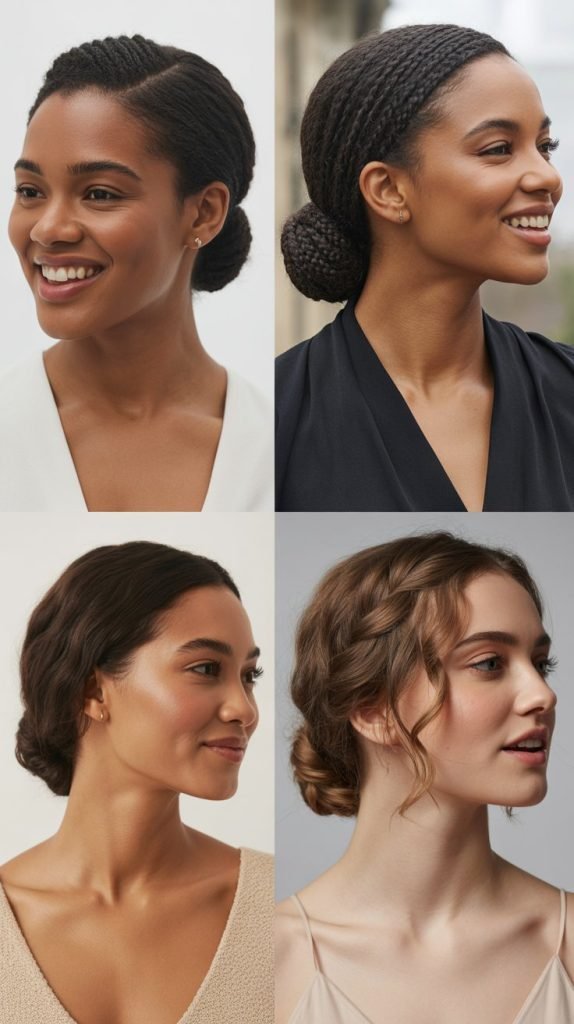
8. The Low Bun with a Twist
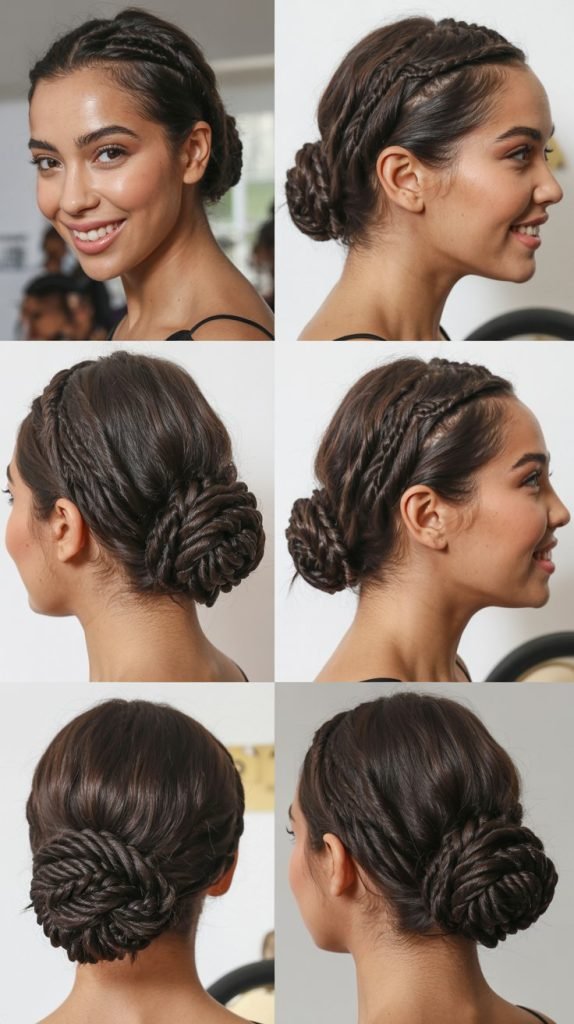
The low bun with a twist combines classic elegance with modern simplicity for a sophisticated everyday look.
This refined hairstyle adds visual interest to a basic bun through simple twisting techniques that elevate the overall appearance.
- Create a low ponytail at the nape of your neck and secure it with an elastic.
- Divide the ponytail into two equal sections and twist each section individually.
- Wrap the twisted sections around the base of the ponytail in opposite directions.
- Secure each twisted section with bobby pins, crisscrossing them for maximum hold.
- Tuck any loose ends into the bun to create a clean, polished finish.
- Gently pull on the twists to add volume and create a fuller bun appearance.
- This style is perfect for professional settings or any occasion requiring a more refined look.
9. The Braided Headband

The braided headband is a creative way to keep hair off your face while adding a bohemian touch to your style.
This technique uses your own hair to create a braid that sits across your head like an actual headband, eliminating the need for accessories.
- Take a small section of hair from behind one ear and divide it into three strands.
- Braid this section traditionally, keeping it relatively tight so it maintains its shape.
- Bring the braid across the top of your head along your hairline like a headband.
- Secure the end of the braid behind your opposite ear with bobby pins that match your hair color.
- Adjust the braid positioning to sit exactly where you want it across your forehead.
- Leave the rest of your hair down in its natural texture or style it as desired.
- For extra hold, spray the braid lightly with hairspray before positioning it.
10. The Faux Hawk Ponytail

The faux hawk ponytail is an edgy yet practical hairstyle that adds personality to your everyday look.
This modern style creates height and visual interest along the crown while keeping hair secured in a functional ponytail.
- Section your hair horizontally from ear to ear across the top of your head.
- Tease the crown section gently with a comb to create volume and height.
- Secure the top section with an elastic, leaving it slightly loose at the roots for lift.
- Create two or three additional ponytails down the center of your head with the remaining hair.
- Gently pull on each section between the elastics to create the faux hawk shape.
- Smooth the sides down with gel or pomade for contrast with the textured center.
- This style works particularly well with medium to long hair lengths for maximum impact.
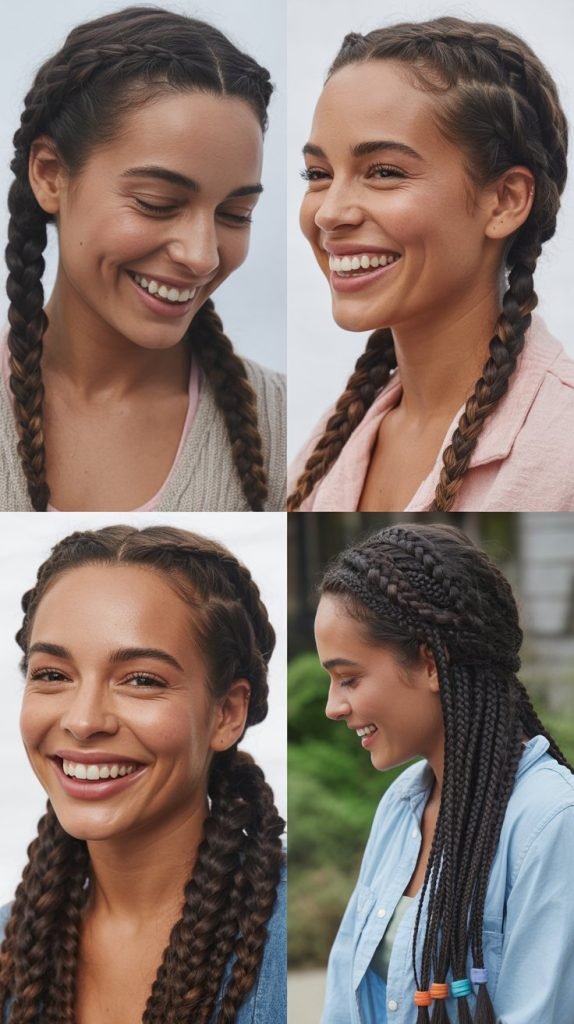
11. The Double Dutch Braids
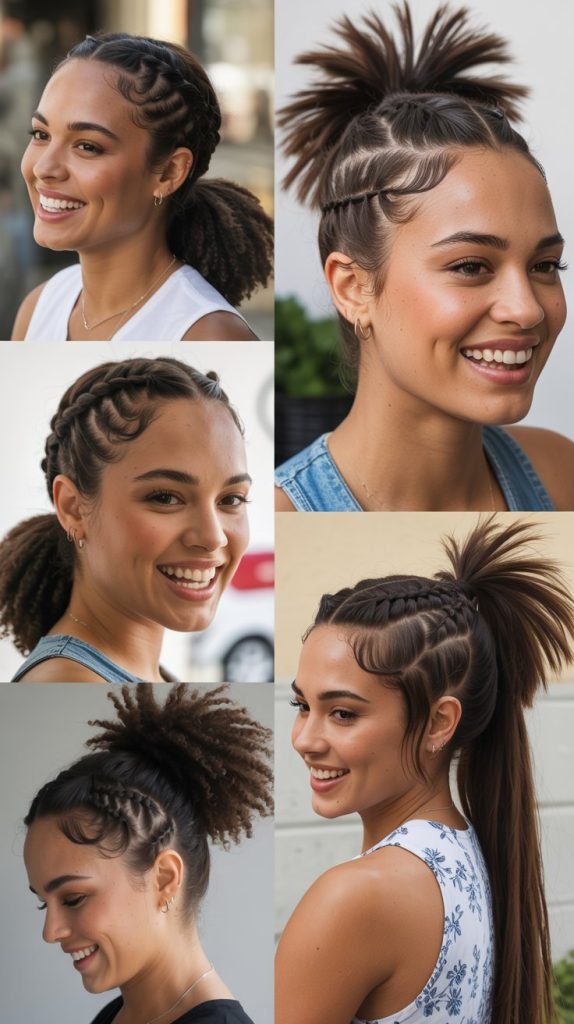
Double Dutch braids are sporty, practical, and incredibly secure, making them ideal for active moms on the go.
These inverted braids sit on top of your head rather than underneath, creating a bold, defined look that stays put all day long.
- Part your hair straight down the middle from forehead to nape to create two equal sections.
- Working with one section, divide a small portion at the hairline into three strands.
- Cross the outer strands under the middle strand instead of over for the Dutch braid technique.
- Add small sections of hair to each strand as you braid down, maintaining consistent tension.
- Continue braiding all the way to the ends and secure with a small elastic.
- Repeat the exact same process on the other side for matching symmetrical braids.
- For a fuller look, gently pancake the braids by pulling on the outer edges.
12. The Wrapped Low Ponytail

The wrapped low ponytail is an elevated version of the classic style that adds sophistication through simple detailing.
By wrapping hair around the elastic, you create a polished, intentional look that takes mere seconds longer than a basic ponytail.
- Create a low ponytail at your preferred position along the nape of your neck.
- Pull a small section of hair from the underside of the ponytail before securing.
- Wrap this section around the elastic several times until the elastic is completely hidden.
- Secure the wrapped section with a bobby pin that slides vertically into the ponytail base.
- Apply a small amount of smoothing serum to the wrapped section for extra shine.
- Adjust the tightness of the ponytail to your comfort level and desired aesthetic.
- This simple upgrade transforms a basic ponytail into a more refined, elegant style.
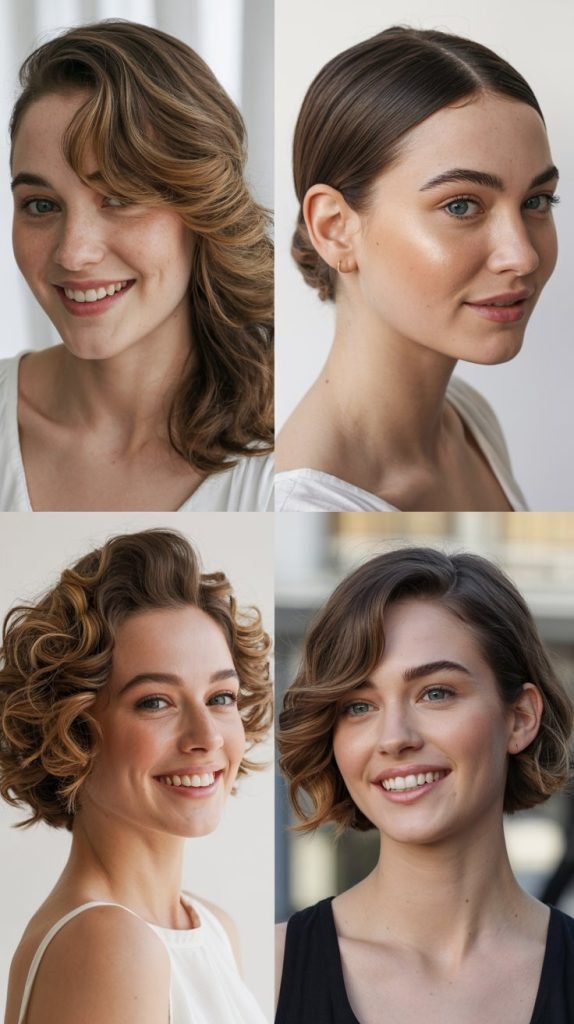
13. The Textured Beach Waves

Textured beach waves are a gorgeous, effortless style that works beautifully for moms who want to embrace their hair’s natural movement.
This relaxed look can be achieved without heat tools and provides a carefree, vacation-ready vibe for everyday wear.
- Start with damp hair after washing or mist dry hair with water in a spray bottle.
- Apply a texturizing spray or sea salt spray throughout your hair from roots to ends.
- Scrunch your hair upward with your hands to encourage natural wave formation.
- Twist sections of hair loosely and allow them to air dry for defined waves.
- Once mostly dry, release the twists and gently separate the waves with your fingers.
- Avoid brushing to maintain the texture and prevent frizz from developing.
- According to hair care experts at Healthline, this no-heat method is healthier for hair while still achieving beautiful results.
14. The Bubble Ponytail

The bubble ponytail is a playful, trendy hairstyle that adds dimension and visual interest to a standard ponytail.
This fun style uses multiple elastics spaced along the ponytail length to create bubble-like segments that look complex but are incredibly easy to achieve.
- Create a high or mid-level ponytail and secure it with a strong elastic at the base.
- Measure down a few inches and add another elastic around the ponytail.
- Gently pull on the hair between the two elastics to create the first bubble shape.
- Continue adding elastics at regular intervals down the length of your ponytail.
- Create bubbles between each elastic by carefully pulling the hair outward for volume.
- Adjust the size of each bubble to be relatively uniform for the most polished appearance.
- This style works particularly well with longer hair and adds instant personality to your look.
15. The Rolled Updo

The rolled updo is a classic, vintage-inspired hairstyle that exudes timeless elegance while being surprisingly practical.
This sophisticated style involves rolling sections of hair upward and pinning them, creating a refined look perfect for professional settings or special occasions.
- Start by creating a low ponytail at the nape of your neck with a soft elastic.
- Roll the ponytail upward toward your head, tucking the ends under as you go.
- Pin the roll securely with bobby pins placed horizontally through the rolled section.
- Add additional pins at the sides to ensure the roll feels secure and stable.
- Smooth any flyaways with a light pomade or hairspray on your fingertips.
- For added sophistication, create two side sections and roll them separately before the main roll.
- This elegant style works beautifully for weddings, interviews, or any formal occasion.
16. The Side Swept Style
The side swept style is an effortlessly glamorous look that drapes all your hair elegantly to one side.
This romantic hairstyle is perfect for moms who want to feel feminine and put-together without spending extensive time on styling.
- Create a deep side part on your preferred side for maximum drama and impact.
- Sweep all your hair to one side, letting it fall over your shoulder naturally.
- Pin the hair behind your opposite ear with decorative or concealed bobby pins.
- Tease the crown area slightly for added volume and height at the roots.
- Curl the ends of your hair loosely for extra polish if you have a few extra minutes.
- Use hairspray on the pinned side to keep hair from falling back throughout the day.
- This style beautifully frames your face and showcases earrings or statement necklaces.
17. The French Twist

The French twist is an iconic updo that conveys sophistication and grace with its sleek, vertical roll.
While it looks complicated, this classic hairstyle can be mastered with practice and becomes a reliable option for elegant occasions or professional environments.
- Gather all your hair to one side at the back of your head as the starting position.
- Twist the gathered hair upward along the back of your head toward the opposite side.
- Continue twisting until the hair forms a vertical roll along the center back.
- Tuck the ends of your hair into the twist at the top for a clean finish.
- Secure the twist with bobby pins placed vertically along the length of the roll.
- Add additional pins at the top and bottom for extra security and stability.
- Finish with a strong-hold hairspray to keep the twist intact throughout your day.
18. The Sock Bun

The sock bun is a clever technique that creates a perfectly round, voluminous bun using a simple sock as a shaping tool.
This method is ideal for moms who want a fuller bun appearance without needing naturally thick hair.
- Cut the toe off a clean sock and roll it into a donut shape to create your bun former.
- Create a high ponytail and pull it through the center of the sock donut.
- Spread your hair evenly around the sock to completely cover it from all angles.
- Roll the sock downward toward your head, tucking hair around it as you go.
- Continue rolling until the sock reaches the base of your ponytail.
- Secure any loose pieces with bobby pins and adjust the bun shape as needed.
- This technique works best with medium to long hair and creates Instagram-worthy results.
19. The Fishtail Braid

The fishtail braid is a stunning alternative to traditional three-strand braids that creates an intricate, woven appearance.
Despite looking complex, this beautiful braid only uses two sections of hair and becomes quite easy once you master the technique.
- Divide all your hair into two equal sections instead of the traditional three.
- Take a small piece from the outer edge of the left section and cross it over to the right section.
- Take a small piece from the outer edge of the right section and cross it over to the left section.
- Continue this alternating pattern all the way down the length of your hair.
- Keep the sections tight initially, then gently pull them apart for a fuller, more textured appearance.
- Secure the end with a small elastic that won’t add unnecessary bulk.
- The smaller your crossing pieces, the more intricate and detailed your braid will appear.
20. The Slicked Back Low Bun

The slicked back low bun is the epitome of polished sophistication and works perfectly for professional settings or elegant events.
This sleek style keeps every strand in place while creating a refined, fashion-forward appearance that exudes confidence.
- Apply a generous amount of smoothing gel or pomade to your hair from roots to mid-lengths.
- Use a fine-tooth comb or boar bristle brush to slick all hair straight back from your hairline.
- Gather all hair at the nape of your neck and secure it with an elastic.
- Twist or wrap the ponytail into a tight, neat bun at the base.
- Secure the bun with bobby pins and use additional gel on any flyaways.
- Spray with strong-hold hairspray to maintain the sleek finish throughout the day.
- According to styling experts at Good Housekeeping, gel is essential for achieving and maintaining this ultra-smooth look.
21. The Twisted Side Ponytail

The twisted side ponytail combines practicality with elegance through simple twisting techniques that elevate a basic side ponytail.
This charming style adds visual interest and works beautifully for both casual and semi-formal occasions.
- Part your hair on your preferred side and divide it into two sections.
- Twist each section individually in the same direction away from your face.
- Bring both twisted sections together at one side behind your ear.
- Secure the combined twists with an elastic at the side of your neck.
- Allow the ponytail to drape over your shoulder for a romantic effect.
- Gently pull on the twists to add volume and create a fuller appearance.
- This style works particularly well with longer hair and adds instant sophistication to any outfit.
22. The Braided Bun
The braided bun combines two classic hairstyles into one stunning updo that looks intricate but is surprisingly manageable.
This elegant style is perfect for special occasions or when you want to feel extra put-together during your busy day.
- Create a ponytail at your desired position, whether high, medium, or low on your head.
- Braid the entire length of the ponytail using your preferred braiding technique.
- Wrap the completed braid around the base of the ponytail in a circular motion.
- Tuck the end of the braid underneath the bun and secure it with bobby pins.
- Add pins around the entire bun to ensure it’s secure and won’t unravel.
- Gently pull on the braid to create a fuller, more dimensional bun appearance.
- This style showcases beautiful texture and works with any type of braid you prefer.
23. The Half-Up Top Knot

The half-up top knot is a trendy, youthful style that keeps the top section of hair secured while leaving the bottom half flowing freely.
This fun hairstyle is perfect for moms who want a casual yet intentional look that’s both practical and stylish.
- Section off the top half of your hair from temple to temple across your head.
- Gather the top section and create a high ponytail at the crown area.
- Twist the ponytail around its base to form a small, compact bun or knot.
- Secure the knot with another elastic or use bobby pins to hold it in place.
- Leave the bottom section of your hair down in its natural texture or styled as desired.
- Pull out a few face-framing pieces for a softer, more relaxed overall appearance.
- This versatile style works beautifully with all hair types and lengths.
24. The Rope Braid Ponytail

The rope braid ponytail is a unique twist on the standard ponytail that creates a distinctive twisted appearance.
This style is incredibly easy to execute and adds textural interest to an otherwise simple hairstyle.
- Create a ponytail at your preferred height and secure it with a strong elastic.
- Divide the ponytail into two equal sections that will become your rope braid.
- Twist the right section clockwise several times until it’s tightly wound.
- Twist the left section clockwise as well, matching the tension of the first section.
- Now wrap the two twisted sections around each other in a counterclockwise direction.
- Continue wrapping until you reach the ends of your hair and secure with an elastic.
- The opposing twist directions create the rope appearance and prevent the braid from unraveling.
25. The Waterfall Braid

The waterfall braid is a romantic, cascading style that weaves a braid across your head while allowing sections of hair to flow freely through it.
This ethereal look is perfect for special occasions or when you want to showcase your hair’s length while adding an elegant detail.
- Start by taking a section of hair near your temple on one side of your head.
- Begin a regular three-strand braid for the first couple of crosses.
- As you braid, drop the bottom strand and let it fall naturally like a waterfall.
- Pick up a new section from the top to replace the dropped strand.
- Continue this pattern of dropping and replacing sections as you braid across your head.
- Secure the braid behind your opposite ear with bobby pins when you reach the other side.
- This delicate style beautifully frames your face and works wonderfully for special events.
26. The Pretzel Bun

The pretzel bun is a creative updo that twists your hair into a pretzel-like shape, creating an artistic and eye-catching style.
This unique bun is surprisingly secure and perfect for moms who want something different from the typical bun variations.
- Create a low ponytail at the nape of your neck and secure it with an elastic.
- Divide the ponytail in half horizontally to create an upper and lower section.
- Loop the upper section through the space above the elastic to create a twist.
- Bring both ends of the ponytail up and cross them over each other.
- Tuck the ends under and through the various loops you’ve created.
- Secure the pretzel shape with bobby pins placed strategically throughout the bun.
- Adjust the loops to create a balanced, symmetrical pretzel appearance.
27. The Scarf-Wrapped Ponytail

The scarf-wrapped ponytail is a stylish way to add color and personality to a simple ponytail using a silk scarf or bandana.
This accessorized style is perfect for bad hair days or when you want to add a pop of interest to your look.
- Create a ponytail at your desired height and secure it with a hair elastic.
- Fold a silk scarf or bandana into a long, narrow strip for easier wrapping.
- Position the center of the scarf under your ponytail at the elastic base.
- Bring both ends of the scarf up and cross them over the top of the ponytail.
- Continue wrapping the scarf around the ponytail, either covering the elastic or wrapping down the length.
- Tie the scarf ends in a knot or bow, letting the excess fabric flow with your ponytail.
- This simple addition transforms a basic ponytail into a fashion-forward statement.
28. The Crown Braid

The crown braid is a regal, halo-like style that wraps around your entire head like a natural crown.
This stunning braid looks incredibly intricate but becomes manageable with practice, making it perfect for special occasions when you want to feel like royalty.
- Part your hair on one side and begin braiding from behind one ear.
- Use the Dutch braid technique (braiding under instead of over) for a raised effect.
- Braid along your hairline, following the natural curve around your head.
- Add small sections of hair to each strand as you braid around your crown.
- Continue the braid all the way around until you reach your starting point.
- Tuck the ends of the braid under the beginning section and secure with bobby pins.
- Gently pull on the braid edges to create fullness and hide the braid connection point.
29. The Quick Twist Back
The quick twist back is an effortless style that takes just seconds to create while keeping hair off your face.
This simple technique uses two twisted sections pinned at the back, making it perfect for busy mornings when you need a polished look instantly.
- Take a section of hair from each temple area, approximately two inches wide.
- Twist each section away from your face toward the back of your head.
- Bring both twisted sections together at the back crown area.
- Secure where the twists meet with bobby pins or a small clip.
- Leave the rest of your hair down for a relaxed, flowing appearance.
- Adjust the tightness of the twists based on your comfort and desired look.
- This versatile style works for all hair lengths and can be dressed up or down easily.
30. The Pinned-Back Waves

Pinned-back waves combine the elegance of flowing hair with the practicality of keeping it off your face.
This glamorous style is perfect for moms who want to show off their hair texture while maintaining functionality throughout the day.
- Style your hair in loose waves using a curling iron, straightener, or natural air-drying methods.
- Take a section from one side of your head near your temple area.
- Pull this section back and secure it behind your ear with decorative or hidden bobby pins.
- Repeat on the other side, creating symmetry or asymmetry based on your preference.
- Adjust the pinned sections to ensure they’re secure but not too tight.
- Leave the back section flowing freely to showcase the wave pattern.
- According to hair experts at WebMD, pinning back sections helps protect hair from environmental damage throughout the day.
31. The Braided Pigtails
Braided pigtails are a playful, youthful style that’s incredibly practical for active moms who need their hair completely secured.
While they may seem childish, when styled correctly, braided pigtails can look fresh, trendy, and surprisingly sophisticated.
- Part your hair straight down the middle from forehead to nape for equal sections.
- Secure one section temporarily while you work on the first braid.
- Braid one section from roots to ends using your preferred braiding technique.
- Secure the first braid with an elastic at the bottom and repeat on the other side.
- Ensure both braids are positioned at the same height for a balanced appearance.
- Gently pancake both braids by pulling on the edges for a fuller look.
- This style is perfect for workouts, outdoor activities, or casual everyday wear.
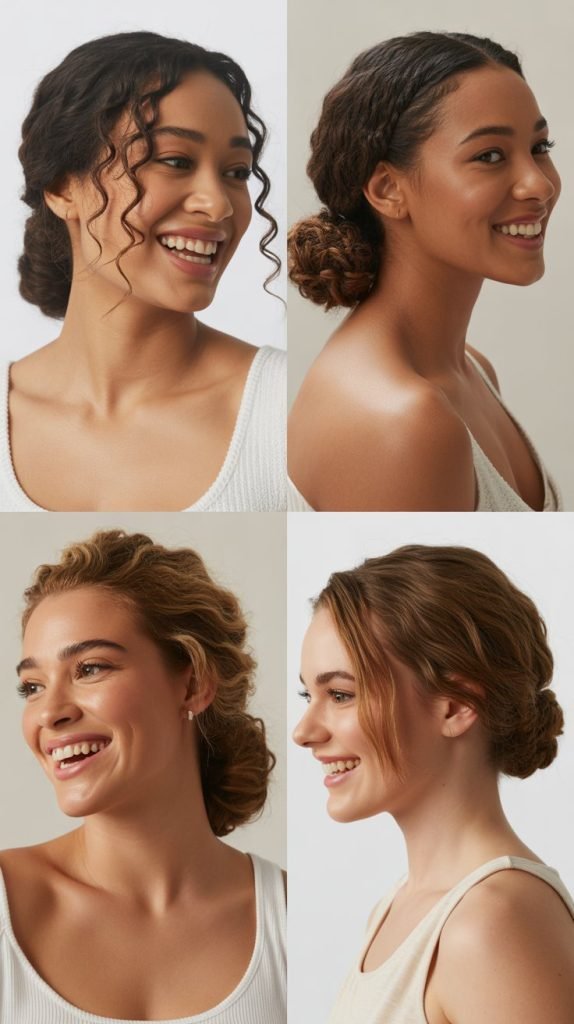
32. The Low Chignon
The low chignon is a sophisticated, timeless updo that sits elegantly at the nape of your neck.
This classic style conveys refinement and grace, making it ideal for professional settings, formal events, or any occasion requiring polished elegance.
- Gather all your hair at the nape of your neck into a low ponytail position.
- Instead of securing with an elastic, twist the gathered hair inward toward your head.
- Continue twisting until the hair naturally wants to coil into itself.
- Tuck the ends under the twisted section to create a compact, neat shape.
- Secure the chignon with bobby pins placed horizontally through the twist.
- Add additional pins around the perimeter for security and stability throughout the day.
- Smooth any flyaways with a light pomade or hairspray for a perfectly polished finish.
33. The Space Buns

Space buns are a fun, trendy hairstyle featuring two buns positioned high on either side of your head.
This playful style has become increasingly popular and works wonderfully for casual outings, festivals, or when you want to embrace a more youthful, carefree aesthetic.
- Part your hair straight down the middle from front to back creating two equal sections.
- Create a high ponytail on one side at the desired position near the top of your head.
- Twist the ponytail around its base to form a compact bun and secure with pins.
- Repeat the exact process on the other side, ensuring both buns are at matching heights.
- Adjust the size of each bun to make them as symmetrical as possible.
- Pull out a few face-framing pieces if you want a softer, less structured appearance.
- This style works best with medium to long hair and adds instant personality to any look.
34. The Infinity Bun

The infinity bun is a creative, figure-eight style that creates visual interest through its unique crossed-loop design.
This artistic updo is surprisingly secure and perfect for moms who want something beyond the standard bun variations.
- Create a ponytail at your preferred position and secure it with an elastic.
- Divide the ponytail into two equal sections that will form the loops.
- Create a loop with the first section by folding it back toward the base and pinning.
- Create a second loop with the remaining section, crossing it over the first loop.
- Adjust both loops to create the infinity or figure-eight shape clearly.
- Secure the loops with bobby pins placed strategically to hold the dimensional shape.
- Tuck any loose ends into the bun structure and secure them out of sight.
Hair Care Tips for Busy Moms
| Category | Quick Tips | Time Saved |
|---|---|---|
| Night Prep | Braid damp hair before bed for morning waves | 15-20 minutes |
| Dry Shampoo | Apply to roots to extend time between washes | 30+ minutes |
| Multi-Use Products | Use leave-in conditioner as detangler and heat protectant | 5-10 minutes |
| Tool Investment | Quality hair ties prevent breakage and restyling | Varies |
Styling Products Essential for Quick Hairstyles
- Keep a small bottle of dry shampoo in your bag for emergency touch-ups throughout the day.
- Invest in quality bobby pins that match your hair color for seamless, invisible hold.
- Use texturizing spray to add grip and volume, making styles hold better and last longer.
- Keep small hair elastics in multiple locations like your car, purse, and bathroom for convenience.
- A travel-size hairspray helps maintain your style when you’re away from home.
- According to beauty experts at Allure, having the right products makes styling significantly faster and more effective.
Conclusion
Finding time for yourself as a busy mom can feel impossible, but your hair routine doesn’t have to be a source of stress or take hours from your already packed schedule.
This comprehensive guide to 34 Easy Everyday Hairstyles for Moms Who Are Always Busy proves that you can look polished, put-together, and beautiful in just minutes each morning.
From classic ponytails and buns to creative braids and twisted styles, these versatile options work for every hair type, length, and occasion.
The key is finding a few favorite styles that work with your natural hair texture and practicing them until they become second nature.
Remember that looking good isn’t about perfection or spending hours in front of the mirror—it’s about finding simple, effective solutions that help you feel confident as you tackle everything on your to-do list.
With these time-saving hairstyles in your repertoire, you’ll never have to choose between looking great and getting things done, because now you can effortlessly do both.