The butterfly haircut has become one of the most sought-after hairstyles for long hair, combining effortless volume with face-framing layers that flutter like delicate wings.
If you’ve been dreaming of transforming your long locks into a dimensional, movement-filled masterpiece, you’ve landed in exactly the right place.
This comprehensive guide on 33 Step-by-Step Butterfly Haircut Tutorials for Long Hair will walk you through various techniques, styling methods, and professional tips to achieve this stunning look at home or understand what to request at your salon.
Whether you have straight, wavy, curly, or thick hair, you’ll discover tailored approaches that work specifically for your hair type.
From understanding the foundational cutting technique to mastering the styling secrets that bring out the butterfly effect, each tutorial has been carefully crafted to ensure you can recreate salon-quality results.
Get ready to unlock the secret to voluminous, face-flattering layers that move beautifully with every turn of your head.
1. Understanding the Classic Butterfly Haircut Technique
The classic butterfly haircut serves as the foundation for all variations you’ll explore throughout this article.
This technique focuses on creating shorter layers around the face that gradually lengthen toward the back, mimicking the graceful shape of butterfly wings when hair falls naturally.
- The hallmark of this cut involves sectioning hair into specific zones that determine layer length and graduation.
- Stylists typically start by dividing hair down the middle and creating a horizontal section at ear level.
- The front sections receive the shortest layers, usually starting around chin or shoulder length depending on face shape.
- Middle sections are cut slightly longer to create seamless blending and transition.
- Back sections maintain the most length, preserving the “long hair” aspect while still incorporating movement.
- The cutting angle typically ranges from 45 to 90 degrees, depending on how dramatic you want the layering effect.
- Point cutting or slide cutting techniques are essential for softening the edges and preventing blunt lines.
- This method works exceptionally well for adding volume to flat hair without sacrificing overall length.
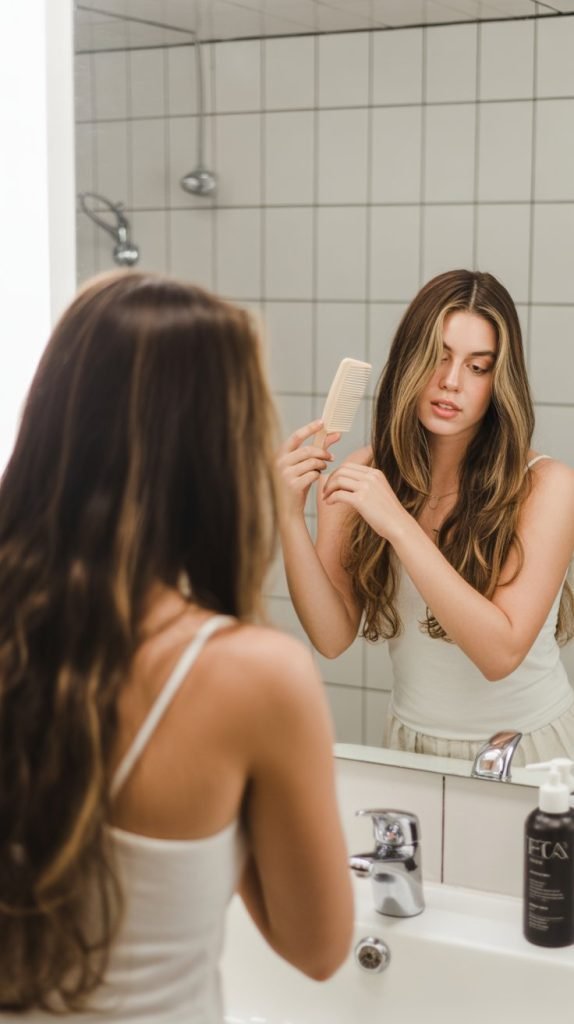
2. Preparing Your Hair for the Butterfly Cut

Proper preparation ensures your butterfly haircut turns out exactly as envisioned and maintains its shape beautifully between salon visits.
- Begin with freshly washed hair using a clarifying shampoo to remove product buildup that could affect cutting precision.
- Apply a lightweight conditioner focusing on mid-lengths to ends, avoiding the root area to prevent weighing down the layers.
- Towel-dry hair gently by squeezing rather than rubbing to minimize frizz and breakage.
- Detangle completely using a wide-tooth comb, starting from the ends and working upward to prevent unnecessary hair loss.
- For at-home cuts, ensure your hair is damp but not dripping wet, as overly saturated hair can stretch and lead to uneven results.
- Assess your hair’s natural texture and growth patterns by observing how it falls when air-dried.
- Identify any cowlicks, natural parts, or directional growth that should be considered during the cutting process.
- Remove any existing split ends before beginning the butterfly cut to ensure clean, healthy-looking layers.
- Have professional haircutting scissors ready—regular household scissors will create ragged edges and damage hair cuticles.
3. Face-Framing Layers for Round Faces
The butterfly haircut can be customized to flatter round face shapes by strategically placing layers that create the illusion of length and definition.
- For round faces, the shortest face-framing layers should begin at or slightly below the chin to elongate facial features.
- Avoid layers that end at the widest part of the face, which typically falls at cheek level.
- Create longer, more gradual layers rather than dramatic short pieces to maintain a slimming vertical line.
- Incorporate side-swept bangs or longer curtain bangs that angle downward to draw the eye vertically.
- The middle layers should fall around collarbone length to continue the lengthening effect.
- Keep more weight in the crown area to add height, which balances the roundness of the face.
- Avoid blunt, horizontal lines across the face; instead, opt for diagonal cutting angles.
- Style the face-framing pieces with a slight inward curve using a round brush to softly frame rather than widen the face.
4. Butterfly Cut Adaptation for Square Face Shapes

Square face shapes benefit from softened angles and rounded movement that the butterfly haircut naturally provides when executed correctly.
- The primary goal is to soften the strong jawline characteristic of square faces through strategic layering.
- Start the shortest face-framing layers slightly above the jaw, around mouth level, to distract from angular features.
- Incorporate soft, wispy textures rather than blunt edges to create feminine movement.
- Add gentle curves when styling the front layers to contrast with the natural facial angles.
- Keep the layers throughout the cut relatively close in length to avoid creating additional horizontal lines.
- Focus volume at the crown and slightly toward the sides to balance the width of the jaw.
- Avoid tucking hair behind the ears, which emphasizes the square jawline; instead, let layers fall forward.
- Consider adding subtle highlights around the face to further soften and add dimension.
5. Oval Face Butterfly Haircut Versatility

Oval faces are considered the most versatile face shape and can accommodate virtually any variation of the butterfly haircut with stunning results.
- With balanced proportions, oval faces can experiment with layers starting anywhere from eyebrow to chin length.
- Both dramatic layering and subtle graduation work beautifully without disrupting facial harmony.
- Feel free to incorporate choppy, textured layers for an edgier look or smooth, blended layers for classic elegance.
- Bangs of any style—from micro bangs to curtain bangs—complement the butterfly cut on oval faces.
- The natural balance of oval faces means you can play with volume placement without concern.
- Experiment with asymmetrical variations where one side features shorter layers than the other.
- This face shape allows for bold color placement in the layered sections without overwhelming features.
- Consider your personal style and maintenance preferences rather than face shape limitations when choosing your butterfly cut variation.
6. Heart-Shaped Face Butterfly Layering

Heart-shaped faces feature wider foreheads and narrower chins, requiring specific layering strategies to create balanced proportions.
- The butterfly cut naturally complements heart-shaped faces by adding width at the jawline where it’s needed most.
- Start the shortest layers around chin length to add volume and balance to the lower half of the face.
- Avoid very short layers near the temples, which can emphasize forehead width.
- Create fuller, more voluminous layers at jaw level to counteract the narrow chin.
- Incorporate side-swept or curtain bangs to minimize forehead prominence while maintaining face-framing softness.
- Keep the crown area relatively smooth without excessive volume to avoid top-heavy proportions.
- Style the chin-length layers with outward movement to broaden the lower face visually.
- Consider adding lighter tones to the lower layers to draw attention downward and create balance.
7. DIY Butterfly Cut: The Ponytail Method
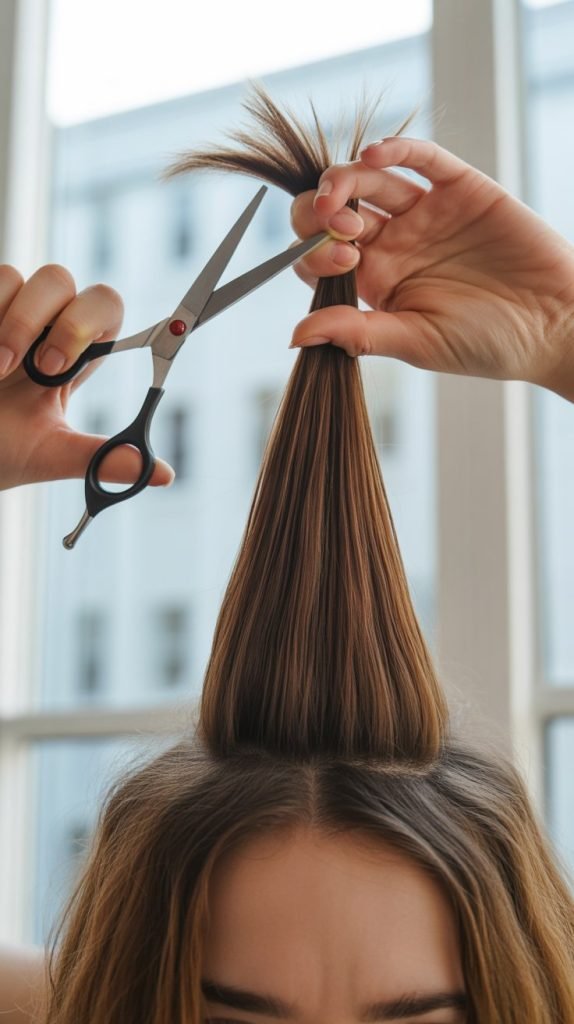
The ponytail method offers a simple approach for achieving butterfly layers at home without professional training, though results vary based on hair texture and technique precision.
- Flip your head upside down and brush all hair forward to create a smooth, unified ponytail at your forehead.
- Secure the ponytail with a hair tie positioned where you want the shortest layer to fall when hair is down.
- Ensure the ponytail is centered and smooth without bumps, as any irregularities will affect the final result.
- Hold the ponytail straight up from your head at a 90-degree angle from your forehead.
- Cut straight across the ponytail at your desired length, remembering that hair will appear shorter when dry.
- For added texture, use point-cutting technique by snipping vertically into the ends rather than straight across.
- Release the ponytail and shake out your hair to reveal the layered effect.
- Assess the results and make minor adjustments by taking small vertical sections and point-cutting any uneven areas.
- This method works best on relatively straight or wavy hair; curly hair may require professional assessment.
8. The Unicorn Cut Technique for Butterfly Layers

The unicorn cut technique, similar to the ponytail method but with hair pulled to the front, creates dramatic butterfly layers with maximum face-framing effect.
- Brush all hair forward and gather it into a single ponytail positioned at the very top center of your forehead.
- Unlike the traditional ponytail method, this technique requires the ponytail to be directly in front of your face.
- Secure tightly with a hair elastic, ensuring all hair from the back, sides, and crown is captured.
- Pull the ponytail straight up toward the ceiling, maintaining even tension throughout.
- Identify where you want your shortest layer to fall—typically between chin and collarbone length.
- Cut straight across the ponytail, using sharp shears and making confident, clean cuts.
- The hair closest to your face will become the shortest layers, while back sections remain longest.
- This creates the signature butterfly effect with substantial face-framing and natural graduation.
- After cutting, release the hair and style as usual to see the dimensional layering throughout.
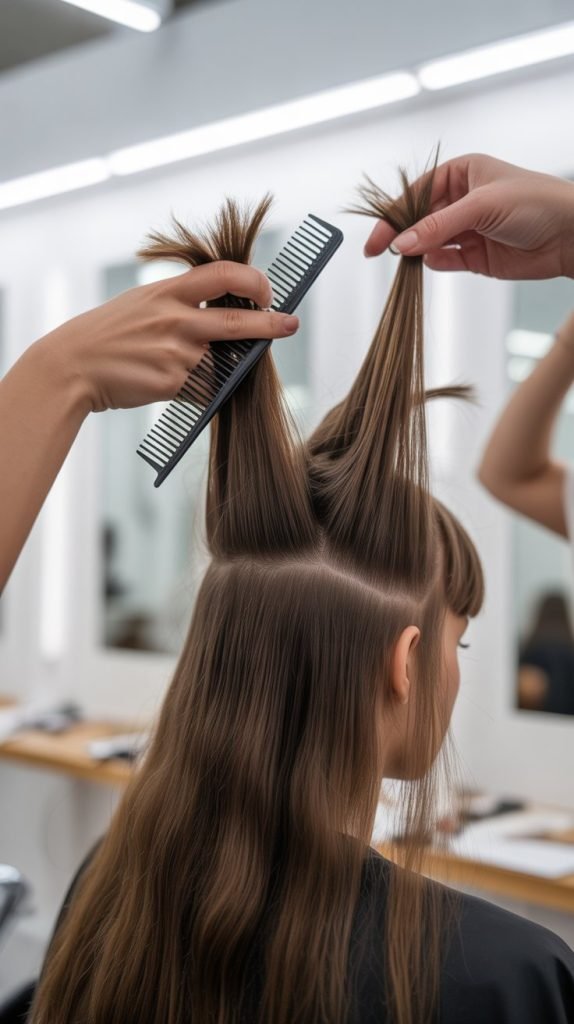
9. Sectioning Techniques for Precision Butterfly Cuts

Professional-quality butterfly cuts rely heavily on proper sectioning to ensure even, symmetrical layering throughout the hair.
- Begin by creating a center part from forehead to nape, dividing hair into left and right sections.
- Make a horizontal part from ear to ear across the crown, creating top and bottom sections.
- Secure each of the four sections with clips to keep them separated during the cutting process.
- Within each section, you’ll create subsections as you cut, working methodically from front to back.
- For the face-framing layers, take vertical subsections about one inch wide starting at the part.
- Pull each subsection away from the head at the appropriate cutting angle—typically 45 to 90 degrees.
- Cut the first subsection to establish your guide length, then match subsequent subsections to this guide.
- Continuously check symmetry by comparing both sides of the face to ensure balanced layering.
- The systematic approach prevents choppy, uneven results and creates the smooth graduation characteristic of butterfly cuts.
10. Texturizing and Thinning for Fine Hair

Fine hair requires special attention during butterfly cutting to create volume and movement without removing excessive density that provides fullness.
- Use point-cutting technique exclusively rather than blunt cutting to create soft, feathered edges that appear fuller.
- Avoid heavy thinning or texturizing throughout the bulk of the hair, which can make fine hair look sparse.
- Focus texturizing efforts on the very ends of layers where weight tends to accumulate.
- Create internal layers by taking small horizontal sections and removing minimal weight underneath.
- Use thinning shears sparingly—no more than two passes per section—and only on the bottom third of each layer.
- The butterfly cut’s natural layering already removes weight, so additional thinning is often unnecessary for fine hair.
- Consider the “slicing” technique where scissors glide through sections at an angle rather than closing fully.
- Preserve as much density as possible at the crown and root areas to maintain the illusion of thickness.
- Style with volumizing products and techniques to maximize the butterfly cut’s movement-enhancing benefits.
11. Butterfly Cut for Thick, Dense Hair

Thick hair benefits tremendously from the butterfly cut’s weight removal while maintaining substantial length and preventing the dreaded triangle shape.
- Thick hair can handle more aggressive layering and texturizing without appearing thin or damaged.
- Start with the basic butterfly shape, then add extensive internal layering to remove bulk from the interior.
- Use a combination of point-cutting, slide-cutting, and channel cutting to create various textures throughout.
- Thinning shears can be used more liberally on thick hair, particularly in the densest areas around the nape and crown.
- Create deeper, more dramatic layers to prevent the pyramid effect that occurs when thick hair is all one length.
- The shortest face-framing layers can start higher (around mouth level) since thick hair has plenty of volume to spare.
- Work in smaller subsections when cutting to ensure thorough, even weight removal throughout each layer.
- Consider razoring techniques on the mid-lengths and ends to create soft, feathery texture that moves beautifully.
12. Curly Hair Butterfly Cut Adaptation

Curly hair requires specialized cutting approaches to achieve butterfly layers that enhance natural curl pattern while maintaining proper shape when dry.
- Always cut curly hair dry or when styled in its natural curl pattern to account for shrinkage.
- Remember that curly hair “jumps” or springs up after cutting, so cut conservatively—longer than your target length.
- The butterfly cut on curly hair creates beautiful dimension by allowing different curl lengths to stack and create volume.
- Focus on cutting curl by curl rather than taking large sections, respecting each curl’s individual pattern.
- Face-framing layers should be cut to fall where you want them when the curl is fully formed, not when stretched.
- Avoid thinning shears on curly hair, which can disrupt the curl pattern and create frizz.
- Use point-cutting exclusively on dry curls to create soft graduation between layers.
- The butterfly effect is particularly stunning on curly hair as the layers create a halo of curls around the face.
- Ensure layers are cut long enough to maintain curl weight; too-short layers on curly hair can stick straight out.
13. Wavy Hair Butterfly Styling Techniques

Wavy hair sits perfectly between straight and curly, requiring specific styling approaches to maximize the butterfly cut’s dimensional effect.
- The natural texture of wavy hair enhances the butterfly cut’s movement and creates effortless beachy vibes.
- Air-drying with a texturizing spray is often sufficient to achieve beautiful results with wavy butterfly cuts.
- Use a diffuser attachment on low heat if blow-drying to enhance waves without creating frizz.
- Apply wave-enhancing mousse to damp hair, scrunching upward from ends to roots.
- The face-framing layers can be loosely curled with a large-barrel curling iron or wand for added definition.
- Avoid brushing wavy hair after it dries, which disrupts the wave pattern and creates puff.
- Sea salt spray provides the perfect amount of texture and hold for wavy butterfly cuts.
- Braid wavy hair overnight for enhanced wave definition that showcases the cut’s layers beautifully.
- The butterfly cut naturally encourages waves to form around the face, creating soft, romantic framing.
14. Straight Hair Butterfly Cut and Volume Creation

Straight hair can appear flat when all one length, but the butterfly cut transforms it into a voluminous, dynamic style with proper cutting and styling techniques.
- Straight hair showcases the precision of butterfly layering more clearly than other textures, making exact cutting crucial.
- Blow-dry with a round brush, rolling each layer under or out depending on desired style direction.
- The face-framing layers should be blow-dried with intentional curve to prevent them from hanging too flat.
- Use a volumizing mousse at the roots before blow-drying to create lift that lasts throughout the day.
- Consider adding a root-lifting spray specifically at the crown where straight hair tends to fall flattest.
- A flat iron can be used to create gentle bends in the layers, mimicking natural movement.
- The butterfly cut’s natural graduation prevents straight hair from looking weighed down or triangular.
- Strategic layering removes weight that pulls straight hair flat while maintaining substantial length.
- Finish with a light-hold hairspray to maintain volume and movement without stiffness.
15. Adding Curtain Bangs to Your Butterfly Cut
Curtain bangs complement the butterfly haircut perfectly, creating a cohesive, face-framing effect that enhances the overall dimensional look.
- Curtain bangs feature a center part with bangs that sweep to each side, blending seamlessly into face-framing layers.
- Determine bang length based on face shape; typically, they should fall between the cheekbone and chin.
- Section out a triangular area at the front of the head, with the point starting at the crown and base at the hairline.
- This section should extend about one to two inches back from the hairline, depending on desired thickness.
- Cut the center shortest, gradually lengthening toward the sides to create the curtain effect.
- Use point-cutting or slide-cutting techniques to soften the edges and blend with existing layers.
- Style curtain bangs by blow-drying with a round brush, rolling them away from the face at the roots.
- The curtain bang naturally transitions into the butterfly cut’s shortest layers, creating unified face-framing.
- Maintenance requires trimming every 3-4 weeks as bangs grow more quickly than the rest of the hair.
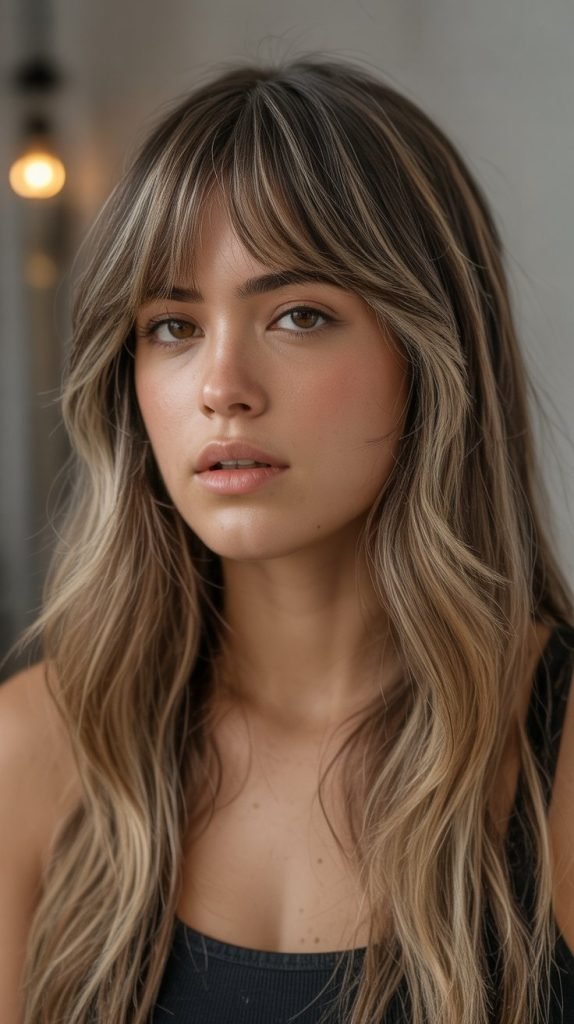
16. Wispy Bangs Integration with Butterfly Layers

Wispy bangs offer a softer, more delicate alternative to traditional or curtain bangs while still enhancing the butterfly haircut’s face-framing qualities.
- Wispy bangs are characterized by their feathery, lightweight texture and slightly broken appearance.
- Take a much smaller triangular section than curtain bangs, creating thinner, more see-through fringe.
- Cut the bangs while holding them at a slight angle rather than straight down for a softer line.
- Use a combination of point-cutting and slide-cutting to create separation and wispy texture.
- The length can vary from eyebrow-grazing to cheekbone-skimming, depending on personal preference.
- Wispy bangs require minimal styling—often just finger-combing and air-drying creates the desired effect.
- This bang style works particularly well for those hesitant about commitment, as wispy bangs are less noticeable when growing out.
- The delicate nature of wispy bangs complements the butterfly cut without competing for attention.
- Texturizing spray helps maintain the separated, piecey appearance of wispy bangs throughout the day.
17. Blunt Bangs with Butterfly Cut Contrast

The contrast between blunt, straight-across bangs and the heavily layered butterfly cut creates an edgy, fashion-forward aesthetic that makes a bold statement.
- Blunt bangs provide structure and frame the eyes dramatically while the butterfly layers add softness below.
- Cut bangs straight across at the desired length, typically between eyebrow and eyelash level.
- Keep bangs slightly heavier and less textured than the rest of the cut to maintain the blunt appearance.
- The sharp line of blunt bangs creates visual interest when paired with the soft graduation of butterfly layers.
- This combination works particularly well for oval and heart-shaped faces.
- Blow-dry bangs flat using a paddle brush to emphasize their straight, clean line.
- The maintenance for blunt bangs is more frequent—trimming needed every 2-3 weeks.
- Consider face-framing layers that start at or below the chin to create clear separation between the bangs and layers.
- This style channels retro inspiration while feeling thoroughly modern when executed correctly.
18. Side-Swept Bangs Butterfly Combination

Side-swept bangs offer versatility and face-framing benefits while maintaining the asymmetrical interest that complements butterfly layering beautifully.
- Side-swept bangs are cut to favor one side of the face, creating an elegant diagonal line across the forehead.
- Determine which side you naturally part your hair and sweep bangs in that direction for easiest styling.
- Cut the bangs longer on one side than the other, with the shortest point near the inner eyebrow.
- The longer side should reach approximately cheekbone or chin length to blend with butterfly face-framing layers.
- Use a round brush while blow-drying to create smooth, swooping movement across the forehead.
- Side-swept bangs soften angular features and add romance to the overall butterfly cut aesthetic.
- This bang style is particularly forgiving during grow-out phases, as length blends naturally into side layers.
- The diagonal line created by side-swept bangs echoes the butterfly cut’s emphasis on angles and movement.
- Bobby pins can redirect side-swept bangs when you want them off your face without losing the cut’s shape.
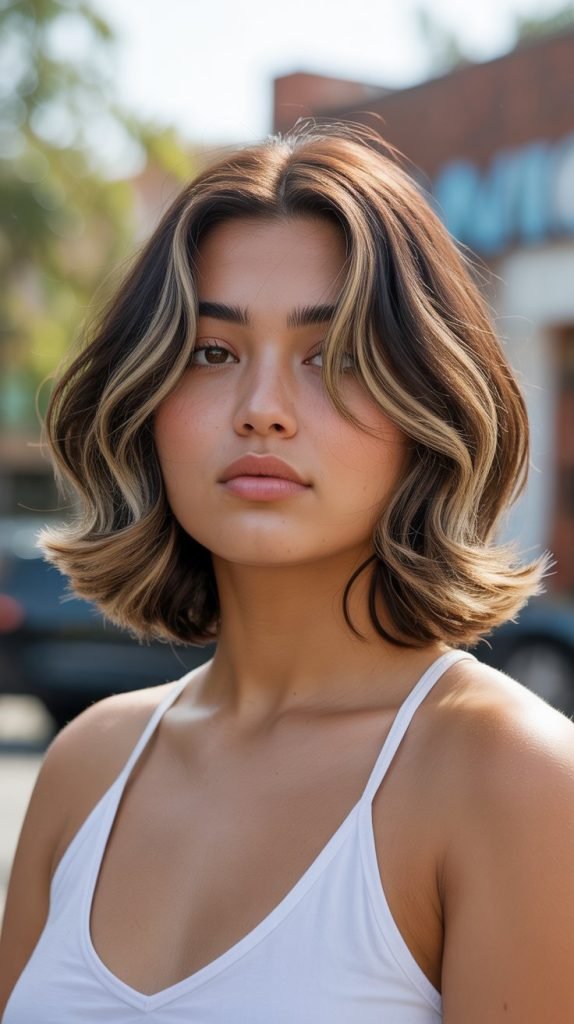
19. Balayage and Highlights on Butterfly Cuts

Strategic color placement enhances the butterfly cut’s dimensional layers, making each level visually distinct and adding depth to the overall style.
- Balayage—hand-painted highlights that create natural-looking dimension—complements butterfly cuts exceptionally well.
- Focus color on the face-framing layers to draw attention to the cut’s most distinctive feature.
- Lighter pieces around the face create a sun-kissed effect that brightens the complexion.
- Apply darker tones underneath and lighter tones on top of layers to emphasize the cut’s graduation.
- The butterfly cut’s movement allows colored sections to peek through when hair moves, creating beautiful dimension.
- Babylights—very fine, delicate highlights—add subtle dimension that doesn’t overwhelm the haircut itself.
- Consider placing the lightest pieces at the ends of layers where they’ll catch the most light.
- Color consultation should happen before or during the haircut to optimize placement based on where layers will fall.
- Properly placed color can make the butterfly cut appear even more voluminous and textured.
20. Blow-Drying Techniques for Butterfly Volume

Proper blow-drying technique maximizes the butterfly cut’s potential for volume, movement, and shape, transforming a good cut into a stunning style.
- Always start with a heat protectant spray applied to damp hair to prevent damage and promote shine.
- Rough-dry hair until about 70% dry by flip-drying upside down to create root volume throughout.
- Section hair into workable parts—typically four to six sections depending on thickness.
- Use a medium-sized round brush (2-3 inches in diameter) to create optimal volume and bend in layers.
- Take sections no thicker than the width of your brush for thorough drying and styling.
- Wrap each section around the brush, apply tension by pulling gently, and direct heat from roots to ends.
- Roll the brush under or away from the face depending on desired direction for face-framing layers.
- Focus the dryer nozzle downward along the hair shaft to smooth the cuticle and create shine.
- Blast cool air on each section after heat styling to set the shape and increase longevity.
- Finish by flipping hair upside down and running fingers through roots while hitting with cool air for lasting volume.
21. Flat Iron Waves for Butterfly Cut Styling

Creating waves with a flat iron on a butterfly cut produces modern, effortless-looking texture that enhances the cut’s inherent movement and dimension.
- Begin with completely dry hair that has been heat-protected to prevent damage during styling.
- Use a flat iron with rounded edges rather than squared edges for smoother wave creation.
- Set the temperature appropriate for your hair type—fine hair needs lower heat (300-350°F) while thick hair can handle higher (350-400°F).
- Take sections about one to two inches wide for defined waves or wider sections for looser, beachy texture.
- Start an inch or two from the roots to create natural-looking movement without obvious heat marks.
- Clamp the flat iron and twist it away from your face, then slowly glide down the hair shaft.
- Alternate the direction of waves throughout the head for natural, lived-in appearance.
- The face-framing layers should be waved away from the face to create opening and flattering movement.
- Allow waves to cool completely before touching them to help the style set properly.
- Finish with texturizing spray or light-hold hairspray while scrunching gently for enhanced separation and hold.
22. Curling Wand Techniques for Layered Butterfly Hair

A curling wand creates varying curl sizes throughout the butterfly cut, emphasizing the dimensional layering while adding glamorous texture and volume.
- Choose a wand with a tapered barrel to create various curl sizes—smaller at the top blending to larger at the bottom.
- Protect hair with thermal spray before beginning any heat styling to maintain hair health.
- Section hair into four to six parts, working from bottom layers to top layers systematically.
- Take sections about one inch wide for defined curls or two inches for looser, more relaxed waves.
- Wrap hair around the wand away from your face in the front sections to create face-framing openness.
- Hold each section on the wand for 5-10 seconds depending on hair thickness and desired curl tightness.
- The varying lengths of butterfly layers naturally create different curl sizes, enhancing the cut’s dimension.
- Allow curls to cool completely in your palm before releasing to help them set firmly.
- Once all hair is curled, flip upside down and shake gently to blend curls together.
- Finish by running fingers through curls to soften and separate, then apply flexible hold hairspray.
23. Air-Dry Styling for Low-Maintenance Butterfly Cuts

Embracing natural texture through air-drying creates an effortless, low-maintenance routine that still showcases the butterfly cut’s beautiful shape and movement.
- Air-drying works particularly well on wavy or slightly curly hair types that have natural texture to enhance.
- Apply styling products to soaking wet hair for maximum absorption and effect.
- Use a combination of leave-in conditioner for hydration and curl cream or mousse for definition.
- Scrunch products into hair from ends to roots, encouraging natural wave or curl pattern formation.
- Plop hair in a microfiber towel or t-shirt for 10-20 minutes to remove excess water while maintaining texture.
- After plopping, allow hair to air-dry completely without touching to prevent frizz and disruption.
- The butterfly cut’s layers create natural volume even when air-dried, eliminating flat, lifeless results.
- Face-framing layers can be twisted while wet to encourage them to curve slightly around the face.
- Apply a small amount of lightweight oil or anti-frizz serum to dry hair for shine and smoothness.
- This method celebrates the butterfly cut’s natural movement while requiring minimal time and effort.
24. Overnight Heatless Curl Methods for Butterfly Hair

Heatless curling techniques protect hair health while creating beautiful waves and curls that showcase the butterfly cut’s dimensional layers without heat damage.
- The ribbon or robe tie method involves wrapping slightly damp hair around a fabric strip secured at the crown.
- Part hair down the middle and wrap each side around the fabric, alternating small sections around the tie.
- Secure the ends with small elastics and sleep with the wrapped style to set curls overnight.
- Foam curling rods can be used throughout the layers, with smaller rods at the top and larger at the bottom.
- Pin curls created on damp hair and secured with bobby pins create vintage-style waves when released.
- Sock curls involve wrapping small sections around rolled socks for bouncy, spiral curls without heat.
- Braiding damp hair in multiple sections creates natural-looking waves that enhance the butterfly cut’s texture.
- Apply styling product before using any heatless method to increase hold and definition.
- Allow hair to dry completely (usually overnight) before unwrapping to ensure curls are fully set.
- Gently separate curls with fingers and apply lightweight texturizing spray for lasting hold.
25. Maintaining Butterfly Cut Between Salon Visits
Proper maintenance ensures your butterfly cut retains its shape, continues to flatter, and looks fresh between professional trimming appointments.
- Schedule salon visits every 8-12 weeks to maintain the cut’s shape and remove split ends that affect the style.
- Trim face-framing layers slightly more frequently (every 6-8 weeks) as they grow out faster and affect the overall look more dramatically.
- Learn to do minor dusting at home using proper hair-cutting scissors to remove split ends between appointments.
- Take before photos right after salon visits to reference the intended shape during home maintenance.
- Deep condition weekly to keep layers healthy, shiny, and manageable—damaged hair doesn’t hold the butterfly shape well.
- Use hair masks or intensive treatments on the ends of layers where hair is oldest and most prone to damage.
- Avoid using elastic bands directly on layered sections, which can cause breakage; use scrunchies or clips instead.
- Protect hair during sleep with a silk or satin pillowcase to reduce friction and preserve styling.
- Regular trimming of the longest back layers maintains balance and prevents the cut from losing its butterfly shape.
- Communicate with your stylist about areas that seem to lose shape quickly so they can adjust cutting techniques.
26. Product Recommendations for Butterfly Cut Styling

Selecting the right products enhances the butterfly cut’s natural movement, maintains healthy hair, and makes styling easier and more effective.
- Volumizing mousse applied at the roots creates lift that showcases the butterfly cut’s dimensional layers.
- Heat protectant spray is non-negotiable before any thermal styling to maintain hair health and prevent damage.
- Texturizing spray adds grit and separation to layers, creating piece-y, modern styling with touchable hold.
- Lightweight hair oil applied to ends prevents frizz and adds shine without weighing down the layered cut.
- Dry shampoo extends styles between washes while adding volume at the roots—essential for maintaining butterfly shape.
- Flexible-hold hairspray keeps styles in place without stiffness, allowing the cut’s natural movement to shine through.
- Leave-in conditioner provides ongoing moisture to prevent the ends of layers from becoming dry and damaged.
- Root-lifting spray specifically targets the crown area where volume is crucial for the butterfly effect.
- Anti-frizz serum smooths the hair cuticle and controls flyaways, particularly important for face-framing layers.
- Wave or curl-enhancing creams help naturally textured hair form defined, bouncy layers that showcase the cut beautifully.
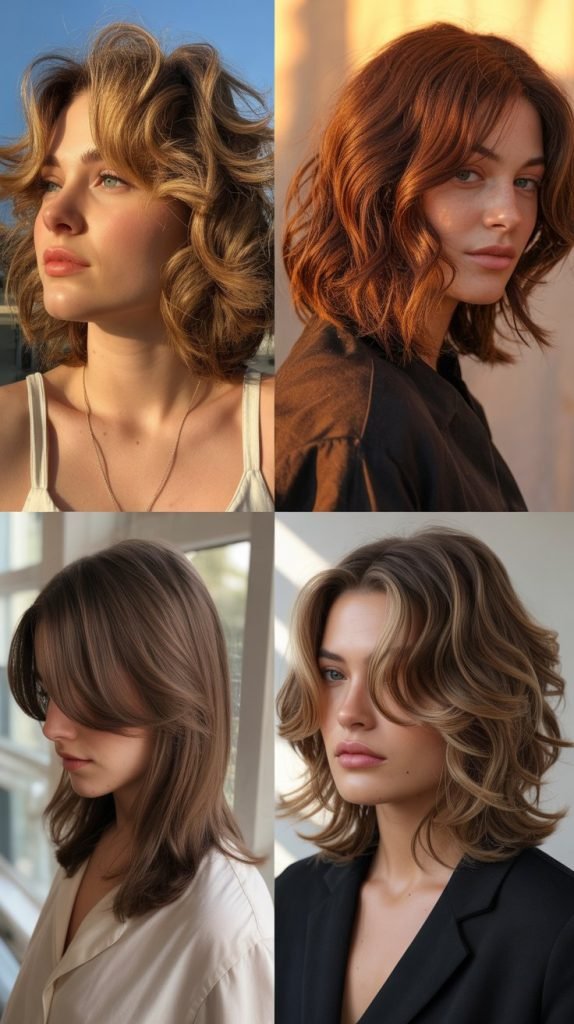
27. Butterfly Cut for Different Hair Lengths

While traditionally associated with long hair, the butterfly cut can be adapted to various lengths, each creating its own unique aesthetic and styling possibilities.
- True long butterfly cuts feature hair that extends past the shoulders with the longest layers reaching mid-back or longer.
- Medium-length butterfly cuts work beautifully with hair falling between chin and shoulder length
- creating dramatic face-framing without excessive length.
- The shortest layers in medium butterfly cuts typically start around the mouth or chin, creating substantial volume.
- Longer versions allow for more dramatic graduation between the shortest and longest layers, emphasizing the butterfly effect.
- Shoulder-length adaptations focus heavily on face-framing with less dramatic length variation in the back.
- Very long hair (waist-length or longer) benefits from the weight removal butterfly cuts provide while maintaining impressive length.
- The longer your hair, the more layers can be incorporated to create dimension without sacrificing the “long hair” classification.
- Consider your lifestyle and styling commitment when choosing butterfly cut length—longer versions require more maintenance time.
- Each length variation changes how the layers fall and move, so discuss your desired outcome thoroughly with your stylist.
28. Fixing Common Butterfly Cut Mistakes

Understanding how to identify and correct common butterfly cut errors prevents disappointment and helps salvage less-than-perfect results.
- If layers are too short and stick out awkwardly, avoid cutting more; instead, use styling products to smooth and redirect them.
- Apply smoothing cream or light gel to problem layers and blow-dry them flat against the head until they grow slightly.
- Uneven layers on both sides can be corrected by carefully trimming the longer side to match the shorter side.
- Always work conservatively when self-correcting—you can remove more hair but cannot add it back.
- If the cut appears too heavy despite layering, book an appointment for additional texturizing rather than cutting more length.
- Choppy, disconnected layers result from incorrect sectioning; a professional can blend these by adding transitional layers.
- Too much volume in unintended areas can be tamed with targeted use of smoothing products and precise blow-drying technique.
- If face-framing layers are too short, style them back with the rest of your hair using bobby pins while they grow.
- Consult a professional stylist for major corrections rather than attempting significant fixes at home.
- Prevention is key—always cut conservatively, check symmetry frequently, and stop if unsure about the next step.
29. Butterfly Cut for Special Occasions
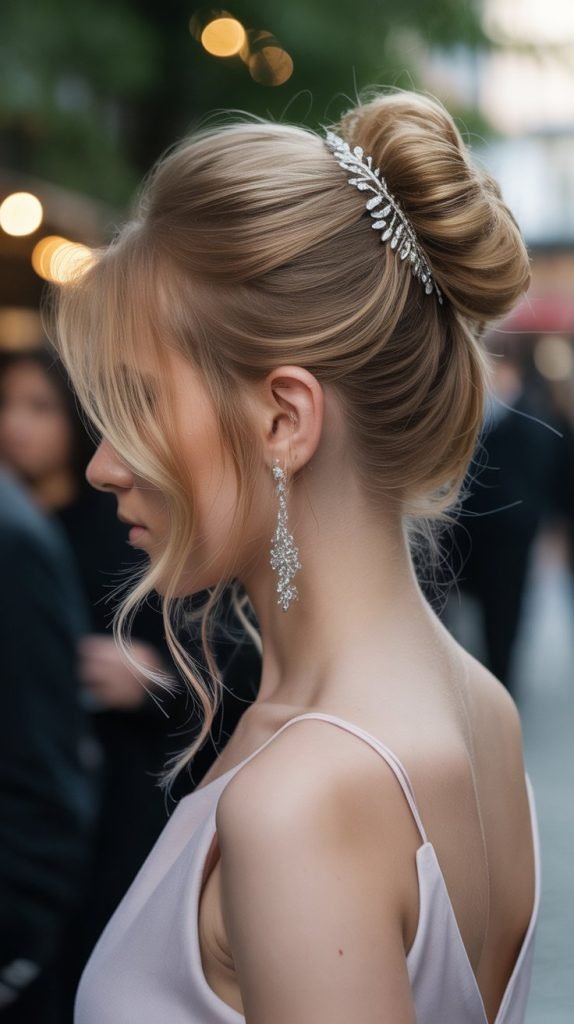
Elevating your butterfly cut for formal events, weddings, or special occasions showcases the cut’s versatility beyond everyday styling.
- Glamorous Hollywood waves created with a large-barrel curling iron highlight the butterfly cut’s dimensional layers dramatically.
- Half-up, half-down styles work beautifully with butterfly cuts, showing off both the face-framing and length simultaneously.
- Pull the top section back into a loose, textured bun or twist while leaving the face-framing layers and lower layers flowing freely.
- Braided crowns or side braids incorporated into butterfly cuts create romantic, ethereal looks perfect for weddings.
- Pin back one side with decorative bobby pins or a jeweled clip to create asymmetry that highlights the layering.
- Sleek, straight styling with a flat iron creates sophisticated elegance, showcasing the cut’s precise lines.
- Voluminous curls pinned loosely at the crown with tendrils framing the face creates timeless formal beauty.
- Add hair accessories like delicate headbands, flowers, or decorative pins that complement the face-framing layers.
- Textured low ponytails with the face-framing layers left out combine casual and elegant aesthetics.
- Light-reflecting hair gloss or shine spray adds red-carpet glamour to any butterfly cut special occasion style.
30. Seasonal Styling Variations for Butterfly Cuts
Adapting your butterfly cut styling to different seasons keeps your look fresh, weather-appropriate, and on-trend throughout the year.
- Summer styling emphasizes natural texture, air-drying, and beachy waves that complement warm weather and outdoor activities.
- Use salt spray and scrunch hair for effortless summer texture that showcases the butterfly cut’s movement.
- Fall calls for richer, more polished styling with smooth blow-outs and deeper, warmer hair tones in the layers.
- Incorporate autumn-appropriate accessories like velvet scrunchies or tortoiseshell clips that complement the season’s aesthetic.
- Winter styling often involves protective techniques like braiding or low buns to shield layers from harsh weather.
- Combat winter dryness with intensive conditioning treatments that keep the ends of layers healthy and shiny.
- Spring invites playful styling experiments—try colorful accessories, temporary color, or fun braiding techniques.
- Lighter highlighting in spring and summer adds sun-kissed dimension to butterfly layers for seasonal brightness.
- Adjust product usage seasonally—lighter products in humid summer months, more moisturizing formulas in dry winter.
- Each season offers opportunities to refresh your butterfly cut’s appearance without changing the actual haircut structure.
31. Butterfly Cut Transformation: Before and After Care
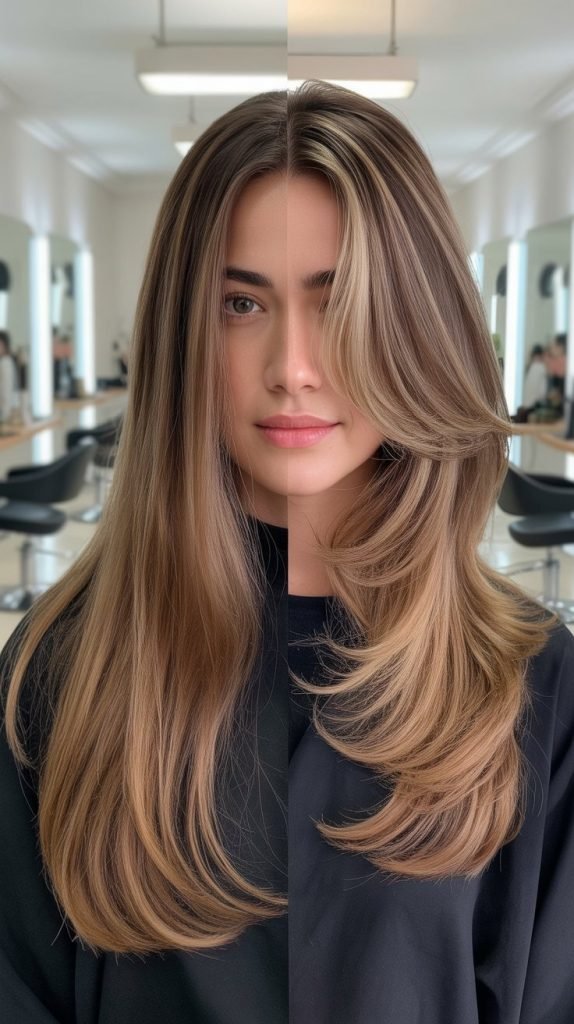
Understanding the dramatic transformation process and caring for newly cut butterfly layers ensures satisfaction and long-term hair health.
- Document your hair before cutting with photos from multiple angles to appreciate the transformation fully.
- Expect an adjustment period of 1-2 weeks as you learn to style your new layers and discover what works best.
- The initial shock of shorter face-framing layers typically gives way to appreciation as you master styling techniques.
- Increased washing frequency may be necessary initially as you experiment with various styling products.
- Your morning routine will change—budget extra time initially until you develop an efficient styling method.
- Hair may feel lighter and more manageable immediately after cutting due to significant weight removal.
- The first professional blow-out shows your butterfly cut’s full potential and provides a styling roadmap to follow.
- Take after photos following your first at-home styling session to track improvement in your technique over time.
- Schedule a follow-up appointment 2-3 weeks after the initial cut to address any concerns or make minor adjustments.
- Celebrate your transformation by experimenting with styles and techniques you couldn’t achieve with your previous haircut.
32. Celebrity-Inspired Butterfly Cut Variations

Drawing inspiration from celebrities who’ve rocked butterfly cuts helps visualize different styling possibilities and personalization options for your own hair.
- Many celebrities have embraced the butterfly cut, each adding their personal style through color, styling, and customization.
- Some opt for heavily textured, choppy versions that create edgy, modern aesthetics perfect for younger demographics.
- Others prefer smoother, more polished butterfly cuts with subtle layering for sophisticated, timeless elegance.
- Bold color choices like platinum blonde or rich chocolate brown on butterfly cuts create striking, memorable looks.
- Mixing the butterfly cut with trending bang styles creates celebrity-worthy, fashion-forward combinations.
- Red carpet styling often showcases the butterfly cut’s versatility through glamorous waves, sleek straight looks, or intricate updos.
- Street style photos reveal how celebrities style their butterfly cuts casually with natural texture and minimal product.
- Use celebrity inspiration as a starting point but customize the cut to suit your face shape, hair texture, and lifestyle.
- Bring reference photos to salon appointments, but communicate clearly about adapting the look to your unique features.
- Remember that celebrity styling often involves professional teams—set realistic expectations for at-home recreation.
33. Combining Butterfly Cut with Other Trending Techniques

Integrating additional cutting and styling techniques with the butterfly cut creates truly customized, contemporary looks that feel fresh and current.
- The “wolf cut” elements—shaggy, heavily textured layers—can be incorporated into butterfly cuts for edgier results.
- Combining face-framing butterfly layers with a V-shaped or U-shaped hemline in the back adds geometric interest.
- Invisible layers cut into the interior of hair add volume without obvious layering, complementing the butterfly’s face-framing focus.
- Money-piece highlighting—bold, contrasting color framing the face—dramatically emphasizes butterfly face-framing layers.
- Feathering techniques at the ends of layers create soft, 70s-inspired texture that modernizes the butterfly cut.
- Razored ends throughout the cut create even more texture and movement than traditional scissor-cutting alone.
- Combining the butterfly cut with a “bottleneck bang” style creates Instagram-worthy, trendy results.
- Asymmetrical variations where one side features shorter layers than the other add contemporary edge.
- Internal channel cutting removes weight without visible layering, perfect for those wanting subtlety with their butterfly cut.
- Discuss combining techniques with your stylist to create a signature look that’s uniquely yours while maintaining the butterfly foundation.
Conclusion
The journey through these 33 Step-by-Step Butterfly Haircut Tutorials for Long Hair has equipped you with comprehensive knowledge to achieve, style, and maintain this stunning, dimensional cut.
From understanding the foundational cutting techniques to mastering various styling methods for different hair types and occasions, you now possess the tools to transform your long hair into a voluminous, face-flattering masterpiece.
Whether you choose to visit a professional stylist armed with specific knowledge about what you want, or carefully attempt DIY methods at home, the butterfly cut offers endless possibilities for customization and personal expression.
Remember that the key to a successful butterfly cut lies in proper sectioning, conservative cutting, and embracing your hair’s natural texture while enhancing it through strategic layering.
As you embark on your butterfly cut journey, be patient with the learning process, experiment with different styling techniques to discover what works best for your lifestyle, and don’t hesitate to seek professional guidance when needed.
Your long hair deserves the movement, dimension, and effortless beauty that the butterfly cut delivers, and with the knowledge gained from these tutorials, you’re fully prepared to make this transformative style your own.