Finding the perfect hairstyle for school when you have curly hair can feel like an endless challenge, but the slickback style offers a sophisticated solution that combines practicality with modern elegance.
33 Sleek Curly Hair Slickback Ideas for School That Look Modern presents a comprehensive collection of styling techniques that transform natural curls into polished, classroom-appropriate looks without compromising your hair’s texture or health.
This article explores everything from basic gel-based slickbacks to creative side-parted variations, low bun combinations, and protective styling methods that keep your curls defined while maintaining a neat appearance throughout the school day.
Whether you have loose waves or tight coils, you’ll discover styling tips, product recommendations, maintenance strategies, and step-by-step techniques that work for different curl patterns and hair lengths.
Get ready to master the art of the curly slickback and never worry about bad hair days at school again.
1. Classic Gel-Based Slickback for Tight Curls
The gel-based slickback remains the foundation of all sleek curly hairstyles, providing maximum hold and shine for students who need their hair to stay perfect from first period to final bell.
This technique works exceptionally well for type 3C to 4C curl patterns where strong hold products can tame frizz while maintaining curl definition at the crown.
- Start with freshly washed, damp hair that’s been treated with a leave-in conditioner to prevent the drying effects of styling gel.
- Apply a generous amount of strong-hold gel (look for products containing flaxseed or aloe vera) from your hairline backward, using a boar bristle brush or fine-tooth comb to smooth the hair flat against your scalp.
- Work in sections, applying gel to each area and immediately brushing it back to ensure even distribution and maximum sleekness.
- Use edge control on your hairline and temples for extra polish, smoothing it with a soft brush or your fingertips in circular motions.
- Secure the slicked-back portion with bobby pins or a hair tie at the nape of your neck, allowing the remaining curls to flow naturally or gathering them into a bun.
- Tie a silk or satin scarf around your hairline for 10-15 minutes to set the style and eliminate any remaining flyaways.
- Finish with a light mist of holding spray to lock everything in place without creating crunchiness or white residue.
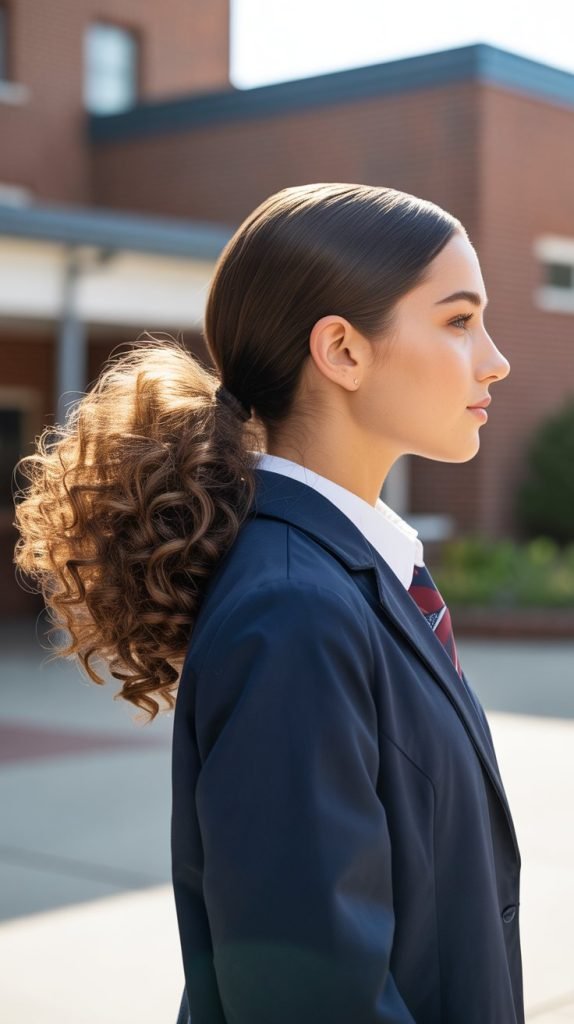
2. Low Bun Slickback with Defined Curl Pattern
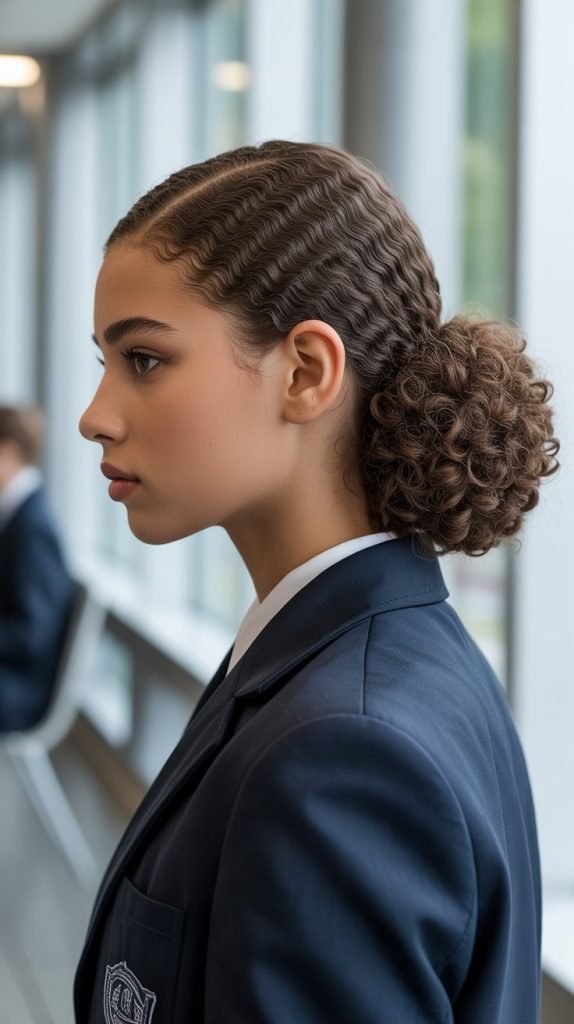
The low bun slickback combines elegance with functionality, making it ideal for school presentations, sports activities, or days when you want a polished look that keeps hair completely off your face and neck.
- Begin by applying a curl-defining cream to damp hair, scrunching it through your curls to enhance their natural pattern before slicking back.
- Use a medium-hold gel or styling cream to smooth the front and sides of your hair backward, leaving enough product flexibility to avoid breakage.
- Gather all your hair at the nape of your neck, twisting it gently to maintain curl definition rather than brushing it out completely.
- Secure the hair with a fabric-covered elastic band that won’t cause tension headaches or damage your curl pattern.
- Arrange the curls into a loose bun by wrapping them around the base of the ponytail, pinning strategically with bobby pins that match your hair color.
- Pull out a few face-framing tendrils if desired for a softer, more approachable look that’s still school-appropriate.
- Apply a small amount of hair oil or shine serum to the bun itself to add dimension and prevent the frizz that can develop throughout the day.
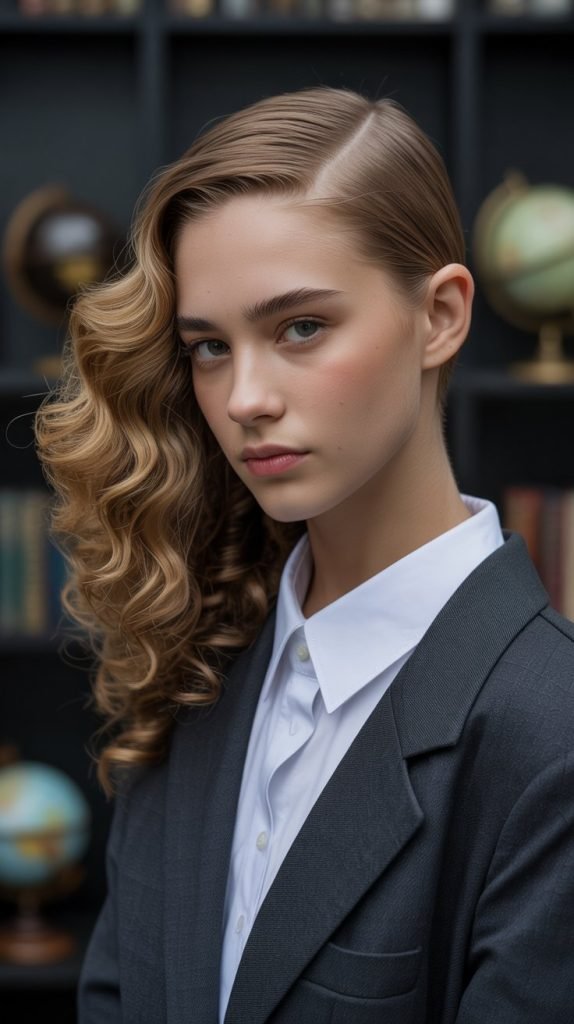
3. Side-Parted Slickback for Loose Waves

The side-parted slickback adds asymmetry and modern sophistication to wavy and loosely curled hair, creating a style that looks effortlessly cool while remaining completely school-dress-code compliant.
- Create a deep side part on damp hair using the end of a rat-tail comb, positioning it approximately two inches from your natural part for maximum impact.
- Apply a smoothing cream or light gel to the heavier side of the part, slicking it back and across your head toward the opposite ear.
- Use a paddle brush or your fingers to guide the hair smoothly, following the natural direction of your wave pattern rather than fighting against it.
- Secure the slicked-back section behind your ear with bobby pins in an X-formation for invisible hold that lasts all day.
- Allow the lighter side of the part to fall naturally over your forehead and temple, creating soft face-framing waves.
- Apply a curl-enhancing mousse to the lengths of your hair to define the wave pattern and add body.
- Set the part by running a straightening iron along the parted section on low heat if needed for extra sleekness, always using heat protectant first.
4. High Ponytail Slickback with Curl Volume
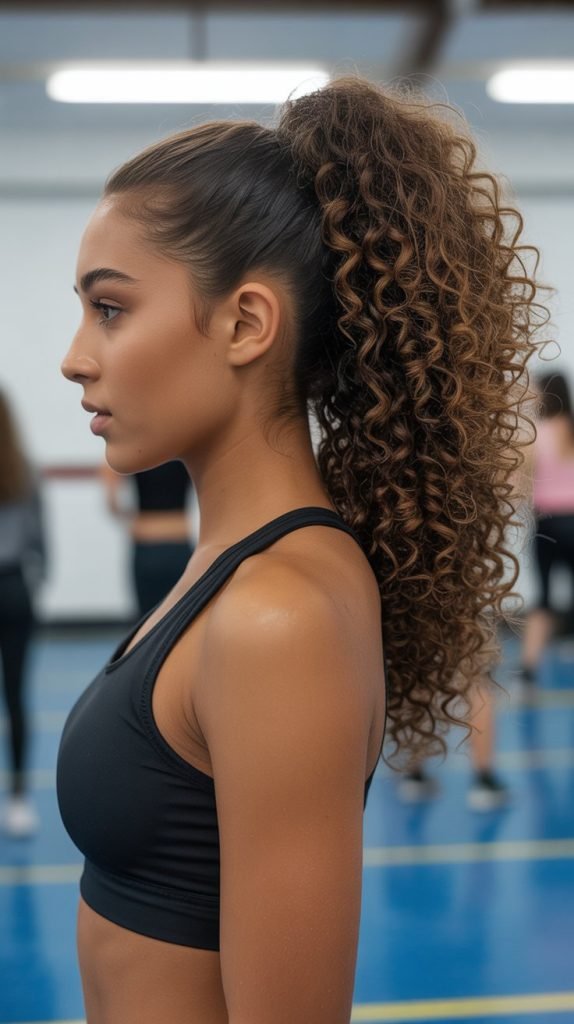
The high ponytail slickback elevates your curls literally and figuratively, creating a youthful, energetic look that’s perfect for active school days while showcasing your natural curl volume.
- Flip your head upside down and gather all your hair at the crown of your head, brushing or smoothing it upward with your hands to avoid bumps.
- Apply gel or edge control to your hairline, temples, and the sides of your head, smoothing firmly with a brush to create that signature sleek appearance.
- Secure the ponytail with a strong elastic band, wrapping it multiple times to ensure it stays put during physical education classes or after-school activities.
- Fluff the curls in the ponytail by gently separating them with your fingers, adding volume without creating frizz.
- Use a curling cream or leave-in conditioner on the ponytail curls to refresh and define them, scrunching gently to encourage the curl pattern.
- Wrap a small section of hair from the ponytail around the elastic band to hide it, securing the end with a bobby pin underneath.
- Spray the slicked portions with a flexible-hold hairspray to maintain the sleekness while allowing the ponytail curls to move naturally.
5. Braided Crown Slickback Combination
The braided crown slickback merges two trending styles into one school-friendly look that adds artistic detail to your slicked-back curls while providing extra security for long school days.
- Section off a two-inch wide strip of hair from your hairline, creating a curved line that follows the shape of your head from one temple to the other.
- Apply gel to the remaining hair and slick it back into a low ponytail or bun, securing it firmly at the nape.
- Divide the front section into three equal parts and begin a Dutch braid (underhand braiding) that sits raised on top of your head like a crown.
- Continue braiding along your hairline from temple to temple, adding small sections of hair as you go to create a cornrow effect.
- Secure the end of the braid with a clear elastic band and tuck it behind your ear or into the slicked-back section.
- Use edge control on any remaining flyaways around the braid and at your hairline for a polished finish.
- Finish with a light oil spray that adds shine without weighing down the braided section or making the slicked areas look greasy.
6. Wet-Look Slickback for Maximum Shine
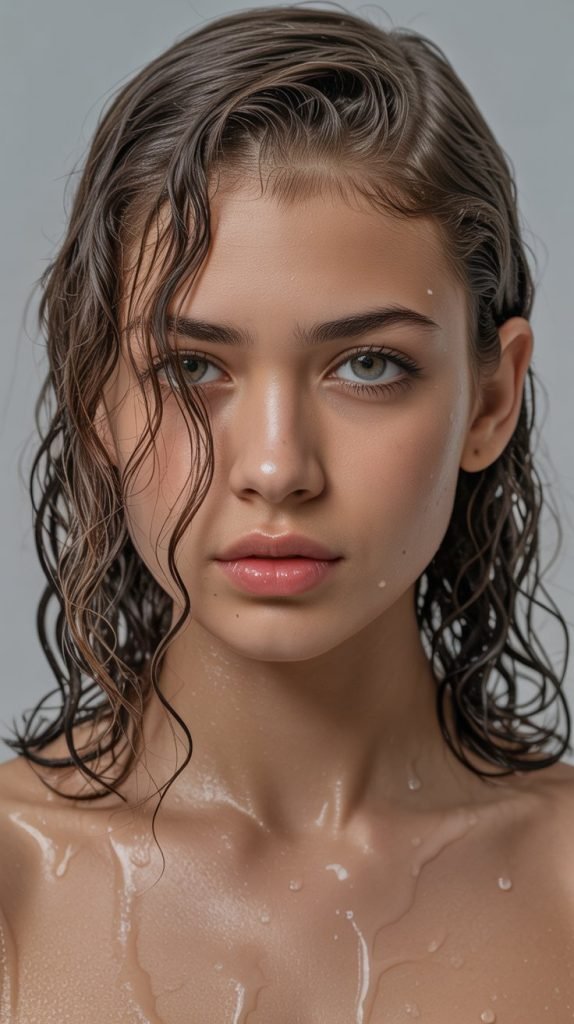
The wet-look slickback creates a bold, fashion-forward statement that works beautifully for school events, picture day, or whenever you want your curly hair to make a memorable impression.
- Work with soaking wet hair rather than damp hair to achieve the authentic wet-look aesthetic that defines this style.
- Apply a generous amount of wet-look gel or pomade, distributing it evenly from roots to ends with your fingers or a wide-tooth comb.
- Smooth the hair back with your hands, pressing firmly against your scalp to eliminate any texture or volume at the roots.
- Use a fine-tooth comb to create defined lines and sections if desired, enhancing the graphic quality of the wet look.
- Allow your curls to clump together naturally at the back rather than separating them, which enhances the wet appearance.
- Do not disturb the hair as it air-dries—touching it will disrupt the gel cast and create unwanted frizz.
- Once completely dry, you can gently scrunch the ends to soften the cast slightly while maintaining the wet-look shine near your scalp.
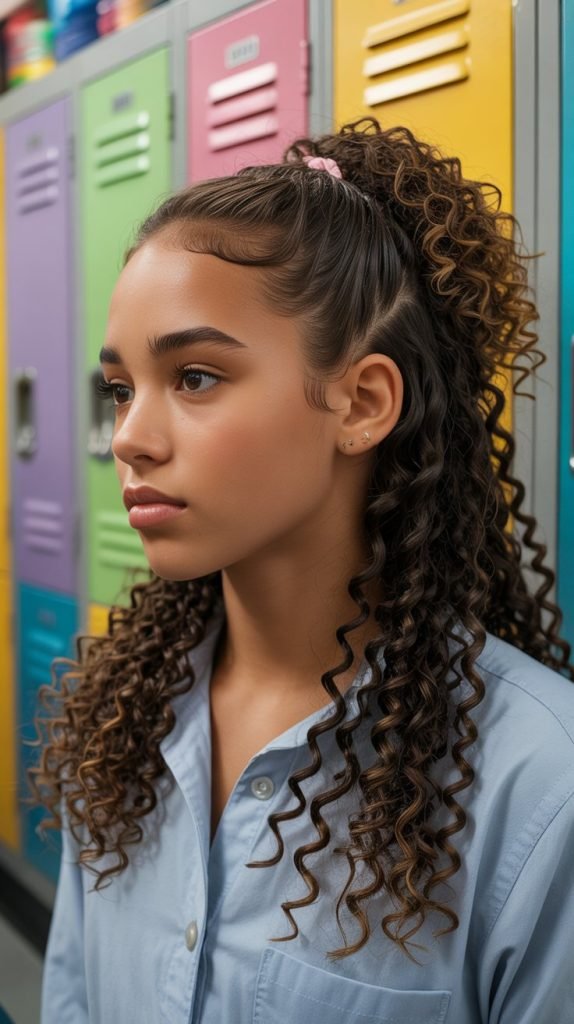
7. Half-Up Half-Down Slickback Style
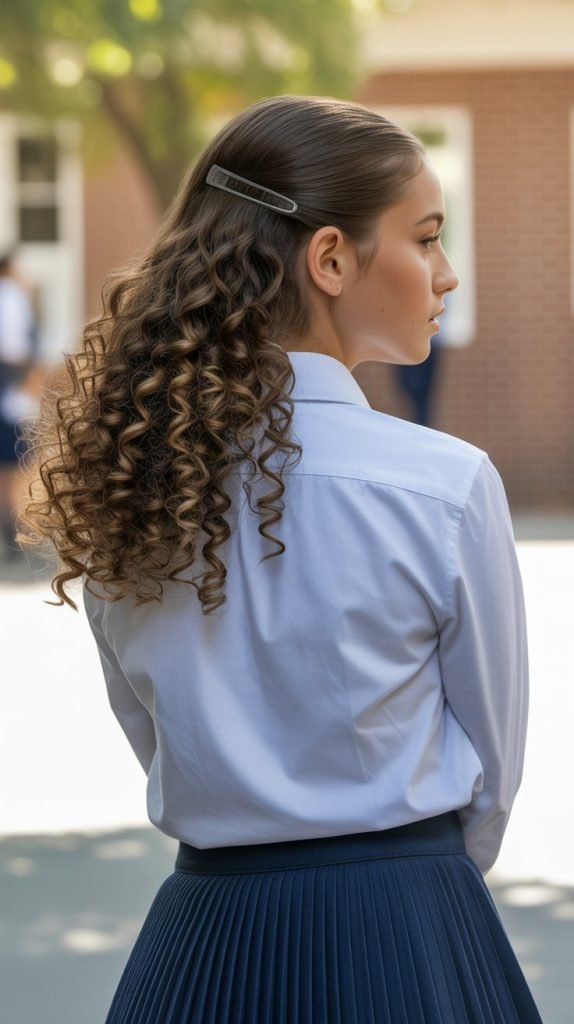
The half-up half-down slickback offers the best of both worlds—a neat, polished top section that keeps hair off your face during classes combined with the beauty of loose curls flowing down your back.
- Divide your hair horizontally from ear to ear, creating a clear separation between the top and bottom sections.
- Apply smoothing cream or gel to the top section only, slicking it back with a brush or your hands from the hairline to the crown.
- Gather the slicked top section at the crown and secure it with an elastic band, leaving the ends loose or tucking them into a small bun.
- Leave the bottom section completely loose, applying a curl-defining product to enhance and separate the natural curl pattern.
- Use edge control around your hairline and part to ensure the slicked section looks intentionally smooth rather than accidentally messy.
- Create texture contrast by ensuring the top is very smooth while the bottom remains voluminous and textured.
- Finish by using a light hairspray on the slicked portion only, leaving the lower curls soft and touchable.
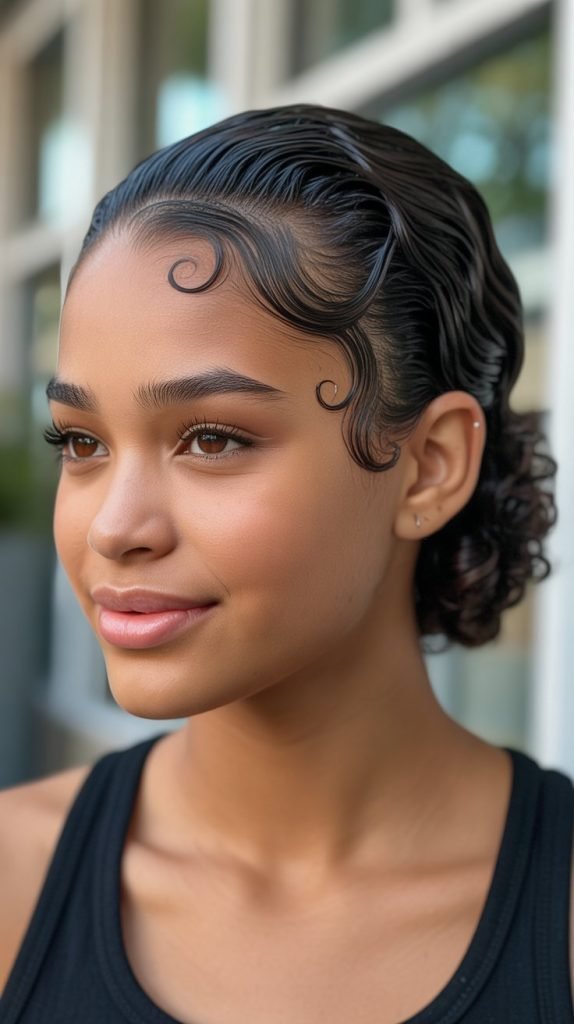
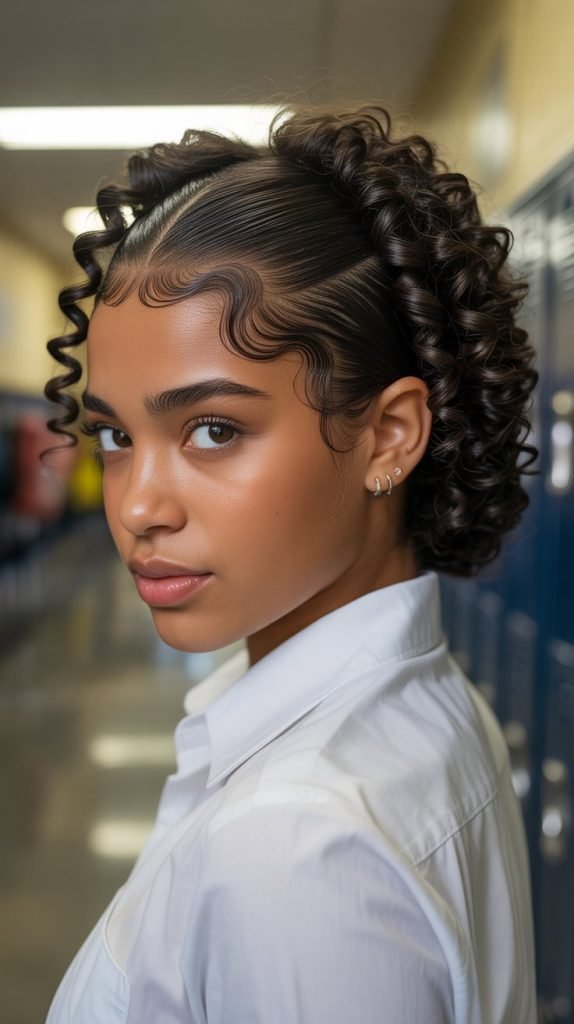
8. Textured Slickback with Finger Waves
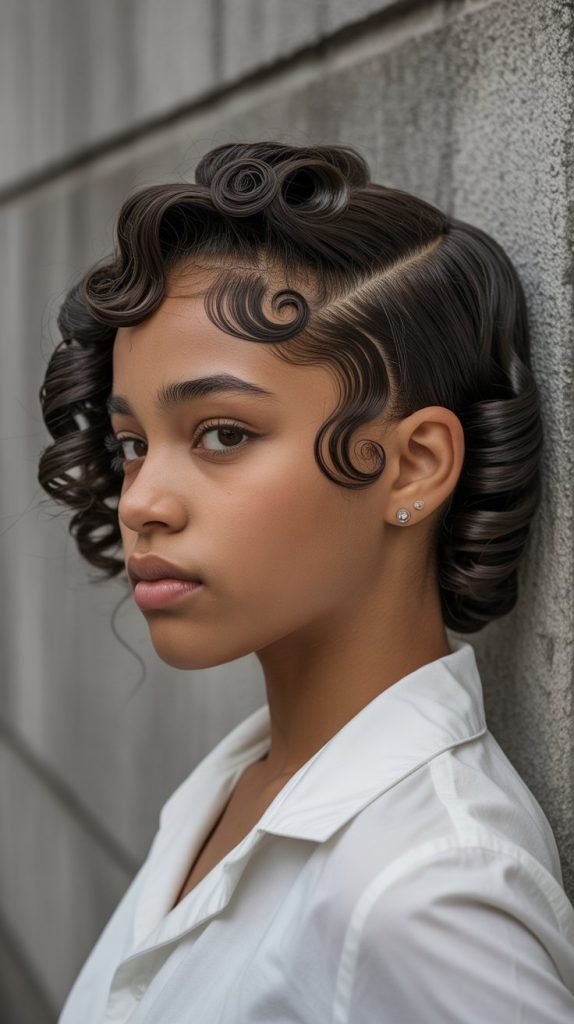
The textured slickback with finger waves adds vintage glamour to modern curly styling, creating S-shaped waves along your hairline that transition into slicked-back curls for a truly unique school look.
- Apply strong-hold gel to damp hair in the front section, saturating it completely to allow for wave manipulation.
- Place your index and middle fingers flat against your scalp near the hairline, pushing the hair forward to create the first curve of the S-shape.
- Move your fingers about an inch back and push in the opposite direction, forming the reverse curve of the wave.
- Continue this pattern for two to three waves along your hairline, using clips to hold each wave in place as you work.
- Slick the remaining hair back smoothly with gel, brushing it flat against your head and securing it at the nape.
- Leave the finger wave clips in place for at least 30 minutes or until the gel has completely dried and set.
- Remove clips carefully and apply a shine spray to enhance the glossy, sculpted appearance of the waves.
9. Sleek Center Part with Slicked Sides
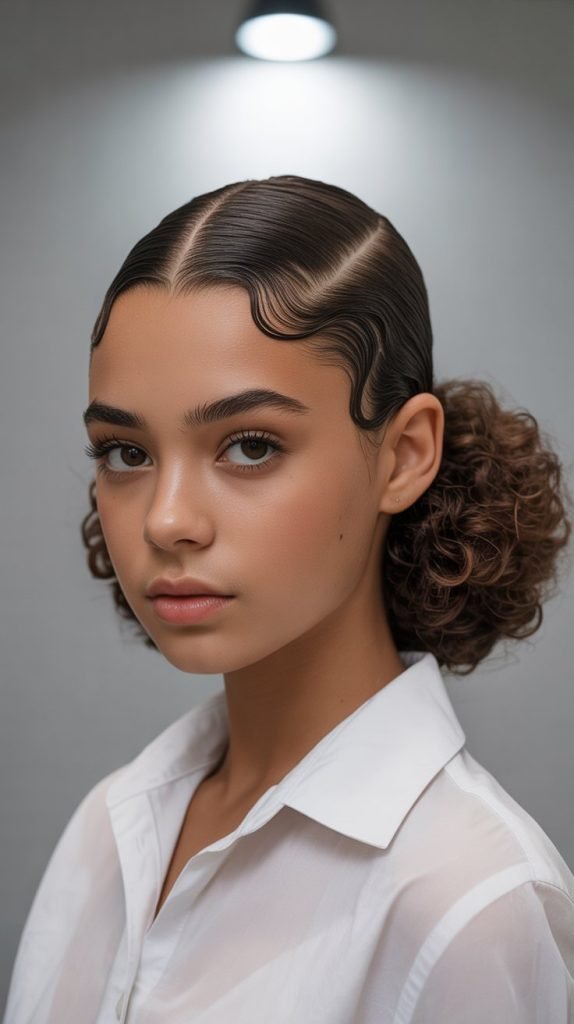
The center part slickback creates perfect symmetry and works exceptionally well for heart-shaped and oval faces, offering a balanced look that’s sophisticated enough for school presentations or club photos.
- Create a precise center part from your forehead to the crown using a rat-tail comb, ensuring both sides are exactly equal.
- Apply gel or pomade to both sides simultaneously, working in small sections to ensure even coverage and smooth application.
- Use a boar bristle brush to smooth each side back toward your ears, creating a flat, sleek surface that hugs the shape of your head.
- Secure the hair behind your ears with bobby pins or allow it to naturally fall back if it’s long enough.
- Apply edge control along the center part itself using a small brush or toothbrush for crisp, clean definition.
- Style the back section of your hair into a ponytail, bun, or leave it loose depending on your preference and school’s dress code.
- Set the style with a medium-hold hairspray that won’t flake or leave white residue on dark hair.
10. Slickback with Twist-Out Ends
The slickback with twist-out ends combines sleek sophistication at the roots with textured, defined curls at the length, creating dimensional interest that photographs beautifully for school events.
- Start with day-old twist-out hair that already has defined, separated curls from your previous styling session.
- Apply gel only to the roots and mid-shaft of your hair, carefully avoiding the twisted ends to preserve their texture.
- Brush or smooth the gelled section back, working carefully to avoid disturbing the twist-out pattern at the ends.
- Gather the hair at your desired height (low, mid, or high) and secure it loosely to maintain the volume of the twist-out.
- Unravel any additional twists if you want more volume and fullness in the loose section.
- Use your fingers to gently separate and fluff the twist-out ends without creating frizz, adding curl cream if needed for definition.
- Spray the slicked section only with hairspray, keeping the twist-out ends product-free for natural movement and bounce.
11. Slicked-Back Faux Hawk for Curly Hair

The curly faux hawk slickback brings edgy, modern style to school while remaining appropriate for dress codes, concentrating volume at the center of the head while keeping the sides sleek and controlled.
- Section your hair into three parts: a wide center strip from forehead to nape, and two side sections from temples to behind the ears.
- Apply strong-hold gel to both side sections, slicking them down flat against your head using a firm brush or comb.
- Leave the center section unstyled or apply a volumizing mousse to enhance the natural curl height and create contrast.
- Use bobby pins to secure the slicked sides if needed, placing them vertically along the transition line between slicked and voluminous sections.
- Fluff and pick out the center curls to maximize height, creating that distinctive mohawk-inspired silhouette.
- Apply edge control to your hairline and the edges where the slicked sides meet the center volume for clean definition.
- Finish with a strong-hold hairspray focused on the sides while leaving the center section flexible and touchable.
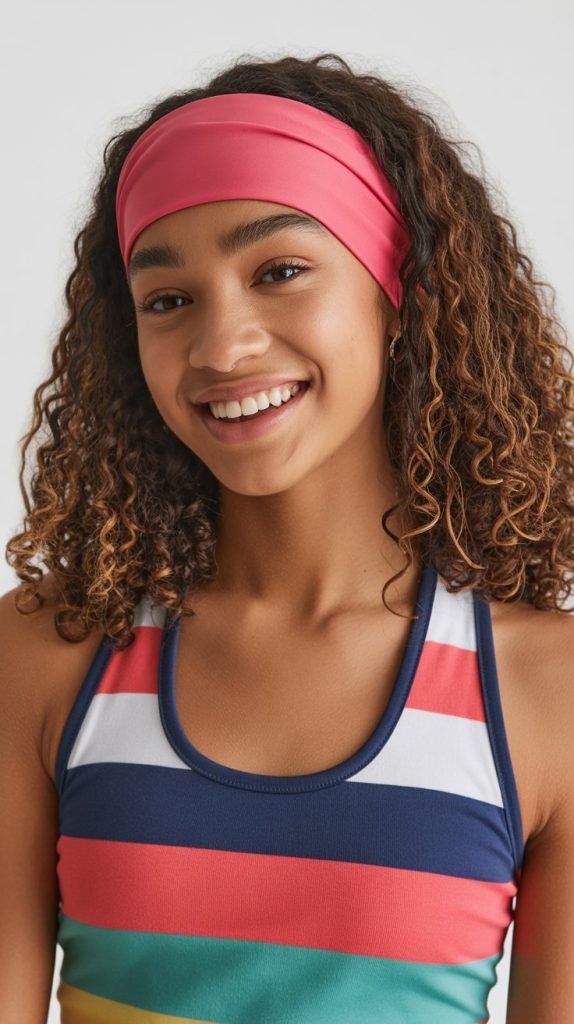
12. Slickback with Bandana or Headband Accent
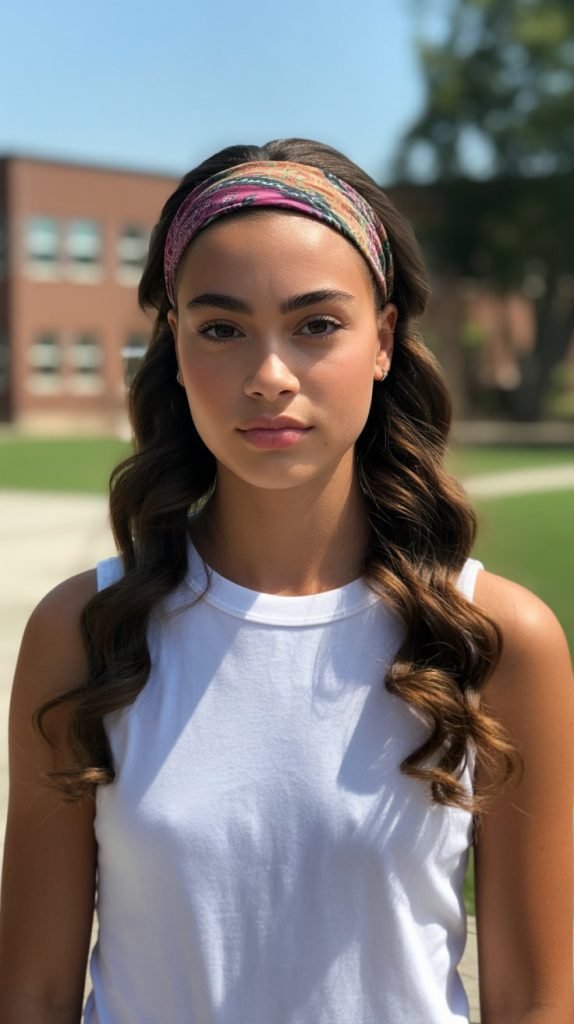
Adding a bandana or decorative headband to your slickback transforms a simple style into a personalized statement piece that shows school spirit or expresses your individual aesthetic.
- Slick your hair back using your preferred method and product, creating a smooth base that will support the accessory.
- Choose a bandana, headband, or scarf that complements your school uniform or personal style, folding it to your desired width.
- Position the accessory approximately one to two inches behind your hairline, ensuring it sits comfortably without causing tension headaches.
- Tie or secure the accessory at the nape of your neck, tucking the ends under for a polished look or letting them hang for casual style.
- Adjust any curls that were displaced by the accessory, fluffing them back into position with your fingers.
- Use the accessory strategically to hide any areas where your slickback might be less smooth or to cover a part line you’re not happy with.
- Ensure the accessory is school-appropriate in color and style, avoiding anything too flashy or distracting for classroom environments.
13. Low Manipulation Slickback for Hair Health
The low manipulation slickback prioritizes hair health and curl pattern preservation while still achieving a neat, school-appropriate appearance, making it ideal for students committed to their natural hair journey.
- Use only your fingers to smooth hair back rather than brushes or combs that can cause breakage and frizz.
- Apply a creamy, moisturizing styler instead of alcohol-based gels that can dry out your curls over time.
- Gather hair gently at the nape without pulling or creating tension that could lead to traction alopecia around the hairline.
- Secure with silk or satin scrunchies that won’t snag or damage the hair shaft like traditional elastic bands.
- Allow the front section to have some texture rather than forcing it completely flat, which reduces stress on the hair follicles.
- Avoid edge control with harsh chemicals, opting instead for natural alternatives like aloe vera gel or flaxseed gel.
- Remove the style gently at the end of the school day, never sleeping in tight slickbacks that can damage your hairline overnight.
14. Slickback with Bubble Ponytail Detail
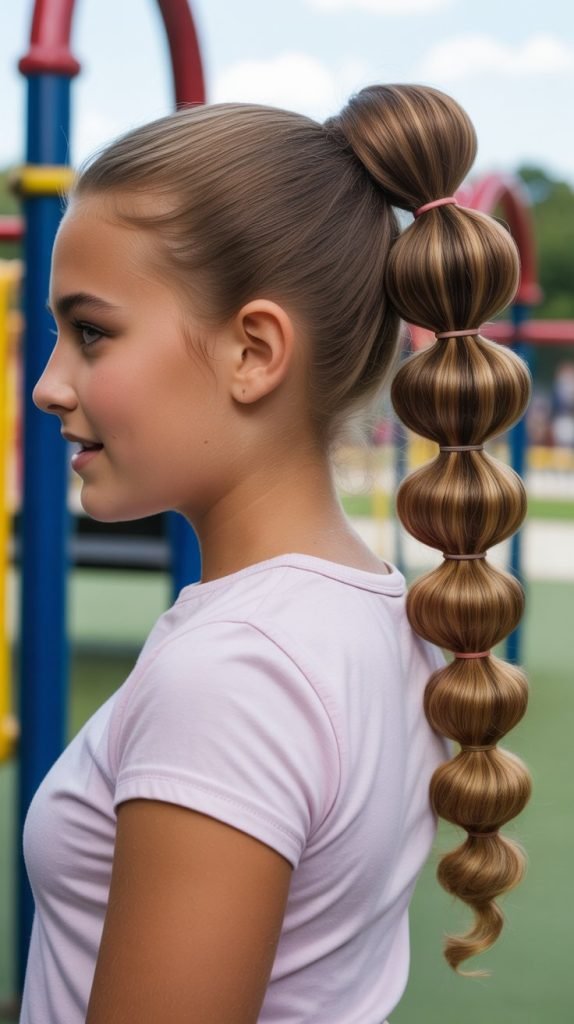
The bubble ponytail slickback adds playful dimension to the classic style while keeping hair secure and creating visual interest that works beautifully for school spirit days or casual Fridays.
- Create a standard slickback by smoothing gel through your hair and gathering it into a high or mid-level ponytail.
- Secure the base ponytail with a strong elastic band, ensuring it’s tight enough to hold but not so tight it causes discomfort.
- Measure approximately two to three inches down the ponytail and add another elastic band, creating the first bubble section.
- Gently pull and tease the hair between the two elastic bands outward to create a rounded bubble shape.
- Continue adding elastic bands every few inches down the length of the ponytail, creating multiple bubble sections.
- Fluff each bubble individually by pulling the hair gently at the sides, maintaining the curl definition while creating volume.
- Finish with a light hairspray mist over the entire ponytail to help the bubbles hold their shape throughout the school day.
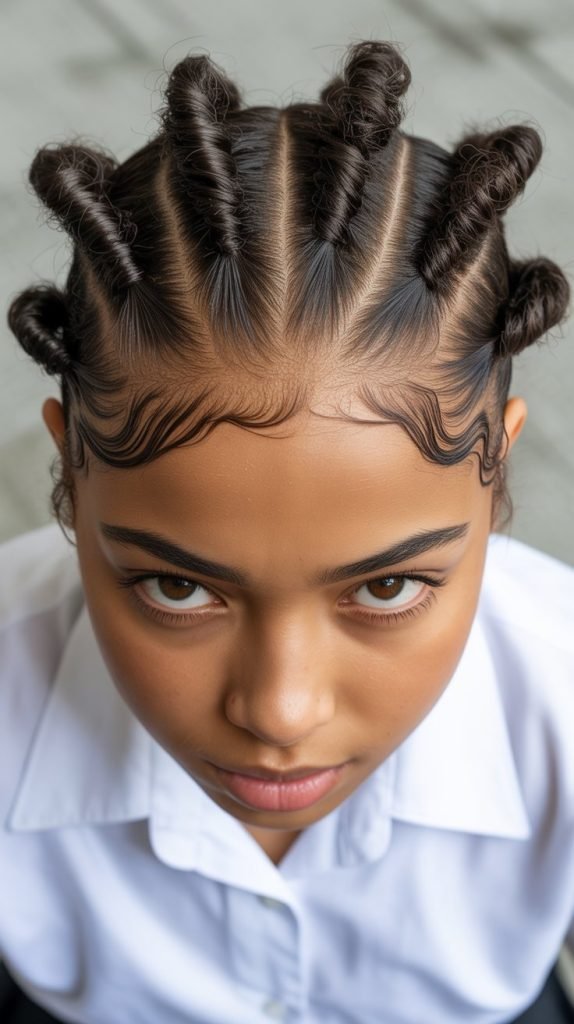
15. Slickback with Baby Hairs Styled
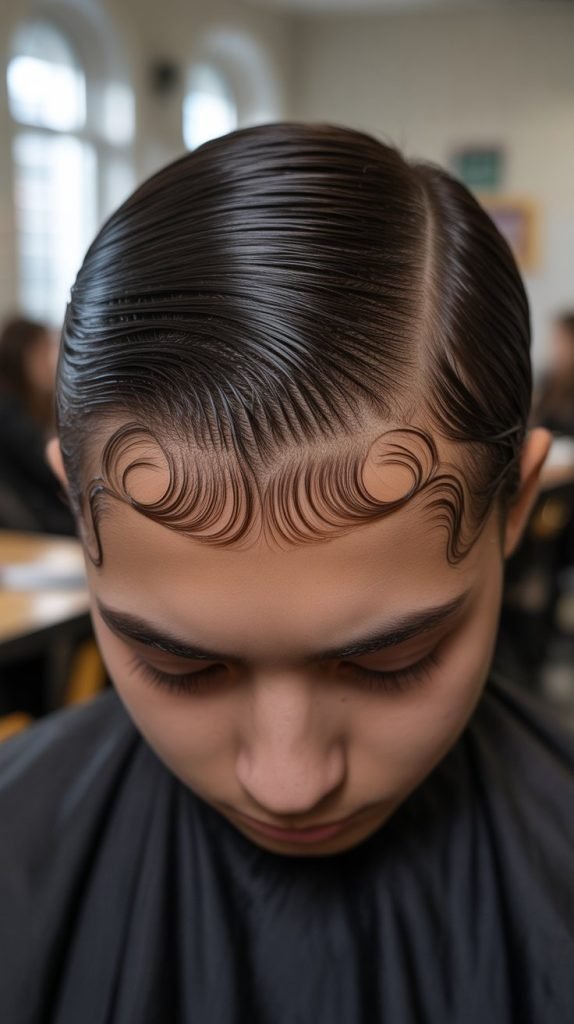
Intentionally styled baby hairs transform a simple slickback into an artful expression of personal style while maintaining the neat, polished aesthetic required for school environments.
- Complete your basic slickback first, ensuring the main body of hair is smoothly secured before focusing on the hairline details.
- Apply a small amount of strong-hold edge control to your baby hairs using a precision applicator or clean toothbrush.
- Create patterns with your baby hairs such as gentle waves, swirls, or soft curves that follow your natural hairline.
- Use the edge of the brush to define specific shapes, wiping excess product off the brush frequently to maintain control.
- Keep baby hair designs relatively subtle and symmetrical for school appropriateness, avoiding overly elaborate patterns that might be distracting.
- Allow the edge control to dry completely before touching the styled baby hairs or putting on headphones or hats.
- Carry edge control and a small brush in your backpack for touch-ups between classes if needed, especially on humid days.
16. Double Bun Slickback Style

The double bun slickback creates a youthful, trendy look that’s equal parts cute and practical, keeping all your hair secured while adding visual interest through the dual bun placement.
- Divide your slicked-back hair into two equal sections by creating a center part from forehead to nape.
- Secure each section into a ponytail at your desired height—high on the head for a playful look or lower for more sophistication.
- Twist each ponytail around its base, wrapping the hair into a bun shape and securing with bobby pins.
- Ensure both buns are the same size and positioned symmetrically for a balanced, intentional appearance.
- Smooth any remaining flyaways with edge control and a small brush, paying special attention to the center part area.
- Adjust the tightness of each bun based on your comfort level and how long you need the style to last.
- Add small hair accessories like pins or clips to the buns if desired, keeping them school-appropriate in size and color.
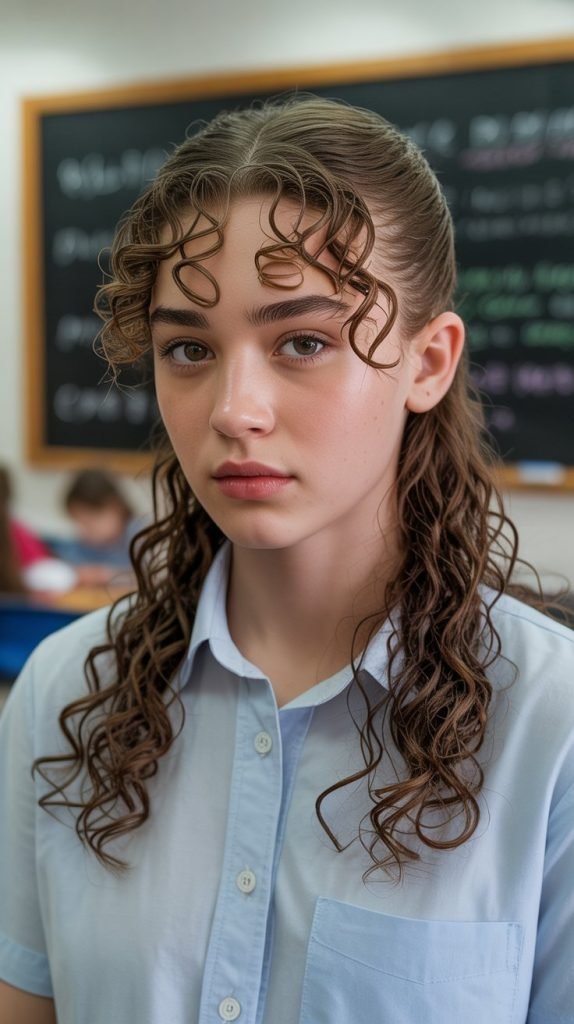
17. Slickback with Loose Curtain Bangs

The curtain bangs slickback softens the severity of a fully slicked style by leaving face-framing pieces loose, creating a more approachable look while maintaining overall polish and neatness.
- Create a triangular section at the front of your hairline, with the point of the triangle at your center part and the base along your hairline.
- Leave this front section completely unstyled while applying gel to the remaining hair and slicking it back as usual.
- Part the front section down the center and allow each side to fall naturally forward, framing your face like curtains.
- Apply a lightweight curl cream to the curtain bang sections to enhance their natural wave or curl pattern without weighing them down.
- Smooth the slicked-back sections that immediately border the curtain bangs to create clean definition between styled and loose sections.
- Trim the curtain bangs if needed so they fall no longer than cheekbone length, keeping them out of your eyes during class.
- Use a light texturizing spray on just the curtain bang sections for piece-y definition and movement.
18. Sleek Top Knot for Curly Hair
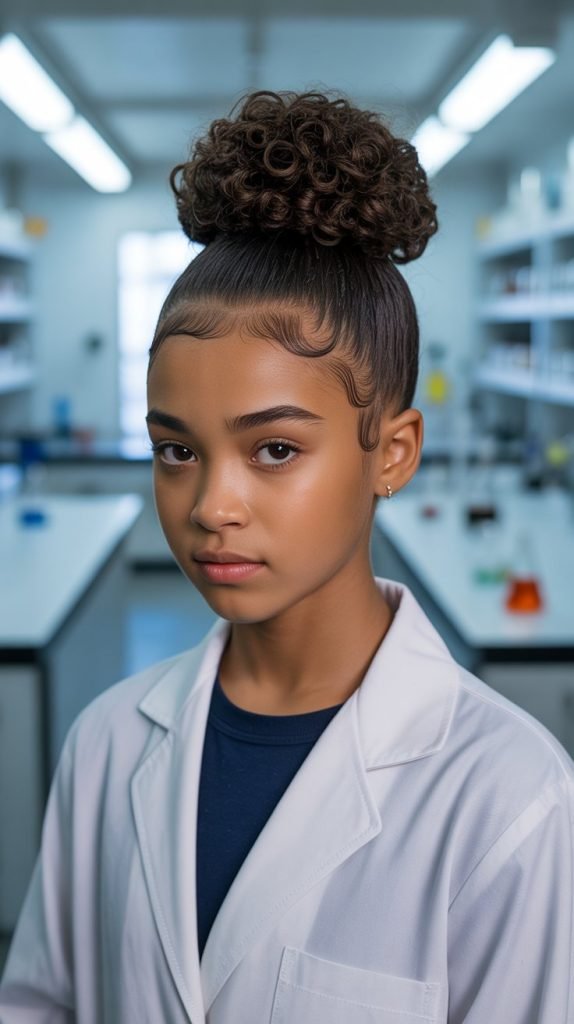
The top knot slickback delivers maximum security and a clean silhouette that’s perfect for laboratory classes, art projects, or any school activity where you need hair completely out of the way.
- Apply gel throughout your hair and brush or smooth it all toward the highest point of your head, where your skull begins to curve backward.
- Gather all hair at this point and secure it tightly with a strong elastic band, creating a ponytail that stands upright.
- Twist the entire ponytail around itself, wrapping it in a spiral motion around the base of the elastic.
- Tuck the ends of your hair under the wrapped bun and secure with multiple bobby pins placed in different directions for maximum hold.
- Smooth any bumps or imperfections in the slicked section by applying more gel and brushing gently.
- Wrap a thin strip of hair from the bun around the elastic band to conceal it, pinning the end underneath for a polished finish.
- Apply strong-hold hairspray in a circular motion around the entire head to set everything in place for all-day wear.
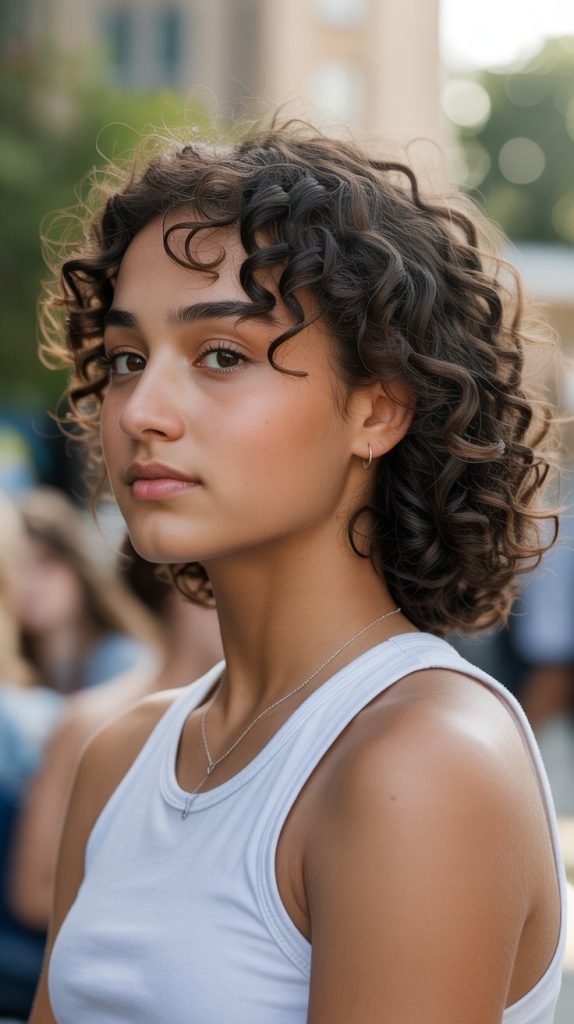
19. Slickback with Cascading Ringlets
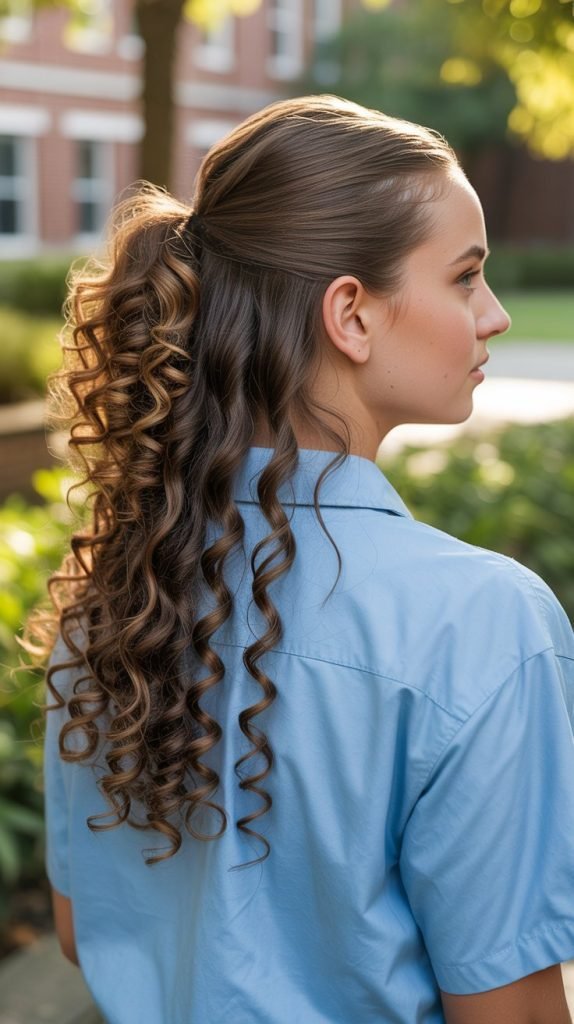
The cascading ringlets slickback showcases the beauty of well-defined curls while keeping the top section neat and school-appropriate, creating a style that’s both polished and romantically feminine.
- Apply curl-defining cream to your entire head first, scrunching it through your curls to enhance their natural pattern and create uniform ringlets.
- Allow the curls to air-dry or diffuse until they’re about 80% dry before applying gel to the top section only.
- Smooth the front and crown area back with gel, leaving all the length loose to cascade down your back or over your shoulders.
- Use a small amount of edge control around your hairline for extra sleekness in the slicked section.
- Separate individual ringlets gently with your fingers if they’ve clumped together too much, creating distinct curl definition.
- Apply a light oil or serum to the ringlets for added shine and frizz control without disrupting the curl pattern.
- Secure the slicked-back portion with a few well-placed bobby pins if needed, but avoid creating a ponytail that would disrupt the cascading effect.
20. Protective Style Slickback with Braided Ponytail
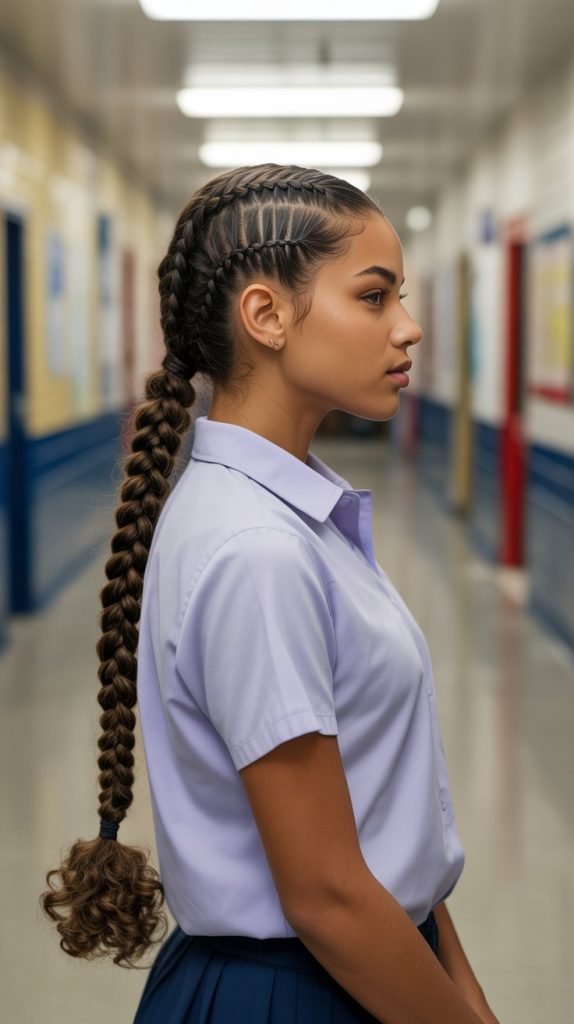
The braided ponytail slickback serves as an excellent protective style that reduces daily manipulation while maintaining a sleek, student-appropriate appearance that can last for several days.
- Slick all your hair back into a secure ponytail at your preferred height using gel and a boar bristle brush.
- Divide the ponytail into three equal sections for a standard three-strand braid or smaller sections for more intricate braiding patterns.
- Braid the entire length of the ponytail, keeping consistent tension throughout to create uniform, neat plaits.
- Secure the end of the braid with a small elastic band, leaving a few inches of curly ends loose if desired for a softer look.
- Apply edge control to your hairline and use a silk scarf to lay your edges for 15-20 minutes.
- Sleep with a silk or satin bonnet or scarf at night to preserve the style and protect your hairline from friction.
- Refresh the slicked section each morning with a small amount of water and edge control rather than completely redoing the style.
21. Asymmetrical Slickback with Volume on One Side
The asymmetrical slickback creates artistic imbalance that’s fashion-forward yet appropriate for school, slicking one side completely flat while allowing volume and texture on the opposite side.
- Create a deep side part that extends from your hairline to the crown, positioning it about three inches from your natural center part.
- Apply gel to the smaller section created by the part, slicking it completely flat against your head and securing it behind your ear with bobby pins.
- Leave the larger section on the opposite side completely voluminous, applying mousse or curl cream to enhance its natural body.
- Use your fingers to position the volumized side forward over your shoulder or allow it to cascade down your back.
- Create maximum contrast between the sleek side and the voluminous side by really emphasizing the flatness of the slicked portion.
- Apply edge control along the part line itself to make it appear crisp and intentional rather than accidental.
- Finish with hairspray on the slicked side only, leaving the voluminous side soft and touchable with natural movement.
22. Slickback with Twisted Side Sections
The twisted side sections slickback adds intricate detail to a classic style, incorporating rope twists along the temples that create visual interest while keeping hair secure and school-appropriate.
- Section off a two-inch strip of hair along each temple, from your hairline back to your ear on both sides.
- Apply gel to the remaining hair and slick it back into your preferred ponytail or bun placement.
- Divide one temple section into two equal strands and twist them around each other in a rope twist, adding more hair as you work backward toward your ear.
- Secure the twist behind your ear with bobby pins, integrating it into the slicked-back section.
- Repeat the twisting process on the opposite side, ensuring both twists are symmetrical in size and placement.
- Apply edge control along your hairline and the path of the twists for enhanced definition and shine.
- Finish with a light holding spray over the entire style, paying special attention to the twisted sections that may loosen throughout the day.
23. Slickback with Pineapple Updo
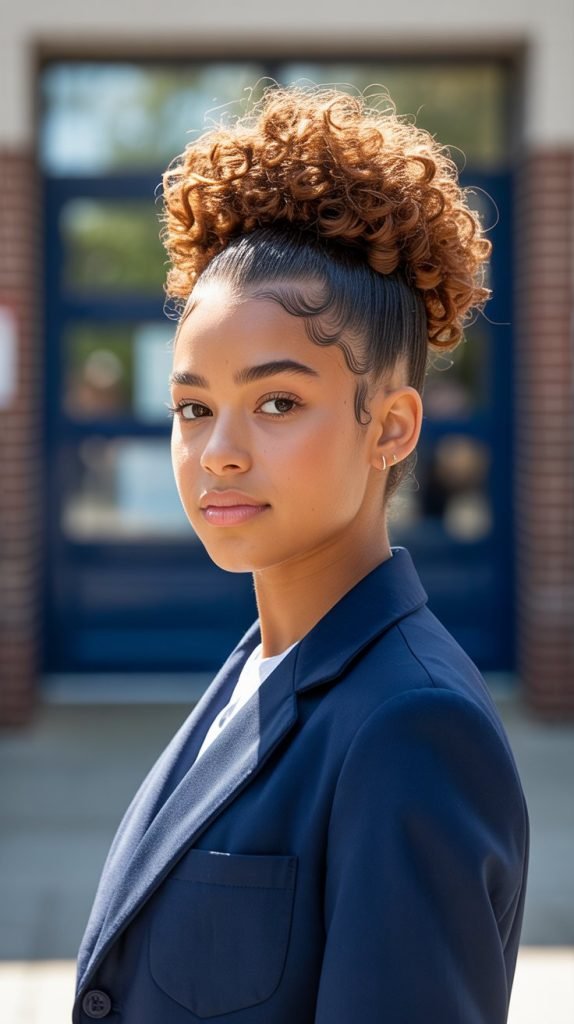
The pineapple updo slickback positions your curls at the very top of your head, maximizing volume while keeping the sides and back sleek, creating a dramatic silhouette that’s perfect for school events.
- Flip your head upside down and gather all your hair at the very top of your head using your hands rather than a brush to maintain curl integrity.
- Apply gel to the sides and back of your head only, smoothing those sections up toward the gathering point at your crown.
- Secure the gathered hair with a fabric scrunchie or elastic band, positioning it so the curls fountain forward over your forehead.
- Use bobby pins to secure the slicked sides if they feel loose or don’t stay flat against your head naturally.
- Fluff the pineapple curls by separating them gently with your fingers, creating a full, rounded shape at the top.
- Apply curl refresher spray or water with leave-in conditioner to revive any curls that look flat or undefined in the pineapple.
- Use edge control around your hairline, particularly at the temples and nape where baby hairs tend to escape throughout the day.
24. Slickback with Low Twisted Bun
The low twisted bun slickback offers elegant sophistication perfect for school concerts, presentations, or formal events, combining sleek sides with an intricate twisted bun detail at the nape.
- Slick all your hair back with gel, gathering it at the nape of your neck and securing it with an elastic band to create a low ponytail base.
- Divide the ponytail into two or three equal sections depending on how intricate you want the twisted bun to appear.
- Twist each section individually into a tight rope, then wrap all the twisted sections around the base of the ponytail in a circular motion.
- Tuck the ends under the bun and secure with multiple bobby pins placed strategically to hold the weight of your curls.
- Pull gently on different sections of the bun to create fullness and dimension, making it appear more elaborate.
- Smooth the slicked sections one final time with a small amount of gel on your hands, ensuring no flyaways have escaped.
- Finish with a flexible-hold hairspray that won’t make the bun stiff or crunchy but will help maintain its structure through a full school day.
25. Sleek Side Ponytail Slickback
The side ponytail slickback brings playful asymmetry to your school look, positioning all your hair to one side while maintaining the sleek, polished aesthetic of a traditional slickback.
- Apply gel throughout your hair and use a paddle brush to direct everything to one side of your head, choosing whichever side feels most comfortable.
- Secure the ponytail at ear level or just below, positioning it closer to the front than the back for maximum visibility of your curls.
- Smooth the opposite side of your head extra carefully since it will be the most visible when viewing your hairstyle from the front.
- Apply edge control around your entire hairline, paying special attention to the side where hair crosses from one side to the other.
- Use your fingers to arrange the curls in the ponytail so they cascade forward over your shoulder rather than hanging down your back.
- Add shine serum or oil to the ponytail for extra gloss and frizz control throughout the day.
- Secure any loose pieces that don’t reach the ponytail with bobby pins that match your hair color, camouflaging them against the slicked surface
26. Slickback with Curl-Defining Gel Cast
The gel cast slickback maximizes curl definition while achieving sleekness, creating a style where your curls are both controlled and beautifully defined, perfect for students who want the best of both worlds.
- Apply a generous amount of curl-defining gel to soaking wet hair, using the “praying hands” method to smooth it from roots to ends.
- Use a denman brush or your fingers to create curl clumps, encouraging your natural curl pattern to form distinct spirals.
- Slick the front section back with additional gel, smoothing it against your scalp while leaving the curl clumps intact in the back sections.
- Allow the hair to air-dry completely without touching it, which forms a protective gel cast around each curl that prevents frizz.
- Once fully dry, gently scrunch the curls to break the crunchy cast, revealing soft, defined spirals underneath.
- Leave the slicked front section with its cast intact for maximum hold and shine throughout the school day.
- Apply a light oil to your palms and smooth over the surface of the curls to add shine without disturbing the definition.
27. Retro-Inspired Slickback with Victory Rolls
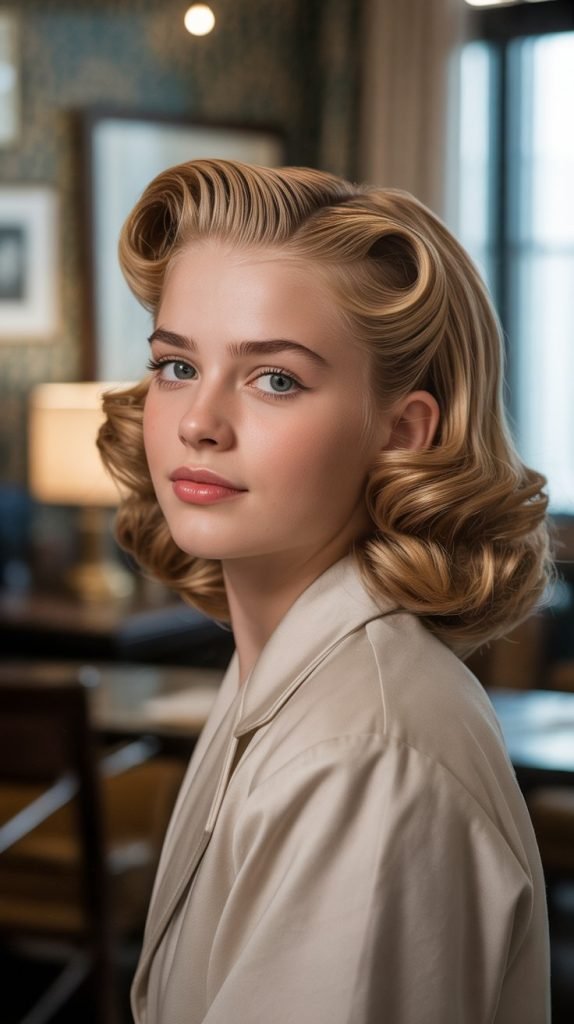
The victory rolls slickback incorporates vintage glamour into modern curly styling, creating rolled sections at the front that add height and drama while the rest remains sleekly controlled.
- Section off the front portion of your hair from temple to temple, creating a strip approximately three inches wide.
- Apply strong-hold gel to the remaining hair and slick it back into a low bun or ponytail.
- Divide the front section into two equal parts with a center part, applying gel to each side.
- Take one section and roll it backward toward your scalp, creating a tube-shaped roll that sits raised above your head.
- Secure each victory roll with bobby pins inserted from multiple angles, ensuring they won’t collapse during the school day.
- Use edge control to smooth the base where each roll meets the slicked-back section for seamless integration.
- Finish with strong-hold hairspray concentrated on the victory rolls, which need extra support to maintain their shape.
28. Slickback with Zigzag Part Detail
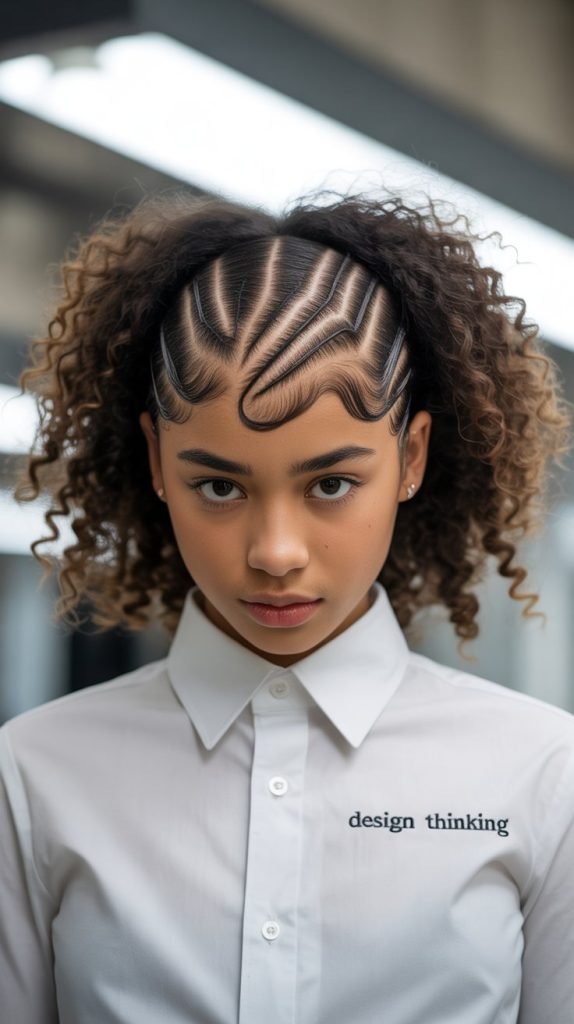
The zigzag part slickback transforms a simple style into something eye-catching and unique, using a geometric part pattern that adds visual interest without requiring complicated styling techniques.
- Use the pointed end of a rat-tail comb to create a zigzag pattern along your scalp where you would normally place a straight part.
- Make each “zag” approximately half an inch to one inch long, creating a consistent pattern from your hairline to your crown.
- Apply gel to both sides of the zigzag part, smoothing the hair back on each side with a brush.
- Take extra care when slicking near the zigzag pattern to ensure the geometric shape remains visible and crisp.
- Secure the hair at the back in your preferred style—ponytail, bun, or loose—depending on your personal preference.
- Use edge control applied with a small precision brush along the zigzag part to make each angle sharply defined.
- Avoid touching the part throughout the day, as oils from your fingers can blur the defined edges of the zigzag pattern.
29. Slickback with Bandeau Accessory
The bandeau slickback uses a wide fabric band that covers a larger portion of your head, creating a bold fashion statement while providing extra hold and control for particularly active school days.
- Complete your basic slickback first, ensuring all hair is smoothly gathered and secured at the back.
- Choose a bandeau that’s approximately two to three inches wide, made from stretchy fabric that will grip without causing headaches.
- Position the bandeau so it covers your hairline and extends back several inches, sitting flat against your slicked hair.
- Ensure the bandeau is school-appropriate in color and pattern—solid colors or subtle prints work best for academic environments.
- Tuck any flyaways under the edges of the bandeau, using it strategically to hide any areas where your slickback isn’t perfectly smooth.
- Adjust the positioning throughout the day if needed, as bandeaus can shift during physical activity or when removing jackets.
- Choose bandeaus in your school colors for spirit days or coordinate with your outfit for a pulled-together appearance.
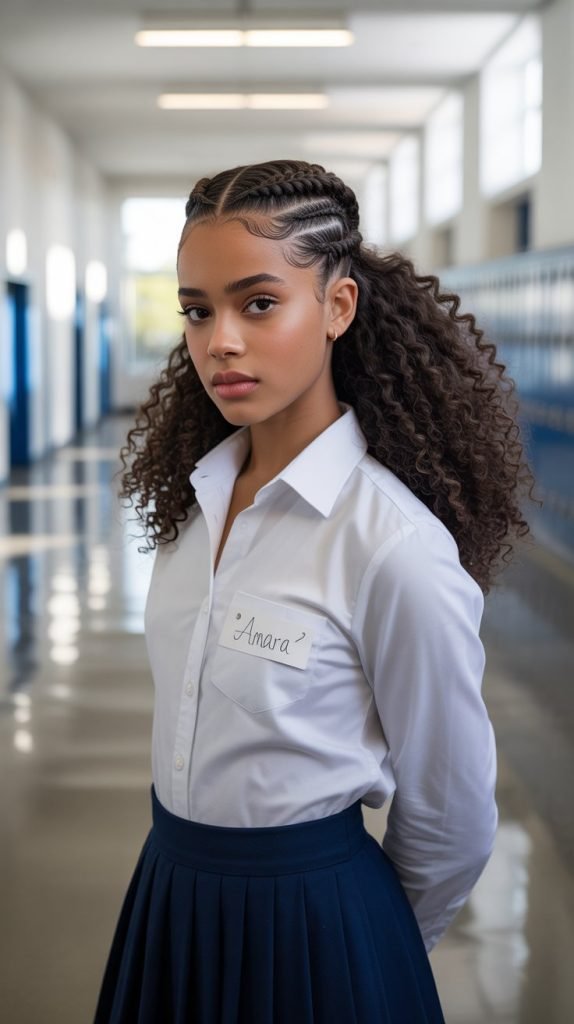
30. Slickback with Micro Braids at Hairline

The micro braids hairline slickback adds intricate detail that showcases your styling skills while maintaining the neat, controlled aesthetic required for school dress codes.
- Section off a thin strip of hair along your entire hairline, approximately half an inch to one inch wide.
- Slick the remaining hair back with gel into your preferred style—bun, ponytail, or loose.
- Divide the hairline section into small subsections, each about a quarter-inch wide.
- Create tight three-strand braids along the entire hairline, keeping them flat against your scalp like cornrows.
- Secure each micro braid with a small clear elastic band, then tuck the ends into the slicked-back section.
- Apply edge control around the braids to smooth any stray hairs and enhance the definition of each tiny braid.
- This style can last multiple days with proper nighttime maintenance using a silk scarf or bonnet.
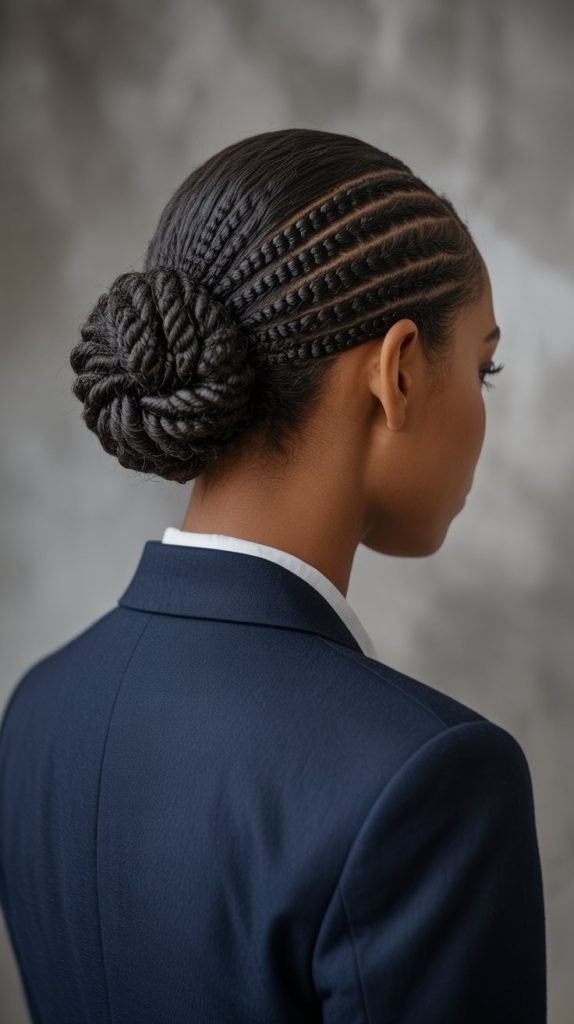
31. Sleek Braided Bun Combination

The braided bun slickback merges two protective styling techniques, creating a long-lasting school hairstyle that requires minimal daily maintenance while looking polished and intentional.
- Slick your hair back with gel into a ponytail positioned at your preferred height on your head.
- Divide the ponytail into three equal sections and create a standard three-strand braid down the entire length.
- Wrap the completed braid around the base of the ponytail in a circular motion, creating a bun from the braided hair.
- Secure the braided bun with bobby pins placed through the braid and into the base, ensuring it won’t unravel.
- Apply edge control around your hairline and use a silk scarf to lay your edges smooth for 15-20 minutes.
- Tuck the tail end of the braid under the bun and secure it with additional pins for a seamless finish.
- This style protects your ends from damage and can last three to five days with nighttime maintenance using a silk bonnet.
32. Slickback with Curly Fringe Left Loose
The curly fringe slickback softens the overall look by leaving a section of curls at the front to fall naturally over the forehead, creating a youthful, approachable style that’s still neat enough for school.
- Section off a curved strip of hair along your front hairline, approximately one to two inches deep, creating your fringe section.
- Apply gel to all remaining hair and slick it back into your preferred gathering point, securing it with an elastic band.
- Leave the fringe section completely unstyled or apply a light curl cream to enhance its natural pattern.
- Allow the fringe to air-dry naturally, creating soft curls that contrast with the sleek back sections.
- Trim the fringe if needed so it falls no longer than eyebrow length, keeping it out of your eyes during class work.
- Use edge control on the slicked sections that border the fringe to create clear definition between the two textures.
- Style the fringe to one side or let it fall naturally forward, depending on what’s most flattering for your face shape.
33. Slickback with Space Buns
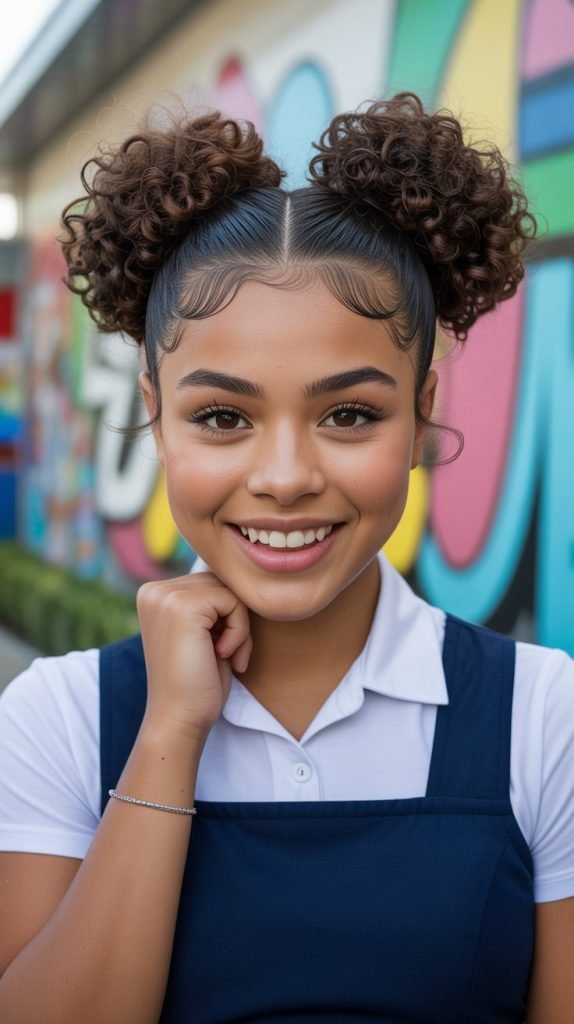
The space buns slickback creates a fun, youthful look that’s perfect for casual school days or spirit weeks, positioning two buns high on the head while keeping the sides and back sleek and controlled.
- Part your hair down the center from forehead to nape, dividing it into two equal sections.
- Apply gel to the sides and back of each section, slicking the hair upward toward the top of your head.
- Gather each section into a high ponytail positioned near the top corners of your head, creating symmetrical placement.
- Twist each ponytail and wrap it around its base to form a bun, securing with bobby pins inserted in multiple directions.
- Keep the buns relatively neat and controlled for school appropriateness, avoiding overly large or dramatic sizes.
- Apply edge control around your entire hairline and along the center part for enhanced definition.
- Use hairspray on the slicked sections and the base of each bun to ensure everything stays secure during active school days.
Conclusion
Mastering 33 Sleek Curly Hair Slickback Ideas for School That Look Modern empowers you to take control of your morning routine while expressing your personal style within school dress codes.
These techniques prove that curly hair can be both beautifully natural and perfectly polished, offering versatile options for every curl pattern, hair length, and skill level.
From the classic gel-based slickback that provides all-day security to creative variations featuring braids, twists, and decorative accessories, you now have an extensive toolkit of styles that work for regular school days, special presentations, athletic activities, and formal events.
Remember that healthy hair should always be your priority—use these styling methods responsibly by limiting tension on your hairline, deep conditioning regularly, and giving your curls breaks between slicked styles.
With practice, the right products, and attention to your hair’s unique needs, you’ll create consistently stunning slickback looks that boost your confidence and let your natural texture shine in a polished, modern way.