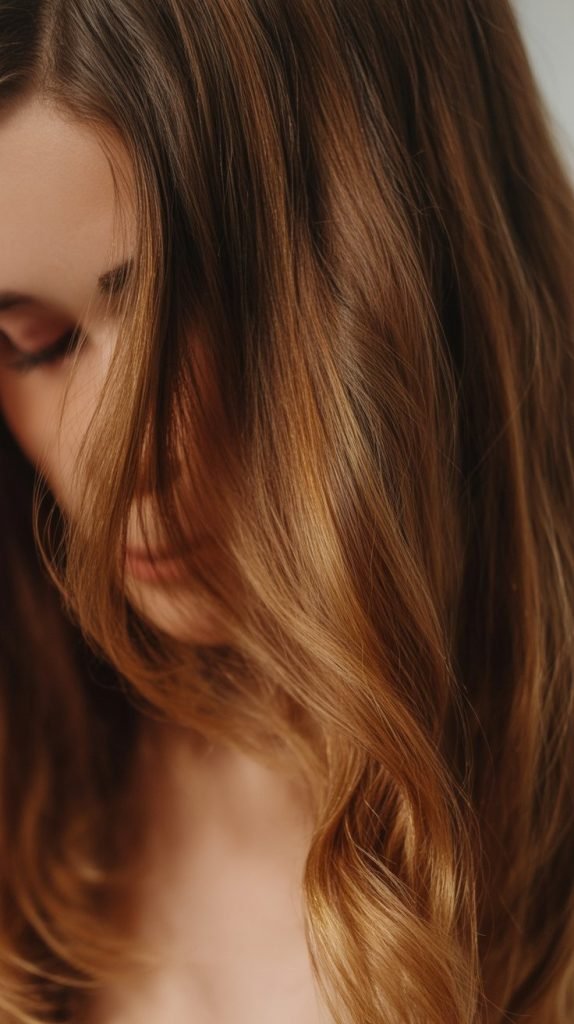
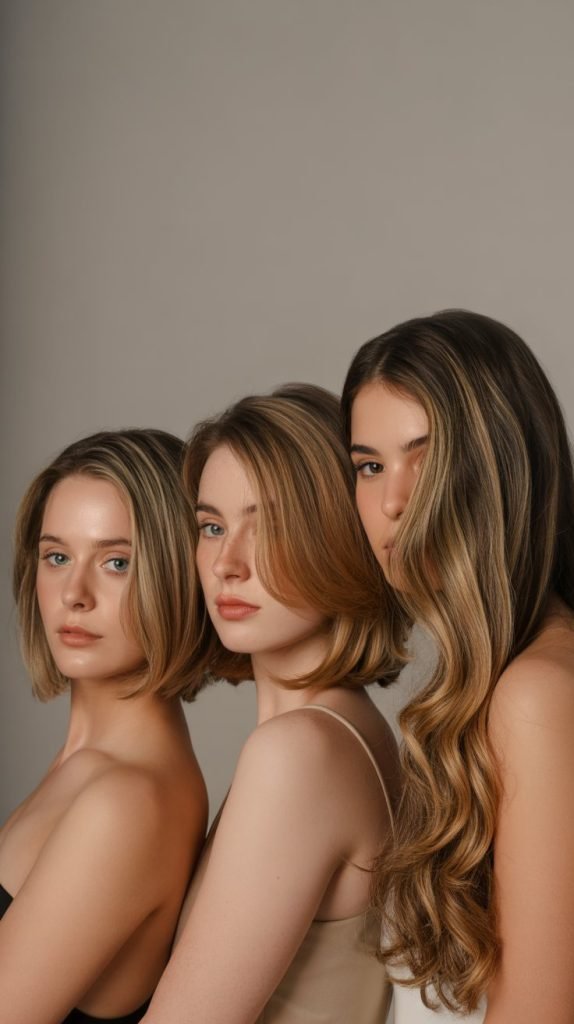
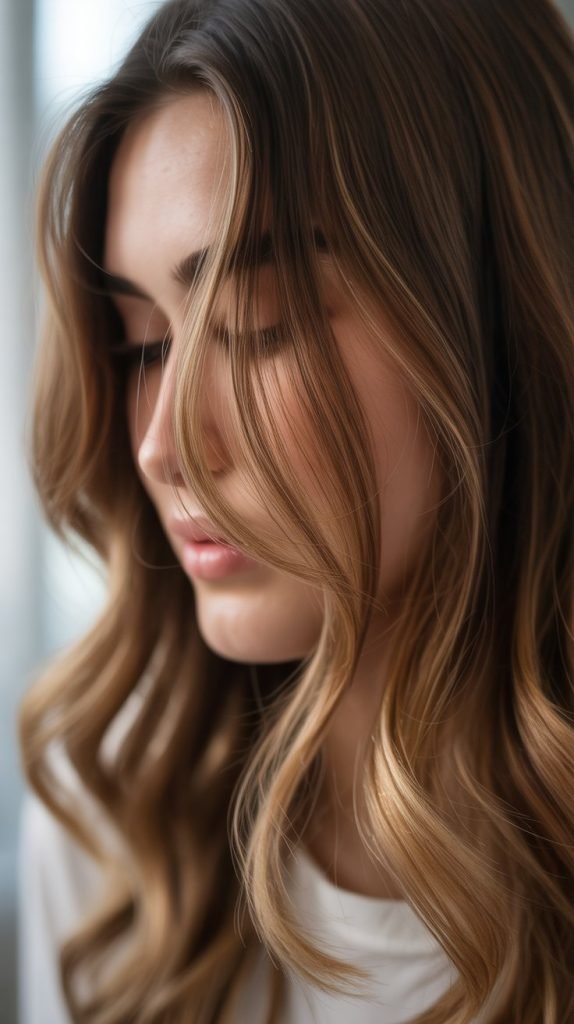
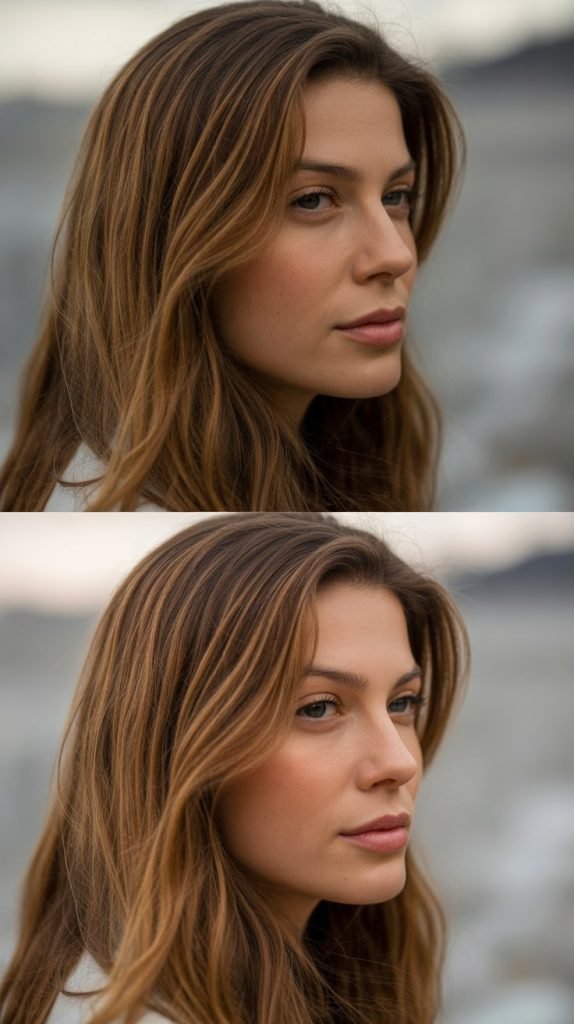
Are you dreaming of sun-kissed, dimensional hair without the salon price tag? Transforming your brown hair with caramel highlights at home is easier than you think, and the results can be absolutely stunning.
Whether you have dark chocolate locks or lighter chestnut tones, caramel highlights add warmth, depth, and a touch of luxury that makes your hair look naturally radiant.
This comprehensive guide on 33 Easy DIY Caramel Highlights on Brown Hair at Home will walk you through everything from choosing the right shade and gathering essential tools to mastering various highlighting techniques that suit your skill level.
You’ll discover foolproof methods for achieving salon-quality results in your own bathroom, learn how to avoid common mistakes, and find the perfect highlighting style that complements your unique features and lifestyle.
Get ready to save hundreds of dollars while creating gorgeous, multi-dimensional hair that turns heads wherever you go.
1. Understanding Caramel Highlights and Why They Work on Brown Hair
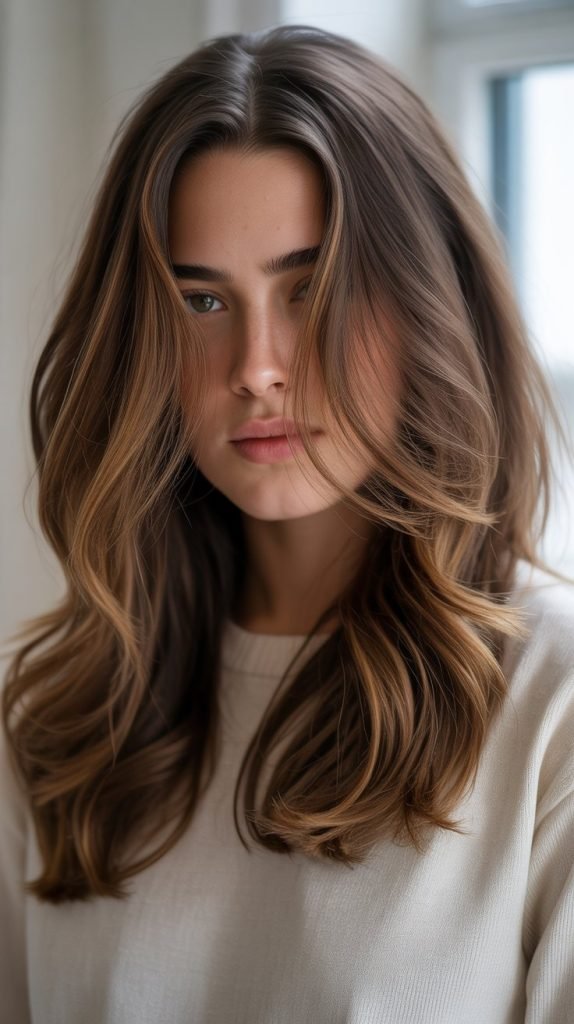
Caramel highlights are warm, golden-brown tones that blend seamlessly with brown hair to create natural-looking dimension and brightness. These highlights work exceptionally well on brown hair because they enhance your natural color rather than drastically changing it, making them perfect for first-time highlighters.
- Caramel shades range from light butterscotch to deeper toffee tones, giving you plenty of options to customize your look.
- These highlights add warmth to brown hair, counteracting any ash or cool undertones that might make your hair look dull.
- The beauty of caramel highlights lies in their versatility—they complement all skin tones from fair to deep.
- Brown hair provides the perfect base for caramel highlights because the contrast is subtle yet noticeable.
- Caramel tones reflect light beautifully, making your hair appear shinier and healthier overall.
- Unlike platinum or ash highlights, caramel shades grow out gracefully without harsh lines of demarcation.
- These highlights work on all brown hair types, from virgin hair to previously colored locks.
2. Determining Your Natural Brown Hair Level

Before you start highlighting, you need to accurately assess your starting hair color to choose the right caramel shade and developer strength. Understanding your natural level prevents processing mistakes and ensures your highlights look harmonious.
- Hair levels range from 1 (black) to 10 (lightest blonde), with most brown hair falling between levels 3 and 6.
- Level 3 to 4 represents dark brown hair that requires stronger developer and longer processing time.
- Level 5 to 6 indicates medium brown hair that lifts more easily and requires less aggressive lightening.
- Hold a section of your hair under natural daylight to accurately determine your true hair color.
- Take photos of your hair in natural light and compare them to professional color charts available online.
- Previously colored brown hair may require color correction before applying caramel highlights.
- Consider consulting online color assessment tools from professional brands like <a href=”https://www.madison-reed.com/”>Madison Reed</a> for guidance.
3. Choosing the Right Caramel Shade for Your Skin Tone
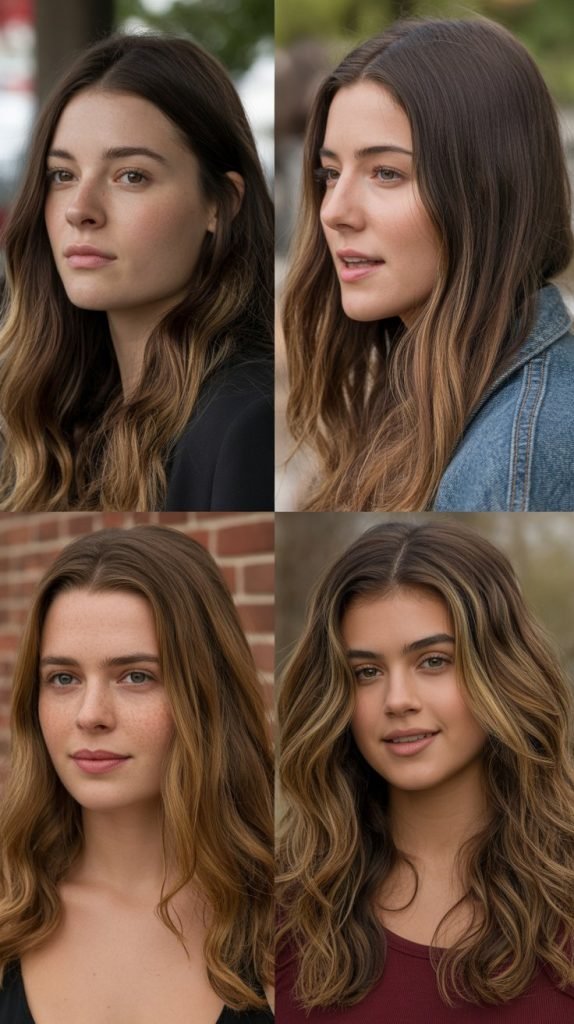
Selecting the perfect caramel shade involves matching warm and cool undertones in your skin to create a harmonious, flattering look. The right shade will brighten your complexion and make your features pop.
- Fair skin with cool undertones looks stunning with lighter, golden caramel highlights that add warmth.
- Fair skin with warm undertones pairs beautifully with medium caramel shades that have peachy or golden notes.
- Medium olive or tan skin tones shine with rich, honey-caramel highlights that enhance natural warmth.
- Deep skin tones are complemented by darker caramel shades with hints of copper and bronze.
- If you have pink undertones in your skin, opt for golden caramel to balance the coolness.
- Yellow or golden undertones in your skin pair perfectly with amber and butterscotch caramel tones.
- Test potential shades by holding colored fabric or hair swatches near your face in natural light.
4. Essential Tools and Materials You’ll Need
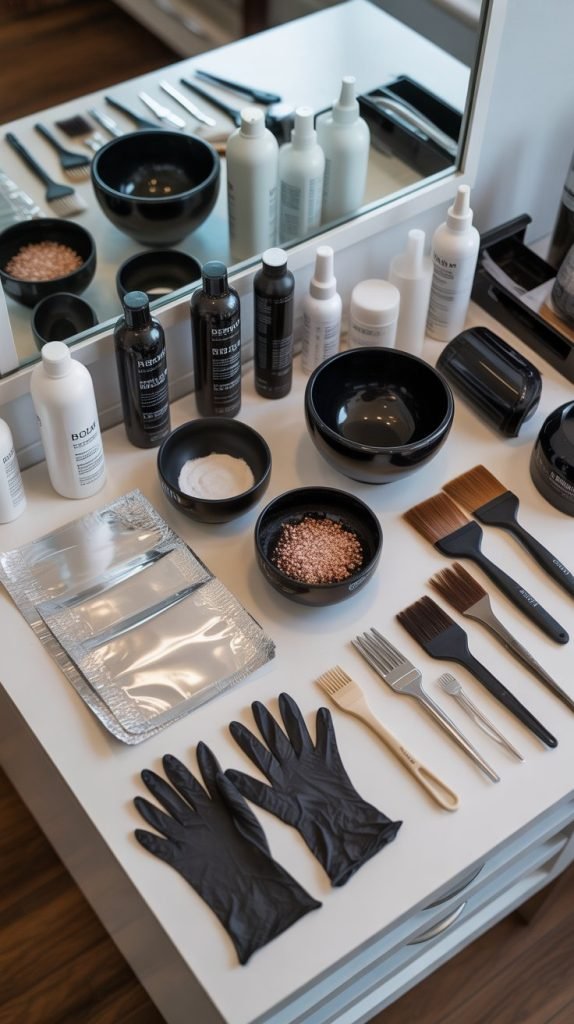
Gathering professional-quality tools before you start ensures a smooth highlighting process and salon-worthy results. Having everything prepared and within reach prevents mid-process scrambling and potential mistakes.
- Highlighting cap with hook or aluminum foil sheets for sectioning your highlights.
- Tail comb for precise parting and section separation throughout your hair.
- Mixing bowl (non-metallic) and application brush with fine bristles for even product distribution.
- Hair lightener or bleach powder specifically formulated for at-home use.
- Developer in appropriate volume (20 or 30 volume depending on your hair level).
- Pre-lightening treatment or bond protector like <a href=”https://www.olaplex.com/”>Olaplex</a> to minimize damage.
- Toner in caramel or golden blonde shade to achieve the perfect warm tone.
- Hair clips to section hair, disposable gloves, old towel, and timer for accurate processing.
- Deep conditioning treatment or hair mask for post-highlighting nourishment.
- Purple or blue shampoo may be needed if highlights turn too brassy.
5. Preparing Your Hair Before Highlighting

Proper preparation is crucial for achieving even, beautiful highlights and minimizing potential damage to your hair. Taking time to prep ensures your hair is in the best condition to accept color.
- Avoid washing your hair for 24-48 hours before highlighting to allow natural oils to protect your scalp.
- However, hair should be free of heavy styling products, silicones, and buildup that can block lightener penetration.
- Apply a clarifying shampoo two days before highlighting if you regularly use styling products.
- Perform a strand test on a hidden section of hair to determine processing time and final color result.
- Check your hair’s overall health—avoid highlighting if your hair is severely damaged or breaking.
- Deep condition your hair a week before highlighting to strengthen strands and improve elasticity.
- Trim split ends before highlighting to ensure even color absorption and prevent further damage.
- Ensure your hair is completely dry before applying any lightening products for optimal results.
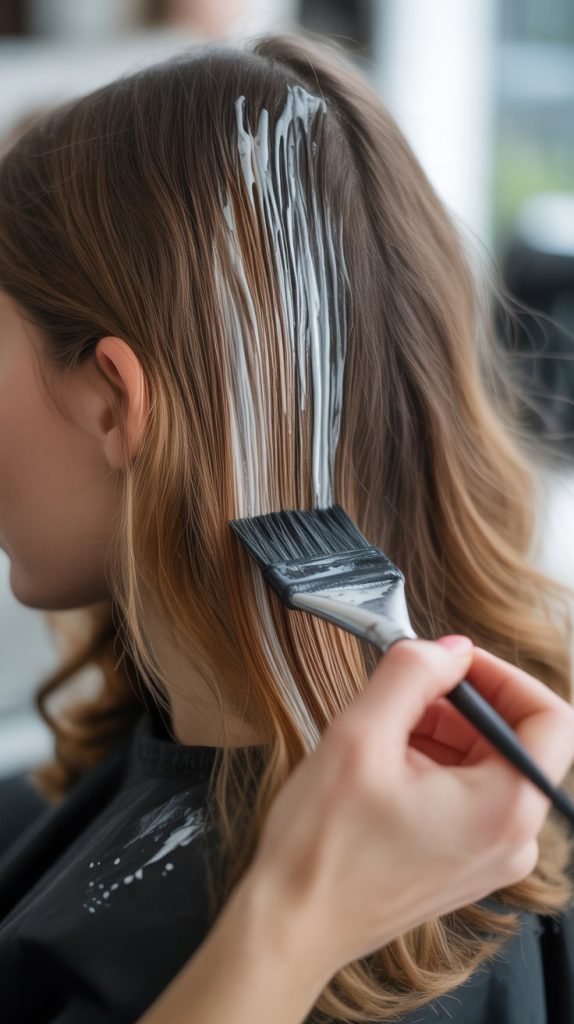
6. The Foil Highlighting Technique for Beginners
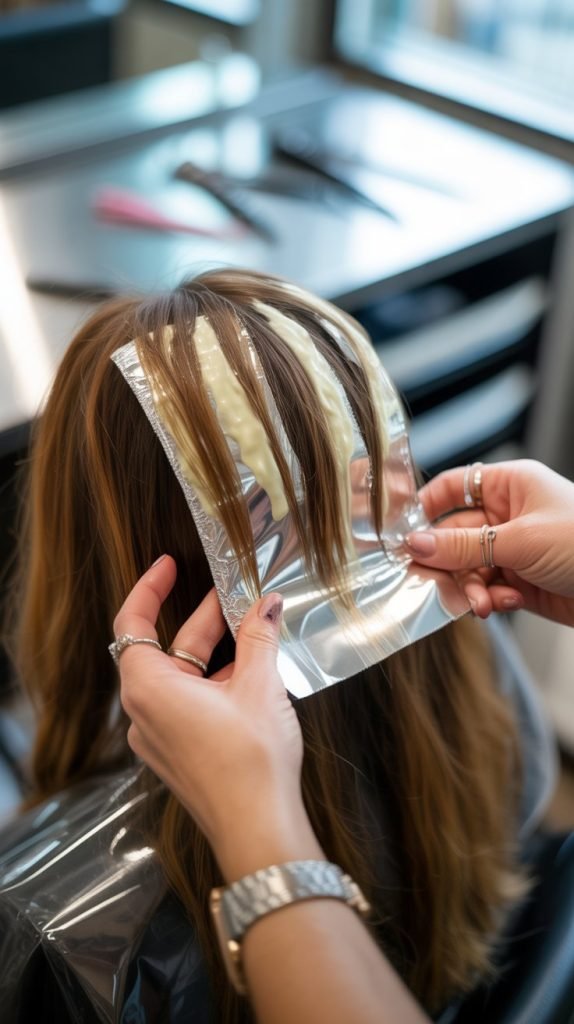
Foil highlighting is the most popular salon technique that’s easy to master at home and gives you precise control over placement. This method creates defined, consistent highlights throughout your hair.
- Start by sectioning your hair into four quadrants using your tail comb and hair clips.
- Cut aluminum foil into rectangles approximately 4 inches wide and 8-10 inches long.
- Begin highlighting at the back lower sections and work your way up to the crown.
- Take thin sections of hair (about 1/4 inch thick) using your tail comb for weaving.
- Weave the comb through the section in a zigzag motion to select strands for highlighting.
- Place the foil underneath the selected strands and apply lightener from mid-shaft to ends first.
- Then apply lightener from roots to mid-shaft, leaving about 1/4 inch away from the scalp.
- Fold the foil in half and then fold the sides inward to seal the highlighted section completely.
- Continue this process throughout all sections, working systematically to avoid missing areas.
- Process according to your strand test results, checking every 10 minutes after the minimum time.
7. The Cap Highlighting Method for All-Over Dimension

The highlighting cap method is perfect for creating evenly distributed highlights with minimal effort and is ideal for beginners who want foolproof results. This technique works especially well for shoulder-length or shorter hair.
- Purchase a highlighting cap that fits snugly on your head without being uncomfortably tight.
- Put the cap on dry, brushed hair and secure it under your chin with the attached ties.
- Use the hook tool to pull small sections of hair through the holes in the cap.
- For subtle highlights, pull hair through every other hole; for more dramatic results, use every hole.
- Pull more hair through the top and crown areas where highlights are most visible.
- Mix your lightener according to package directions and apply generously to pulled-through hair.
- Start from the top of your head and work your way down to ensure even saturation.
- Process for the recommended time, checking frequently to achieve your desired caramel tone.
- Rinse the lightener out while still wearing the cap to prevent it from touching unhighlighted hair.
- Remove the cap carefully and shampoo thoroughly to remove all product residue.
8. Balayage Technique for Natural-Looking Caramel Highlights
Balayage creates the most natural, sun-kissed highlights by hand-painting color onto your hair for a seamless, gradient effect. This French technique requires more skill but produces stunning, low-maintenance results.
- Balayage means “to sweep” in French, referring to the painting motion used to apply color.
- Start with dry, unwashed hair and section it into manageable quadrants using clips.
- Mix your lightener to a slightly thicker consistency than you would for foil highlights.
- Hold a section of hair taut and use your brush to sweep lightener onto the surface in downward strokes.
- Focus highlights around your face, on the top layers, and on the ends for maximum impact.
- Keep the application lighter at the top and heavier toward the ends for natural gradation.
- Avoid applying lightener in straight lines; instead, use varied strokes for organic-looking dimension.
- Place a piece of cotton or plastic wrap under each painted section to prevent transfer.
- Process balayage highlights in open air without foil for softer, more subtle lift.
- This technique grows out beautifully without obvious roots, making maintenance easier.
9. Face-Framing Highlights for Maximum Impact

Strategic face-framing highlights brighten your complexion and draw attention to your facial features with minimal time and product investment. These highlights create an instant lifting effect that makes you look more youthful and radiant.
- Face-framing highlights should be slightly lighter than highlights throughout the rest of your hair.
- Section out the front two inches of hair on each side of your part for highlighting.
- Create a diagonal parting from your hairline to just behind your ear on both sides.
- Apply lightener starting about two inches from your roots and work down to the ends.
- Concentrate more product on the pieces that fall forward around your cheeks and jawline.
- For oval and round faces, focus highlights along the sides to create elongating vertical lines.
- For square or angular faces, place highlights to soften the jawline and add gentle curves.
- For heart-shaped faces, concentrate highlights from cheekbones down to add balance to the lower face.
- Process face-framing highlights slightly longer than other sections for extra brightness and dimension.
- These strategic highlights work beautifully alone or as an accent to all-over highlighting.
10. Creating Chunky Caramel Highlights for Bold Dimension

Chunky highlights create a statement look with thicker, more visible sections of caramel color throughout your brown hair. This ’90s-inspired trend has made a major comeback with a modern, sophisticated twist.
- Chunky highlights use sections of hair that are 1/2 inch to 1 inch thick for maximum visibility.
- This technique works best on medium to long hair where the chunks can be seen clearly.
- Space your chunky highlights about 1-2 inches apart throughout your hair for balanced coverage.
- Focus thicker chunks around the face and crown where they’ll be most noticeable.
- Use foils to keep chunks separated and prevent color bleeding into surrounding hair.
- Apply lightener generously to ensure even saturation throughout the thick sections.
- Process chunky highlights for the full recommended time to achieve vibrant caramel tones.
- This technique creates high contrast and dramatic dimension that’s perfect for making a statement.
- Chunky highlights require more maintenance as they grow out with more obvious roots.
- Modern chunky highlights often incorporate multiple caramel shades for added depth and interest.
11. Babylights Technique for Subtle Caramel Dimension
Babylights are ultra-fine, delicate highlights that mimic the natural sun-kissed hair that children have during summer months. This sophisticated technique creates the most natural and subtle caramel enhancement possible.
- Babylights use sections of hair that are as thin as a few strands—much finer than traditional highlights.
- This technique requires patience and precision but delivers incredibly natural-looking results.
- Take ultra-thin sections using a fine-tooth comb or even a pintail comb for maximum control.
- Focus babylights on the top layers of hair and around the hairline for subtle brightness.
- Apply lightener carefully to avoid saturating surrounding hair with the fine sections.
- Use low-volume developer (20 volume maximum) to prevent over-processing delicate strands.
- Process babylights for less time than traditional highlights since the strands are so fine.
- This technique requires frequent touch-ups as the fine highlights grow out quickly.
- Babylights blend seamlessly with your natural hair color for an expensive, barely-there look.
- Combine babylights with a few chunkier highlights for added dimension while maintaining subtlety.
12. Ombre Effect with Caramel on Brown Hair
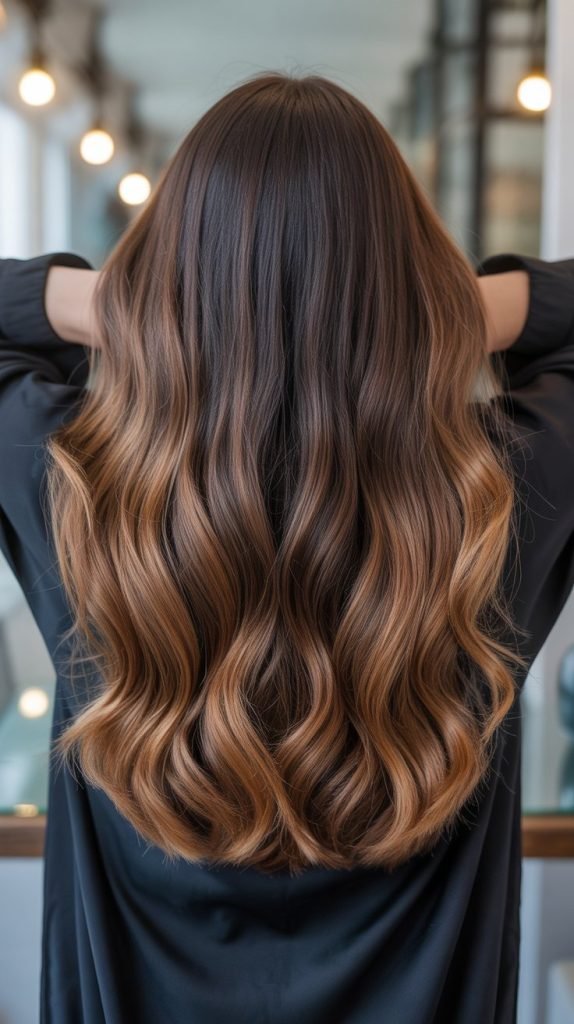
Ombre creates a dramatic gradient from your natural brown roots to caramel ends, offering a low-maintenance highlighting option with maximum impact. This technique focuses color at the bottom half of your hair for a trendy, modern look.
- Ombre means “shadow” in French, referring to the gradual shading from dark to light.
- Determine where you want your ombre transition to begin—typically at chin or shoulder length.
- Apply lightener starting at your chosen transition point and work down to your ends.
- Blend the lightener upward slightly using light feathering motions for a seamless gradient.
- Apply heavier saturation to the ends and lighter application at the transition zone.
- Process the ends first, then apply lightener to the mid-sections for staggered timing.
- For a more gradual ombre, apply lightener in three sections with different processing times.
- Tone the lifted sections with caramel toner to achieve warm, cohesive color throughout.
- Ombre requires minimal maintenance since your roots remain your natural color.
- This technique works beautifully on all hair lengths but looks especially stunning on long hair.
13. Sombre (Soft Ombre) for Natural Caramel Transition

Sombre is the softer, more subtle version of ombre that creates a barely-there gradient from brown to caramel. This technique offers the low-maintenance benefits of ombre with an even more natural, lived-in appearance.
- Sombre uses a much more gradual transition than ombre, starting higher up on the hair shaft.
- Begin applying lightener about 4-6 inches from your roots rather than mid-length.
- Use light, feathered application with your brush to create soft, diffused color placement.
- Apply varying amounts of lightener throughout the mid-lengths to create irregular, natural patterns.
- Leave some sections completely untouched to enhance the natural, un-done appearance.
- Process sombre highlights for less time than traditional ombre for softer color results.
- Use multiple caramel tones in your sombre application for added depth and realism.
- This technique is perfect for those who want dimension without an obvious “colored” look.
- Sombre grows out beautifully and can go 4-6 months between touch-ups.
- Combine sombre with face-framing highlights for a comprehensive, natural-looking transformation.
14. Mixing Developer Ratios for Perfect Lift
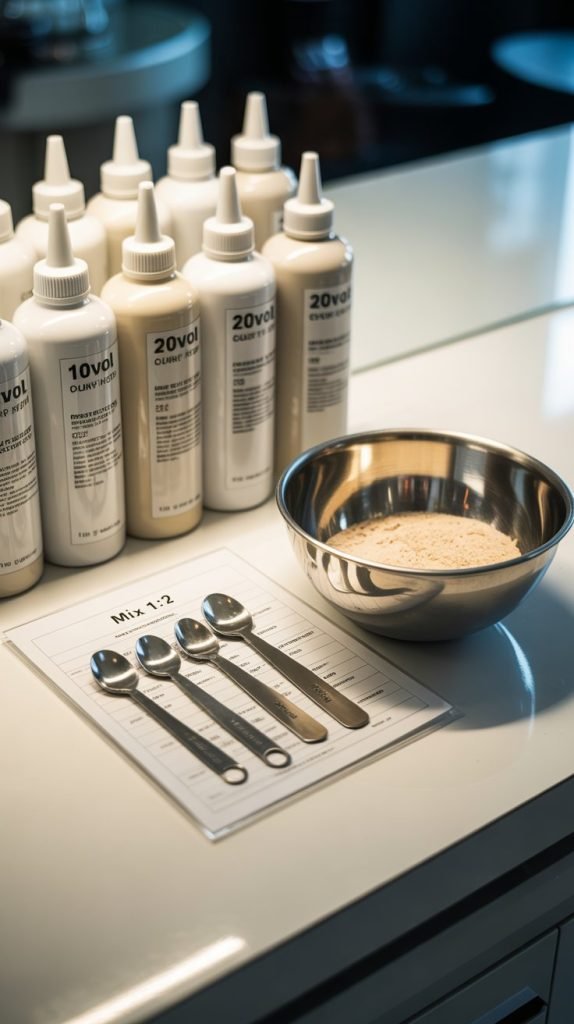
Understanding developer volumes and mixing ratios is crucial for achieving your desired caramel shade without damaging your hair. Using the correct developer strength ensures predictable, safe results every time.
- Always follow the specific mixing ratio recommended on your lightener product packaging.
- Most at-home lighteners use a 1:2 ratio (one part lightener to two parts developer).
- Professional powder bleaches typically use a 1:2 or 1:1.5 ratio depending on desired consistency.
- Mix developer and lightener in a non-metallic bowl to prevent chemical reactions.
- Stir the mixture thoroughly until completely smooth with no lumps or powder pockets.
- Use higher volume developer on dark brown hair (levels 3-4) and lower volume on lighter brown.
- Never use 40 volume developer at home unless you have extensive coloring experience.
- Mixed lightener should be used immediately and never stored for later application.
15. Processing Time Guidelines for Different Brown Hair Levels

Accurate processing time is the difference between perfect caramel highlights and damaged, over-processed hair. Monitoring your highlights throughout the process ensures you achieve your desired shade safely.
- Dark brown hair (level 3-4) typically requires 40-45 minutes of processing time with 30 volume developer.
- Medium brown hair (level 5) usually needs 30-35 minutes of processing time with 20 volume developer.
- Light brown hair (level 6) often reaches desired lift in 25-30 minutes with 20 volume developer.
- Always perform a strand test to determine exact processing time for your specific hair.
- Start checking your highlights 10 minutes before the minimum recommended processing time.
- Gently wipe a small section of lightener away every 5-10 minutes to check color progression.
- Hair at the nape and sides processes more slowly than hair at the crown due to body heat.
- Previously colored brown hair may require additional processing time compared to virgin hair.
- Stop processing immediately if hair feels overly elastic or begins to break when gently stretched.
- Rinse hair promptly once desired lift is achieved to prevent over-processing and damage.
16. How to Apply Toner for Perfect Caramel Tones
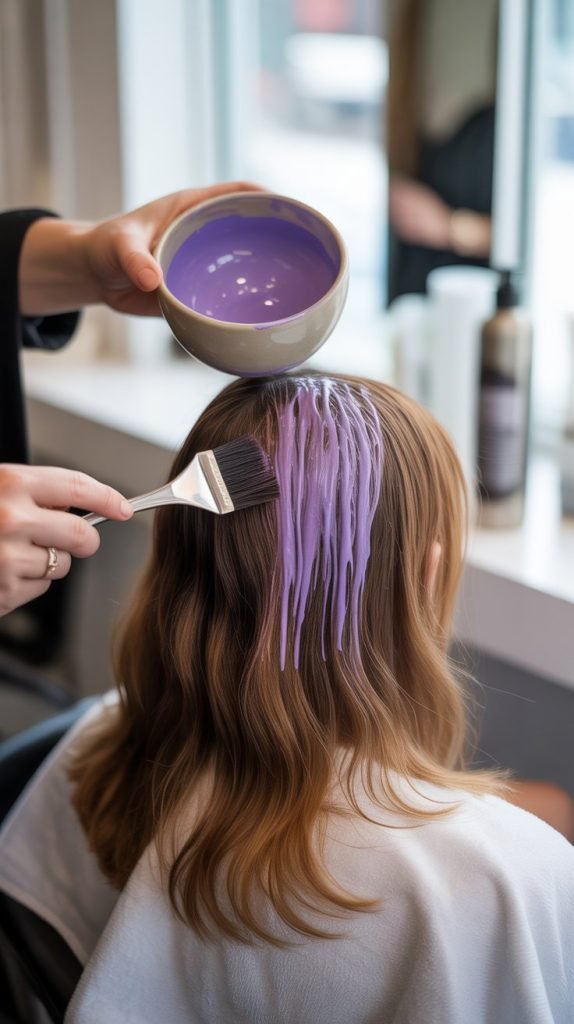
Toning is the essential final step that transforms brassy orange highlights into beautiful, warm caramel tones. This process neutralizes unwanted pigments and deposits your desired color for polished, professional results.
- After rinsing lightener, towel-dry hair until damp but not dripping wet for toner application.
- Choose a toner in golden blonde or caramel shades (typically levels 7G, 8G, or 7N, 8N).
- Mix toner with 10 or 20 volume developer according to the manufacturer’s instructions.
- Apply toner evenly to all highlighted sections using an applicator brush or bottle.
- Toner works quickly—typically processing for only 10-20 minutes maximum.
- Watch your highlights carefully during toning; check every 5 minutes for desired color.
- Rinse toner with cool water when highlights reach a shade slightly lighter than your target.
- Apply purple or blue shampoo if highlights still appear too brassy after toning.
- Toner fades over time, so plan to re-tone every 4-6 weeks to maintain caramel vibrancy.
- Consider demi-permanent caramel glazes like those from <a href=”https://www.redken.com/”>Redken</a> for maintaining tone between highlights.
17. Avoiding Brassiness and Maintaining Caramel Tones

Preventing and correcting brassy orange tones ensures your caramel highlights stay beautiful and warm rather than turning unflattering. Understanding why brassiness occurs helps you combat it effectively.
- Brassiness occurs when lightener reveals underlying warm pigments in brown hair (red, orange, gold).
- Dark brown hair naturally contains more red-orange pigment that can create brass when lightened.
- Use purple shampoo once or twice weekly to neutralize orange tones and maintain caramel color.
- Blue shampoo works better than purple on orange-toned brassiness from brown hair.
- Wash hair with cool or lukewarm water to seal the cuticle and prevent color fading.
- Limit heat styling which oxidizes hair and brings out brassy undertones over time.
- Chlorine from swimming pools turns caramel highlights greenish or brassy—always protect hair before swimming.
- Apply a color-depositing conditioner in caramel or golden tones weekly to refresh highlights.
- Avoid products containing sulfates which strip toner and allow brassiness to return.
- Get toner touch-ups every 4-6 weeks to maintain your perfect caramel shade consistently.
18. Sectioning Hair Properly for Even Highlight Distribution
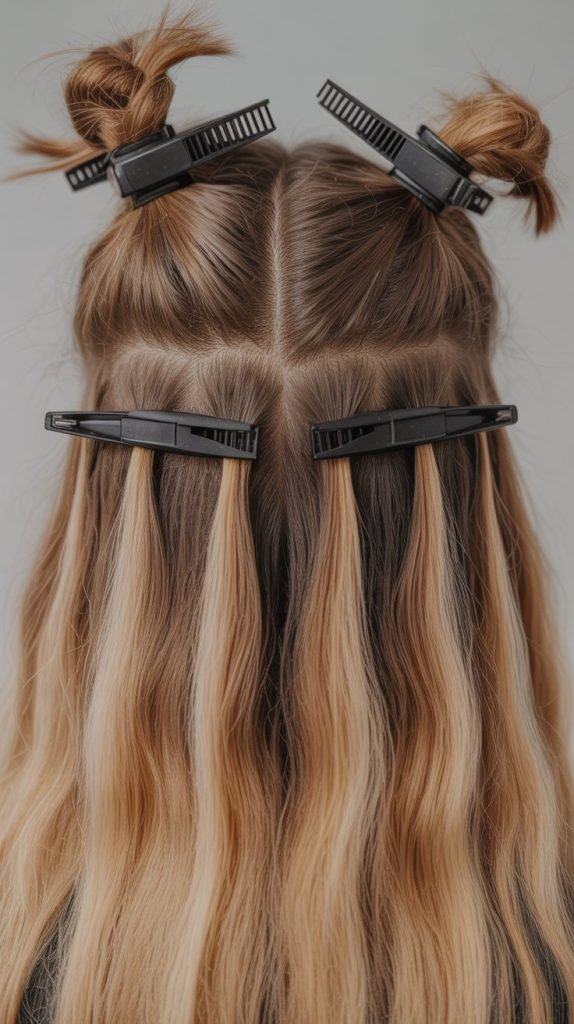
Strategic sectioning is the foundation of professional-looking highlights that appear evenly distributed and intentionally placed. Proper sectioning prevents missed spots and ensures consistent coverage throughout your hair.
- Begin with clean, completely dry hair that’s been thoroughly brushed to remove all tangles.
- Divide hair into four equal quadrants by creating a center part from forehead to nape.
- Make a horizontal part from ear to ear across the back of your head.
- Secure each quadrant with a large hair clip to keep sections separated and manageable.
- Work on one quadrant at a time, keeping the other three clipped away securely.
- Within each quadrant, take horizontal sections about 1/2 inch thick from bottom to top.
- Create clean, straight partings with your tail comb for professional, precise results.
- Allow completed highlighted sections to fall away from sections you’re currently working on.
- For face-framing highlights, create a separate triangular section from the front hairline.
- Number or label your sections if you’re using different techniques in different areas.
19. Protecting Your Scalp During the Highlighting Process
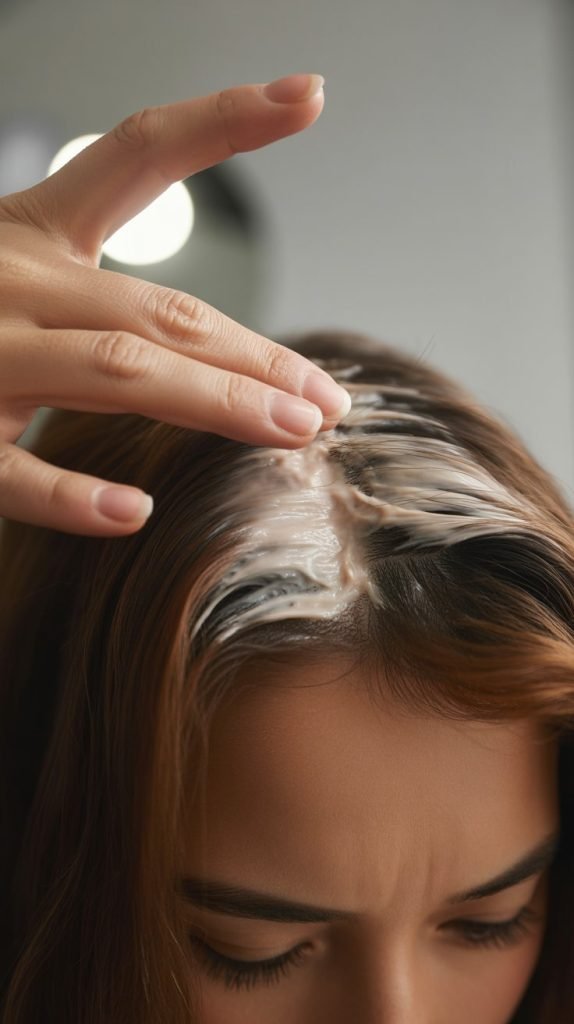
Scalp protection prevents irritation, burning, and discomfort while allowing you to safely lighten hair close to your roots. Taking preventive measures ensures a comfortable highlighting experience.
- Apply petroleum jelly or a professional scalp protector along your hairline and partings before starting.
- Keep lightener at least 1/4 inch away from your scalp to prevent direct contact with skin.
- Never scratch your scalp or wash your hair aggressively the day before highlighting.
- Natural scalp oils provide some protection, which is why unwashed hair is recommended.
- If you feel burning or stinging during processing, rinse the affected area immediately.
- Avoid getting lightener on your ears, neck, or face by applying barrier cream to these areas.
- Use a thick consistency lightener that doesn’t run or drip onto your scalp unexpectedly.
- Consider root-safe formulas specifically designed for at-home use near the scalp.
- Perform a patch test 48 hours before highlighting to check for allergic reactions.
- If you have a sensitive scalp, use a lower volume developer to minimize irritation.
20. DIY Highlight Placement for Different Hair Lengths
Hair length dramatically affects where you should place highlights for the most flattering and noticeable results. Strategic placement based on length ensures your highlights are visible and enhance your hairstyle.
- Short hair (chin-length or shorter): Focus highlights on the top layers and around the face for maximum visibility.
- Short hair shows highlights best when placed close to the roots throughout the crown area.
- Medium-length hair (shoulder to collarbone): Distribute highlights from mid-shaft to ends with concentration around the face.
- Medium hair benefits from varied highlight placement throughout all layers for dimensional movement.
- Long hair (past shoulders): Place highlights throughout the length with heavier concentration on top layers and ends.
- Long hair can accommodate more dramatic techniques like ombre and sombre that showcase gradual color transitions.
- Regardless of length, always include face-framing highlights for brightness and facial feature enhancement.
- Layered haircuts display highlights better than blunt cuts by revealing multiple tones through dimension.
- For bob hairstyles, concentrate highlights on the top surface and around the perimeter for framing.
- Very short pixie cuts need highlights placed very close to roots for them to be visible.
21. Creating a Natural Hairline with Caramel Highlights
Your hairline is one of the most visible areas of your hair, so creating natural-looking highlights here is essential for professional results. Avoiding harsh lines at the hairline prevents an artificial, obviously colored appearance.
- Never place highlights in a straight line along your hairline—this looks obviously artificial.
- Pull slightly more hair through the cap or weave more pieces near the temples and front.
- Create softer, lighter highlights around your face that gradually become bolder toward the back.
- Leave some pieces at the very front edge of your hairline completely natural for softness.
- Apply lightener starting about 1 inch from your hairline rather than directly at the edge.
- Use a light feathering motion when applying lightener near the hairline for soft blending.
- The smallest, finest highlights should be concentrated around your hairline for natural dimension.
- Avoid placing highlights directly at your part line unless you want a very bold look.
- Frame your face with slightly lighter caramel pieces than those in the rest of your hair.
- Natural hairline highlighting prevents the “striped” look that screams “home color job.”
22. Troubleshooting Patchy or Uneven Highlights

Even experienced colorists sometimes encounter uneven results, but knowing how to correct patchy highlights saves your look and your confidence. These troubleshooting techniques help fix common highlighting mishaps.
- Patchy results usually occur from missing sections during application or inconsistent saturation.
- If highlights are too sparse, add more highlights to sparse areas after waiting at least two weeks.
- If highlights are too concentrated in one area, balance them by adding highlights to other sections.
- Uneven lightening within individual highlights often results from insufficient product application.
- To fix streaky highlights, apply additional lightener to darker areas and process briefly.
- If highlights are placed too close together, lowlights can be added to separate them and create balance.
- For highlights that didn’t lift enough, you can re-lighten them after waiting one week minimum.
- Over-processed highlights can be corrected with color-filling treatments and toning down to a darker caramel.
- Apply a color-correcting gloss or glaze to even out slight variations in tone across highlights.
- Consult with a professional colorist if you’re uncomfortable correcting major highlighting mistakes yourself.
23. Adding Lowlights for Depth Between Caramel Highlights
Lowlights are darker tones added between highlights to create additional depth, dimension, and a more natural appearance. This technique prevents highlights from looking flat or too uniform.
- Lowlights are typically 1-2 shades darker than your base color for subtle contrast.
- Apply lowlights using the same foiling technique as highlights but with darker demi-permanent color.
- Space lowlights between your highlights to create shadow and depth that makes highlights pop more.
- Lowlights add richness to over-highlighted hair that looks too light or washed out.
- Use chocolate brown or espresso tones as lowlights for warm, dimensional contrast with caramel.
- Apply lowlights more heavily at the nape and underneath layers where natural shadow would occur.
- This technique mimics how light naturally hits hair, with brighter tones on top and darker underneath.
- Lowlights help extend the life of your highlights by providing transitional tones as color grows out.
- Consider adding lowlights during your second highlighting session rather than during the first application.
- Lowlights require no lightening and actually condition hair by adding pigment back into the shaft.
24. Maintaining Hair Health After Highlighting
Highlighted hair requires specific care to stay healthy, shiny, and strong after the chemical processing involved in lightening. Implementing a proper maintenance routine prevents damage and keeps your caramel highlights looking fresh.
- Use sulfate-free, color-safe shampoo and conditioner to prevent premature fading and maintain moisture.
- Deep condition highlighted hair weekly with protein-rich masks to rebuild strength and elasticity.
- Apply bond-repair treatments like <a href=”https://www.olaplex.com/”>Olaplex</a> or K18 to repair internal damage from lightening.
- Minimize heat styling and always use a heat protectant spray when blow-drying or using hot tools.
- Get regular trims every 6-8 weeks to remove split ends before they travel up the hair shaft.
- Sleep on a silk or satin pillowcase to reduce friction that causes breakage in fragile highlighted hair.
- Apply leave-in conditioner or hair oil to ends daily to maintain moisture and prevent dryness.
- Limit washing to 2-3 times per week maximum to preserve natural oils and color vibrancy.
- Use cool water for the final rinse after shampooing to seal cuticles and boost shine.
- Avoid over-processing by waiting at least 4-6 weeks between highlighting sessions.
25. Touch-Up Schedule for Maintaining Caramel Highlights
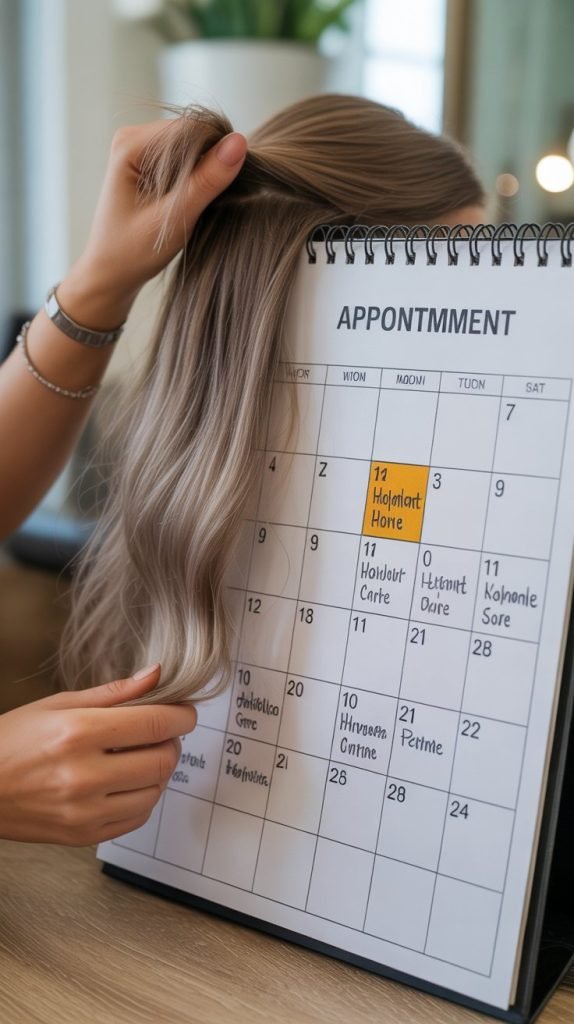
Establishing a consistent touch-up schedule keeps your caramel highlights looking fresh and prevents obvious root growth or faded color. Different highlighting techniques require different maintenance timelines.
- Touch up face-framing highlights more frequently than the rest of your hair for fresh appearance.
- If using ombre or balayage techniques, you can extend time between full highlight sessions significantly.
- Apply root touch-ups only to regrowth area rather than re-highlighting your entire head each time.
- Refresh toner every 4-6 weeks even if you’re not adding new highlights to maintain caramel tones.
- Plan highlight maintenance appointments based on your hair growth rate, which averages 1/2 inch per month.
- Consider your lifestyle and budget when choosing highlighting techniques with different maintenance needs.
- Touch up highlights more frequently before special events or during seasons when you show more hair.
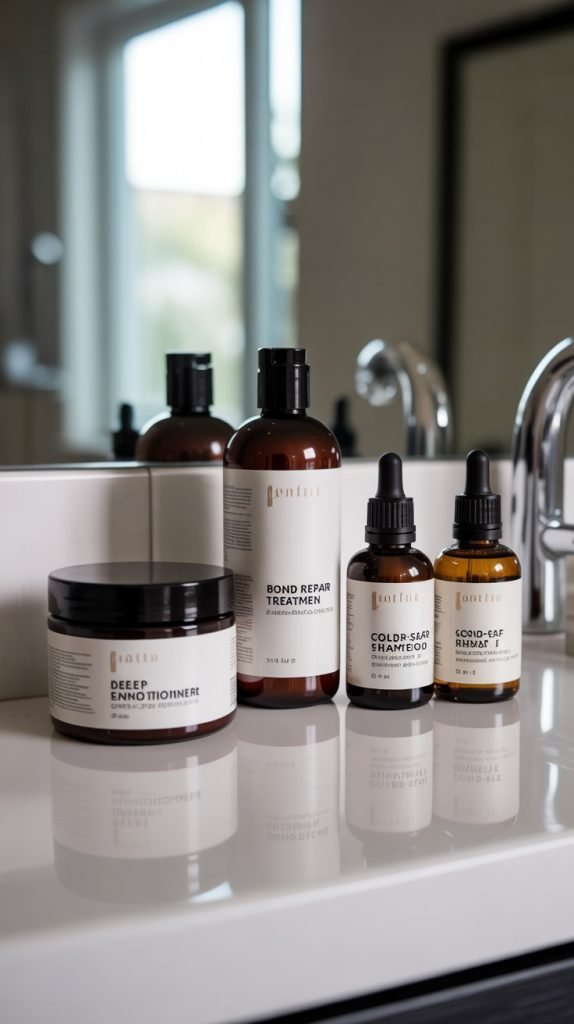
26. Best Products for Color-Treated Brown Hair with Highlights
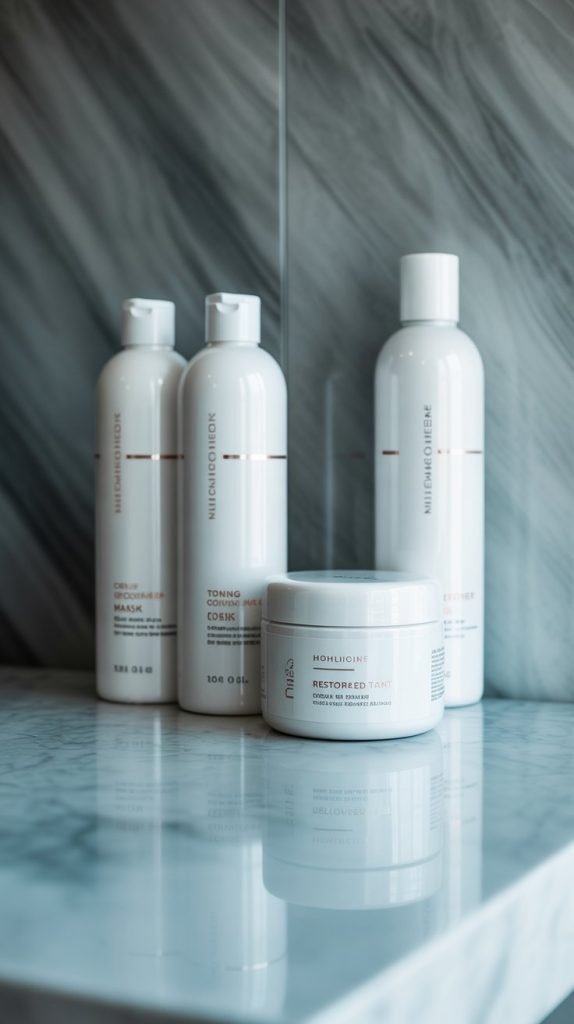
Using the right products specifically formulated for color-treated highlighted hair makes all the difference in maintaining vibrant caramel tones and healthy hair texture. Investing in quality products protects your highlighting investment and extends the life of your color.
- Color-safe shampoo: Choose sulfate-free formulas from brands like Pureology or Redken that won’t strip color or natural oils.
- Purple or blue-tinted shampoos neutralize brassiness and maintain cool caramel tones between toning sessions.
- Deep conditioning masks: Use intensive treatments weekly from brands like <a href=”https://www.moroccanoil.com/”>Moroccanoil</a> or Kerastase for moisture restoration.
- Bond repair treatments: Products containing bond-building technology repair internal damage caused by lightening processes.
- Color-depositing conditioners: Caramel or golden-toned conditioners refresh highlights and add shine with each use.
- Heat protectant sprays: Essential for preventing further damage when styling highlighted hair with hot tools.
- Leave-in treatments: Lightweight formulas provide ongoing protection and moisture throughout the day without weighing hair down.
- Hair oils: Argan, coconut, or specialized blends seal cuticles and add brilliant shine to highlighted sections.
- UV protection sprays: Sun exposure fades caramel highlights quickly, so UV filters are essential for color longevity.
- Avoid products containing harsh sulfates, parabens, or alcohol that dry out and damage chemically processed hair.
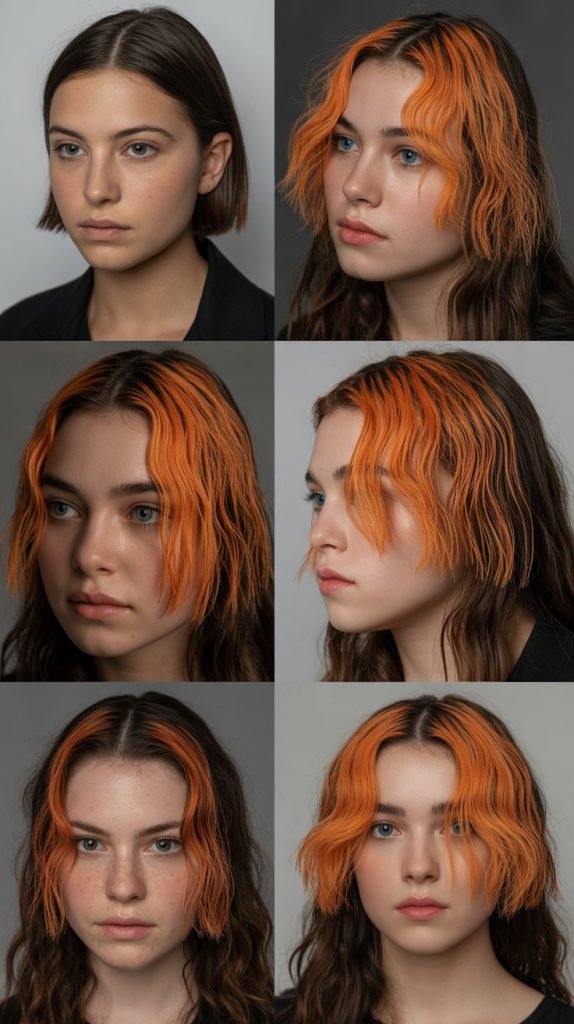
27. Correcting Highlights That Turned Too Orange or Brassy

Orange or brassy highlights are a common issue when lightening brown hair, but they can be corrected with proper toning techniques. Understanding the color wheel helps you neutralize unwanted warm tones effectively.
- Orange tones appear when brown hair isn’t lifted enough or when toner fades over time.
- Use blue or blue-violet based toners to neutralize orange pigments and shift toward caramel tones.
- Apply toner mixed with 10 or 20 volume developer to orange sections for 10-20 minutes.
- For stubborn brassiness, apply a blue-toning shampoo and leave it on for 5-10 minutes before rinsing.
- If highlights are extremely orange, you may need to lift them further before toning for proper correction.
- Mix ash and golden toners together to create the perfect caramel shade without going too cool.
- Wella T18 (lightest ash blonde) mixed with a golden toner creates beautiful caramel on orange highlights.
- Process blue toner carefully and check every 5 minutes to avoid over-toning into muddy or gray shades.
- Prevent future brassiness by using blue shampoo weekly and avoiding hot water when washing hair.
- If highlights remain orange after multiple toning attempts, consult a professional colorist for correction.
28. Seasonal Adjustments for Your Caramel Highlights
Adapting your caramel highlight shade and placement throughout the year keeps your look fresh and seasonally appropriate. Different times of year call for slight variations in tone and intensity.
- Spring/Summer highlights: Go slightly brighter and more golden with lighter caramel tones that reflect sunshine and warmth.
- Add more highlights during warmer months to mimic natural sun-lightening that occurs outdoors.
- Fall/Winter highlights: Choose richer, deeper caramel tones with hints of copper or auburn for cozy, warm dimension.
- Reduce the number of highlights slightly in cooler months for a more sophisticated, understated look.
- Summer highlights fade faster due to sun exposure, chlorine, and saltwater, requiring more frequent toning.
- Winter highlights last longer and require less maintenance due to reduced environmental stressors.
- Adjust your highlight placement based on seasonal hairstyles—more face-framing for updos in summer.
- Consider adding deeper lowlights in fall to create richer dimension as you transition away from summer brightness.
- Protect summer highlights with UV-filtering products and wear hats during extended sun exposure.
- Seasonal adjustments keep your hair looking intentional and current rather than grown-out or neglected.
29. Cost Comparison: DIY Caramel Highlights vs. Salon
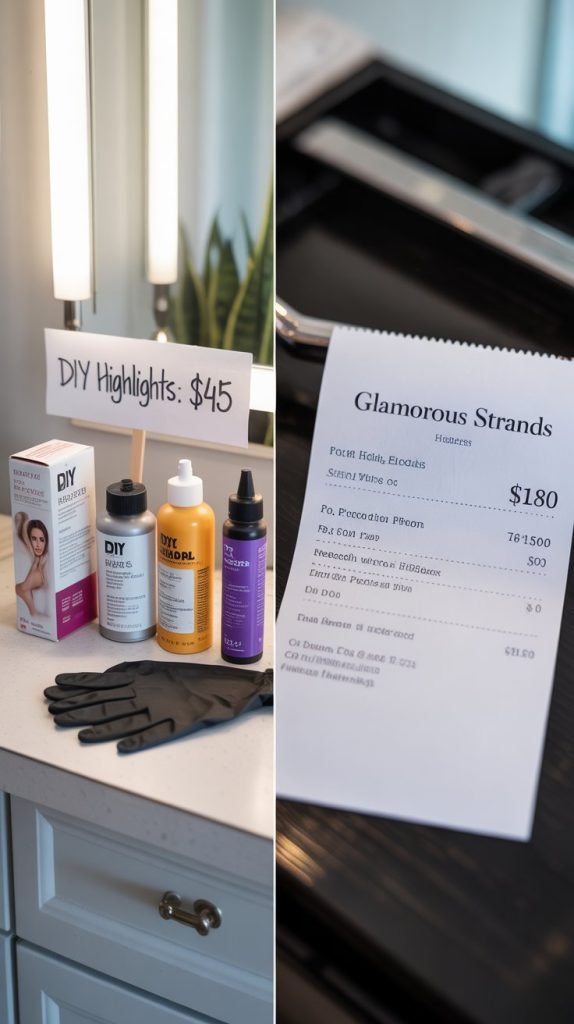
Understanding the financial benefits of DIY highlighting helps you make informed decisions about your hair care budget. While salon highlights offer professional expertise, at-home highlighting provides significant savings.
- Quality at-home highlighting kits cost between $25-45 for complete initial application with enough product.
- Salon caramel highlights typically range from $150-300 depending on hair length, thickness, and location.
- DIY highlighting saves approximately $500-1000 annually when maintaining highlights throughout the year.
- Factor in additional at-home costs like toner ($8-15), conditioning treatments ($15-30), and tools ($20-40 one-time).
- Salon highlighting includes professional expertise, perfect color matching, and guaranteed results if issues arise.
- At-home highlighting requires time investment for learning techniques and executing the application yourself.
- Consider starting with a professional salon session to establish your look, then maintain it at home.
- The cost savings from DIY highlighting can fund other beauty treatments or luxury hair care products.
30. Common Mistakes to Avoid When Highlighting at Home
Learning from common highlighting mistakes prevents damage, disappointing results, and wasted time and money. Awareness of these pitfalls helps you achieve salon-quality results on your first attempt.
- Mistake #1: Using box dye or all-over color instead of proper highlighting lightener for dimensional results.
- Mistake #2: Skipping the strand test and processing blindly, leading to unpredictable color outcomes.
- Mistake #3: Applying highlights to dirty hair with product buildup that blocks lightener penetration.
- Mistake #4: Using too high a developer volume that damages hair unnecessarily or processes too quickly.
- Mistake #5: Placing highlights in straight lines or rows that create an artificial, striped appearance.
- Mistake #6: Saturating hair too close to the scalp and causing chemical burns or irritation.
- Mistake #7: Processing highlights too long past the recommended time, causing breakage and over-lightening.
- Mistake #8: Skipping toner application and leaving highlights brassy orange instead of beautiful caramel.
- Mistake #9: Highlighting over previously highlighted hair without considering accumulated damage.
- Mistake #10: Not sectioning hair properly, resulting in missed spots and uneven highlight distribution.
- Mistake #11: Using metal tools or bowls that can cause dangerous chemical reactions with lightener.
- Mistake #12: Expecting platinum results on dark brown hair in one session instead of gradual lightening.
31. Styling Tips to Show Off Your Caramel Highlights

Once you’ve created beautiful caramel highlights, styling your hair strategically showcases the dimension and makes your color work shine. These styling techniques maximize the visual impact of your highlights.
- Loose waves or curls: Use a large-barrel curling iron to create movement that catches light and displays color dimension.
- Waves reveal multiple tones within your highlights as the hair moves and reflects light differently.
- Side part: Switch your part to the opposite side to reveal fresh highlights and create instant volume.
- Half-up hairstyles: Pull the top section up to showcase face-framing highlights while displaying deeper base color underneath.
- Braids: Intricate braids weave highlighted and non-highlighted sections together for beautiful multi-tonal texture.
- High ponytails: Elevate highlighted top sections to make caramel tones the focal point of your hairstyle.
- Sleek straight styles: Flat iron hair to create smooth, glossy surfaces that reflect light and show crisp color definition.
- Beach waves: Tousled, textured styling mimics natural sun-lightened hair and makes highlights look effortlessly blended.
- Use shine-enhancing products like glossing serums to make caramel highlights reflect maximum light.
- Natural sunlight is the best lighting for showing off caramel highlights—take photos outdoors for stunning results.
32. How to Remove or Fade Caramel Highlights

Sometimes you may want to remove or significantly fade your caramel highlights to return to a more uniform color. Several methods can help you transition away from highlighted hair gradually or quickly.
- Color-depositing treatments: Apply semi-permanent brown dye close to your natural shade to fill in highlights gradually.
- Use demi-permanent color one shade darker than your base to slowly blend highlights over multiple applications.
- Color remover products: Specialized color removers from brands like Color Oops shrink color molecules for gentle removal.
- These products work best on recently applied highlights and may not remove all lightened tones completely.
- Lowlight application: Add brown lowlights throughout highlighted sections to create a more blended, uniform appearance.
- This method allows you to transition gradually without dramatically changing your entire look at once.
- All-over color application: Apply permanent hair color in your natural shade for complete coverage of highlights.
- Choose a color 1-2 shades lighter than your natural hair since highlighted hair absorbs color differently.
- Professional color correction: For significant color changes, consult a professional colorist to avoid damaging hair further.
- Allow hair to rest between color removal attempts to prevent excessive damage from repeated chemical processing.
- Fade highlights naturally over time by using clarifying shampoos and exposing hair to sun (with protection).
- Accept that returning to completely uniform color may take several months of gradual adjustments.
33. When to Seek Professional Help for Your Highlights
While DIY highlighting works beautifully for many people, certain situations require professional expertise to avoid serious damage or disappointing results. Knowing when to consult a stylist protects your hair and ensures beautiful outcomes.
- Seek professional help if your hair is severely damaged, breaking, or extremely fragile before attempting highlights.
- Very dark brown or black hair (level 2-3) often requires professional expertise for proper lifting without damage.
- If you’ve experienced chemical straightening, relaxers, or keratin treatments recently, consult a professional first.
- Previously colored hair with multiple color layers needs professional assessment before adding highlights.
- When attempting dramatic color changes (going from dark brown to very light caramel), professional guidance prevents disasters.
- If your first DIY highlighting attempt goes wrong, don’t try to fix it yourself—see a professional immediately.
- Hair that’s been bleached or highlighted multiple times needs professional evaluation before further processing.
- Complex techniques like balayage or babylights have steep learning curves and benefit from professional execution initially.
- If you’re unsure about color selection, processing times, or have unusual hair texture, professional consultation helps.
- Invest in one professional highlighting session to learn proper placement, then maintain it at home afterward.
- When hair shows signs of over-processing (gummy texture, extreme breakage, or melting), stop immediately and seek help.
- Professional colorists can create custom formulas for your specific hair needs and desired caramel shade.
Conclusion
Creating stunning caramel highlights on your brown hair at home is an achievable, rewarding process that saves you significant money while giving you gorgeous, dimensional color.
Throughout this comprehensive guide on 33 Easy DIY Caramel Highlights on Brown Hair at Home, you’ve learned everything from understanding your hair level and choosing the perfect caramel shade to mastering various highlighting techniques like foiling, balayage, and babylights.
You now have the knowledge to properly prepare your hair, apply highlights safely, correct common mistakes, and maintain your beautiful caramel tones for months to come.
Remember that successful at-home highlighting requires patience, proper preparation, and careful attention to processing times and product selection.
Whether you choose subtle face-framing highlights or bold, all-over dimension, the techniques and tips shared here will help you achieve professional-looking results in the comfort of your own home.
Start with a conservative approach, perform strand tests, and don’t hesitate to seek professional help when needed.
With practice and confidence, you’ll master the art of DIY caramel highlighting and enjoy beautiful, sun-kissed brown hair that looks like you spent hundreds at the salon—all while keeping those savings in your pocket for other indulgences.