School mornings don’t have to mean sacrificing style for convenience, especially when you have gorgeous curly hair that deserves to shine.
Finding the perfect balance between managing your natural curls and creating eye-catching braided styles can transform your entire school experience, giving you the confidence to walk through those hallways with your head held high.
This comprehensive guide to “33 Creative Curly Hair Braided Ideas for School to Try Now” brings you an exciting collection of braided hairstyles specifically designed for curly-haired students who want to look amazing without spending hours in front of the mirror.
From simple and quick options for those rushed Monday mornings to intricate weekend-prep styles that will last through Friday, these braided ideas celebrate your natural texture while keeping your curls protected and manageable throughout the school day.
Whether you’re dealing with tight coils, loose waves, or anything in between, you’ll discover practical techniques, styling tips, and creative combinations that work with your unique curl pattern.
Each style has been carefully selected to ensure it’s age-appropriate, school-appropriate, and designed to withstand the demands of a busy school schedule filled with classes, sports, and social activities.
Get ready to bookmark your favorites and experiment with braided looks that will have your classmates asking for your styling secrets.
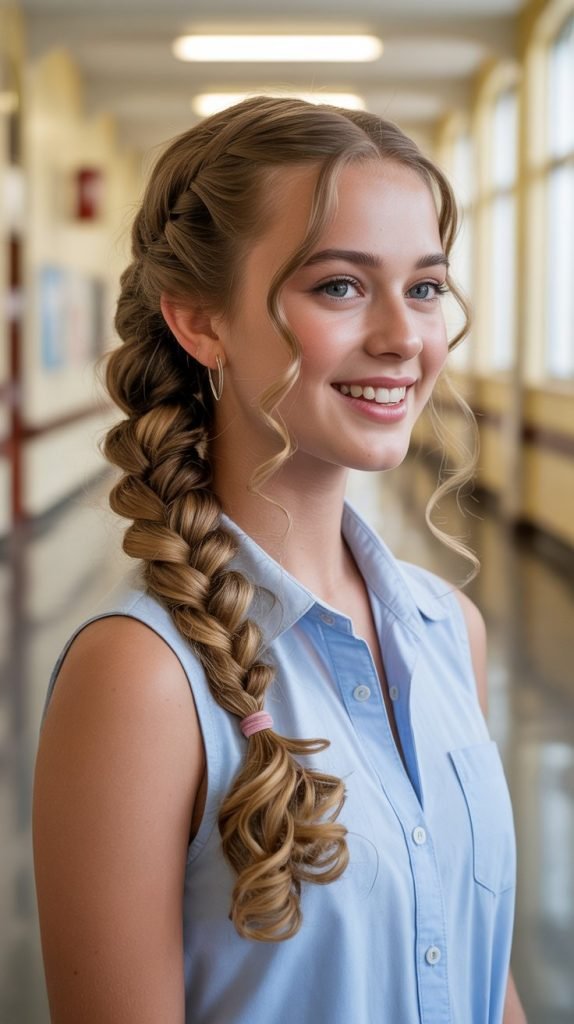
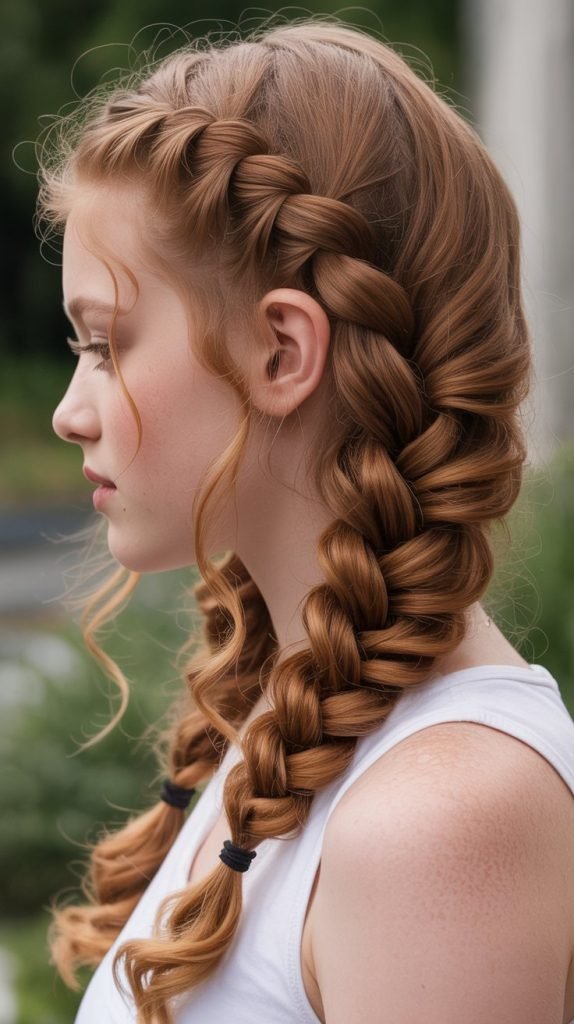
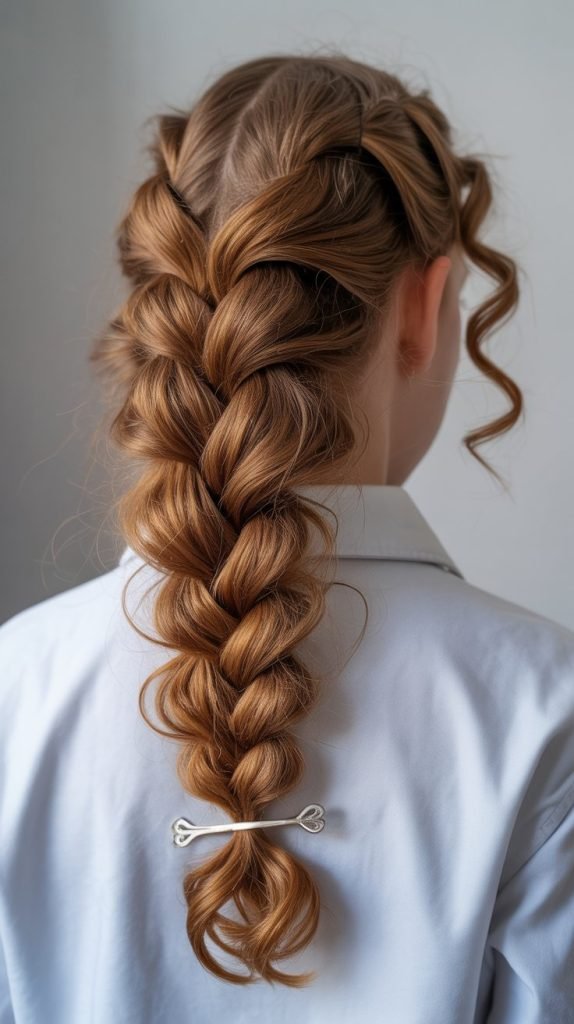
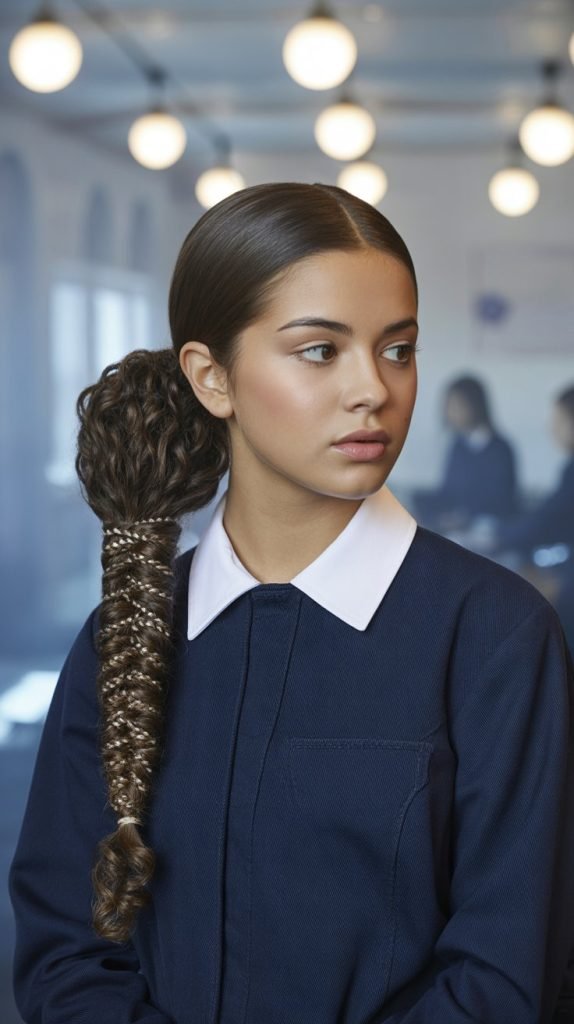
1. Classic Three-Strand Braid with Curly Ends

The classic three-strand braid serves as the foundation for countless hairstyles and works beautifully with curly hair, allowing your natural texture to create a stunning contrast between the sleek braid and voluminous curly ends.
This timeless style is perfect for beginners and can be completed in under five minutes, making it ideal for those hectic school mornings when you need to look polished quickly.
- The three-strand braid on curly hair creates a unique textured appearance that straight hair simply cannot replicate, with each curl adding dimension and visual interest to the braid’s structure.
- Start by applying a leave-in conditioner or curl cream to damp or dry hair to ensure your curls are moisturized and defined before beginning the braiding process.
- Divide your hair into three equal sections at the nape of your neck or wherever you want the braid to begin, making sure each section contains roughly the same amount of hair for a balanced look.
- Cross the right section over the middle section, then cross the left section over the new middle section, continuing this alternating pattern while maintaining consistent tension throughout the braid.
- Secure the end with a hair tie that matches your hair color or choose a colorful elastic band that complements your school outfit for an added pop of personality.
- Allow 2-3 inches of curly ends to remain unbraided for a playful, youthful finish that showcases your natural curl pattern while keeping the majority of your hair neatly contained.
- This style works exceptionally well for gym class or sports activities since it keeps hair securely away from your face without requiring numerous bobby pins or excessive styling products.
2. Double Dutch Braids for Athletic Activities

Double Dutch braids, also known as boxer braids or cornrows, are the ultimate protective style for active students who participate in sports, dance, or physical education classes throughout the school week.
These braids sit flat against the scalp and distribute tension evenly, making them comfortable to wear for extended periods while providing maximum security for your curls.
- Dutch braids differ from regular braids because you cross the sections under rather than over, creating a raised, three-dimensional effect that stands out visibly against your scalp.
- Part your hair down the center from your forehead to the nape of your neck using a rat-tail comb to create two equal sections, ensuring the part is straight for a symmetrical finished look.
- Begin the first Dutch braid by taking a small section of hair near your hairline and dividing it into three strands, then crossing the outer strands under the middle strand.
- Add small sections of hair to each outer strand as you work your way down the scalp, incorporating all the loose hair into the braid before continuing down the length of your hair.
- The key to long-lasting Dutch braids is maintaining firm but not painful tension throughout the braiding process, which prevents the braids from becoming loose or frizzy during the school day.
- Repeat the exact same process on the opposite side of your head, trying to match the tightness and size of the first braid for a cohesive, professional appearance.
- Secure both braids with small, clear elastic bands or hair ties that won’t cause damage when you’re ready to take the style down after several days of wear.
- Apply a light oil or edge control product along your hairline and part to smooth down any flyaways and give your braids a polished, finished appearance.
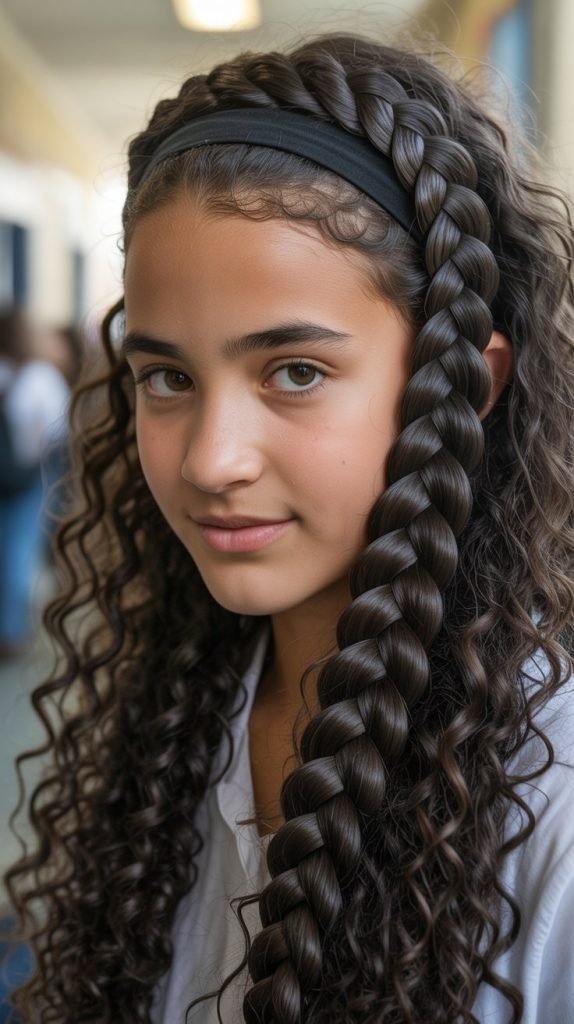
3. Side-Swept Curly Braid
The side-swept curly braid combines elegance with practicality, offering a romantic, asymmetrical look that’s perfect for school presentations, club photos, or days when you want to feel extra special.
This style draws all your hair to one side, creating a beautiful cascade of braided and curly texture that frames your face beautifully.
- Begin by deciding which side you want your braid to fall on, typically choosing the side opposite your natural part or the side that feels most comfortable for you.
- Gather all your hair to your chosen side, sweeping it over your shoulder and holding it temporarily with one hand while you prepare to start braiding.
- Apply a small amount of styling gel or mousse to help control frizz and keep your curls defined throughout the braiding process without making your hair stiff or crunchy.
- Create a regular three-strand braid, French braid, or fishtail braid starting from just behind your ear and working down the length of your hair, incorporating your natural curl pattern into each section.
- The side-swept position naturally showcases your work and makes it easy to admire your braid throughout the day without needing a mirror.
- Gently pull on the outer edges of the braid to create a fuller, more voluminous appearance that highlights your curly texture and adds a bohemian, relaxed vibe to the overall style.
- Secure with a decorative hair tie, ribbon, or scrunchie that adds a pop of color or complements your school uniform for an extra touch of personal style.
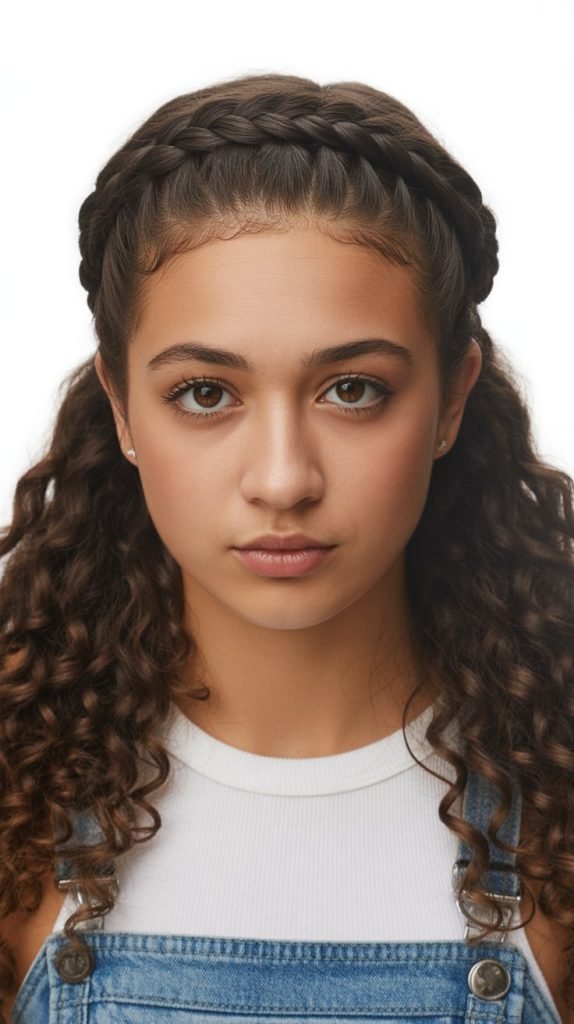
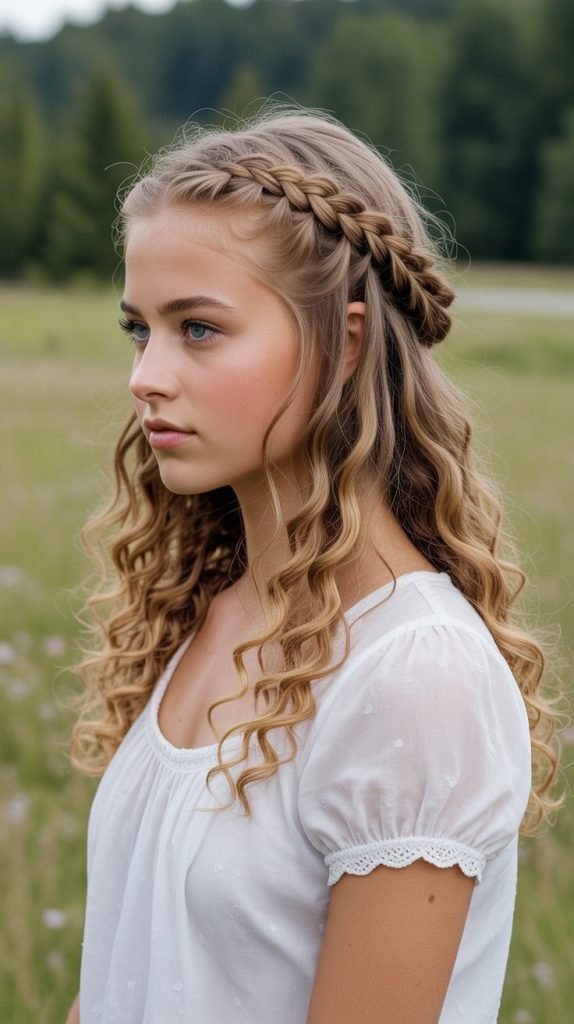
4. Crown Braid with Curly Volume
The crown braid creates a halo effect around your head while allowing the rest of your curls to flow freely, offering the perfect combination of practical face-framing structure and voluminous, curly beauty.
This regal style is surprisingly easy to achieve once you understand the basic technique and works wonderfully for special school events or everyday wear.
- Start with defined, moisturized curls by applying your favorite curl-defining product to clean, damp hair and allowing it to air dry or diffusing it until about 80% dry.
- Create a deep side part on either the left or right side of your head, which will serve as the starting point for your crown braid.
- Take a small section of hair from the front of your part and divide it into three strands to begin a Dutch braid or French braid that will follow your hairline.
- Work the braid along your hairline in a curved, semicircular path, adding small sections of hair from the front as you move toward the opposite side of your head.
- Continue braiding around the crown of your head until you reach the opposite ear or the nape of your neck, depending on how much of a crown effect you want to create.
- Secure the end of the braid with bobby pins tucked discreetly underneath the braid itself or blend it into the rest of your curly hair for a seamless, natural transition.
- Leave the back portion of your hair completely unbraided so your curls can provide maximum volume and create a stunning contrast with the structured crown braid.
- Use a light hairspray to set the crown braid in place while avoiding the curly sections to maintain their natural bounce and movement throughout the school day.
5. Fishtail Braid for Textured Definition
The fishtail braid creates an intricate, woven appearance that looks complex but requires only two sections of hair instead of three, making it an achievable style even for braiding beginners.
When executed on curly hair, the fishtail pattern showcases beautiful texture and depth that straight hair cannot achieve.
- Begin by gathering your hair into a low ponytail or deciding whether you want a single fishtail braid or a side fishtail braid for a more casual, over-the-shoulder look.
- Divide your hair into two equal sections rather than three, which is the distinctive characteristic that differentiates a fishtail braid from traditional braiding techniques.
- Take a small piece of hair from the outer edge of the right section and cross it over to join the left section, effectively transferring a thin strand from one side to the other.
- Repeat this process on the opposite side by taking a small piece from the outer edge of the left section and crossing it over to join the right section.
- Continue alternating sides throughout the length of your hair, always taking small pieces from the outer edges and crossing them over to the opposite section for that signature fishtail appearance.
- The smaller the sections you take with each crossover, the more intricate and detailed your fishtail braid will appear, though this approach requires more time and patience.
- Curly hair naturally adds volume and dimension to the fishtail pattern, creating a fuller, more textured braid that looks effortlessly bohemian and artistic.
- Gently pancake the braid by pulling on the outer loops to create width and showcase the beautiful woven pattern even more dramatically.
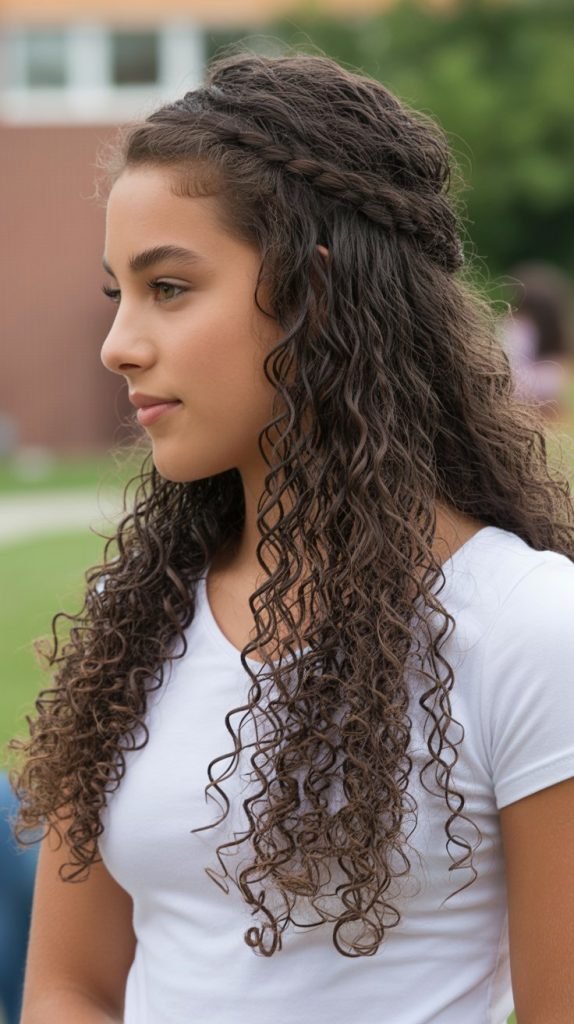
6. Half-Up Braided Crown

The half-up braided crown style offers the best of both worlds by keeping the top section of your hair neatly braided and secured while allowing the bottom half of your curls to cascade freely down your back.
This versatile style works for both casual school days and more formal academic events.
- Section off the top half of your hair from ear to ear, creating a horizontal part that separates the hair you’ll be braiding from the hair you’ll leave down.
- Clip or tie the bottom section away temporarily to keep it out of your way while you work on creating the braided crown portion.
- Divide the top section into two or three parts depending on whether you want to create a single braid across the top, two braids that meet in the middle, or a more complex braided pattern.
- Create Dutch braids, French braids, or simple three-strand braids with the top section, working from one side of your head to the other and following the natural curve of your head.
- Secure the braids with small elastic bands and then use bobby pins to attach them to the rest of your hair, creating a crown-like effect across the top of your head.
- Release the bottom section of curls and use your fingers to gently fluff and separate them for maximum volume and definition.
- The contrast between the structured, braided crown and the free-flowing curls creates visual interest and dimension that’s both practical and beautiful for school settings.
- This style keeps hair away from your face during classes and tests while still allowing you to show off your gorgeous curl pattern.
7. Braided Bangs with Curly Length

Braided bangs provide an excellent solution for growing out bangs or managing shorter front sections of curly hair that tend to fall into your face during class.
This style incorporates just the front hairline into small braids while leaving the rest of your curly hair completely natural and untouched.
- Start with freshly washed or refreshed hair, ensuring your curls are defined and your scalp area is clean and free from excess product buildup.
- Section off a horizontal strip of hair along your entire hairline, approximately 1-2 inches deep, and clip the rest of your hair back to keep it out of your working area.
- Decide whether you want one continuous braid across your forehead, two braids starting from each temple, or multiple tiny braids for a more bohemian appearance.
- Begin braiding at one side of your hairline, creating a Dutch braid or French braid that incorporates the front sections while following the curve of your hairline toward the opposite side.
- Keep the braid relatively flat against your scalp by maintaining consistent tension and adding small sections of hair from the front as you work your way across.
- Secure the end of the braid with a small clear elastic or bobby pins tucked behind your ear or blended into the rest of your curly hair.
- The braided bang section effectively keeps hair out of your eyes during tests, lab work, or any activity requiring clear vision while showcasing your natural curls everywhere else.
- This style is particularly beneficial for curly-haired students with shorter layers or face-framing pieces that are too short to stay in a ponytail or full braid.
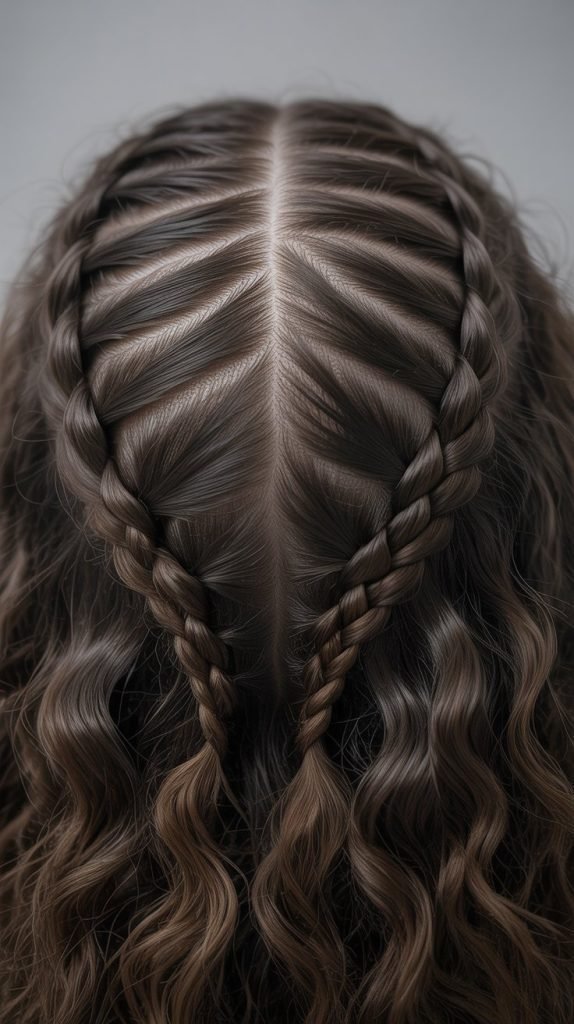
8. Zigzag Part with Double Braids
The zigzag part adds an unexpected, playful element to traditional double braids, creating visual interest before the braiding even begins and showing off your creative styling skills.
This fun variation takes only a minute longer than a standard center part but delivers significantly more personality and style impact.
- Use the pointed end of a rat-tail comb to create your zigzag part by placing the tip at your hairline and drawing it back toward your crown in sharp diagonal movements, alternating the direction every inch or so.
- The zigzag pattern doesn’t need to be perfectly uniform; in fact, a slightly irregular pattern often looks more natural and intentional than a mechanically precise zigzag.
- Once your zigzag part is complete, proceed with creating two braids using any braiding technique you prefer, whether that’s Dutch braids, French braids, or simple three-strand braids.
- The exposed zigzag part along your scalp becomes a key design element that sets this style apart from standard double braids and shows you put thought into your appearance.
- This style works particularly well for school spirit days, casual Fridays, or any day when you want to express more creativity through your hairstyle while still maintaining a neat, school-appropriate look.
- Apply a small amount of edge control or gel along the zigzag part to keep it clean and defined throughout the day, preventing any flyaways from obscuring your design.
- Take a photo of your zigzag part pattern before completing your braids so you can recreate the same design next time or experiment with different zigzag widths and angles.
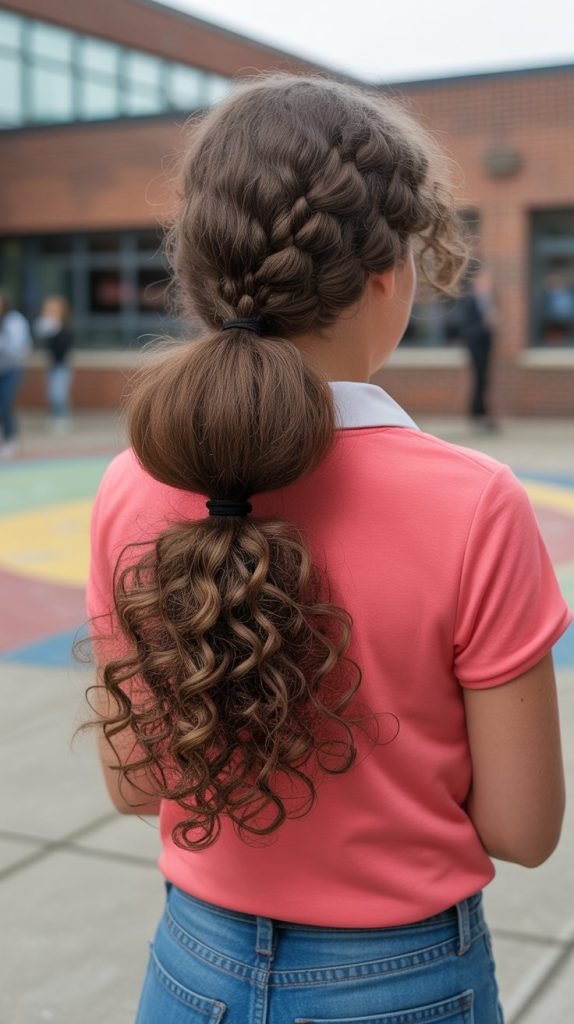
9. Braided Ponytail with Curly Puff

The braided ponytail combines the security of a braid with the volume and bounce of a curly ponytail puff, creating a hybrid style that’s both practical and visually striking.
This versatile look works for everything from gym class to school dances and can be dressed up or down depending on accessories.
- Start by gathering all your hair into a high, mid, or low ponytail depending on your preference and securing it tightly with a strong elastic band that can support the weight of your curls.
- Smooth down your edges and any flyaways around the base of the ponytail using a small amount of gel, edge control, or light pomade applied with a soft-bristle brush.
- Divide the ponytail into two or three sections and create a braid with one section while leaving the remaining curly hair loose and free within the ponytail.
- Alternatively, braid the entire length of the ponytail and then gently pull apart the braid to create a fuller, more voluminous appearance that showcases your curl texture.
- You can also wrap a small braid around the base of the ponytail to conceal the elastic band and add an extra decorative detail to the overall style.
- The combination of braided and curly elements within the same ponytail creates dimension and prevents the style from looking too flat or one-dimensional.
- Adjust the height of your ponytail based on your school’s dress code requirements and your personal comfort level, knowing that higher ponytails tend to look more youthful and energetic while lower ponytails appear more sophisticated.
10. Waterfall Braid with Loose Curls
The waterfall braid creates the illusion of hair cascading through a braid like water flowing over rocks, resulting in a romantic, ethereal style that looks incredibly intricate despite being relatively simple to execute.
This style works beautifully on curly hair because the dropped sections naturally curl and blend with the rest of your hair.
- Begin with well-defined curls by applying your curl cream or mousse to damp hair and allowing it to dry completely before starting the waterfall braid.
- Take a small section of hair near your temple and divide it into three strands to begin a regular braid along the side of your head, working horizontally toward the back.
- After completing one stitch of the braid, drop the bottom strand completely and let it fall, then pick up a new section of hair from the top to replace it and continue braiding.
- Continue this pattern of dropping the bottom strand and picking up a new top strand with each stitch, creating the characteristic waterfall effect where strands of hair appear to cascade through the braid.
- The dropped strands should blend seamlessly with your loose curls, creating a unified look that appears as though your curls are naturally woven through the braid.
- Work the waterfall braid as far around your head as you’d like, either stopping at the back of your ear for a subtle accent or continuing all the way around to the opposite side for a more dramatic effect.
- Secure the end of the braid with bobby pins that match your hair color, tucking them underneath the braid or into your curls where they won’t be visible.
- The waterfall braid draws attention to your natural curl pattern while adding structure and interest to the side of your head, making it perfect for school picture day or special presentations.
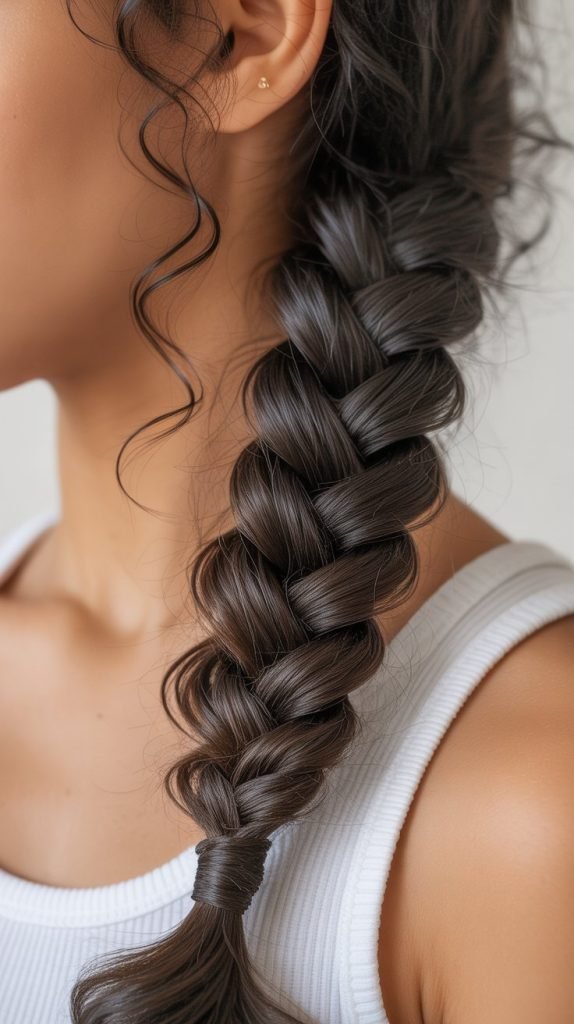
11. Twisted Braids for Quick Styling
Twisted braids, also called rope braids or two-strand twists, offer a faster alternative to traditional three-strand braids while still providing a polished, intentional look.
These twisted styles work exceptionally well on curly hair because they enhance and define your natural curl pattern rather than concealing it.
- Section your hair into the desired number of twists, whether that’s two large sections for double twisted braids, four sections for a more intricate look, or many small sections for individual twists throughout.
- Apply a curl-defining cream or light gel to each section before twisting to ensure the twists hold their shape and maintain definition throughout the school day.
- Divide each section into two equal parts and twist them around each other in the same direction, always keeping the twist tight and uniform from root to tip.
- The key to successful rope braids is twisting each individual strand clockwise (or counterclockwise) before wrapping them around each other in the opposite direction, which creates tension and prevents the twist from unraveling.
- Twisted braids typically take about half the time of regular braids, making them perfect for those mornings when you’ve hit the snooze button one too many times but still want to look put-together.
- Secure each twist with a small elastic band at the end, and consider wrapping the band with a small piece of hair to conceal it for a more polished appearance.
- Two-strand twists can last for several days when properly maintained at night with a satin bonnet or silk pillowcase, making them an excellent wash-and-go alternative for busy school weeks.
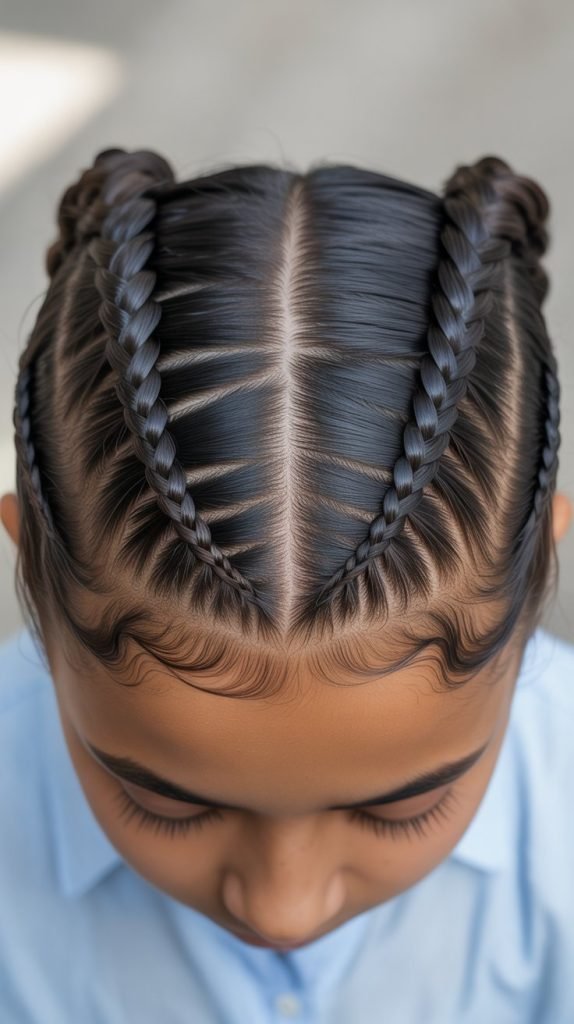
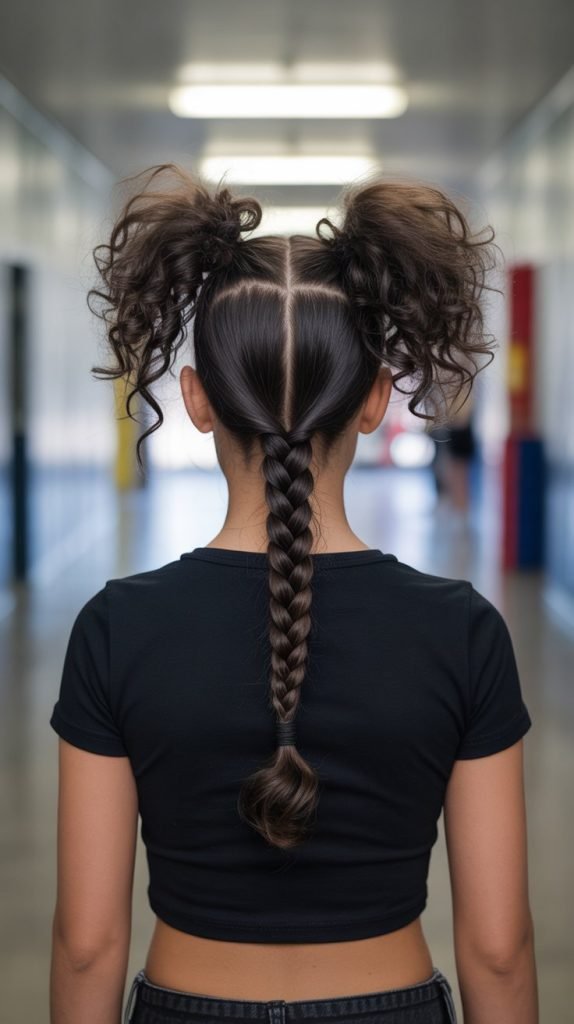
12. Braided Space Buns with Curly Texture
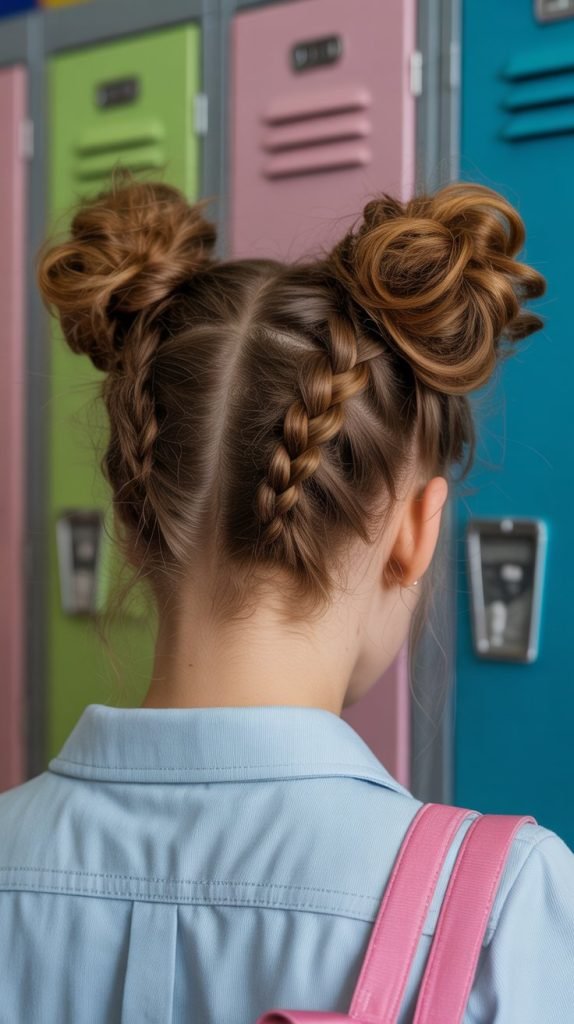
Braided space buns combine the playful, youthful energy of space buns with the structure and detail of braids, creating a fun, dimensional style that’s perfect for school spirit days or casual Fridays.
This trendy style keeps all your hair secured while still allowing your natural curl texture to shine through.
- Part your hair down the center from your forehead to the nape of your neck, creating two equal sections that will each become a space bun.
- Gather each section into a high ponytail positioned toward the upper sides of your head rather than directly on top, which creates the characteristic space bun placement.
- Braid each ponytail completely from base to tip using a regular three-strand braid, a fishtail braid, or a rope twist depending on your preference and skill level.
- Wrap each braided ponytail around its base in a circular motion, creating a bun shape and tucking the end underneath to hide the elastic band.
- Secure each bun with bobby pins inserted vertically through the bun and into the hair underneath, using enough pins to ensure the bun stays secure through an entire school day.
- Allow some of your natural curls to peek out from the buns or intentionally pull out a few face-framing pieces for a softer, more relaxed appearance.
- The braided element adds texture and interest to the buns while helping them maintain their shape better than if they were simply twisted curly hair.
- This style works well for gym class or active school days since it keeps all your hair completely off your neck and face while still looking intentional and stylish.
13. Side French Braid into Low Bun
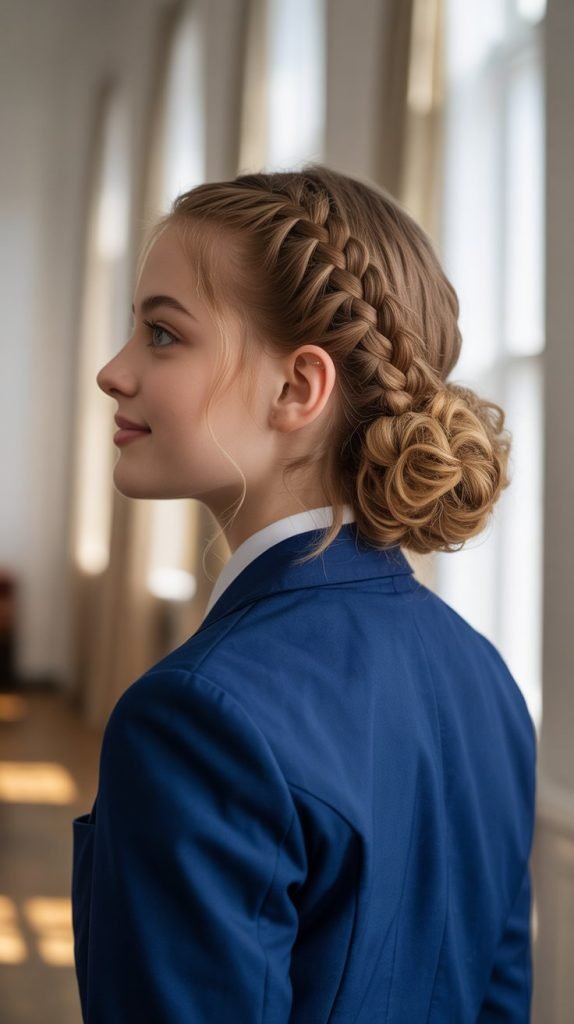
This elegant combination style begins with a side French braid that travels diagonally across the head before gathering into a low bun at the nape of the neck.
The contrast between the structured braid and the textured curly bun creates sophistication perfect for school presentations or more formal academic settings.
- Start by creating a deep side part on your preferred side, which will serve as the beginning point for your French braid.
- Take a triangular section of hair from the front of your part and divide it into three strands to begin your French braid, working diagonally toward the opposite lower side of your head.
- Add small sections of hair to the outer strands as you braid, incorporating all the hair from the top and sides as you work your way down toward the nape of your neck.
- The diagonal path of the French braid creates visual interest and draws the eye across your head before arriving at the low bun placement.
- Once you’ve incorporated all your hair into the braid and reached the nape of your neck, continue braiding the remaining length for a few inches or secure it directly into the bun.
- Gather all the hair, including the braid, into a low ponytail at the nape of your neck and secure it with an elastic band.
- Twist the ponytail loosely and wrap it around the base to create a low bun, allowing your curly texture to show through while keeping the overall shape neat and contained.
- Secure the bun with bobby pins and use the braided section as a decorative band that wraps into the bun, creating a cohesive, polished final look.
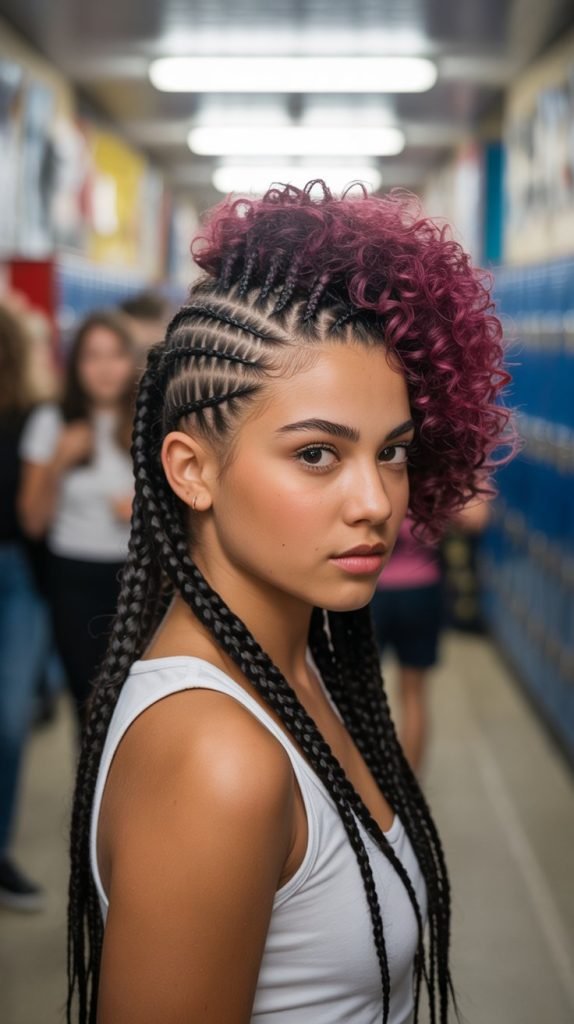
14. Mohawk Braid with Curly Sides
The mohawk braid creates a bold, edgy statement while remaining school-appropriate by incorporating a central braid down the middle of the head with curly hair left loose on the sides.
This style works particularly well for students who want to express individuality while adhering to school grooming policies.
- Create two horizontal parts running from your forehead to the nape of your neck, positioned about 2-3 inches from your center part on each side to define the mohawk section.
- Pin or tie the side sections away temporarily so you can focus on braiding the center mohawk strip without interference from the surrounding hair.
- Begin a Dutch braid at your hairline in the center section, crossing strands under rather than over to create the raised, prominent effect characteristic of mohawk styling.
- Continue the Dutch braid down the center of your head, maintaining firm tension to keep the braid elevated and clearly defined against your scalp.
- Release the side sections and allow your natural curls to frame your face and create volume on both sides of the central braid.
- The contrast between the sleek, structured center braid and the voluminous, curly sides creates drama and dimension without requiring extreme styling or hair products.
- Apply a light curl-enhancing product to the side sections to define and separate your curls, making them stand out even more against the braided mohawk.
- This style can be modified by making the center section wider or narrower depending on how dramatic you want the mohawk effect to appear.
15. Pull-Through Braid for Volume

The pull-through braid creates the illusion of an elaborate, voluminous braid without requiring any actual braiding technique, making it perfect for students who struggle with traditional braiding or want a faster styling option.
This technique uses a series of ponytails pulled through each other to create a stunning, puffy effect that works beautifully with curly hair.
- Begin by securing a small ponytail at the crown of your head with a clear elastic band, positioning it wherever you want your pull-through braid to start.
- Create a second ponytail directly below the first one, about 2-3 inches down, securing it with another elastic band.
- Split the first ponytail in half and pull those two sections around the sides of the second ponytail, temporarily pinning them out of the way.
- Create a third ponytail below the second one, this time incorporating the two halves of the first ponytail that you split and pulled around the sides.
- Continue this pattern down the length of your hair, always splitting the previous ponytail, pulling it around the new one, and incorporating it into the next ponytail.
- The result looks like a braided chain running down your head, but it’s actually a series of ponytails creating the dimensional, woven appearance.
- Gently pull on the edges of each ponytail section to create width and volume, transforming the pull-through sections into full, round segments that showcase your curl texture.
- This technique is particularly stunning on curly hair because the natural volume and texture of curls makes each pulled-through section appear fuller and more dramatic than it would on straight hair.
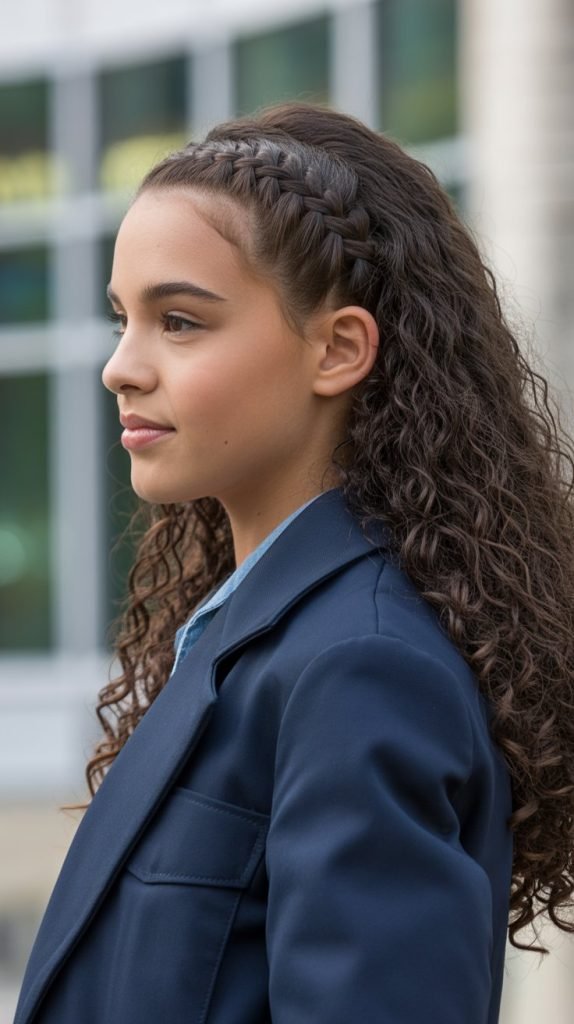
16. Lace Braid Headband
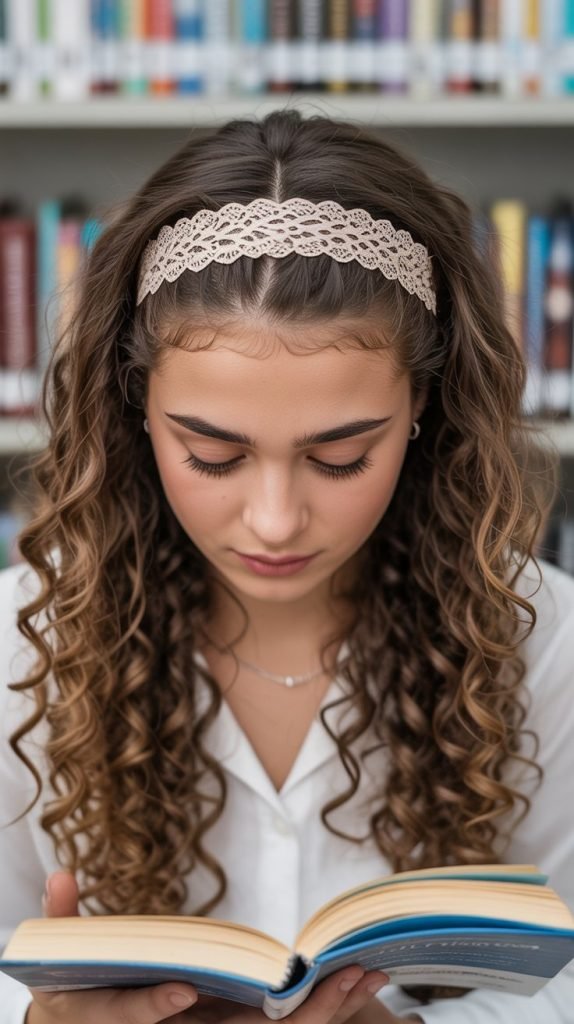
The lace braid, which only adds hair from one side of the braid rather than both sides like a French braid, creates a delicate headband effect when worked along the hairline.
This subtle, feminine style keeps hair away from the face while allowing maximum curl volume throughout the rest of your hair.
- Begin by taking a small section of hair from behind one ear and dividing it into three strands to start your lace braid.
- Work the braid along your hairline toward the opposite ear, but only add new hair from the front/hairline side of the braid, never from the back side.
- This one-sided adding technique creates the characteristic lace appearance, making the braid look like a delicate band laid across your hairline rather than a traditional French braid.
- Keep the braid relatively small and tight against your head so it functions as a practical headband rather than a bulky braid that sticks out from your hairline.
- Continue the lace braid all the way around your hairline to the opposite ear or back of your head, depending on whether you want a partial or full headband effect.
- Secure the end of the lace braid with a small bobby pin tucked behind your ear or blended into your curly hair where it won’t be visible.
- The rest of your curls remain completely loose and natural, creating a beautiful contrast between the structured headband braid and the free-flowing volume everywhere else.
- This style is particularly useful during warm weather or for students who find their curly bangs or front sections distracting during tests and focused classwork.
17. Four-Strand Braid for Advanced Detail
The four-strand braid showcases advanced braiding skills and creates an intricate, woven pattern that stands out from typical three-strand braids.
While this technique requires more practice and coordination, the stunning result is worth the effort for special school events or days when you want to showcase your styling abilities.
- Divide your hair into four equal sections instead of the typical three, numbering them mentally from left to right as sections 1, 2, 3, and 4.
- The four-strand braiding pattern follows a specific sequence: cross section 1 over section 2, then cross section 4 under section 3, then cross the new section 2 over section 3.
- This over-under-over pattern repeats continuously as you work down the length of your hair, creating a complex woven appearance with more dimension than a traditional braid.
- Maintain consistent tension throughout all four sections to ensure the braid pattern remains visible and doesn’t become loose or distorted as you work.
- The learning curve for four-strand braids is steeper than simpler braiding techniques, so practice this style several times before attempting it on a school morning when you’re pressed for time.
- Once mastered, the four-strand braid becomes a signature style that sets you apart and demonstrates impressive hair styling skills that few of your classmates will possess.
- Curly hair adds natural texture and volume to the four-strand pattern, making the intricate weaving even more visible and impressive than it would be on straight hair.
- Consider creating a side four-strand braid for easier viewing of your handiwork and to allow you to monitor the pattern as you braid without needing mirrors.
18. Braided Pigtails with Curly Ends
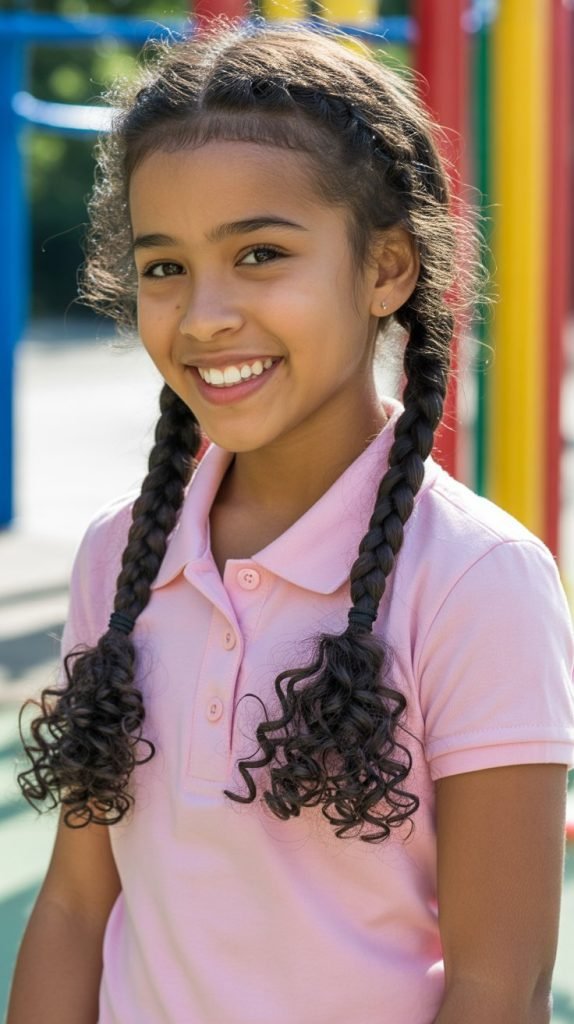
Braided pigtails offer a youthful, playful style that works for younger students or anyone wanting to embrace a casual, approachable look for school.
The combination of structured braids with bouncy curly ends creates the perfect balance between neat and fun.
- Part your hair down the center from forehead to nape, creating two equal sections that will each become a pigtail braid.
- Secure each section into a ponytail positioned at or slightly below ear level, using elastic bands that won’t damage your hair or leave creases.
- Braid each ponytail using your preferred braiding technique, whether that’s a simple three-strand braid, rope twist, or even a fishtail braid for more visual interest.
- Leave the last 2-4 inches of each pigtail unbraided so your natural curls can spring out and create a playful, bouncy finish at the ends.
- The positioning of pigtails can dramatically change the overall vibe of the style: higher placement looks more youthful and energetic while lower placement appears more sophisticated and mature.
- Consider creating asymmetrical pigtails with one positioned slightly higher than the other for an intentionally quirky, creative take on this classic style.
- Smooth down your center part and edges with a small amount of gel or edge control to ensure the style looks polished and intentional rather than messy.
- Braided pigtails work exceptionally well for gym class, field trips, or any active school day since they keep hair completely secured and prevent tangles.
19. Infinity Braid for Unique Styling
The infinity braid creates a stunning figure-eight pattern that looks incredibly complex but uses a surprisingly simple technique once you understand the basic concept.
This unique style guarantees you’ll be the only person at school wearing this particular braid variation.
- Begin with a small section of hair and divide it into two strands instead of three, which is the foundation for creating the infinity pattern.
- Take a small piece from the outside of the right strand, bring it up and over the right strand in a figure-eight motion, then add it to the left strand.
- Repeat this same figure-eight motion on the opposite side, taking a small piece from the outside of the left strand, bringing it up and over, and adding it to the right strand.
- The continuous figure-eight motion creates the infinity symbol pattern throughout the length of the braid, resulting in a unique woven appearance that differs from all traditional braiding techniques.
- Maintain consistent tension and size in the pieces you cross over to ensure the infinity pattern remains visible and uniform throughout the braid.
- This braid works best as a side b
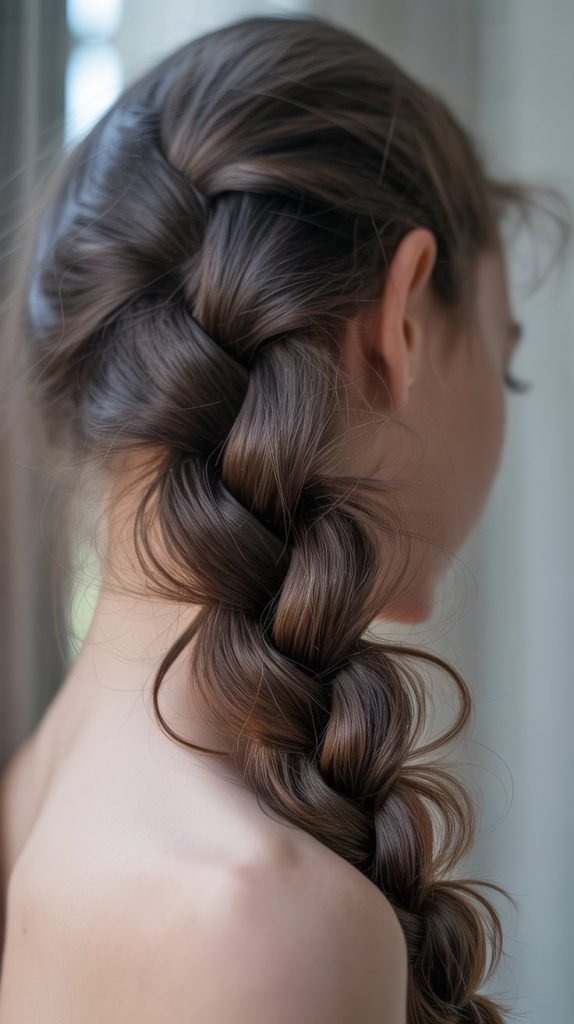
20. Bubble Braid with Defined Curls
The bubble braid creates a fun, segmented appearance using multiple elastic bands spaced throughout a ponytail, with each section gently pulled apart to form rounded bubbles.
This trendy style works beautifully on curly hair because the natural volume enhances each bubble’s fullness.
- Start by gathering your hair into a high, mid, or low ponytail depending on your preference and secure it with a strong elastic band.
- Place a second elastic band 2-3 inches below the first one, creating the first segment of your bubble braid.
- Gently pull on the hair between the two elastic bands, tugging it outward from all sides to create a rounded, bubble-like shape.
- Continue adding elastic bands every 2-3 inches down the length of your ponytail, creating multiple segments and pulling each one out to form individual bubbles.
- The spacing between elastic bands can be adjusted based on the overall length of your hair and how many bubbles you want to create.
- Use clear elastic bands for a subtle look or colorful bands that coordinate with your school outfit for added personality and flair.
- Curly hair naturally creates fuller, more voluminous bubbles than straight hair, making this style particularly impressive and dimensional on natural curls.
- The bubble braid keeps your hair secured while creating visual interest through its unique segmented structure, making it perfect for both casual school days and more dressy academic events.
- This style is extremely easy to remove at the end of the day by simply cutting or sliding off the elastic bands, making it a no-commitment option that doesn’t require complex unbraiding.
21. Halo Braid with Center Part
The halo braid wraps completely around your head like a crown, creating an angelic, ethereal look that keeps all your hair secured while showcasing your braiding skills.
This style works beautifully for school concerts, presentations, or any day when you want to feel extra polished.
- Create a center part from your forehead to the nape of your neck, dividing your hair into two equal sections.
- Begin a Dutch braid or French braid on one side, starting at the nape of your neck and working upward and around your head rather than downward.
- Continue braiding along the curve of your head, following your hairline and working toward the opposite side where you started.
- The key to a successful halo braid is keeping the braid relatively flat against your head so it sits like a crown rather than sticking out awkwardly.
- When you reach the point where you started braiding, continue braiding the remaining length of hair and tuck the end underneath the beginning of the halo braid.
- Secure the tucked end with bobby pins, hiding them underneath the braid where they won’t be visible to others.
- The halo braid keeps every strand of hair neatly contained, making it perfect for gym class, science labs, or any activity where loose hair might be problematic.
- Apply a light finishing spray to smooth any flyaways and ensure your halo braid maintains its neat appearance throughout the entire school day.
- This style works particularly well on second or third-day curls when your hair has slightly less volume and is easier to braid smoothly against your scalp.
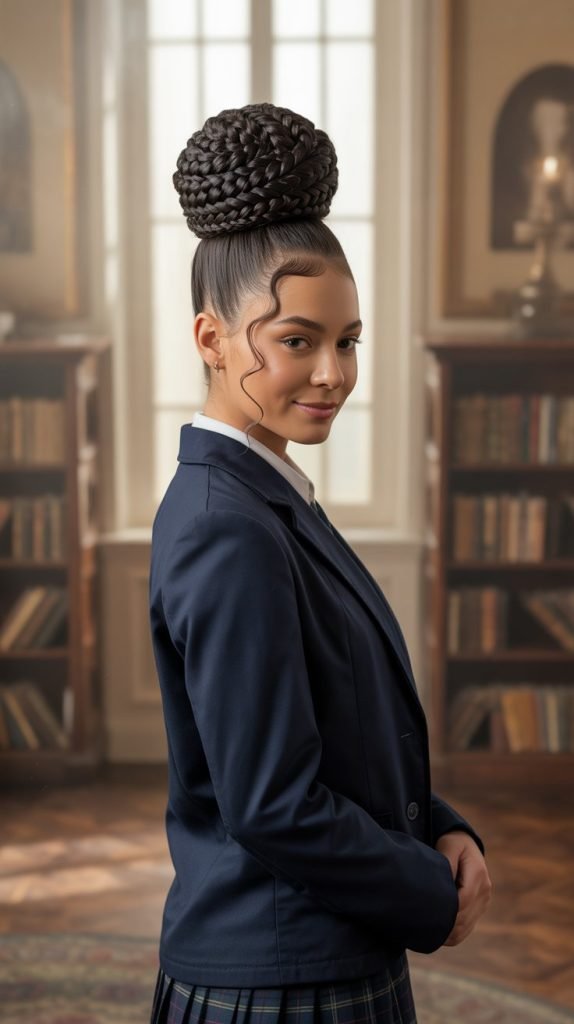
22. Braided Top Knot with Loose Curls
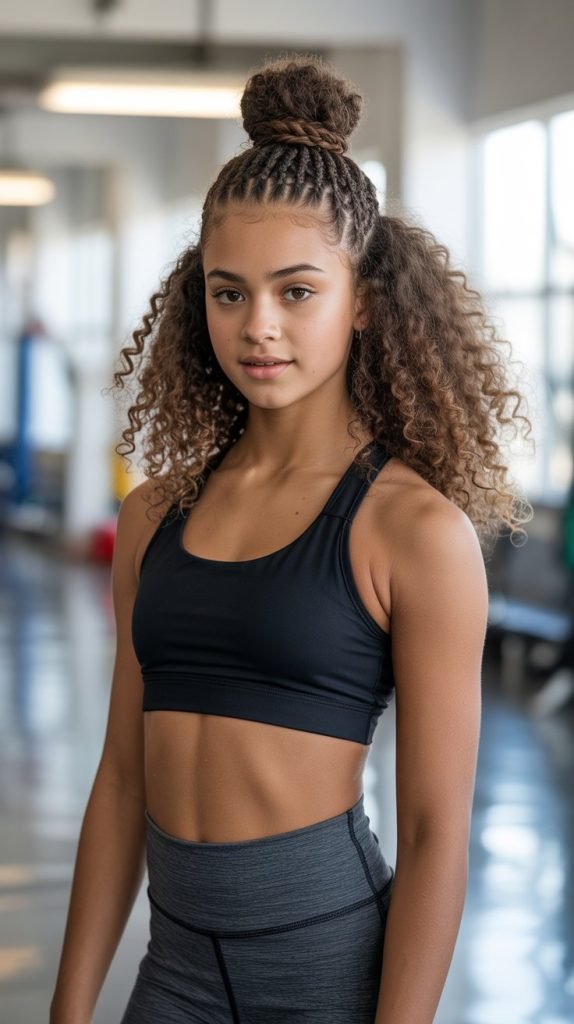
The braided top knot elevates the classic top knot by incorporating a braid into the base or throughout the bun structure, adding texture and visual interest to this convenient updo.
This style keeps hair completely off your neck and face while still looking intentional and stylish.
- Flip your head upside down and gather all your hair at the crown of your head, securing it into a high ponytail with a strong elastic band.
- Create a braid with the entire ponytail using your preferred braiding technique, working from the base of the ponytail all the way to the ends.
- Wrap the braided ponytail around its base in a circular motion, creating a top knot shape with the braid visible throughout the bun structure.
- Secure the braided top knot with bobby pins inserted through the braid and into the base ponytail, using enough pins to ensure the bun stays secure through an active school day.
- Alternatively, you can braid just the front section of hair before gathering it into the top knot, creating a braided detail that leads into the bun.
- Pull out a few face-framing pieces before creating the top knot for a softer, more romantic appearance that balances the severity of the high bun placement.
- The braided element adds texture and prevents the top knot from looking too simple or understated, elevating it from a basic gym hairstyle to an intentional fashion choice.
- This style works exceptionally well for warm weather, sports activities, or days when you want to showcase earrings or a statement necklace without hair interference.
23. Snake Braid for Textured Interest
The snake braid creates a unique, winding pattern by alternating the direction of your braiding, resulting in a serpentine appearance that zigzags down your head.
This creative style showcases advanced braiding skills and creates maximum visual impact with minimal additional time investment.
- Begin a Dutch braid or French braid on one side of your head near the temple, working diagonally toward the opposite side rather than straight down.
- After braiding 2-3 inches diagonally across your head, change direction and begin braiding back toward the original side, creating the first curve of the snake pattern.
- Continue alternating the direction of your braid every few inches, working your way down your head in a zigzag or snake-like pattern.
- Each directional change creates a curve in the braid that mimics the movement of a snake, hence the name of this creative braiding technique.
- The snake braid works best when you maintain consistent section sizes and tension throughout each directional change to ensure the pattern remains visible and intentional.
- This style naturally incorporates all your hair as you work down your head, eventually gathering everything into a single braid that can hang freely or be secured into a bun.
- The winding path of the snake braid creates visual interest across your entire head rather than focusing attention on just one area.
- Curly hair adds extra dimension to the snake braid pattern because the texture makes each curve and directional change even more pronounced and visible.
24. Milkmaid Braid with Curly Volume
The milkmaid braid creates a sweet, vintage-inspired look by wrapping braids across the top of your head like a crown or halo, evoking pastoral, romantic imagery.
This timeless style works beautifully for school picture day or any occasion when you want to look polished and put-together.
- Part your hair down the center and create two separate braids, one on each side of your head, using simple three-strand braids.
- Braid all the way to the ends of your hair on both sides, securing each braid with a small elastic band that matches your hair color.
- Take the right braid and drape it across the top of your head following your hairline, securing it with bobby pins along the left side of your head.
- Take the left braid and drape it across the top of your head in the opposite direction, positioning it either in front of or behind the first braid depending on the look you prefer.
- Secure the second braid with bobby pins along the right side of your head, creating a complete crown effect across the top of your head.
- Tuck the ends of both braids underneath the opposite braid, hiding the elastic bands and creating a seamless, circular appearance.
- The milkmaid braid keeps all your hair secured and off your face while creating a soft, feminine look that works for both casual and dressy school occasions.
- If you have particularly voluminous curls, you may need to braid them tightly and use extra bobby pins to ensure the milkmaid braids stay flat and secure against your head.
- Pull out a few wispy pieces around your hairline before pinning the braids for a softer, more romantic finish that prevents the style from looking too severe.
25. Cornrow Side Design
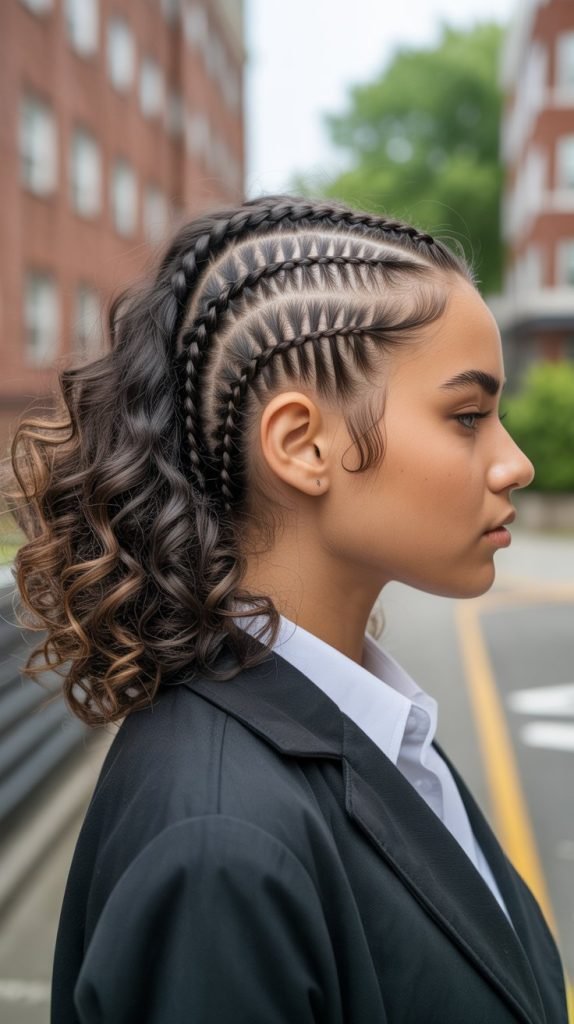
Cornrow side designs incorporate small, tight braids along one side of the head in creative patterns before transitioning into loose curls on the remaining sections.
This style combines protective braiding techniques with the beauty of natural curls for a look that’s both practical and striking.
- Section off one side of your hair from your part down to behind your ear, creating a triangular or rectangular section that will contain your cornrow design.
- Create small, tight cornrows within this section, working in straight lines, curves, or geometric patterns depending on your desired design.
- Cornrows are created using the Dutch braiding technique with very small sections of hair, braiding tightly against the scalp to create raised rows.
- The cornrow pattern can be as simple as 2-3 parallel lines or as complex as zigzags, curves, or intersecting patterns that showcase your creativity.
- Leave the remaining hair loose and curly, creating a beautiful contrast between the sleek, sculptural cornrows and the voluminous, textured curls.
- Apply edge control or gel to the cornrow section before braiding to ensure smooth, defined rows that stay neat throughout the school day.
- The cornrow side design works particularly well for students who want protective styling on one side while still showing off their natural curl pattern.
- This style can last several days when properly maintained with a satin bonnet or silk pillowcase at night, making it an excellent option for busy school weeks.
- Consider adding small decorative beads or cuffs to the ends of your cornrows for extra personality and cultural connection, if allowed by your school dress code.
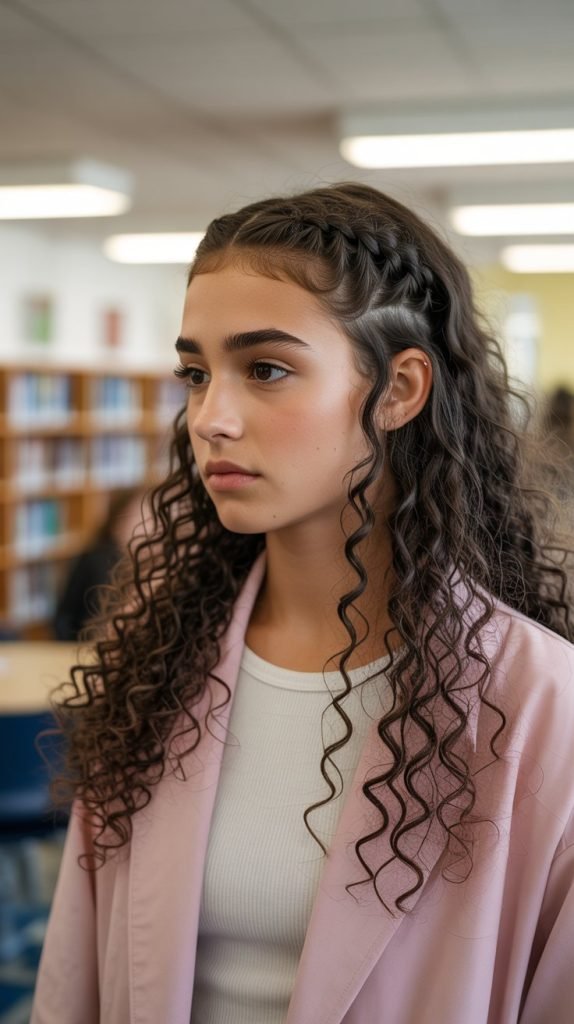
26. Twisted Crown with Curly Cascade
The twisted crown uses two-strand twists rather than braids to create a crown effect around the front of your head, offering a faster alternative to the braided crown while still providing structure and style.
This technique works particularly well on natural curls and enhances your curl pattern rather than concealing it.
- Section off the front portion of your hair from temple to temple, leaving the back section completely loose for maximum curl volume.
- Divide the front section into two parts, one on each side of your center part.
- Create two-strand twists with each front section, working from the front hairline toward the back and twisting the hair away from your face.
- The twists should follow the natural curve of your head, creating a crown or headband effect across the front while framing your face.
- Secure each twist at the back of your head with bobby pins, either leaving them as separate twists or joining them together and pinning them as one unit.
- The back section of your hair remains completely loose and curly, cascading down your back and creating volume and movement.
- Twisted crowns typically take less time than braided crowns because two-strand twists require fewer steps than traditional three-strand braiding.
- The texture of the twists complements your natural curl pattern beautifully, creating a cohesive look that celebrates your curly hair rather than fighting against it.
- Apply a curl-defining product to the loose curly section to enhance definition and prevent frizz throughout the school day.
27. Braided Low Ponytail with Wrapped Base
The braided low ponytail with wrapped base elevates a simple ponytail by incorporating braided details either throughout the length or wrapped around the base to conceal the elastic band.
This sophisticated style works well for school presentations, assemblies, or any formal academic setting.
- Gather all your hair into a low ponytail at the nape of your neck, positioning it at the base of your skull for a classic, elegant placement.
- Secure the ponytail with a strong elastic band that can support the weight of your curls without slipping or causing discomfort.
- Take a small section from the ponytail and create a three-strand braid with it, braiding down several inches before securing with a small elastic band.
- Wrap this small braid around the base of the ponytail, completely covering the elastic band and creating a polished, finished appearance.
- Secure the wrapped braid with bobby pins inserted vertically through the braid and into the base of the ponytail, ensuring it stays in place all day.
- The remaining curly hair in the ponytail provides volume and texture while the braided wrap adds structure and sophistication to the overall style.
- Alternatively, you can braid the entire ponytail and wrap it loosely around the base to create a low braided bun variation of this style.
- Smooth down your hairline and any flyaways with edge control or a light pomade to ensure the style looks intentional and polished from all angles.
- The low placement of this ponytail makes it comfortable to wear while sitting in classroom chairs or car seats without the ponytail pressing against your head.
28. Diagonal Braid with Asymmetric Styling
The diagonal braid travels from one side of the head to the opposite side, creating an asymmetric, dynamic look that draws the eye across your entire head.
This directional styling technique adds visual interest and makes a simple braid feel more artistic and intentional.
- Create a deep side part on your preferred side, which will serve as the starting point for your diagonal braid.
- Begin a French braid or Dutch braid at the front of your deep side part, immediately working the braid at a diagonal angle toward the opposite lower side of your head.
- The diagonal path creates a striking visual line across your head rather than following the typical straight-down braiding direction.
- Continue braiding diagonally across your head, adding hair from both sides as you work toward the opposite shoulder area.
- Once you reach the opposite side and have incorporated all your loose hair, continue braiding the remaining length or secure it into a low side ponytail.
- The asymmetric nature of the diagonal braid creates an edgy, fashion-forward look that stands out from traditional braiding placements.
- This style works particularly well for showcasing your natural curl pattern on the side with more loose hair while keeping the opposite side neatly braided.
- Adjust the angle of your diagonal braid to be more or less severe depending on the level of drama you want to create with the style.
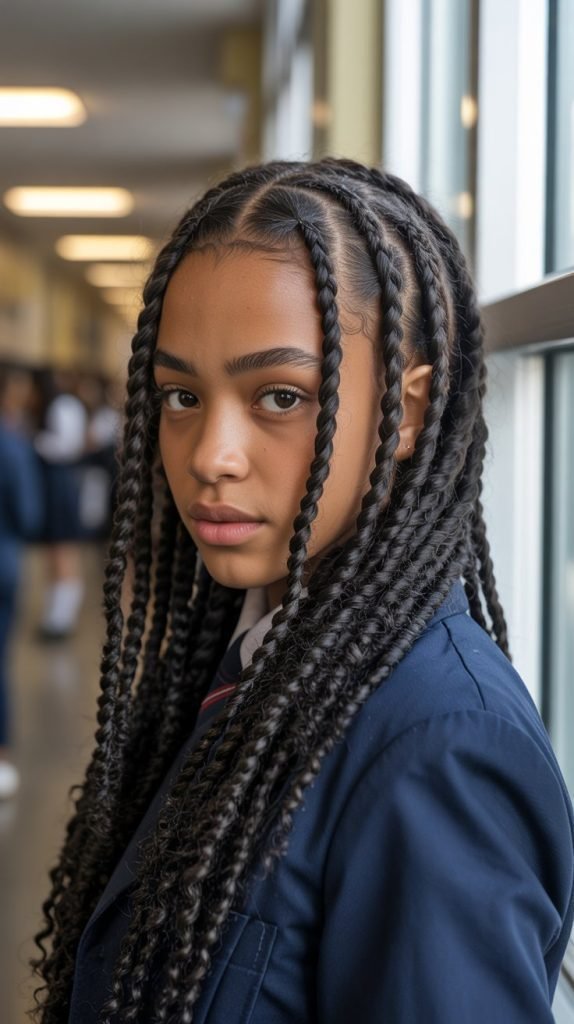
29. Multi-Strand Tiny Braids
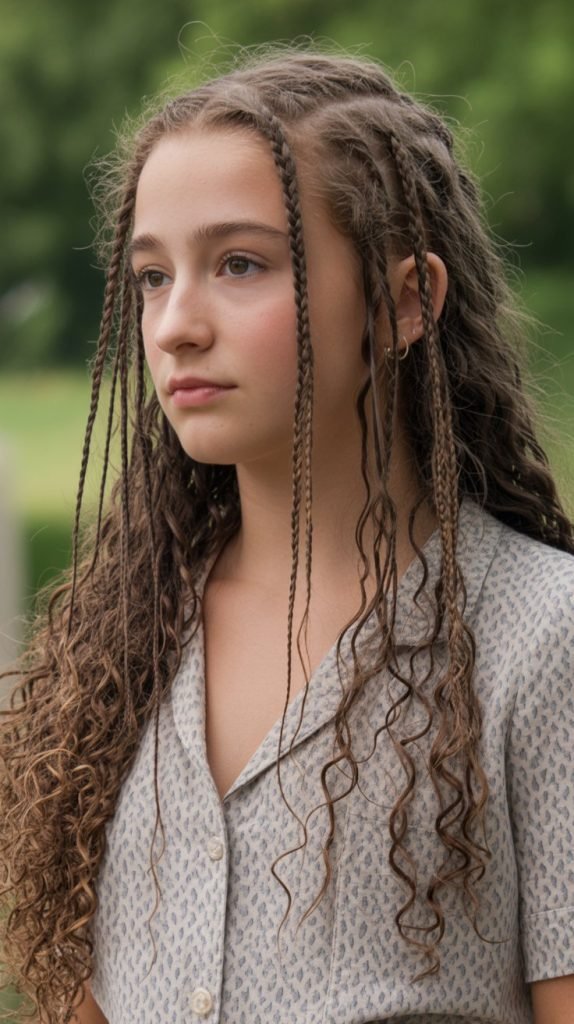
Multi-strand tiny braids involve creating numerous small braids throughout your hair rather than one or two large braids, resulting in a textured, bohemian look with maximum protective benefits.
This style requires more time investment but can last for several days with proper nighttime maintenance.
- Section your hair into multiple small sections, anywhere from 4 to 20 sections depending on how much time you have and how detailed you want the final look to be.
- Create a simple three-strand braid with each small section, working methodically through your entire head until all sections are braided.
- The tiny braids can be left hanging loose for a festival-inspired, bohemian look or gathered into a ponytail or bun for more practical styling.
- This technique works as a protective style that keeps your curls stretched and prevents tangling, making it excellent for busy school weeks when you don’t have time for daily styling.
- Consider creating different sizes of braids throughout your head for a more organic, less uniform appearance that adds visual interest.
- Tiny braids showcase your curl pattern at the ends while providing sleek, defined structure along the length of each braid.
- When you eventually take down the tiny braids after several days, your hair will have a beautiful crimped texture that creates incredible volume and definition.
- Apply a light oil to your scalp between the tiny braids to keep your scalp moisturized and prevent any dryness or itching during the extended wear period.
- Secure the ends of each tiny braid with small elastic bands, or leave them unsecured if your curl pattern naturally holds the braids without elastic bands.
30. Braided Faux Hawk
The braided faux hawk creates an edgy, punk-inspired look by braiding the sides of your head flat while leaving a strip of curly hair standing tall down the center.
This bold style makes a statement while remaining within most school dress code parameters.
- Create two vertical parts running from your forehead to the nape of your neck, positioned about 2-3 inches from your center on each side to define the faux hawk section.
- Braid the side sections flat against your head using Dutch braids or cornrows, working from the front hairline toward the back of your head on both sides.
- The braided sides should lie as flat as possible against your scalp to create maximum height contrast with the center section.
- Leave the center strip completely loose and encourage your curls to stand as tall as possible by applying a volumizing product or mousse.
- Fluff and separate the center curls with your fingers to create maximum height and width, emphasizing the mohawk effect.
- The braided faux hawk keeps the sides of your head neat and controlled while allowing your curl pattern to create dramatic volume in the center.
- This style works particularly well for school spirit days, casual Fridays, or any occasion when you want to express creativity and individuality.
- Secure the ends of the side braids behind your ears with small elastic bands or bobby pins, keeping them flat and inconspicuous.
31. Wrapped Braid Bun
The wrapped braid bun creates a sophisticated updo by braiding your hair and then wrapping it into a bun shape, combining the structure of braids with the elegance of a formal bun.
This style works beautifully for school concerts, award ceremonies, or any dressy academic occasion.
- Gather all your hair into a ponytail at your desired bun placement, whether high, mid, or low on your head.
- Braid the entire ponytail from base to tip using a three-strand braid, fishtail braid, or four-strand braid for extra visual interest.
- Begin wrapping the braid around the base of the ponytail in a circular motion, creating a spiral or coiled appearance.
- Pin the wrapped braid in place with bobby pins inserted through the braid and into the hair underneath, working around the entire bun circumference.
- Tuck the end of the braid underneath the bun and secure it with additional bobby pins, hiding the elastic band and creating a seamless finish.
- The braided texture of the bun adds dimension and interest while keeping your hair completely secured and off your neck.
- Apply a light finishing spray to smooth any flyaways and ensure the bun maintains its polished appearance throughout your school day or evening event.
- The wrapped braid bun showcases your natural curl texture within the braided structure while presenting a sophisticated, formal appearance appropriate for any school occasion.
- Consider leaving a few face-framing curls loose before creating the bun for a softer, more romantic version of this elegant style.
32. Starburst Braid Pattern
The starburst braid pattern creates multiple braids that radiate outward from a central point on your head, resembling a starburst or sunburst design.
This creative style showcases advanced sectioning and braiding skills while creating a truly unique look for school.
- Create a circular section at the crown of your head, which will serve as the center point of your starburst pattern.
- Divide the hair around this central section into 4-8 pie-shaped sections, depending on how many braids you want radiating from the center.
- Begin braiding each section away from the center point, working outward like rays extending from the sun.
- The braids can be simple three-strand braids, Dutch braids, or cornrows depending on your preference and the level of detail you want in the final design.
- Each braid should start small at the center and gradually incorporate more hair as it moves away from the central point.
- Secure each braided “ray” with a small elastic band or allow the braids to blend into loose curls at the ends for a more natural transition.
- The starburst pattern creates maximum visual impact and is sure to make you stand out in school hallways and classrooms.
- This style works particularly well for special school events, spirit days, or occasions when you want to showcase your creativity and braiding skills.
- Consider adding small decorative beads or colored elastics at the ends of each ray for additional personality and visual interest.
33. Mixed Braid Combination Style

The mixed braid combination style incorporates multiple different braiding techniques into one hairstyle, creating a showcase of your braiding repertoire and maximum visual complexity.
This ultimate creative style allows you to experiment with various techniques and create a truly one-of-a-kind look.
- Plan your combination by deciding which braiding techniques you want to incorporate, such as Dutch braids on the sides, a fishtail braid down the back, and rope twists as accents.
- Begin with the most complex or time-consuming braid first, typically starting at the front or crown of your head where it will be most visible.
- Incorporate each different braiding technique in a different section of your head, creating zones of varied texture and pattern.
- The combination approach allows you to practice multiple braiding skills in one styling session while creating a unique, personalized look.
- Ensure all the different braids work together cohesively by maintaining consistent tension and size proportions throughout your head.
- Mixed braid styles work particularly well on curly hair because your natural texture ties all the different braiding techniques together visually.
- Consider combining protective cornrows on one side with a decorative French braid on top and a fishtail braid down the back for a truly comprehensive mixed style.
- This approach encourages creativity and experimentation, allowing you to develop your own signature style that combines your favorite braiding techniques.
- The mixed braid combination can be modified and adjusted with each wearing, ensuring you never have to repeat the exact same hairstyle twice.
Conclusion
Embracing your natural curls while incorporating creative braided styles opens up an entire world of possibilities for school hairstyling that celebrates your unique texture and personal creativity.
These “33 Creative Curly Hair Braided Ideas for School to Try Now” provide you with an extensive toolkit of techniques ranging from quick five-minute styles for busy mornings to elaborate designs that showcase advanced braiding skills and artistic vision.
The beauty of braiding curly hair lies in the way braids provide structure and protection while your natural curl pattern adds dimension, volume, and personality that straight hair simply cannot achieve.
As you experiment with these styles throughout the school year, you’ll discover which techniques work best with your specific curl pattern, which styles withstand your busiest school days, and which looks make you feel most confident and beautiful.
Remember that practice makes perfect, and even the most complex braiding techniques become second nature with repetition and patience.
Your curly hair is a crown that deserves to be styled with creativity and care, and these braided ideas ensure you’ll never run out of fresh, exciting options for showcasing your gorgeous curls throughout your school journey.
Whether you’re heading to class, playing sports, performing in a concert, or simply hanging out with friends, there’s a perfect curly braided style waiting for you to try, master, and make your own signature look.Retry.