If you have ever dreamed of stepping into the world of Bridgerton, with its breathtaking ballrooms, romantic storylines, and stunning hairstyles, you are in the right place.
The 32 Bridgerton Hairstyle Tutorials for a Regency Look article is your ultimate guide to recreating the most iconic and elegant hair looks inspired by the beloved Netflix series.
From soft braided updos to pearl-adorned chignons, this guide covers everything you need to bring that Regency-era glamour into your everyday life or special occasions.
Whether you are a beginner or an experienced styling enthusiast, these tutorials are designed to be easy to follow, visually inspiring, and completely achievable at home.
Read on and discover how you can transform your hair into a masterpiece worthy of a Bridgerton ball.
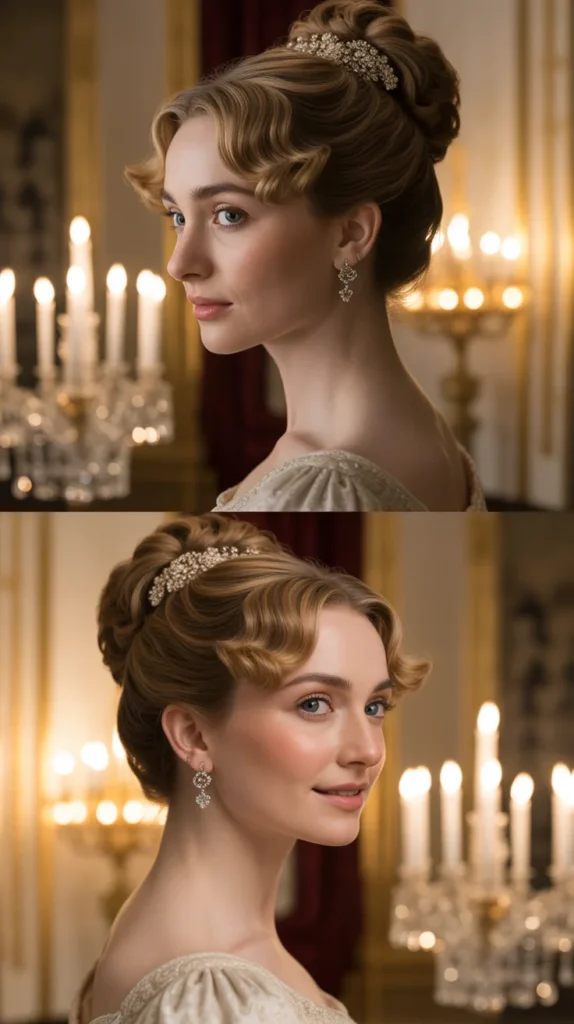
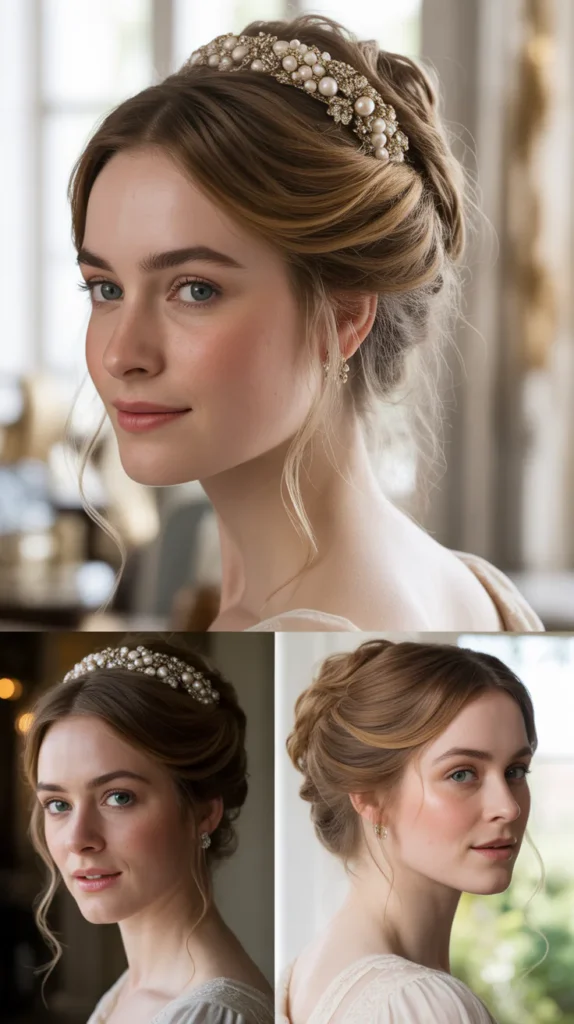
1. Classic Regency Updo with Soft Curls
The Classic Regency Updo with Soft Curls is one of the most timeless hairstyles from the Bridgerton universe.
It combines structured volume at the crown with soft, face-framing curls for a romantic, polished look.
This style is perfect for weddings, galas, or any event where you want to channel your inner Daphne Bridgerton.
- Start by curling all your hair with a 1-inch curling wand to create loose, bouncy waves throughout.
- Gather the top two-thirds of your hair and pin it into a loose, high bun at the crown of your head.
- Pull out a few face-framing tendrils and let them fall naturally at the sides of your face.
- Secure the bun with bobby pins, allowing some curls to fall loosely at the back for a romantic effect.
- Finish the look with a strong-hold hairspray to keep everything in place throughout the day or evening.
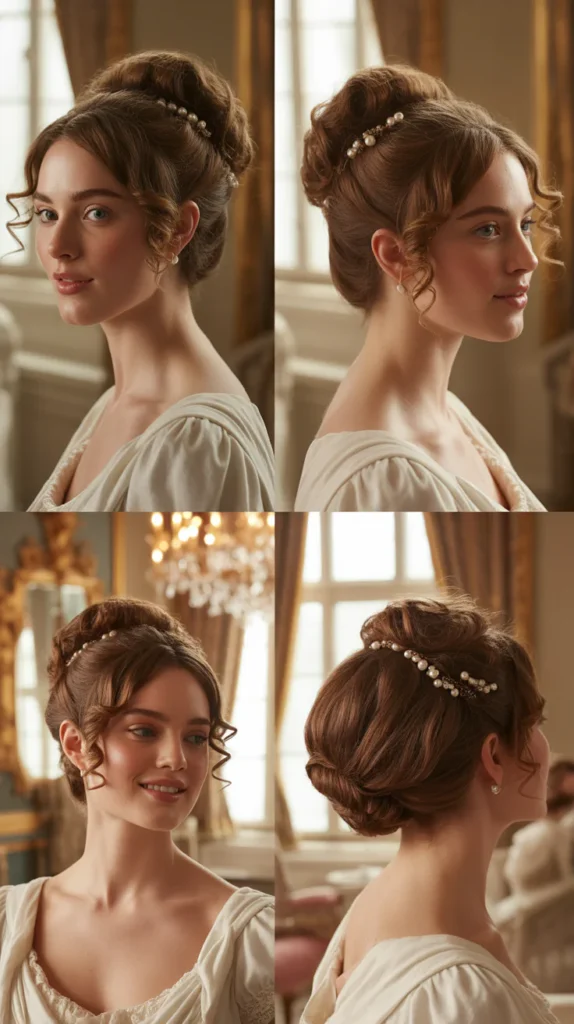
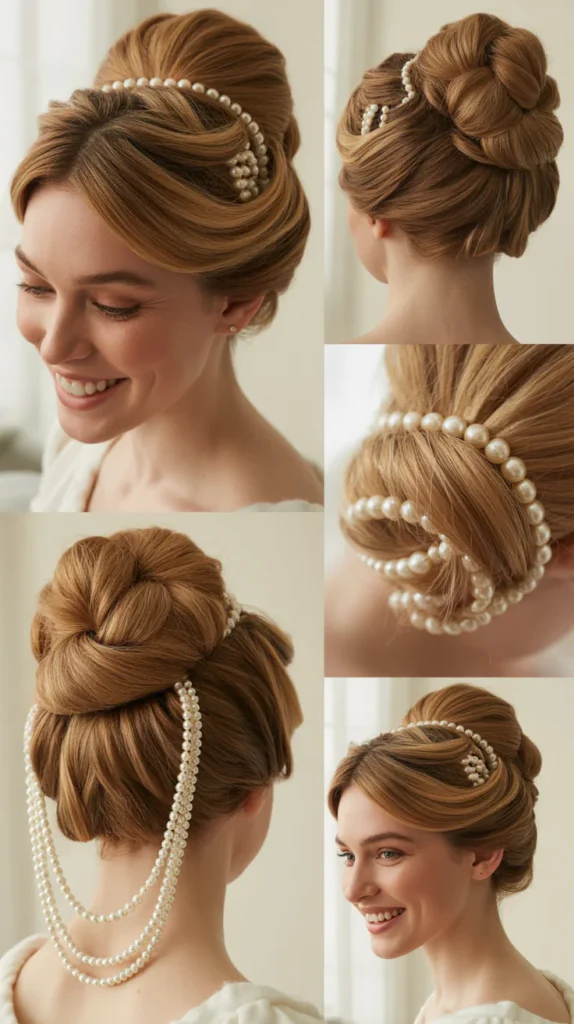
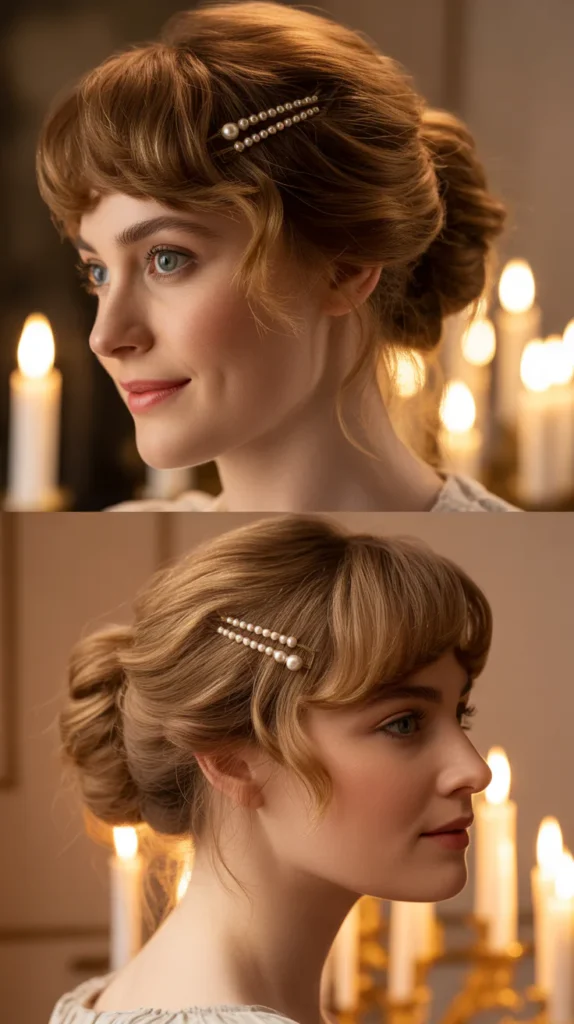
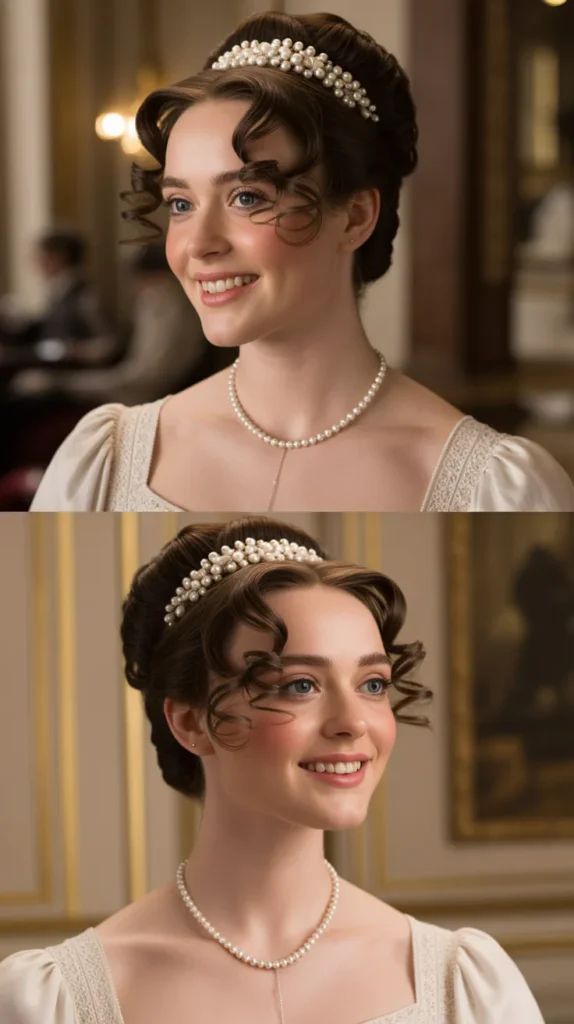
2. Pearl-Adorned Chignon
The Pearl-Adorned Chignon is one of the most recognizable hairstyles associated with the Regency era.
This elegant updo features a sleek or textured bun decorated with pearl pins or pearl chains woven throughout.
It is a go-to style for anyone wanting to look effortlessly regal.
- Begin by smoothing your hair back into a low ponytail at the nape of your neck using a fine-tooth comb.
- Twist the ponytail into a neat chignon and secure it with bobby pins around the base.
- Tuck the ends of your hair under the bun and pin them flat to create a clean, structured shape.
- Insert pearl-tipped bobby pins evenly throughout the bun for a luxurious, Regency-inspired embellishment.
- Spray the entire style with a shine-enhancing hairspray to give it a polished, glossy finish.
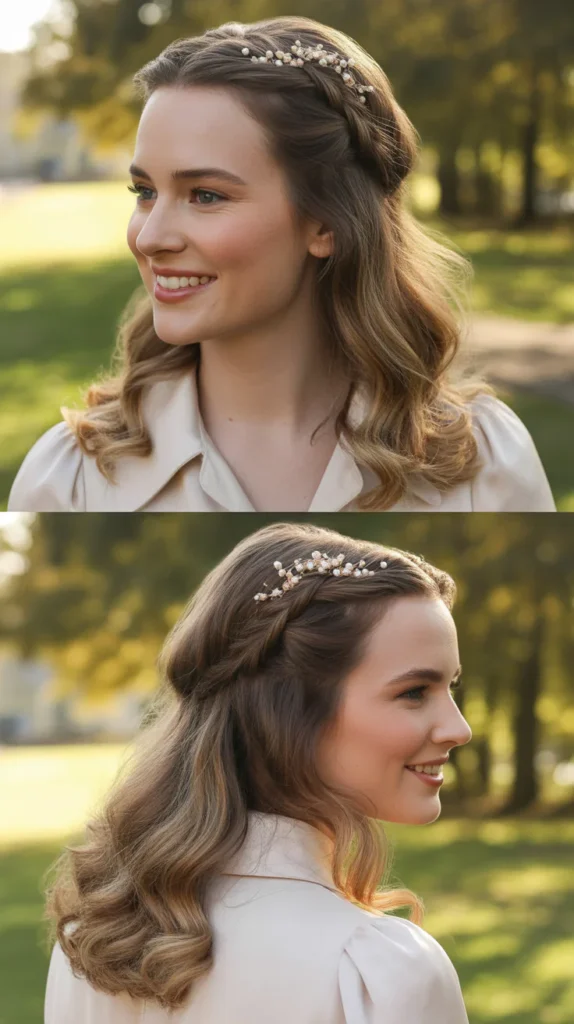
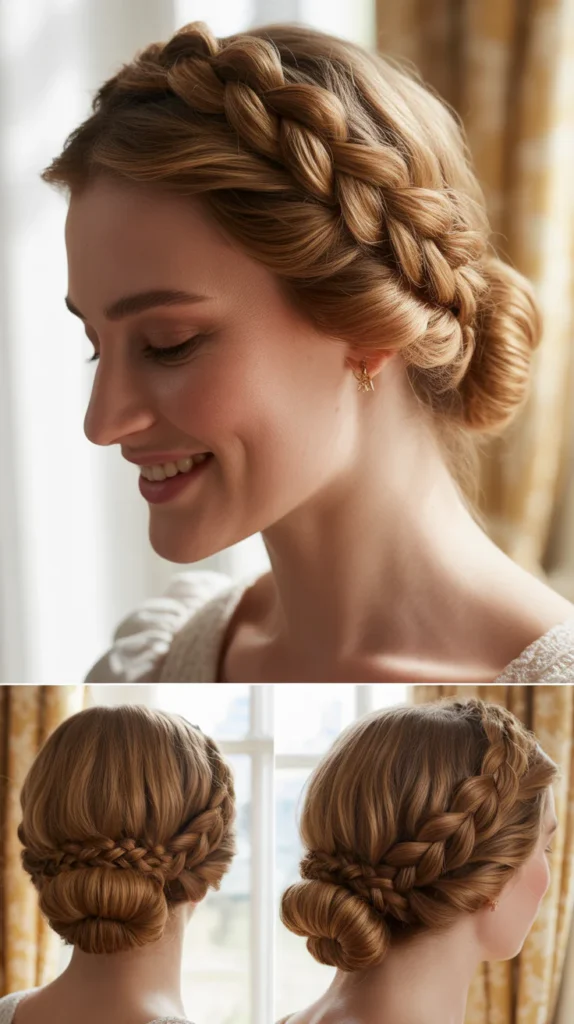
3. Half-Up Braided Crown
The Half-Up Braided Crown brings together the best of both worlds — flowing locks below and an intricate braided crown above.
This Bridgerton-inspired hairstyle is incredibly versatile and suits both casual and formal occasions. It works beautifully on medium to long hair of all textures.
- Separate the top half of your hair from the bottom and clip the lower section away temporarily.
- Take a small section from each side of your head near the temples and braid each section into a three-strand braid.
- Bring both braids across the top of your head and secure them together at the center back with bobby pins.
- Release the lower section of hair and let it flow freely in its natural wave or curl pattern.
- Decorate the crown braid with small pearl pins or tiny ribbon bows for a Regency finishing touch.
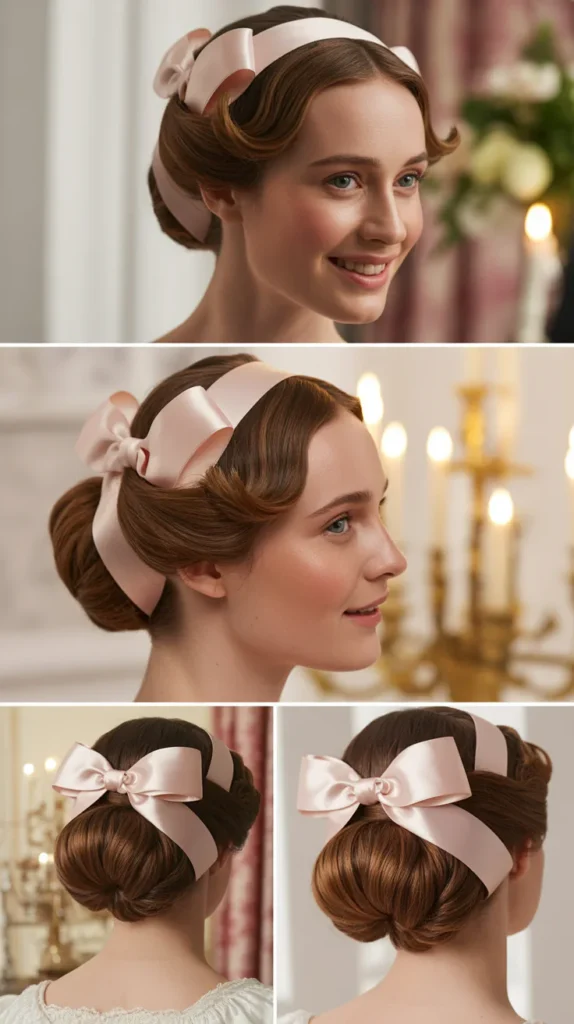
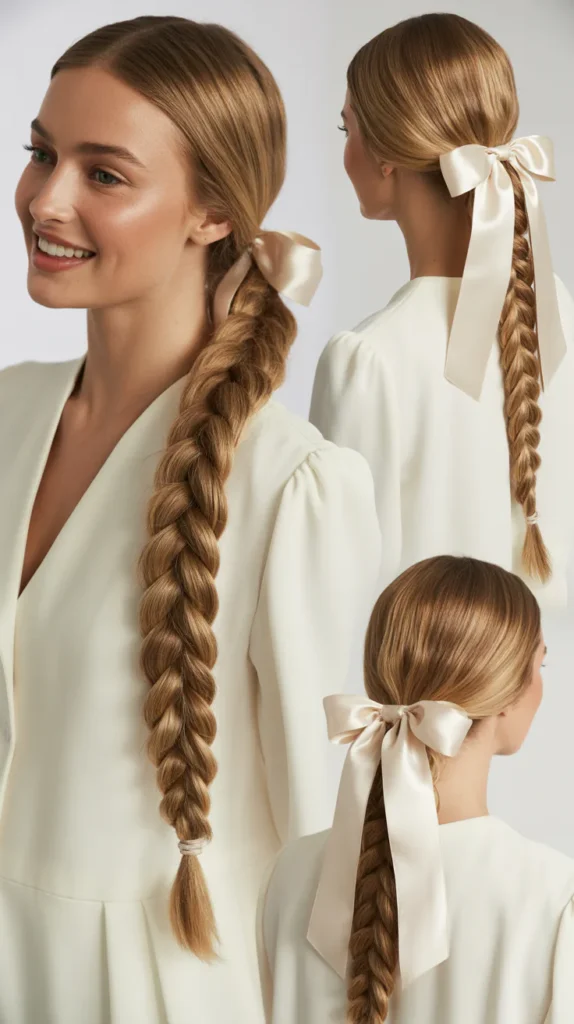
4. Loose Romantic Bun with Ribbon
The Loose Romantic Bun with Ribbon is an effortlessly beautiful hairstyle that captures the carefree elegance of Regency-era heroines.
It features a soft, undone bun wrapped with a delicate satin ribbon for a dreamy aesthetic. This style is ideal for daytime events or garden parties.
- Lightly curl your hair with a large-barrel curling iron to add soft texture and movement throughout.
- Gather all your hair into a low ponytail and loosely twist it upward into a messy bun shape.
- Pin the bun loosely so that several pieces fall naturally, giving it a soft, undone appearance.
- Wrap a thin satin ribbon around the base of the bun and tie it into a small, delicate bow at the back.
- Pull out two or three loose curls near the temples to frame the face beautifully.
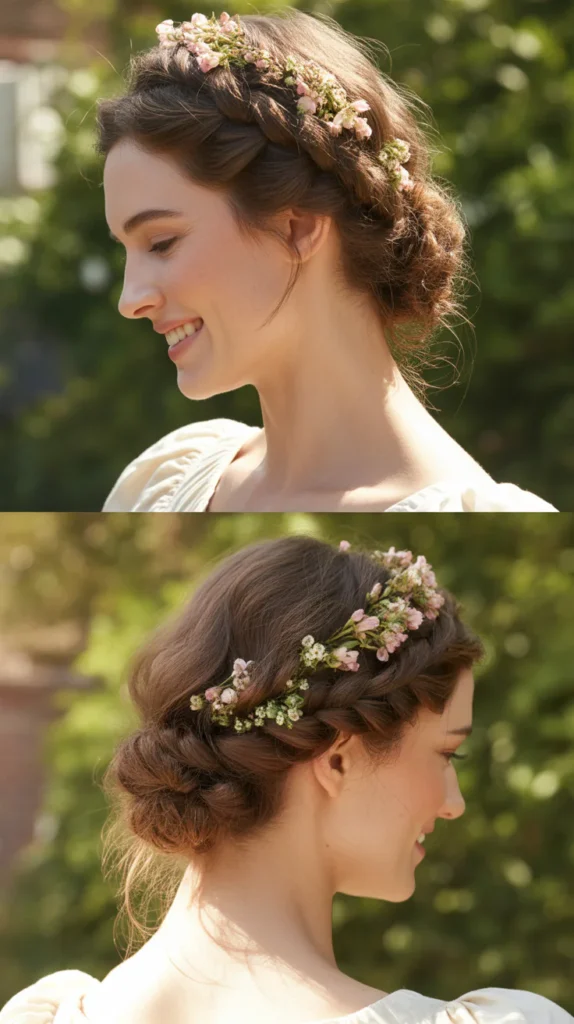
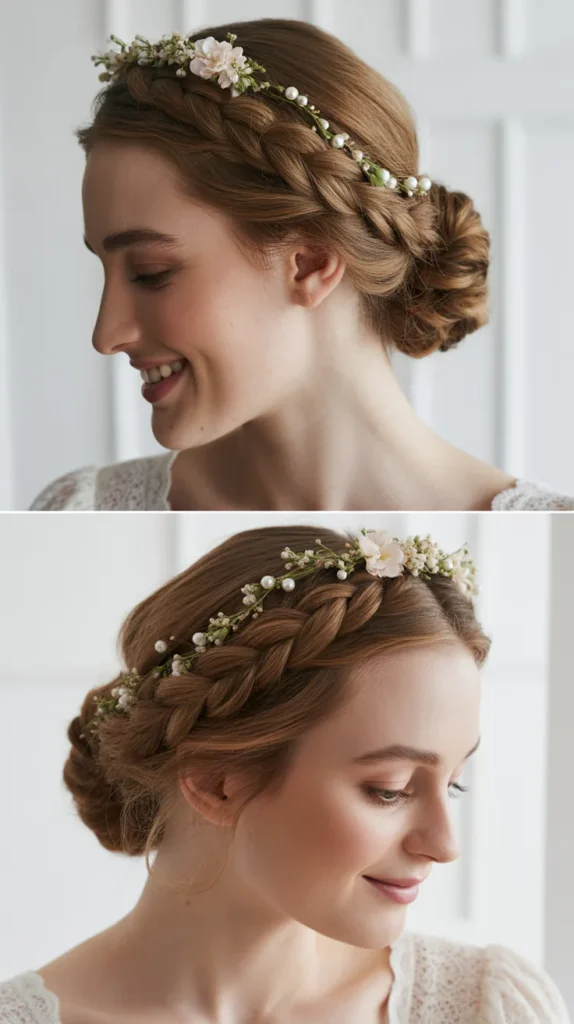
5. Braided Updo with Floral Accents

The Braided Updo with Floral Accents is a spectacular choice for those who want a lush, garden-party-worthy hairstyle.
Inspired by the florals and nature seen throughout Bridgerton’s set design, this style pairs intricate braiding with delicate flower adornments.
It brings a fresh, romantic energy to any Regency-inspired look.
- Start by creating a deep side part and braiding a French braid from one side of the head toward the back.
- Pin the braid across the nape of the neck and secure the tail into the opposite side with bobby pins.
- Gather the remaining hair into a low, textured bun and pin it just above where the braid ends.
- Tuck small fresh or silk flowers — such as baby’s breath, roses, or lavender — throughout the bun and along the braid.
- Finish with a light mist of hairspray to hold the florals and braid securely in place.
6. Regency Topknot with Face-Framing Curls
The Regency Topknot with Face-Framing Curls is a bold and structured hairstyle that draws inspiration from the high, theatrical updos of the early 19th century.
It creates a striking silhouette while remaining elegant and wearable. This look works especially well for those with thick or long hair.
- Curl your entire head of hair using a 3/4-inch curling iron for tight, defined curls.
- Gather all the hair high on top of the head and secure it into a tight, high bun or topknot.
- Leave out several small sections around the hairline and let them fall as defined curls around the face.
- Smooth the sides of the topknot with a boar bristle brush to reduce flyaways and create a sleek finish.
- Add a decorative jeweled pin or comb to the base of the topknot for an authentic Regency-era detail.
7. Waterfall Braid with Soft Waves
The Waterfall Braid with Soft Waves is a breathtakingly beautiful hairstyle that gives the illusion of flowing water cascading through your hair.
It has a naturally romantic quality that perfectly suits the Regency-inspired aesthetic of Bridgerton. This style is beginner-friendly and looks far more complex than it actually is.
- Begin with loose, soft waves created using a large-barrel curling wand for a relaxed base texture.
- Start a French braid at one side of the head near the temple and drop strands downward as you braid across.
- Continue the waterfall braid across the back of the head and secure it at the opposite side with a small clear elastic.
- Allow the dropped strands to blend naturally with the soft waves flowing below.
- Tuck a small pearl pin or tiny floral clip where the braid is secured to add a Bridgerton-worthy finishing detail.
8. Side-Swept Curls with Jeweled Headband
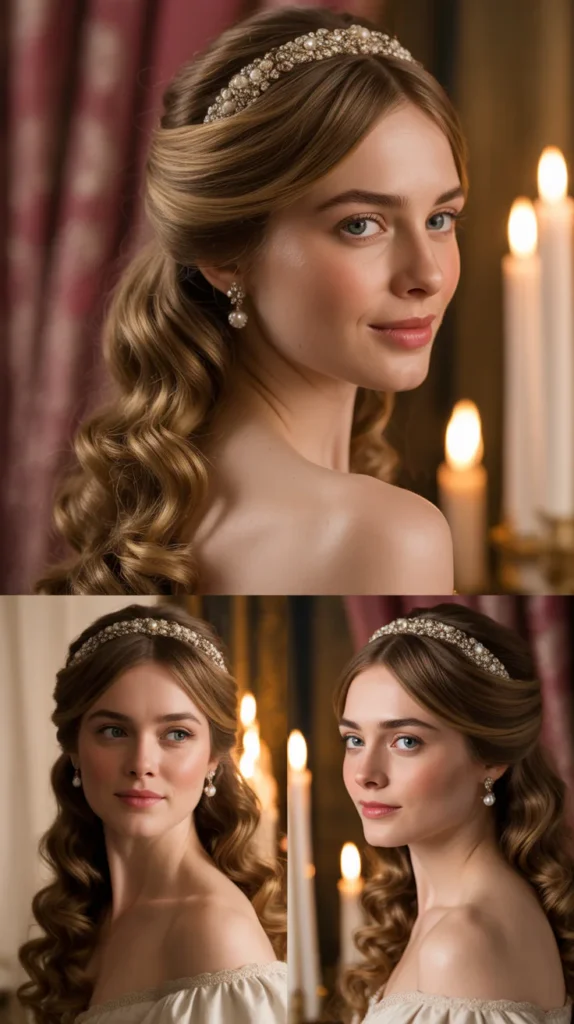
Side-Swept Curls with a Jeweled Headband is a quick yet stunning Regency-inspired look that requires minimal effort for maximum impact.
The jeweled headband serves as the centerpiece of the style, recalling the decorative diadems worn by Regency-era aristocrats. This style is perfect for those short on time but wanting to look regal.
- Curl your hair into voluminous, bouncy curls using a 1-inch curling wand, working in sections.
- Sweep all the curls to one side and secure them loosely behind the opposite ear with a few bobby pins.
- Place a jeweled or rhinestone headband across the crown of the head, positioned just behind the hairline.
- Loosen a few curls near the forehead to soften the overall effect and create a more romantic silhouette.
- Spray the entire style lightly with flexible-hold hairspray to maintain the sweep without stiffness.
9. Twisted Rope Braid Updo
The Twisted Rope Braid Updo is a sophisticated and intricate-looking hairstyle that is surprisingly easy to achieve.
It uses a simple rope-braiding technique to create a sculptural, textured updo with strong Regency-era appeal. This look suits all hair types and is especially stunning on thicker hair.
- Divide your hair into two equal sections and twist each section tightly in a clockwise direction.
- Wrap both twisted sections around each other in a counterclockwise direction to form a rope braid.
- Coil the rope braid into a bun shape at the nape of the neck or the crown of the head and pin it securely.
- Gently tug at the outer edges of the braid to create volume and a more textured, relaxed appearance.
- Secure any loose ends with bobby pins and finish with a light mist of shine spray for a polished look.
10. Regency-Inspired Low Ponytail

The Regency-Inspired Low Ponytail is a sleek, understated style that still manages to look thoroughly refined and period-appropriate.
It can be dressed up with accessories or kept minimal for an everyday elegant look. This is one of the most accessible styles in this entire guide for beginners.
- Smooth your hair back using a boar bristle brush to eliminate all bumps and flyaways before styling.
- Gather your hair into a low ponytail at the nape of your neck and secure it with a covered elastic band.
- Wrap a thin piece of hair around the elastic to conceal it and pin the end underneath with a bobby pin.
- Curl the ends of the ponytail into soft waves using a curling wand for a more romantic, Regency-inspired finish.
- Add a satin bow or pearl-embellished hair tie at the base for an elegant decorative touch.
11. Victorian-Inspired Finger Waves
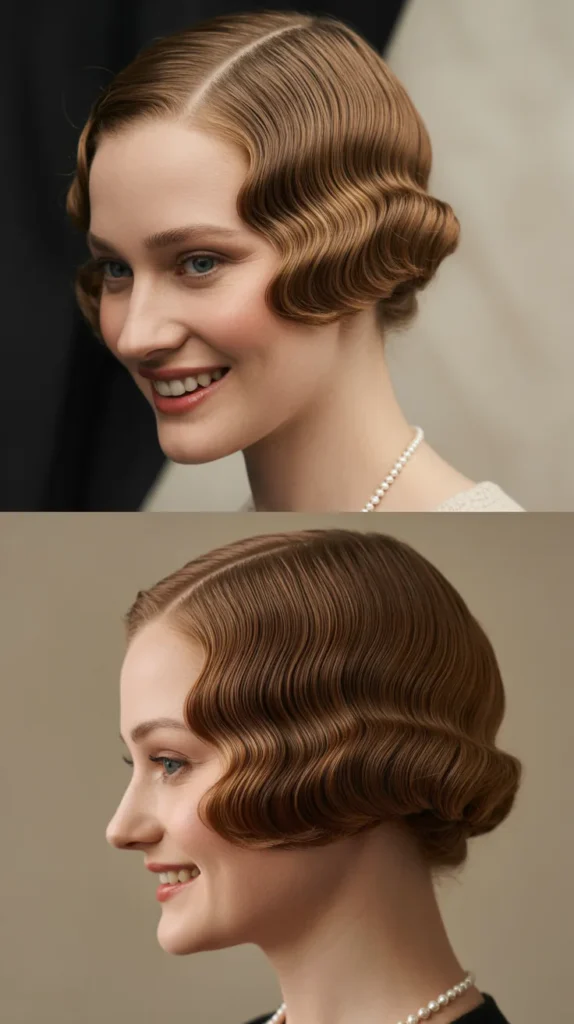
Victorian-Inspired Finger Waves bring a distinctive, sculpted texture to Regency-era styling with a slightly more vintage flair.
This style features deeply defined S-shaped waves set close to the scalp and held in place with setting lotion or gel. It works beautifully on shorter to medium-length hair.
- Apply a generous amount of hair setting lotion or wave gel to freshly washed, towel-dried hair.
- Use a fine-tooth comb to direct the hair into an S-shaped wave pattern close to the scalp, working from the hairline back.
- Clamp each wave in place using metal wave clips and allow the hair to dry completely under a hooded dryer or naturally.
- Carefully remove all the clips once the hair is fully dry to reveal the defined, sculpted waves.
- Finish by applying a light pomade or shine serum to enhance the glossy, polished look of the waves.
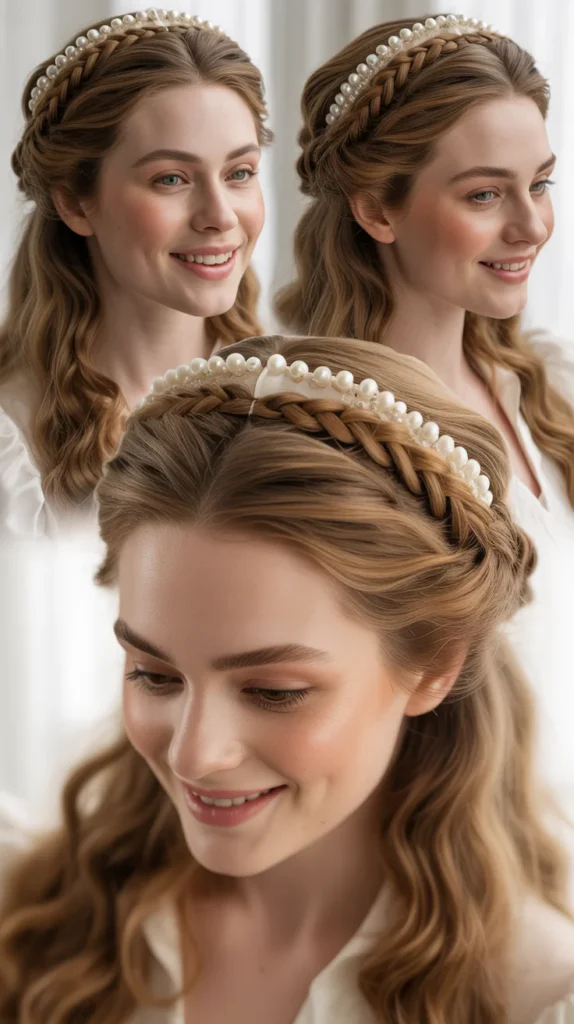
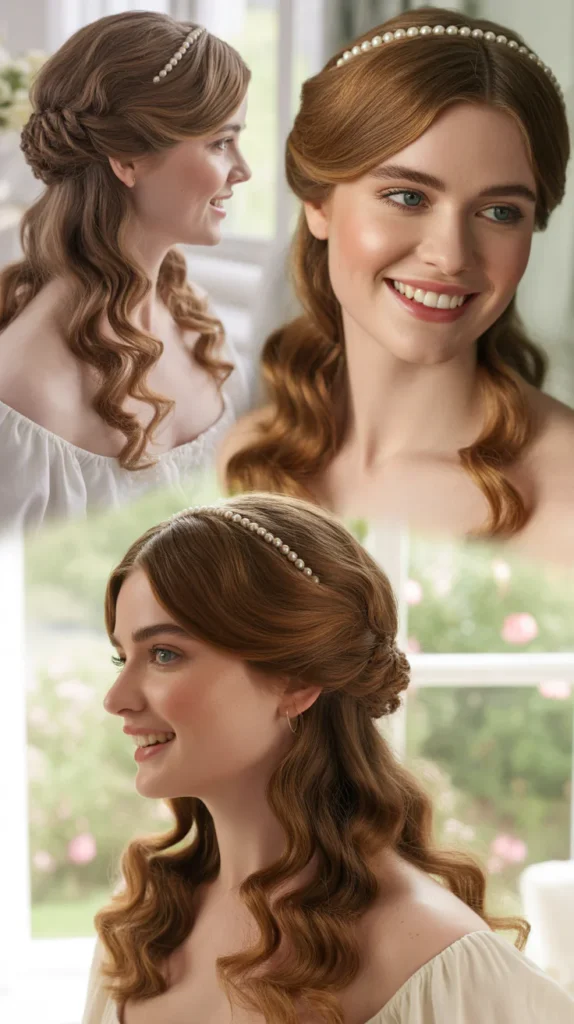
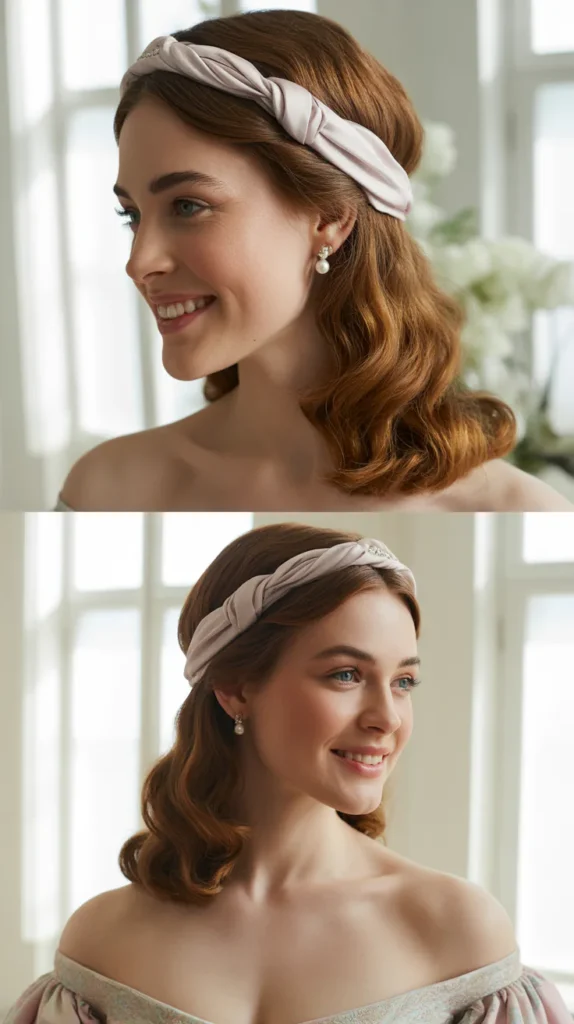
12. Braided Headband Hairstyle
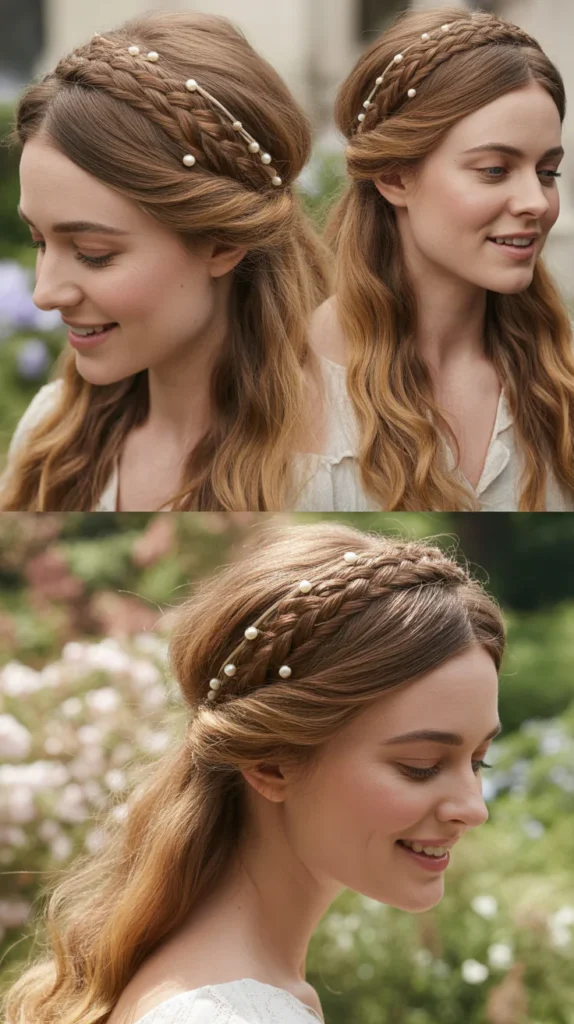
The Braided Headband Hairstyle is a charming and romantic look that uses your own hair to create a natural-looking braided headband across the crown.
It is a hallmark of understated Regency elegance and has become a beloved style for those recreating Bridgerton-inspired looks. This style is especially flattering on medium to long hair.
- Take a small section of hair from one side of the head near the temple and braid it into a simple three-strand braid.
- Pull the braid gently across the top of the head, positioning it like a headband from ear to ear.
- Secure the end of the braid on the opposite side with bobby pins tucked discreetly under the hair.
- Leave the rest of the hair flowing freely in natural waves or loose curls for a contrast of textures.
- Add small pearl or floral pins along the braid to enhance the Regency-inspired aesthetic.
13. Elaborate Gibson Tuck
The Gibson Tuck is a classic updo technique that creates a smooth, rolled effect at the back of the head with an effortlessly refined appearance.
It was a popular hairstyle in the late Victorian and Edwardian eras and fits seamlessly into the Regency aesthetic celebrated in Bridgerton. This style is one of the easiest formal updos to master.
- Create a loose, low ponytail and secure it with an elastic band, leaving the ends untucked.
- Place your fingers above the elastic and create a horizontal gap in the hair above the ponytail.
- Flip the ponytail up and through the gap, tucking it smoothly inside to create the Gibson Tuck roll.
- Adjust the roll by gently pulling sections outward to make it fuller and more voluminous.
- Pin any loose ends securely and adorn the tuck with a decorative jeweled clip or pearl headband.
14. Feather-Accented Regency Updo
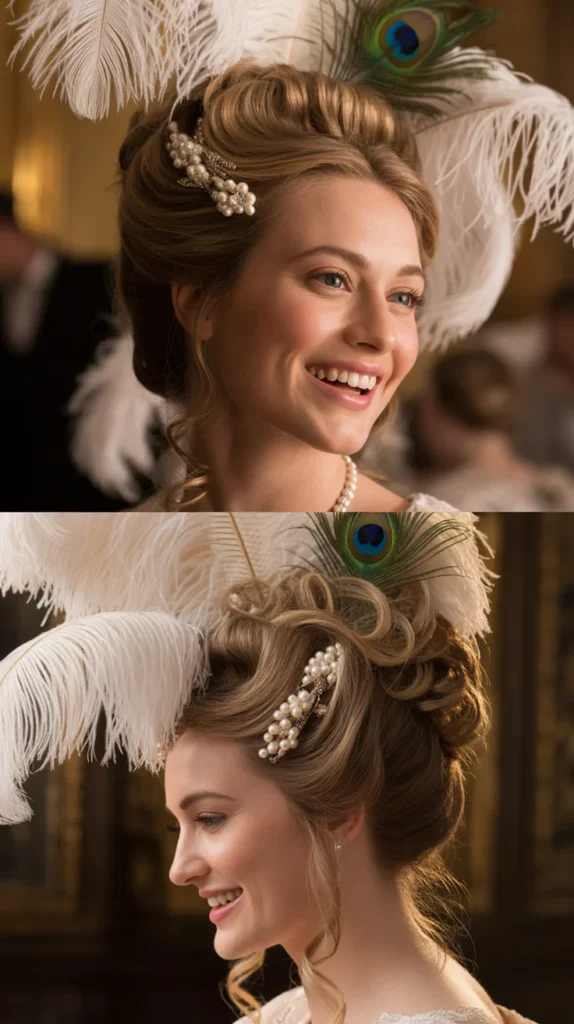
Feathers were a beloved accessory in Regency-era fashion, often worn in the hair as a symbol of status and elegance.
The Feather-Accented Regency Updo incorporates this dramatic detail into a formal updo for a truly show-stopping look.
This hairstyle is perfect for costume events, themed parties, or Bridgerton-inspired photoshoots.
- Style your hair into a high, structured bun or elaborate updo using pins and teasing for added volume.
- Smooth the surface of the updo with a fine-tooth comb and finish it with strong-hold spray.
- Insert long, elegant feather picks — such as ostrich or peacock feathers — into the top of the updo at an angle.
- Balance the feathers with pearl or crystal pins placed throughout the bun for a luxurious contrast of textures.
- Curl a few face-framing pieces and let them fall gently to soften the dramatic effect of the feathers.
15. Loose French Twist
The Loose French Twist is an iconic hairstyle that balances elegance with a hint of effortless charm.
Unlike the tightly structured classic version, the loose interpretation suits the soft romanticism of the Bridgerton aesthetic.
It works on a wide range of hair types and lengths.
- Gather all your hair to one side and hold it vertically along the back of the head.
- Twist the hair upward and fold it inward against the back of the head to form the French twist shape.
- Tuck the ends into the twist and secure everything with bobby pins placed vertically along the fold.
- Gently pull a few soft strands loose near the face and temples for a more relaxed, romantic silhouette.
- Add a decorative hair stick, jeweled comb, or ribbon bow to complete the Regency-era inspired style.
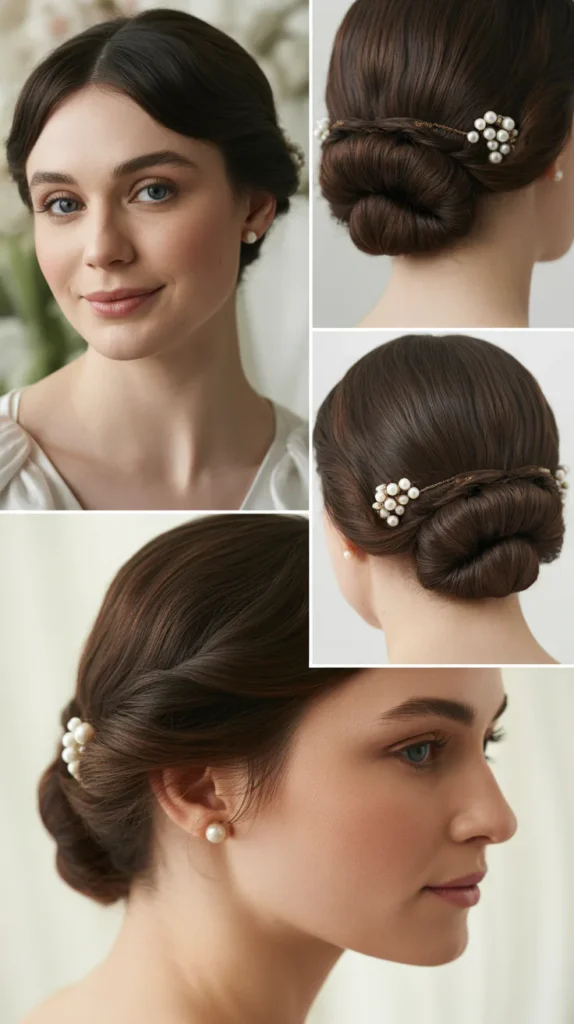
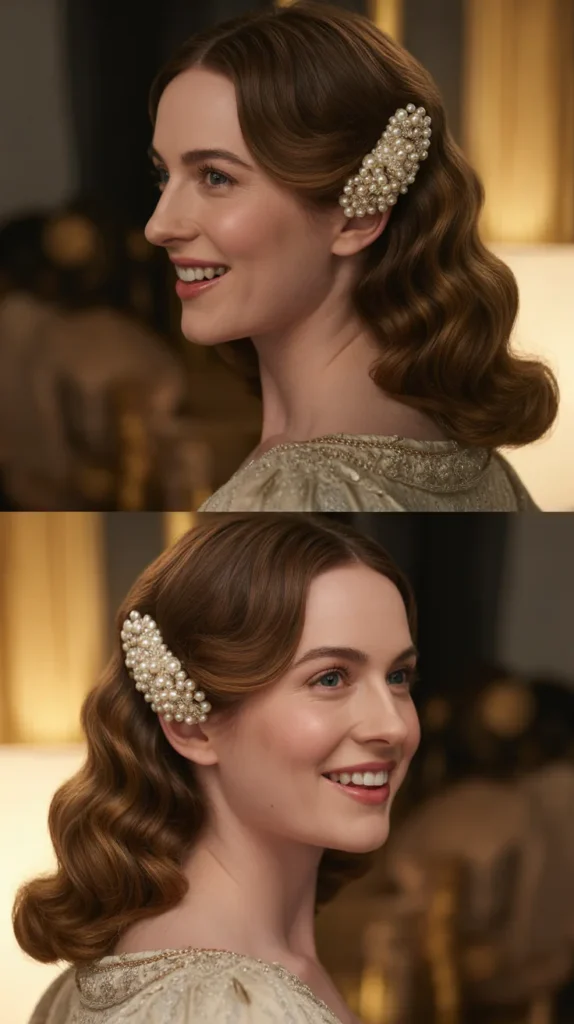
16. Knot Bun with Pearls
The Knot Bun with Pearls is a modern take on the classic Regency bun that adds a sculptural, fashion-forward element while staying true to period aesthetics.
The knotted shape gives the bun a unique visual interest that sets it apart from standard updos. Pearl accessories complete the look with a refined, aristocratic touch.
- Divide your hair into two equal sections and tie them into a loose overhand knot at the back of the head.
- Fold the ends of the knot downward and tuck them under the knot structure to form a rounded bun shape.
- Secure the knot bun with several bobby pins placed underneath and around the bun for stability.
- Thread a string of delicate pearls through the bun or wrap a pearl-studded hairpiece around the base.
- Spray the finished style with medium-hold hairspray to keep the pearls and knot secure throughout wear.
17. Dutch Braid Updo
The Dutch Braid Updo uses an inverted braiding technique that makes the braid appear to sit on top of the hair for a bold, textured effect.
This style brings a modern confidence to Regency-era inspired looks while retaining all the elegance associated with the period. It is a wonderful option for those with thick, long hair.
- Begin a Dutch braid at the crown of the head by crossing strands under rather than over as you braid down.
- Continue the braid down the back of the head and stop just above the nape of the neck.
- Gather the remaining hair together with the braid tail into a low bun and pin it securely.
- Gently pancake or pull apart the braid to make it appear wider and more voluminous.
- Finish by tucking pearl pins along the braid and bun for a polished Regency-inspired accent.
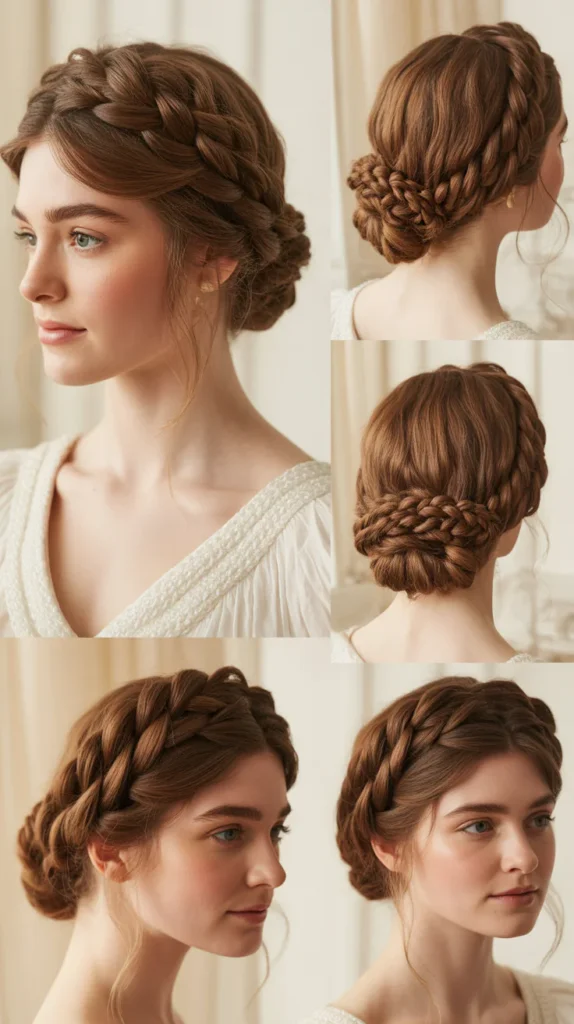
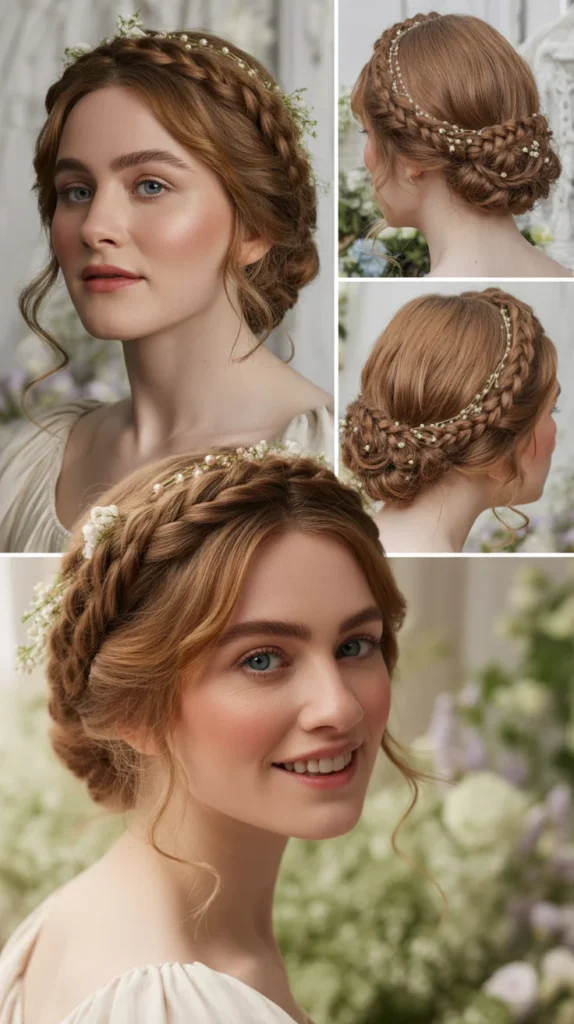
18. Soft Halo Braid
The Soft Halo Braid encircles the entire head in a crown of braided hair, creating a saintly, ethereal appearance that feels right at home in a Bridgerton scene.
It is one of the most universally flattering hairstyles and works beautifully for weddings, engagements, or themed photoshoots. This style requires some patience but delivers truly stunning results.
- Begin braiding from one side just above the ear, working the braid in a Dutch or French style as you go.
- Continue the braid all the way around the head, keeping it positioned just above the hairline.
- Secure the end of the braid where you started with bobby pins, tucking the tail neatly underneath.
- Gently loosen and pancake the braid for a softer, fuller halo shape that frames the face beautifully.
- Weave small pearl pins, baby’s breath, or delicate floral picks throughout the braid for a Regency touch.
19. Messy Romantic Chignon
The Messy Romantic Chignon is the ideal hairstyle for those who love the look of a perfectly undone updo.
It gives off an air of effortless grace while still looking intentional and polished — a combination that defines the Bridgerton aesthetic. This style is forgiving for beginners and looks beautiful on all hair textures.
- Lightly texturize your hair with dry shampoo or a texturizing spray to give it grip and volume before styling.
- Gather all your hair into a low ponytail and loosely twist it into a messy bun without smoothing out any bumps.
- Pull apart sections of the bun gently with your fingertips to give it a romantic, slightly disheveled appearance.
- Secure any loose ends with bobby pins, intentionally letting some pieces fall free for a natural effect.
- Insert small pearl pins or delicate floral picks throughout the chignon to elevate its elegance.
20. Side-Parted Old Hollywood Waves
Side-Parted Old Hollywood Waves blend the glamour of early cinema with the timeless romanticism of the Regency era.
These deep, glossy waves cascade beautifully over one shoulder and pair perfectly with Regency-era gowns and accessories. This look is ideal for formal events where you want to make a dramatic entrance.
- Apply a heat protectant and wave-setting mousse to damp hair before blow-drying it smooth and sleek.
- Use a 1.5-inch curling iron to curl your hair in alternating directions, then brush through each curl.
- Use a paddle brush and blow dryer to smooth and set the waves in a deep side part and a flowing side-sweep.
- Apply a medium-hold pomade or serum through the waves to define them and add a glamorous shine.
- Secure the waves softly behind one ear with a sparkling jeweled clip or pearl hair accessory.
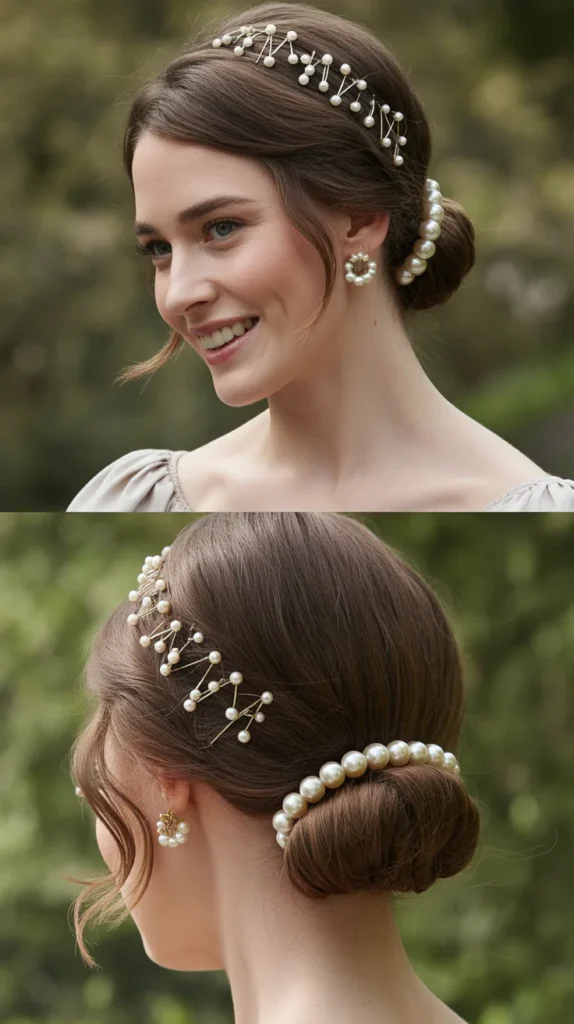
21. Twisted Half-Up with Pearl Pins
The Twisted Half-Up with Pearl Pins is a delicate and feminine hairstyle that strikes the perfect balance between casual and formal.
It keeps hair out of the face with a simple twisted section while allowing the rest of the hair to flow freely below. Pearl pins elevate this everyday style into something distinctly Regency-worthy.
- Take a section of hair from each side of the head near the temples and twist both sections backward.
- Join both twists at the center back of the head and secure them together with a bobby pin.
- Gently pull the twisted sections apart slightly to add volume and a looser, more romantic shape.
- Allow the remaining hair to fall freely in natural waves or curls for a soft, flowing contrast below.
- Insert three to five pearl-tipped pins throughout the twist for a classic Bridgerton-inspired embellishment.
22. Regency Fishtail Braid Updo
The Regency Fishtail Braid Updo combines one of the most intricate-looking braiding techniques with a structured updo format for a sophisticated, show-stopping result.
Fishtail braids have a naturally elegant, layered texture that pairs beautifully with Regency-era aesthetics. This style is especially stunning on long, thick hair.
- Divide your hair into two equal sections and begin a fishtail braid by crossing small pieces from the outer edge of each section to the other.
- Continue the fishtail braid all the way down to the ends and secure it with a clear elastic.
- Coil the completed fishtail braid into a low bun shape at the nape of the neck and pin it securely.
- Gently loosen the braid by tugging at its edges to create a fuller, more textured appearance.
- Add pearl or crystal pins throughout the bun to complete the refined Regency-inspired finishing touch.
23. Ribbon-Wrapped Bun
The Ribbon-Wrapped Bun is a whimsical yet polished hairstyle that uses a length of satin or velvet ribbon to transform a simple bun into a Regency-worthy masterpiece.
The ribbon adds color, structure, and charm to the style in an effortless way. This look is ideal for those who want something uniquely decorative without spending hours on elaborate braiding.
- Gather your hair into a smooth, medium bun at the nape or crown of the head and pin it securely.
- Take a long, thin ribbon in satin, velvet, or grosgrain and begin wrapping it around the base of the bun.
- Continue wrapping the ribbon across and around the bun itself in a crisscross or circular pattern.
- Tie the remaining ribbon into a small, tidy bow at the top or side of the bun to finish the wrap.
- Tuck the bow ends under the ribbon slightly to keep it from unraveling throughout the day.
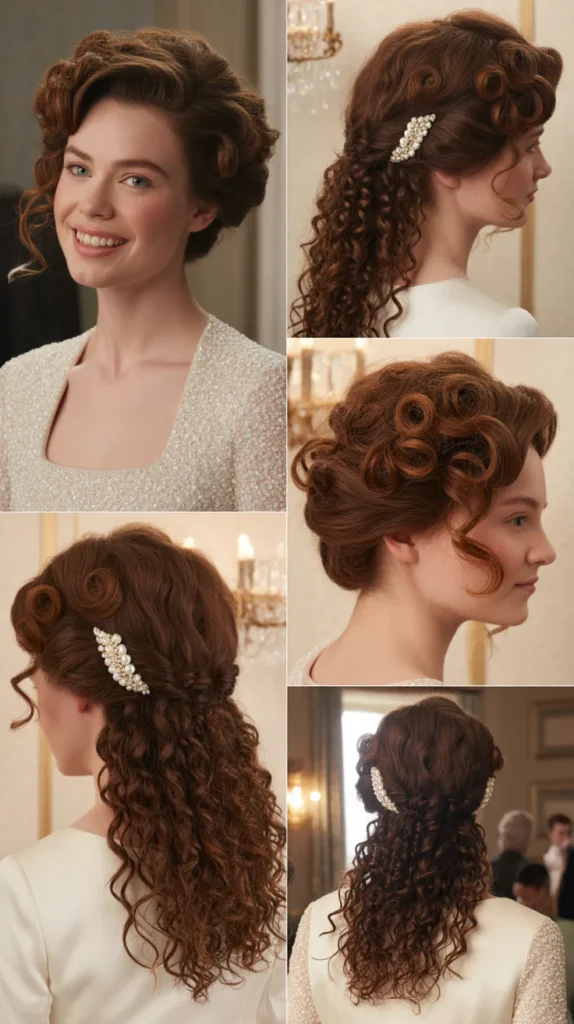
24. Regency Chignon with Ringlet Curls
The Regency Chignon with Ringlet Curls is one of the most historically accurate hairstyles in this guide, closely resembling the elaborate updos seen in early 19th-century portraiture and illustrated fashion plates.
It pairs a tidy chignon at the back with carefully arranged ringlet curls at the front and sides. This style is truly fit for a Bridgerton ball.
- Use a small-barrel curling iron or flexi rods to create tight, defined ringlet curls throughout your hair.
- Gather the majority of the hair into a low or medium chignon at the back and secure it neatly with pins.
- Arrange several ringlet curls at the front and sides to frame the face, allowing them to fall naturally.
- Smooth the hair going into the chignon with a boar bristle brush for a clean transition between curls and updo.
- Decorate the chignon with pearl pins, a jeweled comb, or a small Regency-era style headpiece for authenticity.
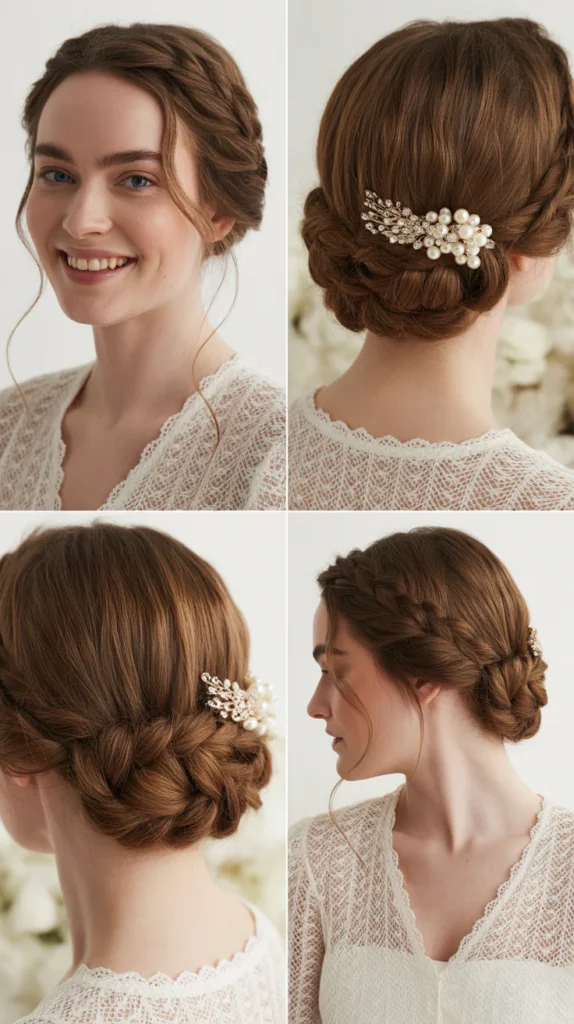
25. Braided Low Bun
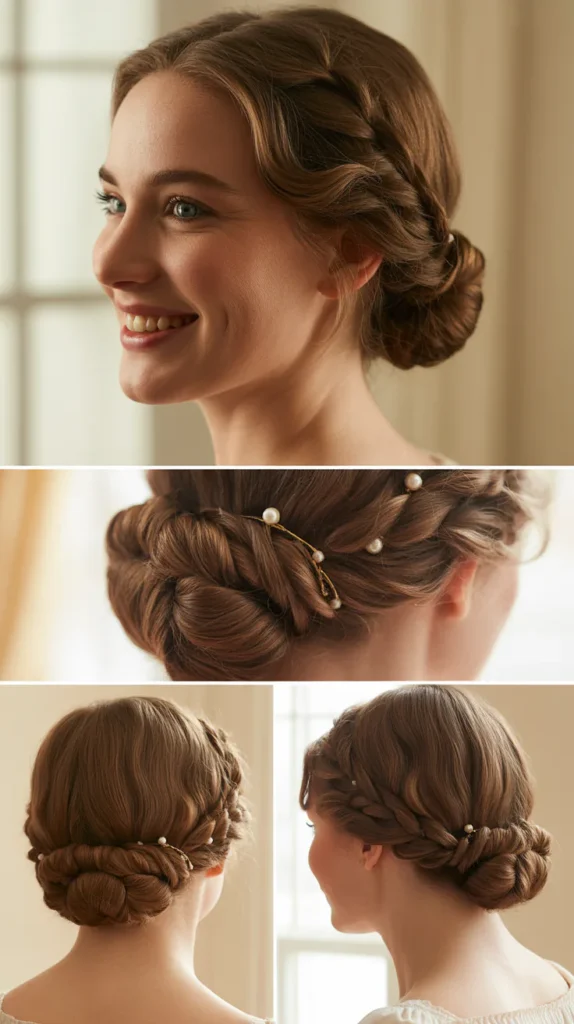
The Braided Low Bun is a practical yet beautiful hairstyle that feels equally at home in a Regency drawing room or a modern event venue.
It incorporates braiding into the structure of the bun itself to add visual texture and detail. This style is quick to create once mastered and stays put beautifully throughout long events.
- Create a loose three-strand braid starting from the nape of the neck and braid all the way down the ponytail.
- Coil the braid around itself in a circular pattern to create a bun shape at the nape of the neck.
- Pin the coiled braid securely with multiple bobby pins placed around the base and underneath the bun.
- Gently loosen the braid at the outer edges to create a fuller, more relaxed appearance.
- Embellish with pearl pins, a floral pick, or a delicate ribbon tied around the base of the bun.
26. Curly Natural Regency Updo

The Curly Natural Regency Updo celebrates the beauty of natural curl patterns while incorporating them into the timeless aesthetics of the Regency era.
This style is particularly designed for those with naturally curly or coily hair who want to embrace their texture in a historically inspired way. It proves that Regency elegance is for every hair type.
- Apply a curl-defining cream or gel to your natural hair and allow it to dry fully before styling.
- Gather the top and sides of the hair loosely and pin them into a high, voluminous bun at the crown.
- Allow several curls to fall naturally around the nape, sides, and front of the face for an organic effect.
- Smooth just the hairline with a soft-hold edge gel to give the style a more polished, put-together appearance.
- Add pearl or gold pins throughout the bun to introduce a Regency-era sparkle to the natural texture.
27. Low Braided Wreath Updo
The Low Braided Wreath Updo is a circular, structured style that wraps braids around the lower part of the head in a wreath-like formation. It has the look of an elaborately crafted style but is achievable with basic braiding skills and a few extra pins.
This style pairs beautifully with Regency-era gowns or modern formal wear.
- Divide your hair into two sections down the middle and braid each section into a three-strand braid.
- Drape the right braid from the nape across the back of the head toward the left ear and pin it in place.
- Drape the left braid from the nape across the back toward the right ear, overlapping the first braid.
- Tuck the ends of each braid neatly underneath the opposite braid to form a continuous, wreath-like loop.
- Secure the entire wreath with multiple bobby pins and decorate with small flowers or pearl pins.
28. High Regency Plait
The High Regency Plait is a structured and striking hairstyle that pairs a sleek, high ponytail with an elongated braid running down the back.
It draws inspiration from the neoclassical simplicity seen in early Regency fashion, which favored understated elegance over excessive ornamentation. This style makes a bold, clean statement.
- Brush all your hair thoroughly to remove any tangles and gather it into a tight high ponytail at the crown.
- Secure the ponytail with a strong elastic and smooth the base with a boar bristle brush for a sleek finish.
- Braid the ponytail into a tight, neat three-strand plait all the way to the ends and secure with a clear elastic.
- Wrap a thin piece of hair around both the top and bottom elastics to conceal them for a polished finish.
- Add a slender satin ribbon bow at the top of the plait near the ponytail base for a Regency-era detail.
29. Cascading Curl Updo
The Cascading Curl Updo is a lavish, voluminous hairstyle that features a structured updo at the top while allowing a cascade of curls to fall dramatically at the back.
It creates a sense of movement and grandeur that makes it one of the most impressive styles in this guide. This look is ideal for black-tie events, Regency balls, or formal photoshoots.
- Create voluminous curls throughout all your hair using a 1-inch curling wand and allow them to set before styling.
- Gather the top two-thirds of your hair into a high, structured updo and pin it securely at the crown.
- Release the remaining bottom section of curls and allow them to fall naturally in a cascading waterfall effect.
- Arrange the cascading curls by hand to ensure they fall evenly and beautifully on both sides of the back.
- Pin pearl and crystal pins throughout the updo section for a sparkling, regal Bridgerton-inspired finishing touch.
30. Knotted Headband Hairstyle
The Knotted Headband Hairstyle uses a braided or twisted rope of your own hair to form a thick, decorative headband across the crown of the head.
It is a creative and eye-catching variation of the classic braided headband that adds more texture and dimension. This is a fantastic choice for those who want something a little different from the standard Regency styles.
- Take a generous section of hair from the nape of the neck and loosely twist or braid it into a rope.
- Bring the twisted rope up and over the top of the head, positioning it as a headband across the crown.
- Secure both ends of the headband with bobby pins tucked discreetly underneath the hair on each side.
- Leave the rest of the hair loose or curl it into soft waves to create a flowing, romantic contrast.
- Add pearl pins along the knotted headband to enhance its Regency-era visual appeal.
31. Elegant Chignon with Hair Sticks
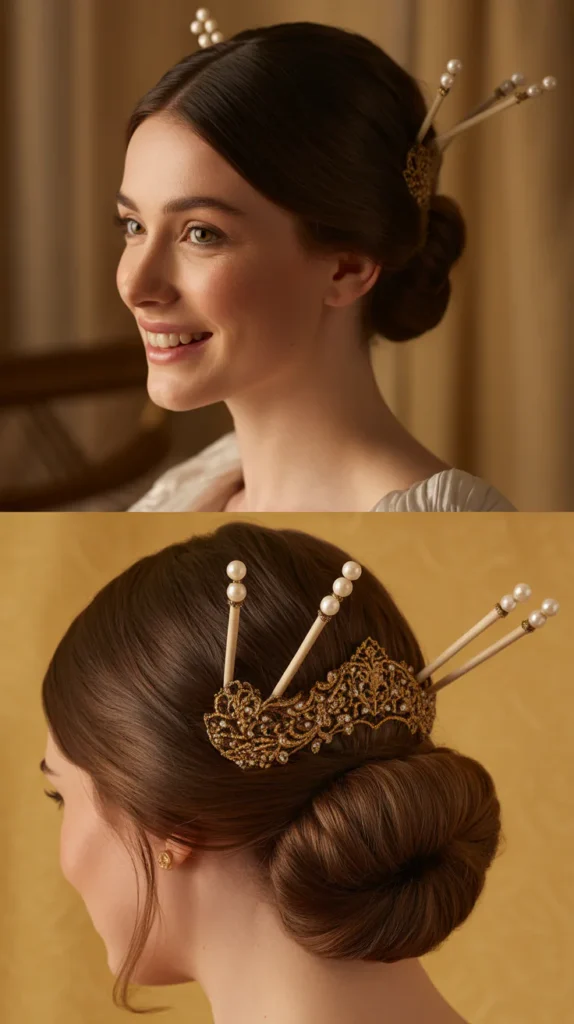
The Elegant Chignon with Hair Sticks is a minimalist Regency hairstyle that relies on decorative hair accessories to create its visual impact.
Hair sticks were a popular styling tool in historical periods and add an undeniable period-appropriate elegance. This style is fast to achieve and incredibly versatile.
- Smooth your hair into a neat chignon positioned at the low back or nape of the neck using a brush and pins.
- Once the chignon is secured, insert two or three decorative hair sticks diagonally across the bun.
- Choose hair sticks featuring pearls, jade, gold, or crystal detailing to match the Regency aesthetic.
- Pull a small wisp of hair at each temple to frame the face softly and relieve the structure of the style.
- Lightly mist the finished style with hairspray to keep the chignon secure and the hair sticks in position.
32. Braided Crown Updo with Jeweled Accessories
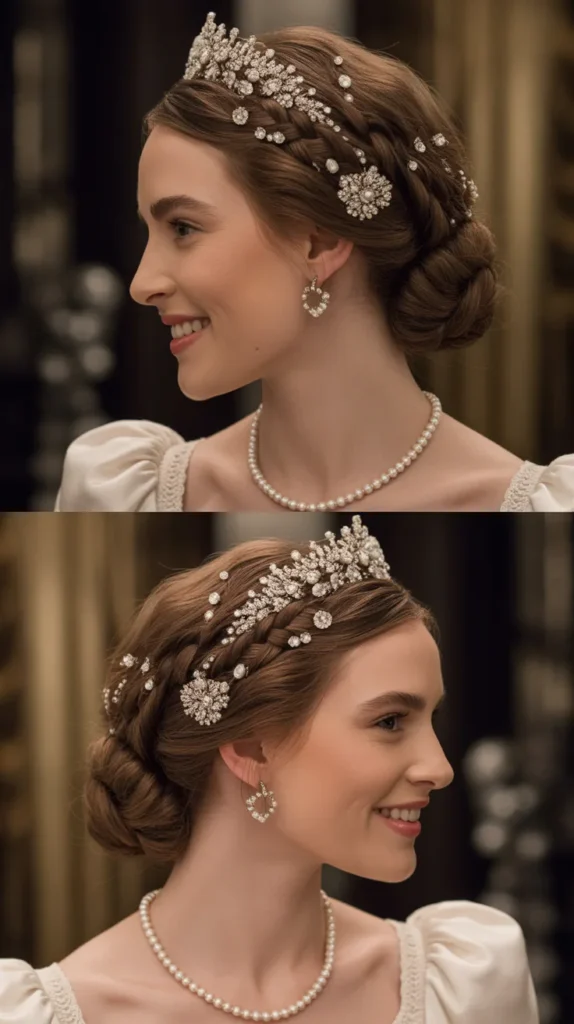
The Braided Crown Updo with Jeweled Accessories is the ultimate Regency hairstyle — regal, intricate, and utterly unforgettable.
It combines the halo braid technique with a structured updo center and the dazzle of jeweled accessories for a look that could walk straight out of a Bridgerton ballroom.
This is the showstopper style to close this guide on a truly spectacular note.
- Create a Dutch or French halo braid encircling the entire head, starting from just above one ear and working around.
- In the center of the crown, where the braid meets itself, create a small, neat bun or chignon using the remaining hair.
- Secure both the braid and the central bun with multiple bobby pins to ensure everything stays in place.
- Adorn the braid and bun with a mix of crystal pins, pearl picks, and a central jeweled tiara or headpiece.
- Finish the entire style with a generous mist of shine spray and strong-hold hairspray for a lasting, luminous result.
Hairstyle Quick Reference Table
| # | Hairstyle | Skill Level | Best For | Key Accessory |
|---|---|---|---|---|
| 1 | Classic Regency Updo | Intermediate | Formal Events | Pearl Pins |
| 2 | Pearl-Adorned Chignon | Beginner | Weddings | Pearl Bobby Pins |
| 3 | Half-Up Braided Crown | Beginner | Casual/Formal | Ribbon Bow |
| 4 | Loose Romantic Bun | Beginner | Garden Parties | Satin Ribbon |
| 5 | Braided Updo with Florals | Intermediate | Outdoor Events | Fresh Flowers |
| 6 | Regency Topknot | Intermediate | Black Tie | Jeweled Pin |
| 7 | Waterfall Braid | Beginner | Daytime Events | Pearl Clip |
| 8 | Side-Swept Curls | Beginner | Evening Events | Jeweled Headband |
| 9 | Twisted Rope Braid | Intermediate | All Occasions | Shine Spray |
| 10 | Regency Low Ponytail | Beginner | Everyday Elegance | Satin Bow |
| 11 | Finger Waves | Advanced | Themed Events | Pomade |
| 12 | Braided Headband | Beginner | Casual | Floral Pins |
| 13 | Gibson Tuck | Beginner | Formal | Jeweled Clip |
| 14 | Feather-Accented Updo | Intermediate | Costume/Themed | Feather Picks |
| 15 | Loose French Twist | Beginner | All Occasions | Hair Stick |
| 16 | Knot Bun with Pearls | Intermediate | Formal | Pearl Chain |
| 17 | Dutch Braid Updo | Intermediate | Weddings | Pearl Pins |
| 18 | Soft Halo Braid | Advanced | Weddings | Baby’s Breath |
| 19 | Messy Romantic Chignon | Beginner | Casual Formal | Pearl Pins |
| 20 | Hollywood Waves | Advanced | Galas | Jeweled Clip |
| 21 | Twisted Half-Up | Beginner | Daytime | Pearl Pins |
| 22 | Fishtail Braid Updo | Advanced | Black Tie | Crystal Pins |
| 23 | Ribbon-Wrapped Bun | Beginner | All Occasions | Satin Ribbon |
| 24 | Chignon with Ringlets | Advanced | Formal Balls | Jeweled Comb |
| 25 | Braided Low Bun | Beginner | Everyday | Floral Pick |
| 26 | Curly Natural Updo | Beginner | All Hair Types | Gold Pins |
| 27 | Braided Wreath Updo | Intermediate | Formal | Pearl Pins |
| 28 | High Regency Plait | Beginner | Casual Formal | Ribbon Bow |
| 29 | Cascading Curl Updo | Advanced | Black Tie | Crystal Pins |
| 30 | Knotted Headband | Beginner | Casual | Pearl Pins |
| 31 | Chignon with Hair Sticks | Beginner | All Occasions | Hair Sticks |
| 32 | Braided Crown Updo | Advanced | Formal/Themed | Jeweled Tiara |
Conclusion
From simple twisted half-ups to elaborate braided crown updos adorned with jeweled tiaras, the 32 Bridgerton Hairstyle Tutorials for a Regency Look has guided you through every level of styling skill and every type of occasion.
Whether you were searching for an everyday-elegant hairstyle or a showstopping formal updo, this collection has proven that the timeless beauty of the Regency era is more accessible than ever.
With the right tools, accessories, and a little practice, anyone can channel the grace and grandeur of a Bridgerton heroine.
For more inspiration on recreating period-inspired styles, check out resources like Pinterest’s Regency hairstyle boards and YouTube braiding tutorials that bring these looks to life step by step.
The world of Regency elegance is at your fingertips — now go style your hair like the leading character you truly are.