The Renaissance era, spanning from the 14th to 17th century, brought us some of the most elegant and romantic hairstyles in history.
If you have curly hair and love the timeless beauty of historical aesthetics, you’re in for a treat with 31 Gorgeous Renaissance Hairstyles for Curly Hair.
These stunning styles celebrate the natural texture of curls while embracing the ornate sophistication that defined Renaissance beauty standards.
From elaborate braided updos adorned with pearls to flowing ringlets framed by decorative headpieces, each hairstyle tells a story of artistry and grace.
Modern interpretations of these classic looks allow you to channel your inner Renaissance muse while keeping your styling practical for contemporary life.
Whether you’re preparing for a themed event, a wedding, or simply want to elevate your everyday look, these hairstyles prove that curly hair was made for Renaissance-inspired elegance.
This comprehensive guide will walk you through a diverse collection of styles, from simple half-up arrangements to complex braided masterpieces, complete with tips on achieving each look and suggestions for accessories that enhance your natural curls.
Get ready to discover how Renaissance beauty techniques can transform your curly hair into works of art worthy of a palace portrait.
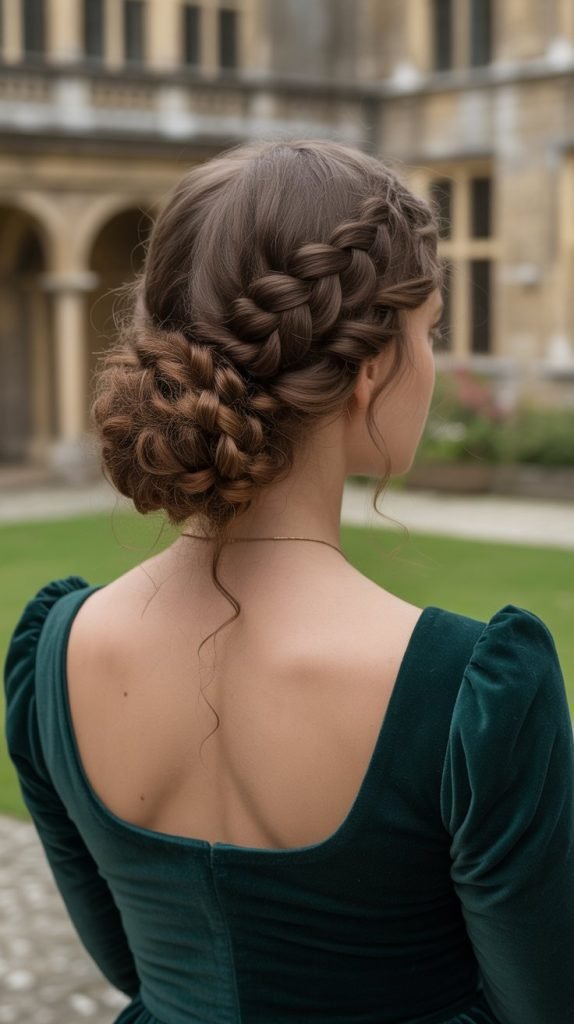
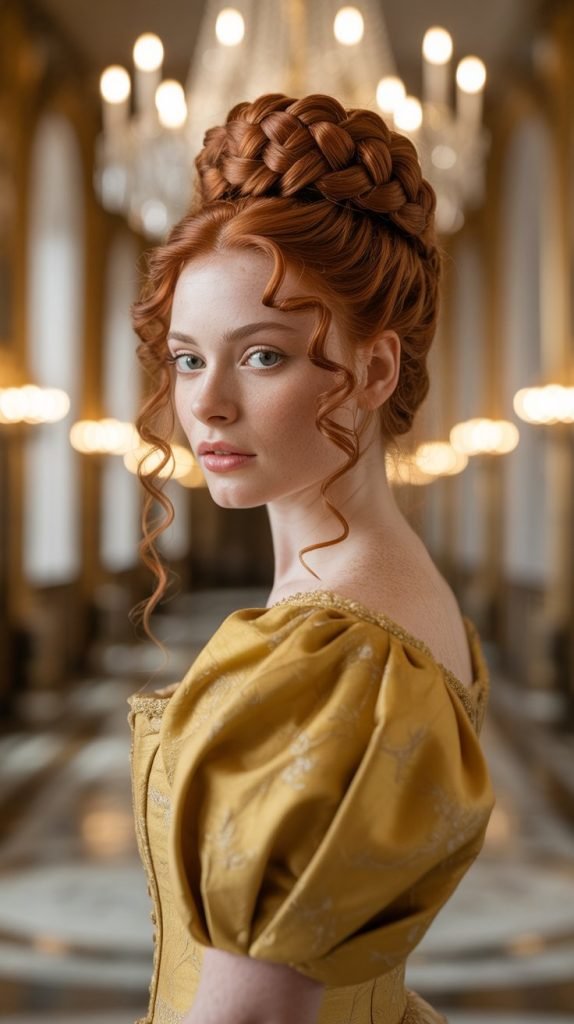
1. The Classic Renaissance Crown Braid
The crown braid stands as one of the most iconic Renaissance hairstyles, perfectly suited for curly hair textures.
This elegant style wraps braided hair around the head like a natural crown, creating a regal appearance that was favored by nobility.
Curly hair adds extra volume and texture to this timeless look, making it even more striking than its straight-haired counterpart.
How to Achieve This Style:
- Start with clean, moisturized curls that have been defined with a curl-enhancing product
- Part your hair down the middle or create a deep side part depending on your preference
- Begin a Dutch braid or French braid on one side, starting near the front hairline
- Continue braiding around the circumference of your head, incorporating all hair as you go
- Secure the end of the braid and tuck it underneath the starting point
- Pull gently at the braid sections to create a fuller, more romantic appearance
- Secure any loose pieces with bobby pins that match your hair color
- Finish with a light-hold hairspray to maintain the style throughout the day
Accessories to Consider:
- Small pearl pins scattered throughout the braid for authentic Renaissance glamour
- A delicate gold or silver chain woven into the braid
- Fresh or silk flowers tucked into the crown for outdoor events
- Decorative hairpins with gemstones at strategic points
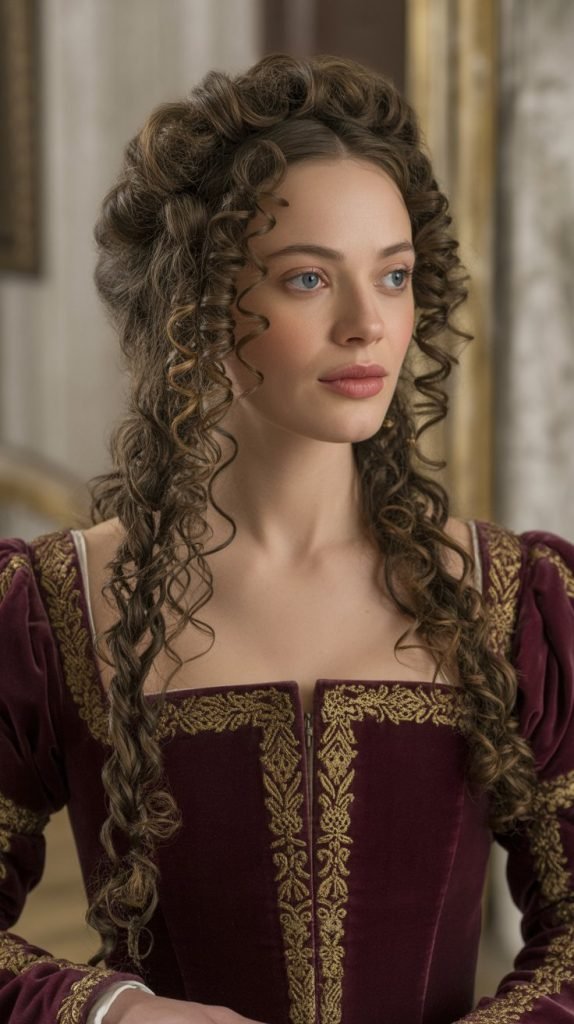
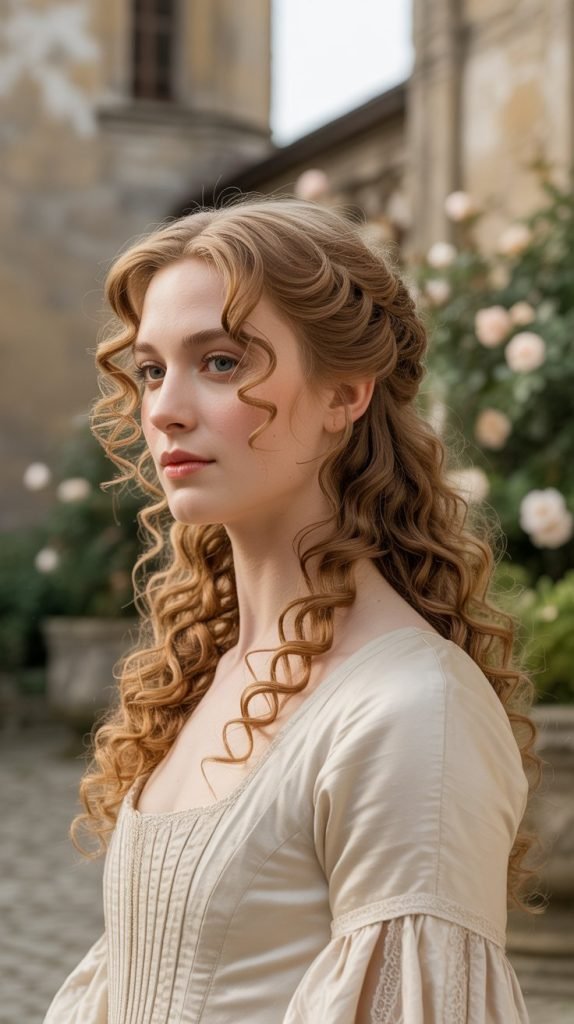
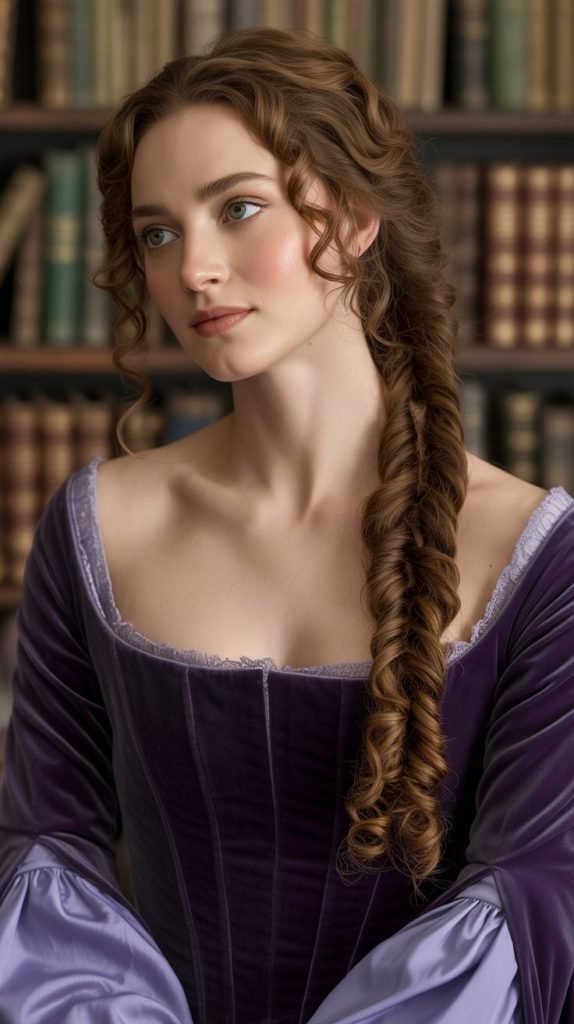
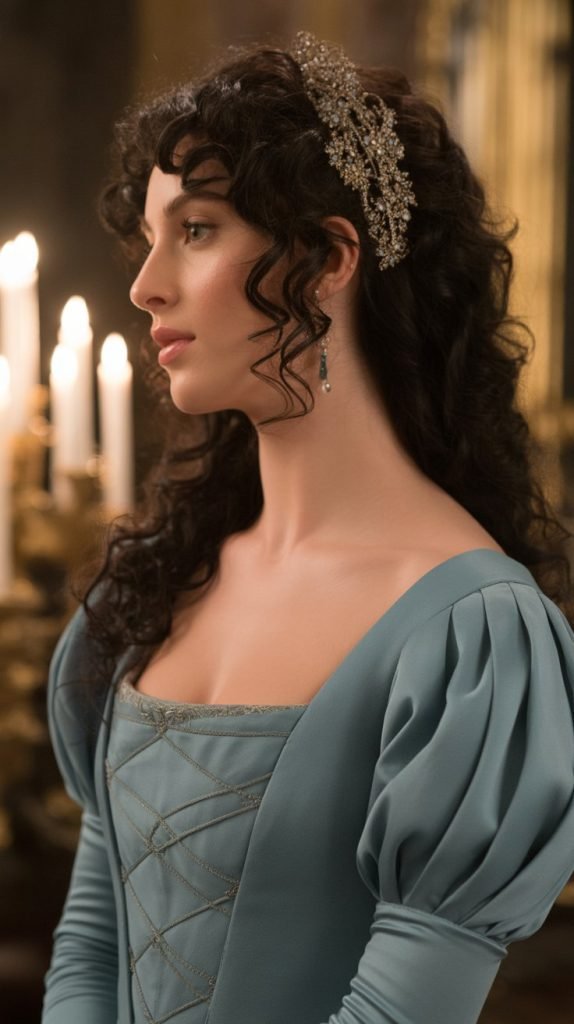
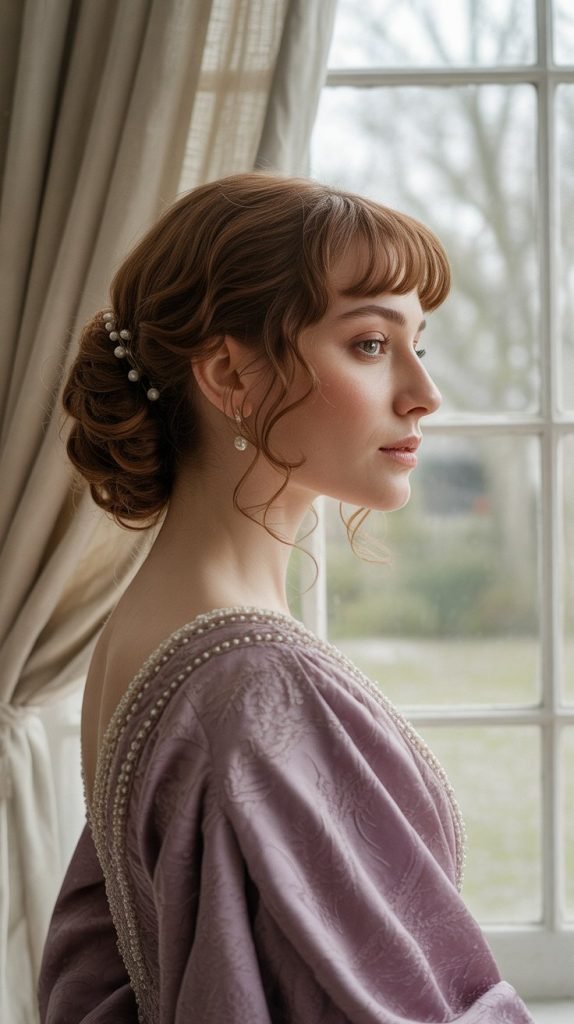
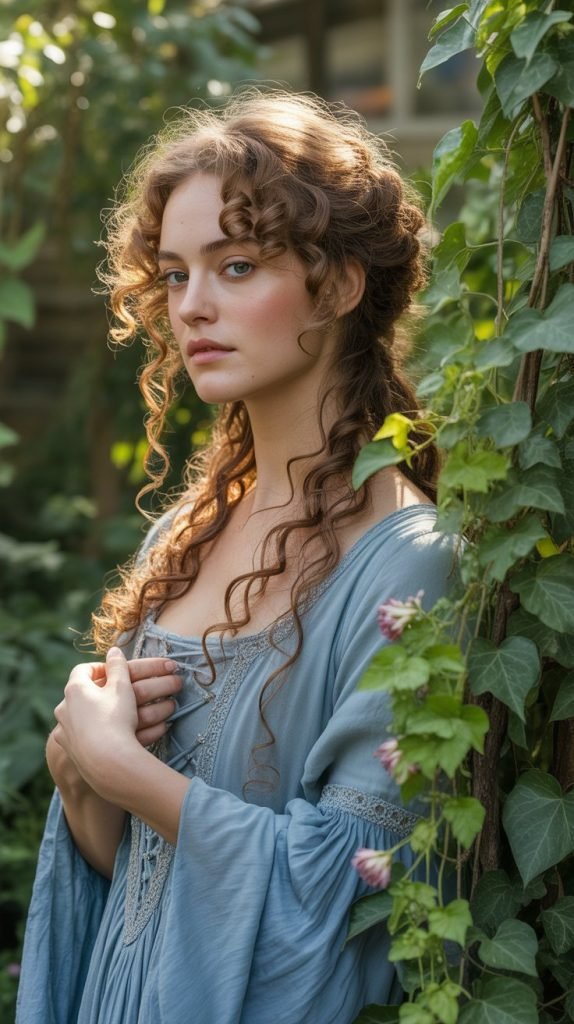
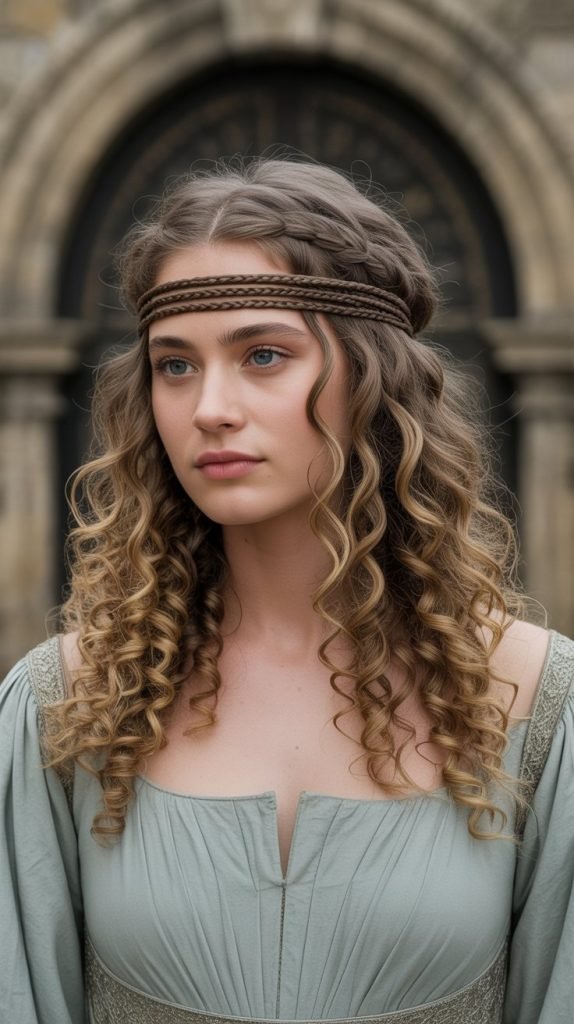
2. Flowing Ringlets with Pearl Headband
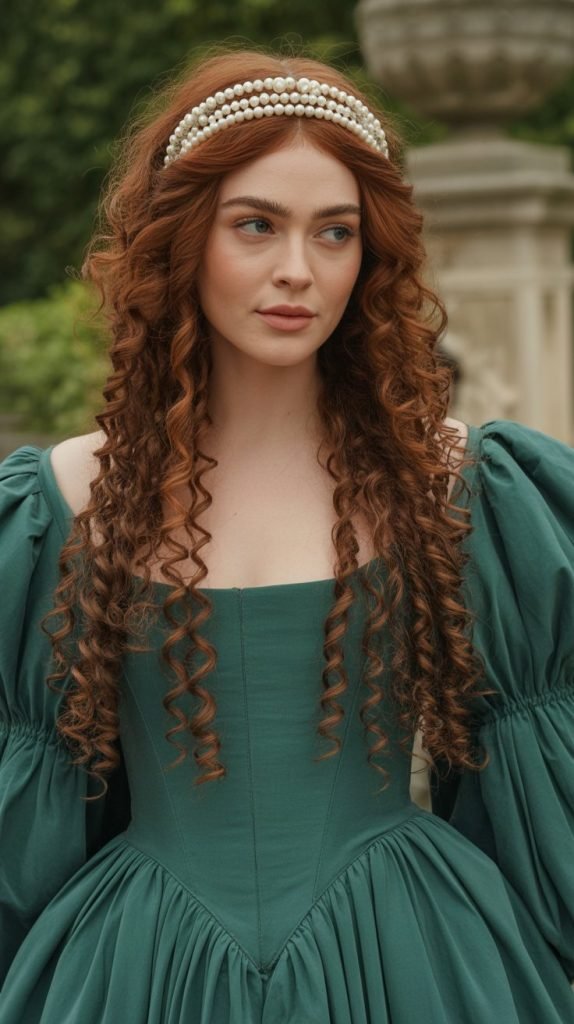
Renaissance women cherished loose, flowing curls as a symbol of femininity and youth.
This style allows your natural curls to shine while adding a touch of period-appropriate elegance through a decorative headband.
The beauty of this look lies in its simplicity and the way it showcases the natural texture of curly hair.
Styling Steps:
- Wash and condition your curls with products that enhance natural curl pattern
- Apply a curl-defining cream or mousse to damp hair
- Allow hair to air-dry or use a diffuser attachment on low heat
- Once completely dry, gently separate larger curl clumps with your fingers for added volume
- Create a deep side part or middle part based on your face shape
- Place a pearl-adorned headband approximately two inches back from your hairline
- Arrange front curls to frame your face softly on both sides
- Use a small amount of oil or serum on the ends to add shine and reduce frizz
Headband Options:
- Traditional pearl-encrusted bands that sit across the forehead
- Gold or silver metal circlets with intricate Renaissance designs
- Velvet ribbons in jewel tones wrapped around the head twice
- Beaded bands with dangling ornaments at the temples
3. The Twisted Back Halo
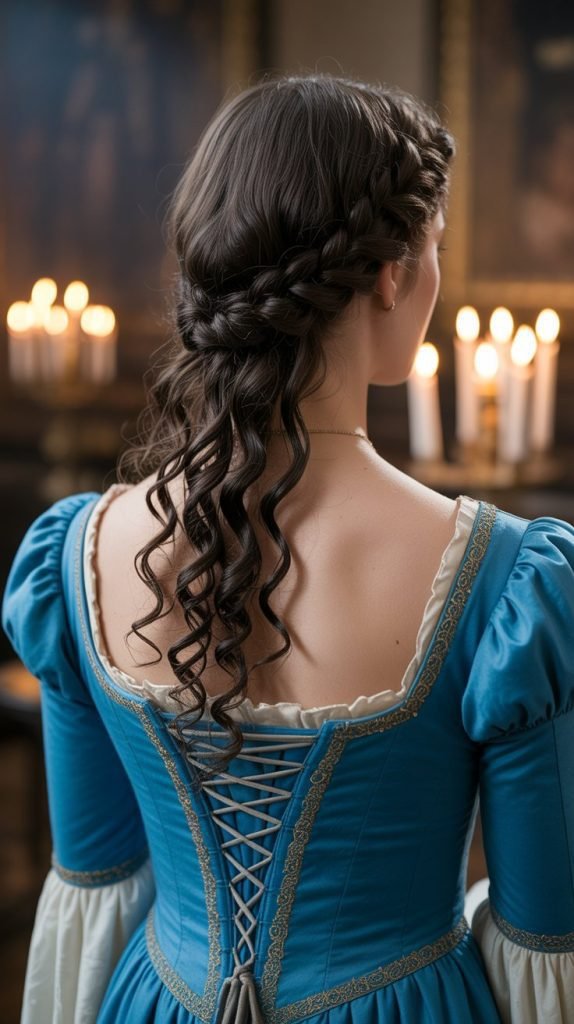
The twisted back halo combines the elegance of an updo with the romantic appeal of visible curls.
This style pulls hair away from the face while creating a beautiful halo effect at the back of the head.
Curly hair naturally provides the volume and texture needed to make this style truly spectacular.
Creation Process:
- Begin with second-day curls or refresh your curls with a spray bottle of water
- Divide your hair into three sections: two at the front sides and one at the back
- Take the right front section and twist it back toward the center of your head
- Secure it with bobby pins at the back center point
- Repeat with the left front section, crossing it over the right twist
- Take small sections from the back and twist them upward to meet the front twists
- Create a circular halo pattern by continuing to twist and pin sections
- Leave the remaining length of your curls flowing down or gathered in a low arrangement
- Mist with flexible-hold hairspray to keep twists in place
4. Half-Up Renaissance Knot
The half-up Renaissance knot provides the perfect balance between elegant styling and showcasing your beautiful curls.
This versatile look keeps hair away from the face while allowing the natural volume and bounce of curly hair to remain the focal point.
It was a popular choice among Renaissance ladies for both daily wear and special occasions.
Step-by-Step Guide:
- Start with dry, defined curls that have been properly moisturized
- Section off the top half of your hair from ear to ear
- Gather this top section at the crown of your head
- Twist the section loosely to maintain curl definition
- Wrap the twisted section into a knot or bun shape
- Secure with pins, allowing some curls to escape naturally for a softer look
- Gently pull at the knot to create more volume and a relaxed appearance
- Leave the bottom half of your curls flowing freely
- Add face-framing pieces by pulling out a few curls near your temples
Enhancement Ideas:
- Wrap a silk ribbon around the knot and tie it into a bow
- Insert decorative pins with Renaissance-style ornaments
- Add small braids within the pulled-back section before creating the knot
- Incorporate a small jeweled comb at the base of the knot
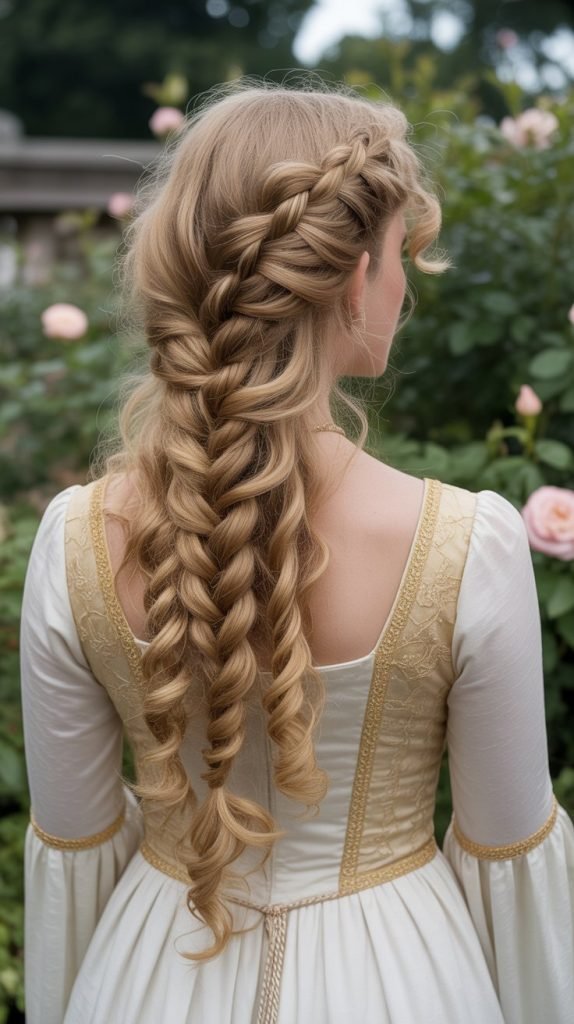
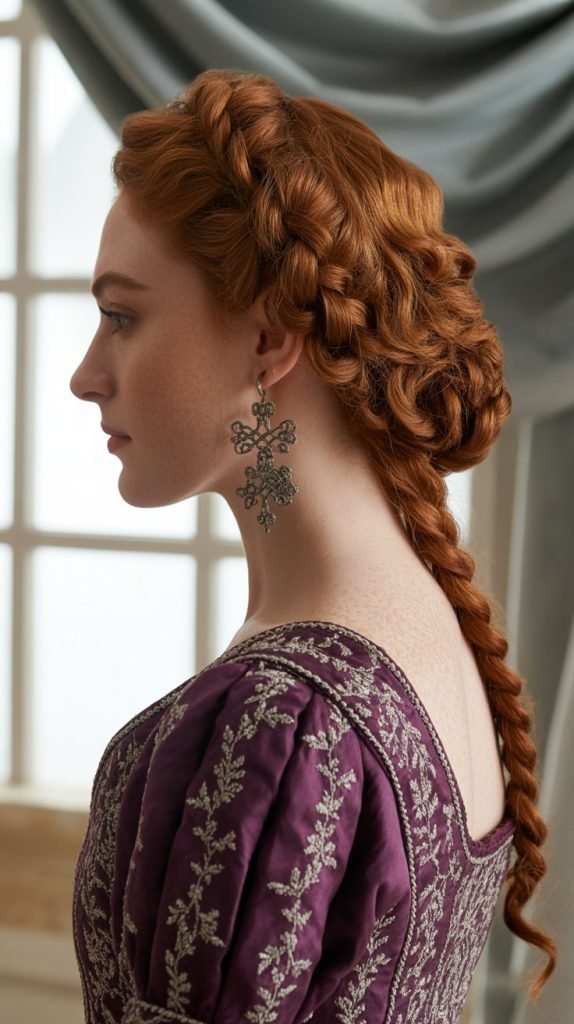
5. Braided Side Cascade
The braided side cascade creates a romantic, asymmetrical look that was highly fashionable during the Renaissance period.
This style works exceptionally well with curly hair, as the braid provides structure while the loose curls add softness and movement.
The cascading effect over one shoulder creates an elegant, feminine silhouette.
How to Create:
- Part your hair deeply on one side, creating a dramatic side part
- On the side with more hair, begin a loose braid starting near the part
- Continue the braid along the hairline, moving toward the back of your head
- As you braid, keep it loose to accommodate the volume of curly hair
- Once you reach behind your ear, continue braiding down the length
- Bring all remaining hair over the same shoulder as your braid
- Secure the braid end with a clear elastic or ribbon
- Gently pancake the braid by pulling sections to create width
- Arrange the loose curls over your shoulder to cascade alongside the braid
- Use bobby pins to secure any pieces that won’t stay in place naturally
6. The Double Crown Twist
The double crown twist offers a sophisticated take on Renaissance styling that perfectly suits curly hair.
This intricate look features two layers of twisted hair creating a double-crown effect around the head.
The natural volume of curls makes this style appear fuller and more dramatic than it would on straight hair.
Instructions:
- Work with hair that has been refreshed and has good curl definition
- Create a horizontal part from ear to ear across the crown
- Divide the front section into two equal parts
- Twist the right front section back and secure at the center back with pins
- Repeat with the left front section, pinning next to the first twist
- Take the back section and create two more twists in the same manner
- Position these second set of twists slightly below the first set
- Ensure both levels of twists create parallel crown-like lines
- Leave remaining length in natural curls or gather into a low style
- Spray lightly to hold the twists without weighing down your curls
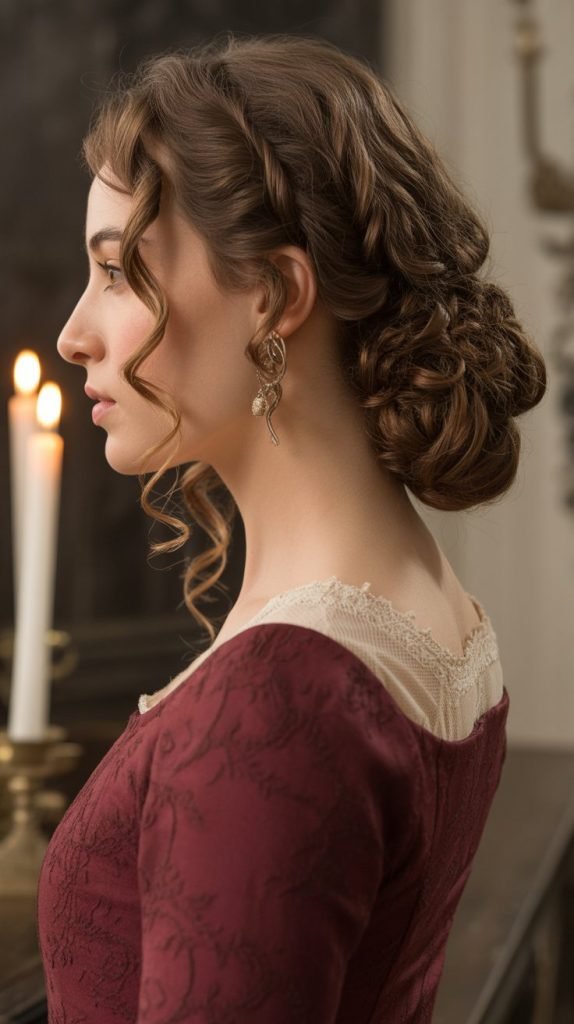
7. Curly Low Chignon with Ribbon
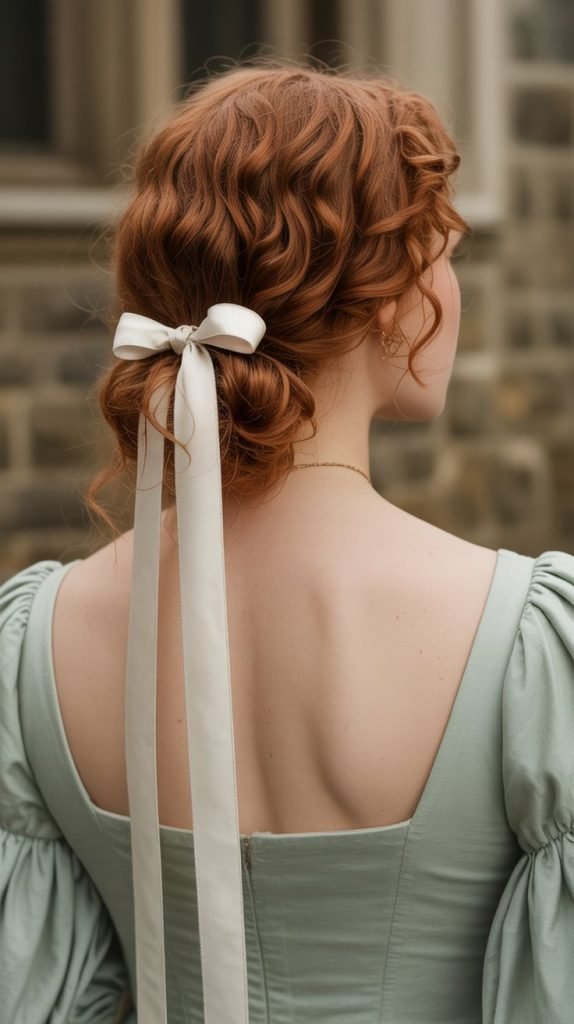
The curly low chignon brings Renaissance elegance to a classic updo style.
Unlike traditional sleek chignons, this version celebrates the natural texture of curly hair while maintaining a polished, romantic appearance.
The addition of a ribbon weaved through the style adds an authentic period touch.
Creating the Look:
- Gather your curls into a low ponytail at the nape of your neck
- Don’t smooth the hair too much; allow natural texture to show
- Twist the ponytail loosely to keep curls defined
- Wrap the twisted ponytail around its base to form a chignon
- Secure with bobby pins, ensuring the chignon feels stable
- Leave a few curly tendrils loose around your face and neck
- Take a silk ribbon in a complementary color to your outfit
- Weave the ribbon through the chignon or wrap it around the base
- Tie the ribbon into a bow at the bottom or side of the chignon
- Use hairspray sparingly on the style, focusing on any flyaways
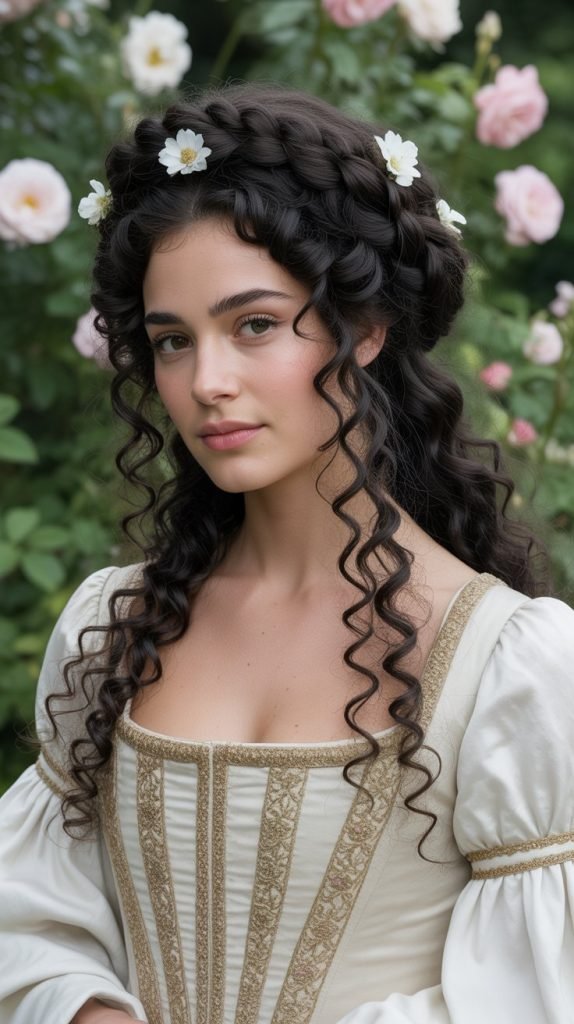
8. The Forehead Braid with Loose Curls
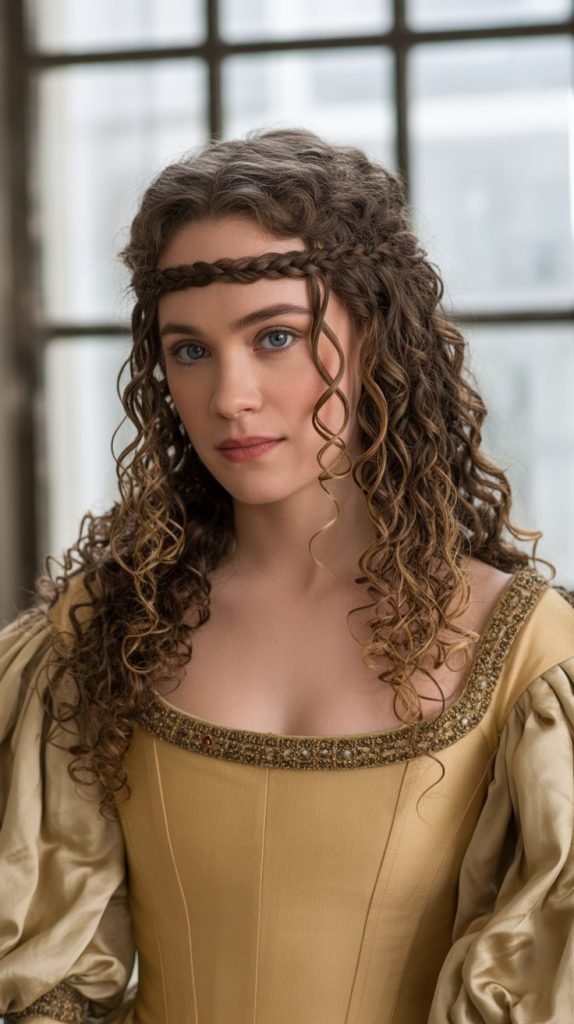
Renaissance fashion often featured decorative elements across the forehead, and the forehead braid perfectly captures this aesthetic.
This style frames the face beautifully while allowing your natural curls to flow freely.
It’s particularly striking on curly hair as the textural contrast between the braid and loose curls creates visual interest.
Styling Method:
- Start with a side part on either the left or right side
- Take a small section of hair from the front near your part
- Create a thin Dutch or French braid that follows your hairline across your forehead
- Keep the braid close to your hairline, about an inch back
- Continue braiding until you reach the opposite side of your head
- Secure the braid behind your ear with bobby pins
- Allow all remaining curls to flow naturally down your back and shoulders
- Add volume at the crown by gently lifting the roots
- Frame your face with a few loose curls pulled forward
Decorative Options:
- Thread tiny pearls or beads onto sections as you braid
- Add small gold or silver rings to the braid segments
- Pin small flowers along the length of the forehead braid
- Use a decorative hair cuff where the braid ends
9. Renaissance Rope Braid Updo

The rope braid technique creates a twisted, cable-like appearance that looks particularly stunning with curly hair.
This updo style combines multiple rope braids arranged in an intricate pattern at the back of the head. The result is a sophisticated style worthy of Renaissance royalty.
How to Achieve:
- Divide hair into four equal sections: two at the front and two at the back
- Create rope braids by dividing each section in two and twisting them around each other
- As you twist, ensure both strands are twisted in the same direction individually
- Then wrap them around each other in the opposite direction to create the rope effect
- Create four rope braids total, securing each end temporarily
- Begin pinning the rope braids in a circular or figure-eight pattern at the back
- Layer the braids on top of each other to create dimension
- Tuck the ends underneath and secure with pins
- Gently pull at the rope braids to make them appear fuller
- Finish with decorative pins at key points of the design
10. Side-Swept Curls with Jeweled Comb
This elegant yet simple style showcases the natural beauty of curly hair while incorporating a luxurious Renaissance accessory.
Side-swept curls create an asymmetrical, romantic look that was favored during the Renaissance period for evening occasions and formal events.
Styling Process:
- Enhance your natural curl pattern with appropriate styling products
- Create a deep side part on your preferred side
- Sweep all hair over to one shoulder, leaving the opposite side exposed
- Use a large decorative comb to secure the hair behind your ear on the exposed side
- Position the jeweled comb so it’s visible and creates a focal point
- Arrange curls over the opposite shoulder in a cascading manner
- Allow some face-framing curls to soften the look
- Apply a light serum to add shine without weighing down curls
- Set with a flexible-hold spray that won’t make hair crunchy
Comb Selection Tips:
- Choose combs with faux gemstones in colors that complement your outfit
- Gold-toned combs work beautifully with warm hair colors
- Silver or pewter combs enhance cool-toned hair shades
- Vintage-style combs with intricate metalwork add authentic Renaissance flair
11. The Milkmaid Braid Crown for Curls
The milkmaid braid creates a charming, pastoral Renaissance look that translates beautifully to curly hair.
This style involves two braids wrapped around the head, creating a crown effect that’s both practical and romantic.
The natural volume of curly hair makes this style appear even more substantial and impressive.
Step-by-Step Instructions:
- Part your hair down the center from forehead to nape
- Create two loose braids, one on each side, starting behind the ears
- Keep the braids loose to accommodate the volume of curly hair
- Braid all the way to the ends and secure with clear elastics
- Bring the right braid over the top of your head like a headband
- Pin it securely on the left side, hiding the end
- Take the left braid and bring it over the top, crossing the first braid
- Pin it securely on the right side, tucking the end underneath
- Gently pull at both braids to create a fuller, softer appearance
- Use additional pins to secure any sections that feel loose
- Leave a few wispy curls around your face for a softer effect
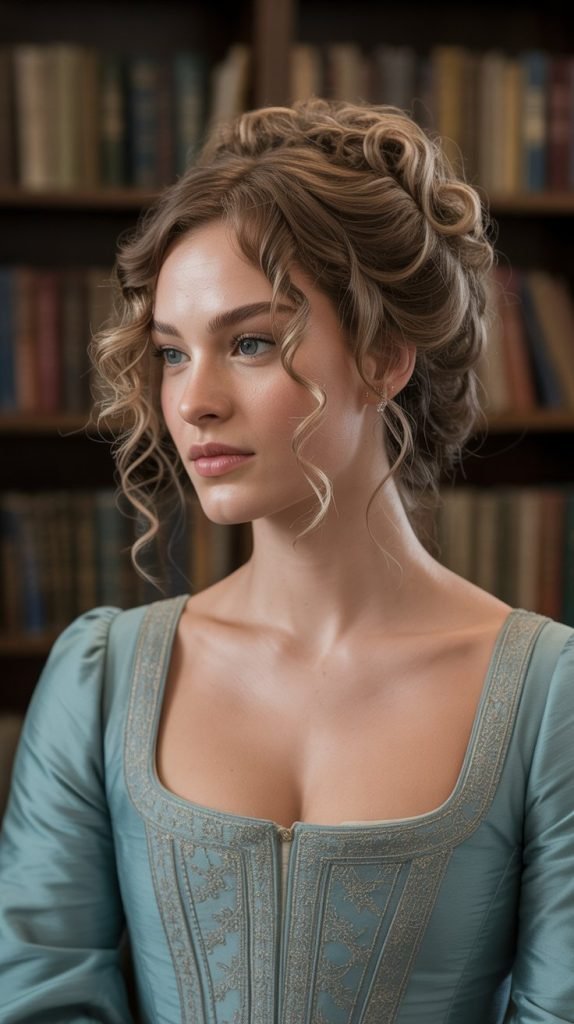
12. Curly High Bun with Cascading Tendrils
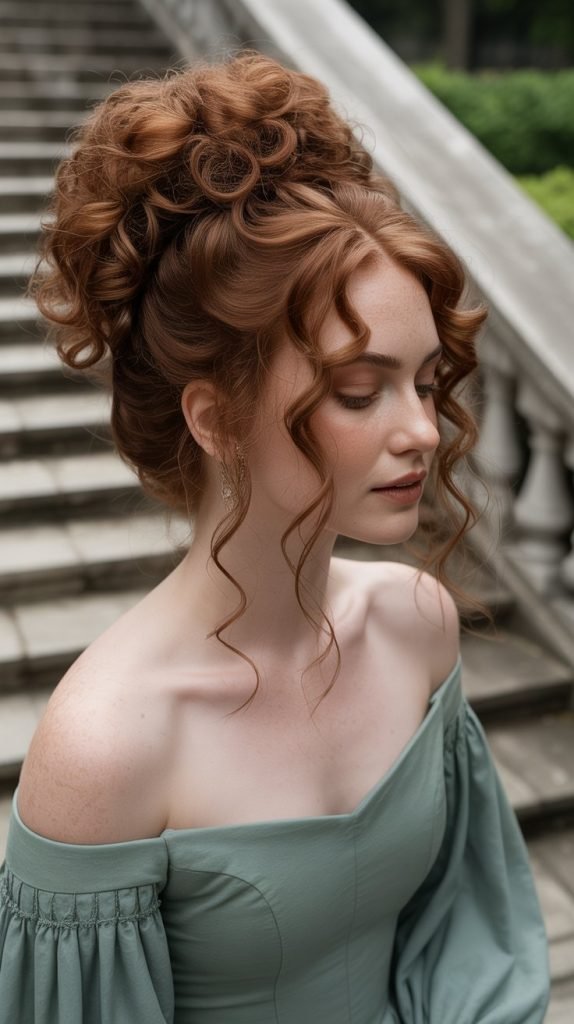
The high bun was a sign of elegance and refinement during the Renaissance, and this curly version adds romantic tendrils that soften the formal look.
This style is perfect for showing off the neck and shoulders while still celebrating your natural curls.
Creating This Style:
- Flip your head upside down and gather all hair at the crown
- Secure with an elastic band, creating a high ponytail
- Don’t pull hair completely through on the last wrap, creating a loop
- The loop forms the base of your bun
- Wrap remaining length around the base, pinning as you go
- Allow the natural curl texture to show in the bun rather than smoothing it
- Pull out several curly tendrils around your face, at the temples and nape
- Gently arrange these tendrils to frame your face romantically
- Pin any sections of the bun that need additional security
- Finish with a light mist of hairspray
Enhancement Suggestions:
- Wrap a velvet ribbon around the base of the bun
- Add a decorative hairnet over the bun (a popular Renaissance accessory)
- Insert pearl pins throughout the bun for sparkle
- Attach a small jeweled ornament at the front of the bun
13. Infinity Braid with Curly Ends
The infinity braid, also known as a figure-eight braid, creates an intricate woven pattern that looks incredibly complex but is achievable with practice.
When combined with curly ends left loose, this style perfectly balances structure and natural texture in true Renaissance fashion.
How to Create:
- Section off the hair you want to braid (typically from the crown down)
- Divide this section into two equal parts
- Take a small piece from the outside of the right section
- Bring it over the right section, under the left section, and join it with the right section
- Take a small piece from the outside of the left section
- Bring it over the left section, under the right section, and join it with the left section
- Continue this pattern, creating the infinity weave effect
- Braid to your desired length, leaving several inches of curly ends loose
- Secure with a clear elastic or decorative ribbon
- Gently pull at the braid to create more width and visual impact
- Allow the curly ends to cascade naturally for a romantic finish
14. Side Bun with Curly Fringe
The side bun creates an elegant asymmetrical look while the curly fringe adds a soft, romantic element. This Renaissance-inspired style was particularly popular among young noblewomen and translates beautifully to modern times.
Styling Steps:
- Create a deep side part on your preferred side
- Leave out the front section on the side with more hair for your fringe
- Gather remaining hair to the opposite side at ear level
- Twist the gathered hair loosely to maintain curl definition
- Wrap the twisted hair into a bun shape
- Secure with pins, allowing some curl texture to show through the bun
- Style your fringe section by arranging curls to sweep across your forehead
- Use your fingers to define and separate the fringe curls
- Pin any pieces needed to keep the style secure
- Apply a light-hold product to the fringe to keep it in place without stiffness
15. The Wrapped Ponytail with Curly Volume
This elevated ponytail style incorporates wrapping techniques that were popular during the Renaissance era. The height and volume of curly hair make this style particularly striking, while the wrapped section adds a polished, refined element.
Instructions:
- Create a high or mid-level ponytail, positioning it based on your preference
- Don’t smooth hair back too tightly; allow some natural volume at the crown
- Secure the ponytail with an elastic band
- Take a small section from the ponytail and wrap it around the elastic
- Pin the wrapped section underneath the ponytail to hide the elastic
- Gently separate the curls in the ponytail to create maximum volume
- Use a pick or your fingers to lift the curls for added height
- Create height at the crown by gently backcombing or lifting roots
- Leave a few curly pieces loose around your face
- Set with a flexible-hold spray that won’t flatten your curls
Accessory Ideas:
- Add a velvet ribbon bow at the base of the ponytail
- Thread a pearl strand through the wrapped section
- Attach a decorative brooch where the wrap is pinned
- Use ornate bobby pins visible along the sides
16. Braided Headband with Half-Up Style
This versatile style combines the practicality of keeping hair off your face with the romance of flowing curls.
The braided headband is created from your own hair, making it a truly Renaissance-inspired look that works perfectly with curly textures.
Creation Process:
- Take a section of hair from behind one ear, about an inch wide
- Braid this section all the way to the end
- Bring the braid across the top of your head like a headband
- Pin it securely behind the opposite ear
- Gather the top half of your remaining hair
- Loosely twist or clip this section at the back of your head
- Leave the bottom half of your curls flowing freely
- Adjust the braided headband so it sits naturally
- Pull out a few face-framing curls on both sides
- Finish by gently fluffing the curls for maximum volume
17. The Twisted Low Bun with Pearl Accents
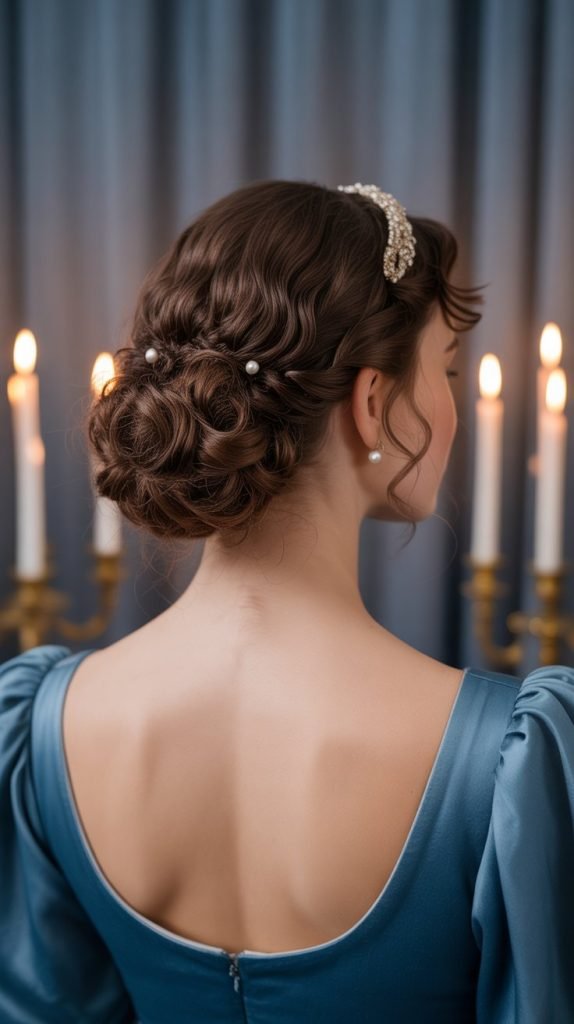
The twisted low bun represents understated Renaissance elegance, perfect for formal occasions or when you want a sophisticated look.
Pearl accents add that authentic period touch while the natural texture of curly hair prevents the style from looking too severe.
How to Style:
- Gather hair into a low ponytail at the nape of your neck
- Divide the ponytail into two or three sections
- Twist each section individually, keeping the curl texture visible
- Wrap the twisted sections around the ponytail base in different directions
- Pin each twisted section securely as you wrap
- Create a rounded bun shape that sits low on the neck
- Insert pearl-headed pins throughout the bun at regular intervals
- Leave a few curly tendrils loose at the nape and temples
- Smooth the sides gently without flattening them completely
- Spray lightly to hold the style in place
Pearl Placement Tips:
- Distribute pearls evenly for a balanced look
- Cluster pearls on one side for an asymmetrical design
- Create a line of pearls along one section of the bun
- Mix pearl sizes for added visual interest
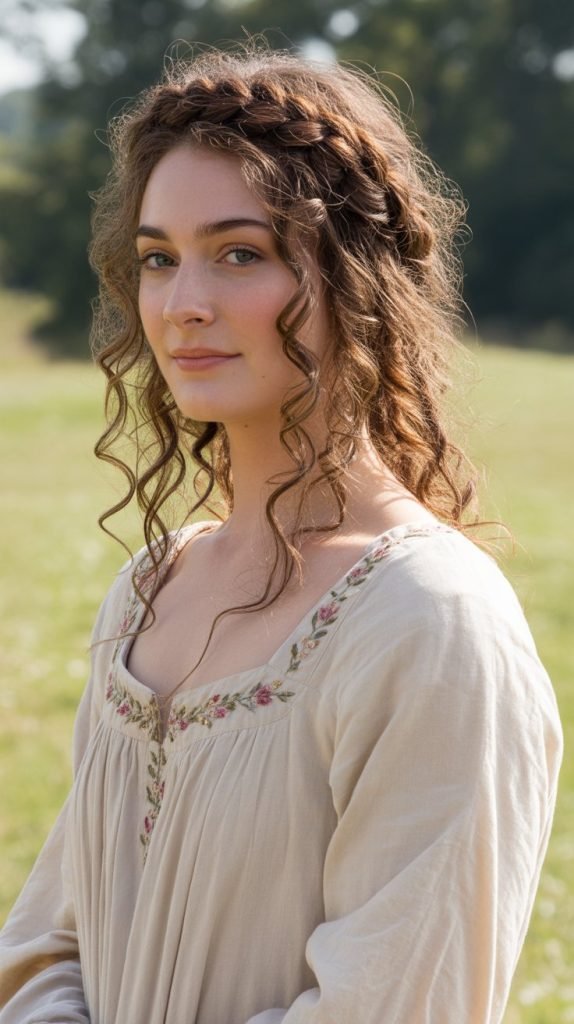
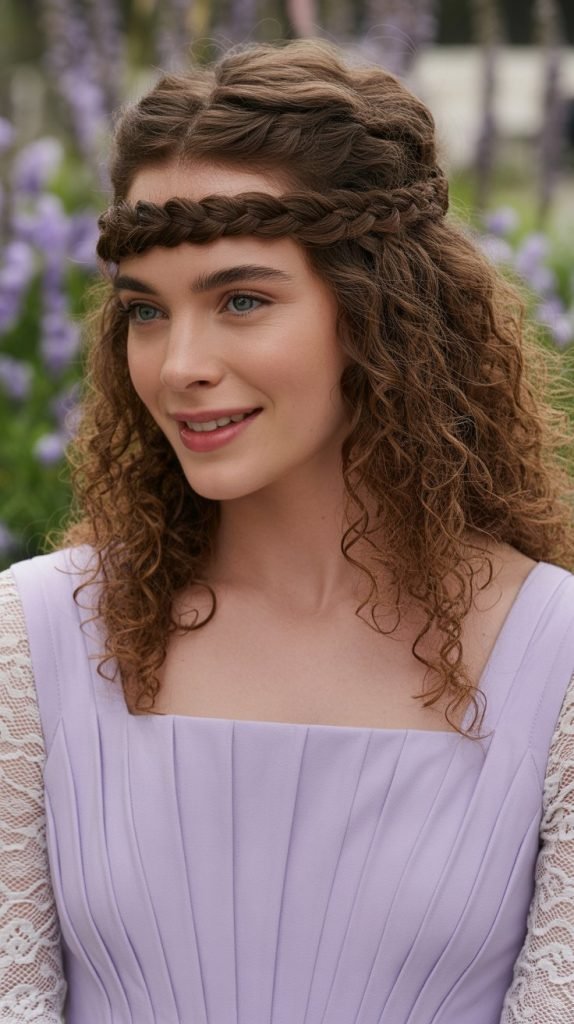
18. Curly Half-Crown Braid

The half-crown braid offers a delicate, feminine look that’s perfect for showcasing curly hair. This style braids hair around only the upper portion of the head, creating a partial crown effect while leaving the majority of your curls flowing free.
Step-by-Step Guide:
- Part your hair on your preferred side
- Take a section from the front on the heavier side of the part
- Begin a Dutch or French braid along your hairline
- Braid around the crown area, moving toward the back
- Stop braiding at the center back of your head
- Secure the braid with a small elastic or bobby pins
- Allow all remaining hair to flow naturally in curls
- Gently pull at the braid sections to create a fuller appearance
- Arrange your loose curls to cascade over one shoulder if desired
- Add shine serum to the ends of your curls
19. The Coiled Crown Updo
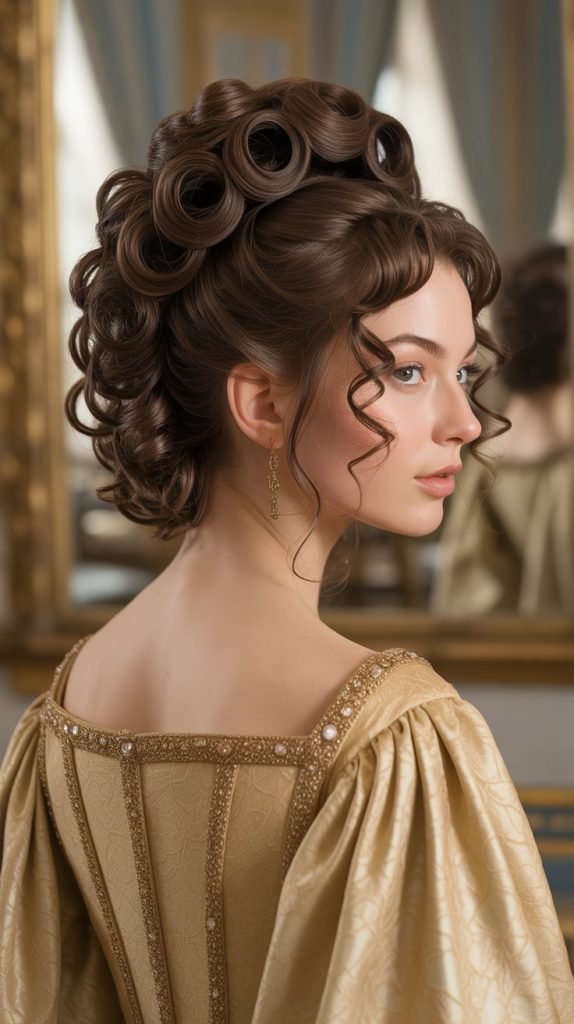
This intricate updo involves coiling sections of curly hair around the crown of the head, creating a textured, dimensional style reminiscent of Renaissance portraiture. The natural volume of curls makes each coil appear full and lush.
Creating the Look:
- Divide your hair into six to eight sections around your head
- Work with one section at a time, leaving the others clipped
- Take the first section and twist it into a rope-like shape
- Coil the twisted section around itself to form a small bun
- Pin the coil securely to your scalp
- Repeat with each section, arranging coils around the crown
- Create a circular or spiral pattern with your coils
- Ensure each coil is pinned firmly but the curls remain visible
- Leave the ends of the last few sections loose for a softer effect
- Insert decorative pins at the center of some coils for embellishment
20. Waterfall Braid with Cascading Curls

The waterfall braid creates the illusion of curls flowing through a braid like water over a fall. This romantic Renaissance-inspired style is particularly stunning on curly hair, as each “waterfall” section shows off your natural curl pattern beautifully.
How to Achieve:
- Part your hair on your preferred side
- Take a section near the part and divide it into three strands
- Begin a regular braid for one or two stitches
- On the third stitch, drop the bottom strand and let it fall
- Pick up a new strand from the top to replace the dropped strand
- Continue braiding, dropping the bottom strand each time
- Pick up new sections from the top to continue the braid
- The dropped strands create the waterfall effect through the braid
- Continue the waterfall braid to your desired endpoint
- Secure the braid end with a small elastic or pin it behind your ear
- Allow all dropped curls to cascade naturally
Enhancement Options:
- Create waterfall braids on both sides meeting at the back
- Add small flowers where curls drop through the braid
- Weave a thin ribbon through the braid sections
- Curl the waterfall sections extra tight for more definition
21. The Gibson Tuck with Curly Texture
While the Gibson Tuck became popular in the Victorian era, its roots trace back to Renaissance styling techniques.
This elegant updo tucks curly hair inward, creating a sophisticated roll at the back while maintaining the natural texture that makes curly hair so beautiful.
Styling Method:
- Create a low ponytail but don’t secure it too tightly
- Use a hair elastic or ribbon to tie the ponytail loosely
- Create a space above the elastic by separating the hair
- Tuck the ponytail up and through this space
- Continue tucking the length of the ponytail inward and upward
- Pin the tucked hair securely, creating a rolled effect at the nape
- Allow the natural curl texture to show in the roll
- Pull out a few curly tendrils around the face and neck
- Use pins to secure any sections that feel loose
- Smooth the sides gently while maintaining some volume
22. Dutch Braided Updo for Curls
The Dutch braid technique, where strands cross under rather than over, creates a raised braid that sits on top of curly hair beautifully. This updo incorporates multiple Dutch braids arranged in an elaborate pattern, perfect for special occasions.
Instructions:
- Divide hair into three sections: two sides and one back
- Begin a Dutch braid on the right side near the temple
- Cross strands under each other as you braid toward the back
- Repeat on the left side, creating a matching Dutch braid
- Continue both braids to the nape of the neck
- Twist the back section and coil it into a low bun
- Wrap both Dutch braids around the bun in opposite directions
- Pin each braid securely, tucking ends underneath
- Pull gently at the Dutch braids to make them appear fuller
- Leave a few curly pieces loose for a softer, romantic effect
23. Side-Swept Romantic Waves with Jeweled Pins
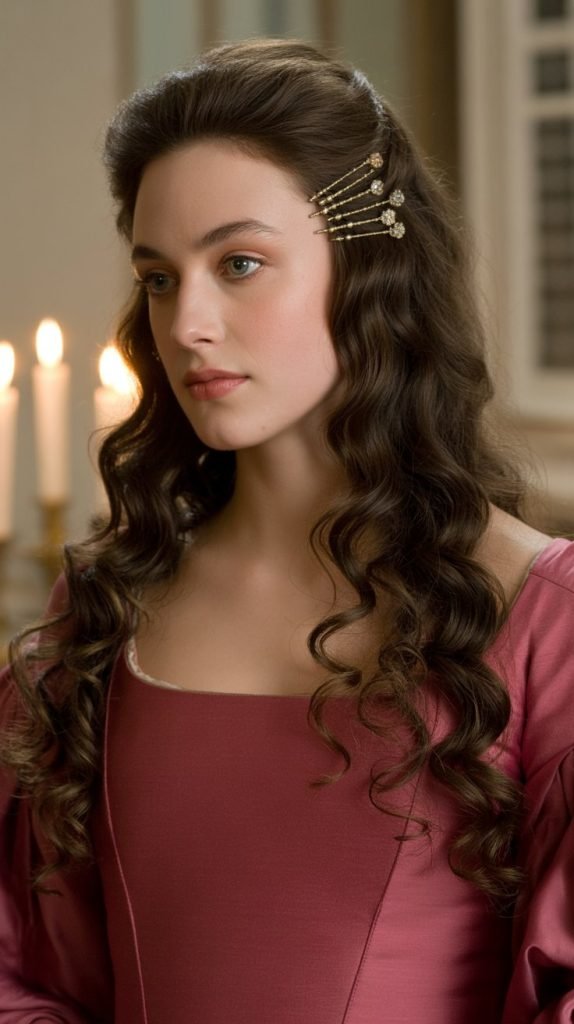
This simple yet elegant style embraces the natural wave pattern of looser curls while incorporating Renaissance-style ornamentation. The side-swept design creates romantic asymmetry that was highly fashionable during the period.
Creating This Look:
- Enhance your natural curl pattern with appropriate styling products
- Allow curls to form loose, flowing waves rather than tight ringlets
- Create a dramatic deep side part
- Sweep all hair over one shoulder
- Use jeweled bobby pins to secure hair along the side
- Place pins in a decorative pattern visible from the front
- Arrange waves to cascade elegantly over one shoulder
- Use a curling wand on a few sections if you want more uniform waves
- Apply a shine-enhancing serum to make waves glossy
- Set with a light hairspray that allows movement
Pin Arrangement Ideas:
- Create a line of pins following the curve from ear to shoulder
- Cluster pins in a small group at the temple
- Space pins evenly along the side in a scattered pattern
- Use pins of varying sizes for visual interest
24. The Pretzel Braid Bun
The pretzel braid creates an intricate, woven appearance that looks like its namesake.
When formed into a bun, this style becomes a stunning statement updo perfect for curly hair.
The complexity of the braid combined with the texture of curls creates a truly Renaissance-worthy hairstyle.
How to Create:
- Gather hair into a ponytail at your desired height
- Divide the ponytail into three equal sections
- Braid each section individually into regular three-strand braids
- Take the three braids and braid them together (braiding braids)
- This creates a thick, textured super-braid
- Wrap the super-braid around the base of the ponytail
- Form it into a rounded bun shape
- Pin securely at multiple points to ensure stability
- Tuck the end of the braid underneath and pin it hidden
- Gently pull at sections to create a fuller, more dimensional look
25. Loose Half-Up with Twisted Details
This effortless yet elegant style captures Renaissance romance through simplicity. The twisted details add structure while the majority of curls flow freely, creating a look that’s both practical and beautiful.
Styling Steps:
- Start with well-defined, moisturized curls
- Take a section of hair from each temple area
- Twist each section back toward the center of your head
- Cross the twists over each other at the back of the crown
- Pin them securely where they cross
- Take two smaller sections just below the first twists
- Twist these back and pin them below the first set
- Allow all remaining curls to flow naturally down your back
- Pull out a few face-framing curls for softness
- Add a decorative pin or small jeweled clip at the crossing point
Variation Options:
- Create three levels of twists instead of two
- Braid the side sections instead of twisting them
- Add ribbons woven through the twists
- Incorporate small pearls pinned along the twists
26. The Coronet Braid with Curly Embellishments
The coronet braid wraps around the entire head like a crown, and when done with curly hair, it creates extra texture and dimension. This regal style is perfect for special occasions and embodies Renaissance elegance.
How to Achieve:
- Part your hair down the middle from forehead to nape
- Begin a Dutch braid on one side, starting at the part near your forehead
- Braid along your hairline, moving around the side and back of your head
- Continue the braid all the way around until you reach your starting point
- As you near the end, the braid should meet back at the front
- Secure the end and tuck it underneath the beginning of the braid
- Pin securely to hide where the braid begins and ends
- Gently pull at the braid sections to create a fuller coronet
- Allow a few curly pieces to escape naturally for a softer look
- Pin any loose sections that won’t stay in place
Decorative Additions:
- Tuck fresh or silk flowers into the braid at intervals
- Add pearl pins throughout the coronet for sparkle
- Weave a delicate gold chain through the braid
- Pin small jeweled ornaments at the temples and back
27. Asymmetrical Braided Updo
This modern interpretation of Renaissance styling creates an eye-catching asymmetrical design using multiple braids positioned on one side of the head. The natural volume of curly hair makes this style particularly dramatic and striking.
Creation Process:
- Create a deep side part, leaving significantly more hair on one side
- On the side with less hair, create a small Dutch braid along the hairline
- Secure this braid temporarily at the nape
- On the side with more hair, create two or three regular braids
- These braids should be positioned at different heights
- Gather all braids together at the back on the side with more hair
- Twist and coil the gathered braids into an asymmetrical bun
- Position the bun behind one ear rather than centered
- Pin securely, allowing some curl texture to show through
- Leave a few curly tendrils on the opposite side for balance
- Pull gently at the braids to create more volume and texture
28. The Rope Twist Crown with Flowing Curls

Rope twists create elegant, defined lines that contrast beautifully with loose curls. This half-up style uses rope twists to create a crown effect while showcasing the natural beauty of curly hair flowing beneath.
Styling Instructions:
- Section off the top third of your hair from temple to temple
- Divide this section into two equal parts
- Create rope twists by dividing each part in half
- Twist both strands clockwise, then wrap them around each other counterclockwise
- This creates the rope effect that stays more secure than simple twists
- Bring both rope twists to the back center of your head
- Cross them over each other or position them side by side
- Pin securely where they meet at the back
- Allow all remaining curls to cascade down naturally
- Add volume at the crown by gently lifting the roots
- Frame your face with a few loose curls pulled forward
Enhancement Ideas:
- Wrap the rope twists with thin gold or silver wire
- Add small beads to the rope twists before pinning
- Pin a decorative jeweled piece where the twists meet
- Create three rope twists instead of two for more intricacy
29. Victorian-Renaissance Hybrid Side Bun
This style bridges Renaissance elegance with Victorian sophistication, creating a low side bun that sits just behind the ear. The natural texture of curly hair adds romantic softness to this otherwise structured style.
How to Create:
- Create a deep side part on your preferred side
- Gather all hair to the opposite side behind your ear
- Position the gathering point low, near the jawline
- Twist the gathered hair loosely to maintain curl definition
- Wrap the twisted hair into a loose bun shape
- Pin the bun securely, allowing curls to show texture
- Don’t smooth the bun too much; let it appear soft and full
- Pull out several curly tendrils around your face and neck
- Create extra volume at the crown by gently backcombing
- Add a decorative comb or pin above the bun for embellishment
- Finish with a light mist of flexible-hold hairspray
30. Multi-Strand Braided Headband Crown
This intricate style uses multiple thin braids to create a headband effect that crowns the head. The various braids interweave to create texture and visual interest, while the remaining curls provide volume and movement.
Step-by-Step Guide:
- Section off a two-inch wide strip of hair from temple to temple across the front
- Divide this section into four or five smaller sections
- Braid each small section into a thin three-strand braid
- Secure each tiny braid with a clear elastic
- Bring all the small braids across the head like a headband
- Arrange them in a layered pattern, some higher, some lower
- Pin each braid securely behind the opposite ear
- Allow the remaining curls to flow freely down your back
- Gently pull at the tiny braids to make them appear slightly fuller
- Leave a few curly pieces loose around your face for softness
- The multiple braids create a woven, textured headband effect
Decorative Options:
- Thread tiny beads onto some of the small braids
- Wrap embroidery thread in complementary colors around sections
- Pin small flowers where the braids are secured
- Add metallic thread woven through the braids
31. The Romantic Low Twisted Ponytail
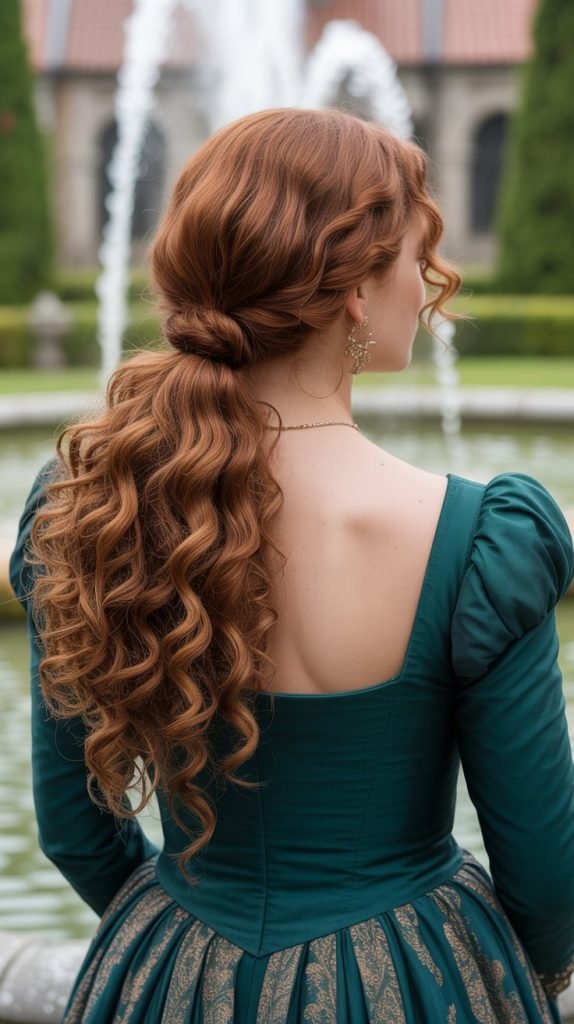
This elegant yet simple style adds Renaissance flair to a basic ponytail through strategic twisting and positioning. Perfect for curly hair, this look balances structure with the natural movement of curls.
Creating the Look:
- Brush or finger-comb curls back gently to maintain definition
- Create two sections by parting hair horizontally from ear to ear
- Twist the top section loosely back toward the center
- Secure the twisted top section with pins at the crown
- Gather the bottom section along with the twisted top into a low ponytail
- Position the ponytail at the nape, slightly to one side if desired
- Secure with a decorative hair tie or ribbon
- Take a small section from the ponytail and wrap it around the elastic
- Pin the wrapped section to hide the elastic band
- Gently pull at the twisted top section to add volume
- Allow some curly pieces to frame your face naturally
- The ponytail should cascade with full, defined curls
Finishing Touches:
- Tie a velvet ribbon around the ponytail base with a bow
- Add pearl pins to the twisted top section
- Pin a jeweled brooch where the twist meets the ponytail
- Wrap a decorative chain around the ponytail at intervals
Conclusion
The timeless elegance of 31 Gorgeous Renaissance Hairstyles for Curly Hair proves that historical beauty techniques translate beautifully to modern styling.
These Renaissance-inspired looks celebrate the natural texture and volume of curly hair while embracing the ornate sophistication that defined one of history’s most artistically rich periods.
From simple flowing ringlets adorned with pearl headbands to complex braided updos worthy of Renaissance royalty, these styles offer options for every skill level and occasion.
The beauty of adapting Renaissance hairstyles for curly hair lies in how the natural texture enhances each look, adding dimension and romantic appeal that straight hair simply cannot achieve in the same way.
Whether you choose an elaborate coronet braid for your wedding day or a simple half-up twist for daily wear, these styles allow you to express your appreciation for historical beauty while showcasing your gorgeous curls.
By understanding the historical context, mastering the techniques, and choosing appropriate accessories, you can transform your curly hair into stunning Renaissance-inspired creations that honor the past while remaining perfectly suited for contemporary life.
The journey through these 31 styles demonstrates that curly hair and Renaissance aesthetics are a match made in beauty heaven, offering endless possibilities for elegant, romantic, and unforgettable hairstyles that celebrate both historical artistry and your natural hair texture.