Woodworking is more than just a pastime; it’s a gateway to creativity, learning, and hands-on fun for kids.
In this article, 30 Wood Projects for Kids, we explore a variety of engaging and educational woodworking activities designed specifically for young minds.
From simple crafts to more intricate builds, these projects aim to spark imagination and develop practical skills.
Whether you’re a parent, teacher, or caregiver, you’ll find inspiration and guidance to help children embark on their woodworking journey. Let’s dive into these exciting projects that promise both fun and learning!
1. Wooden Birdhouse
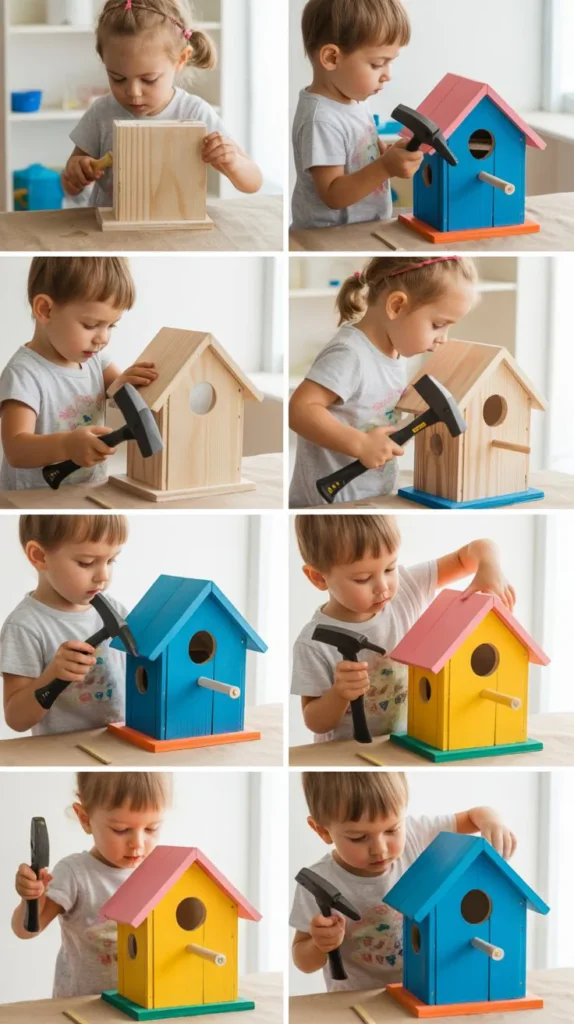
Building a birdhouse is a classic woodworking project that introduces kids to basic construction techniques. It’s a rewarding activity that also teaches them about nature and wildlife.
Step-by-Step Instructions:
- Gather materials: wood pieces, nails, hammer, and paint.
- Cut the wood to the desired dimensions for the base, walls, roof, and entrance hole.
- Assemble the pieces using nails and a hammer, ensuring the structure is sturdy.
- Paint and decorate the birdhouse to add a personal touch.
- Mount the birdhouse in a suitable outdoor location.Architectural Digest+1The Spruce+1
2. Simple Wooden Toolbox
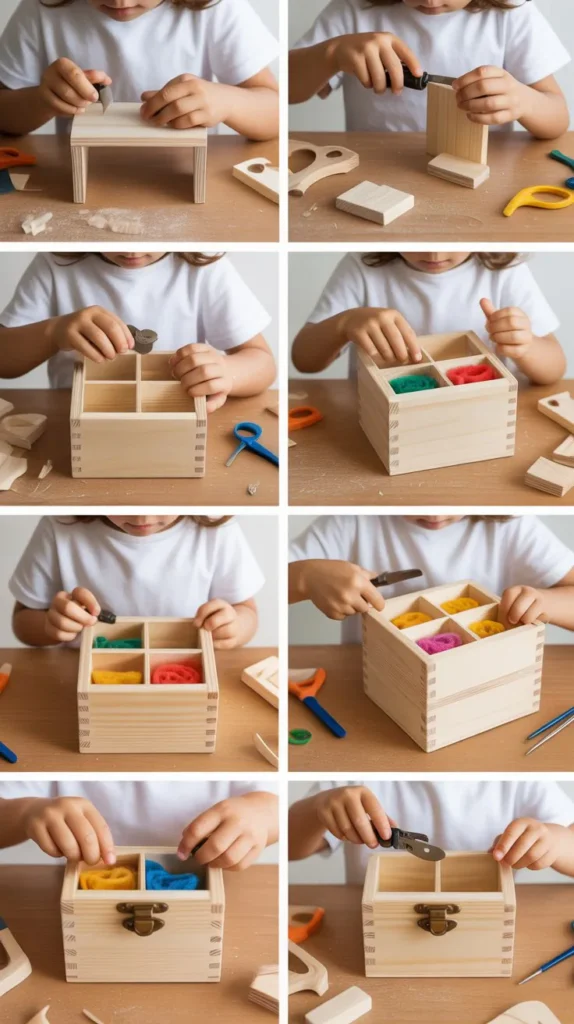
Creating a wooden toolbox is a practical project that helps kids learn about measurements and assembly. It also provides them with a place to store their tools or treasures.
Step-by-Step Instructions:
- Collect materials: wood panels, nails, hammer, and handle.
- Measure and cut the wood for the base, sides, ends, and handle.
- Assemble the base and sides using nails, ensuring corners are square.
- Attach the ends and secure the handle across the top.
- Sand any rough edges and finish with paint or varnish if desired.How We Learn+18Teaching Woodwork.com+18The Spruce+18
3. Wooden Picture Frame
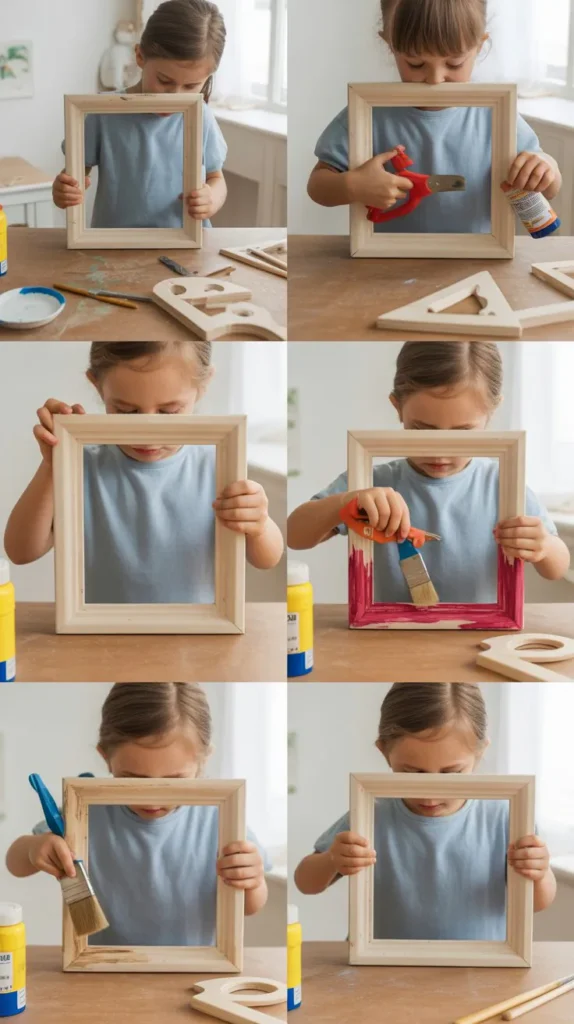
A wooden picture frame project allows kids to create a personalized display for their favorite photos or artwork. It’s a simple yet meaningful craft.
Step-by-Step Instructions:
- Prepare materials:a wood strips, saw, glue, clamps, and decorations.
- Cut the wood strips to the desired frame size, mitering the corners at 45 degrees.
- Apply glue to the joints and clamp the frame until the glue dries.
- Sand the frame smooth and decorate with paint, stickers, or other embellishments.
- Insert a photo or artwork and secure it with backing.
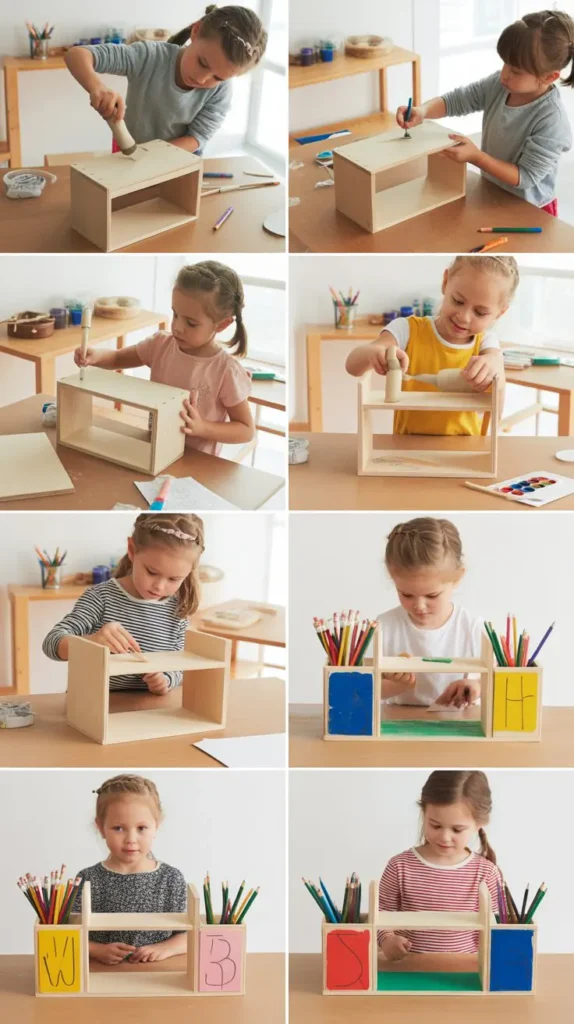
4. Wooden Pencil Holder
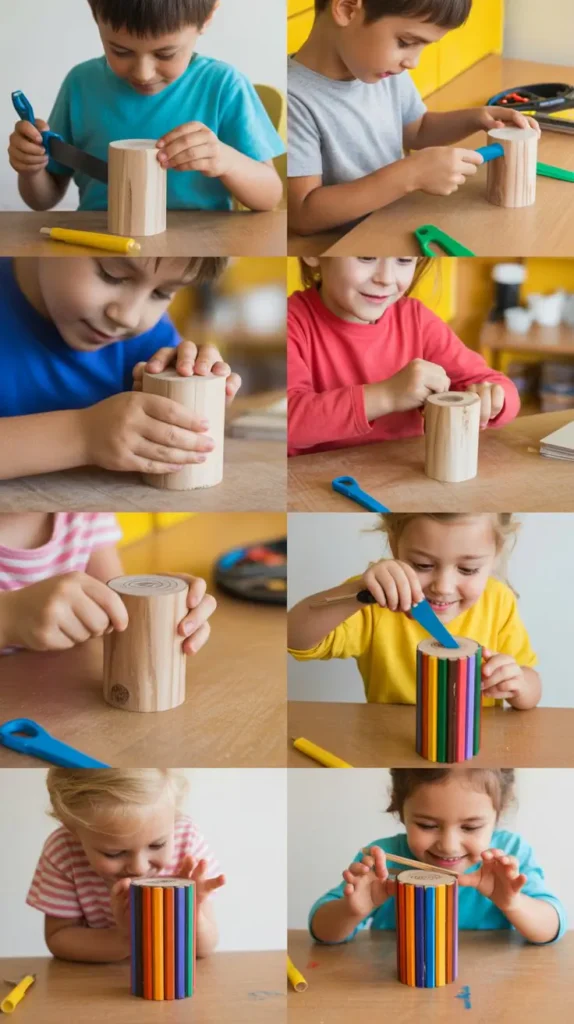
Crafting a pencil holder helps kids organize their desk space while practicing drilling and assembly skills. It’s a functional and creative project.
Step-by-Step Instructions:
- Gather materials: wooden block, drill, sandpaper, and paint.
- Mark and drill holes into the top of the wooden block to hold pencils.
- Sand the entire block to remove rough edges.
- Paint or decorate the pencil holder as desired.
- Allow the paint to dry before use.How We Learn+1The Spruce+1Pinterest+1Pinterest+1
5. Wooden Toy Car
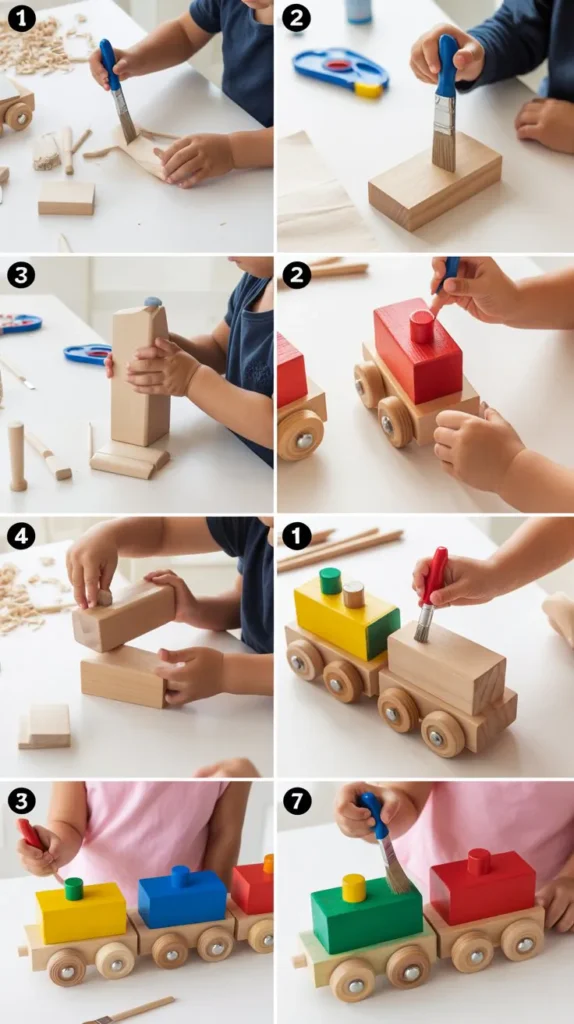
Building a toy car introduces kids to moving parts and design concepts. It’s an engaging project that results in a fun toy to play with.
Step-by-Step Instructions:
- Collect materials: wood blocks, wheels, axles, drill, and paint.
- Shape the wood block into a car body using saws and sandpaper.
- Drill holes for the axles and attach the wheels securely.
- Paint and decorate the car to personalize it.
- Test the car to ensure it rolls smoothly.
6. Wooden Name Sign
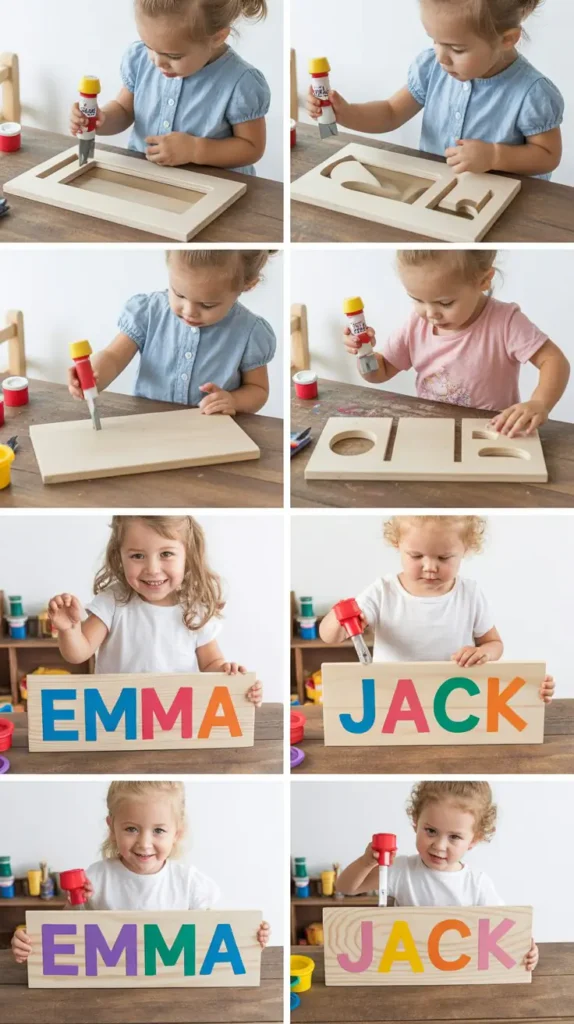
Creating a name sign allows kids to personalize their space and practice letter recognition and painting skills.
Step-by-Step Instructions:
- Prepare materials: wooden board, stencils or letter cutouts, paint, and brushes.
- Sand the wooden board to a smooth finish.
- Arrange and trace the letters onto the board.
- Paint the letters and add decorative elements as desired.
- Allow the paint to dry and display the sign in a chosen location.
7. Wooden Bird Feeder
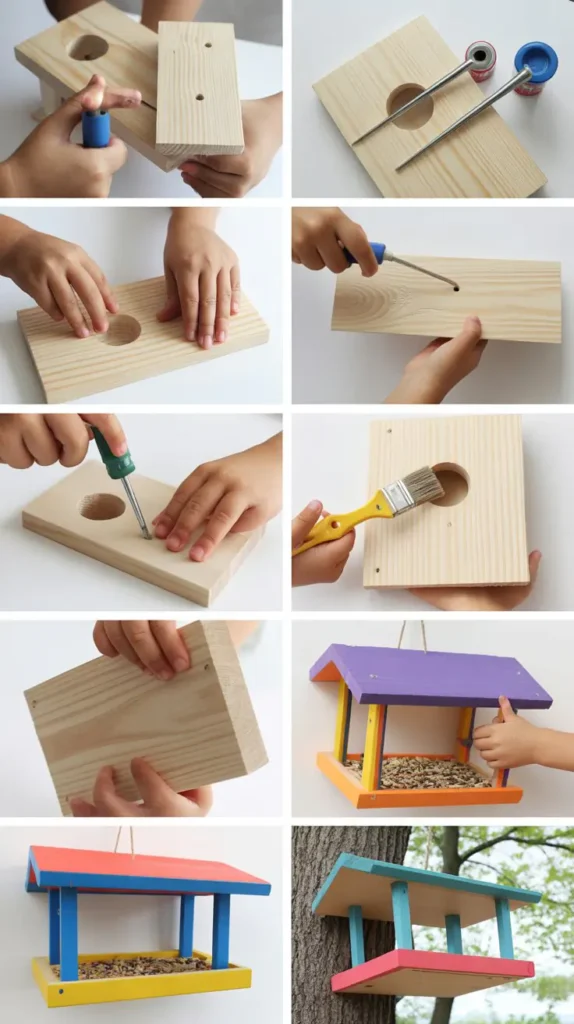
Building a bird feeder is a project that combines woodworking with an appreciation for nature. It teaches kids about wildlife and the importance of caring for animals.
Step-by-Step Instructions:
- Gather materials: wood pieces, nails, hammer, and string or wire.
- Cut the wood to create a base, sides, and roof for the feeder.
- Assemble the pieces to form the feeder structure.
- Attach string or wire for hanging.
- Fill the feeder with birdseed and hang it in a suitable outdoor area.
8. Wooden Step Stool
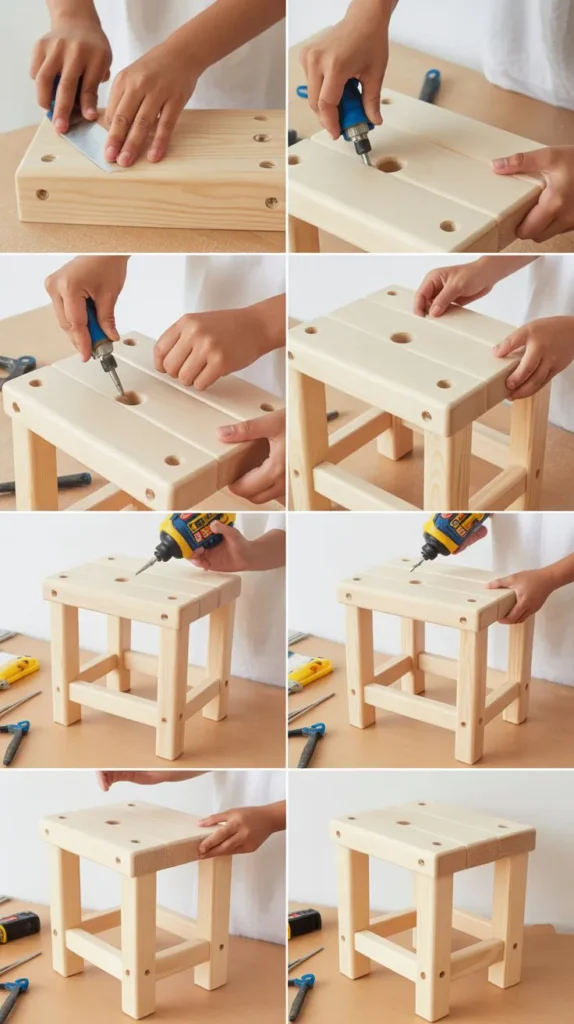
A step stool project helps kids understand structural stability and provides them with a useful item for reaching higher places safely.
Step-by-Step Instructions:
- Collect materials: wood panels, screws, screwdriver, and paint.
- Cut the wood to create the top platform and supporting legs.
- Assemble the legs to the platform using screws, ensuring stability.
- Sand all surfaces to remove rough edges.
- Paint or decorate the stool as desired.wired.com+5YouTube+5The Spruce+5Architectural DigestReddit+3Pinterest+33dorigamiforkids.blogspot.com+3
9. Wooden Jewelry Box
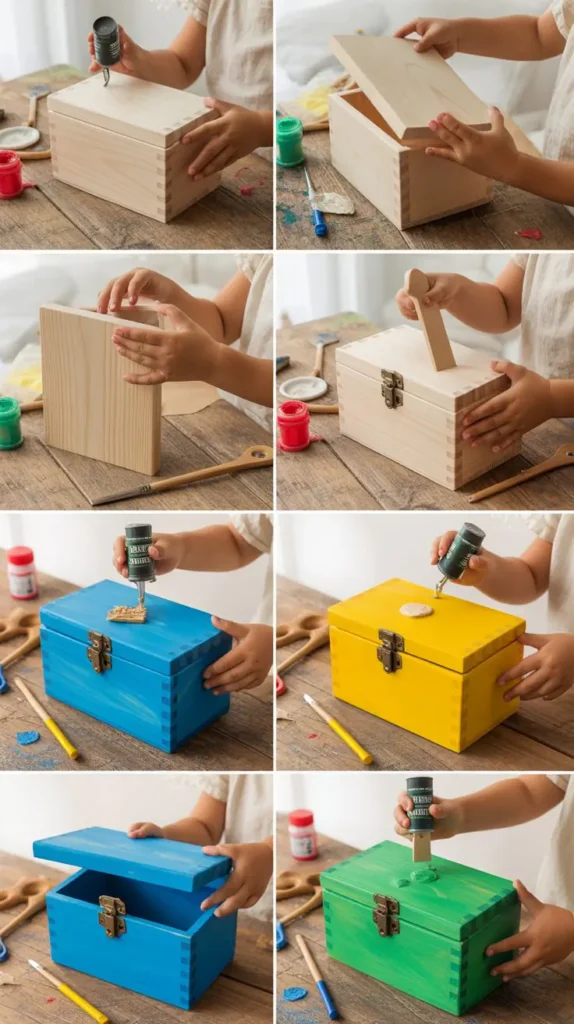
Crafting a jewelry box introduces kids to hinge installation and fine detailing. It’s a project that results in a cherished keepsake.
Step-by-Step Instructions:
- Prepare materials: wood pieces, hinges, screws, screwdriver, and decorations.
- Cut the wood to create the base, sides, and lid of the box.
- Assemble the sides to the base and attach the lid using hinges.
- Sand all surfaces smooth.
- Decorate the box with paint, stickers, or other embellishments.
10. Wooden Coat Rack
Building a coat rack teaches kids about functional design and provides a practical item for home organization.
Step-by-Step Instructions:
- Gather materials: wooden board, hooks, screws, screwdriver, and paint.
- Sand the wooden board to a smooth finish.
- Mark and attach the hooks evenly along the board.
- Paint or decorate the board as desired.
- Mount the coat rack on a wall at an appropriate height.
11. Wooden Bookends
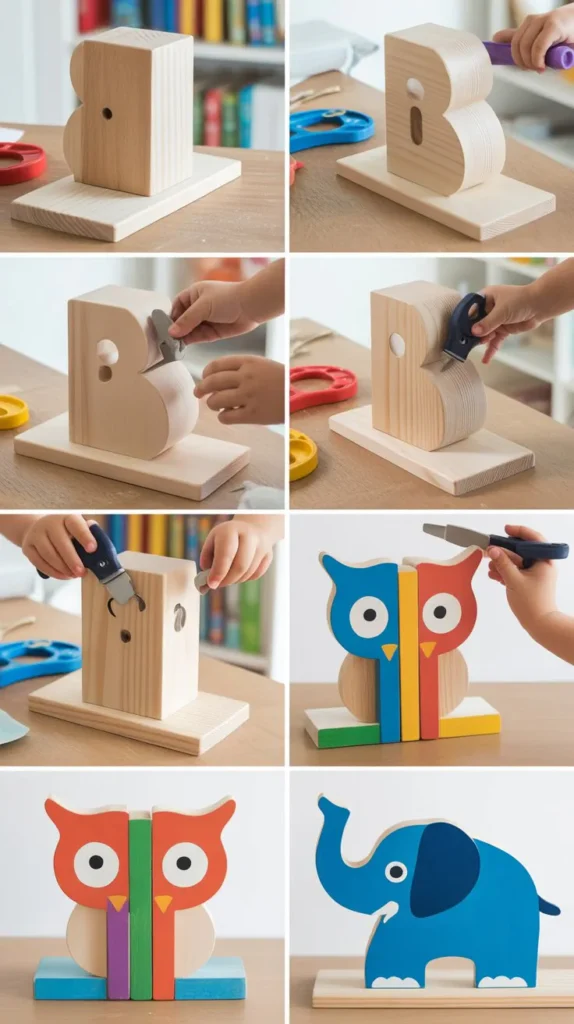
Creating bookends combines creativity with functionality, helping kids organize their books while expressing their artistic side.
Step-by-Step Instructions:
- Collect materials: wood blocks, decorations, glue, and paint.
- Sand the wood blocks to remove any rough edges.
- Decorate the blocks with paint, carvings, or attached figures.
- Allow decorations to dry completely.
- Place the bookends on a shelf to support books upright.
12. Wooden Wall Shelf
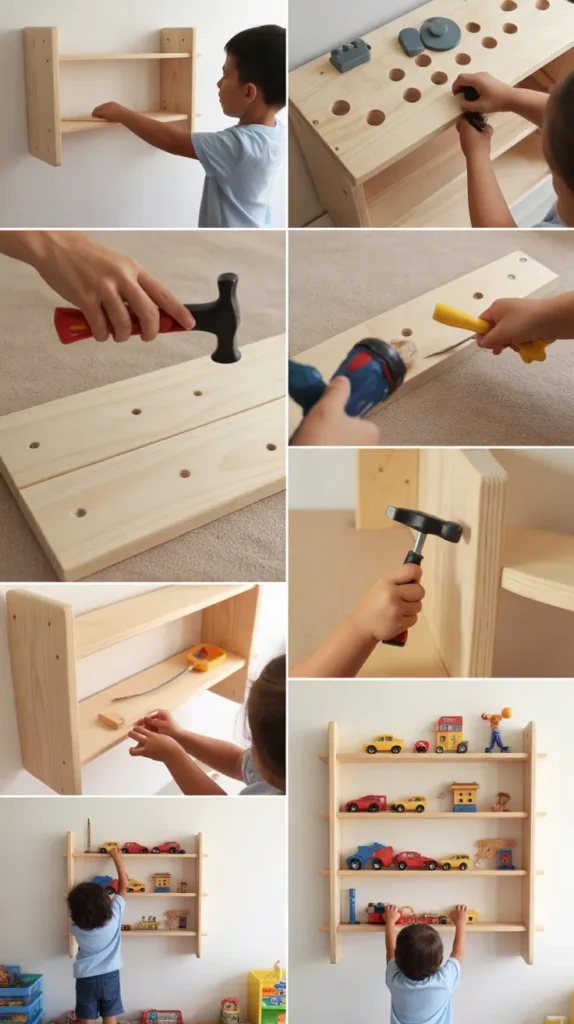
Building a wall shelf introduces kids to concepts of balance and weight distribution, resulting in a useful storage solution.
Step-by-Step Instructions:
- Prepare materials: wood board, brackets, screws, screwdriver, and paint.
- Sand the wood board to a smooth finish.
- Paint or stain the board as desired.
- Attach brackets to the board and then secure the shelf to the wall.
- Ensure the shelf is level and securely mounted.
13. Wooden Napkin Holder

Crafting a napkin holder helps kids understand the importance of measurements and symmetry in design.
Step-by-Step Instructions:
- Gather materials: wood pieces, glue, clamps, and decorations.
- Cut the wood to create the base and sides of the holder.
- Assemble the pieces using glue and clamps, allowing them to dry.
- Sand the holder to remove any rough edges.
- Decorate with paint or other embellishments.
14. Wooden Key Holder
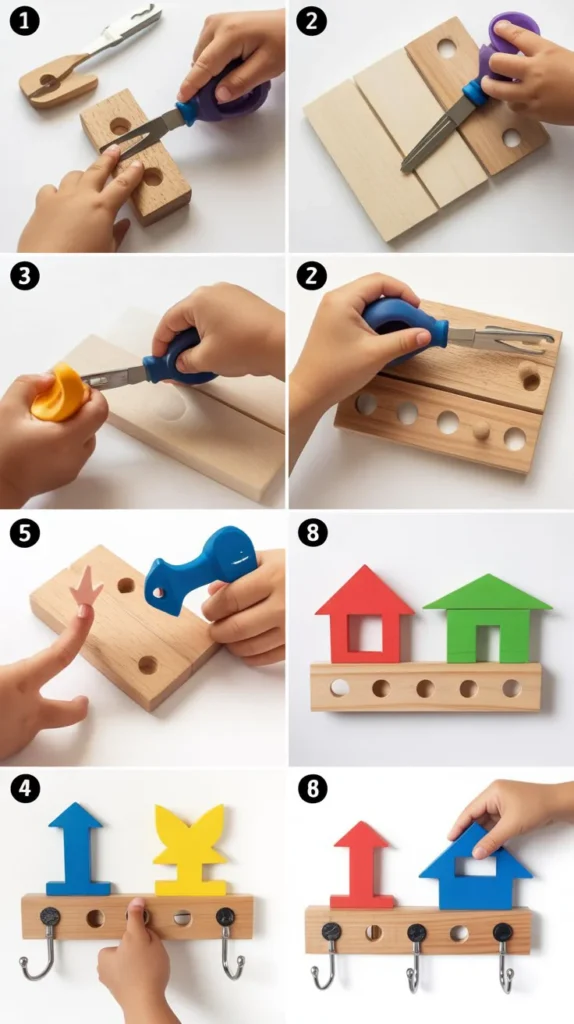
Creating a key holder combines utility with creativity, teaching kids about organization and design.
Step-by-Step Instructions:
- Collect materials: wooden board, hooks, screws, screwdriver, and paint.
- Sand the board to a smooth finish.
- Paint or decorate the board
Continuing our exploration of “30 Wood Projects for Kids,” here are more engaging and educational woodworking activities that children can enjoy:
15. Wooden Crayon Holder
A wooden crayon holder is a fun and functional project that helps kids organize their art supplies while practicing drilling and sanding skills.
Step-by-Step Instructions:
- Gather materials: a wooden block, drill, sandpaper, and paint.
- Mark evenly spaced holes on the top surface of the block.
- Drill holes deep enough to hold crayons securely.
- Sand all surfaces to remove splinters and rough edges.
- Paint or decorate the holder as desired and allow it to dry.
16. Wooden Toy Boat
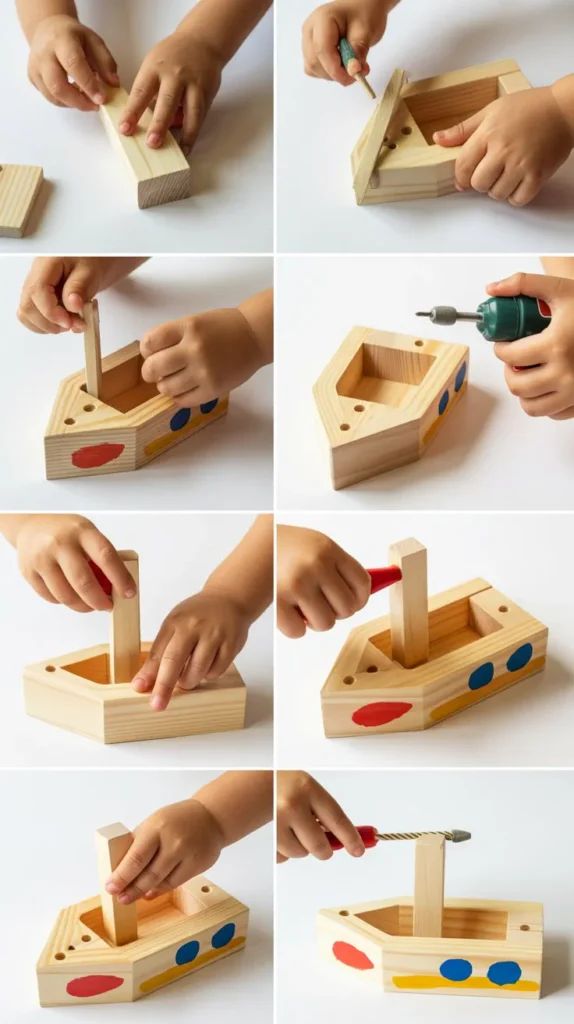
Building a toy boat introduces kids to concepts of buoyancy and design, resulting in a delightful toy for water play.
Step-by-Step Instructions:
- Collect materials: lightweight wood (like balsa), saw, sandpaper, dowel, fabric for the sail, and waterproof paint.
- Cut the wood into a boat shape and sand it smooth.
- Drill a hole in the center to insert the dowel mast.
- Attach the fabric sail to the mast and secure it in the hole.
- Paint the boat with waterproof paint and let it dry before use.
17. Wooden Wind Chimes

Creating wind chimes allows kids to explore sound and movement, combining woodworking with musical creativity.DIY Craft Ideas
Step-by-Step Instructions:
- Prepare materials: small wooden pieces, string, drill, and decorative items like beads.
- Drill holes into the wooden pieces for hanging.
- Thread string through the holes and attach decorative items.
- Tie the strings to a larger wooden piece that serves as the base.
- Hang the wind chime in a breezy outdoor area.
18. Wooden Balance Board
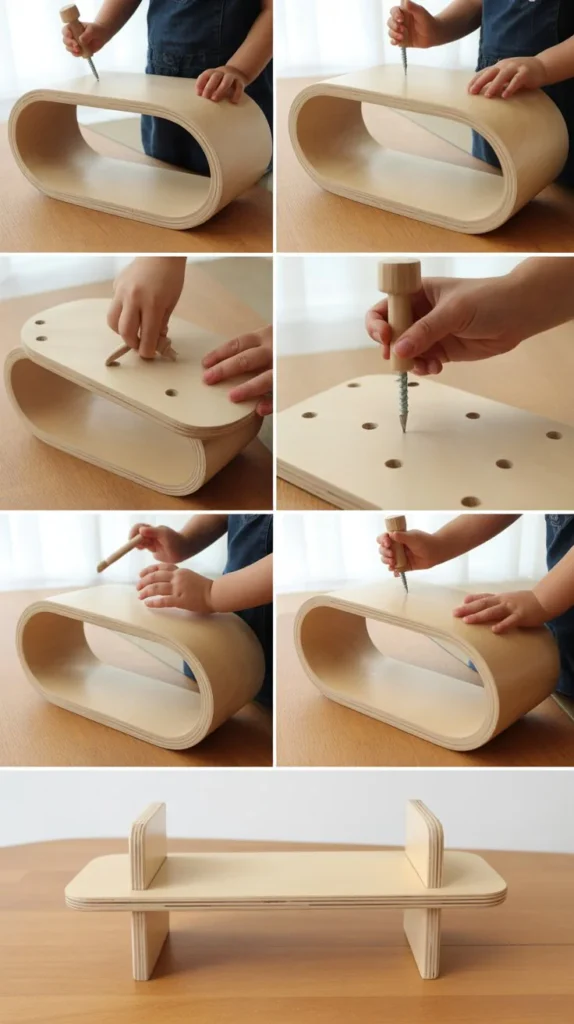
A balance board project helps kids develop coordination and balance while understanding the principles of motion.Teaching Woodwork.com
Step-by-Step Instructions:
- Gather materials: sturdy plywood, a cylindrical piece (like a PVC pipe), sandpaper, and non-slip tape.
- Cut the plywood into a rectangular shape and sand all edges.
- Apply non-slip tape to the top surface for safety.
- Place the cylindrical piece underneath the board to create the balancing mechanism.
- Supervise children as they test and enjoy the balance board.
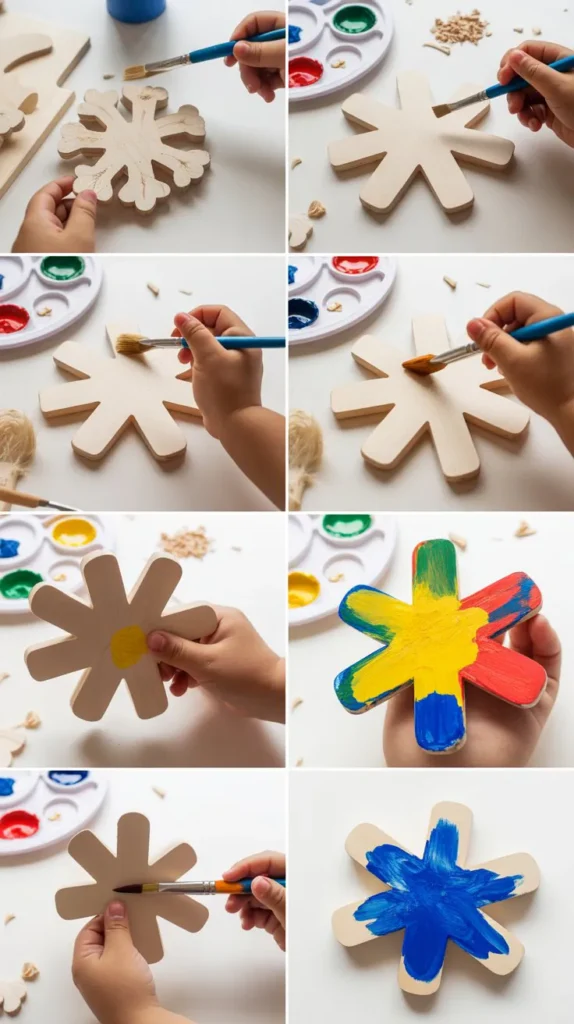
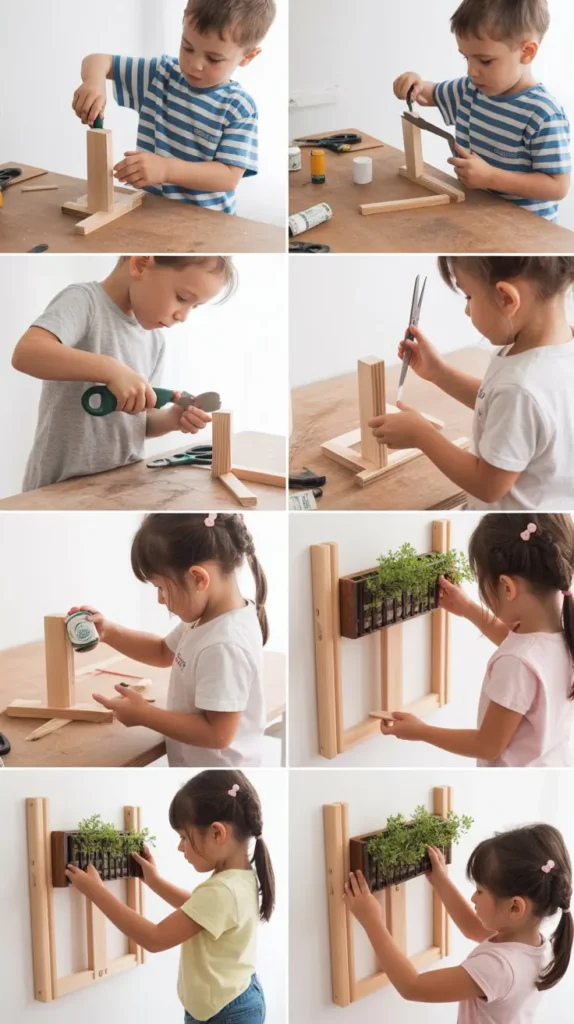
19. Wooden Wall Art
Creating wall art from wood allows kids to express their creativity and results in personalized room decor.
Step-by-Step Instructions:
- Collect materials: wooden board, paint, stencils, and hanging hardware.
- Sand the board to a smooth finish.
- Use stencils or freehand painting to create designs on the board.
- Allow the paint to dry completely.
- Attach hanging hardware to the back and display the art on a wall.
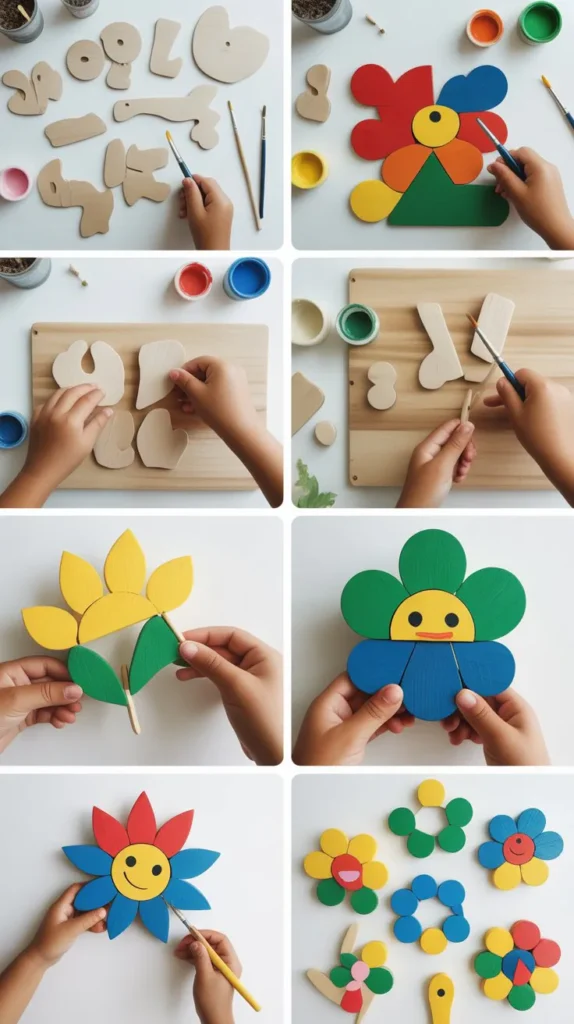
20. Wooden Puzzle
Building a wooden puzzle enhances problem-solving skills and provides a fun, interactive toy.
Step-by-Step Instructions:
- Prepare materials: thin plywood, saw, sandpaper, and paint.
- Draw a simple image on the plywood and cut it into interlocking pieces.
- Sand all edges to ensure safety.
- Paint each piece with vibrant colors and let them dry.
- Assemble the puzzle and enjoy the challenge.
These additional projects in “30 Wood Projects for Kids” offer a blend of creativity, learning, and fun. Engaging in these activities not only teaches valuable woodworking skills but also fosters confidence and imagination in children.
Whether it’s crafting a toy boat or designing personalized wall art, each project provides an opportunity for hands-on learning and quality time together.
21. Wooden Marble Maze
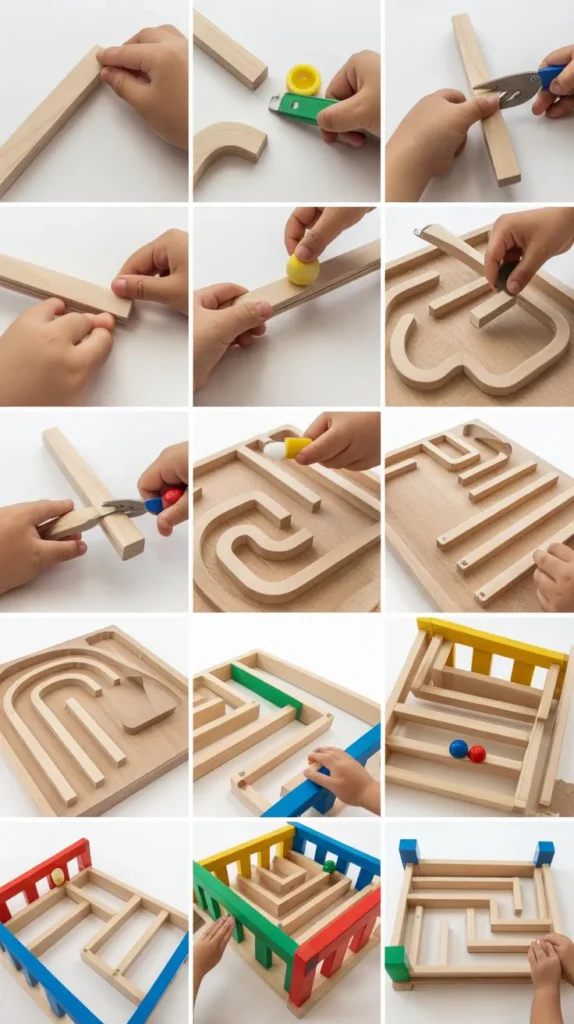
Creating a wooden marble maze introduces kids to design thinking, patience, and hand-eye coordination in a fun and interactive way.
Step-by-Step Instructions:
- Gather materials: a wooden board, thin wooden strips (or skewers), glue, marbles, and paint.
- Plan your maze design on paper, considering start and finish points.
- Cut and glue the wooden strips onto the board to form the maze’s walls.
- Let the glue dry completely.
- Paint or decorate the maze if desired.
- Drop in a marble and tilt the board to guide it through the maze.
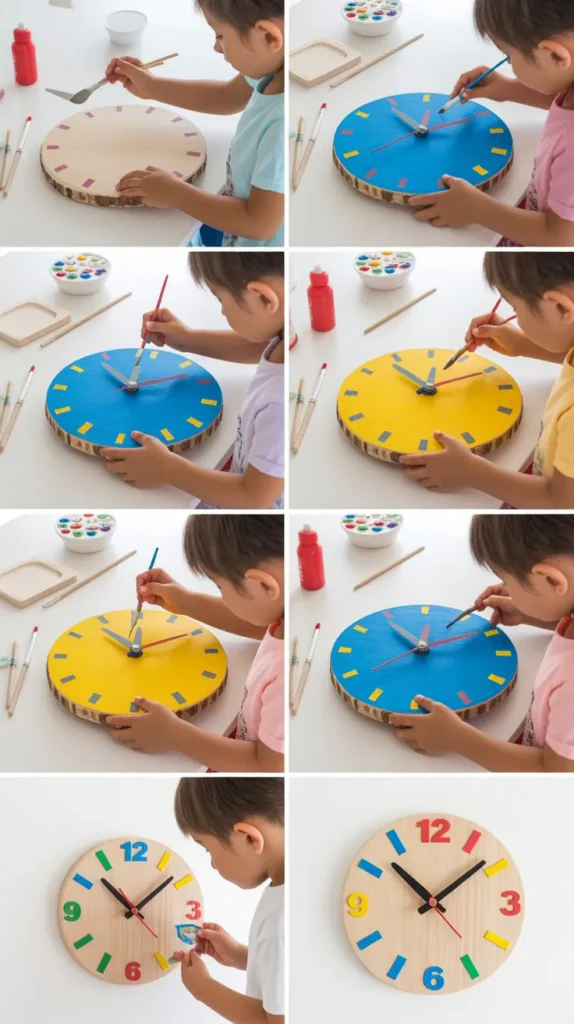
22. Wooden Clock

This project helps kids learn how time works while getting hands-on experience with basic construction and painting.
Step-by-Step Instructions:
- Prepare materials: wooden circle, clock mechanism, drill, numbers/stickers, and paint.
- Drill a hole in the center of the wooden circle for the clock mechanism.
- Paint and decorate the clock face.
- Attach numbers or stickers to mark the hours.
- Install the clock mechanism according to the kit’s instructions.
- Add batteries and test the clock.
23. Wooden Robot Model
Building a wooden robot encourages imagination and basic engineering as kids piece together movable wooden parts.
Step-by-Step Instructions:
- Gather materials: small wooden blocks, dowels, glue, and decorations like googly eyes or buttons.
- Drill small holes for dowel connections between head, body, arms, and legs.
- Assemble the robot using glue and dowels, allowing parts to rotate if desired.
- Decorate with paint or markers.
- Display or use for pretend play.
24. Wooden Mini Easel
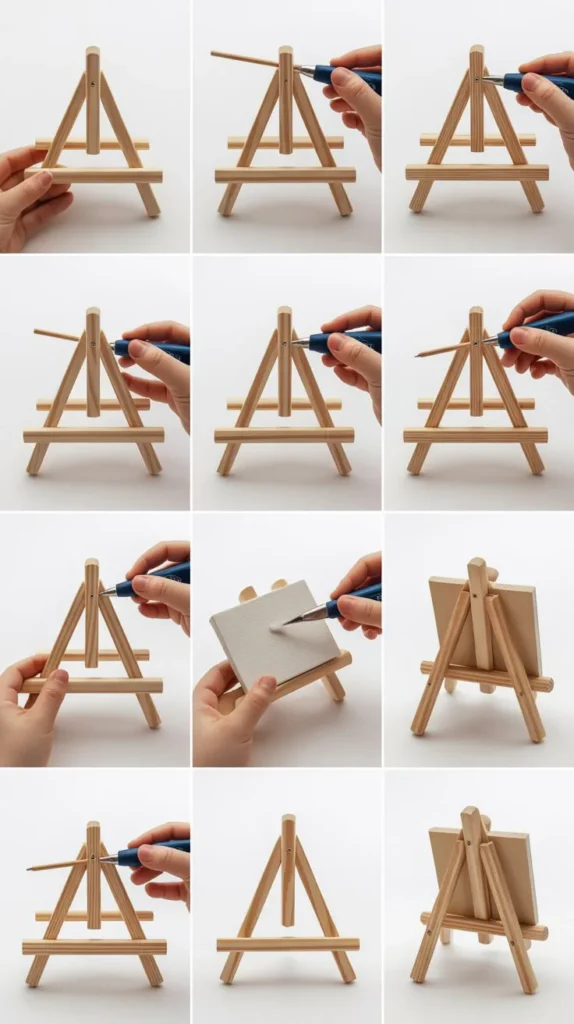
Perfect for displaying kids’ artwork or photos, this small easel is simple to make and teaches balance and construction skills.
Step-by-Step Instructions:
- Collect materials: thin wooden slats, small hinges or screws, and glue.
- Cut and sand the slats to form the triangle easel shape.
- Assemble the frame and add support from the back using hinges or a dowel.
- Glue a small wooden lip to the front to hold the artwork.
- Paint or stain the easel if desired.
25. Wooden Ruler
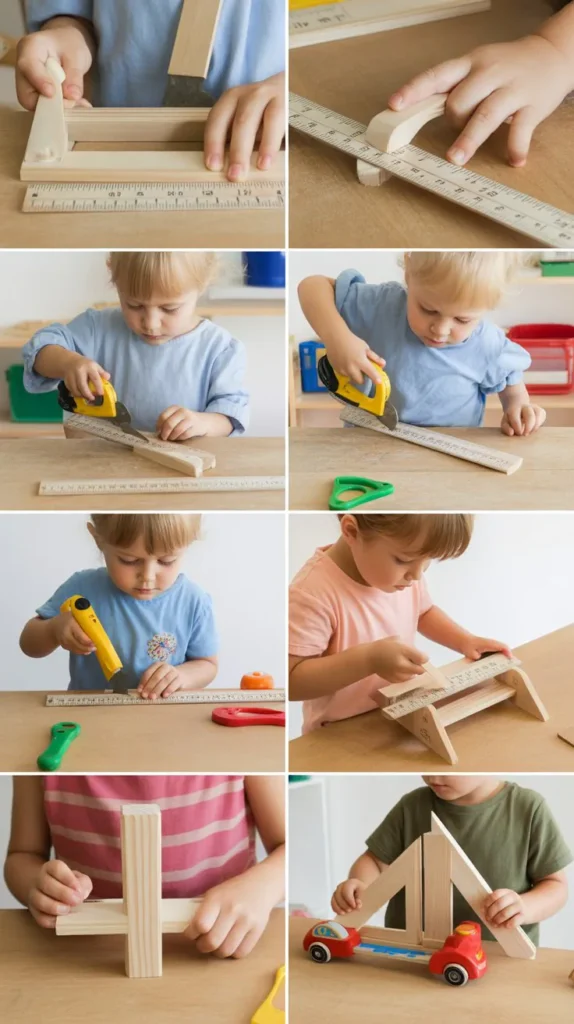
Making a personalized wooden ruler introduces kids to units of measurement and fine markings.
Step-by-Step Instructions:
- Gather a thin wooden strip, ruler for measurement, pencil, and woodburning tool or marker.
- Sand the wooden strip until smooth.
- Use the real ruler to mark inch or centimeter lines.
- Burn or draw the marks and numbers.
- Decorate the back side with stickers, paint, or name tags.
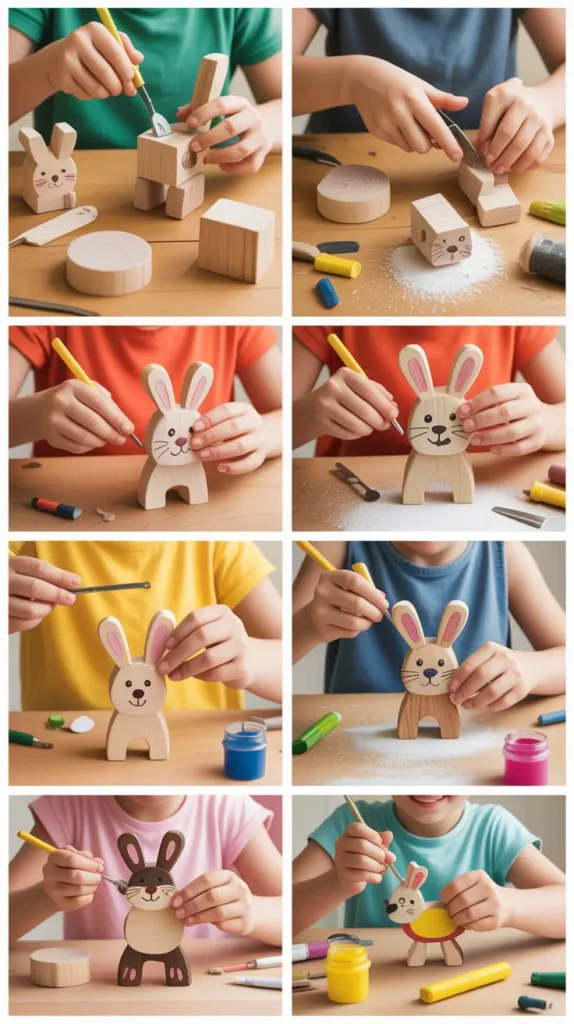
26. Wooden Animal Figures

Crafting animal figures from wood allows kids to explore carving or shaping while engaging their love for wildlife.
Step-by-Step Instructions:
- Prepare thin wood pieces, templates or animal outlines, scroll saw (adult help), sandpaper, and paint.
- Trace the animal shapes onto the wood.
- Cut carefully using a scroll saw or coping saw with supervision.
- Sand edges to make them safe.
- Paint and decorate with details.
27. Wooden Chess Set
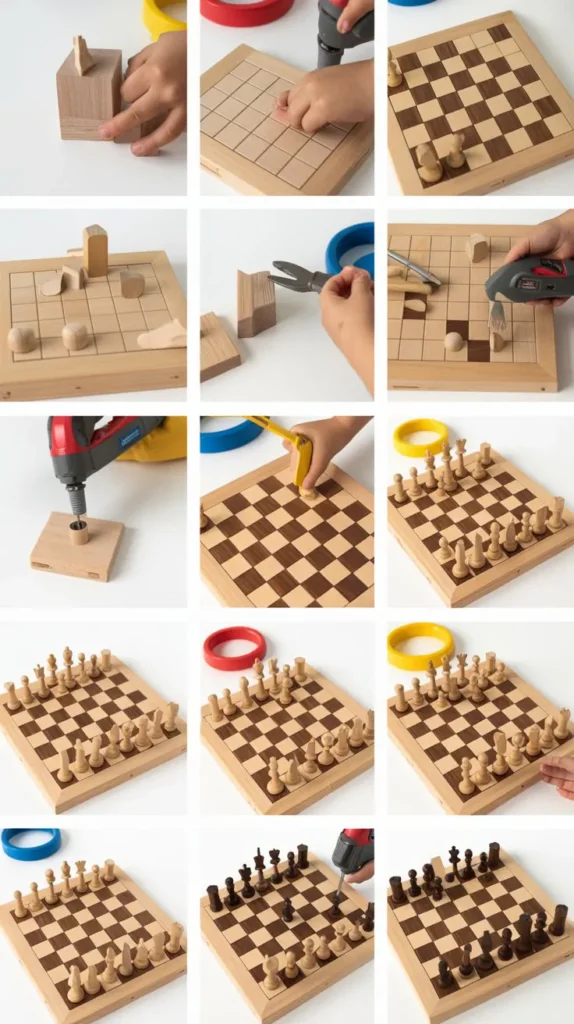
A mini chess set is an ambitious project that involves detail, repetition, and a love for board games.
Step-by-Step Instructions:
- Collect materials: small wood blocks, board (8×8 grid), ruler, wood glue, paint.
- Draw and paint the board with alternating squares.
- Carve or cut small blocks into simplified chess pieces.
- Paint or stain the pieces in two contrasting colors.
- Optionally, add felt pads to the bottom for smooth movement.
28. Wooden Tablet Stand
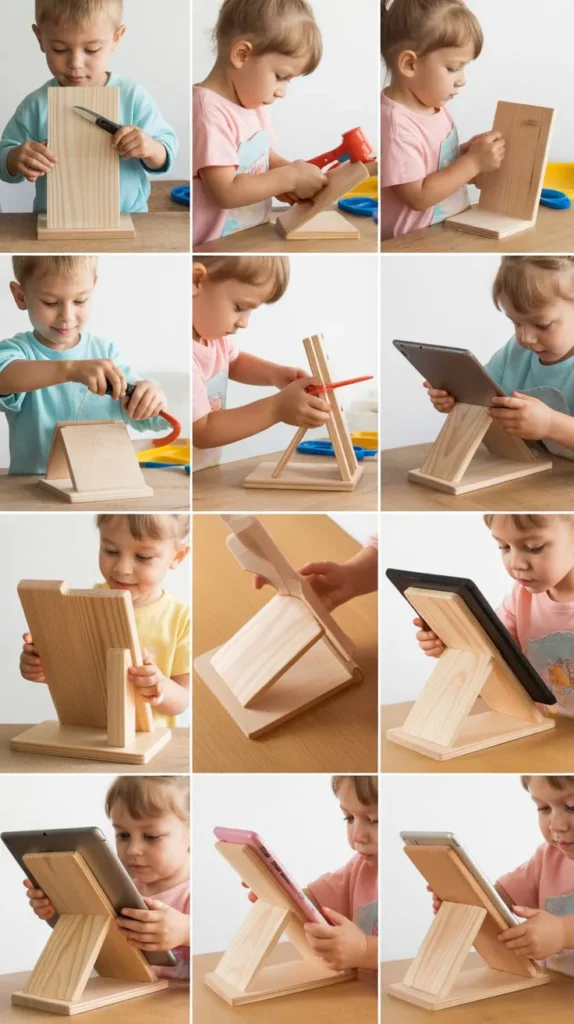
This project teaches practical construction and results in a useful stand for screens or books.
Step-by-Step Instructions:
- Gather a flat wooden board, angled support piece, and small lip for the base.
- Measure and cut pieces to support a typical tablet or book.
- Assemble the base, lip, and support at the correct angle using glue or screws.
- Sand and finish the wood.
- Decorate with name or fun patterns.
29. Wooden Garden Markers
These markers help kids label plants and vegetables, combining crafting with gardening.
Step-by-Step Instructions:
- Collect small wooden stakes or tongue depressors, paint, and a permanent marker.
- Sand each marker smooth.
- Paint the top section and write the name of each plant.
- Optionally seal with outdoor-safe varnish.
- Stick them into garden soil next to the plants.
30. Wooden Door Hanger Sign

Fun and easy, this project lets kids express themselves with a personalized door sign.
Step-by-Step Instructions:
- Use a thin wood board with a pre-drilled hole or one you can shape with adult help.
- Sand the entire board.
- Paint with phrases like “Do Not Disturb” or “Welcome In.”
- Decorate with paint, stickers, glitter, or carved symbols.
- Use a ribbon or hook to hang it on the doorknob.
Conclusion
Woodworking doesn’t just teach children how to use tools—it builds confidence, enhances creativity, and provides a rewarding sense of accomplishment.
In this article, 30 Wood Projects for Kids, we’ve explored a diverse collection of activities designed to introduce kids to the joys of working with wood.
From simple birdhouses to personalized tablet stands and garden markers, each project combines fun with valuable learning.
Whether you’re a parent looking to spark your child’s interest or a teacher seeking engaging activities, these woodworking ideas will help develop young minds through hands-on experience. Let your next project begin today!