Starting a woodworking side hustle has never been more accessible, and “30 Easy Wood Crafts Beginners Can Make and Sell” is your comprehensive guide to turning simple pieces of wood into profitable products.
Whether you’re looking to supplement your income, explore a new creative outlet, or launch a full-fledged business, woodworking offers incredible opportunities for beginners willing to learn basic techniques.
This article walks you through thirty practical, beginner-friendly wood craft projects that require minimal tools, modest investment, and no advanced skills—yet have proven market appeal.
You’ll discover detailed instructions for each project, understand what materials and tools you need, learn pricing strategies, and find out where to sell your finished pieces.
From rustic home décor items like floating shelves and picture frames to functional pieces like cutting boards and plant stands, each craft has been selected for its simplicity, profitability, and customer demand.
We’ll also cover essential woodworking safety tips, finishing techniques that make your products stand out, and marketing strategies to help you build a loyal customer base.
By the end of this guide, you’ll have a complete roadmap to start creating beautiful wooden items that people actually want to buy, transforming your spare time into a rewarding and profitable venture.
1. Wooden Cutting Boards
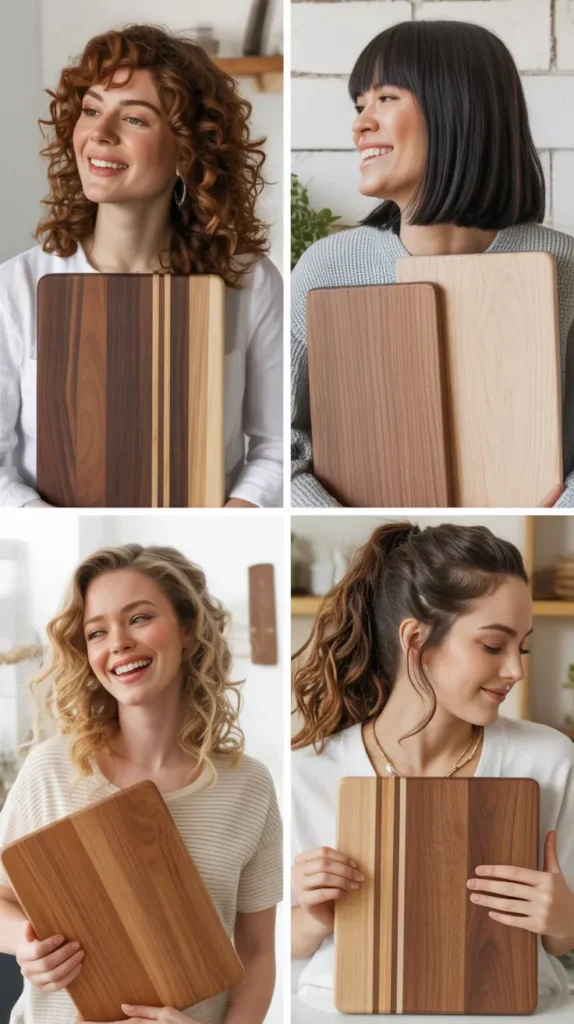
Wooden cutting boards remain one of the most profitable and beginner-friendly wood crafts you can make and sell.
These essential kitchen items appeal to home cooks, food enthusiasts, and people seeking thoughtful housewarming gifts.
Starting with a simple rectangular design allows you to master fundamental woodworking techniques like measuring, cutting, sanding, and finishing before advancing to more complex patterns.
Materials and Tools Needed
- Hardwood boards such as maple, walnut, cherry, or oak work best for durability and food safety
- Table saw or circular saw for cutting wood to size
- Planer to ensure uniform thickness across the board
- Orbital sander with various grit sandpapers (80, 120, 220 grit)
- Food-safe wood glue for joining multiple pieces
- Clamps to hold pieces together while glue dries
- Food-safe mineral oil or butcher block conditioner for finishing
- Rubber feet or pads to attach to the bottom (optional)
Step-by-Step Construction Process
- Select your hardwood and decide on dimensions (common sizes are 12×9 inches, 14×10 inches, or 18×12 inches)
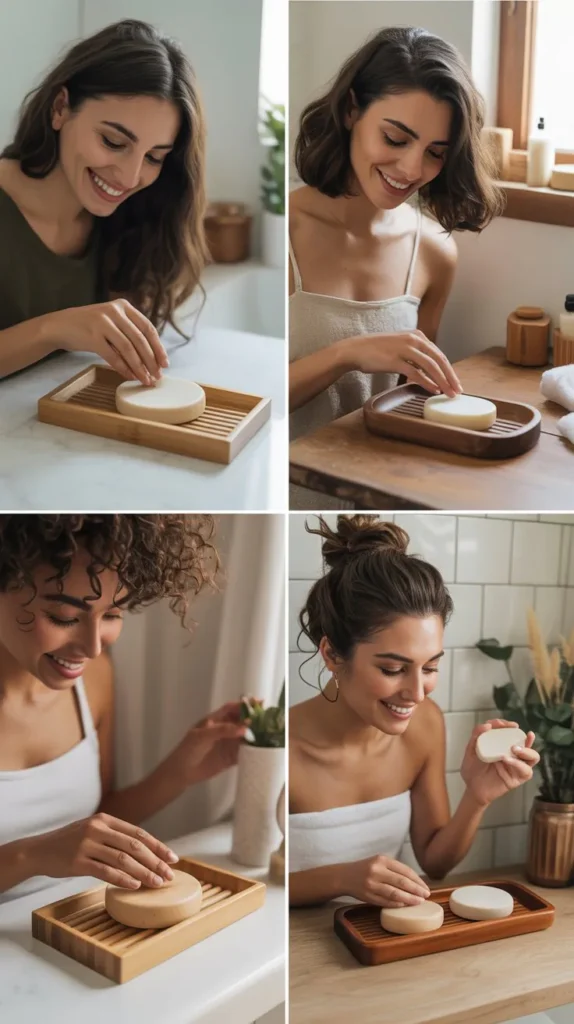
- Cut the wood to your desired length using a table saw with proper safety equipment
- If creating a multi-wood design, cut strips of different woods and arrange them in your preferred pattern
- Apply food-safe wood glue to the edges and clamp the pieces together firmly
- Allow the glue to cure for at least 24 hours according to manufacturer instructions
- Use a planer to flatten both sides and ensure even thickness
- Sand the entire surface starting with 80-grit sandpaper and progressing to 220-grit for a smooth finish
- Round the edges slightly with sandpaper to prevent sharp corners
- Wipe away all sawdust with a damp cloth and let dry completely
- Apply multiple coats of food-safe mineral oil, allowing each coat to penetrate for 20-30 minutes
- Buff the surface with a clean cloth after the final oil application
Pricing and Market Appeal
- Basic rectangular cutting boards typically sell for $25-$45 depending on size and wood type
- Edge-grain boards with multiple wood species command $40-$70
- End-grain cutting boards with checkerboard patterns can sell for $75-$150
- Personalized boards with laser engraving or wood burning add $10-$25 to the price
- Market these items on Etsy, at farmers markets, craft fairs, and through social media
- Emphasize food safety, durability, and the natural beauty of the wood grain
- Create product bundles with matching wooden spoons or spreaders to increase average order value
2. Rustic Floating Shelves
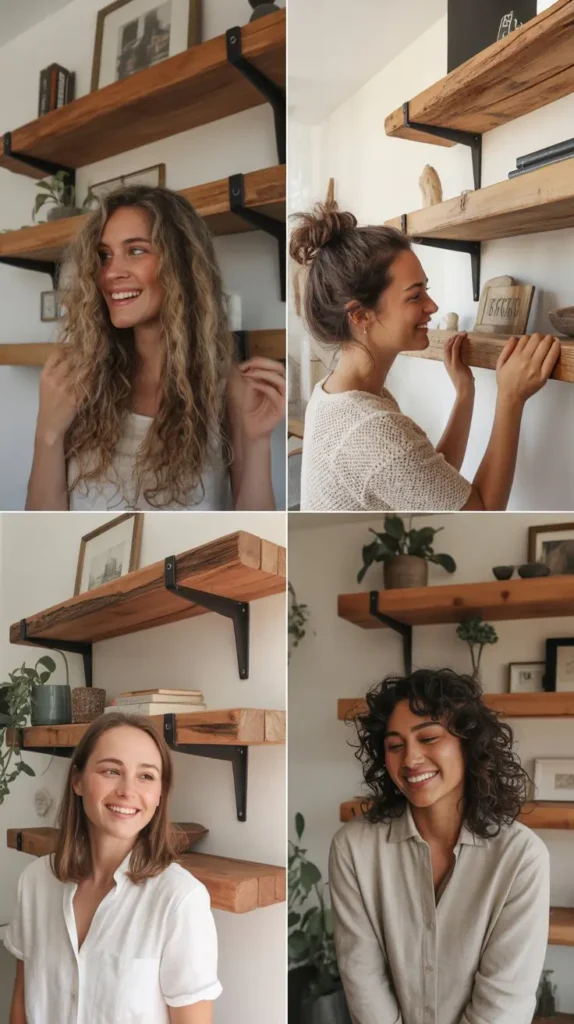
Rustic floating shelves have become incredibly popular in modern home décor, offering both functionality and aesthetic appeal.
These minimalist shelves create the illusion of floating on the wall without visible brackets, making them perfect for displaying books, plants, photos, and decorative items.
Beginners can easily master this project with basic carpentry skills and simple tools.
Design Variations and Wood Selection
- Reclaimed barn wood provides authentic rustic character with natural weathering and nail holes
- Pine boards offer an affordable option that can be stained or painted to match any décor
- Cedar provides natural resistance to warping and a pleasant aroma
- Live-edge slabs create a dramatic statement piece with natural bark edges
- Standard depths range from 6-12 inches, with lengths from 24-48 inches being most popular
- Thickness of 2-3 inches provides substantial presence and structural integrity
Construction and Installation Hardware
- Cut wood to desired length using a miter saw for clean, square ends
- Sand all surfaces thoroughly, keeping rustic imperfections if desired
- Drill pocket holes or create a hollow interior for hidden mounting rod installation
- Apply stain, paint, or clear sealant according to your design aesthetic
- Install heavy-duty floating shelf brackets rated for appropriate weight capacity
- Use a stud finder to locate wall studs for secure mounting
- Level the brackets carefully before final installation to ensure shelves sit perfectly horizontal
Marketing and Pricing Strategies
- Single shelves typically sell for $30-$60 depending on length and wood type
- Sets of 2-3 matching shelves can command $80-$150
- Custom-sized or live-edge shelves range from $75-$200
- Offer installation services in your local area for additional revenue
- Target home décor enthusiasts through Instagram and Pinterest with styled product photography
- Partner with interior designers and home stagers for bulk orders
- Emphasize the handcrafted nature and unique character of each piece
3. Wooden Planters and Plant Stands

Wooden planters and plant stands capitalize on the ongoing houseplant trend, providing stylish homes for the growing collections of plant enthusiasts.
These projects range from simple rectangular boxes to tiered display stands, offering various complexity levels for beginners to grow their skills while creating products with strong market demand.
Basic Planter Box Construction
- Cedar or redwood work best due to natural rot resistance for outdoor use
- Standard planter dimensions are 18-24 inches long, 8-10 inches wide, 8-10 inches deep
- Cut four side pieces and a bottom piece using a miter saw or circular saw
- Drill drainage holes in the bottom piece to prevent water accumulation
- Assemble the box using exterior wood screws and waterproof wood glue
- Sand all exterior surfaces smooth and round the top edges
- Apply exterior wood stain or sealant to protect against moisture
- Line the interior with plastic or install a removable waterproof liner
- Add decorative feet or legs to elevate the planter and improve drainage
Tiered Plant Stand Designs
- Three-tiered stands are most popular, typically 30-36 inches tall
- Use 1×4 or 1×6 boards for the shelves and 2×2 posts for the frame
- Cut shelf pieces to graduated lengths (24″, 18″, 12″ for a cascading effect)
- Assemble the frame structure with pocket hole joinery or traditional mortise and tenon
- Ensure all shelves are level and securely attached to support plant weight
- Apply a finish suitable for indoor or outdoor use depending on intended placement
- Consider adding wheels or casters to bottom for easy mobility
Pricing and Target Markets
- Basic wooden planter boxes sell for $35-$65 depending on size
- Multi-tiered plant stands command $60-$120
- Custom sizes or specialty designs can reach $100-$175
- Target urban dwellers, apartment residents, and houseplant collectors
- Sell through garden centers, plant shops, and farmers markets
- Create social media content showing your planters styled with popular plants
- Partner with local nurseries to display and sell your products
4. Picture Frames and Photo Displays
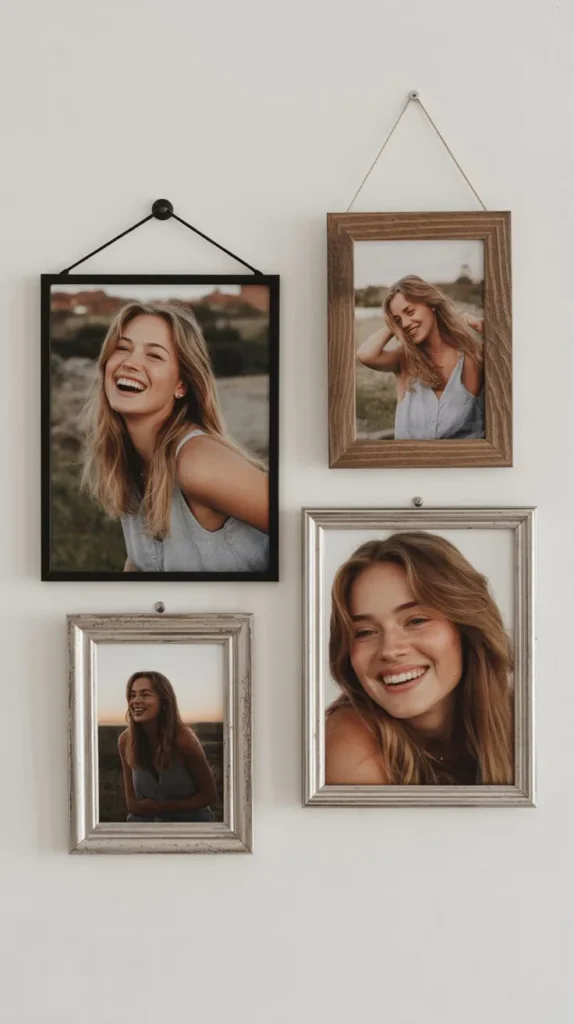
Handcrafted wooden picture frames offer endless customization possibilities and appeal to customers seeking unique ways to display their cherished memories.
From simple rectangular frames to elaborate multi-photo displays, this versatile project allows beginners to practice precision cutting, joining techniques, and finishing skills while creating products with universal appeal.
Frame Construction Techniques
- Select wood molding profiles from simple flat designs to ornate routed edges
- Popular woods include pine, oak, walnut, and cherry for different price points
- Cut four pieces at precise 45-degree angles using a miter saw with proper angle settings
- Ensure opposite sides are exactly the same length for square, even frames
- Apply wood glue to mitered corners and use corner clamps or band clamps to hold
- Reinforce corners with brad nails, V-nails, or biscuit joints for added strength
- Route a rabbet along the inside back edge to hold glass, photo, and backing
- Sand all surfaces smooth, paying special attention to corners and edges
- Apply stain, paint, or clear finish according to your design vision
Glass, Backing, and Hardware Installation
- Cut glass to size or purchase pre-cut glass slightly smaller than frame opening
- Use acid-free mat board for professional presentation and photo preservation
- Install backing board (typically hardboard or foam core) to protect photos
- Secure all layers with glazier points or flexible metal tabs
- Attach sawtooth hangers, D-rings, or wire hanging systems to the back
- Add rubber bumpers to bottom corners to protect walls and keep frames level
- Include a protective paper backing to give a finished, professional appearance
Market Positioning and Pricing
- Standard 5×7 inch frames sell for $15-$30
- 8×10 inch frames typically command $25-$45
- Larger 11×14 or 16×20 frames range from $40-$85
- Multi-photo collage frames can sell for $60-$150
- Custom sizing and special wood species justify premium pricing
- Market frames for weddings, anniversaries, new babies, and graduations
- Offer personalization through engraving, wood burning, or custom staining
- Create sets of matching frames in various sizes for coordinated gallery walls
5. Wooden Signs with Sayings

Wooden signs featuring inspirational quotes, family names, or humorous sayings have become staples of farmhouse and rustic home décor.
These highly profitable projects require minimal materials and tools while offering tremendous creative freedom, making them ideal for beginners looking to build a woodworking business quickly.
Preparation and Design Selection
- Use pine boards, pallet wood, or reclaimed barn wood for authentic rustic appeal
- Standard sign sizes range from 12×12 inches to 24×48 inches
- Sand boards smooth while preserving some rustic character if desired
- Apply base coat of paint or stain according to your design concept
- Create distressed finishes by sanding edges and high points after base coat dries
- Select sayings and fonts that resonate with your target market’s values and aesthetics
- Popular themes include family, faith, welcome messages, and seasonal greetings
Lettering and Design Transfer Methods
- Use vinyl stencils for crisp, professional lettering with reusable templates
- Hand-paint letters using acrylic craft paint for a more artisanal appearance
- Apply vinyl decals directly for quick production and consistent results
- Wood burning creates permanent, rustic lettering with unique character
- Print designs on transfer paper and trace onto wood surface
- Use paint pens for fine details and decorative flourishes
- Layer multiple colors for dimensional, eye-catching text
Finishing Touches and Protection
- Seal completed signs with polyurethane, polycrylic, or clear wax for durability
- Add decorative elements like metal accents, rope hangers, or ribbon
- Install sawtooth hangers or wire for easy wall mounting
- Distress edges with sandpaper for enhanced vintage appearance
- Apply antiquing glaze to highlight wood grain and add depth
- Photograph signs in styled settings to show how they enhance home décor
Pricing Structure and Sales Channels
- Small signs (12×12 to 16×20 inches) typically sell for $20-$45
- Medium signs (18×24 inches) command $35-$65
- Large statement pieces (24×48 inches or larger) range from $60-$150
- Custom family name signs with established dates sell for $40-$80
- Seasonal and holiday signs create recurring revenue opportunities
- Sell at craft fairs, farmers markets, home décor boutiques, and online marketplaces
- Offer custom wording for weddings, new homes, and special occasions at premium prices
6. Wooden Coasters
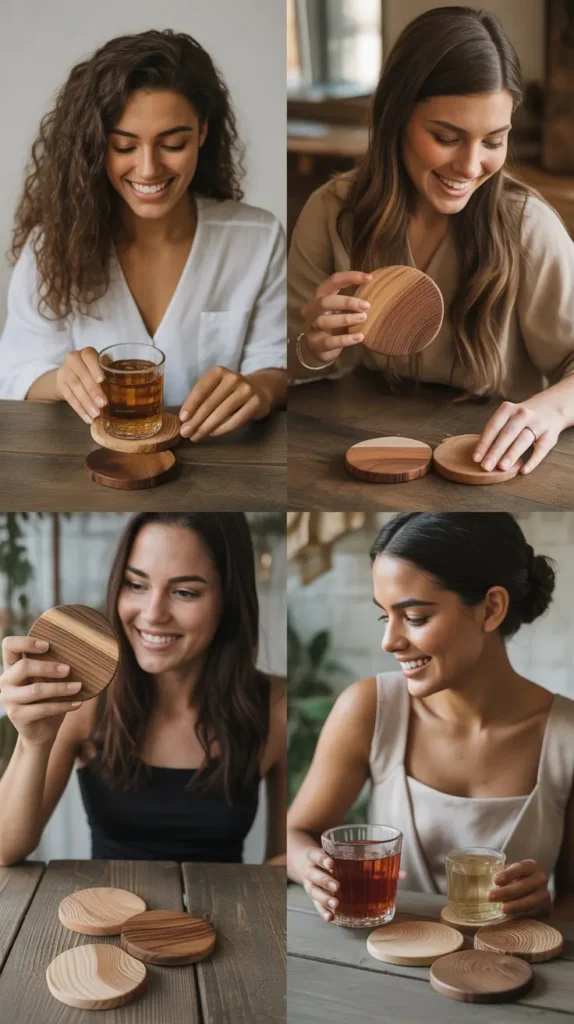
Wooden coasters are quick, affordable projects that yield high profit margins and make excellent impulse purchases or gift items.
These functional pieces protect furniture while adding natural warmth to home décor, and beginners can produce them efficiently using scrap wood, making this an ideal project for minimizing waste while maximizing profit.
Material Selection and Cutting
- Use hardwoods like walnut, cherry, oak, or maple for durability and appearance
- Softwoods like pine work but may dent more easily over time
- Standard coaster size is 4×4 inches square or 4-inch diameter circles
- Cut coasters using a miter saw, table saw, or bandsaw depending on shape
- Create sets of 4-6 coasters for attractive packaging and higher price points
- Mix different wood species in a set for visual interest
- Slice tree branches or small logs into rustic rounds with bark edges intact
Design Enhancement Techniques
- Create geometric patterns by gluing contrasting wood species together
- Use epoxy resin to fill voids, create ocean or river effects, or add color
- Wood burn designs, initials, or decorative patterns onto coaster surfaces
- Apply laser engraving for intricate designs, logos, or custom text
- Inlay metal, stone, or other contrasting materials for unique aesthetics
- Route decorative edges or create beveled designs for added sophistication
- Preserve natural imperfections like knots and grain variations as design features
Functional Features and Finishing
- Sand surfaces to at least 220-grit for smooth, splinter-free finish
- Apply waterproof finish such as polyurethane, water-based polycrylic, or epoxy coating
- Multiple thin coats provide better protection than single thick applications
- Attach cork, felt, or rubber pads to bottoms to prevent scratching furniture
- Ensure coasters are completely flat so glasses don’t wobble
- Test water resistance by placing cold drinks on finished coasters before selling
- Allow all finishes to cure fully (typically 7-14 days) before packaging
Packaging and Pricing Strategy
- Individual coasters sell for $5-$10 depending on wood and design complexity
- Sets of 4 coasters typically command $20-$35
- Sets of 6 with storage caddy can reach $35-$50
- Premium materials like walnut or designs with resin sell for higher prices
- Package sets in clear shrink wrap, fabric pouches, or custom wood holders
- Include care instructions to maintain finish and longevity
- Market as housewarming gifts, wedding favors, or corporate promotional items
- Create themed sets for holidays, seasons, or special interests
7. Wooden Keychains and Bag Tags

Wooden keychains and bag tags represent perfect entry-level woodworking projects that require minimal investment, use scrap wood effectively, and sell quickly at craft fairs and online markets.
These small items allow beginners to practice fundamental skills while creating affordable products with broad market appeal.
Design Shapes and Personalization Options
- Simple geometric shapes (circles, squares, rectangles, hexagons) are easiest for beginners
- State or country outlines appeal to travelers and locals with regional pride
- Monogram letters create personalized gift options with high perceived value
- Pet silhouettes attract animal lovers and pet owners
- Hobby-themed shapes (guitars, hearts, anchors, crosses) target specific interests
- Keep thickness between 1/4 inch and 3/8 inch for durability without bulk
- Create templates for consistent reproduction of popular shapes
Materials and Construction Process
- Use hardwood scraps from other projects to minimize material costs
- Walnut, cherry, maple, and oak provide attractive appearance and durability
- Cut shapes using a scroll saw, bandsaw, or laser cutter for precision
- Drill holes for split rings or keychain hardware using 1/4 inch bit
- Sand all surfaces and edges thoroughly to 220-grit smoothness
- Round edges slightly to prevent snagging and improve comfort
- Add personalization through wood burning, engraving, stamping, or painting
Finishing and Hardware Assembly
- Apply durable finish like polyurethane or Danish oil to protect from handling
- Allow finish to cure completely before handling and assembly
- Use quality split rings and keychain hardware that won’t break easily
- Consider adding tassels, leather straps, or beads for decorative appeal
- Attach metal luggage tags or carabiners for versatile functionality
- Package individually in small bags or boxes for professional presentation
- Include brand stickers or tags to build business recognition
Sales and Marketing Approach
- Price individual keychains at $6-$12 depending on complexity and personalization
- Offer volume discounts (buy 3 get 1 free) to increase transaction size
- Custom engraved keychains command $10-$18 premium pricing
- Create seasonal designs for holidays and special occasions
- Market as graduation gifts, realtor closing gifts, or promotional items
- Sell at checkout counters as impulse purchases alongside higher-priced items
- Offer customization for weddings, corporate events, and team sports
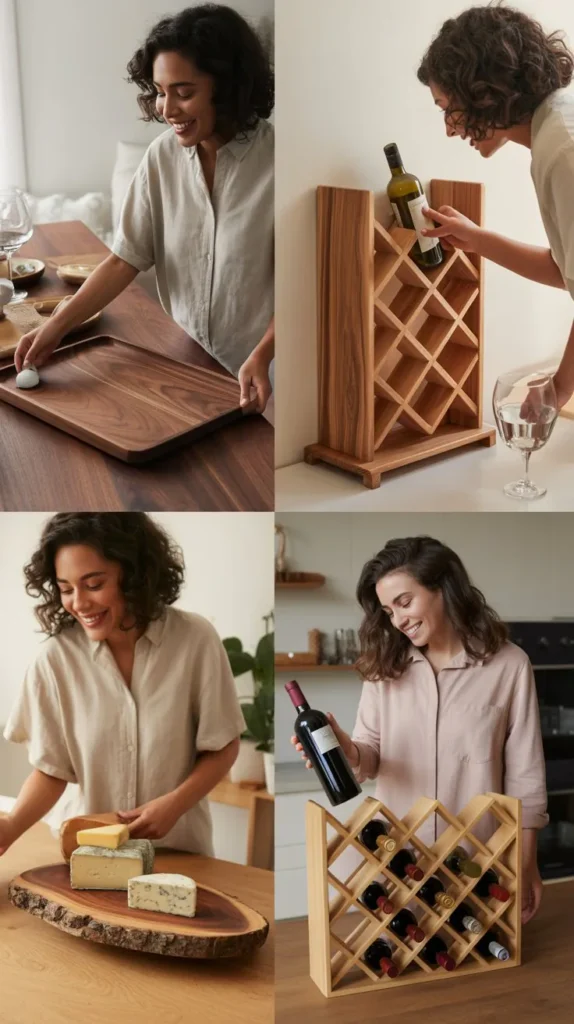
8. Wooden Wine Racks
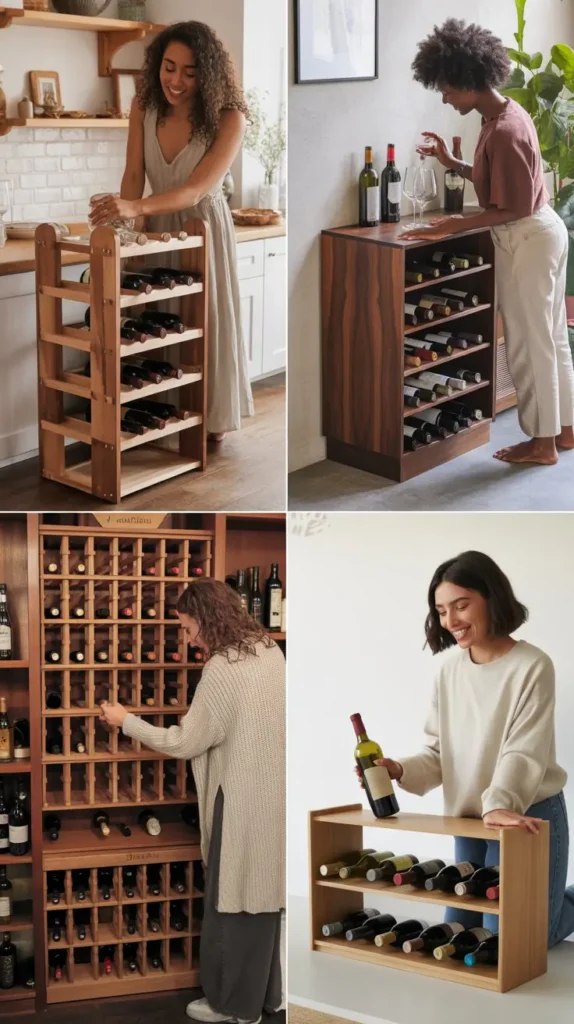
Wooden wine racks combine functionality with decorative appeal, making them popular gifts and home accessories.
These projects range from simple countertop designs holding 4-6 bottles to elaborate wall-mounted systems, providing beginners with opportunities to develop skills while creating items with strong profit potential.
Countertop Wine Rack Designs
- Simplest designs hold 4-6 bottles in horizontal orientation
- Use 3/4 inch plywood or solid wood boards for main structure
- Cut circular holes slightly larger than wine bottle diameter (approximately 3.5-4 inches)
- Angle holes at 15-20 degrees so bottles tilt slightly downward for proper cork moisture
- Create supporting frame structure with side panels and back support
- Space bottle positions 4-5 inches apart to prevent bottles touching
- Sand all edges smooth and apply food-safe finish for wine contact areas
Wall-Mounted Wine Storage Systems
- Wall-mounted racks save counter space while creating visual interest
- Include wine glass holders suspended beneath bottle storage for complete solution
- Use hardwoods like oak or walnut for strength to support bottle weight
- Mount securely to wall studs using heavy-duty screws or anchors
- Design with modular components so customers can expand system over time
- Add decorative elements like wine glass stemware racks or shelf for accessories
- Ensure proper spacing allows easy bottle removal without disturbing adjacent bottles
Finishing and Quality Considerations
- Apply multiple coats of polyurethane for durability and moisture resistance
- Stain woods to match customer’s existing furniture or décor preferences
- Sand to ultra-smooth finish to prevent labels catching or tearing
- Reinforce joints with wood glue and pocket screws for structural integrity
- Test weight capacity before selling to ensure safety and durability
- Round all edges that might contact bottles or hands
- Consider felt or cork lining in bottle slots for added protection
Pricing Based on Capacity and Complexity
- Small countertop racks (4-6 bottles) sell for $35-$60
- Medium tabletop designs (8-12 bottles) command $60-$95
- Wall-mounted racks with glass storage range from $75-$150
- Large floor-standing wine racks can reach $150-$300
- Custom sizing and premium woods justify higher pricing
- Market to wine enthusiasts, wedding couples, and housewarming gift buyers
- Partner with wine shops, tasting rooms, and home décor stores for retail placement
9. Serving Trays
Wooden serving trays blend functionality with aesthetic appeal, serving as versatile pieces for entertaining, breakfast in bed, or decorative displays.
These rectangular or circular platforms with handles allow beginners to practice joinery, finishing, and detail work while creating products with year-round demand.
Tray Construction Fundamentals
- Standard serving tray dimensions are 18×12 inches to 24×14 inches
- Use 1/2 to 3/4 inch thick wood for the tray bottom platform
- Edge pieces should be 2-3 inches tall to contain items safely
- Join edge pieces to base using wood glue and finishing nails or pocket screws
- Reinforce corners with additional glue blocks for structural integrity
- Create raised lip by routing decorative edge or attaching separate trim pieces
- Ensure tray bottom is completely flat so items don’t slide or tip
Handle Design Options
- Cut handles directly from side pieces using jigsaw or bandsaw
- Attach purchased wooden handles with screws from underneath for clean appearance
- Use rope handles threaded through drilled holes for nautical or rustic aesthetic
- Install metal handles, pulls, or brackets for industrial or modern designs
- Create comfortable grip width of 4-5 inches for easy two-handed carrying
- Position handles at proper height for balanced weight distribution
- Sand handle areas especially smooth for comfortable grip
Decorative and Functional Enhancements
- Route decorative profiles along edges for refined, professional appearance
- Inlay contrasting wood strips or patterns into tray bottom for visual interest
- Apply stenciled designs, painted patterns, or decoupage for customization
- Add rubber feet to bottom corners to protect furniture surfaces
- Create sections or dividers for breakfast tray organization
- Include cutout areas for wine glasses or coffee cup stability
- Apply multiple finish coats for water resistance and easy cleaning
Market Applications and Pricing
- Basic wooden serving trays sell for $35-$60
- Larger or more decorative trays command $55-$90
- Custom designs with personalization reach $70-$120
- Premium hardwoods and intricate details justify higher pricing
- Market for entertaining, weddings, Mother’s Day, and hostess gifts
- Create seasonal designs for holidays and special occasions
- Sell through home décor boutiques, gift shops, and online marketplaces
- Offer custom monogramming or family name engraving for premium pricing
10. Simple Wooden Toys
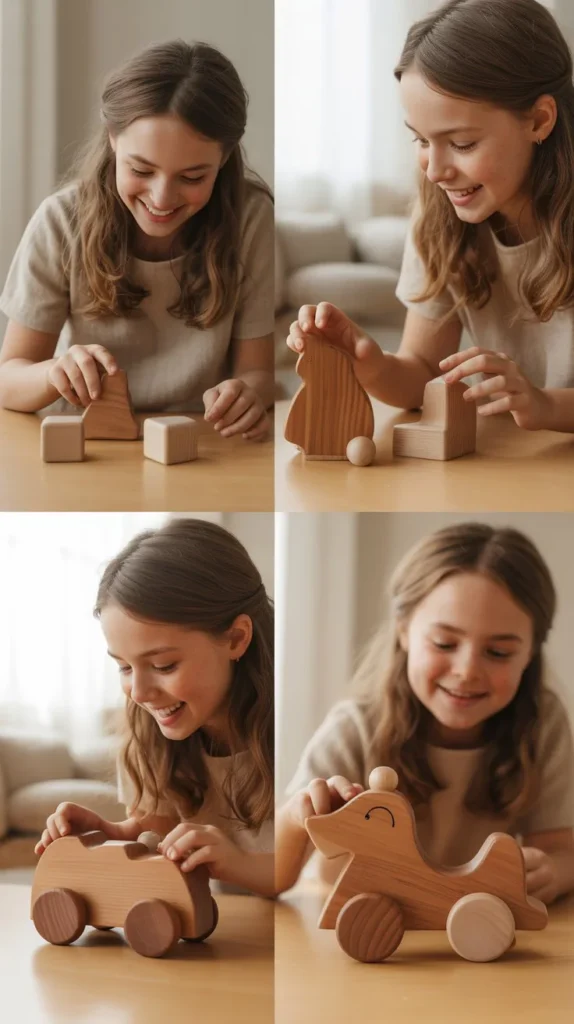
Handcrafted wooden toys tap into parents’ desire for screen-free play, natural materials, and heirloom-quality items for children.
Simple designs like cars, blocks, and puzzles require basic woodworking skills while creating products with emotional appeal and strong gift-giving potential.
Safety-First Design Principles
- All toys must meet safety standards with no small detachable parts for children under 3
- Round all edges and corners extensively to prevent injury during play
- Use only non-toxic, child-safe finishes approved for children’s products
- Ensure pieces are large enough not to pose choking hazards (1.5 inches minimum diameter)
- Avoid sharp points, splinters, or rough surfaces through thorough sanding
- Test durability by applying significant force to ensure pieces won’t break
- Use strong wood glues and mechanical fasteners that won’t separate
Popular Beginner-Friendly Toy Designs
- Simple wooden cars and trucks with wheels attached securely
- Building blocks in various sizes and shapes for creative play
- Pull toys with rope or string attached to wheeled base
- Stacking toys with rings or shapes that fit on central post
- Simple puzzles with large pieces that fit into corresponding cutouts
- Push toys like rolling cylinders with internal bells or rattles
- Animal shapes and figures for imaginative play
Materials and Finishing for Children
- Use hardwoods like maple, beech, or birch for durability and smooth grain
- Avoid woods with potential allergens or toxic properties
- Select vegetable-based, food-grade oils like walnut or coconut oil for finishing
- Water-based, non-toxic paints certified for children’s toys add color safely
- Beeswax provides natural, safe protective coating with pleasant smell
- Sand to extremely smooth finish with 220-grit or finer sandpaper
- Round edges using sanding blocks or router with roundover bit
Legal Considerations and Pricing
- Research CPSC (Consumer Product Safety Commission) requirements for children’s products
- Consider product liability insurance when selling toys for children
- Label products with age appropriateness and any necessary warnings
- Simple wooden cars sell for $12-$25 each
- Block sets (20-30 pieces) command $40-$75
- Puzzles range from $15-$35 depending on complexity
- Market to parents seeking natural, educational, screen-free toys
- Emphasize handcrafted quality, durability, and heirloom potential
- Sell at children’s boutiques, toy stores, and parenting expos
11. Wooden Phone Stands and Docking Stations
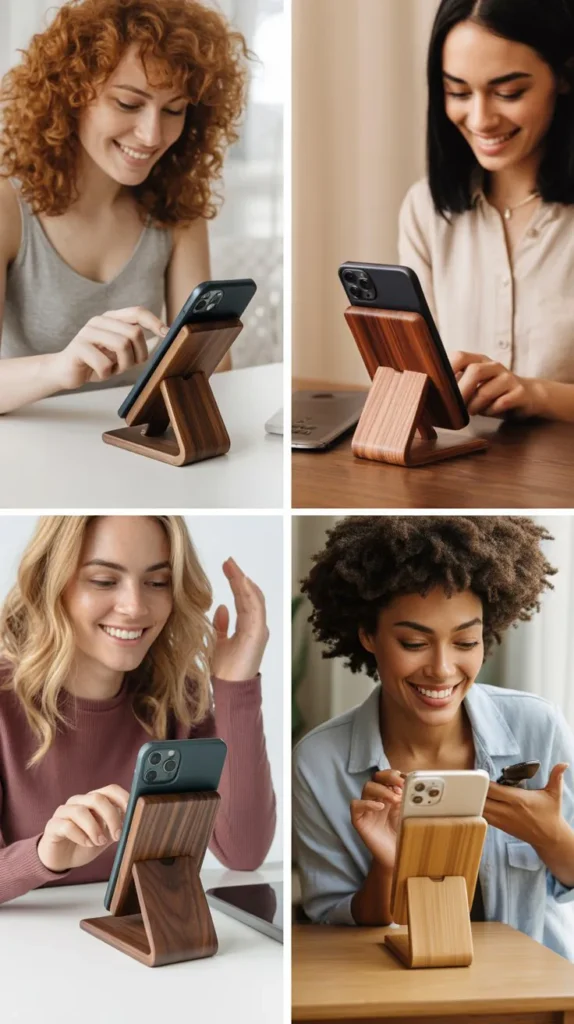
Wooden phone stands and docking stations merge technology with natural materials, creating functional desk accessories with modern aesthetic appeal.
These compact projects require precision cutting and thoughtful design while serving the practical need for hands-free device viewing and organized charging.
Basic Stand Design and Construction
- Create simple angled stands from single piece of wood cut at specific angle
- Optimal viewing angle is typically 60-70 degrees from horizontal surface
- Cut slot approximately 1/2 inch wide to hold phone securely
- Depth of slot should be 3/4 to 1 inch to support phone weight
- Base should be weighted or wide enough (4-6 inches) to prevent tipping
- Sand slot edges smooth to prevent scratching phone cases
- Create versions for both portrait and landscape phone orientation
Advanced Docking Station Features
- Route channel in back or bottom for charging cable management
- Include space for AirPods, smart watch, or other small accessories
- Add drawer or compartment for holding keys, wallet, or business cards
- Create multi-device stations to charge phone, watch, and earbuds simultaneously
- Install USB charging ports directly into wood for integrated functionality
- Design fold-flat or adjustable angle mechanisms for travel portability
- Add cork or felt padding where devices rest to prevent scratches
Material Selection and Finishing
- Walnut provides rich, dark appearance popular in tech accessories
- Maple offers light, modern aesthetic that complements Apple products
- Cherry develops beautiful patina over time with exposure to light
- Bamboo provides eco-friendly option with attractive grain patterns
- Apply satin or matte finish to avoid glare interfering with screen viewing
- Use danish oil or polycrylic for durability against daily handling
- Laser engrave company logos or custom designs for corporate gifts
Marketing to Tech-Savvy Consumers
- Simple phone stands sell for $15-$30
- Multi-device docking stations command $35-$75
- Premium wood species and complex features reach $60-$100
- Market to remote workers, students, and professionals seeking organized workspaces
- Emphasize sustainable, natural alternative to plastic tech accessories
- Target corporate buyers for employee gifts or office supplies
- Create social media content showing products in clean, minimalist workspace settings
- Sell through Amazon Handmade, Etsy, tech accessory shops, and office supply stores
12. Hexagon Shelves
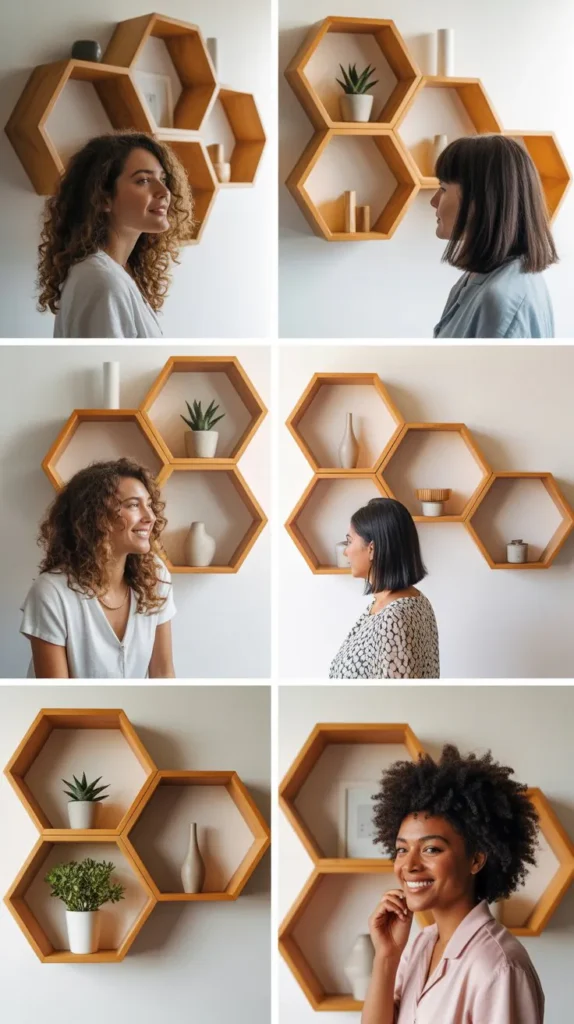
Hexagon shelves have emerged as trendy geometric décor pieces that create striking visual displays when arranged in clusters.
These six-sided wall-mounted units appeal to modern aesthetic sensibilities while remaining simple enough for beginners to construct with basic tools and mathematical precision.
Precise Angle Cutting and Assembly
- Each hexagon consists of six equal-length pieces with 30-degree angles at both ends
- Set miter saw to exactly 30 degrees for accurate cuts
- Common sizes include 6-inch, 8-inch, or 10-inch sides for varied visual interest
- Use stop block on miter saw to ensure all six pieces are identical length
- Apply wood glue to mitered ends and use corner clamps or band clamps during assembly
- Reinforce joints with brad nails from back side for additional strength
- Check that all angles are perfect using square or by measuring diagonal distances
Design Variations and Configurations
- Create sets of 3, 5, or 7 hexagons in graduated sizes for dynamic wall arrangements
- Mix stain colors (light, medium, dark) for visual contrast in grouped displays
- Include backs on some hexagons for closed storage while leaving others open
- Add dividers inside larger hexagons to create smaller display compartments
- Paint interiors in contrasting colors while keeping exteriors natural wood
- Create deep hexagons (4-6 inches) for substantial book or plant display
- Design interlocking systems so multiple hexagons connect seamlessly
Installation and Mounting Methods
- Attach French cleat system to back for secure, level wall mounting
- Use keyhole hangers routed into back for invisible hardware
- Provide level and mounting template showing exact honeycomb arrangement
- Ensure mounting method supports weight of expected contents
- Include detailed installation instructions with hardware and wall anchors
- Photograph various arrangement patterns for customer inspiration
- Offer installation services locally for premium pricing
Pricing and Target Demographics
- Individual small hexagons (6-inch sides) sell for $20-$35
- Medium hexagons (8-inch sides) command $28-$45
- Sets of 3 graduated hexagons range from $65-$110
- Sets of 5-7 hexagons with arrangement template reach $120-$200
- Market to millennials and Gen Z decorators seeking modern aesthetic
- Target apartment dwellers and dorm residents with limited floor space
- Emphasize versatility for plants, books, collectibles, and photos
- Create lifestyle photography showing styled hexagon arrangements
13. Wooden Jewelry Boxes
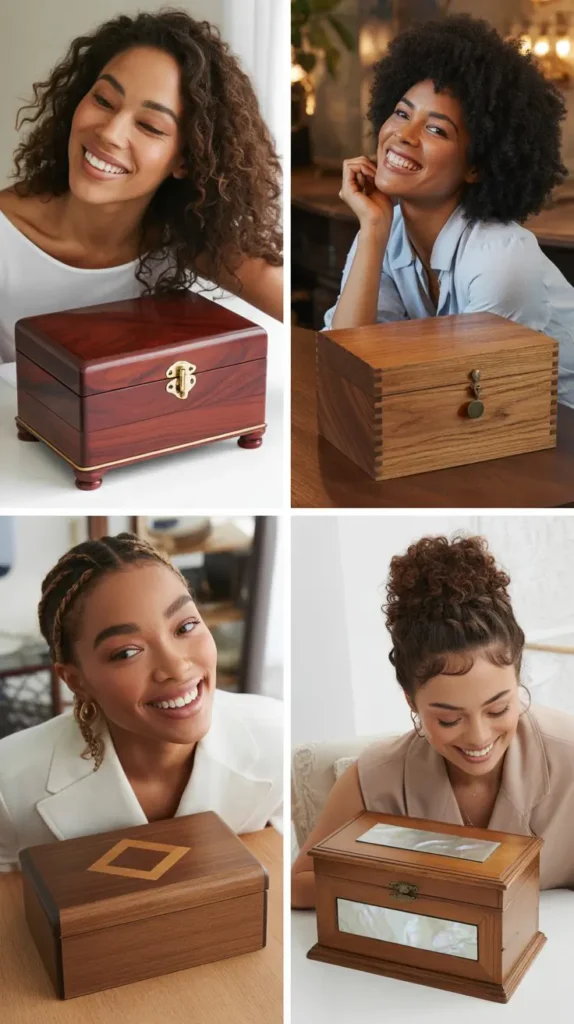
Wooden jewelry boxes represent classic woodworking projects that combine multiple skills including joinery, hardware installation, and finishing while creating functional storage with lasting sentimental value.
These intimate pieces make treasured gifts and allow beginners to practice precision craftsmanship at small scale.
Box Construction Techniques
- Simple butt joints work for beginners, advancing to mitered or dovetail corners
- Box dimensions typically range from 6x4x3 inches to 12x8x4 inches
- Use 1/2 inch thick wood for sides and 1/4 inch plywood for bottom
- Cut grooves in side pieces to accept sliding bottom panel
- Apply wood glue generously and clamp firmly during assembly
- Install dividers or compartments for organizing different jewelry types
- Create removable trays with finger pulls for layered storage
Hardware and Functional Elements
- Install small brass or nickel hinges for smooth lid operation
- Add lid support chains to prevent hinges from over-extending
- Include small lock and key hardware for secure valuable storage
- Attach decorative feet to bottom corners for elegant elevation
- Install mirror inside lid for convenient accessory viewing
- Add ring rolls, necklace hooks, or earring posts for specialized storage
- Line interior with felt, velvet, or suede to protect delicate pieces
Decorative Finishing Options
- Select beautiful hardwoods like cherry, walnut, or figured maple
- Apply satin or gloss polyurethane for smooth, protective finish
- Inlay contrasting wood patterns or marquetry for artistic detail
- Carve or route decorative elements into lid surface
- Add wood burning, painting, or stenciled designs for personalization
- Install decorative metal corners or edge protectors for vintage appeal
- Create two-tone finishes with natural wood exterior and painted interior
Personalization and Pricing
- Basic jewelry boxes sell for $40-$75
- Medium boxes with compartments command $65-$110
- Elaborate boxes with inlay or carving reach $100-$200
- Add personalization through engraving names or initials for $10-$20 extra
- Market for graduations, sweet sixteen, weddings, and anniversaries
- Emphasize heirloom quality and handcrafted uniqueness
- Target jewelry stores and gift boutiques for retail partnerships
- Offer custom sizing for specific jewelry collection needs
14. Wooden Bookends

Wooden bookends provide both function and aesthetic appeal to bookshelves, desks, and display areas while offering beginners opportunities to explore creative shapes, decorative techniques, and weighted stability.
These paired items sell individually or as sets with themes ranging from rustic to modern.
Basic L-Shape Construction
- Create simple right-angle design with base and upright support
- Base should extend 4-6 inches from upright to prevent tipping
- Upright piece typically stands 6-8 inches tall to support standard books
- Join base and upright at perfect 90-degree angle using glue and screws
- Countersink screw holes and fill with wood plugs for clean appearance
- Add weight to base by attaching metal plates or filling cavity with sand
- Felt pads on bottom protect furniture and prevent sliding
Creative Design Variations
- Cut decorative silhouettes (trees, animals, mountains) from upright piece using scroll saw
- Create geometric modern designs with angled or asymmetric shapes
- Stack and laminate contrasting wood species for striped visual effect
- Route decorative edges or create beveled profiles for refined appearance
- Incorporate live edge slabs for organic, natural aesthetic
- Design themed bookends (states, hobbies, sports) for targeted markets
- Create matching pairs with complementary rather than identical designs
Stability and Functional Considerations
- Ensure adequate weight prevents books from pushing bookends over
- Calculate base-to-height ratio to maintain stability with heavy books
- Test bookends with actual books before finishing and selling
- Consider adding non-slip material to book-facing surface
- Design base large enough to accommodate various shelf depths
- Create versions specifically for children’s books, cookbooks, or coffee table books
- Include rubber or cork bottom to grip shelf surface
Market Positioning and Pricing
- Simple bookend pairs sell for $25-$45
- Decorative cut-out designs command $35-$60 per pair
- Premium hardwood or complex designs reach $50-$90 per pair
- Market to readers, students, libraries, and home office workers
- Create literary-themed designs for book lovers and teachers
- Target businesses for reception area and office display
- Offer custom shapes or monograms for personalized gifts
- Bundle with book-themed items like bookmarks or reading lights
15. Wooden Utensil Holders
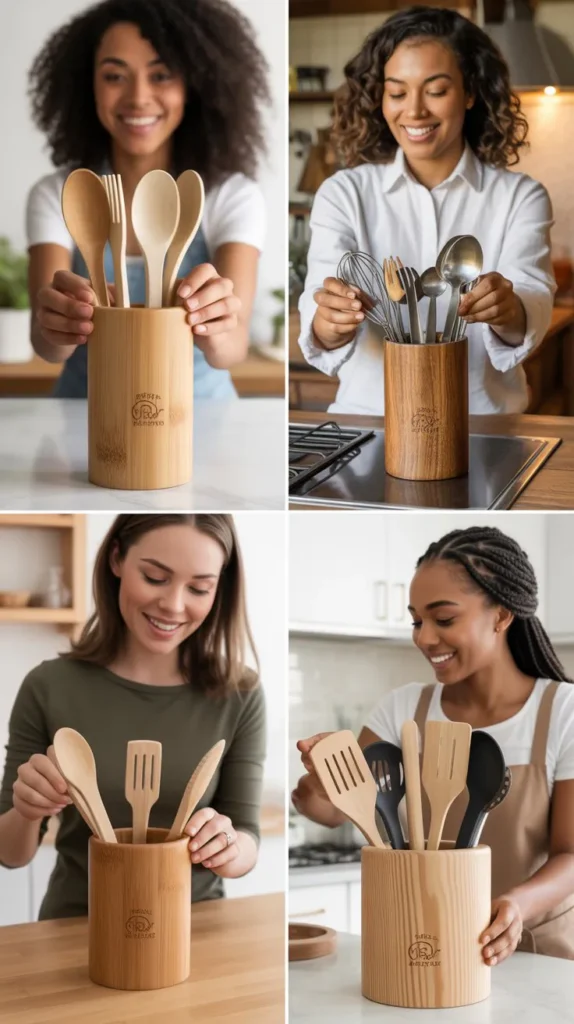
Wooden utensil holders bring natural warmth to kitchen countertops while organizing cooking tools in accessible, attractive displays.
These cylindrical or box-shaped containers allow beginners to practice circular or square construction while creating practical items with consistent demand.
Round Cylindrical Design Construction
- Use stave construction method joining narrow strips around circular form
- Alternatively, cut 4-6 inch diameter sections from 4×4 or 6×6 posts
- Hollow interior using drill bits and chisels or purchase pre-made cylinders
- Sand interior smooth to prevent splinters on utensil handles
- Create stable flat bottom by ensuring perfectly perpendicular cut
- Height of 6-8 inches accommodates most kitchen utensils
- Add decorative bands or burn lines around exterior for visual interest
Square or Rectangular Box Holders
- Four-sided construction allows easier assembly for beginners
- Typical dimensions are 4×4 inches to 6×6 inches, 7-8 inches tall
- Use finger joints, box joints, or simple butt joints for corners
- Install dividers creating 2-4 compartments for organizing different utensil types
- Attach bottom piece using glue and small nails or screws from outside
- Route decorative edges along top rim for refined finish
- Create handles or grip indentations for easy movement
Food-Safe Finishing Requirements
- Apply only food-safe finishes approved for kitchen contact
- Mineral oil provides simple, renewable protection for interior surfaces
- Beeswax and mineral oil mixture creates water-resistant finish
- Food-safe polyurethane or polycrylic work for exterior surfaces
- Avoid toxic stains or finishes that could contaminate utensils
- Multiple thin coats provide better protection than single heavy coat
- Reapply finish periodically to maintain appearance and protection
Pricing and Kitchen Market Appeal
- Basic round holders sell for $20-$35
- Divided square holders command $25-$45
- Premium hardwoods or decorative carving reach $35-$60
- Market alongside cutting boards and wooden utensils as kitchen sets
- Target cooking enthusiasts and people furnishing new homes
- Emphasize natural, non-toxic alternative to plastic or ceramic
- Sell at farmer’s markets, kitchen stores, and home goods boutiques
- Create branded sets with other kitchen items for higher transaction value
16. Wooden Magnets

Wooden magnets combine small-scale woodworking with creative design possibilities, resulting in low-material-cost items perfect for impulse purchases and gift additions.
These tiny projects allow beginners to practice precision cutting and finishing while quickly building inventory for markets and online sales.
Design and Shape Options
- Simple geometric shapes (circles, squares, hexagons) are quickest to produce
- State or country outlines appeal to travelers and locals
- Seasonal shapes (pumpkins, snowflakes, hearts) create holiday inventory
- Mini animal silhouettes attract pet lovers and children
- Food shapes (fruit, vegetables, kitchen items) suit culinary themes
- Tiny signs with inspirational words or phrases
- Create sets with matching themes or progressive sizes
Materials and Construction Process
- Use 1/4 inch thick wood or wood veneer for lightweight magnets
- Hardwoods provide durability despite small size
- Cut shapes using scroll saw, laser cutter, or purchased shape punches
- Sand all edges smooth with fine-grit sandpaper
- Drill small relief area in back for magnet recess (optional)
- Glue strong rare earth magnets to backs using epoxy or wood glue
- Ensure magnets are positioned for proper balance
Finishing and Embellishment
- Paint designs using acrylic craft paints in bright, cheerful colors
- Apply wood burning for rustic, natural designs
- Use permanent markers for fine details and patterns
- Seal with clear acrylic spray or brush-on polycrylic
- Add vinyl decals or printed images adhered with mod podge
- Leave some designs natural to showcase wood grain
- Create two-tone effects with painted details on natural wood
Bulk Production and Pricing
- Individual magnets sell for $3-$6 each
- Sets of 4-6 themed magnets command $12-$20
- Seasonal sets create recurring revenue throughout year
- Calculate material cost to ensure profitable pricing at low retail point
- Produce in batches to maximize efficiency and inventory
- Package sets in clear bags, small boxes, or on display cards
- Position as add-on purchases at checkout or alongside larger items
- Market to tourists, gift shops, and craft fair shoppers looking for affordable souvenirs
17. Wooden Candle Holders
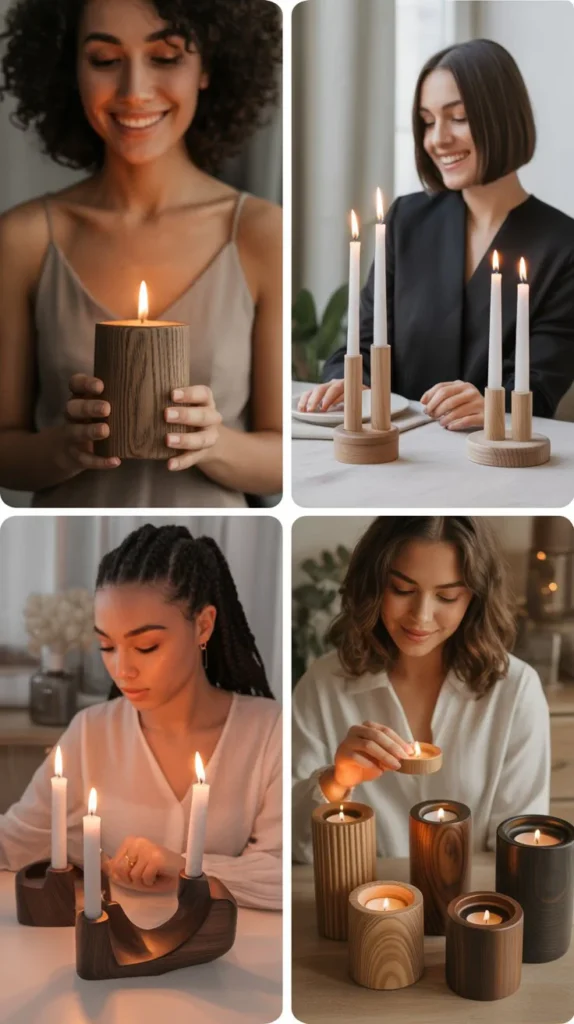
Wooden candle holders blend functionality with rustic elegance, creating warm ambiance pieces that appeal to home décor enthusiasts and gift buyers.
These projects range from simple single-candle designs to elaborate multi-candle centerpieces, accommodating various skill levels while maintaining strong market demand.
Pillar Candle Holder Construction
- Use 4×4 or 6×6 posts cut to heights ranging from 6-14 inches
- Drill candle wells using Forstner bits sized for specific candle diameters
- Standard pillar candle well is 3 inches diameter and 1-2 inches deep
- Create stable base by ensuring perfectly level bottom cut
- Sand smooth any saw marks or rough spots
- Turn on lathe for decorative shapes and tapered designs (advanced)
- Group holders in sets of varying heights for layered visual interest
Tea Light and Votive Designs
- Drill 1.5-inch diameter wells for standard tea light candles
- Space multiple wells 3-4 inches apart in long rectangular bases
- Create patterns with wells arranged in geometric or organic layouts
- Depth of 1/2 inch accommodates tea lights while showing flame
- Use natural wood slices or bark-edged pieces for rustic appeal
- Install metal tea light cups in wells for easy candle removal and cleaning
- Create floating tea light holders from driftwood or branch sections
Safety and Finish Considerations
- Ensure candle wells are deep enough to securely hold candles
- Position wells away from edges to prevent heat damage or fire hazard
- Apply heat-resistant finishes or leave wells unfinished near flame
- Warn customers to never leave burning candles unattended
- Use only natural, non-toxic finishes approved for heat exposure
- Test prototypes with actual candles to verify safety before selling
- Include care instructions and safety warnings with each sale
Seasonal and Pricing Strategy
- Single pillar candle holders sell for $15-$30
- Multi-tea-light holders command $25-$50
- Elaborate centerpieces with multiple levels reach $50-$100
- Create seasonal inventory for holidays (Halloween, Christmas, Thanksgiving)
- Market for weddings, anniversaries, and romantic occasions
- Emphasize natural materials and handcrafted quality
- Bundle with candles for complete gift sets at premium pricing
- Target home décor stores, gift shops, and wedding venues
18. Wooden Desk Organizers
Wooden desk organizers bring order and natural aesthetics to workspaces while providing beginners with opportunities to create compartmentalized designs requiring precision and planning.
These functional pieces appeal to remote workers, students, and professionals seeking to declutter and beautify their work areas.
Basic Compartment Layout Design
- Create rectangular base measuring 10-16 inches wide, 6-8 inches deep
- Divide space into sections for different office supplies
- Include vertical pen/pencil holders with 1-inch diameter drilled holes
- Add shallow trays for paper clips, rubber bands, and small items
- Design slot for phone or tablet storage with viewing angle
- Include business card holder section with slight angle
- Create mail or document sorting vertical slots
Multi-Level and Drawer Options
- Stack two levels connected by dividers for increased storage capacity
- Install small sliding drawers for concealing less attractive supplies
- Create removable trays that lift out for flexible organization
- Add desktop shelf above organizer for additional display space
- Include cable management channels or holes for charging cords
- Design fold-out sections that expand workspace when needed
- Install magnetic strips for holding metal office supplies
Joinery and Construction Quality
- Use dado joints for strong, precise divider installation
- Reinforce corners with glue blocks or additional fasteners
- Ensure drawer slides operate smoothly with proper clearances
- Sand all interior surfaces to prevent snagging papers or supplies
- Create finger pulls or install small wooden knobs on drawers
- Test weight capacity of shelves and compartments before selling
- Apply durable finish that withstands daily handling and wear
Professional Market Positioning
- Basic organizers sell for $35-$65
- Multi-compartment designs with drawers command $60-$100
- Large executive organizers with premium woods reach $100-$175
- Market to remote workers setting up home offices
- Target students preparing for school or college
- Emphasize productivity benefits and workspace aesthetics
- Offer custom configurations for specific organizational needs
- Sell through office supply stores, furniture shops, and online
19. Wooden Trivets and Hot Pads
Wooden trivets protect countertops and tables from hot cookware while adding natural beauty to kitchens and dining spaces.
These heat-resistant platforms allow beginners to explore creative patterns, wood combinations, and construction techniques while producing practical items with gift-giving appeal.
Pattern and Design Construction
- Create simple grid patterns with alternating wood species
- Arrange strips in herringbone or chevron designs for visual interest
- Cut circular or hexagonal shapes for geometric variety
- Use contrasting woods (light maple with dark walnut) for dramatic effect
- Glue wood strips together tightly with weatherproof wood glue
- Clamp firmly and allow adequate drying time for strength
- Sand surface completely flat for stable pot placement
Heat Resistance and Functional Elements
- Select hardwoods with good heat resistance like oak, maple, or cherry
- Thickness of 3/4 to 1 inch provides adequate insulation
- Attach wooden feet, cork pads, or silicone bumpers to bottom for elevation
- Raised feet allow air circulation and protect surfaces
- Test heat tolerance with hot pots before declaring temperature limits
- Apply food-safe, heat-resistant finish or leave natural
- Ensure completely flat surface prevents pots from wobbling
Size and Shape Options
- Standard square trivets measure 8×8 to 10×10 inches
- Round trivets typically 8-10 inches diameter accommodate most pots
- Rectangular designs (12×8 inches) suit roasting pans and casseroles
- Create oversized trivets (14×14 inches) for large pots or centerpiece displays
- Mini trivets (4×4 inches) work for individual serving dishes or teapots
- Design nesting sets that stack for storage
Marketing and Pricing Approach
- Individual trivets sell for $15-$28
- Sets of 2-3 trivets command $35-$60
- Large or intricate pattern trivets reach $30-$50
- Market alongside cutting boards and kitchen accessories
- Target cooking enthusiasts and people who entertain frequently
- Emphasize protection of furniture and countertops
- Create seasonal designs for holiday entertaining
- Bundle with potholders or oven mitts for complete kitchen gift sets
20. Wooden Tablet or Laptop Stands
Wooden tablet and laptop stands address ergonomic needs while incorporating natural materials into tech-dominated workspaces.
These angled platforms elevate screens to comfortable viewing heights, reducing neck strain for remote workers and students while showcasing woodworking craftsmanship.
Ergonomic Design Considerations
- Optimal viewing angle is typically 15-20 degrees for laptops
- Stand height should elevate screen to eye level (6-8 inches for most users)
- Platform width must accommodate various laptop sizes (12-17 inches)
- Depth of 10-12 inches provides stable support without tipping
- Include lip or edge to prevent device from sliding forward
- Create adjustable angle options using multiple support positions
- Design foldable versions for portability and travel
Ventilation and Cable Management
- Drill ventilation holes or slots in platform to prevent device overheating
- Route cable channels through stand for organized cord management
- Create notch in back for charging cable to exit cleanly
- Include gaps or holes for device ports and connections
- Design platform with open area beneath for storage or airflow
- Consider adding USB hub integration for advanced functionality
- Ensure adequate space around device for heat dissipation
Material and Finish Selection
- Use stable hardwoods like oak, maple, or walnut that won’t warp
- Bamboo provides eco-friendly alternative with modern aesthetic
- Apply smooth, polished finish to prevent device scratching
- Add cork, felt, or rubber padding where devices rest
- Use non-slip material on bottom to prevent stand movement
- Create matte finish to avoid glare interfering with screen
- Consider wood species that complement tech device aesthetics
Sizing Options and Pricing
- Tablet stands (smaller, adjustable) sell for $25-$45
- Standard laptop stands command $40-$75
- Large adjustable stands with premium features reach $70-$120
- Multi-device stands accommodating laptop and phone sell for $60-$100
- Market to remote workers, students, and digital professionals
- Emphasize ergonomic health benefits and improved posture
- Target corporate buyers for employee wellness programs
- Sell through office supply stores, tech accessory shops, and online platforms
21. Wooden Bird Houses and Feeders
Wooden bird houses and feeders connect outdoor enthusiasts with nature while providing beginners with straightforward projects requiring basic construction skills.
These functional garden items appeal to environmentally conscious consumers and create recurring revenue through seasonal variations and regional bird species designs.
Basic Bird House Construction
- Standard house dimensions are 8-10 inches tall, 6-8 inches wide and deep
- Use cedar or redwood for natural rot and insect resistance
- Drill entrance hole sized for target bird species (1.25″ for wrens, 1.5″ for bluebirds)
- Position entrance hole 6-7 inches above floor for predator protection
- Create sloped roof with overhang to shed rain and protect entrance
- Include ventilation holes near roof line for air circulation
- Add drainage holes in floor to prevent water accumulation
Feeder Design Variations
- Platform feeders offer simple flat tray with raised edges
- Hopper feeders store seed in enclosed reservoir with dispensing opening
- Tube feeders protect seed from weather using clear plastic or glass tubes
- Suet feeders hold fat cakes with wire mesh or wooden slat design
- Include perches for birds to rest while feeding
- Create roof or cover to protect seed from rain and snow
- Design removable bottoms or sections for easy cleaning and refilling
Weather Protection and Maintenance
- Apply exterior wood stain or sealant to protect from elements
- Use galvanized or stainless steel hardware that won’t rust
- Design hinged or removable roof for annual cleaning access
- Avoid toxic paints or treatments that could harm birds
- Natural unstained cedar weathers attractively while remaining functional
- Create drainage and ventilation for bird health and comfort
- Include mounting hardware for posts, trees, or hanging installation
Species-Specific and Pricing Strategy
- Basic bird houses sell for $20-$40
- Decorative or large houses command $35-$65
- Bird feeders range from $25-$60 depending on capacity and design
- Create region-specific houses for local bird species
- Market to gardeners, nature lovers, and outdoor enthusiasts
- Emphasize wildlife conservation and habitat creation
- Partner with garden centers, nurseries, and wild bird supply stores
- Offer seasonal designs and limited editions for collector appeal
22. Wooden Soap Dishes
Wooden soap dishes solve the practical problem of soap residue while bringing natural aesthetics to bathrooms and kitchens.
These small, quick-to-produce items require minimal materials, making them ideal for using wood scraps while creating products with broad market appeal and healthy profit margins.
Slat Design Construction
- Cut 1/2 inch thick slats approximately 4-5 inches long
- Space slats 1/4 to 1/2 inch apart for water drainage
- Use 3-4 slats per dish for adequate support
- Attach slats to two crosspiece supports with waterproof glue
- Ensure level, even spacing between all slats
- Round top edges of slats for comfortable handling
- Create slight slope to encourage water drainage to one end
Solid Bottom with Drainage Grooves
- Start with solid piece of wood 4×3 inches, 3/4 inch thick
- Route parallel grooves 1/4 inch wide, 1/8 inch deep across surface
- Space grooves 1/2 inch apart for effective drainage
- Create small feet by routing shallow recess in bottom
- Round all edges and corners for refined appearance
- Sand grooves smooth to prevent soap catching
Water-Resistant Wood and Finishes
- Teak and cedar naturally resist moisture and decay
- Bamboo provides affordable, water-resistant alternative
- Apply multiple coats of waterproof polyurethane or marine varnish
- Tung oil provides natural water resistance with low-sheen finish
- Allow finish to cure completely before contact with wet soap
- Reapply finish periodically to maintain water protection
- Consider leaving some woods unfinished for natural antimicrobial properties
Marketing and Profit Margins
- Wooden soap dishes sell for $8-$18 each
- Premium woods or decorative designs command $15-$25
- Sets with matching accessories (toothbrush holders) sell for $25-$40
- Material cost is minimal, creating excellent profit margins
- Market alongside handmade soaps for natural bath product bundles
- Target eco-conscious consumers seeking plastic alternatives
- Sell at bath and body shops, farmers markets, and craft fairs
- Position as thoughtful host gifts or stocking stuffers
23. Wooden Address Number Plaques
Wooden address number plaques combine functionality with curb appeal, helping visitors locate homes while adding personality to exterior décor.
These customizable pieces allow beginners to practice precision layout and finishing while creating products with universal necessity and personalization premium.
Design Layout and Sizing
- Standard horizontal plaques measure 12-18 inches wide, 6-8 inches tall
- Vertical designs work well for narrow spaces beside doorways
- Allow adequate space around numbers for visual clarity and readability
- Use large, clear numbers at least 4 inches tall for street visibility
- Select legible fonts or numeral styles appropriate for home architecture
- Create border or frame around numbers for finished appearance
- Consider including street name beneath house numbers
Number Application Methods
- Paint numbers using stencils and exterior acrylic paint
- Route numbers into wood surface for dimensional appearance
- Apply vinyl number decals in contrasting colors
- Attach metal house numbers to wood backing
- Wood burn numbers for rustic, permanent marking
- Use laser engraving for precise, professional results
- Create raised numbers by attaching cut wooden numerals
Weather Resistance and Mounting
- Use cedar, redwood, or pressure-treated wood for outdoor durability
- Apply exterior-grade polyurethane, spar varnish, or marine finish
- Seal all edges thoroughly to prevent moisture penetration
- Install mounting holes with weatherproof hardware
- Add spacers behind plaque for air circulation and prevent water trapping
- Create slight overhang or angled mounting for rain runoff
- Include installation template and hardware with purchase
Customization and Pricing
- Basic number plaques sell for $25-$45
- Custom designs with family names command $40-$70
- Large or elaborate plaques reach $60-$100
- Offer full customization including wood type, stain color, and font choice
- Market to new homeowners, realtors for closing gifts, and home improvement customers
- Emphasize increased curb appeal and property value
- Target neighborhoods with HOA requirements for address displays
- Partner with real estate agents and home décor stores
24. Wooden Bottle Openers
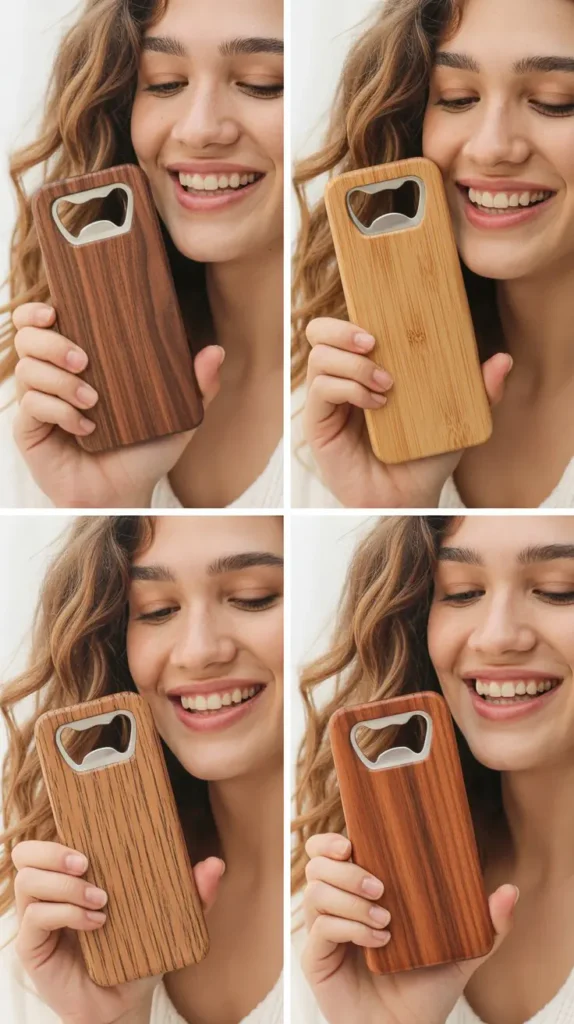
Wooden bottle openers merge practical bar tool functionality with handcrafted aesthetics, creating unique gifts and home accessories.
These compact projects require minimal materials while allowing creative shape exploration and personalization opportunities, making them ideal for beginners building diverse product lines.
Handle Design and Ergonomics
- Paddle-style handles measuring 6-8 inches long provide comfortable grip
- Width of 2-3 inches offers adequate surface for hand placement
- Create shaped handles with curves for natural grip contours
- Sand handles extensively smooth for comfort during use
- Round all edges to prevent hand fatigue or discomfort
- Design decorative cutouts or carved elements for visual interest
- Consider adding lanyard hole for hanging storage
Metal Insert Installation
- Purchase wall-mounted bottle opener hardware from hardware suppliers
- Recess metal opener into wood using router or chisel
- Ensure opener is perfectly flush or slightly recessed with wood surface
- Secure with heavy-duty wood screws or epoxy adhesive
- Position opener for leverage advantage during use
- Test functionality with actual bottles before finalizing design
- Consider magnetic cap catchers for wall-mounted versions
Personalization and Decorative Elements
- Wood burn names, initials, or humorous sayings onto handles
- Laser engrave custom logos for corporate promotional items
- Inlay contrasting wood species or metal accents
- Apply painted designs or sports team colors
- Create themed shapes (states, bottles, beer mugs) for targeted markets
- Add bottle cap holders or small shelves for functional wall units
- Include beer wisdom quotes or drinking-themed messages
Market Segments and Pricing
- Handheld bottle openers sell for $12-$25
- Wall-mounted designs command $18-$35
- Custom engraved corporate or wedding openers reach $20-$40
- Market to beer enthusiasts, home bar owners, and gift shoppers
- Target weddings as groomsmen gifts or party favors
- Sell at breweries, bars, liquor stores, and specialty gift shops
- Emphasize handcrafted quality over mass-produced alternatives
- Bundle with beer-related items like coasters for increased value
25. Wooden Napkin Rings
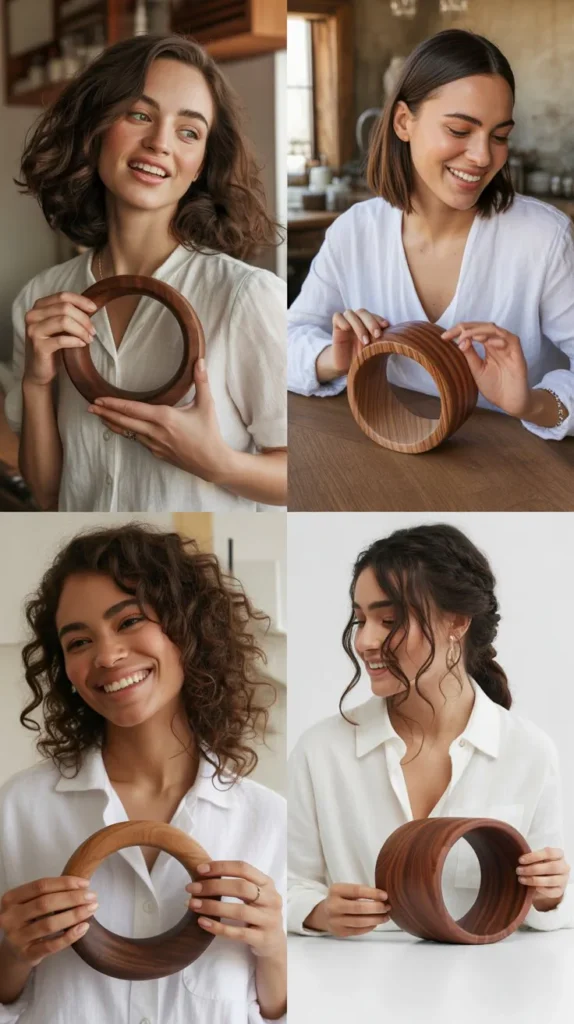
Wooden napkin rings elevate table settings while providing quick, material-efficient projects perfect for batch production.
These circular accessories allow beginners to practice lathe turning or circular cutting while creating seasonal inventory with strong gift-giving and wedding market appeal.
Lathe-Turned Ring Construction
- Turn 2-inch diameter cylinders on lathe from hardwood blanks
- Create decorative profiles with beads, coves, or tapered shapes
- Maintain consistent 1.5-1.75 inch interior diameter for napkin fit
- Width of 1.5-2 inches provides adequate napkin support
- Sand while spinning on lathe for ultra-smooth finish
- Part off individual rings using parting tool
- Polish with friction finish or sanding sealer while on lathe
Alternative Cutting Methods for Non-Lathe Makers
- Cut 2-inch thick slices from 4×4 or larger posts
- Mark 1.75 inch center circle and drill pilot hole
- Use hole saw or scroll saw to cut interior opening
- Sand interior opening smooth using dowel with sandpaper
- Shape exterior into circles, squares, or hexagons
- Route decorative edges around interior and exterior
- Create rustic versions from tree branch slices with bark
Decorative Variations and Finishes
- Apply contrasting stains to create striped or banded effects
- Wood burn patterns, monograms, or seasonal designs
- Wrap with twine, ribbon, or metal wire for embellishment
- Inlay contrasting wood strips or metal accents
- Paint with seasonal colors for holiday table settings
- Apply metallic wax or gilt for formal, elegant appearance
- Leave natural for organic, farmhouse aesthetic
Set Pricing and Seasonal Markets
- Sets of 4 napkin rings sell for $18-$35
- Sets of 6-8 rings command $30-$55
- Custom wedding or event sets range from $4-$8 per ring
- Create seasonal designs for holidays (fall leaves, snowflakes, hearts)
- Market to brides, event planners, and hospitality businesses
- Target home entertaining enthusiasts through lifestyle blogs
- Sell at wedding shows, home shows, and specialty gift boutiques
- Offer rental services for events and parties in local area
26. Wooden Business Card Holders
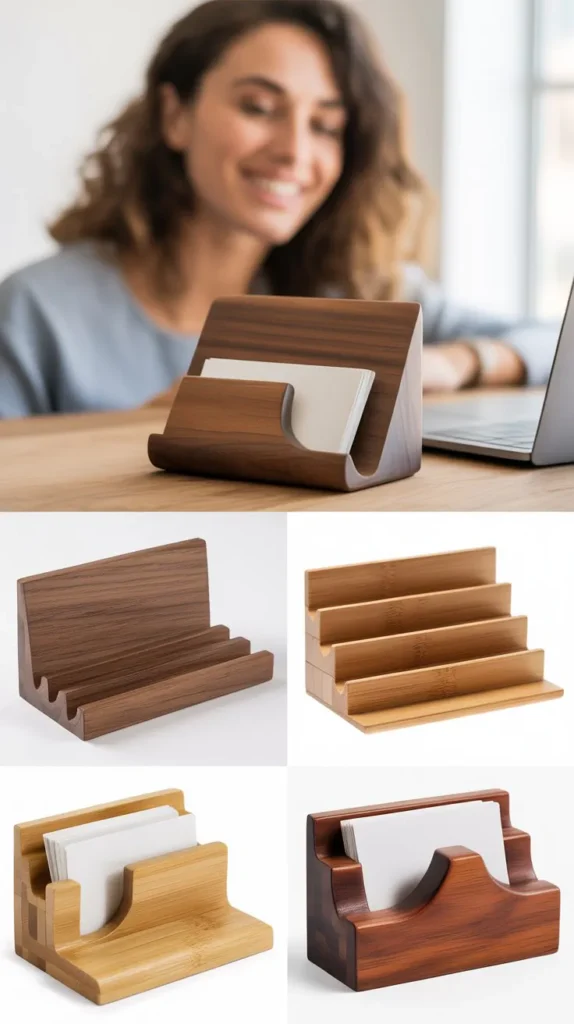
Wooden business card holders bring natural elegance to professional spaces while offering beginners straightforward projects requiring precision cutting and minimal materials.
These desk accessories serve practical networking functions while showcasing craftsmanship, making them valuable corporate gifts and office essentials.
Basic Angled Slot Design
- Create base block approximately 3×2 inches, 1-2 inches tall
- Cut slot at 60-70 degree angle for optimal card display visibility
- Slot width should be slightly wider than standard business card thickness (1/8 inch)
- Depth of 1/2 to 3/4 inch securely holds cards without tipping
- Position slot off-center toward back for stability
- Sand slot interior smooth to prevent card damage
- Round base edges for refined, professional appearance
Multi-Slot and Vertical Designs
- Create tiered designs with multiple slots at different heights
- Vertical holders display cards edge-on saving desk space
- Rotating cylinder designs allow access to multiple card types
- Add pen holder integration for comprehensive desk accessory
- Include business card storage compartment with sliding lid
- Design wall-mounted versions for reception areas
- Create matching sets for coordinated office aesthetics
Professional Finishing and Branding
- Select professional woods like walnut, cherry, or maple
- Apply satin or semi-gloss finish for refined, business-appropriate appearance
- Laser engrave company logos for corporate branded gifts
- Add name plates or personalized engraving for executives
- Create two-tone designs with contrasting wood species
- Apply felt or cork bottom to protect desk surfaces
- Include company information or contact details for promotional use
Corporate Market and Pricing
- Basic single-slot holders sell for $15-$30
- Multi-slot or integrated designs command $25-$50
- Custom branded corporate holders reach $30-$60
- Market to businesses for employee gifts and client appreciation
- Target networking events, trade shows, and professional conferences
- Sell through office supply stores and corporate gift catalogs
- Offer bulk pricing for large corporate orders
- Partner with print shops that produce business cards
27. Wooden Wall Hooks and Coat Racks
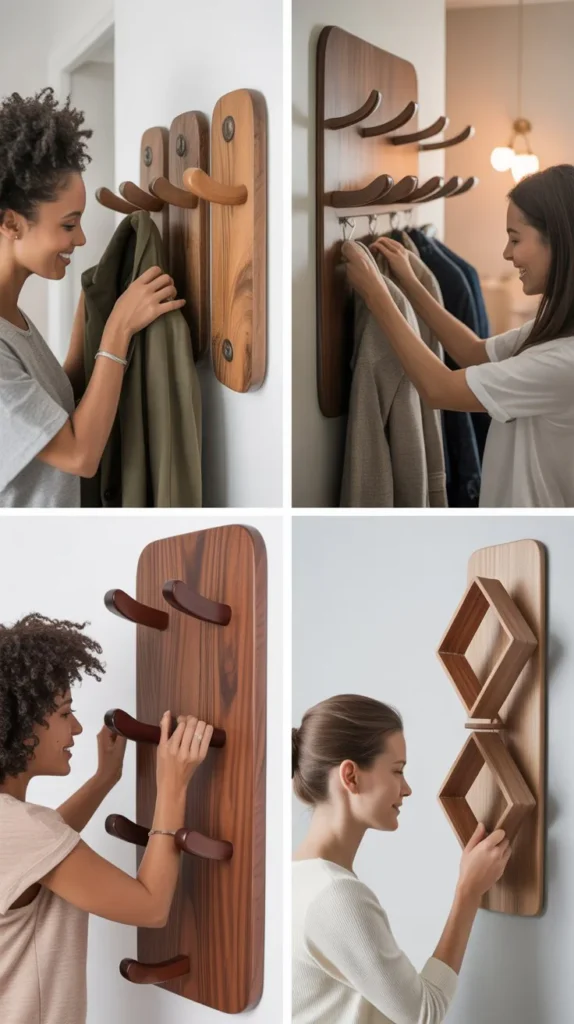
Wooden wall hooks and coat racks provide essential storage solutions while adding decorative elements to entryways, mudrooms, and bedrooms.
These functional projects range from simple single-hook designs to elaborate multi-hook racks, offering beginners versatile products with strong market demand across residential and commercial sectors.
Single and Double Hook Designs
- Cut backplates in decorative shapes (houses, trees, states, animals)
- Standard backplate size is 6-12 inches wide, 8-10 inches tall
- Attach single large hook or double hooks 4-6 inches apart
- Use metal coat hooks, railroad spikes, or carved wooden pegs
- Drill pilot holes and countersink for clean screw installation
- Ensure hooks project 2-3 inches from wall for functional hanging
- Add decorative elements like wood burning or painted details
Multi-Hook Coat Rack Construction
- Create horizontal boards 24-48 inches long, 4-8 inches tall
- Space 3-5 hooks evenly across length for balanced appearance
- Use live-edge slabs for rustic, natural aesthetic
- Install shelf above hooks for additional storage capacity
- Add bottom shelf or small drawer for keys and accessories
- Consider vertical designs for narrow spaces
- Include number designations or name plates above each hook
Mounting Hardware and Installation
- Attach keyhole hangers or French cleats for secure wall mounting
- Use heavy-duty screws or anchors rated for expected weight
- Provide mounting template showing exact hole positions
- Include all necessary hardware and detailed instructions
- Ensure mounting method accommodates wall type (drywall, plaster, concrete)
- Design for mounting directly to wall studs when possible
- Add decorative bracket supports for heavy-duty applications
Market Applications and Pricing
- Single hook designs sell for $15-$30
- Multi-hook racks (3-5 hooks) command $40-$85
- Large entryway racks with shelves reach $80-$150
- Market to homeowners organizing mudrooms and entryways
- Target schools, offices, and commercial spaces needing coat storage
- Emphasize space-saving vertical storage solutions
- Create themed designs for children’s rooms (animals, sports, hobbies)
- Offer custom sizing and hook quantities for specific spaces
28. Wooden Pencil or Pen Holders
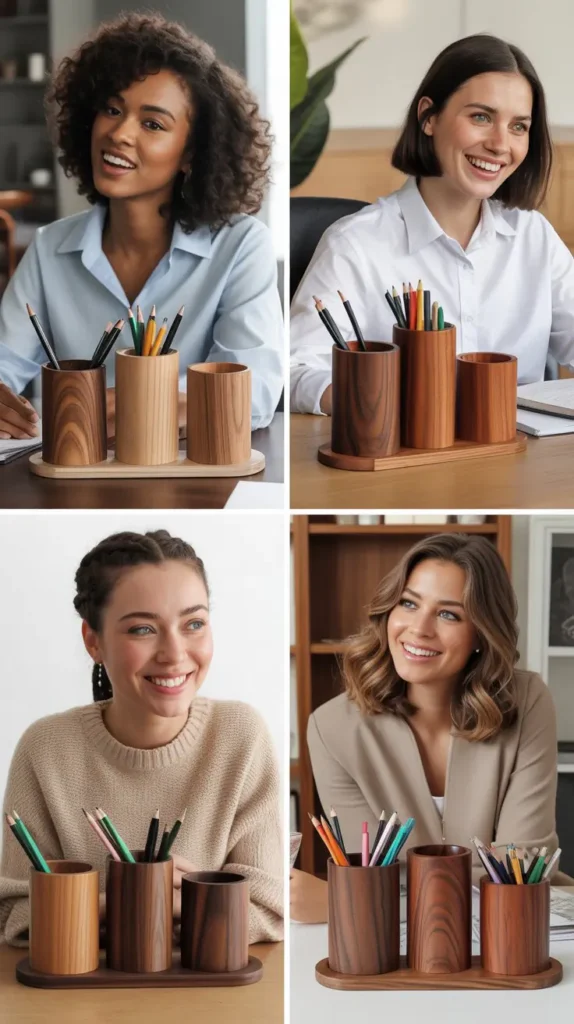
Wooden pencil and pen holders bring organized elegance to desks while offering beginners straightforward projects utilizing wood scraps and basic drilling techniques.
These compact accessories serve universal need for writing instrument storage while allowing creative customization for various market segments.
Cylinder and Block Designs
- Use 3-4 inch diameter wood rounds cut to 4-5 inch height
- Drill 1/2 inch diameter holes 2-3 inches deep for writing instruments
- Space holes approximately 3/4 inch apart in symmetrical pattern
- Sand interior of holes smooth to prevent instrument scratching
- Create stable base with flat, level bottom cut
- Add weight to bottom for stability if needed
- Route decorative grooves or create carved details on exterior
Multi-Compartment Organizers
- Design rectangular blocks with sections for different supplies
- Include larger compartment for scissors, rulers, or markers
- Add shallow tray section for paper clips and rubber bands
- Create angled slots for better visibility of contents
- Install dividers using dado joints or glued partitions
- Incorporate business card holder or phone stand sections
- Design stackable units for modular organization
Personalization and Decoration
- Wood burn names, initials, or inspirational quotes
- Laser engrave school logos or company branding
- Apply chalk paint allowing customizable labeling
- Create themed designs (sports, hobbies, professions)
- Inlay contrasting wood species for decorative accents
- Add carved relief designs or router patterns
- Apply student-safe, non-toxic finishes for school use
Educational and Office Markets
- Basic pen holders sell for $12-$22
- Multi-compartment organizers command $20-$40
- Custom branded holders for corporations reach $25-$50
- Market to students, teachers, and office workers
- Target back-to-school shopping season for peak sales
- Sell through office supply stores and school supply shops
- Offer bulk pricing for classroom sets or corporate orders
- Create teacher appreciation gift sets with personalization
29. Wooden Photo Ledges
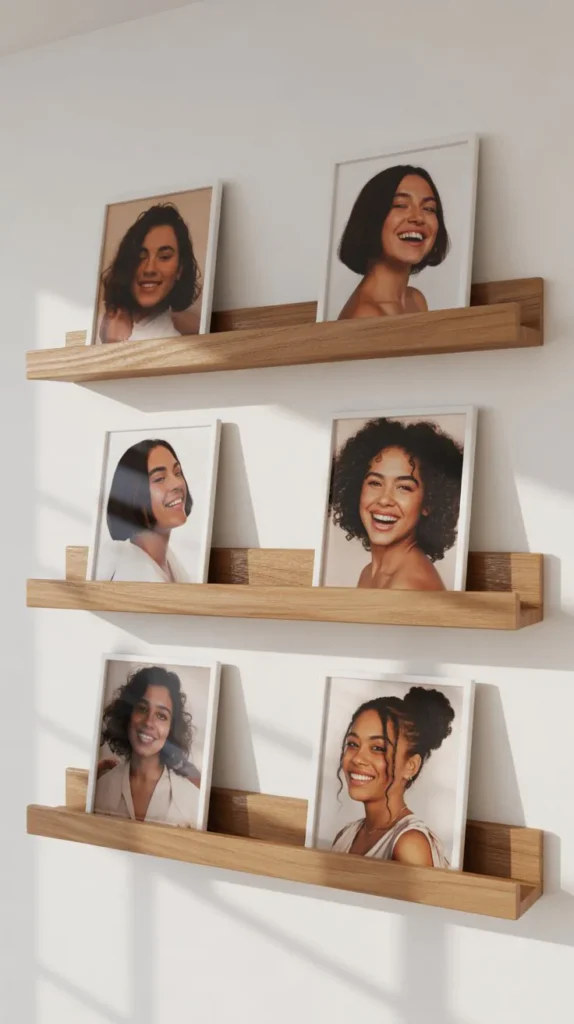
Wooden photo ledges provide versatile display solutions for rotating artwork, photos, and decorative objects without permanent wall damage.
These simple shelf-with-lip designs allow beginners to practice straight cutting and finishing while creating popular home décor items with broad market appeal.
Basic Ledge Construction
- Cut shelf boards to desired lengths (common sizes: 24″, 36″, 48″)
- Use 1×4 or 1×6 boards for adequate display depth
- Attach 1×2 lip along front edge with glue and finishing nails
- Lip should project 1/2 to 3/4 inch above shelf surface
- Sand all surfaces smooth, paying attention to lip joint
- Create perfectly straight, level shelves for proper item display
- Round front edges of lip slightly for refined appearance
Wall Mounting Systems
- Route keyhole slots in back for hidden hardware mounting
- Attach French cleat system for secure, adjustable positioning
- Install Z-clips or sawtooth hangers for simple installation
- Provide wall anchors and screws appropriate for drywall
- Include mounting template showing exact positions
- Design for mounting to wall studs when possible for weight capacity
- Add felt or cork pads where ledge contacts wall
Design Variations and Finishes
- Create sets of 2-3 ledges in graduated lengths
- Apply various stain colors to match different décor styles
- Leave natural for Scandinavian minimalist aesthetic
- Paint in trendy colors (navy, sage green, charcoal gray)
- Use reclaimed wood for rustic, vintage appearance
- Add decorative carved or routed details along edge
- Create live-edge versions with natural bark on front lip
Display Versatility and Pricing
- 24-inch ledges sell for $20-$35
- 36-inch ledges command $28-$45
- 48-inch ledges range from $35-$55
- Sets of 3 graduated ledges reach $70-$120
- Market as alternative to picture frames for rotating displays
- Target renters who want damage-free decorating options
- Emphasize versatility for photos, art prints, plants, and collectibles
- Create seasonal styling content showing various arrangement ideas
30. Wooden Recipe Card Boxes
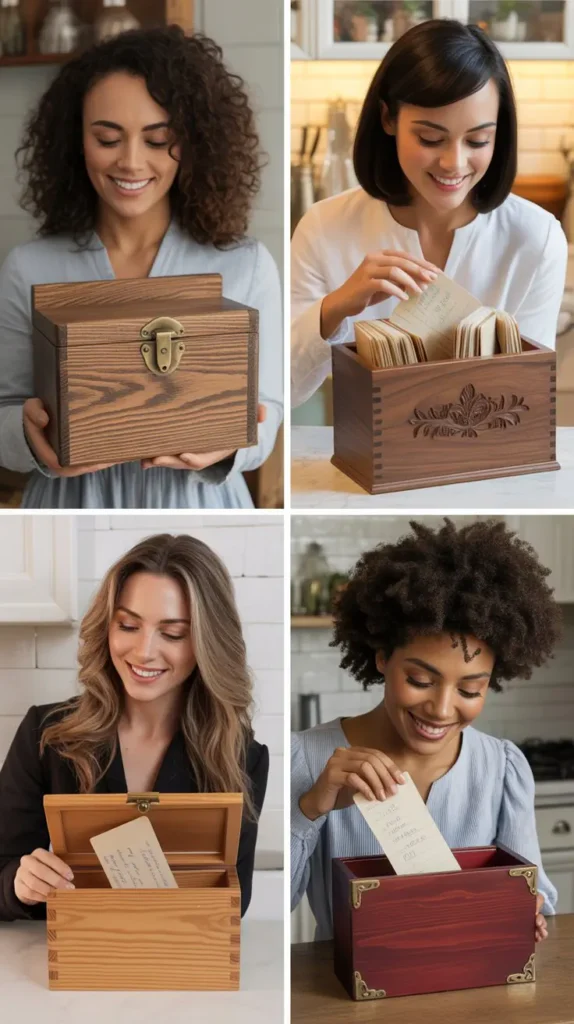
Wooden recipe card boxes preserve family culinary traditions while providing organized storage for treasured recipes.
These functional keepsakes combine simple box construction with personalization opportunities, creating meaningful gifts for weddings, housewarmings, and holidays while allowing beginners to practice fundamental woodworking skills.
Box Dimensions and Construction
- Standard recipe card box holds 4×6 inch cards measuring approximately 7x5x4 inches
- Use 1/2 inch thick wood for sides and 1/4 inch plywood for bottom
- Join corners with simple butt joints, finger joints, or box joints
- Create lid using hinged design or removable sliding cover
- Ensure interior dimensions accommodate recipe cards with easy access
- Cut groove in bottom edges to accept sliding bottom panel
- Sand interior smooth to prevent card damage
Interior Organization Features
- Create removable dividers labeled with recipe categories
- Include alphabetical tabs for easy recipe location
- Design slots for dividers to maintain organized sections
- Add recipe card starter set with purchase for immediate use
- Include lined card pockets inside lid for favorite recipes
- Create small drawer or compartment for pens and notes
- Design angled interior for better card visibility
Personalization and Decorative Elements
- Laser engrave “Family Recipes” or custom family names on lid
- Wood burn decorative kitchen motifs (utensils, vegetables, herbs)
- Apply chalk paint for customizable labeling surface
- Inlay contrasting wood patterns or decorative borders
- Add brass corner protectors or decorative hardware
- Include recipe card templates printed on quality card stock
- Create themed designs for specific cuisines or cooking styles
Gift Market and Pricing
- Basic recipe boxes sell for $35-$60
- Personalized boxes with engraving command $45-$80
- Premium hardwood boxes with elaborate details reach $70-$120
- Market as wedding gifts emphasizing tradition and family
- Target bridal showers, housewarmings, and Mother’s Day shoppers
- Bundle with recipe cards, dividers, and cookbook for complete gift set
- Emphasize heirloom quality meant to pass through generations
- Partner with kitchen stores, cooking schools, and gift boutiques
Conclusion
“30 Easy Wood Crafts Beginners Can Make and Sell” has provided you with a comprehensive roadmap to launch your woodworking side business with confidence and creativity.
Each project in this guide has been carefully selected to balance beginner accessibility with market demand, ensuring you can start producing saleable items immediately while progressively developing your skills.
From the practical functionality of cutting boards and phone stands to the decorative appeal of floating shelves and wooden signs, you now have thirty proven products that customers actively seek and purchase.
Remember that success in selling wood crafts comes not just from quality craftsmanship but also from understanding your target market, creating consistent branding, and providing excellent customer service.
Start with one or two projects that excite you most, perfect your technique, and gradually expand your product line as your confidence and skills grow.
Invest in quality tools as your budget allows, always prioritize safety, and don’t be afraid to put your unique creative spin on these classic designs.
The woodworking community is welcoming and supportive, so seek out local makers, join online forums, and continuously learn from others’ experiences.
Whether you’re building a full-time business or simply enjoying a profitable hobby, the satisfaction of creating beautiful, functional items with your own hands while earning income is truly rewarding.
Take that first step today—select your first project, gather your materials, and begin your journey as a woodworking entrepreneur.
Your handcrafted wooden creations are waiting to find homes with customers who value quality, craftsmanship, and the timeless beauty of natural wood.