Transform your ordinary hair routine into something magical with these delightful and achievable hairstyles that anyone can master.
Whether you’re heading to work, a special event, or just want to add some playful charm to your everyday look, these 30 Easy Whimsical Hairstyles Anyone Can Do will become your go-to styling guide.
From braids that look complex but take minutes to create, to updos that add instant elegance, each style is designed to be both beautiful and manageable for all skill levels.
This comprehensive guide covers everything from bohemian-inspired looks to fairy-tale worthy styles, ensuring you’ll never run out of creative hair inspiration again.
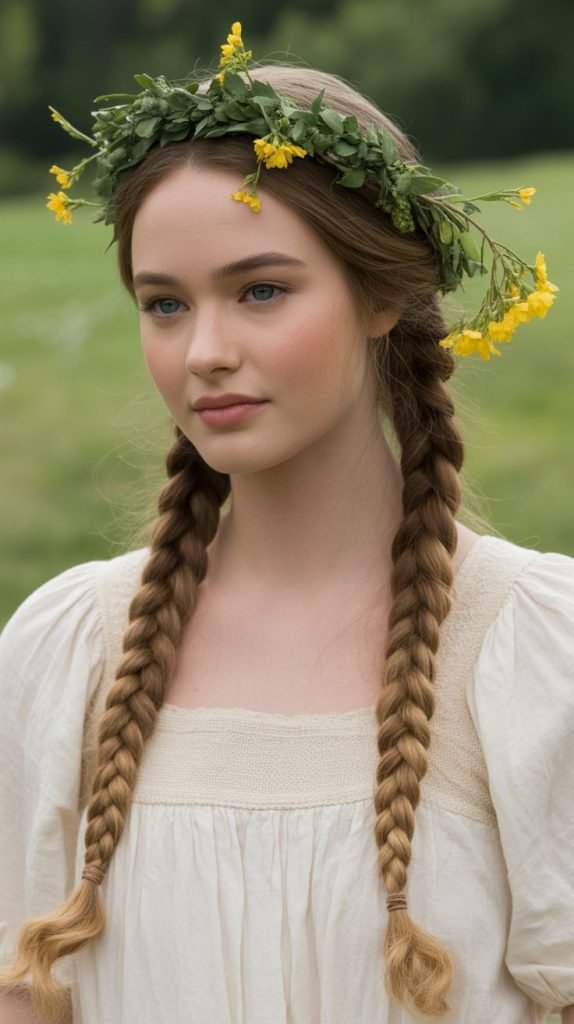
1. Fairy Braid Crown
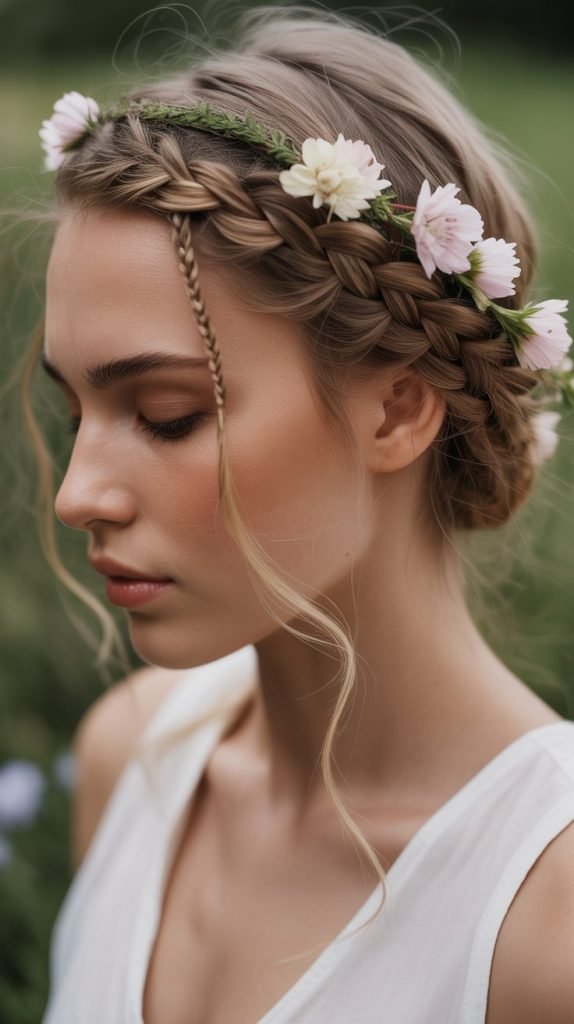
The fairy braid crown creates an ethereal, princess-like appearance that’s surprisingly simple to achieve.
This romantic style works beautifully for weddings, festivals, or whenever you want to feel like you’ve stepped out of a storybook.
The technique involves creating loose braids around your hairline that meet at the back of your head.
Steps:
- Part your hair down the middle and section off the front portions on both sides
- Begin a loose three-strand braid starting from your left temple, incorporating small sections of hair as you go
- Continue braiding along your hairline, keeping the braid loose and slightly messy for a whimsical effect
- Repeat on the right side, mirroring the left braid
- Secure both braids at the nape of your neck with a clear elastic
- Gently pull at the braid sections to create volume and texture
- Pin any loose pieces with bobby pins that match your hair color
2. Messy Space Buns
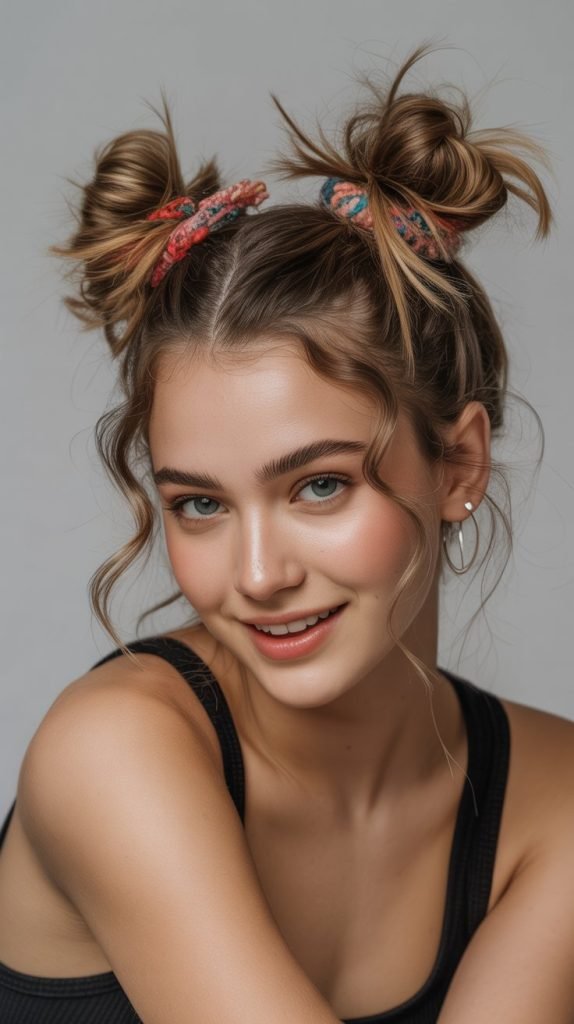
Space buns bring out your playful side while maintaining an effortlessly chic appearance.
This trendy style gained popularity through social media and works perfectly for casual outings, music festivals, or when you want to channel your inner free spirit.
The key is embracing the “perfectly imperfect” aesthetic.
Steps:
- Create a center part from your forehead to the nape of your neck
- Gather the left section of hair high on your head, about 2 inches above your ear
- Secure with an elastic, leaving the ends loose to create texture
- Twist the loose ends around the base of the ponytail, securing with bobby pins
- Repeat on the right side, ensuring both buns are at the same height
- Gently pull at sections of each bun to create volume and messiness
- Leave some face-framing pieces loose for a softer look
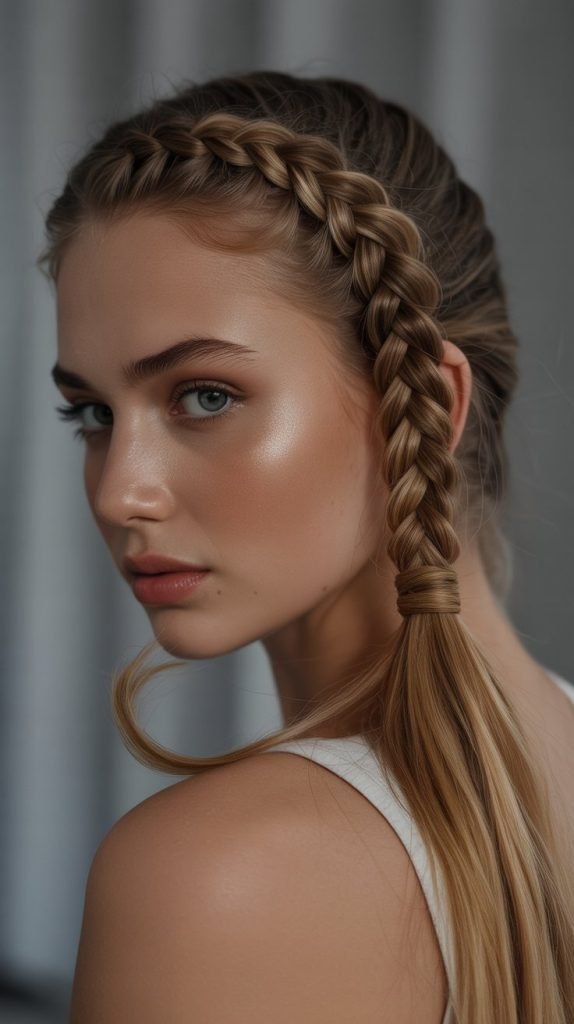
3. Waterfall Braid
The waterfall braid creates the illusion of hair cascading like a gentle waterfall while maintaining an intricate braided pattern.
This romantic style is perfect for special occasions and photographs beautifully from every angle.
Despite its complex appearance, it’s quite manageable once you understand the basic technique.
Steps:
- Start with slightly textured hair for better grip and longevity
- Begin a regular three-strand braid near your left temple
- After crossing the top strand over the middle, drop it completely and pick up a new section from the top of your head
- Continue this pattern, always dropping the top strand and picking up new hair
- Work your way around your head, maintaining even tension throughout
- Secure the end with a small clear elastic when you reach your right ear
- Gently loosen the braid for a more relaxed, whimsical appearance
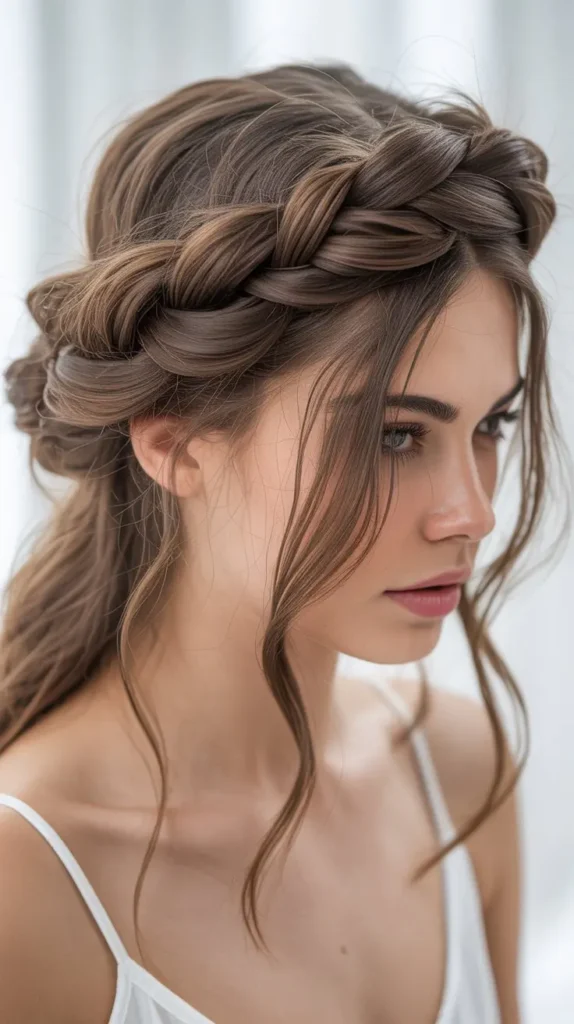
4. Twisted Halo
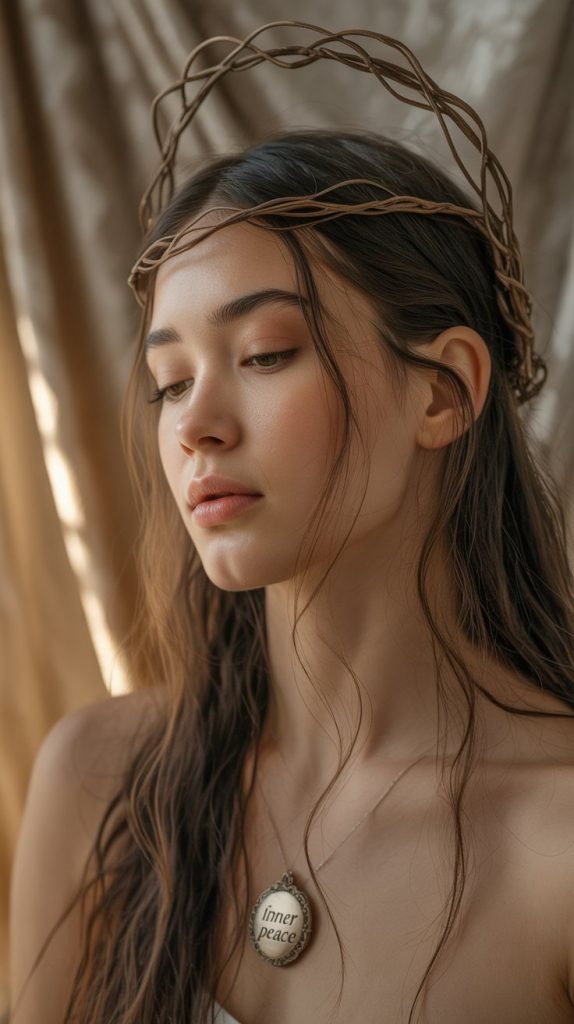
The twisted halo creates an angelic frame around your face while keeping hair elegant and controlled.
This versatile style works equally well for professional settings and romantic occasions.
The technique involves creating twisted sections that wrap around your head like a natural crown.
Steps:
- Part your hair deeply on one side for maximum impact
- Take a 2-inch section from the heavy side of your part near your hairline
- Twist this section away from your face while gradually adding more hair
- Continue twisting around your head, following your natural hairline
- Secure the twisted section behind your opposite ear with bobby pins
- Repeat on the lighter side of your part if desired for symmetry
- Finish with a light-hold hairspray to maintain the style throughout the day
5. Bubble Ponytail
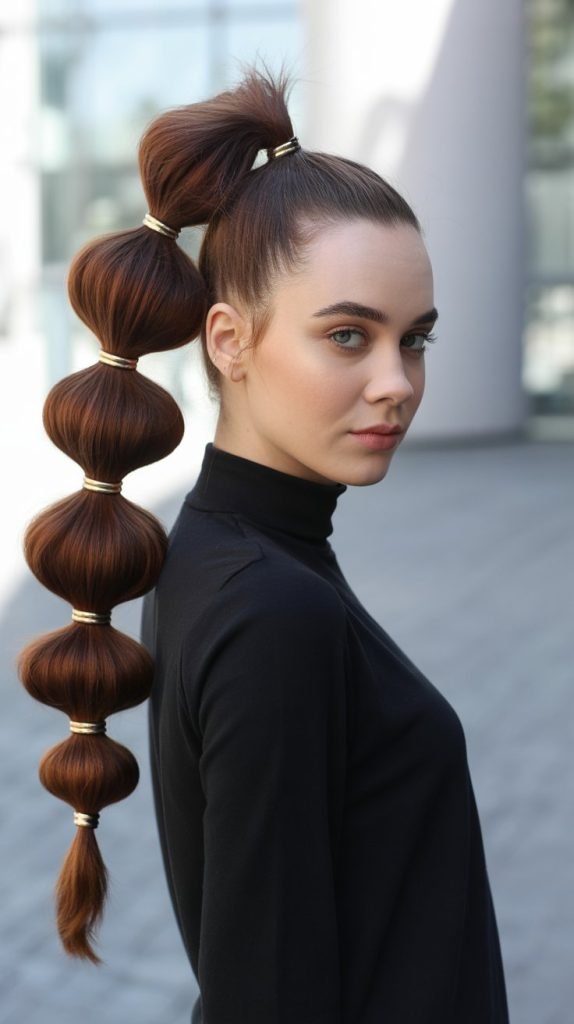
The bubble ponytail transforms a basic ponytail into a playful, dimensional style that looks far more complex than it actually is.
This modern twist on a classic style works beautifully for both casual and dressy occasions.
The technique creates distinct “bubbles” along the length of your ponytail.
Steps:
- Gather your hair into a high ponytail and secure with a strong elastic
- Measure about 3 inches down from the base and add another clear elastic
- Gently pull at the hair between the elastics to create the first bubble
- Continue adding elastics every 3 inches down the length of your ponytail
- Create bubbles by gently pulling at each section until they’re evenly sized
- Adjust the volume of each bubble to create a balanced, whimsical appearance
- Finish by curling the ends of your ponytail for added movement
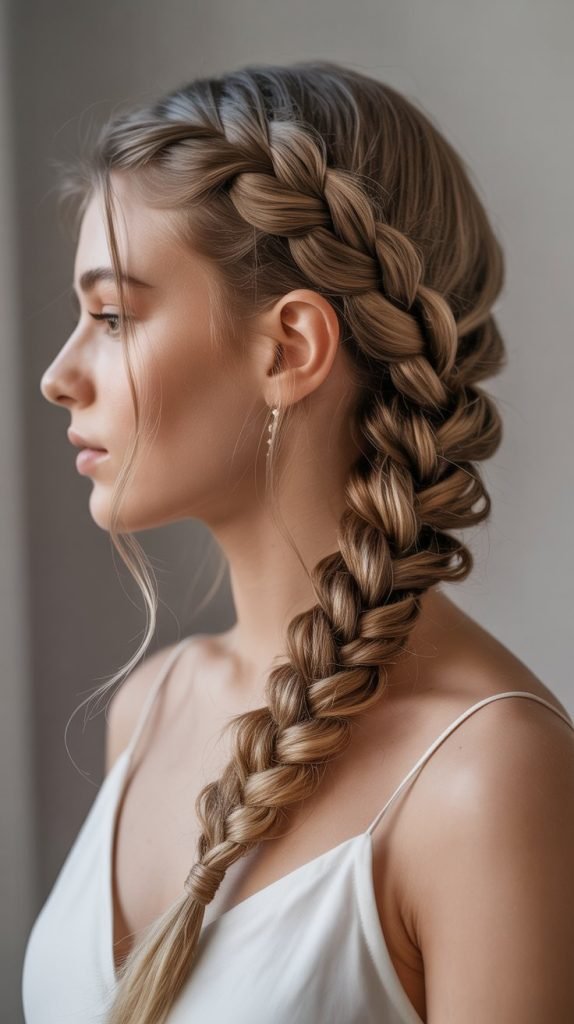
6. Bohemian Side Braid
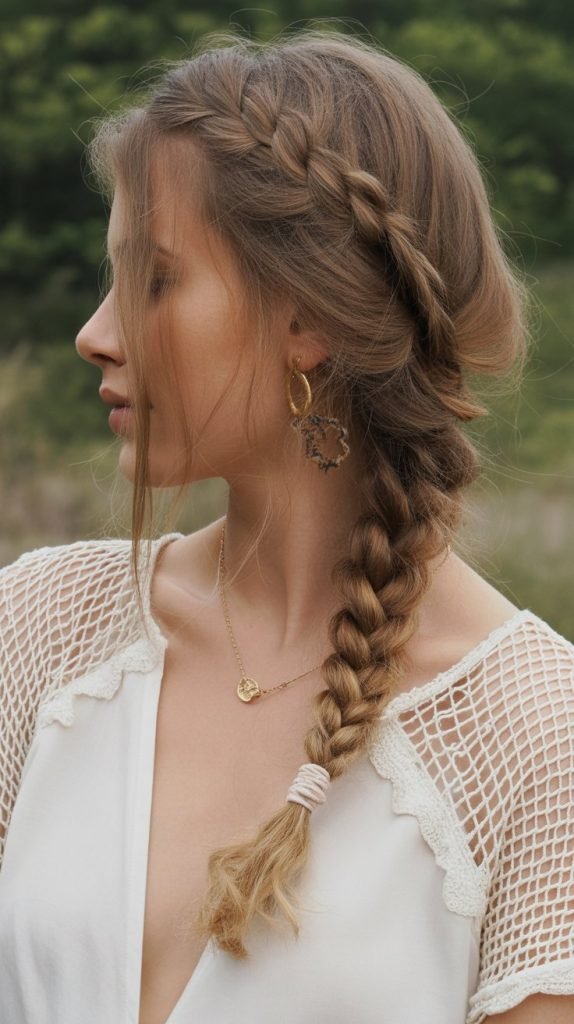
The bohemian side braid embodies free-spirited elegance with its relaxed, textured appearance.
This effortlessly romantic style works perfectly with wavy or textured hair and suits various face shapes.
The key is maintaining a loose, undone quality that looks naturally beautiful.
Steps:
- Apply texturizing spray to clean, dry hair for better grip and volume
- Create a deep side part and gather all hair to your preferred shoulder
- Begin a loose three-strand braid, leaving the tension deliberately relaxed
- Incorporate varying sizes of hair sections to create an organic, uneven texture
- Continue braiding to about 2 inches from the ends and secure with a clear elastic
- Gently pull at random sections of the braid to increase volume and texture
- Leave some shorter pieces around your face loose for a softer frame
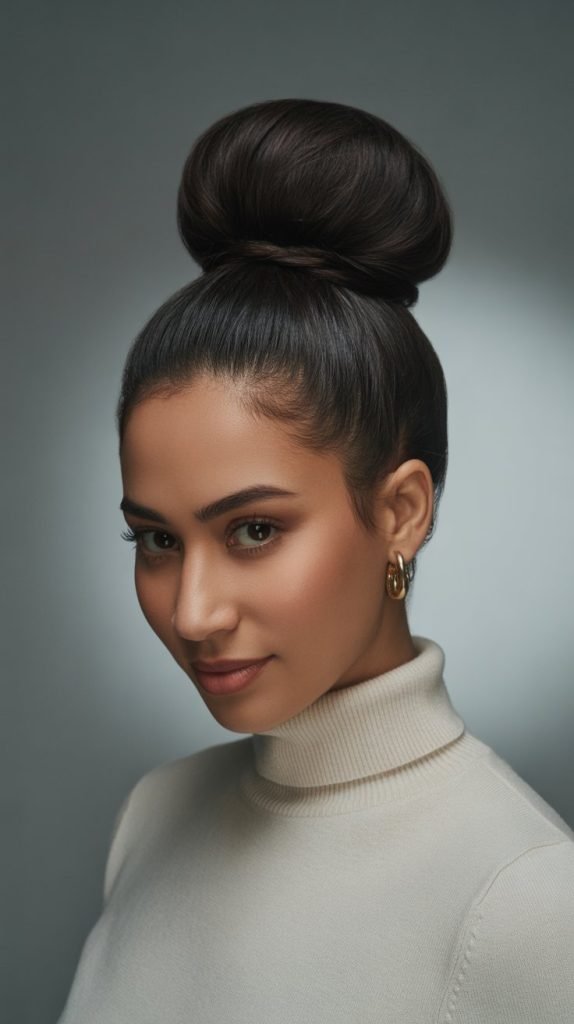
7. Top Knot with Face-Framing Pieces
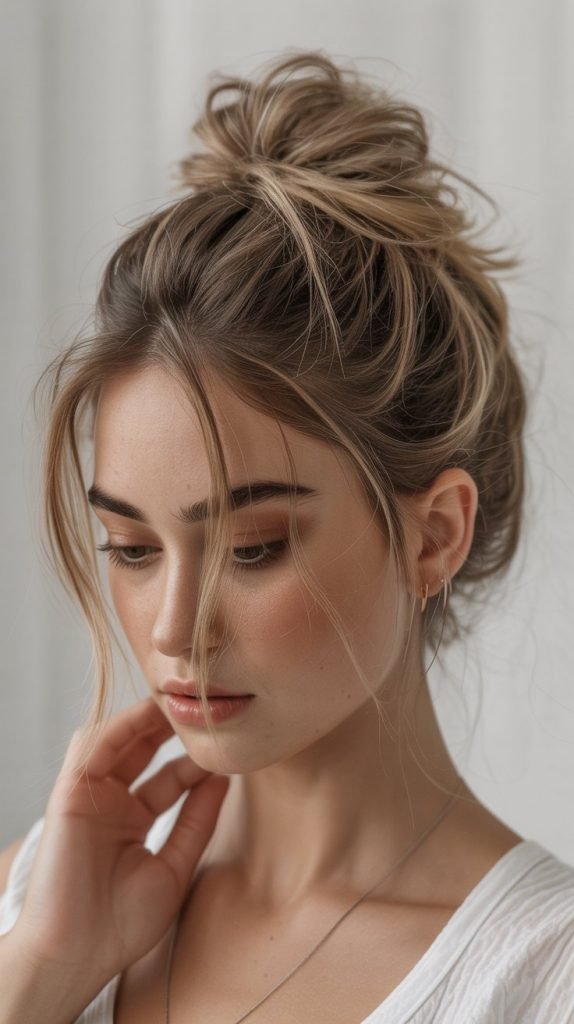
The top knot with face-framing pieces combines practical styling with feminine softness.
This versatile updo keeps hair out of your way while maintaining an approachable, romantic appeal.
The strategic placement of loose pieces creates movement and prevents the style from looking too severe.
Steps:
- Gather your hair into a high ponytail, leaving 1-inch sections loose around your face
- Twist the ponytail loosely and wrap it around the base to form a bun
- Secure with bobby pins, allowing some pieces to stick out for texture
- Gently pull at the bun to create volume and a slightly messy appearance
- Use a large barrel curling iron to add gentle waves to the face-framing pieces
- Finish with texturizing spray for hold and movement
- Adjust loose pieces as needed throughout the day for maintained softness
8. Dutch Braid Pigtails
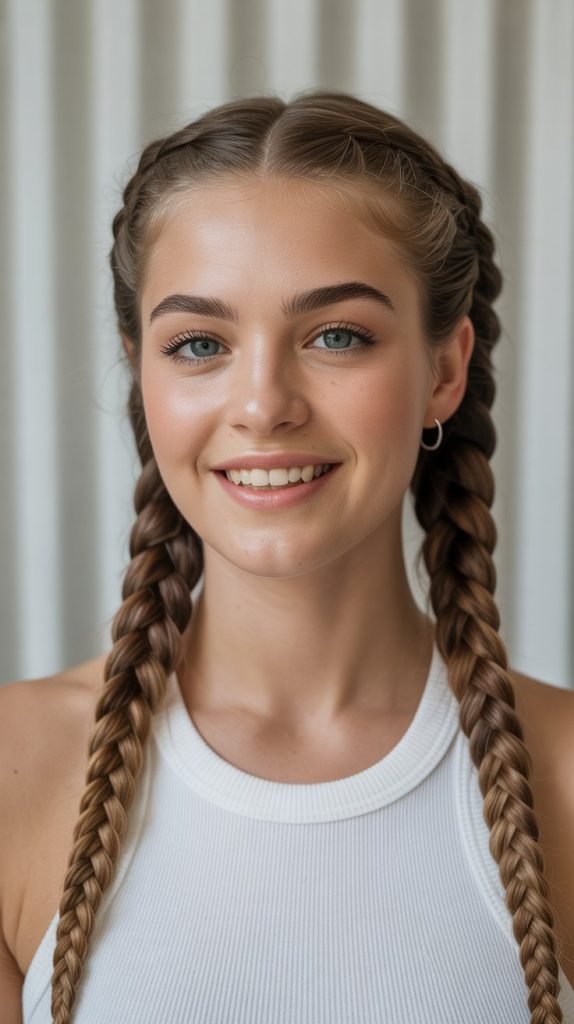
Dutch braid pigtails offer a playful twist on traditional braids by creating raised, three-dimensional patterns.
This youthful style works wonderfully for active days, festivals, or when you want to embrace your inner child.
The inside-out braiding technique makes the braids appear to sit on top of your head.
Steps:
- Create a clean center part from forehead to neck
- Begin with the left section, taking a 2-inch piece at your hairline
- Cross the side strands under the middle strand instead of over
- Add hair to the outer strands with each cross, maintaining the under-over pattern
- Keep consistent tension to ensure the braid maintains its raised appearance
- Continue to the nape of your neck and finish with a regular braid
- Repeat on the right side, ensuring both braids are symmetrical
- Secure ends with colorful elastics that complement your outfit
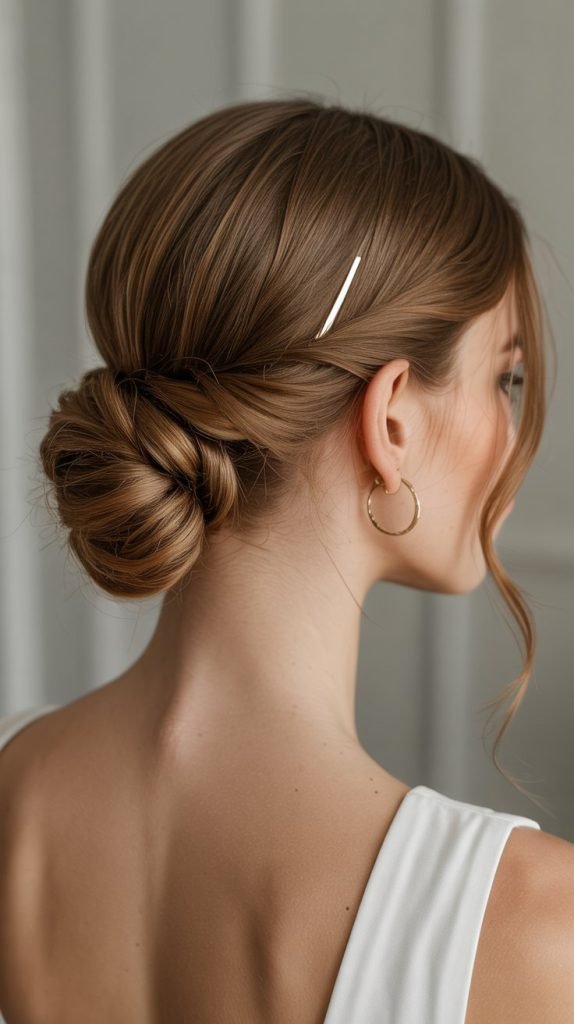
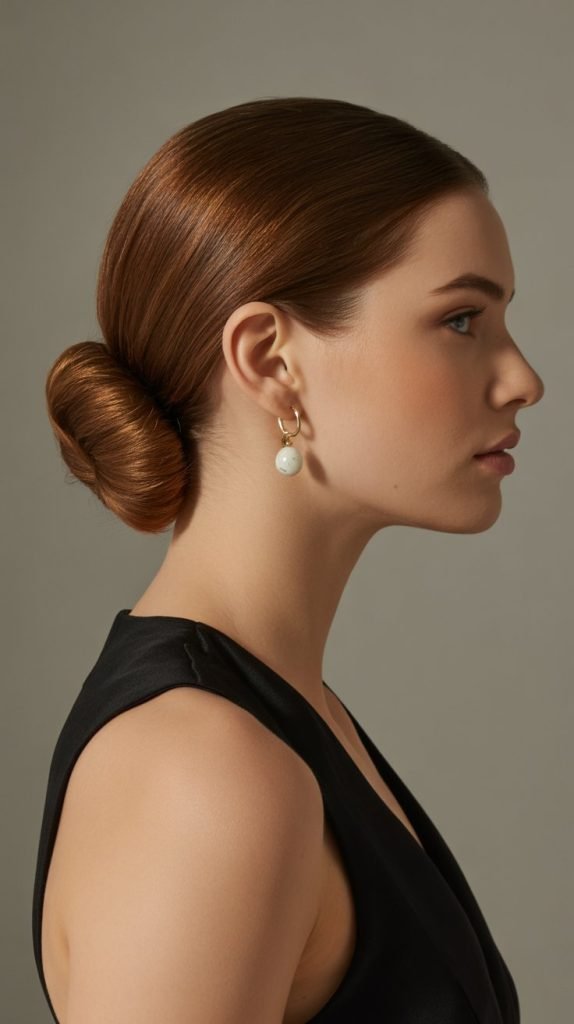
9. Romantic Low Bun
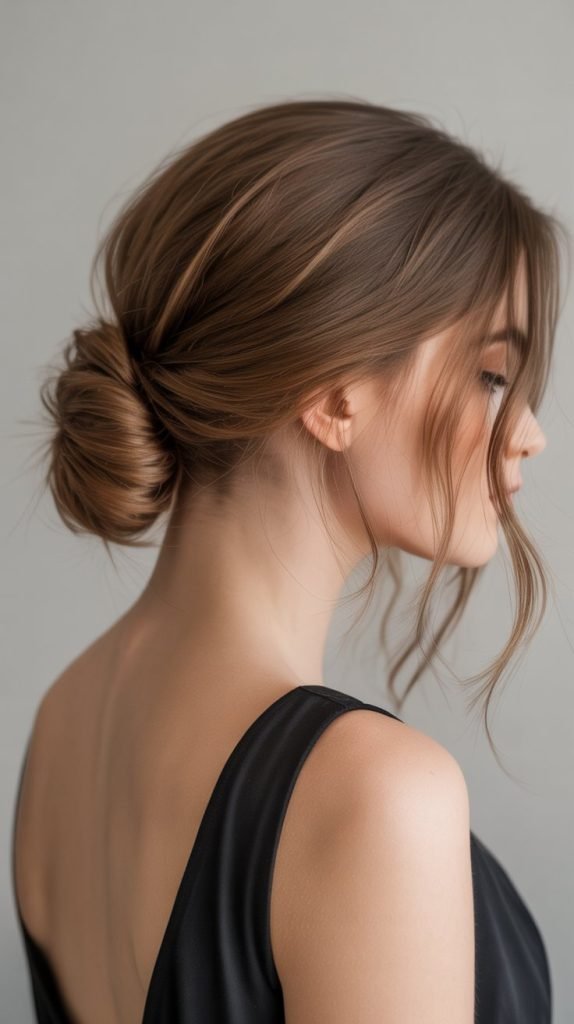
The romantic low bun exudes timeless elegance while remaining surprisingly simple to create.
This sophisticated style works perfectly for weddings, date nights, or professional events where you want to look polished yet approachable.
The key lies in creating soft texture and strategic looseness.
Steps:
- Start with day-old hair or use dry shampoo for better texture and grip
- Create loose waves throughout your hair using a large barrel curling iron
- Gather hair loosely at the nape of your neck, allowing for some natural volume
- Twist the gathered hair and wrap it into a low, loose bun shape
- Secure with bobby pins that match your hair color, hiding them within the bun
- Gently pull at sections around your crown to create soft volume
- Allow a few pieces to fall naturally around your face and neck
- Finish with a flexible hold hairspray to maintain the style without stiffness
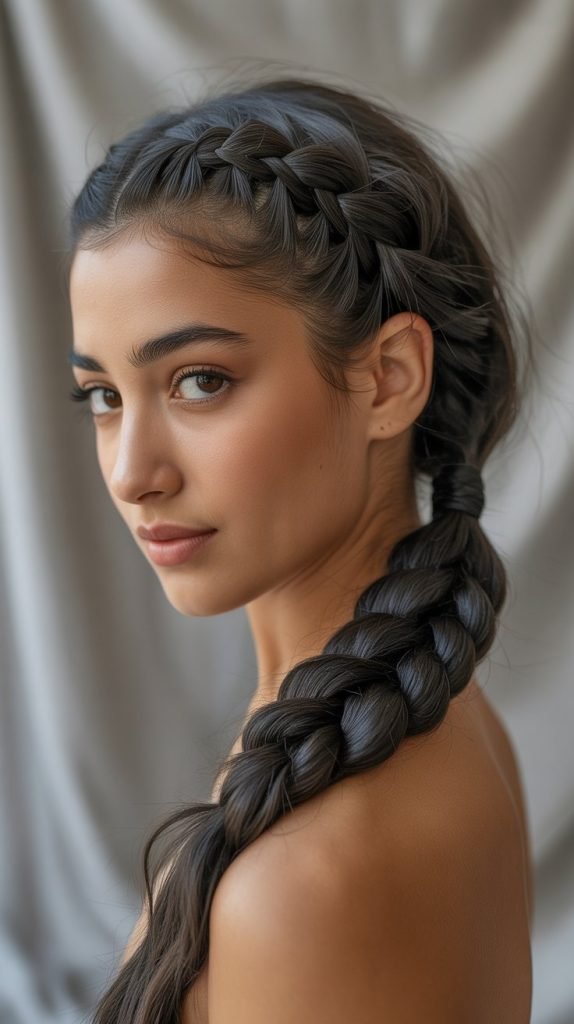
10. Fishtail Side Ponytail
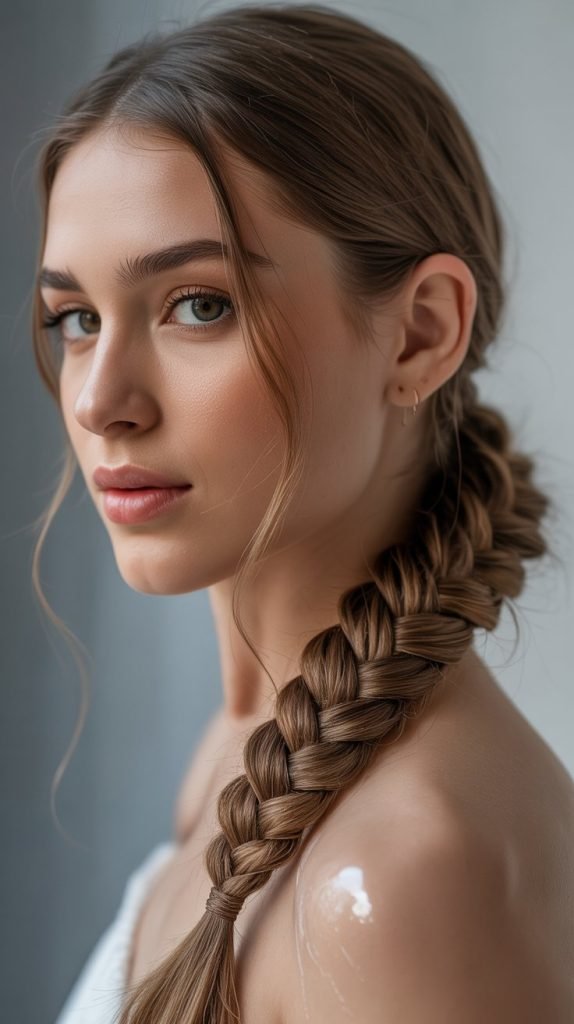
The fishtail side ponytail combines the intricate beauty of fishtail braiding with the practicality of a ponytail.
This elegant style creates visual interest through its detailed weaving pattern while keeping hair contained and manageable.
The side placement adds asymmetrical appeal that’s both modern and romantic.
Steps:
- Gather all hair to one side at the base of your neck behind your ear
- Secure with an elastic, then divide the ponytail into two equal sections
- Take a thin strand from the outside of the left section and cross it over to the right section
- Take a thin strand from the outside of the right section and cross it to the left
- Continue this alternating pattern, keeping the strands thin for intricate detail
- Maintain consistent tension throughout to ensure an even, tight braid
- Secure the end with a clear elastic and gently pull at the braid edges to add width
- Consider wrapping a small section of hair around the base elastic to hide it
11. Half-Up Twist
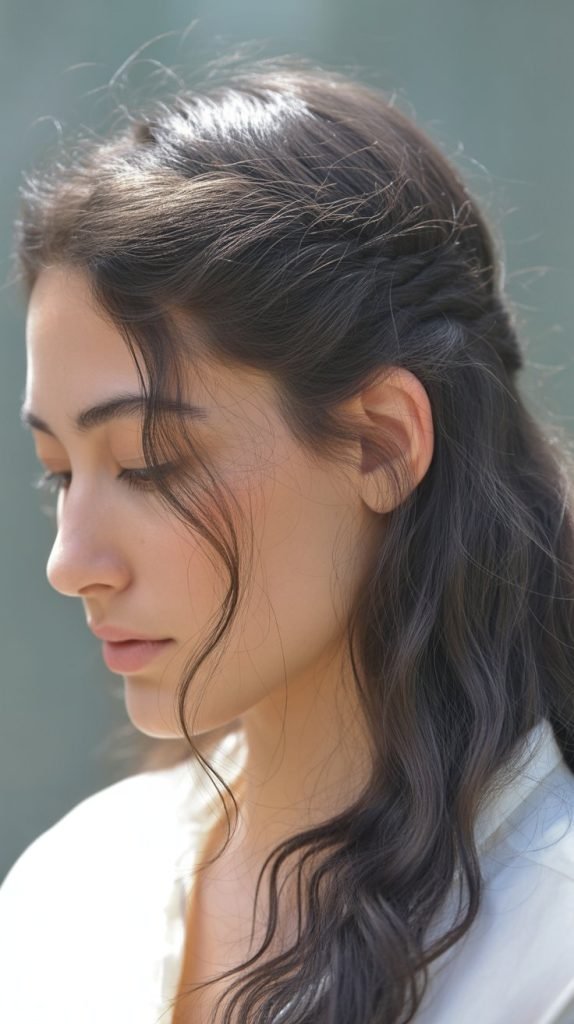
The half-up twist offers the perfect balance between wearing hair up and down.
This versatile style keeps hair out of your face while showcasing length and movement in the remaining hair.
The twisted elements add visual interest and prevent the style from looking too casual or undone.
Steps:
- Part your hair in your preferred location and work with dry, styled hair
- Take 2-inch sections from both temples, starting about an inch above your ears
- Twist each section away from your face, adding small pieces of hair as you go back
- Continue twisting until you reach about 2 inches behind each ear
- Cross the twisted sections over each other at the back of your head
- Secure the crossing point with bobby pins, creating a small twisted knot
- Leave the remaining hair loose and add gentle waves if desired
- Adjust the twisted sections by gently pulling them to create volume and texture
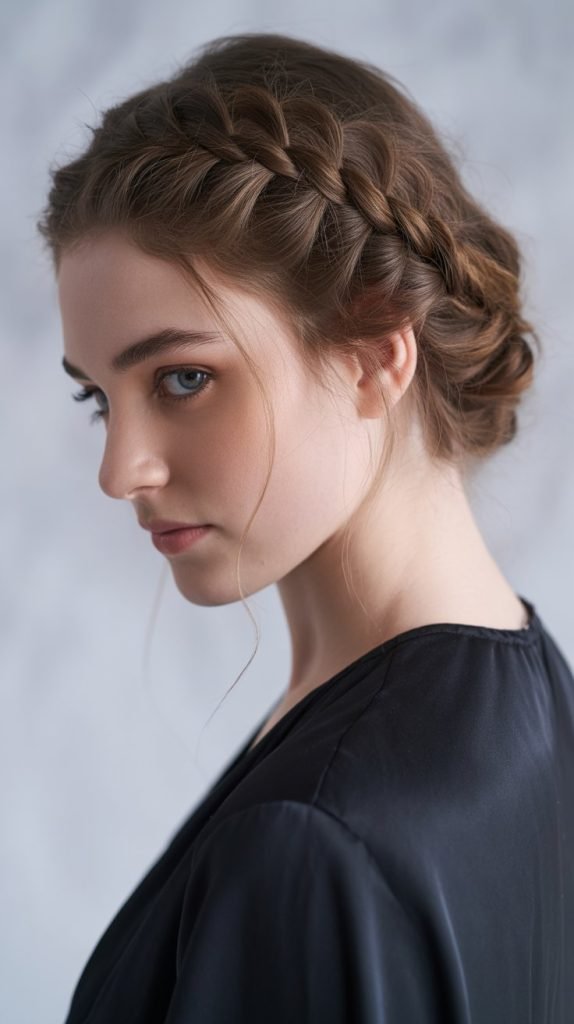
12. Braided Headband
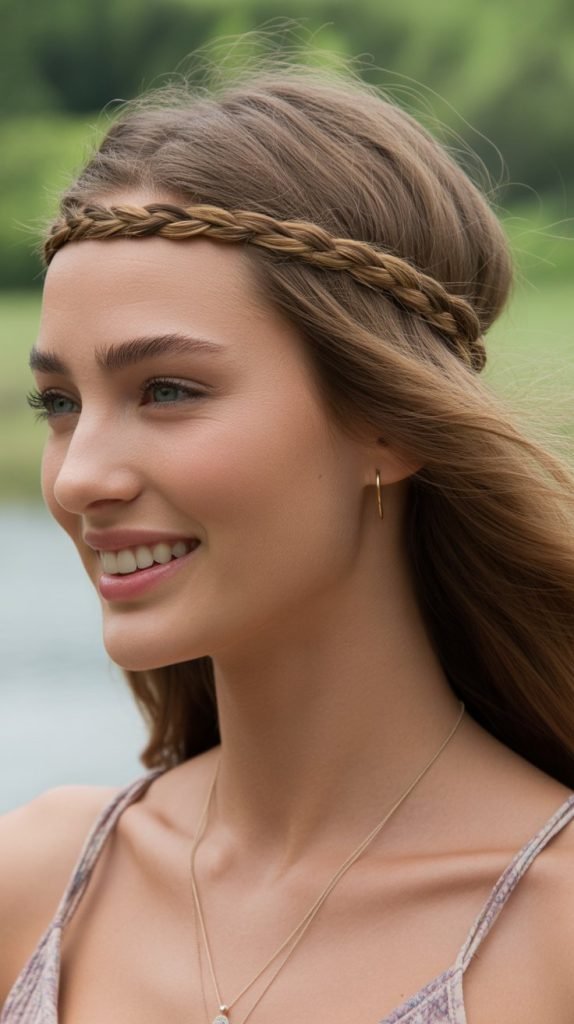
The braided headband creates the illusion of wearing an accessory while using only your natural hair.
This clever technique adds visual interest to loose hair styles and works particularly well for keeping shorter layers contained.
The braid acts as a natural crown that frames your face beautifully.
Steps:
- Part your hair deeply on one side to create enough hair for the braid
- Take a 1-inch section from the heavy side of your part near your hairline
- Begin a regular three-strand braid, keeping it tight and close to your hairline
- Braid across your forehead, following your natural hairline pattern
- Continue the braid behind your opposite ear and secure with a small elastic
- Hide the elastic by tucking the braid end behind your ear and pinning it
- Leave the rest of your hair loose and add texture with sea salt spray
- Adjust the braided headband by gently pulling at sections to create slight volume
13. Sock Bun
The sock bun creates a perfectly round, voluminous bun using a simple sock as a shaping tool.
This technique ensures your bun maintains its shape throughout the day while adding significant volume to fine or thin hair.
The result is a polished, professional-looking updo that requires minimal skill.
Steps:
- Cut the toe off a clean sock and roll it into a donut shape
- Gather your hair into a high ponytail and secure with a strong elastic
- Thread the ponytail through the sock donut, positioning it near the elastic
- Spread your hair evenly around the sock, covering it completely
- Roll the sock down toward your head, bringing all hair with it
- Continue rolling until the sock reaches the base of your ponytail
- Tuck any loose ends under the bun and secure with bobby pins
- Smooth any flyaways with a small amount of hair gel or pomade
14. Twisted Crown Updo
The twisted crown updo combines multiple twisted elements to create an elaborate-looking style that’s surprisingly achievable.
This elegant updo works beautifully for formal events, weddings, or any occasion requiring sophisticated styling. The technique creates the illusion of a complex braided crown.
Steps:
- Start with textured, day-old hair for better grip and staying power
- Create a deep side part and section off the front portions of your hair
- Begin twisting the larger front section away from your face, adding hair gradually
- Continue the twist around your head, following your hairline pattern
- Secure the first twist temporarily while you work on the opposite side
- Create a second twist on the lighter side of your part, mirroring the first
- Pin both twists at the back of your head, creating a crown-like pattern
- Gather remaining hair into a low bun and secure with pins
- Adjust twisted sections by gently pulling them to add volume and texture
15. Loose Waves with Braided Accent
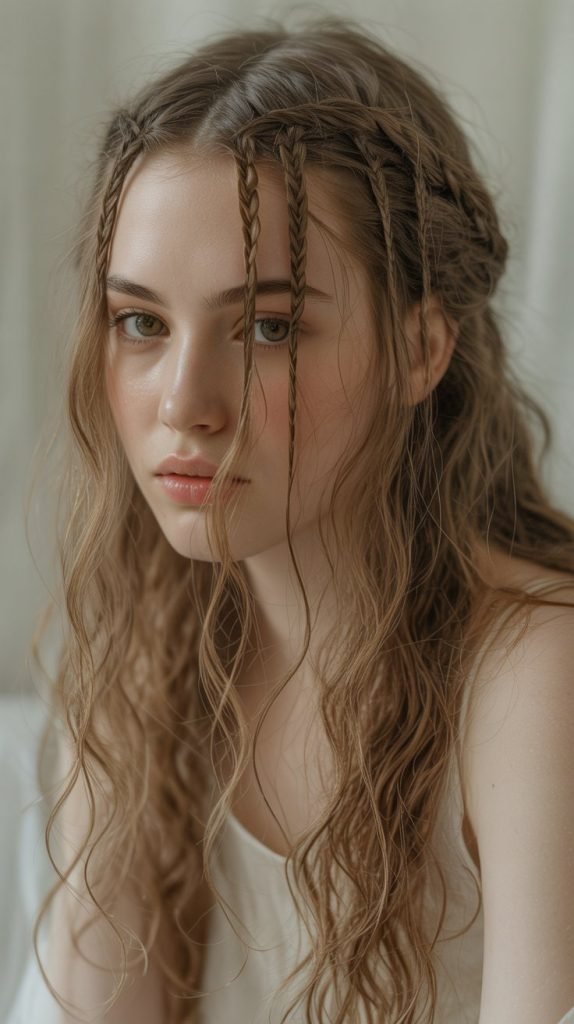
Loose waves with a braided accent combine the romantic appeal of flowing hair with strategic braided details.
This style offers the best of both worlds by keeping most hair loose while adding interesting braided elements.
The contrast between textures creates visual depth and movement.
Steps:
- Create loose waves throughout your hair using a large barrel curling iron
- Allow waves to cool completely, then gently separate them with your fingers
- Select random 1-inch sections throughout your hair for braiding
- Create small, loose three-strand braids in these sections, varying the placement
- Leave some braids loose and incorporate others into larger sections
- Secure small braids with tiny clear elastics that won’t be noticeable
- Scrunch hair gently with texturizing spray to enhance the wave pattern
- Leave the braided accents slightly messy for a natural, undone appearance
16. Side-Swept Bangs with Low Ponytail
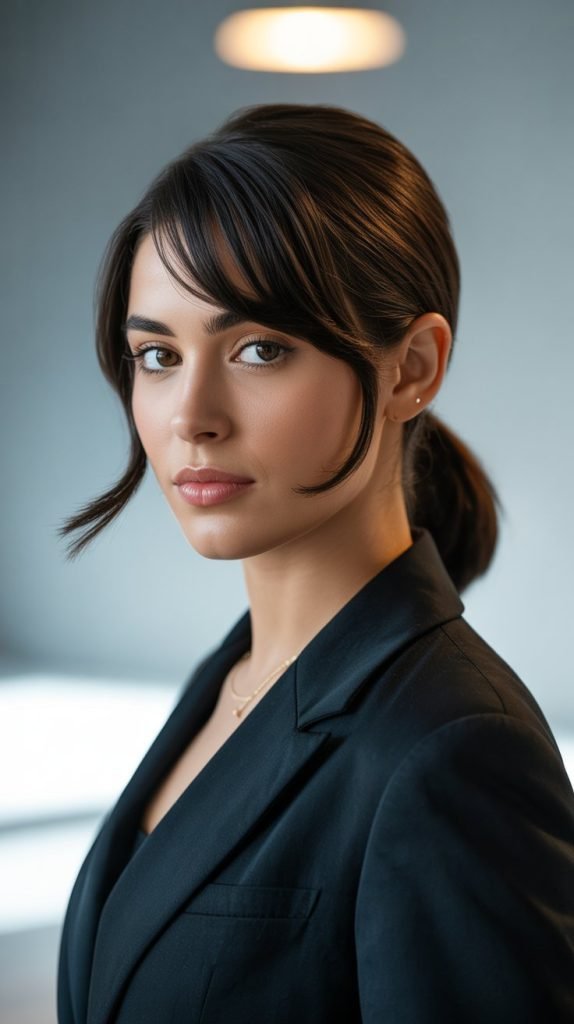
Side-swept bangs with a low ponytail create a classic, sophisticated look that never goes out of style.
This combination frames the face beautifully while maintaining simplicity and elegance.
The style works particularly well for professional settings or when you want polished simplicity.
Steps:
- Style your bangs by blow-drying them to one side with a round brush
- Create a deep side part, allowing your bangs to fall naturally across your forehead
- Smooth the rest of your hair back with a paddle brush, maintaining sleekness
- Gather hair at the nape of your neck, ensuring the sides are smooth and even
- Secure with an elastic that matches your hair color
- Take a small section from the ponytail and wrap it around the elastic to hide it
- Secure the wrapped section with a bobby pin underneath the ponytail
- Finish with a light mist of shine spray for a polished, healthy appearance
17. Milkmaid Braids
Milkmaid braids create a sweet, countryside-inspired look that’s both practical and charming.
This traditional style involves wrapping braids around your head like a crown, creating an updo that’s perfect for warm weather or active days.
The technique keeps all hair contained while maintaining feminine appeal.
Steps:
- Create a center part and divide your hair into two equal sections
- Braid each section into a regular three-strand braid, securing with clear elastics
- Take the left braid and wrap it over the top of your head toward the right ear
- Secure the left braid behind your right ear with bobby pins
- Take the right braid and wrap it over your head toward the left ear
- Tuck the end of the right braid under the left braid and pin securely
- Adjust both braids by gently pulling at sections to create volume
- Hide any visible bobby pins by tucking them under the braids
18. Textured Beach Waves
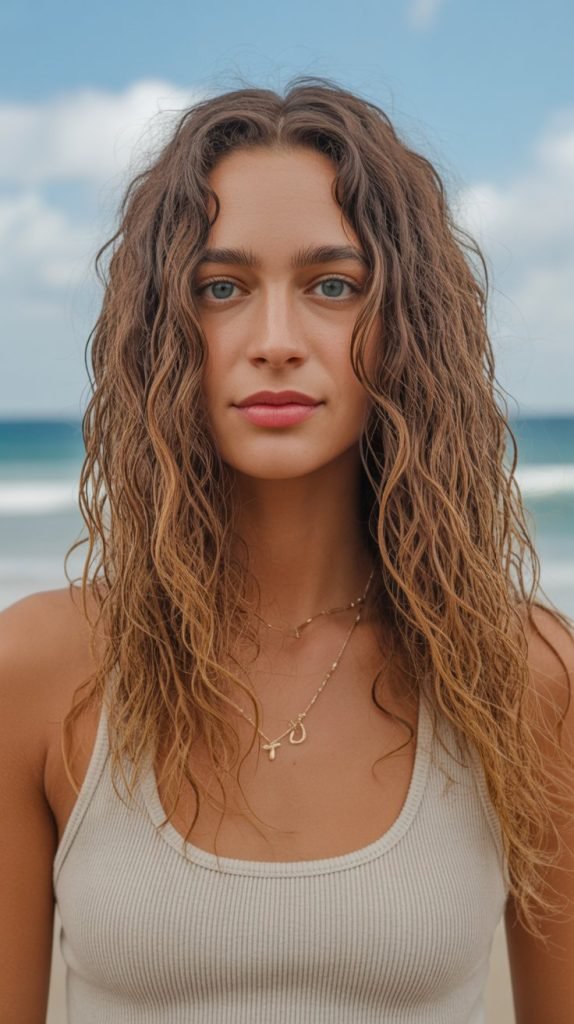
Textured beach waves capture the effortless beauty of hair that’s been naturally tousled by ocean air.
This carefree style works with various hair lengths and textures, creating movement and volume through strategic texturizing techniques.
The key is achieving that “I woke up like this” appearance while actually putting in minimal effort.
Steps:
- Apply sea salt spray to damp hair, scrunching from ends toward roots
- Braid damp hair into two loose braids and allow to air dry completely
- Once dry, gently separate the braids with your fingers to reveal waves
- Scrunch additional texturizing spray throughout for enhanced definition
- Use your fingers to piece out individual wave sections for more movement
- Avoid brushing or combing to maintain the natural, tousled texture
- For extra volume, flip your head upside down and scrunch hair toward your scalp
- Finish with a light oil on the ends to add shine and reduce frizz
19. Gibson Tuck
The Gibson Tuck creates an elegant vintage-inspired updo that appears complex but requires only basic tucking techniques.
This sophisticated style gained popularity in the early 1900s and remains a timeless choice for formal occasions.
The inward-rolling technique creates smooth, polished lines.
Steps:
- Gather your hair loosely at the nape of your neck with a soft elastic
- Create a small opening above the elastic by separating the hair with your fingers
- Flip the ponytail up and through the opening, creating an inward roll
- Continue tucking the length of the ponytail into the created pocket
- Secure the tucked hair with bobby pins placed horizontally for stability
- Gently pull at the sides and crown to create soft volume and texture
- Leave a few wispy pieces around your face loose for a romantic touch
- Finish with hairspray to ensure the tuck stays secure throughout the day
20. Rope Braid Ponytail
The rope braid ponytail offers an interesting alternative to traditional braiding techniques.
This style creates a twisted, rope-like pattern that adds visual texture and interest to a simple ponytail.
The technique is easier than it appears and works well with various hair lengths.
Steps:
- Gather hair into a ponytail at your desired height and secure with elastic
- Divide the ponytail into two equal sections
- Twist both sections in the same direction (clockwise or counterclockwise)
- Wrap the twisted sections around each other in the opposite direction
- Continue twisting and wrapping until you reach the ends of your hair
- The sections will naturally want to twist together, creating the rope effect
- Secure the end with a clear elastic to maintain the rope pattern
- Gently pull at sections of the rope braid to add width and texture
21. Asymmetrical Updo

The asymmetrical updo breaks traditional styling rules by creating intentional imbalance that’s both modern and striking.
This contemporary style works particularly well for fashion-forward events or when you want to make a style statement.
The key is creating purposeful asymmetry that looks deliberate rather than accidental.
Steps:
- Create a deep side part, making one side significantly heavier than the other
- Gather the majority of your hair to the heavier side behind one ear
- Twist the gathered hair upward, creating height and volume on one side only
- Pin the twisted section high on your head, leaving the other side relatively flat
- Take smaller sections from the lighter side and pin them loosely across
- Allow some pieces to remain loose and wispy for an undone effect
- The finished style should appear intentionally off-balance but visually appealing
- Use texturizing spray to add grip and hold to the asymmetrical elements
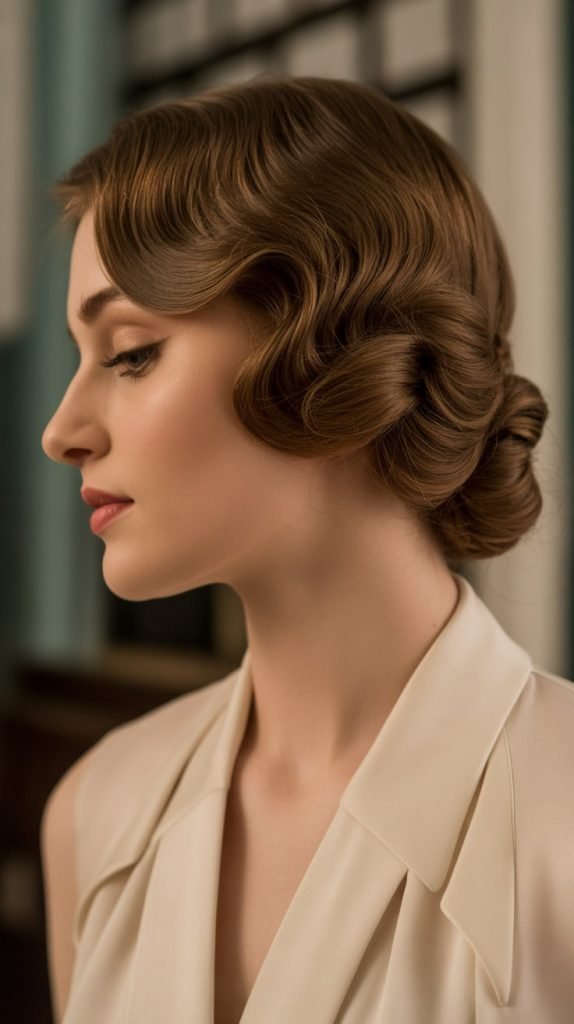
22. Vintage Pin Curls
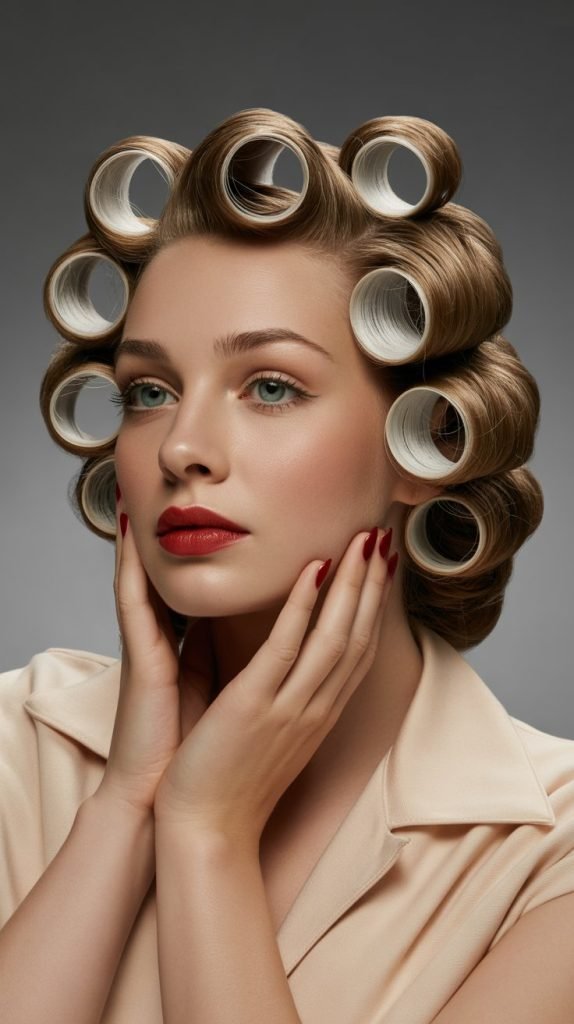
Vintage pin curls recreate the glamorous styling of the 1940s and 1950s with their sculptural, set appearance.
This elegant technique creates defined curls that are pinned close to the head, forming patterns and waves that exude old Hollywood glamour.
The style requires patience but produces stunning, photograph-worthy results.
Steps:
- Start with damp hair and apply strong-hold mousse throughout
- Section hair into 1-inch squares across your entire head
- Take each section and wrap it around your finger to form a tight curl
- Slide the curl off your finger and pin it flat against your head with a bobby pin
- Continue this process across your entire head, creating uniform curl patterns
- Allow hair to dry completely while pinned (this may take several hours)
- Once dry, carefully remove all bobby pins and gently separate the curls
- Use your fingers to arrange the curls into your desired vintage pattern
- Finish with strong-hold hairspray to maintain the sculptural appearance
23. Flower Crown Braid
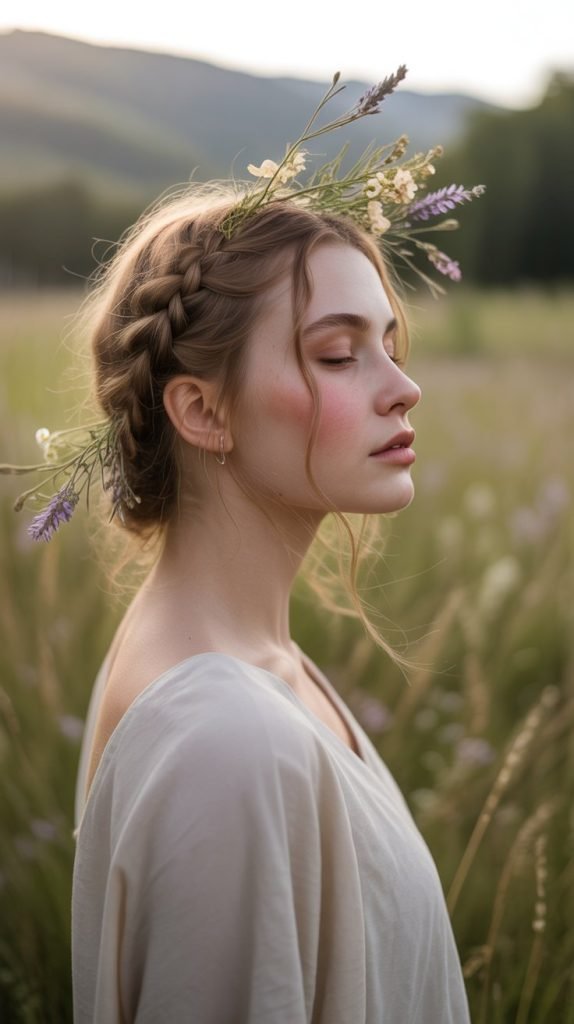
The flower crown braid combines braiding techniques with floral elements to create an ethereal, nature-inspired style.
This romantic look works beautifully for outdoor weddings, festivals, or photo shoots.
The technique can be adapted to work with real flowers, silk flowers, or simply textured braiding.
Steps:
- Create loose texture throughout your hair using texturizing spray
- Begin a loose braid starting from behind one ear, working around your hairline
- Keep the braid relaxed and slightly messy for a natural, organic appearance
- As you braid, gently pull at sections to create volume and texture
- Work the braid around your head like a crown, ending behind the opposite ear
- Secure with bobby pins and hide the elastic under the braid
- If using flowers, gently weave stems through the braid sections
- For a flower-free version, pull extra pieces from the braid to create texture
- Finish with a light hairspray that won’t damage real flowers if using them
24. Twisted Side Updo
The twisted side updo creates elegant asymmetry through strategic twisting and pinning techniques.
This sophisticated style works beautifully for formal events while remaining achievable for everyday wear.
The side placement adds modern appeal to classic updo techniques.
Steps:
- Create a deep side part and begin working with the heavier section first
- Take a large section from the front and begin twisting it away from your face
- Continue adding hair to the twist as you work toward the back of your head
- Once you reach the nape area, begin coiling the twist upward and to the side
- Pin the coiled twist securely with bobby pins, creating an elegant side bun
- Take smaller sections from the lighter side and twist them loosely
- Pin these smaller twists across and into the main updo for added interest
- Leave a few wispy pieces loose around your face for softness
- Finish with flexible hold hairspray to maintain the style without stiffness
25. Braided Updo with Loose Pieces
The braided updo with loose pieces combines structured braiding with romantic, flowing elements.
This style offers the sophistication of an updo while maintaining the softness of loose hair.
The contrast between braided and flowing sections creates visual interest and movement.
Steps:
- Braid random sections of your hair before creating the updo for added texture
- Leave some sections completely loose to create contrast with the braided parts
- Gather the braided and loose sections together at the nape of your neck
- Twist the gathered hair upward, allowing some pieces to escape naturally
- Pin the twisted sections to create a loose, textured updo shape
- Arrange the loose pieces around the updo, pinning some and leaving others free
- The finished style should appear effortlessly elegant with purposeful messiness
- Use texturizing spray to enhance the contrast between braided and loose elements
26. Ponytail with Braided Wrap
The ponytail with braided wrap elevates a simple ponytail through the addition of a braided element that wraps around the base.
This technique hides the elastic while adding visual interest and texture.
The style works with various ponytail heights and hair textures.
Steps:
- Create your ponytail at the desired height and secure with a strong elastic
- Before securing, leave out a 2-inch section from the underside of the ponytail
- Braid this reserved section into a tight three-strand braid
- Wrap the braided section around the base of the ponytail, covering the elastic
- Secure the end of the braid under the ponytail with a bobby pin
- For added security, use a second bobby pin on the opposite side
- Gently pull at the braid wrap to create slight texture and volume
- The wrapped braid should completely hide the elastic and create a polished finish
27. Cascading Curls with Side Part
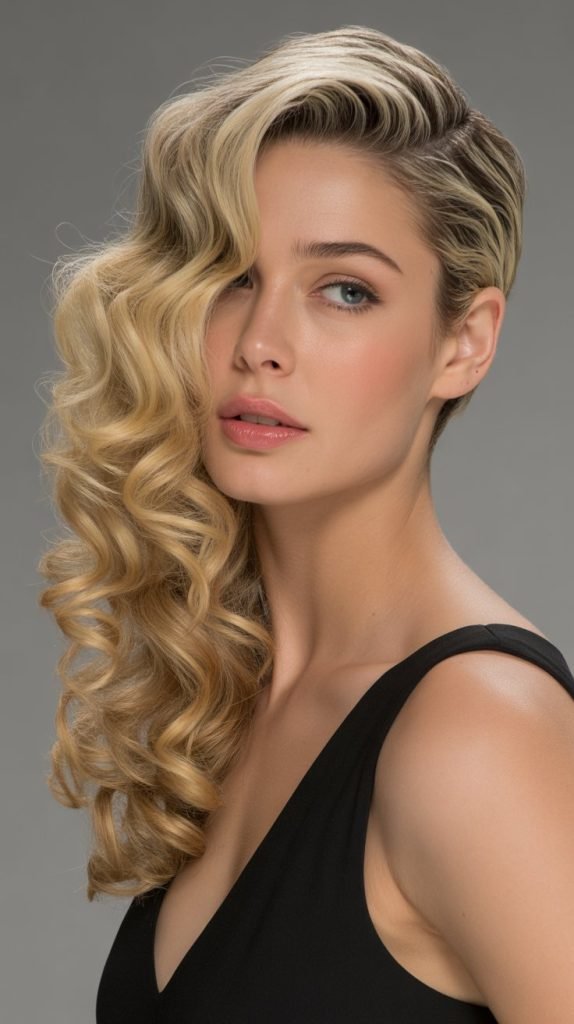
Cascading curls with a side part create Hollywood-worthy glamour through strategic curl placement and dramatic parting.
This style emphasizes volume and movement while maintaining elegant sophistication.
The technique involves creating curls that flow in the same direction for maximum impact.
Steps:
- Create a deep side part, making one side significantly heavier than the other
- Section hair into 2-inch pieces for curling with a large barrel iron
- Curl all sections in the same direction to create uniform curl flow
- Allow curls to cool completely while maintaining their shape
- Gently brush through curls on the heavier side to create smooth waves
- Leave the lighter side more defined with individual curl separation
- Use your fingers to direct all curls to flow toward the heavier side
- Finish with shine spray and flexible hold hairspray for movement with control
28. Double Dutch Braids into Buns
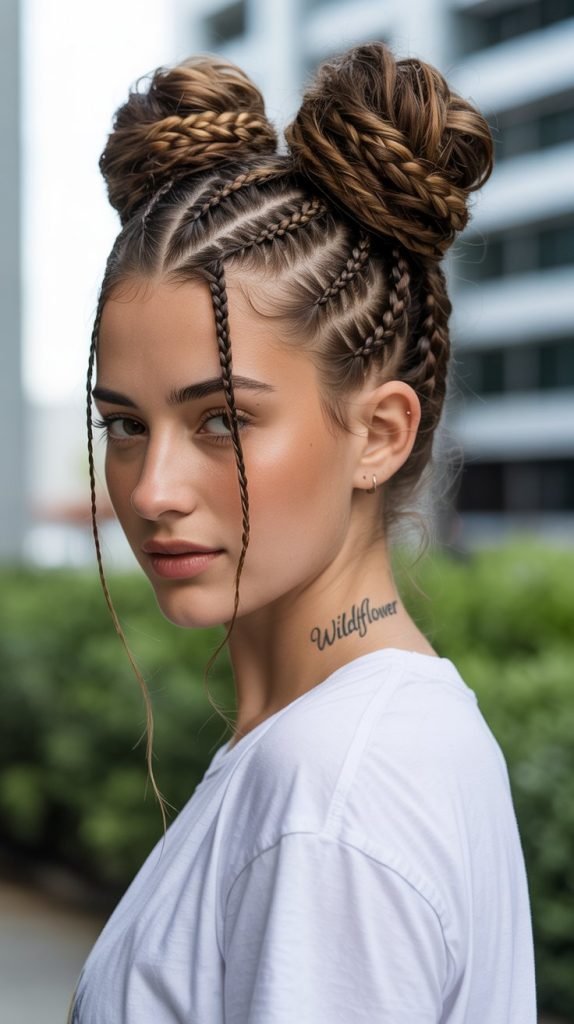
Double Dutch braids into buns combine the raised texture of Dutch braiding with the practicality of space buns.
This athletic-inspired style works perfectly for workouts, festivals, or casual days when you want your hair completely contained.
The Dutch braiding technique creates dimensional texture.
Steps:
- Create a clean center part from forehead to neck, dividing hair equally
- Begin Dutch braiding on one side, starting at the hairline
- Cross sections under rather than over to create the raised Dutch effect
- Continue Dutch braiding straight up the side of your head toward the crown
- When you reach the top, secure with elastic and form remaining hair into a bun
- Repeat the same process on the opposite side for symmetry
- Gently pull at the Dutch braid sections to create width and volume
- Secure both buns with bobby pins, allowing for some messiness and texture
29. Boho Chic Half Braid
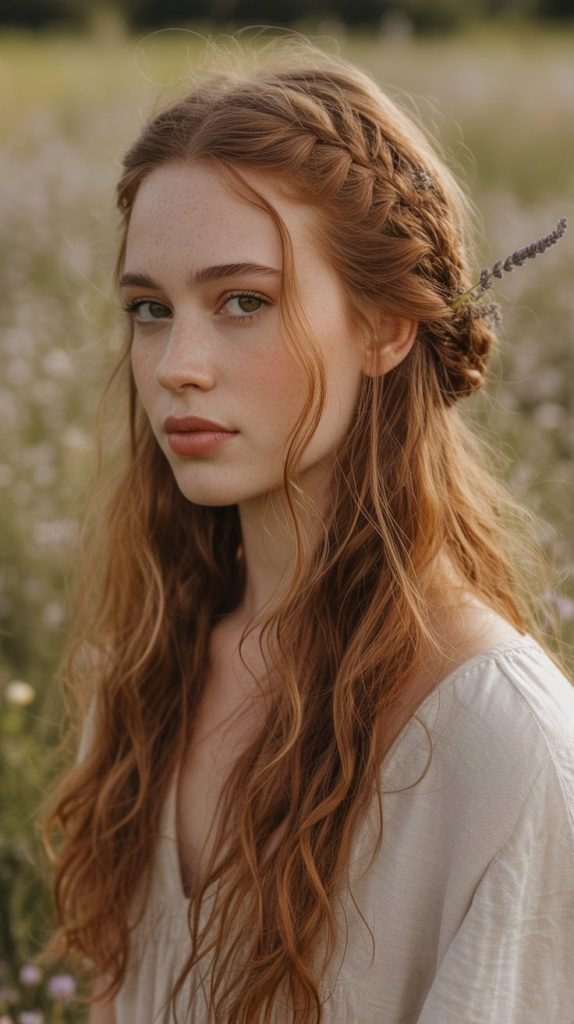
The boho chic half braid embodies free-spirited styling with its relaxed, undone appearance and strategic braided elements.
This style works beautifully with textured or wavy hair and suits various casual occasions.
The key is maintaining an effortless, lived-in quality that looks naturally beautiful.
Steps:
- Apply texturizing spray to enhance natural texture and provide grip
- Take a section from one temple and begin a loose, relaxed braid
- Allow pieces to fall out naturally as you braid for an undone effect
- Stop braiding when you reach the back of your head and secure temporarily
- Repeat with a section from the opposite temple, creating a second loose braid
- Cross the braids at the back of your head and pin them together
- Leave the remaining hair loose and enhance with additional texturizing product
- Pull gently at the braids to increase their relaxed, bohemian appearance
- The finished style should look effortlessly tousled and romantically undone
30. Elegant Chignon
The elegant chignon represents the pinnacle of sophisticated updo styling with its sleek, polished appearance and timeless appeal.
This classic French style works beautifully for formal events, weddings, or professional occasions requiring refined elegance.