Homecoming season brings excitement, glamour, and the perfect opportunity to showcase stunning hairstyles that complement your special dress.
The half-up half-down hairstyle has become the ultimate choice for HoCo events, offering the perfect balance between elegance and youthful charm.
This versatile style works beautifully with any dress length, neckline, or personal style preference, making it a favorite among high school students preparing for their memorable night.
Whether you’re aiming for romantic curls, sleek sophistication, or bohemian waves, “30 Cute HoCo Half-Up Half-Down Hairstyles Everyone Loves” will guide you through the most coveted looks that will make you feel confident and beautiful.
This comprehensive guide features detailed styling instructions, essential tools, and expert tips to help you achieve red-carpet worthy results at home or with your stylist.
1. Classic Twisted Half-Up Style
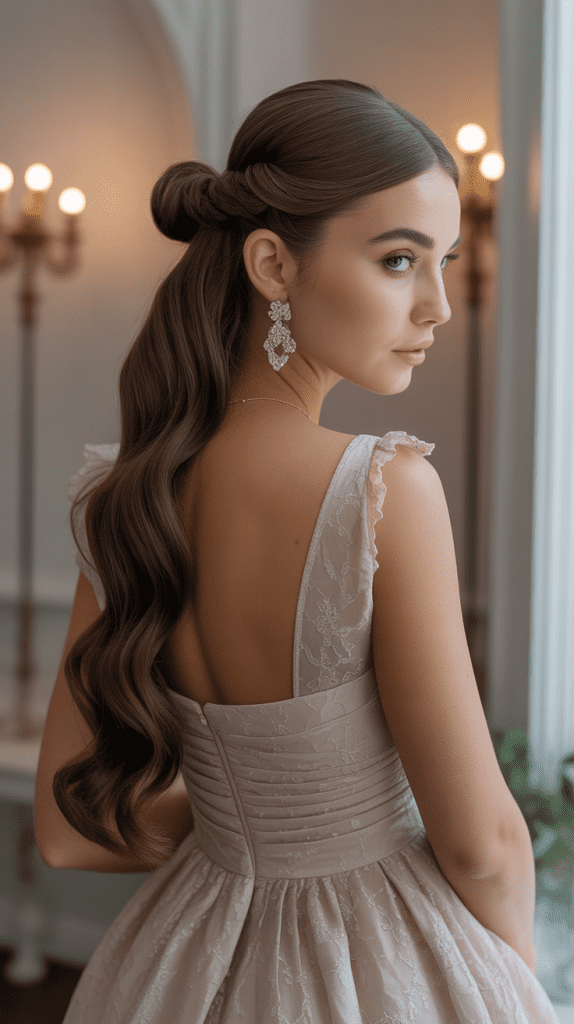
The classic twisted half-up style remains a timeless choice that effortlessly combines simplicity with elegance.
This versatile look works exceptionally well with both straight and wavy hair textures, creating a polished appearance that photographs beautifully under homecoming lighting.
- Start by creating loose waves throughout your hair using a 1.5-inch curling iron
- Part your hair in the center or on your preferred side for the most flattering frame
- Take a small section of hair from each temple area, approximately 2 inches wide
- Gently twist each section backward toward the crown of your head
- Secure both twisted sections with bobby pins that match your hair color
- Allow the remaining hair to cascade naturally over your shoulders
- Finish with a light-hold hairspray to maintain the style throughout the evening
- Add subtle hair accessories like small pearl pins for extra glamour
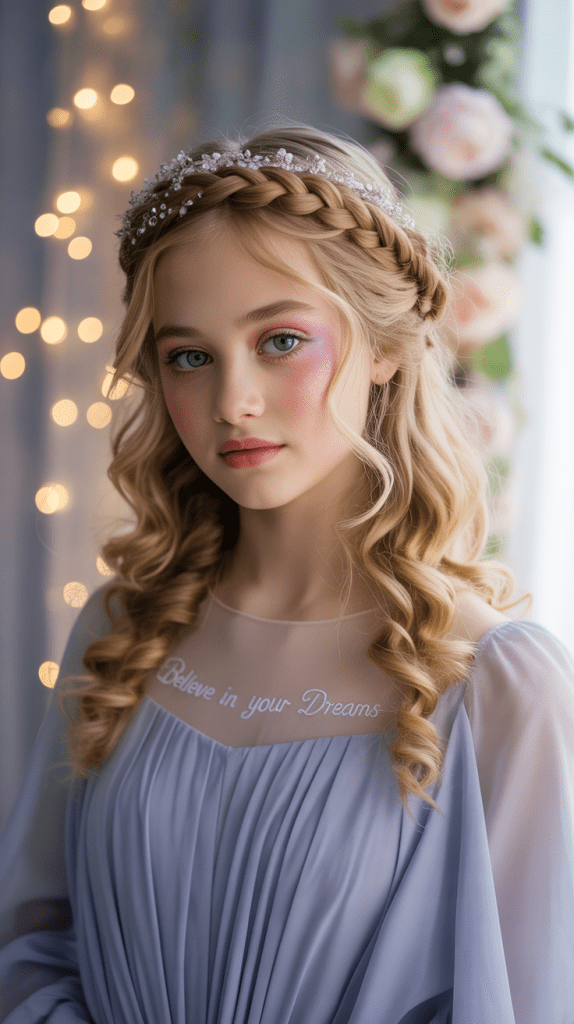
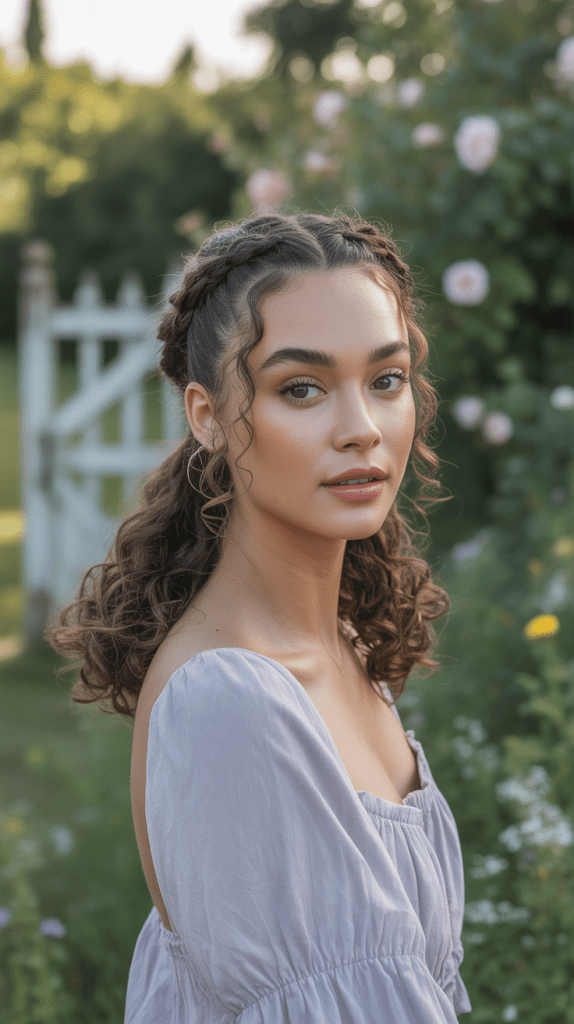
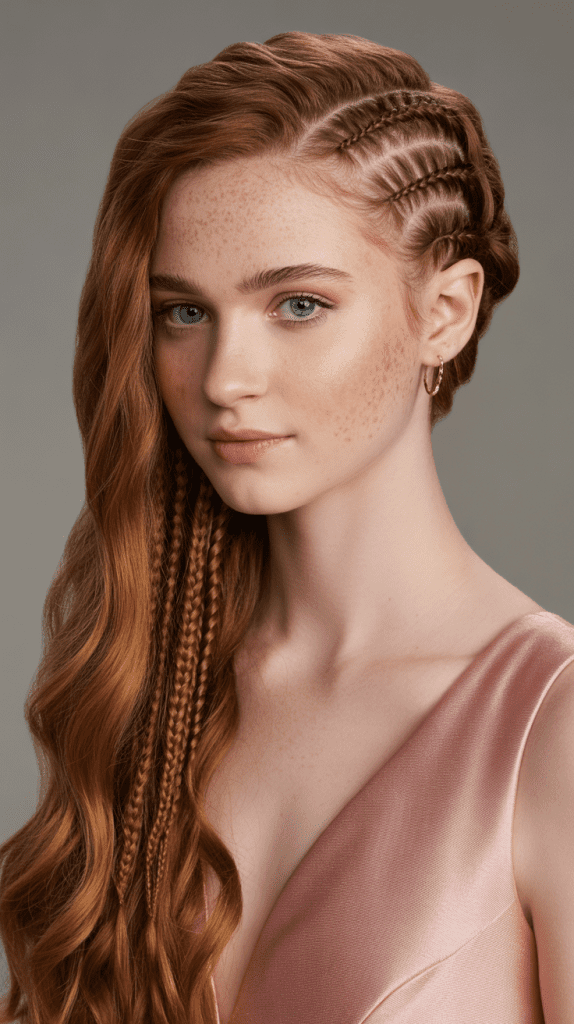
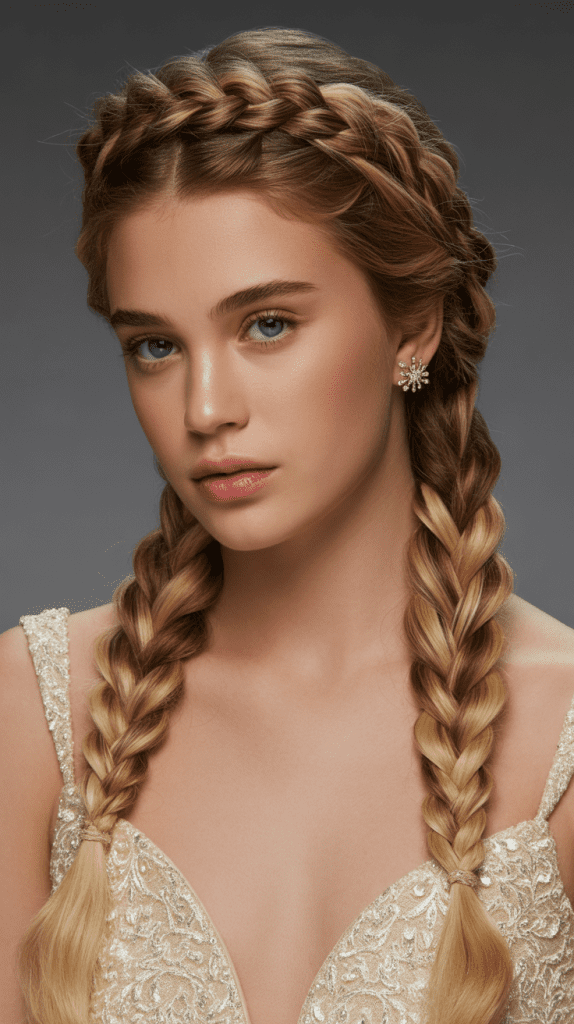
2. Romantic Braided Crown
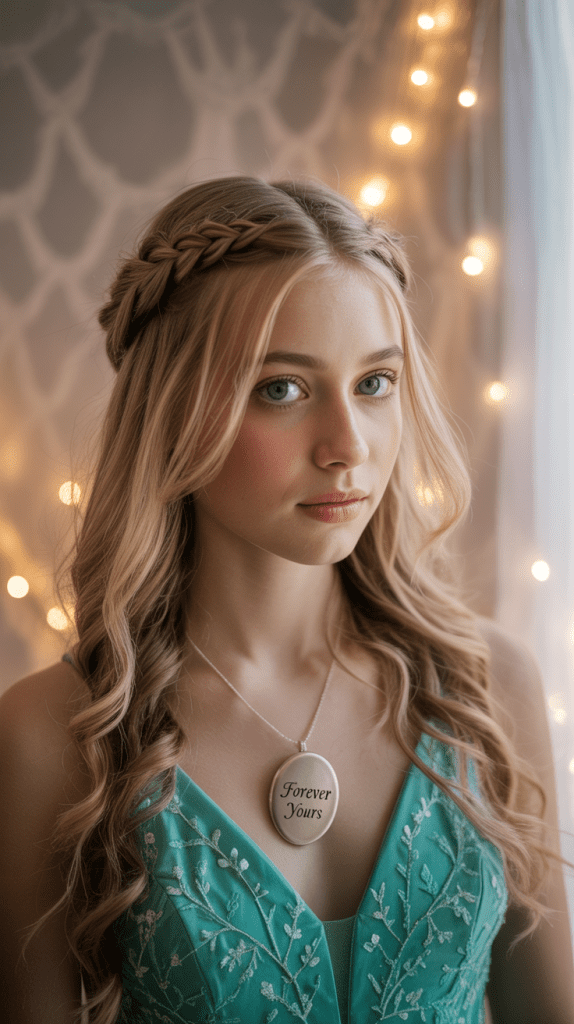
The romantic braided crown creates an ethereal, princess-like appearance that’s perfect for fairytale-themed homecoming looks.
This intricate style combines the beauty of braiding with the flowing elegance of loose hair, making it ideal for medium to long hair lengths.
- Begin by parting your hair slightly off-center for a more natural look
- Create loose curls using a large barrel curling iron before starting the braiding process
- Section off the top portion of hair from ear to ear across the crown
- Divide this section into three smaller parts to create individual braids
- Braid each section loosely, allowing some pieces to fall naturally for texture
- Wrap the braids around the crown area like a soft headband
- Secure with clear elastic bands and bobby pins hidden within the braids
- Gently tug at the braids to create volume and a more relaxed appearance
- Leave the bottom half of your hair in beautiful flowing curls
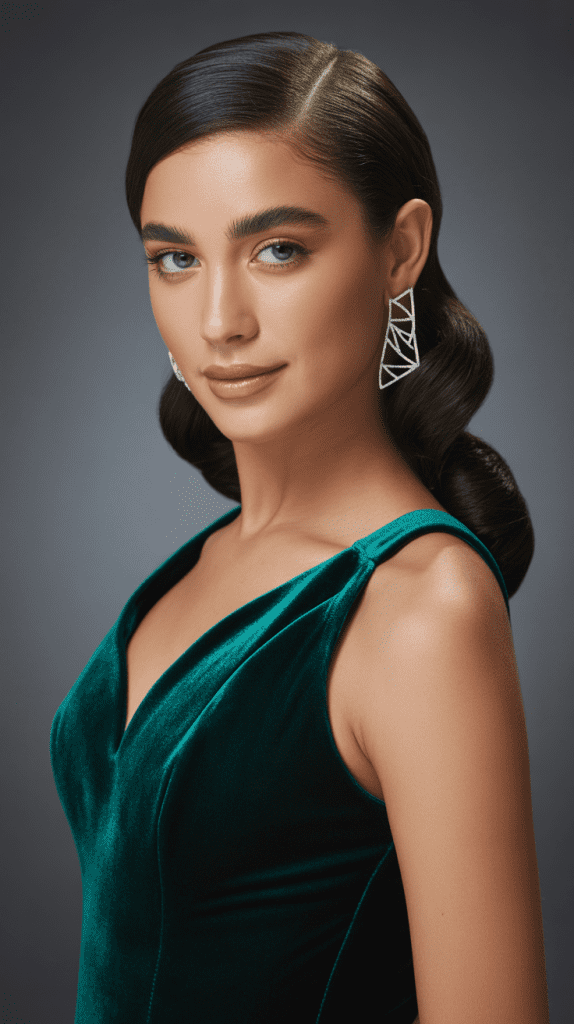
3. Hollywood Glamour Waves
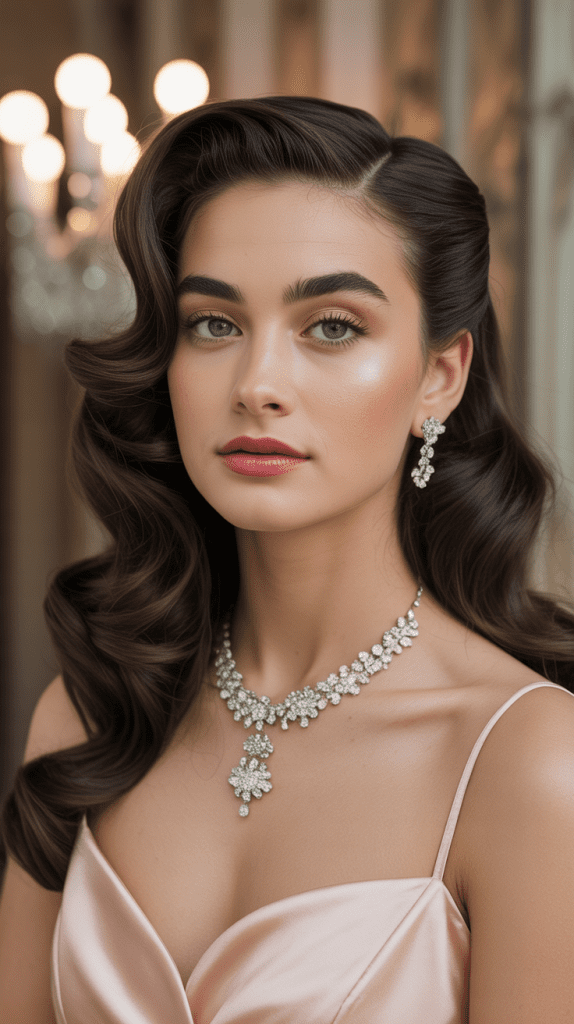
Hollywood glamour waves bring old-school elegance to modern homecoming celebrations.
This sophisticated style channels vintage movie stars while maintaining contemporary appeal, making it perfect for students who want to make a dramatic entrance.
- Apply a volumizing mousse to damp hair before blow-drying with a round brush
- Use a large barrel curling iron to create deep, uniform waves throughout your hair
- Brush through the curls gently with a paddle brush to create smooth waves
- Section off the top layer of hair from temple to temple
- Create a deep side part for maximum vintage appeal
- Sweep the front sections back smoothly and secure at the crown
- Use strong-hold bobby pins to maintain the sleek appearance
- Apply a shine serum to enhance the glamorous finish
- Set the style with a firm-hold hairspray for long-lasting results
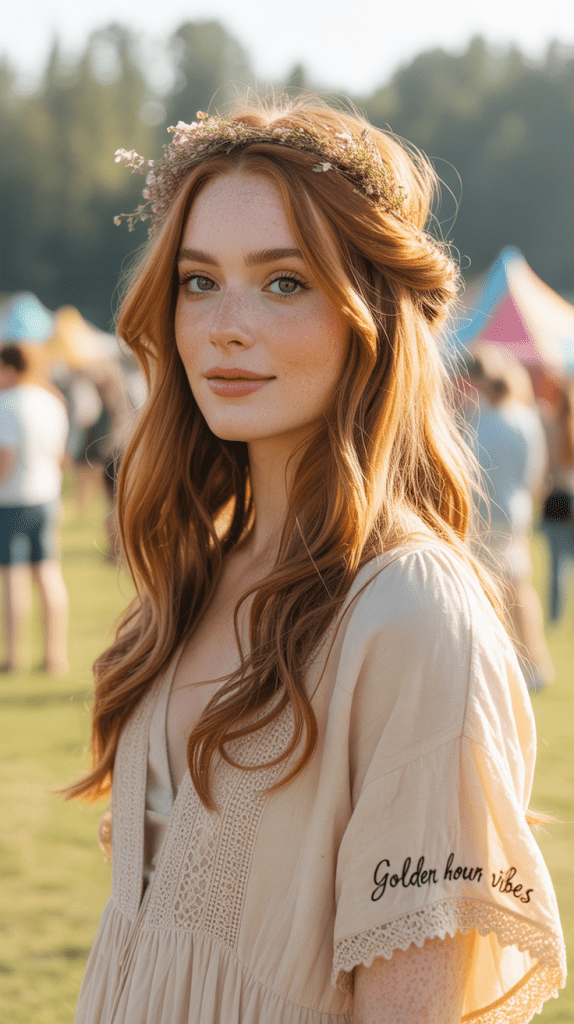
4. Boho Textured Half-Up

The boho textured half-up style embraces natural texture and effortless beauty, perfect for free-spirited students who prefer relaxed elegance.
This look celebrates natural hair movement while still maintaining a polished appearance suitable for formal events.
- Start with naturally textured or lightly waved hair for the best foundation
- Apply a texturizing spray throughout damp hair before air-drying
- Scrunch your hair gently while drying to enhance natural wave patterns
- Section off random pieces from the front and sides, avoiding perfect symmetry
- Twist these sections loosely and secure them at different heights for variety
- Leave some face-framing pieces loose for a softer, more natural look
- Use your fingers to gently tease the crown area for added volume
- Finish with a light mist of sea salt spray for enhanced texture
- Add small floral accessories or delicate headbands to complete the boho aesthetic
5. Sleek Straight Half-Up
The sleek straight half-up style offers modern sophistication with clean lines and polished perfection.
This contemporary look works beautifully with minimalist dress styles and appeals to students who prefer understated elegance over elaborate styling.
- Begin with freshly washed hair and apply a heat protectant spray evenly
- Use a high-quality flat iron to create perfectly straight, smooth hair
- Part your hair in a precise center or deep side part using a fine-tooth comb
- Section off the top layer of hair in a clean horizontal line across the crown
- Pull this section back tightly and secure with a clear elastic band
- Wrap a small section of hair around the elastic to hide it completely
- Use a smoothing serum on the remaining loose hair for extra shine
- Apply a light mist of anti-humidity spray to prevent frizz
- Keep bobby pins minimal and hidden for the cleanest possible finish
6. Voluminous Curly Half-Up
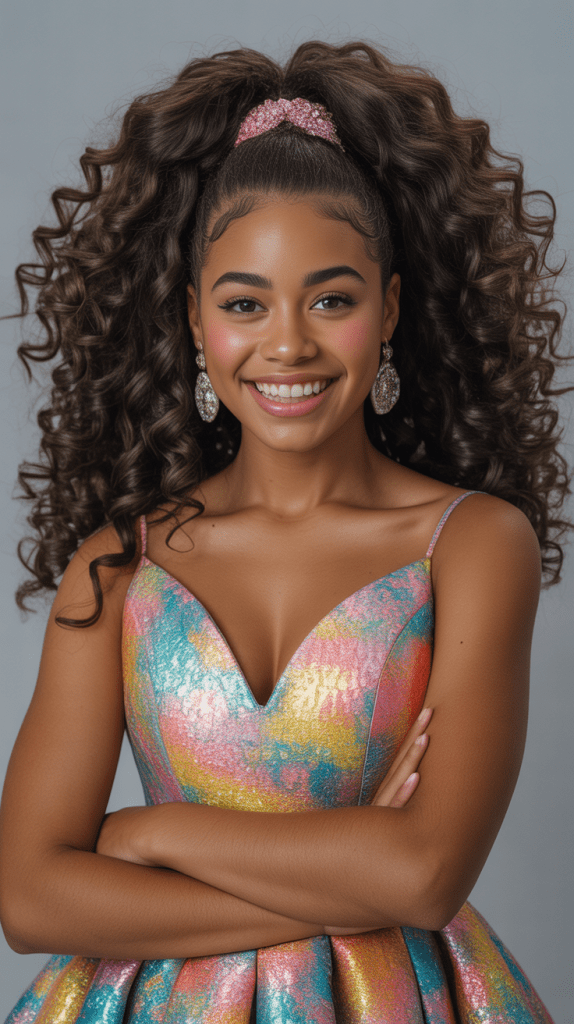
The voluminous curly half-up style celebrates natural curl patterns while creating dramatic height and movement.
This show-stopping look is perfect for students with naturally curly hair who want to enhance their texture for a glamorous homecoming appearance.
- Start with well-moisturized curls using a curl-enhancing cream or gel
- Use a diffuser attachment on your blow dryer to enhance natural curl definition
- Apply a volumizing foam to the roots before drying for maximum lift
- Gently separate larger curl clumps with your fingers for added volume
- Section off the top portion of curls from ear to ear across the crown
- Gather this section loosely, maintaining the natural curl shape
- Secure with a decorative hair tie or elegant scrunchie that complements your dress
- Allow the remaining curls to frame your face and flow freely
- Finish with a curl-defining spray to maintain bounce throughout the evening
- Add sparkly hair pins or a decorative comb for extra glamour
7. French Braid Half-Up Combo

The French braid half-up combo merges intricate braiding techniques with flowing hair for a style that’s both structured and romantic.
This versatile look works well with various hair textures and can be customized with different braiding patterns.
- Start by creating a center part or slight side part depending on your preference
- Begin a French braid on one or both sides starting from the hairline
- Incorporate small sections of hair as you braid toward the back of your head
- Stop braiding when you reach the crown area, leaving the ends loose
- Secure the braid end with a small clear elastic that won’t show
- Repeat on the opposite side if creating a symmetrical look
- Gather the loose braid ends with the remaining top section of hair
- Secure everything together at the crown with bobby pins or a decorative clip
- Curl the remaining loose hair for added texture and movement
- Gently pull at the braids to create a fuller, more voluminous appearance
8. Twisted Side Sweep

The twisted side sweep creates an asymmetrical elegance that’s both modern and romantic.
This style works particularly well for students who want to showcase statement earrings or an off-shoulder dress design.
- Create a deep side part on your preferred side using a rattail comb
- Apply a light-hold mousse to add texture and grip to your hair
- Begin with the larger side of your part and section off the front portion
- Create loose twists starting from the hairline and working backward
- Gradually incorporate more hair into the twist as you move toward your ear
- Continue the twist around the side of your head toward the back
- Secure the twisted section with bobby pins hidden within the twist
- Leave the smaller side of your part smooth and flowing
- Curl the remaining loose hair in loose waves for movement
- Apply a medium-hold hairspray to maintain the asymmetrical shape
9. Crown Braid with Loose Curls
The crown braid with loose curls combines the regal elegance of braided crowns with the romantic appeal of flowing curls.
This fairy-tale inspired style is perfect for students who want to feel like royalty on their special night.
- Start by curling your entire head of hair with a medium-barrel curling iron
- Create a side part and section off hair from ear to ear across the top of your head
- Divide this top section into three equal parts for braiding
- Begin a loose Dutch braid starting from one side of your head
- Continue braiding around your head like a crown, incorporating new hair as you go
- When you reach the starting point, secure the braid end with a clear elastic
- Tuck the braid end under the beginning of the braid and pin securely
- Brush through the remaining curls gently to create soft, flowing waves
- Apply a light-hold hairspray to maintain the braid structure
- Add small decorative pins or flowers along the crown braid for extra detail
10. Messy Bun Half-Up
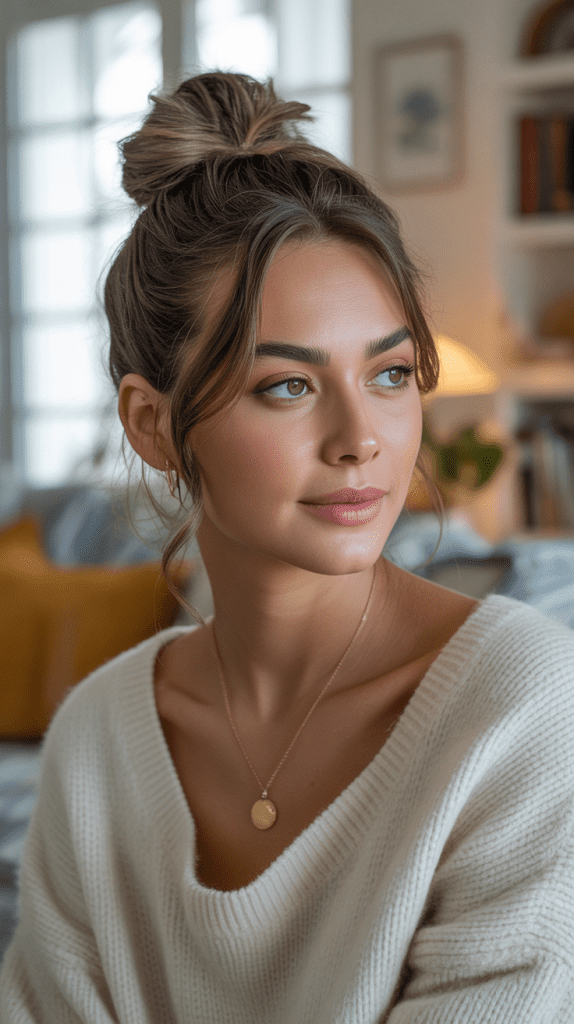
The messy bun half-up style offers relaxed elegance with an effortlessly chic appearance.
This versatile look is perfect for students who want sophistication without the pressure of perfect styling, making it ideal for those who prefer a more laid-back approach to formal events.
- Begin with textured hair, either naturally wavy or enhanced with texturizing spray
- Section off the top half of your hair from temple to temple
- Gather this section loosely at the crown, allowing some pieces to fall naturally
- Twist the gathered hair into a loose bun, leaving the ends slightly messy
- Secure with bobby pins, intentionally leaving some pieces sticking out artfully
- Pull out a few face-framing pieces for a softer, more relaxed look
- Gently tug at the bun to create more volume and texture
- Leave the bottom section of hair natural or add loose waves for movement
- Finish with a light texturizing spray for enhanced natural texture
- Add delicate accessories like small pins or a subtle headband if desired
11. Fishtail Accent Half-Up
The fishtail accent half-up style incorporates the intricate beauty of fishtail braiding with the flowing elegance of loose hair.
This detailed look is perfect for students who enjoy intricate styling and want to showcase their braiding skills.
- Start by creating loose waves throughout your hair for added texture
- Section off a portion of hair from one temple, about 2 inches wide
- Divide this section into two equal parts for the fishtail braid
- Take a small piece from the outside of the left section and cross it to the right
- Repeat on the opposite side, taking from the right and crossing to the left
- Continue alternating sides, keeping the braid loose and textured
- Secure the end with a small clear elastic when you reach your desired length
- Repeat on the opposite side if you want symmetrical fishtail accents
- Gather both fishtail braids at the back of your head with the remaining top section
- Secure with bobby pins or a decorative hair accessory
- Gently pull at the fishtail braids to create a fuller, more voluminous appearance
12. Vintage Victory Rolls
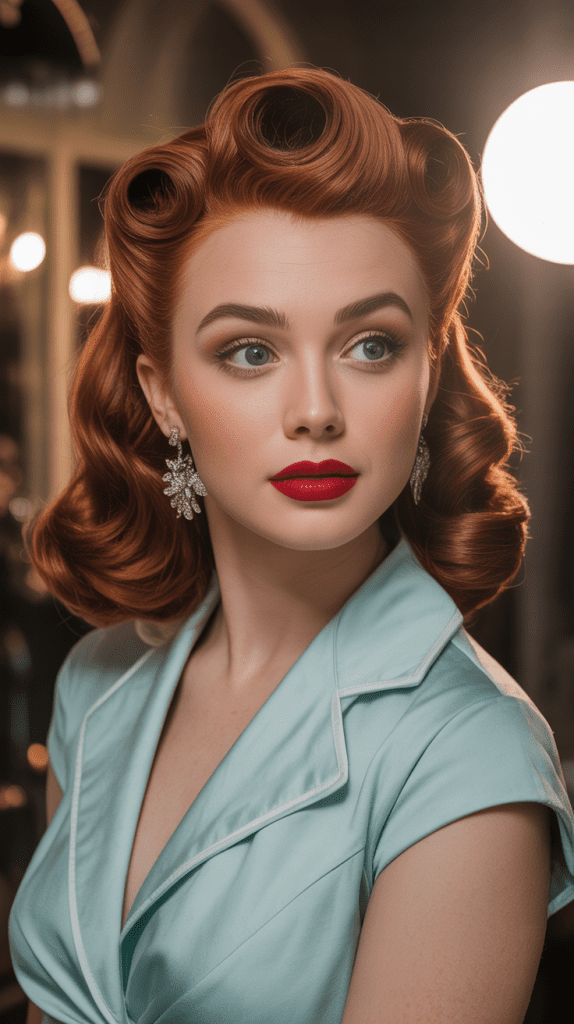
Vintage victory rolls bring 1940s glamour to modern homecoming celebrations.
This sophisticated retro style is perfect for students who appreciate classic beauty and want to stand out with a unique, time-honored look.
- Begin with clean, slightly damp hair and apply a strong-hold styling mousse
- Create a deep side part using a fine-tooth comb for authentic vintage appeal
- Section off the front portions of hair on both sides of your head
- Roll each front section over a large round brush, creating smooth, curved shapes
- Use bobby pins to secure each roll tightly against your head
- The rolls should curve away from your face and toward the back of your head
- Apply a firm-hold hairspray to each roll while it’s still being shaped
- Style the remaining hair in smooth waves or pin curls for complete vintage authenticity
- Add a decorative hair net or vintage-inspired accessories to complete the look
- Finish with a strong-hold hairspray to ensure your victory rolls last all evening
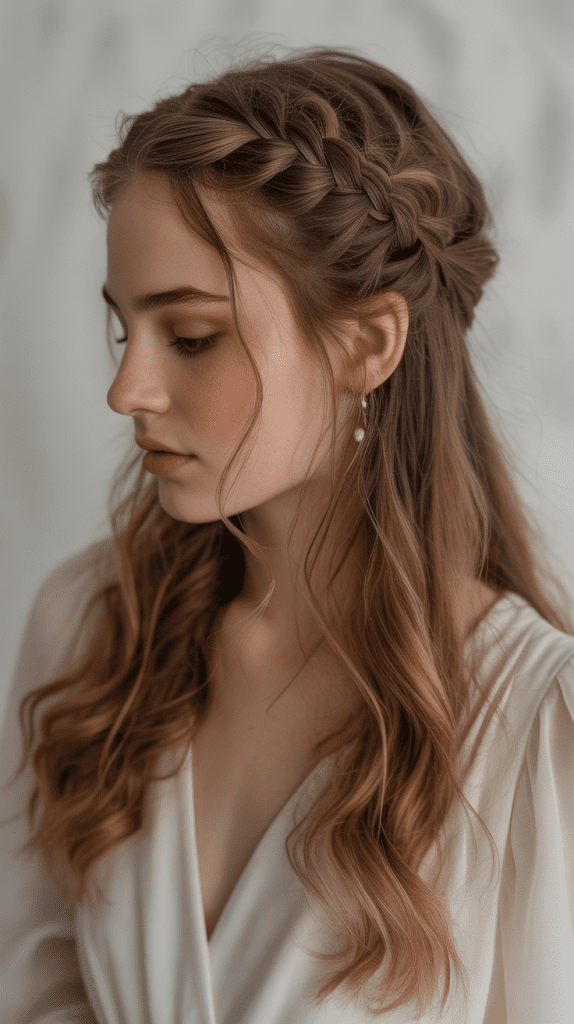
13. Waterfall Braid Elegance
The waterfall braid creates a cascading effect that mimics flowing water while maintaining the sophistication needed for formal events.
This intricate style works beautifully with all hair textures and adds movement and visual interest to any homecoming look.
- Start with lightly curled hair to enhance the waterfall effect
- Create a side part and begin braiding from the larger side of your part
- Start with a regular three-strand braid, incorporating hair from the top
- After a few stitches, drop the bottom strand and pick up a new section from the top
- Continue this pattern, always dropping the bottom strand and adding new hair from above
- The dropped strands will create the “waterfall” effect as they cascade down
- Continue the braid around the side of your head toward the back
- Secure the braid with a small clear elastic when you reach behind your ear
- Curl any straight pieces in the dropped sections for uniformity
- Apply a light-hold hairspray to maintain the braid structure without stiffness
14. Pinned Back Waves
Pinned back waves offer timeless elegance with a focus on showcasing beautiful wave patterns while keeping hair away from the face.
This classic style is perfect for students who want to highlight their facial features and jewelry.
- Create uniform waves throughout your hair using a large barrel curling iron
- Allow the curls to cool completely before brushing them into soft waves
- Apply a smoothing serum to eliminate any frizz and add shine
- Section off the front portions of hair from both temples
- Sweep these sections back smoothly, maintaining the wave pattern
- Pin the sections securely at the crown using decorative or hidden bobby pins
- Ensure both sides are symmetrical and sit at the same height
- Leave the remaining waves to flow naturally over your shoulders
- Use a shine spray for added luster and smoothness
- Finish with a flexible-hold hairspray to maintain movement in the waves
15. Braided Headband Style
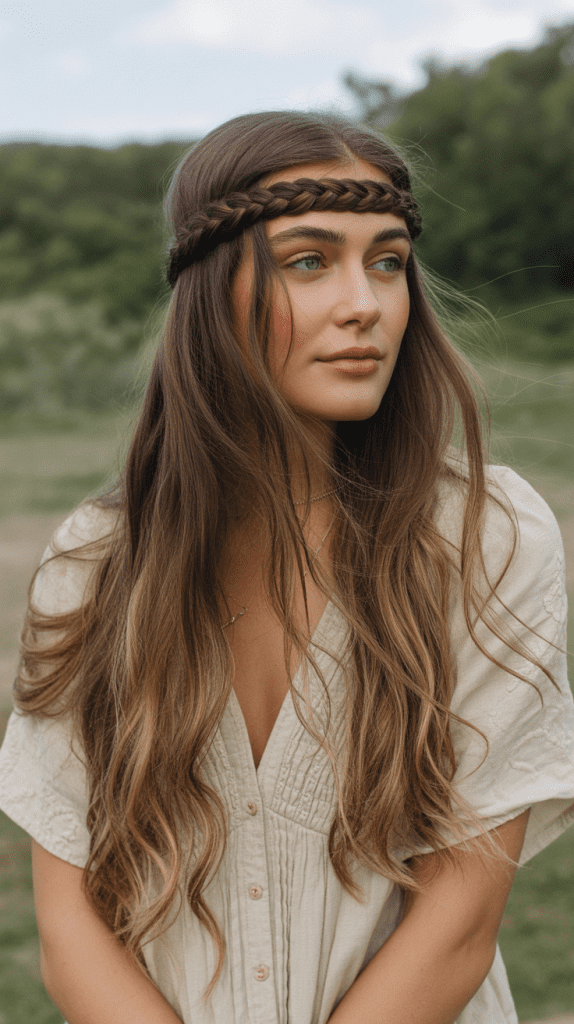
The braided headband style creates a natural hair accessory using your own hair while keeping the remaining length flowing freely.
This bohemian-inspired look is perfect for students who want intricate detail without overwhelming their overall appearance.
- Start with slightly textured or naturally wavy hair for the best foundation
- Create a side part on your preferred side
- Take a section of hair from above one ear, about 1 inch wide
- Braid this section tightly to create a rope-like headband effect
- Continue braiding around your hairline, staying close to your forehead
- Stop when you reach the opposite ear and secure with a bobby pin
- Hide the bobby pin by tucking it under other hair or behind your ear
- Leave the rest of your hair natural or add loose waves for texture
- Pull out a few small pieces around your face for a softer look
- Apply a light-hold hairspray to keep the braided headband in place throughout the evening
16. Low Twisted Chignon

The low twisted chignon combines the elegance of an updo with the softness of a half-down style.
This sophisticated look works beautifully for students who want refined elegance with modern appeal.
- Start with slightly textured hair using a texturizing spray
- Section off the top half of your hair from ear to ear
- Divide this section into two parts and twist each section loosely
- Bring both twisted sections together at the nape of your neck
- Create a low chignon by pinning the twisted sections into a soft knot
- Leave the remaining hair flowing naturally beneath the chignon
- Secure with bobby pins that match your hair color
- Pull out a few face-framing pieces for softness
- Add small pearl pins or delicate accessories for extra elegance
- Finish with a medium-hold hairspray to maintain the twisted texture
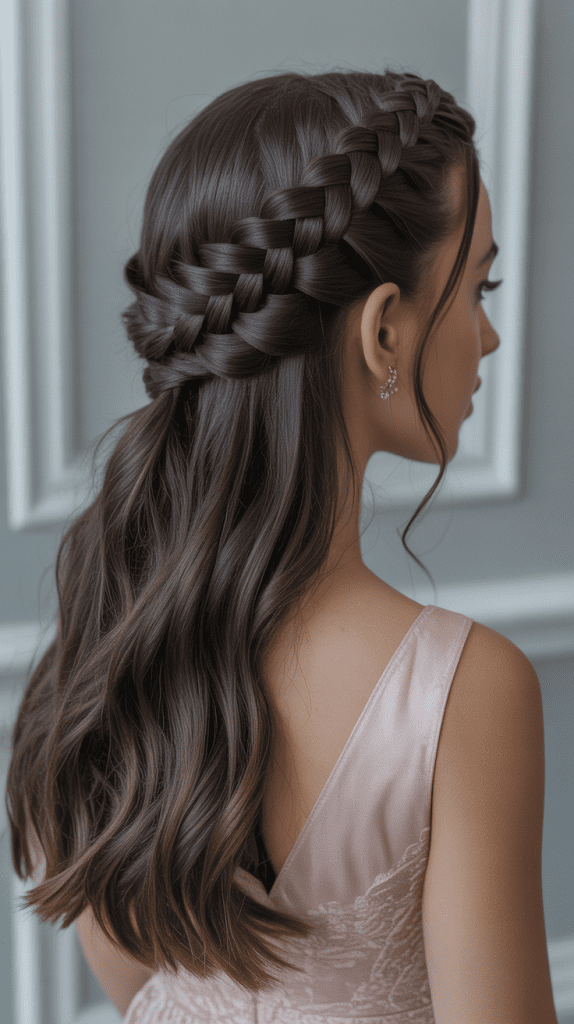
17. Dutch Braid Half Crown

The Dutch braid half crown creates a bold, raised braid that stands out dramatically while maintaining the flowing beauty of loose hair below.
This modern style is perfect for students who want to make a statement with their homecoming look.
- Begin with clean, dry hair and apply a texturizing spray for grip
- Create a side part and section off hair from one ear to the other across the crown
- Start a Dutch braid by crossing sections under instead of over
- Continue the Dutch braid around the crown of your head like a tiara
- Incorporate new hair into the braid as you work around your head
- When you reach the opposite ear, secure with a clear elastic
- Tuck the braid end under existing hair and pin securely
- Curl the remaining loose hair for added texture and movement
- Gently pull at the Dutch braid to create more volume and dimension
- Set with a strong-hold hairspray to maintain the raised braid structure
18. Rope Twist Half-Up
The rope twist half-up style creates elegant twisted sections that resemble rope while maintaining simplicity in styling.
This versatile look works well with all hair textures and can be dressed up or down depending on accessories.
- Start with lightly waved or natural hair texture
- Part your hair in the center or on your preferred side
- Take a section of hair from each temple area, about 2 inches wide
- Divide each section into two strands and twist them around each other tightly
- Continue twisting until you reach the back of your head
- Secure both rope twists together at the crown with bobby pins
- Allow the twisted ends to blend with the remaining loose hair
- Add loose curls to the bottom section for extra texture
- Pull gently at the rope twists to create more volume
- Finish with a light-hold hairspray to maintain the twisted texture
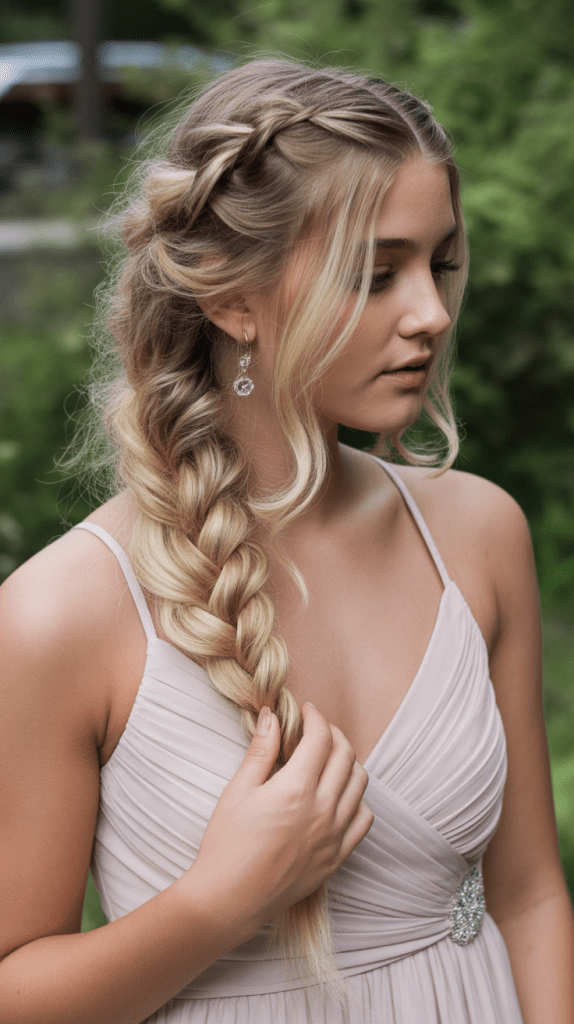
19. Side Braid Sweep
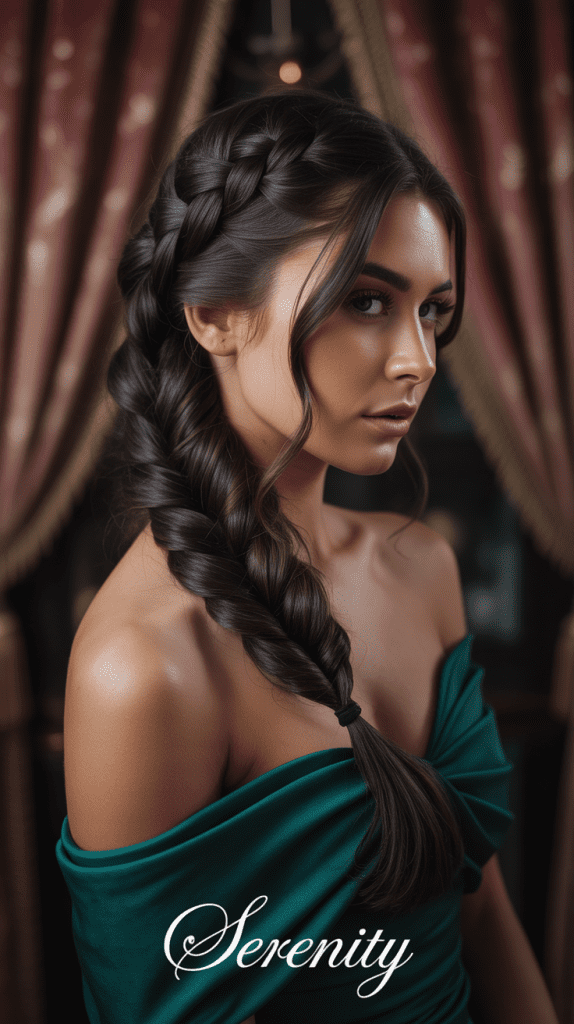
The side braid sweep creates an asymmetrical look that’s both romantic and modern.
This style works particularly well for students with long hair who want to showcase intricate braiding while maintaining flowing length.
- Create a deep side part on your preferred side
- Section off hair from the larger side of your part
- Begin a loose side braid starting from the hairline near your forehead
- Continue braiding down the side of your head, incorporating new hair as you go
- Stop braiding when you reach your shoulder and secure with a clear elastic
- Sweep the braid over one shoulder for an asymmetrical look
- Leave the remaining hair natural or add soft waves for texture
- Gently pull at the braid to create a fuller, more relaxed appearance
- Add small decorative pins along the braid for extra glamour
- Finish with a flexible-hold hairspray to maintain the sweep
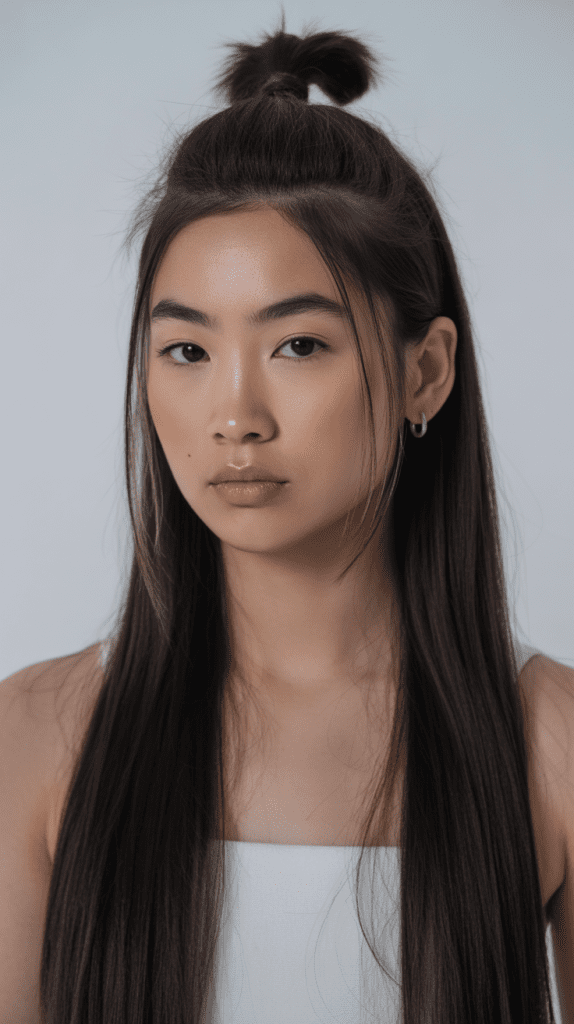
20. Half-Up Top Knot
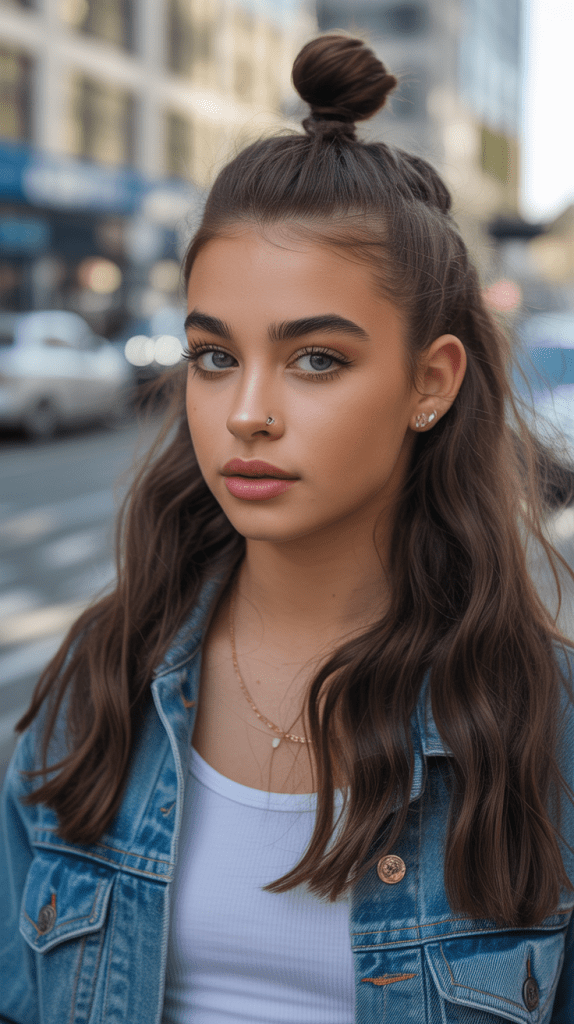
The half-up top knot combines trendy topknot styling with flowing hair below for a contemporary look that’s both chic and youthful.
This modern style is perfect for students who want to stay current with hair trends.
- Start with textured hair using a sea salt spray for grip
- Section off the top portion of your hair from temple to temple
- Gather this section high on the crown of your head
- Twist the gathered hair and wrap it into a tight knot
- Secure the knot with bobby pins, leaving some pieces deliberately messy
- Allow a few strands to fall naturally around your face
- Style the remaining hair in loose waves or leave natural
- Pull at the top knot slightly to create more volume and texture
- Add trendy accessories like wire headbands or minimalist pins
- Set with a texturizing spray for a modern, lived-in finish
21. Infinity Braid Half-Up
The infinity braid creates a figure-eight pattern that adds mathematical beauty to your hairstyle while maintaining romantic appeal.
This intricate style is perfect for students who enjoy detailed braiding techniques and want a unique homecoming look.
- Begin with slightly damp hair and apply a styling cream for control
- Create a center part and section off the top portion of hair
- Divide the top section into two equal parts
- Create a figure-eight pattern by crossing the sections over and under alternately
- Continue the infinity pattern while incorporating new hair from the sides
- Secure the braid end with a small clear elastic when you reach the desired length
- Gather the infinity braid with any remaining top hair at the crown
- Pin everything securely with bobby pins hidden within the braid
- Style the loose hair below in soft waves or natural texture
- Apply a light-hold hairspray to maintain the intricate infinity pattern
22. Twisted Halo Effect

The twisted halo effect creates a celestial appearance with twisted sections that frame the face like a soft halo.
This ethereal style is perfect for students who want a dreamy, romantic look for their homecoming celebration.
- Start with loose waves throughout your hair using a large curling iron
- Create a center part for the most symmetrical halo effect
- Take sections of hair from around your hairline, starting at the temples
- Twist each section loosely and pin them back, creating a soft frame around your face
- Continue this process around the front of your head, creating a halo effect
- Leave the twisted sections slightly loose for a more natural, romantic appearance
- Allow the remaining hair to flow in soft waves over your shoulders
- Add small decorative pins or flowers within the twisted halo for extra detail
- Use a light-hold hairspray to maintain the twisted shape without stiffness
- Pull out a few wispy pieces around your face for added softness
23. Cascade Braid Half-Up
The cascade braid creates a flowing, waterfall-like effect with multiple small braids that cascade down the side of your head.
This intricate style combines multiple braiding techniques for a truly unique homecoming look.
- Begin with lightly textured hair to help the braids hold their shape
- Create a deep side part on your preferred side
- Start with the larger section and begin multiple small braids near the hairline
- Create 3-4 small braids of varying lengths down the side of your head
- Allow each braid to flow into the loose hair at different points
- Secure each small braid with tiny clear elastics
- Gather all the braid ends together at the back of your head
- Secure the gathered section with bobby pins or a decorative clip
- Style the remaining loose hair in soft waves for movement
- Apply a medium-hold hairspray to maintain the multiple braid structure
24. Elegant Chignon Half-Up

The elegant chignon half-up style brings sophisticated French styling to modern homecoming looks.
This refined style works beautifully for students who appreciate classic elegance with contemporary appeal.
- Start with smooth, straight hair for the most polished finish
- Section off the top half of your hair from ear to ear
- Smooth this section back tightly using a fine-tooth comb
- Create a low chignon by twisting the section and pinning it into a neat knot
- Use bobby pins that match your hair color for invisible hold
- Leave the remaining hair flowing smoothly over your shoulders
- Apply a smoothing serum for extra shine and polish
- Add subtle accessories like small crystal pins for elegance
- Use a firm-hold hairspray to maintain the sleek chignon structure
- Keep face-framing pieces minimal for the cleanest look
25. Bohemian Twist Crown
The bohemian twist crown creates a relaxed, festival-inspired look that’s perfect for free-spirited students.
This style combines multiple loose twists with natural texture for an effortlessly beautiful appearance.
- Begin with naturally textured or slightly wavy hair
- Apply a texturizing spray throughout your hair for better grip
- Create multiple loose twists starting from different points around your hairline
- Vary the size and tightness of each twist for a more organic look
- Pin the twists back at different heights to create a crown-like effect
- Leave plenty of hair loose and flowing for the bohemian aesthetic
- Pull out random pieces from the twists for added texture and volume
- Add small flowers, feathers, or bohemian accessories throughout the twists
- Use a light-hold hairspray to maintain texture without stiffness
- Embrace imperfection for the most authentic bohemian appearance
26. Sculptural Knot Half-Up

The sculptural knot half-up style creates an artistic, architectural appearance that’s both modern and sophisticated.
This avant-garde look is perfect for students who want to make a bold fashion statement.
- Start with smooth, straight hair for the most defined sculptural effect
- Section off a large portion of hair from the crown area
- Create a high, tight ponytail with this top section
- Divide the ponytail into two or three sections
- Twist and knot these sections together to create a sculptural shape
- Pin the knot securely to maintain its architectural form
- Leave the remaining hair sleek and straight for contrast
- Use strong-hold gel or pomade to maintain clean lines
- Add modern accessories like geometric clips if desired
- Finish with a strong-hold hairspray to preserve the sculptural structure
27. Romantic Rose Braid
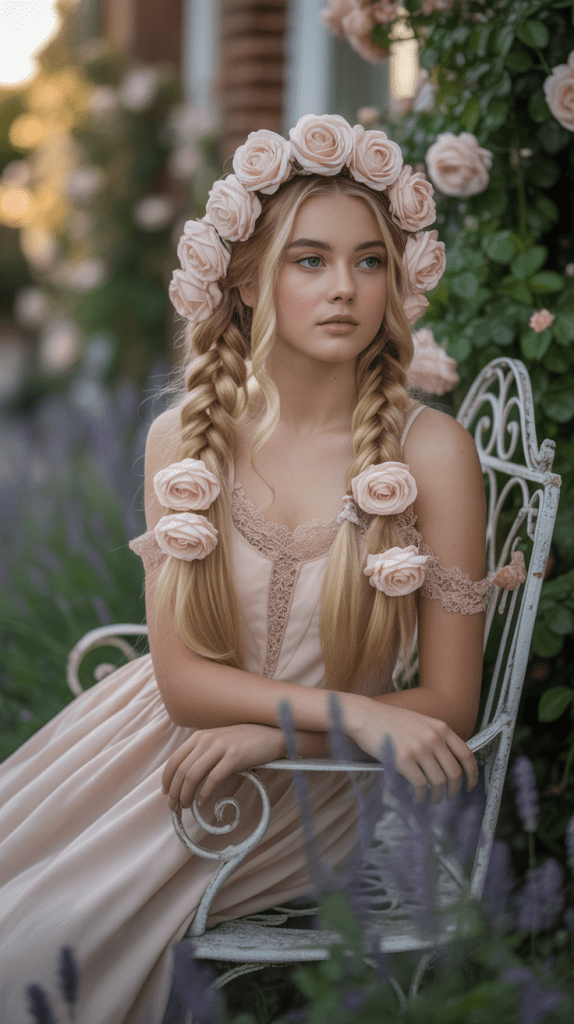
The romantic rose braid creates flower-like shapes using braiding techniques that mimic the appearance of roses.
This feminine style is perfect for students who want ultra-romantic styling for their homecoming night.
- Begin with slightly textured hair using a texturizing cream
- Create small sections of hair and braid each one tightly
- Coil each braid into a spiral shape to mimic a rose bloom
- Pin each “rose” securely to your head, creating a half-crown effect
- Vary the sizes of your rose braids for more natural appearance
- Leave the remaining hair in soft, romantic curls
- Add small pearl pins within each rose braid for extra elegance
- Use bobby pins that match your hair color to keep roses secure
- Apply a light-hold hairspray to maintain the rose shapes
- Pull gently at the edges of each rose to create fuller blooms
28. Geometric Braid Pattern
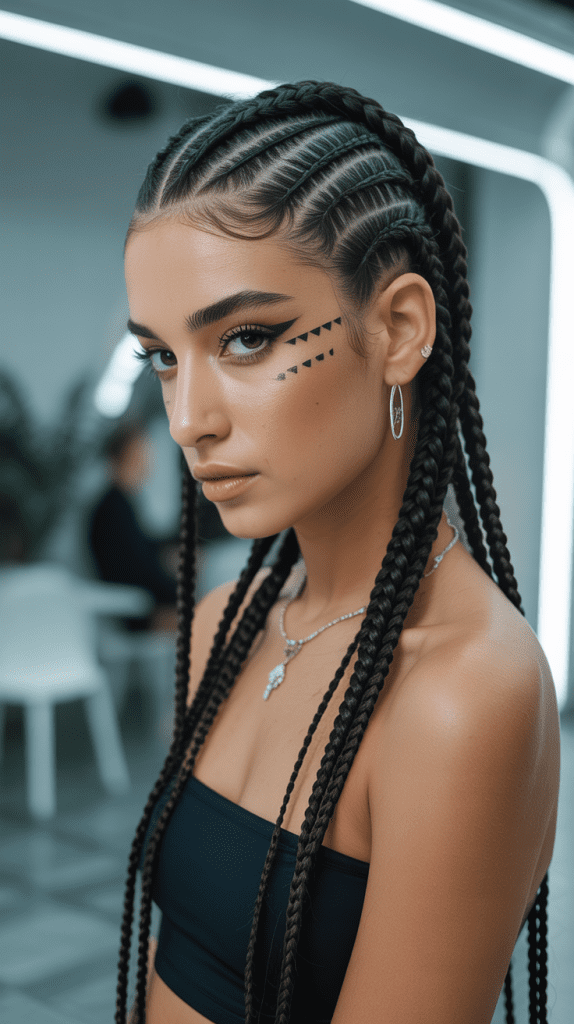
The geometric braid pattern creates precise, angular designs that showcase mathematical beauty in hair styling.
This modern approach to braiding is perfect for students who appreciate contemporary art and design.
- Start with clean, straight hair for the most precise geometric lines
- Plan your geometric pattern before beginning the braiding process
- Use a rattail comb to create perfectly straight sections
- Create tight, precise braids following your planned geometric design
- Maintain consistent tension throughout each braid for uniform appearance
- Use small clear elastics to secure each geometric section
- Pin the braided pattern securely to maintain its architectural structure
- Leave the remaining hair sleek and straight to showcase the geometric design
- Apply a strong-hold gel for the cleanest, most defined lines
- Finish with firm-hold hairspray to preserve the geometric precision
29. Twisted Flower Garden

The twisted flower garden style creates multiple flower-like shapes using twisted hair sections, resembling a beautiful garden blooming in your hair.
This whimsical style is perfect for students who love nature-inspired beauty.
- Begin with lightly waved hair to provide texture for the twists
- Create multiple small sections of hair throughout the crown area
- Twist each section tightly and coil it into flower-like shapes
- Pin each twisted flower securely with bobby pins hidden within the design
- Vary the sizes of your twisted flowers for a more natural garden effect
- Leave some sections looser than others for organic appearance
- Add small fresh flowers or floral accessories between the hair flowers
- Style the remaining loose hair in soft waves that complement the garden theme
- Use a light-hold hairspray to maintain the twisted flower shapes
- Pull gently at the edges of each twisted flower to create fuller blooms
30. Crown Braid Finale
The crown braid finale combines multiple braiding techniques into one spectacular style that serves as the perfect culmination of homecoming hair artistry.
This show-stopping look incorporates elements from various braid styles for ultimate elegance.
- Start with perfectly prepped hair using volumizing mousse and heat protectant
- Plan your braid combination, choosing 2-3 different braiding techniques
- Begin with a Dutch braid along one side of your head
- Transition into a fishtail braid as you work around the crown
- Incorporate small accent braids throughout the main crown braid
- Secure all braid ends with clear elastics before pinning
- Create a cascading effect with any remaining braid length
- Add elegant accessories like small crystals or pearls throughout the braids
- Leave the remaining hair in luxurious waves for maximum impact
- Finish with professional-strength hairspray for all-night hold
- Take photos to document this masterpiece hairstyle
Essential Tools for Success
Creating stunning half-up half-down hairstyles requires the right tools and products for professional results.
A high-quality curling iron with multiple barrel sizes allows for versatile curl patterns, while a good flat iron ensures smooth sections when needed.
Professional-grade bobby pins that match your hair color are essential for invisible hold, and a fine-tooth comb helps create precise parts and sections.
Quality hair products make a significant difference in both styling ease and longevity.
A heat protectant spray prevents damage while styling, volumizing mousse adds lift and texture, and flexible-hold hairspray maintains your style without stiffness.
Texturizing spray enhances natural movement, while shine serum adds the finishing touch for red-carpet worthy results.
Troubleshooting Common Issues
- Slipping Styles: Use bobby pins in an X-pattern for stronger hold and apply texturizing spray before styling for better grip
- Flat Crown Area: Tease gently at the roots before securing the half-up section, or use volumizing powder for instant lift
- Frizzy Texture: Apply a smoothing serum to damp hair before styling and use a humidity-blocking spray as your final step
- Short Hair Struggles: Use small clear elastics first, then cover with decorative accessories or wrapped hair sections
- Uneven Sections: Use the tip of a rattail comb to create precise parts and measure sections with your fingers for symmetry
Color and Accessory Coordination
The beauty of half-up half-down styles lies in their versatility with both hair accessories and dress colors.
Metallic hair pins and clips complement cool-toned dresses in blues, purples, and silvers, while warm gold accessories pair beautifully with reds, oranges, and warm-toned gowns.
Pearl accessories work universally well with any color palette and add timeless elegance to any style.
For students with colored hair, these styles showcase color placement beautifully.
Highlights become more visible in twisted and braided sections, while ombre effects are enhanced by the contrast between the secured top section and flowing bottom half.
Temporary color sprays or chalks can add fun pops of color that coordinate with your dress or school colors.
Professional Styling vs. DIY Approach
While many of these styles can be achieved at home with practice and patience, some of the more intricate designs may benefit from professional styling.
Simple twisted styles, basic braids, and loose waves are perfect for DIY styling and can be mastered with a few practice sessions.
More complex styles like the Crown Braid Finale or Geometric Braid Pattern may require professional expertise for the best results.
If you choose to style your hair yourself, practice your chosen look at least once before homecoming night.
Take photos from different angles to ensure you’re happy with the overall appearance, and time yourself to ensure you can complete the style within your getting-ready schedule.
Having a friend help with hard-to-reach sections can make the process easier and more enjoyable.
Hair Health Considerations
Homecoming preparation often involves heat styling, chemical treatments, and potentially harsh styling products.
Protect your hair’s health by using heat protectant sprays before any thermal styling, deep conditioning treatments in the weeks leading up to your event, and gentle, sulfate-free shampoos that won’t strip your hair of natural oils.
Schedule any major hair changes, such as cuts or color treatments, at least two weeks before homecoming to allow time for adjustments if needed.
This timeline also ensures your hair has recovered from any chemical processing and looks its healthiest for your special night.
Timeline Planning for Homecoming Day
Creating a realistic timeline for your homecoming hair styling ensures you won’t feel rushed and can enjoy the preparation process.
For simple styles requiring 15 minutes or less, plan to start your hair 30 minutes before you need to move on to makeup or getting dressed.
More complex styles requiring 30-45 minutes should be started 60-90 minutes before your next preparation step.
Factor in time for touch-ups, photos, and potential adjustments to your style.
Having a backup plan or simplified version of your chosen style can save the day if time runs short or if your first attempt doesn’t turn out as expected.
Conclusion
Homecoming represents one of the most exciting milestones in high school, and choosing the perfect hairstyle should enhance your confidence and complement your personal style.
The “30 Cute HoCo Half-Up Half-Down Hairstyles Everyone Loves” showcased in this guide offers something beautiful for every student, regardless of hair type, length, or skill level.
From classic twisted styles that can be mastered in minutes to intricate braided creations that rival professional salon work, these versatile looks ensure you’ll feel absolutely stunning on your special night.
Remember that the best hairstyle is one that makes you feel confident and comfortable, allowing your natural beauty and personality to shine through.
With proper preparation, the right tools, and a little practice, you’ll be ready to create a memorable look that photographs beautifully and lasts throughout your entire homecoming celebration.