We’ve all been there—waking up to hair that’s less than fresh, with that telltale oiliness at the roots that makes you want to reach for dry shampoo or hide under a hat.
But here’s a secret that experienced hairstylists have known for years: greasy hair is actually a blessing in disguise when it comes to creating stunning updos.
The natural oils in your hair provide the perfect texture and grip for styles that would otherwise slip and fall apart on freshly washed strands.
In this comprehensive guide on 27 Elegant Updo Greasy Hair Hairstyles, you’ll discover how to transform what you might consider a bad hair day into an opportunity for gorgeous, salon-worthy looks.
Whether you’re heading to work, attending a wedding, or simply want to feel put-together without washing your hair, these elegant updos will become your go-to solutions.
From classic chignons to modern twisted buns, each style harnesses the natural texture of second-day (or third-day!) hair to create looks that are not only beautiful but also longer-lasting than styles done on freshly washed hair.
Get ready to embrace your greasy roots and learn techniques that will save you time, protect your hair from overwashing, and keep you looking effortlessly chic no matter the occasion.
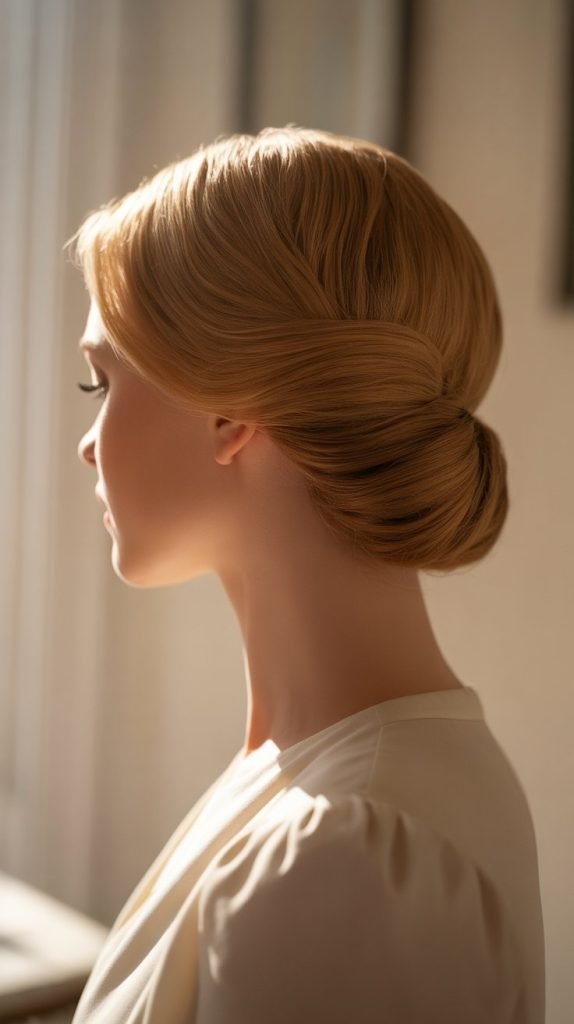
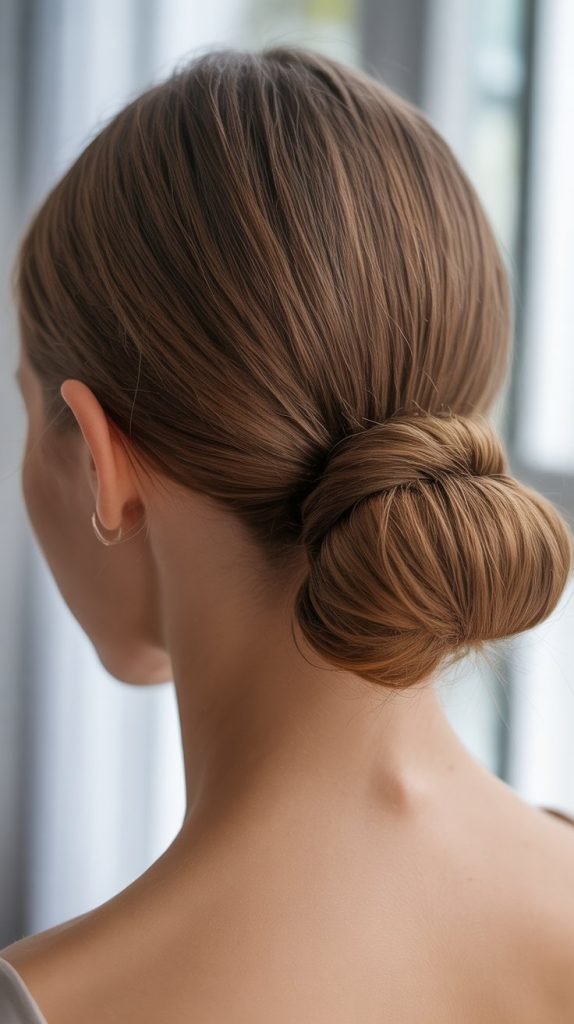
1. The Classic Low Bun with Side Part

The classic low bun paired with a deep side part is the ultimate solution when your hair needs an elegant update without a wash.
This timeless style works beautifully with greasy hair because the natural oils help smooth flyaways and create that sleek, polished finish that’s perfect for professional settings or formal events.
How to Create This Look
- Start by brushing your hair thoroughly to distribute the natural oils evenly from roots to ends.
- Create a deep side part using a tail comb for precision and drama.
- Gather all your hair at the nape of your neck, keeping tension smooth and controlled.
- Twist the hair into a rope and wrap it around itself to form a bun shape.
- Secure with bobby pins, inserting them in an X-pattern for maximum hold.
- Use a light hairspray to set any loose pieces around the hairline.
Why It Works for Greasy Hair
- The natural oils act as a styling product, eliminating the need for additional serums or gels.
- Greasy hair holds pins better, making the bun more secure throughout the day.
- The weight of oily hair prevents the bun from becoming too fluffy or losing its shape.
- Second-day texture provides better grip when twisting, preventing slippage.
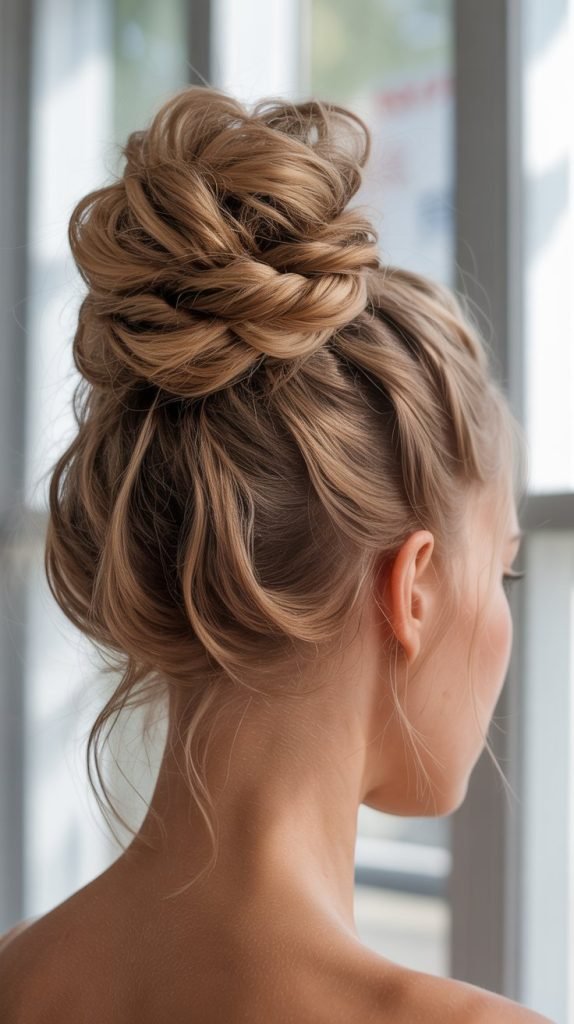
2. Messy Top Knot with Face-Framing Pieces
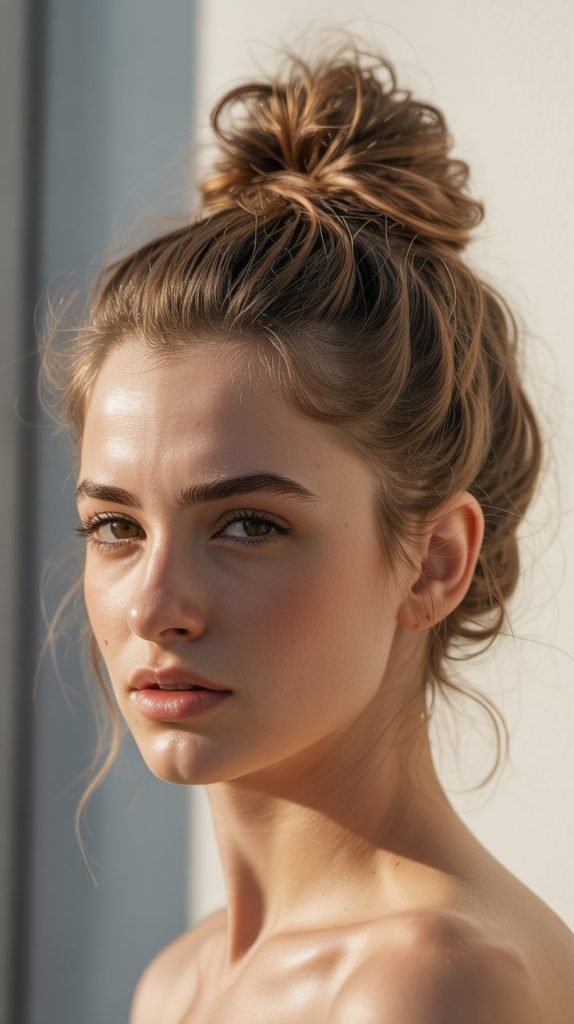
The messy top knot is a casual yet chic option that actually looks better with greasy hair than freshly washed strands.
This effortlessly cool style embraces texture and volume while keeping oily roots disguised at the crown.
Styling Steps
- Flip your head upside down and gather hair into a high ponytail without brushing.
- Twist the ponytail loosely and wrap it around the base to create volume.
- Pull pieces out strategically to create that “undone” texture.
- Leave a few strands around your face for a soft, romantic effect.
- Secure with a hair tie and add pins where needed for stability.
Best Occasions for This Style
- Casual weekend brunches or coffee dates with friends.
- Work-from-home video calls where you need to look presentable quickly.
- Gym sessions or active days when you need hair completely off your neck.
- Running errands while still maintaining a stylish appearance.
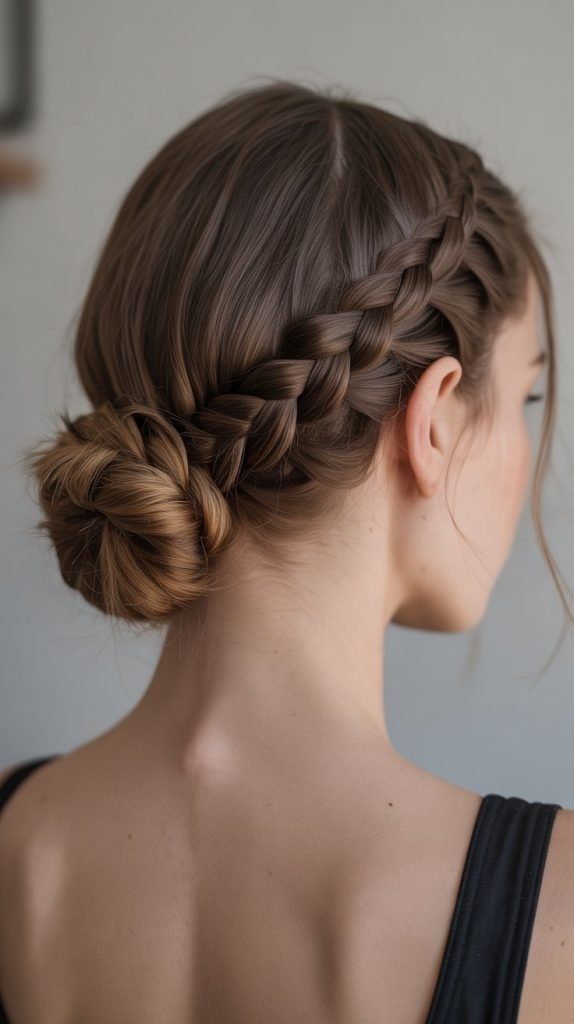
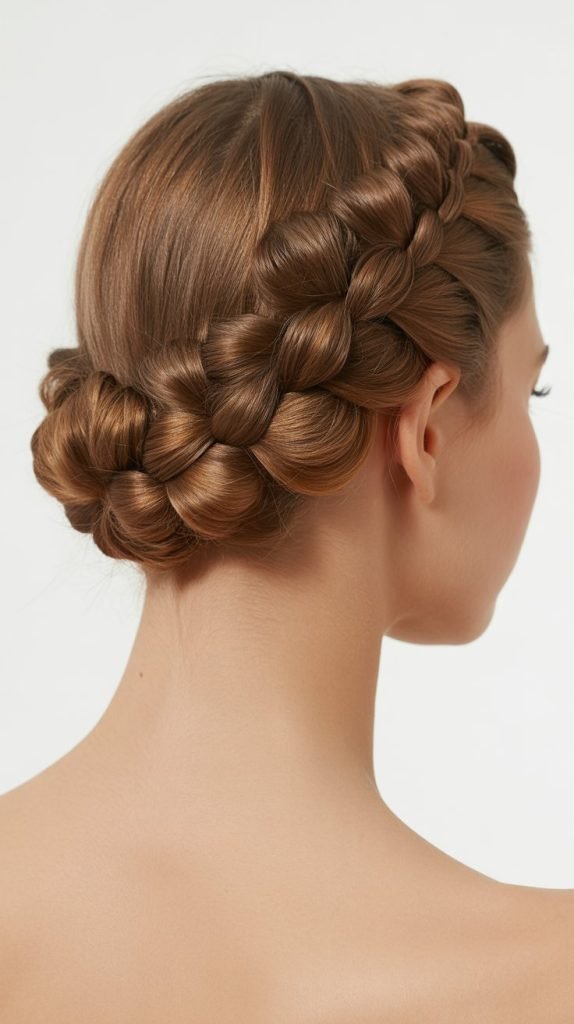
3. Braided Crown Updo
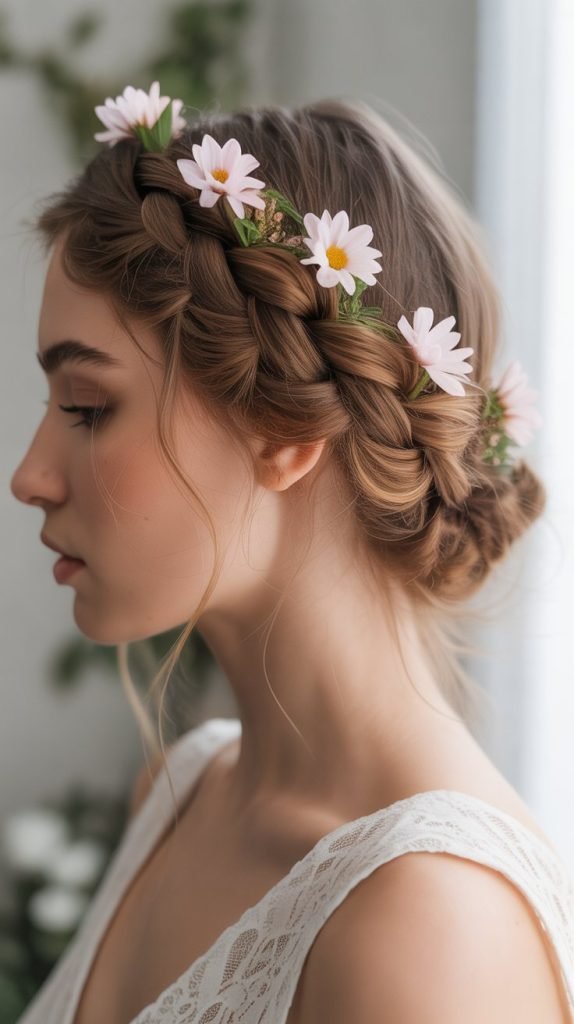
The braided crown updo transforms greasy hair into a romantic, bohemian masterpiece perfect for weddings, festivals, or any special occasion.
The natural oils in unwashed hair provide the ideal texture for braiding, preventing strands from slipping out.
Braiding Technique
- Part your hair down the middle to create two equal sections.
- Begin a Dutch braid on one side, starting from behind the ear and working forward.
- Continue braiding across the front of your head like a headband.
- Repeat the process on the other side, meeting at the back.
- Tuck the ends underneath and secure with bobby pins invisibly.
- Gently pull at the braid edges to create fuller, more textured loops.
Accessorizing Tips
- Add small flowers or decorative pins throughout the crown for weddings.
- Weave in ribbon that matches your outfit for a coordinated look.
- Use metallic hair cuffs or rings along the braids for an edgy vibe.
- Keep it simple with just your natural hair for everyday elegance.
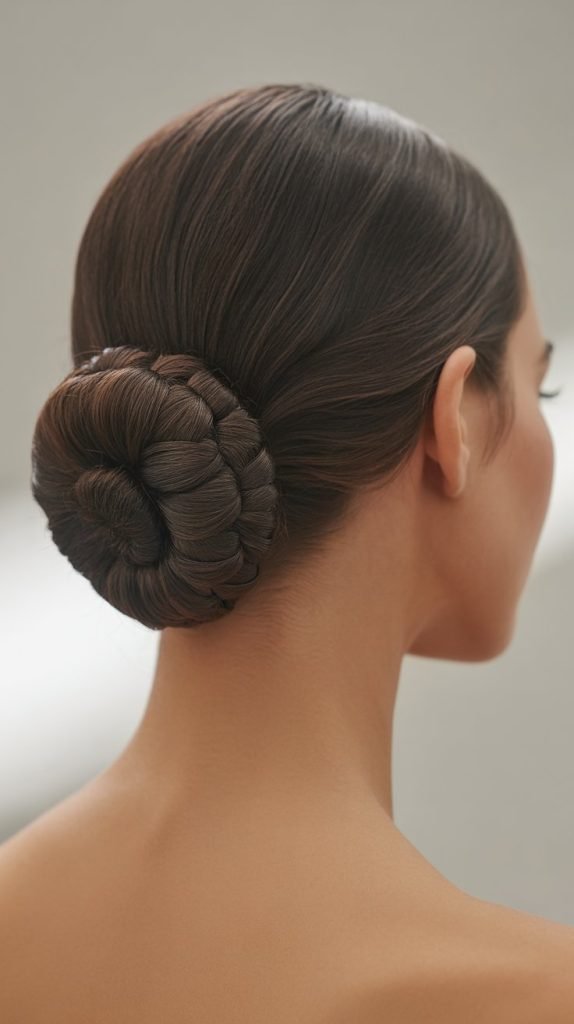
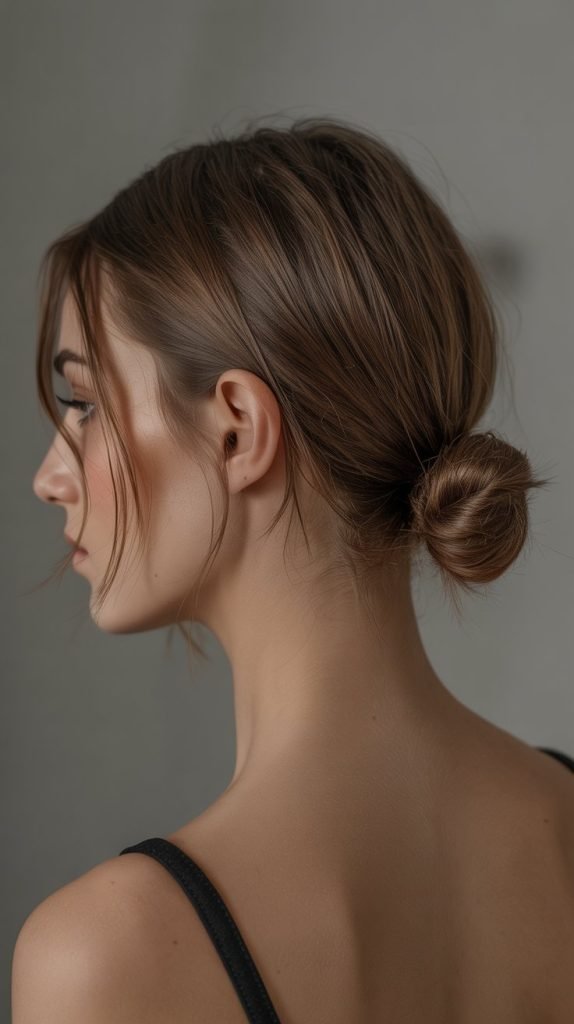
4. Sleek Ballerina Bun
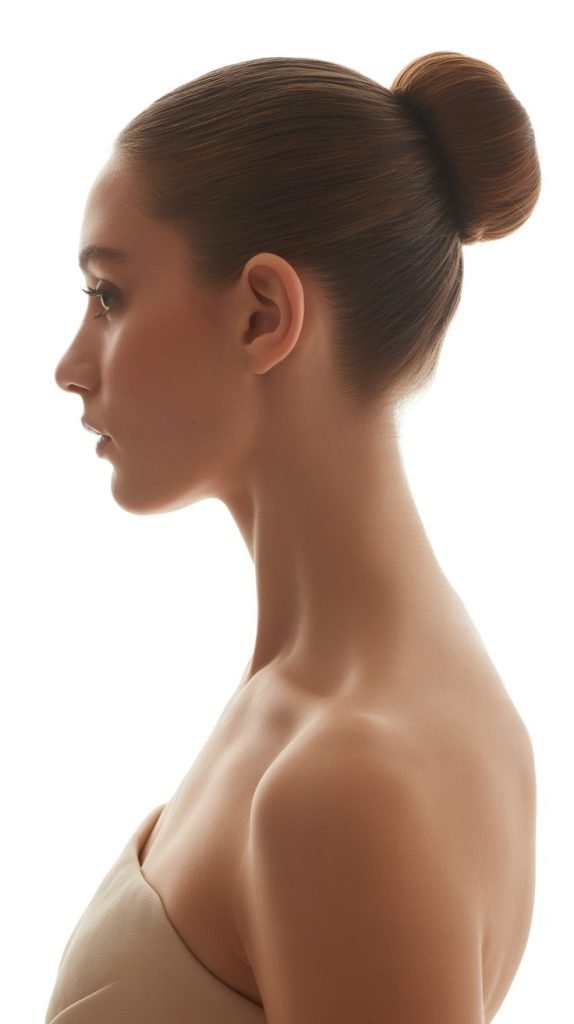
The sleek ballerina bun is sophistication at its finest, and greasy hair is your secret weapon for achieving that tight, polished finish dancers are famous for.
This style works exceptionally well for formal events where you need to look immaculate all night long.
Achieving Perfect Smoothness
- Apply a small amount of gel or pomade to your palms before starting.
- Brush hair upward into a high ponytail using a fine-tooth comb for maximum smoothness.
- Eliminate any bumps by brushing from multiple angles before securing.
- Twist the ponytail tightly and wrap it around the base in a spiral pattern.
- Use hairpins to secure every layer of the bun to your head.
- Finish with strong-hold hairspray and a soft brush to smooth any flyaways.
- Use an edge control product or toothbrush to lay down baby hairs around the hairline.
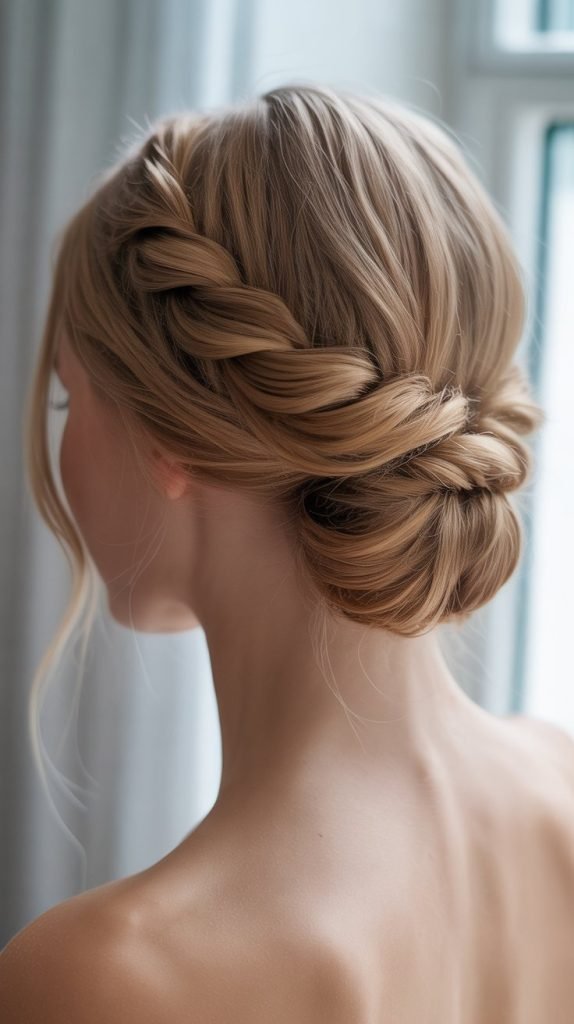
5. Twisted Side Bun
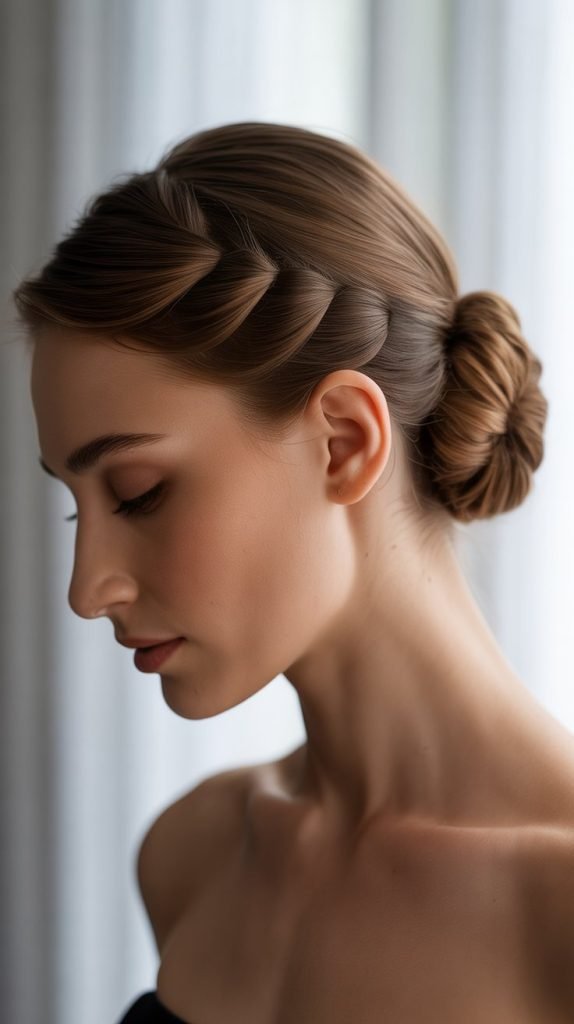
The twisted side bun offers asymmetrical elegance that’s both modern and timeless, perfectly suited for greasy hair that needs disguising while maintaining style.
This look draws attention to your profile and works beautifully for both daytime and evening events.
Creating the Twist
- Sweep all your hair to one side, deciding which side best flatters your face shape.
- Divide the hair into two equal sections at your shoulder.
- Twist each section individually in the same direction (clockwise or counterclockwise).
- Wrap the two twisted sections around each other, creating a rope-like texture.
- Coil this rope into a bun shape at the nape behind your ear.
- Secure thoroughly with pins, hiding them within the twisted texture.
Face Shape Considerations
- Oval faces can wear this style on either side with equal success.
- Round faces benefit from wearing the bun on the side to create elongation.
- Square faces should add soft tendrils around the face to soften angular features.
- Heart-shaped faces look best with the bun positioned lower on the neck.
6. French Twist with Volume

The French twist is a quintessential elegant updo that has graced red carpets and formal events for decades, and the secret to its staying power lies in slightly greasy hair.
This sophisticated style creates an illusion of longer neck and refined grace.
Step-by-Step French Twist
- Gather your hair to one side and hold it firmly at the center back of your head.
- Begin twisting the hair inward toward the center, creating a vertical roll.
- Continue twisting upward while tucking the ends into the center of the roll.
- Use one hand to hold the twist while inserting bobby pins vertically into the roll.
- Place pins in a zigzag pattern for maximum security throughout the twist.
- Tease the crown area before beginning for added height and volume.
- Set with hairspray, concentrating on the pins and any loose areas.
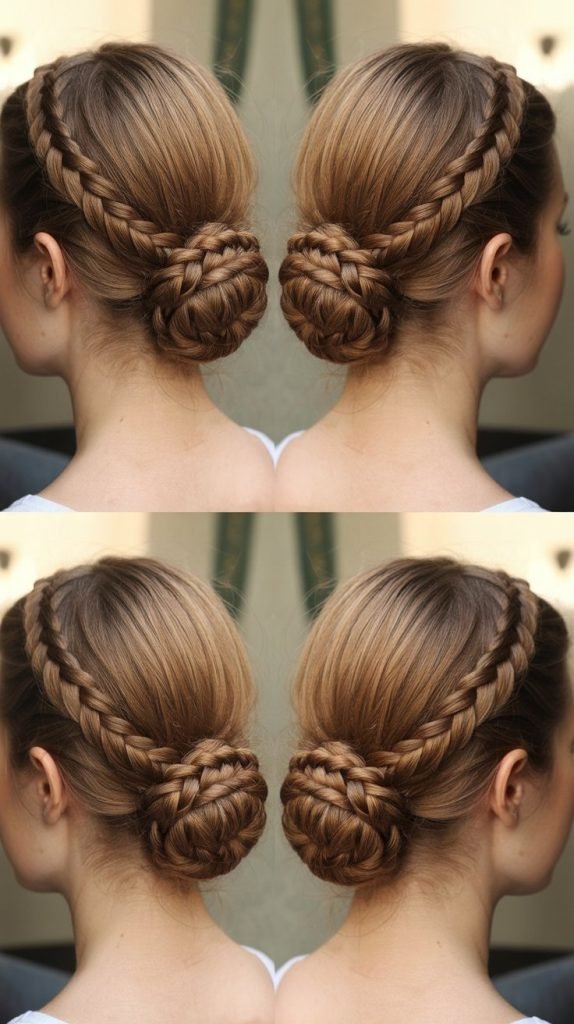
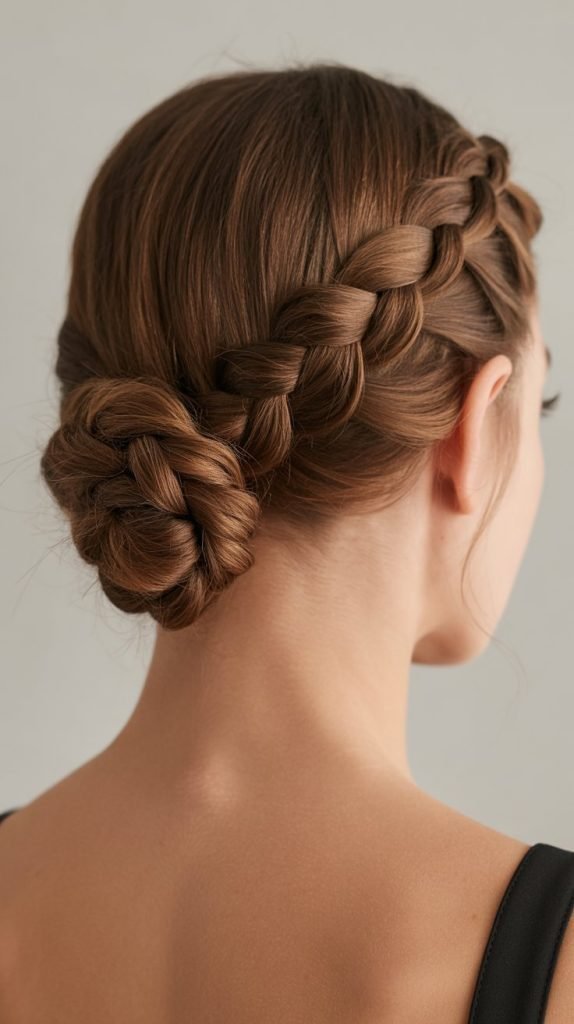
7. Braided Low Bun Combo
The braided low bun combination offers texture and interest while keeping greasy roots concealed within intricate braiding patterns.
This versatile style transitions seamlessly from office to evening events with just a few accessory changes.
Combination Techniques
- Create two or three braids starting from different points around your head.
- Leave the remaining loose hair to gather into a low ponytail.
- Wrap each braid around the base of the ponytail in different directions.
- Tuck the loose ponytail into a bun in the center of the braided frame.
- Secure each braid end with pins hidden underneath other sections.
- Pull gently at the braid edges to create dimension and fullness.
8. Chignon with Wrapped Detail
The chignon with wrapped detail is understated elegance personified, and the natural texture of greasy hair makes this style hold its shape beautifully throughout any event.
This refined updo is perfect for professional settings and formal occasions alike.
Creating Wrapped Sections
- Form a low ponytail and divide it into three equal sections before beginning.
- Take one section and wrap it around the base, securing the end with pins.
- Repeat with the second section, wrapping in the opposite direction for visual interest.
- Use the third section to cover any visible elastic or pins from the first two wraps.
- Ensure each wrapped section slightly overlaps the previous one for seamless appearance.
- Tuck all ends securely underneath the chignon to maintain a clean finish.
9. Half-Up Twisted Bun
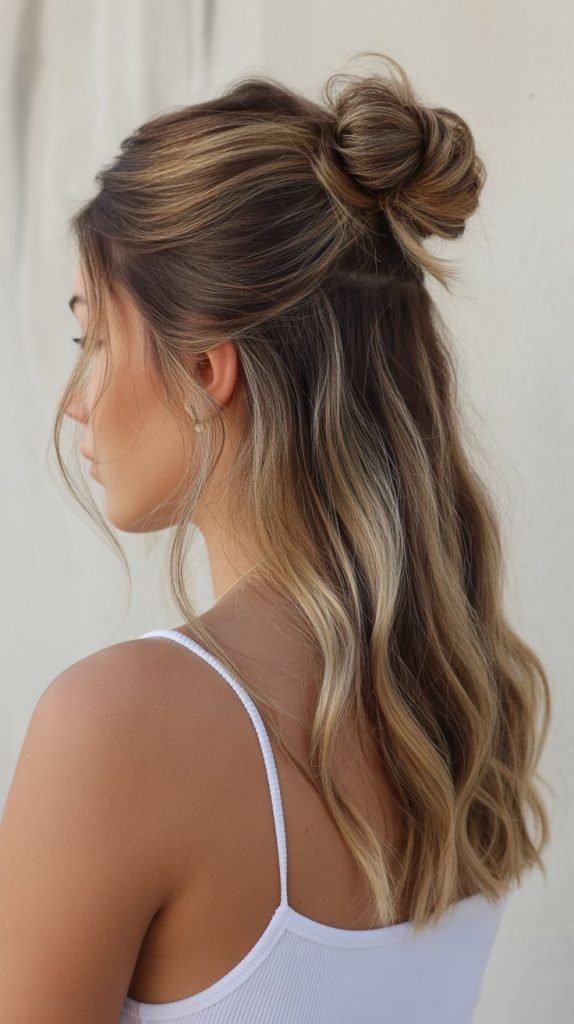
The half-up twisted bun combines the best of both worlds—showing off your length while managing greasy roots at the crown.
This style is incredibly versatile and works for virtually any occasion from casual to semi-formal.
Half-Up Styling Method
- Section off the top half of your hair from ear to ear across the crown.
- Twist this section loosely as you bring it back toward the center of your head.
- Coil the twisted section into a small bun at the crown.
- Secure with pins and leave the bottom section flowing naturally.
- Add waves or curls to the loose hair for extra polish if desired.
Variation Ideas
- Create two twisted buns instead of one for a playful double-bun effect.
- Incorporate small braids before twisting for added texture and detail.
- Pull face-framing pieces out before creating the bun for a softer look.
- Use decorative pins or clips at the bun for a statement accessory moment.
10. Rope Braid Bun
The rope braid bun offers a unique twisted texture that looks complex but is surprisingly simple to create, especially with greasy hair that provides natural grip.
This style adds visual interest while keeping oily hair completely under control.
Rope Braiding Basics
- Divide your hair into two equal sections after gathering into a ponytail.
- Twist both sections individually in the same direction (both clockwise or both counterclockwise).
- Wrap the two twisted sections around each other in the opposite direction.
- This opposite-direction wrapping creates the rope effect that won’t unravel.
- Coil the completed rope braid around the ponytail base to form the bun.
- Secure the end underneath the bun with several strong bobby pins.
11. Gibson Tuck
The Gibson Tuck is a vintage-inspired updo that experienced a resurgence in recent years, and it’s perfectly suited for greasy hair that needs elegant concealment.
This romantic style creates a beautiful rolled effect at the nape.
Gibson Tuck Tutorial
- Create a low ponytail with a loose hair elastic, positioned at the nape.
- Make a hole in the hair above the elastic by separating it into two sections.
- Flip the ponytail up and through this hole, creating an inverted twist.
- Continue rolling the remaining length under and tucking it into the space.
- Secure the tucked hair with bobby pins inserted horizontally.
- Gently pull at the rolled section to create volume and width.
- Add decorative pins or a barrette at the center for vintage charm.
12. Braided Bun with Wrap
The braided bun with wrap is an intricate-looking style that’s actually quite manageable, and greasy hair’s texture makes the braiding process smoother.
This elegant updo is perfect for special occasions when you want something memorable.
Advanced Braiding Technique
- Create a standard bun at your desired height on the head.
- Take small sections from around the perimeter and braid each one.
- Wrap each completed braid around the bun in different patterns.
- Cross braids over each other to create a woven appearance.
- Secure each braid end by pinning it under another braid for concealment.
- Use a small amount of hairspray between each braid for lasting hold.
13. Asymmetrical Low Bun
The asymmetrical low bun breaks away from centered styles to create modern, editorial appeal that works beautifully with the texture of greasy hair.
This contemporary take on classic elegance adds unexpected interest to your look.
Positioning for Asymmetry
- Decide which side will showcase the bun based on your outfit or jewelry.
- Sweep hair smoothly to that side, creating a diagonal line from opposite temple.
- Position the bun low, just behind and below the ear.
- Ensure the other side remains sleek and close to the head for contrast.
- Add interest by leaving the hair slightly looser on the bun side.
14. Double Twisted Bun
The double twisted bun creates dimension and volume through layering, making it an excellent choice for those with greasy hair who want to add height without teasing.
This style works particularly well for medium to long hair lengths.
Creating Double Layers
- Divide your hair horizontally into top and bottom sections.
- Create a twisted bun with the bottom section first, securing it firmly.
- Form a second twisted bun with the top section, positioning it above or slightly overlapping.
- Ensure the second bun is slightly larger for visual balance.
- Pin both buns securely, making sure they connect for stability.
- Pull small pieces from each bun to create intentional texture.
15. Knotted Low Updo
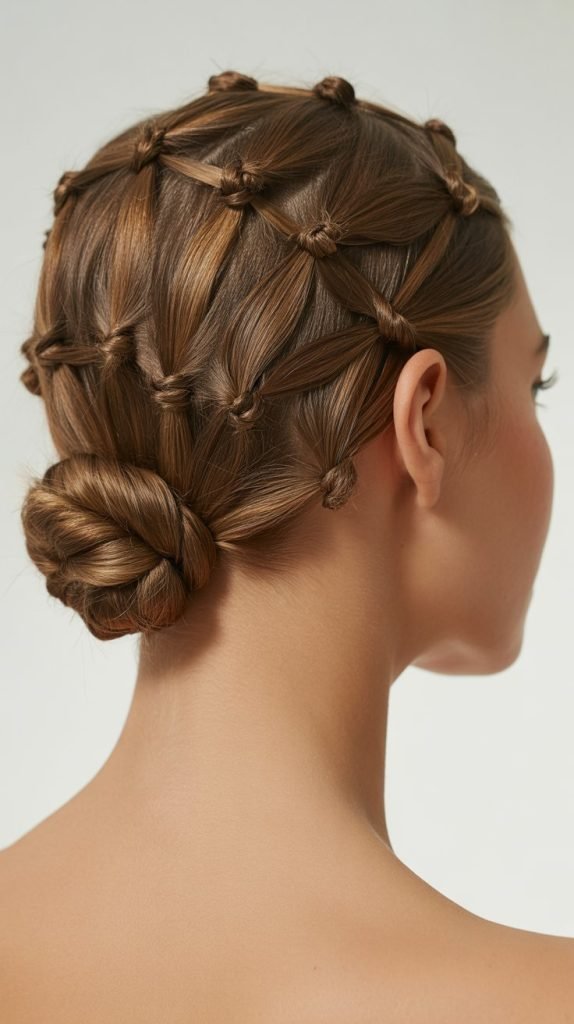
The knotted low updo uses simple knots instead of traditional twisting or braiding, creating unique texture that embraces the natural grip of greasy hair.
This modern approach to updos feels fresh and contemporary.
Knotting Technique
- Divide hair into two equal sections after applying light product.
- Tie these sections together in a simple overhand knot.
- Continue tying knots down the length until you run out of hair.
- Coil the knotted section into a bun shape at the nape.
- Secure with pins placed strategically within the knots themselves.
- Pull gently at each knot to create fuller, more visible loops.
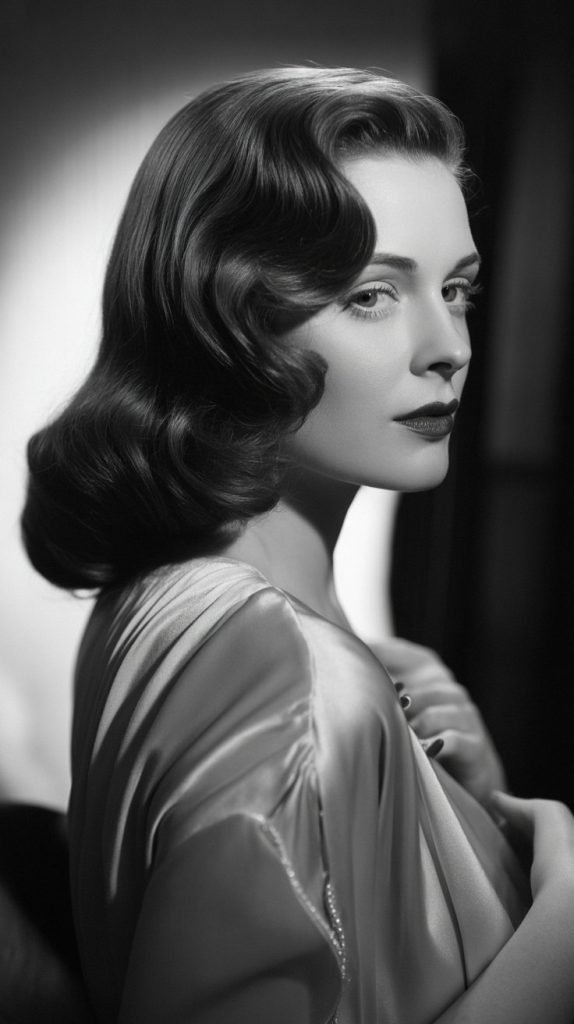
16. Pinned Roll Updo
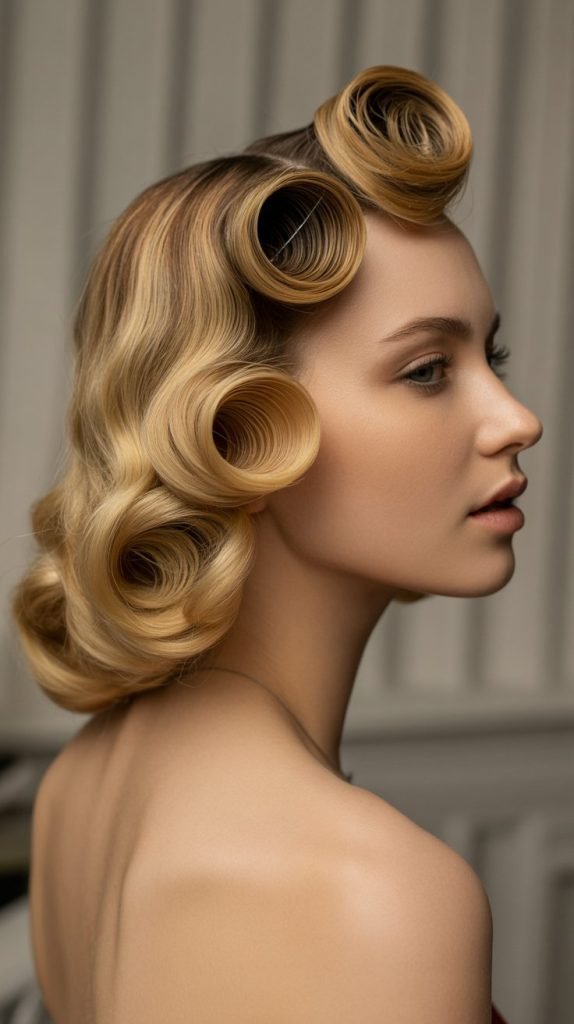
The pinned roll updo creates elegant waves and curves using strategic pinning techniques, and greasy hair’s pliability makes it easier to shape these rolls.
This vintage-inspired style evokes Old Hollywood glamour.
Rolling and Pinning Method
- Section hair into horizontal layers from nape to crown.
- Take the bottom section and roll it under toward the scalp.
- Pin the roll securely with bobby pins placed inside the curve.
- Move to the next section up and repeat the rolling process.
- Continue until all hair is incorporated into rolled waves.
- Each roll should rest on top of the one below it for structure.
- Finish with flexible-hold hairspray to maintain shape without stiffness.
17. Braided Chignon
The braided chignon combines the sophistication of a classic chignon with the textural interest of braiding, making it perfect for greasy hair that needs both style and coverage.
This elegant fusion works for weddings and formal events.
Braided Chignon Construction
- Create three separate braids starting from different positions on the head.
- Leave them loose at the bottom rather than securing with elastics initially.
- Begin wrapping the first braid into a circular chignon shape.
- Layer the second braid around the first, building outward.
- Add the third braid to complete the circular design.
- Tuck all ends underneath the chignon and pin securely from multiple angles.
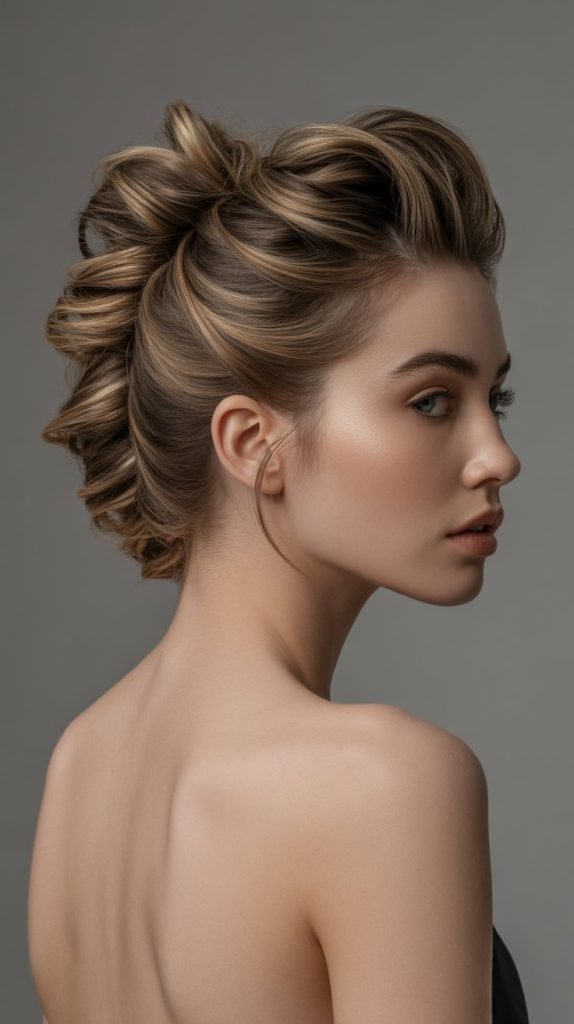
18. Faux Hawk Updo
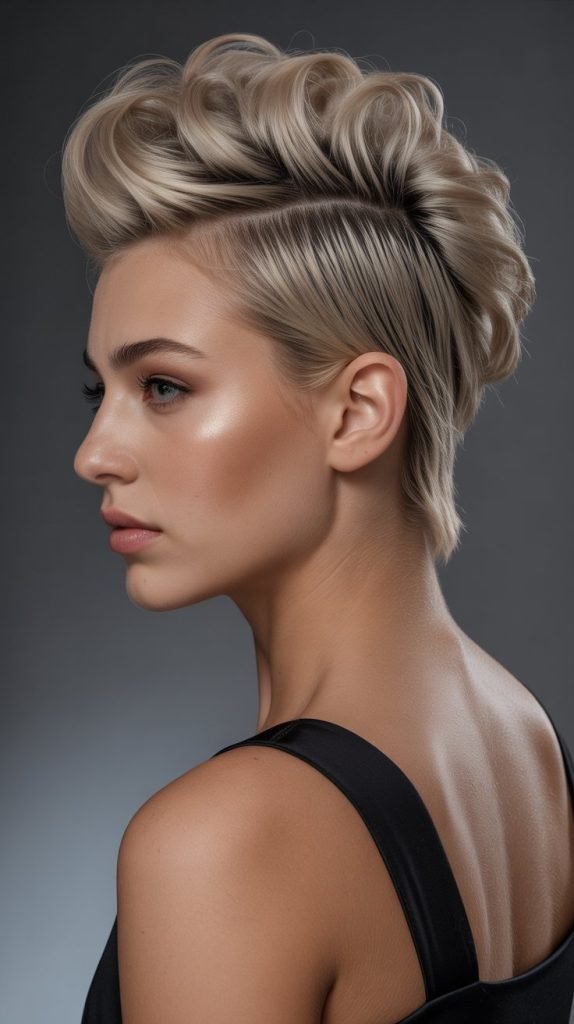
The faux hawk updo brings edgy sophistication to greasy hair, transforming oily roots into a statement style with height and attitude.
This bold look is perfect for those who want to stand out at evening events or creative gatherings.
Creating the Faux Hawk
- Section hair down the center from forehead to nape, creating a mohawk-shaped area.
- Smooth the side sections down and back, pinning them flat against the head.
- Tease the center section at the roots to create volume and height.
- Fold and pin this section backward in sections, creating raised bumps.
- Each folded section should stand up before being pinned down behind it.
- Use strong-hold hairspray between each section for lasting lift.
Adding Edge
- Incorporate small braids along the sides for extra texture.
- Use metallic or jeweled pins along the center raised section.
- Create a sleeker version by keeping the center smooth instead of teased.
- Pair with bold makeup for a complete statement look.
19. Wrapped Ponytail Bun
The wrapped ponytail bun conceals the elastic and creates a polished, refined appearance that benefits from greasy hair’s smoothing properties.
This simple yet elegant style works for professional and social settings alike.
Wrapping Technique
- Create a ponytail at your desired height and secure tightly.
- Separate a small section from the underside of the ponytail.
- Wrap this section around the elastic until it’s completely concealed.
- Secure the end of the wrapping section with a small bobby pin tucked underneath.
- Form the remaining ponytail into a bun using your preferred method.
- Ensure the wrapped section remains smooth and tight throughout the day.
20. Criss-Cross Updo
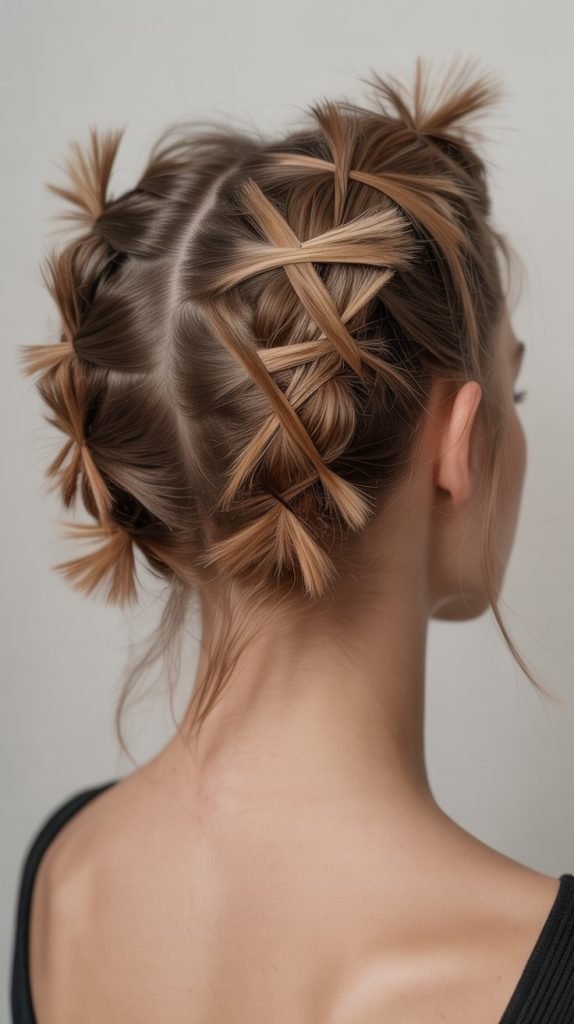
The criss-cross updo creates geometric interest through overlapping sections, and greasy hair’s texture helps these sections hold their crossed positions.
This artistic style makes a statement while managing oily roots effectively.
Crossing Sections
- Divide hair into multiple horizontal sections from nape to crown.
- Take sections from alternating sides and cross them over the center back.
- Pin each crossed section on the opposite side from where it originated.
- Continue this criss-crossing pattern up the back of the head.
- Tuck remaining ends into a final bun or twist at the crown.
- Ensure each cross is visible and distinct for maximum visual impact.
21. Twisted Crown with Low Bun
The twisted crown with low bun combines two techniques into one sophisticated style that showcases greasy hair’s ability to hold intricate designs.
This romantic look works beautifully for outdoor events and garden parties.
Crown Twisting Method
- Create a curved part from ear to ear over the crown.
- Divide the front section into two parts, one on each side.
- Twist each side section back toward the center crown, securing with pins.
- Gather remaining hair at the nape into a low bun.
- Ensure the twisted sections frame the face elegantly before meeting the bun.
- Add small flowers or pins where the twists meet the bun for decoration.
22. Bubble Braid Updo
The bubble braid updo transforms a trendy ponytail style into an elegant updo perfect for greasy hair management.
This playful yet sophisticated style adds dimension and works for both casual and dressy occasions.
Creating Bubbles
- Form a ponytail and secure with an elastic at your desired position.
- Add another elastic several inches down the ponytail.
- Gently pull at the hair between elastics to create a bubble shape.
- Continue adding elastics and creating bubbles down the entire length.
- Coil the bubbled braid around the base to form an updo.
- Secure with pins, being careful not to deflate the bubble shapes.
- Adjust each bubble for uniform size and maximum volume.
23. Side-Swept Roll
The side-swept roll brings Old Hollywood glamour to modern styling, and greasy hair’s pliability makes achieving smooth rolls much easier.
This dramatic style works particularly well for evening events and formal photographs.
Rolling to the Side
- Sweep all hair dramatically to one side of your head.
- Section the hair into horizontal layers starting from the bottom.
- Roll each section under toward the scalp, creating a wave effect.
- Pin each roll as you work your way up toward the crown.
- The rolls should follow the curve from one side to the other.
- Finish with shine spray for that vintage Hollywood glow.
24. Pretzel Bun
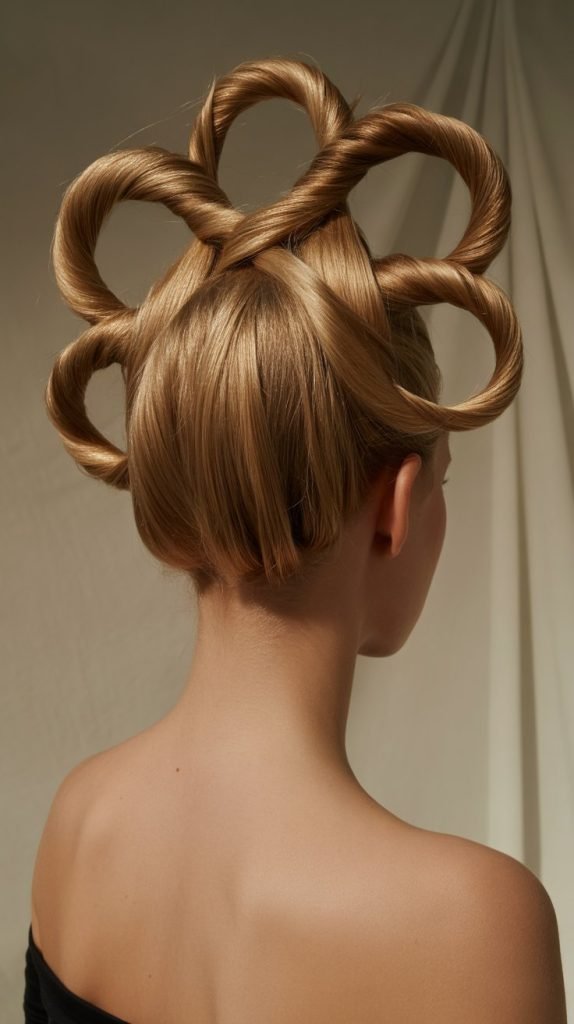
The pretzel bun creates a unique twisted shape that resembles its namesake, offering visual interest through unconventional shaping.
Greasy hair’s texture makes achieving this creative style more manageable and longer-lasting.
Shaping the Pretzel
- Create a ponytail and divide it into two equal sections.
- Twist the sections around each other loosely, leaving space between wraps.
- Shape the twisted sections into a figure-eight or pretzel configuration.
- Pin at crossing points to maintain the distinctive shape.
- Tuck ends underneath and secure with additional hidden pins.
- Pull gently at loops to create even, balanced proportions.
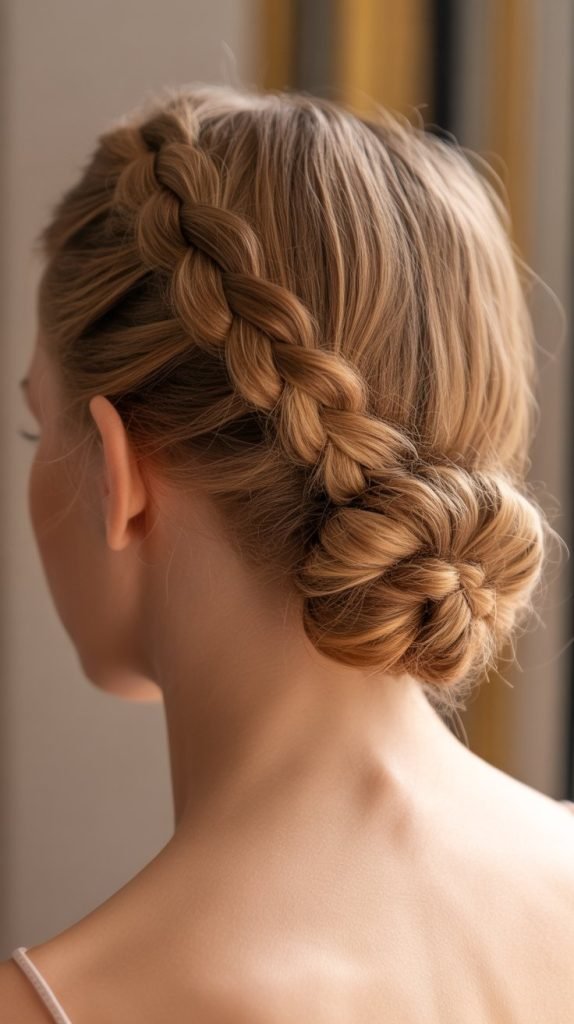
25. Braided Headband Updo
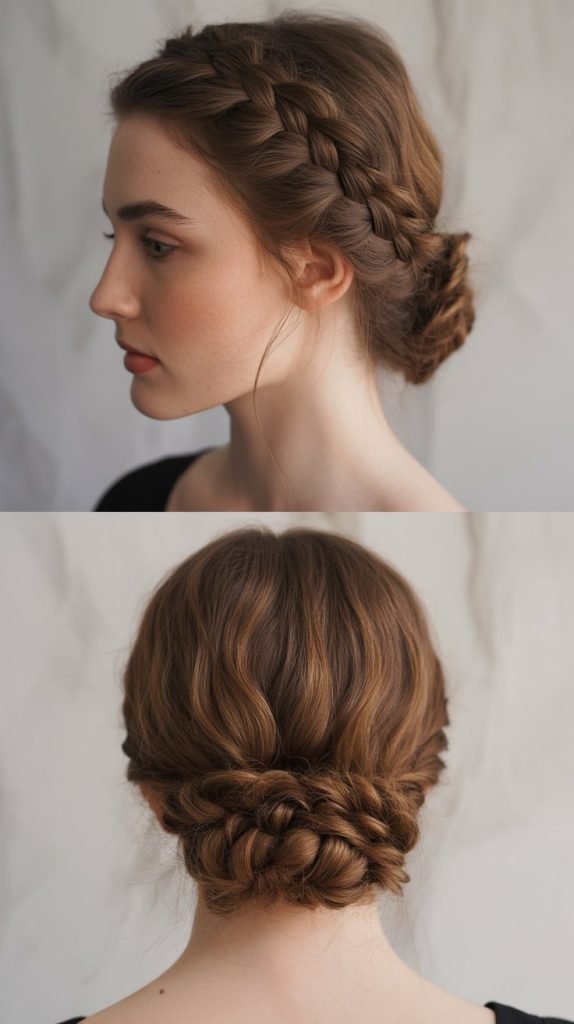
The braided headband updo uses your own hair to create a headband effect while gathering the rest into an elegant updo.
This style perfectly disguises greasy roots while creating a cohesive, polished look.
Headband Braid Creation
- Section off a strip of hair along your hairline from ear to ear.
- Create a braid with this section, working from one side to the other.
- Pin the braid to follow your natural hairline like a headband.
- Gather the remaining hair at the back into your choice of updo style.
- The braid should sit comfortably across the forehead or slightly back.
- Secure both ends of the headband braid behind the ears with pins.
26. Stacked Twists Updo
The stacked twists updo builds height and drama through layered twisted sections, creating a sculptural effect that benefits from greasy hair’s hold.
This architectural style makes a bold statement for special occasions.
Stacking Technique
- Divide hair into four to five horizontal sections from nape to crown.
- Begin with the lowest section, twisting it and pinning it horizontally.
- Move to the next section up, twisting and pinning it to rest on the first.
- Continue stacking each twisted section on top of the previous one.
- Each layer should be visible and create increasing height.
- Secure the final top section with extra pins for stability.
- Use hairspray between layers to ensure all-day hold.
27. Romantic Loose Updo

The romantic loose updo embraces soft texture and deliberately imperfect styling, and greasy hair’s natural piecey-ness actually enhances this intentionally undone look.
This effortlessly romantic style works beautifully for weddings and date nights.
Achieving Romantic Looseness
- Avoid brushing hair completely smooth; embrace natural texture and separation.
- Loosely gather hair at the nape without pulling it tight.
- Twist sections gently and pin them randomly rather than in a structured pattern.
- Pull pieces out intentionally around the face and throughout the updo.
- Leave some sections slightly disconnected for an organic, flowing appearance.
- Use your fingers rather than a comb for a softer, more romantic effect.
- Finish with a flexible-hold spray that allows movement while maintaining shape.
Enhancing Romance
- Add fresh or silk flowers throughout the updo for garden party vibes.
- Incorporate delicate pearl pins or crystal accessories for bridal styling.
- Leave several face-framing tendrils curled loosely for softness.
- Pair with natural, glowing makeup for a complete romantic aesthetic.
Tips for Making Updos Last Longer with Greasy Hair
Greasy hair naturally holds styles better than freshly washed hair, but these additional tips will ensure your updo stays perfect from morning to night.
Pre-Styling Preparation
- Use dry shampoo at the roots to absorb excess oil while maintaining styling texture.
- Brush hair thoroughly before beginning to distribute oils evenly throughout strands.
- Apply a small amount of light styling cream to ends if they feel dry despite oily roots.
- Consider using a texturizing spray for additional grip in fine or slippery hair.
During Styling
- Use professional-quality bobby pins that grip better than drugstore versions.
- Insert bobby pins with the wavy side down against your scalp for superior hold.
- Cross two bobby pins in an X-formation at crucial stress points in your updo.
- Don’t skimp on pins—use as many as necessary for security and confidence.
- Work in sections and secure each completely before moving to the next area.
Setting the Style
- Apply hairspray in light layers rather than one heavy application to avoid crunchiness.
- Hold the spray 10-12 inches away from your head for even distribution.
- Allow each layer to dry before adding more product for maximum hold.
- Use a small amount of edge control or pomade on any flyaways around the hairline.
Common Mistakes to Avoid
Even experienced hairstylists make mistakes when working with greasy hair, so learning what to avoid will save you time and frustration.
Over-Manipulation
- Touching and adjusting your updo constantly throughout the day breaks down the style.
- Excessive brushing before styling can make hair even oilier by stimulating oil production.
- Pulling sections too tight can cause pain and headaches while also making your style too severe.
Product Problems
- Using too much product on already greasy hair creates buildup and makes hair look dirty.
- Applying the wrong type of product can make hair too slippery to hold pins securely.
- Forgetting hairspray completely often results in updos falling apart by midday.
- Using heavy oils or serums on already oily hair weighs down the style unnecessarily.
Pin Placement Issues
- Inserting pins horizontally when they should go vertically leads to slippage and failure.
- Placing too few pins in crucial areas means your updo won’t last through the day.
- Using pins that match your outfit instead of your hair color draws unwanted attention.
- Skipping the X-pattern pin technique at stress points reduces overall stability.
Hair Care Between Washes
Maintaining healthy hair while extending time between washes requires intentional care and smart product choices.
Dry Shampoo Strategy
- Apply dry shampoo the night before rather than morning-of for better oil absorption.
- Focus application on the roots and scalp where oil production is highest.
- Use a brush to distribute dry shampoo through hair after application for natural results.
- Choose dry shampoos formulated for your hair color to avoid white residue.
Nighttime Protection
- Sleep on a silk or satin pillowcase to reduce friction and oil transfer.
- Loosely braid or twist hair before bed to maintain some style and reduce tangling.
- Avoid tight sleep hairstyles that create dents and kinks difficult to style over.
- Keep hair off your face while sleeping to prevent facial oils from transferring to hair.
Scalp Health
- Massage your scalp regularly to promote circulation without stimulating excess oil production.
- Consider your diet and hydration levels as they significantly impact oil production.
- Avoid touching your hair and scalp throughout the day to prevent oil transfer from hands.
- Use a clarifying shampoo once every few weeks when you do wash to remove buildup.
Conclusion
These 27 Elegant Updo Greasy Hair Hairstyles prove that unwashed hair isn’t something to hide—it’s actually your secret advantage for creating long-lasting, beautiful styles that hold their shape throughout your busiest days.
From quick everyday buns to intricate special occasion updos, each style harnesses the natural texture and grip that greasy hair provides.
By embracing your hair’s natural state between washes, you’re not only saving time and protecting your hair from damage caused by overwashing, but you’re also opening up a world of styling possibilities that simply work better on second-day or third-day hair.
Whether you prefer sleek and polished looks like the classic French twist, romantic and soft styles like the Gibson tuck, or bold and contemporary options like the faux hawk updo, there’s an elegant solution for every occasion and skill level.