Homecoming is just around the corner, and you’re probably feeling the pressure to look absolutely perfect for this special night.
The good news is that achieving a stunning hairstyle doesn’t require hours at the salon or professional styling skills.
With the right techniques and a few simple tools, you can create gorgeous looks that will make you feel confident and beautiful on the dance floor.
This guide to 27 Easy Cute HoCo Hairstyles You Can Do in Minutes is designed specifically for busy students who want maximum impact with minimal time investment.
From sleek ponytails to romantic braids, messy buns to elegant twists, these quick and achievable styles will have you looking red-carpet ready without breaking a sweat.
Whether you have long hair, medium length, or shorter locks, there’s a perfect style waiting for you that can be completed in under 15 minutes.
1. Classic High Ponytail

The classic high ponytail is the ultimate go-to style when you need to look polished and put-together in just minutes.
This timeless look works for all hair types and creates an instant face-lift effect while keeping your hair secure for dancing.
- Brush your hair straight back and gather it at the crown of your head
- Secure with a strong elastic band, ensuring the ponytail sits high and tight
- Wrap a small section of hair around the elastic to hide it and secure with a bobby pin
- Smooth any flyaways with a light mist of hairspray or smoothing serum
- Add volume by gently teasing the ponytail or using a texturizing spray
- Time needed: 3-5 minutes
2. Messy Low Bun

The messy low bun epitomizes effortless chic and is perfect for those who want an elegant look without appearing too formal or structured.
This versatile style works beautifully with both casual and dressy homecoming outfits.
- Gather your hair loosely at the nape of your neck, leaving some pieces around your face
- Twist the gathered hair and wrap it into a loose bun shape
- Secure with bobby pins, allowing some pieces to fall naturally for texture
- Gently pull at the bun to create more volume and mess
- Leave face-framing pieces loose or curl them lightly for added softness
- Time needed: 4-6 minutes
3. Side Braid Sweep
The side braid sweep combines the romance of braiding with the elegance of swept hair, creating a look that’s both sophisticated and youthful.
This style works particularly well for medium to long hair lengths.
- Part your hair deeply to one side and begin a loose braid starting at the temple
- Continue braiding along the hairline toward the opposite ear
- Secure the braid with a clear elastic behind the ear
- Gently tug at the braid sections to create a fuller, more voluminous appearance
- Sweep the remaining hair to one side and secure with decorative bobby pins
- Time needed: 5-7 minutes
4. Half-Up Top Knot

The half-up top knot is a trendy, youthful style that keeps hair out of your face while maintaining a casual-cool vibe.
This look is perfect for showing off statement earrings and works with all hair textures.
- Section off the top half of your hair from ear to ear
- Gather this section high on your head and secure with an elastic
- Twist the ponytail and wrap it around the base to create a small bun
- Secure with bobby pins and allow the ends to stick out for a messy effect
- Leave the bottom half of your hair down and add loose waves if desired
- Time needed: 3-5 minutes
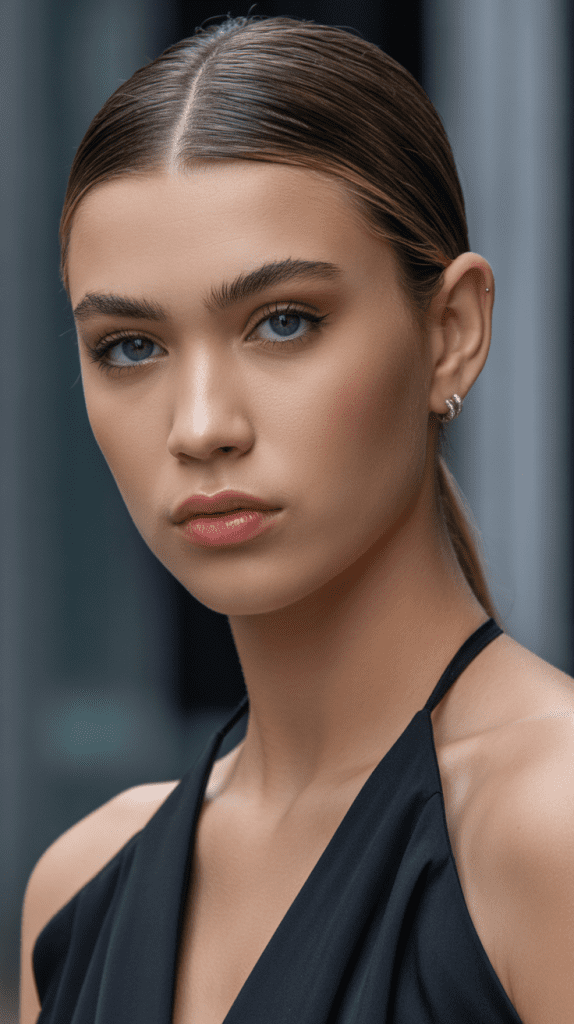
5. Sleek Side Part

The sleek side part is the epitome of sophisticated simplicity, creating a polished look that works beautifully with any dress style or makeup look.
This classic style is perfect when you want your outfit to be the star.
- Create a deep side part using a fine-tooth comb for precision
- Apply smoothing serum or gel to damp hair for sleek finish
- Use a blow dryer and paddle brush to smooth hair straight down
- Tuck one side behind your ear and secure with a decorative bobby pin if needed
- Finish with a light mist of shine spray for glossy, healthy-looking hair
- Time needed: 8-10 minutes
6. Braided Crown

The braided crown creates an ethereal, princess-like appearance that’s perfect for homecoming royalty.
This romantic style looks complex but is surprisingly simple to achieve with a little practice.
- Part your hair in the middle and begin a Dutch braid on one side starting at the temple
- Continue braiding along your hairline, incorporating hair as you go around your head
- When you reach the opposite ear, continue braiding the remaining hair normally
- Bring the braid across the back of your head like a crown and secure with bobby pins
- Gently pull at the braid to create fuller, more voluminous texture
- Time needed: 8-12 minutes
7. Twisted Side Ponytail

The twisted side ponytail adds an elegant twist to the classic ponytail, creating asymmetrical interest while maintaining the practicality of secured hair.
This style is perfect for dancing the night away.
- Part your hair to one side and begin twisting hair from the heavier side backward
- Continue gathering hair as you twist toward the opposite ear
- Secure all hair in a low side ponytail with a strong elastic
- Wrap a section of hair around the elastic to hide it
- Gently tug at the twisted section to create more volume and texture
- Time needed: 5-7 minutes
8. Beach Waves

Beach waves create effortless, romantic texture that looks like you just stepped off a coastal vacation.
This versatile style works with all hair lengths and adds movement and dimension to your homecoming look.
- Apply texturizing mousse to damp hair for enhanced hold and volume
- Braid your hair into 2-3 loose braids while it’s still damp
- Allow hair to air dry or use a blow dryer with a diffuser attachment
- Gently unbraid and scrunch with your fingers to separate the waves
- Finish with sea salt spray for enhanced texture and beachy scent
- Time needed: 15 minutes (plus drying time) or overnight
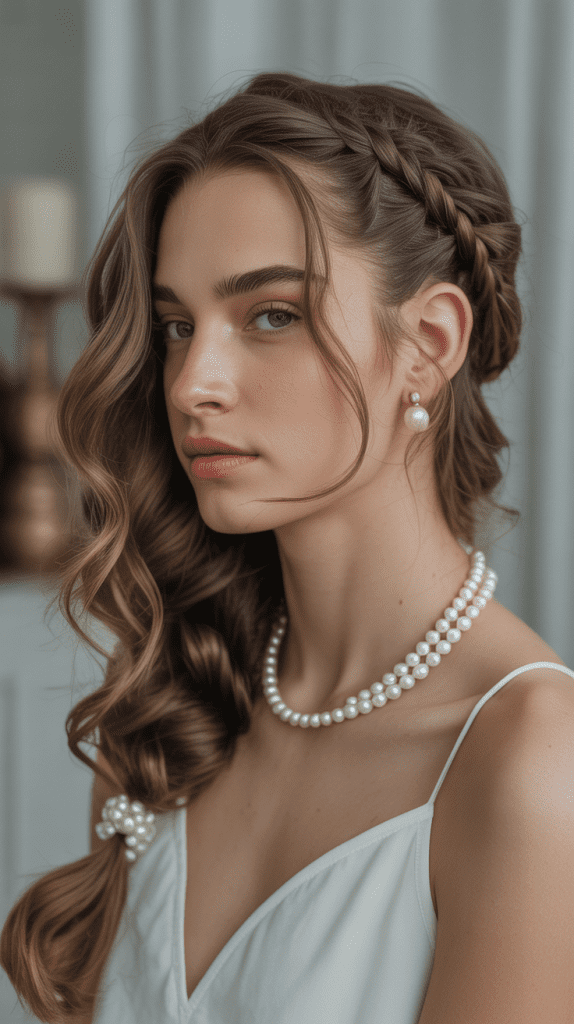
9. Low Twisted Bun
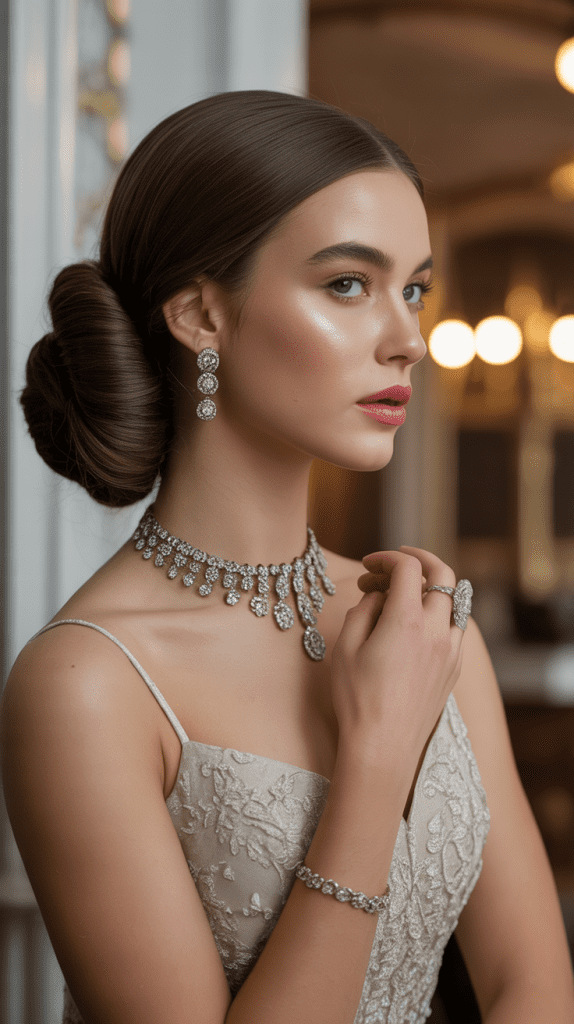
The low twisted bun offers sophisticated elegance with a modern twist, perfect for those who want a refined updo without the complexity of traditional formal styles.
This look complements both vintage and contemporary dresses.
- Gather your hair at the nape of your neck and divide into two sections
- Twist each section in opposite directions, then twist them around each other
- Wrap the twisted hair around itself to create a low bun
- Secure with bobby pins, ensuring the twisted texture remains visible
- Pull out a few face-framing pieces for a softer, more romantic finish
- Time needed: 6-8 minutes
10. Double Dutch Braids

Double Dutch braids create a sporty-chic look that’s both practical and stylish, perfect for active dancers who want their hair to stay put all night.
This youthful style works especially well with fun, colorful dresses.
- Part your hair down the middle to create two equal sections
- Begin a Dutch braid on one side, starting at the hairline and braiding backward
- Repeat the same process on the other side, ensuring both braids are even
- Secure each braid with a clear elastic at the nape of your neck
- Gently tug at the braid sections to create fuller, more voluminous appearance
- Time needed: 10-15 minutes
11. Voluminous Blowout

The voluminous blowout creates Hollywood glamour with bouncy, full-bodied hair that moves beautifully as you dance.
This classic style never goes out of fashion and works with any dress silhouette.
- Apply volumizing mousse to damp hair, focusing on the roots
- Use a round brush and blow dryer to lift hair at the roots while drying
- Roll sections of hair around the brush and blast with cool air to set
- Flip your head upside down and shake out the roots for extra volume
- Finish with volumizing hairspray and a light mist of shine spray
- Time needed: 12-15 minutes
12. Fishtail Side Braid

The fishtail side braid creates intricate-looking detail that’s easier to achieve than it appears, making it perfect for impressing friends while keeping styling time minimal.
This bohemian-inspired look pairs beautifully with flowy dresses.
- Gather all your hair to one side and divide into two large sections
- Take a small piece from the outer edge of one section and cross it to the other
- Repeat this process, alternating sides and keeping sections small for definition
- Continue until you reach the end of your hair and secure with a clear elastic
- Gently pull apart the braid sections to create a fuller, more textured appearance
- Time needed: 8-12 minutes
13. High Bun with Face-Framing Pieces
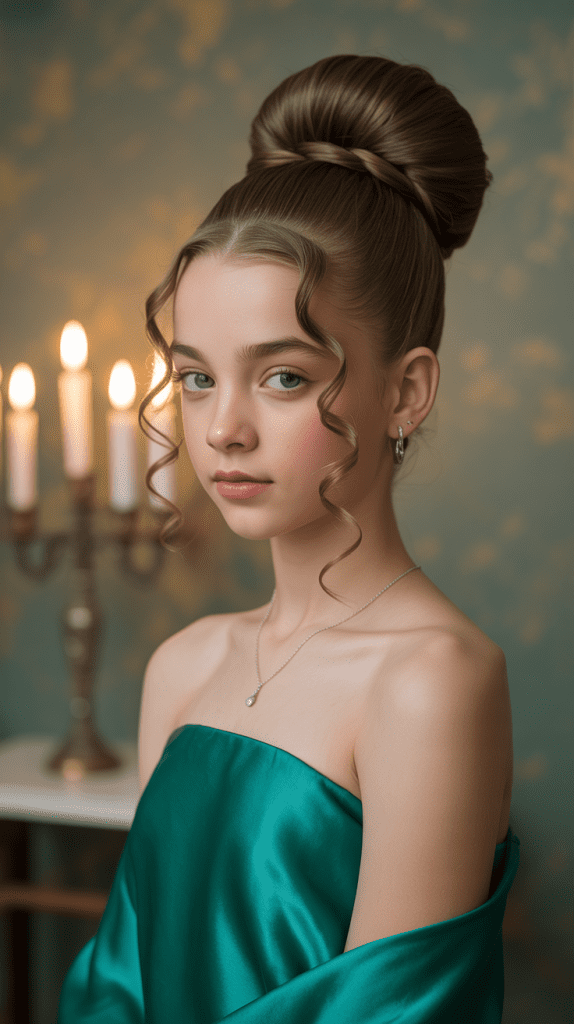
The high bun with face-framing pieces combines the elegance of an updo with the softness of loose hair, creating a balanced look that’s both formal and approachable.
This style works beautifully with strapless dresses.
- Pull the majority of your hair into a high ponytail, leaving face-framing sections loose
- Twist the ponytail and wrap it around the base to create a bun
- Secure with bobby pins, ensuring the bun feels tight and secure
- Curl the loose face-framing pieces with a small curling iron
- Lightly tease the bun for added volume and texture
- Time needed: 7-10 minutes
14. Textured Pixie Style

The textured pixie style is perfect for shorter hair, creating edgy sophistication with minimal effort.
This modern look pairs beautifully with bold makeup and statement accessories.
- Apply texturizing paste or pomade to damp hair for hold and definition
- Use your fingers to scrunch and separate pieces, creating piecey texture
- Focus on creating height at the crown by lifting sections upward
- Define the front pieces by twisting them slightly with your fingers
- Finish with a light mist of flexible hold hairspray
- Time needed: 5-7 minutes
15. Rope Braid Ponytail

The rope braid ponytail adds textural interest to a classic style, creating dimension and sophistication with just a simple twisting technique.
This elegant look works well with both casual and formal homecoming outfits.
- Gather your hair into a ponytail at your desired height and secure with elastic
- Divide the ponytail into two equal sections
- Twist each section in the same direction, then wrap them around each other in the opposite direction
- Continue twisting until you reach the ends and secure with a clear elastic
- Gently pull apart the rope braid to create fuller, more voluminous texture
- Time needed: 5-8 minutes
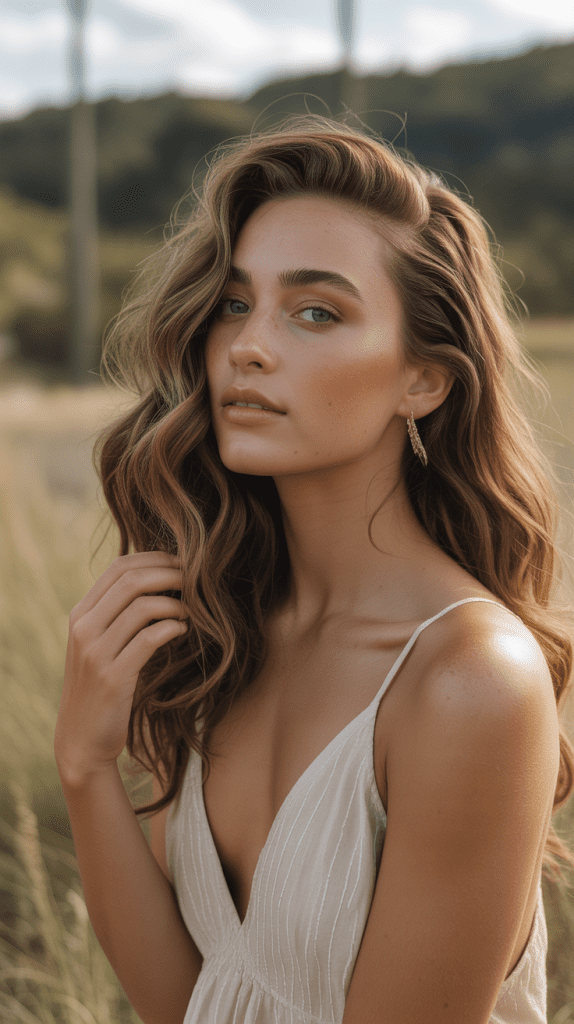
16. Loose Curls with Deep Side Part

Loose curls with a deep side part create romantic, feminine appeal that works beautifully with any dress style.
This classic look is timeless and photographs beautifully for homecoming memories.
- Create a deep side part using a fine-tooth comb for precision
- Use a large barrel curling iron to create loose, bouncy curls throughout your hair
- Allow curls to cool completely before gently brushing through with fingers
- Sweep the majority of hair to one side for dramatic effect
- Finish with flexible hold hairspray to maintain curl definition
- Time needed: 12-15 minutes
17. Braided Headband Style
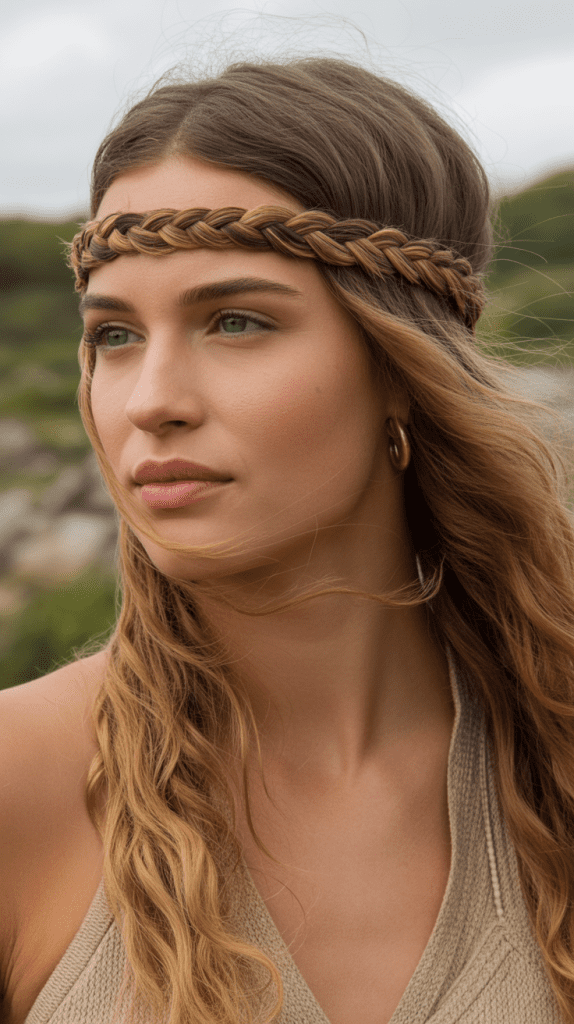
The braided headband style uses your own hair to create a natural headband effect, keeping hair away from your face while adding bohemian charm.
This versatile look works with both up and down hairstyles.
- Take a section of hair from one temple and begin a simple three-strand braid
- Continue braiding this section backward along your hairline toward the opposite ear
- Secure the braid behind your ear with bobby pins that match your hair color
- Leave the rest of your hair down in natural waves or curls
- Gently tug at the braided headband to create fuller, more relaxed texture
- Time needed: 6-9 minutes
18. Slicked Back Style
The slicked back style creates modern edge with sophisticated polish, perfect for fashion-forward students who want to make a statement.
This bold look pairs beautifully with dramatic makeup and structured dresses.
- Apply strong-hold gel or pomade to damp hair for maximum control
- Use a fine-tooth comb to slick hair straight back from your forehead
- Ensure there are no bumps or uneven sections for a smooth finish
- Tuck hair behind your ears or secure at the nape with bobby pins
- Finish with strong-hold hairspray to maintain the sleek look all night
- Time needed: 5-8 minutes
19. Twisted Half-Up Style

The twisted half-up style combines the elegance of an updo with the romance of flowing hair, creating a versatile look that works for any homecoming theme.
This style flatters all face shapes and hair types.
- Take sections from both sides of your head starting at the temples
- Twist each section backward toward the crown of your head
- Secure the twisted sections together with bobby pins or a decorative clip
- Leave the bottom half of your hair flowing naturally or add loose waves
- Gently pull at the twisted sections to create volume and texture
- Time needed: 4-7 minutes
20. Low Side Ponytail

The low side ponytail offers asymmetrical elegance that’s both sophisticated and effortless, perfect for showcasing beautiful earrings or necklaces.
This versatile style works with straight, wavy, or curly hair.
- Part your hair deeply to one side using a fine-tooth comb
- Gather all hair to the opposite side at the nape of your neck
- Secure with a decorative elastic or wrap hair around a regular elastic to hide it
- Allow the ponytail to drape over one shoulder for maximum impact
- Add loose waves to the ponytail length for extra romance and movement
- Time needed: 4-6 minutes
21. Space Buns

Space buns create a fun, youthful look that’s perfect for playful homecoming themes or casual dance parties.
This trendy style is Instagram-ready and works especially well with colorful or patterned dresses.
- Part your hair down the middle to create two equal sections
- Gather each section into high ponytails positioned above your ears
- Twist each ponytail and wrap around the base to create buns
- Secure with bobby pins and allow some pieces to stick out for texture
- Leave face-framing pieces loose or add small braids for extra detail
- Time needed: 6-10 minutes
22. Waterfall Braid

The waterfall braid creates a cascading effect that looks complex but is surprisingly achievable with practice.
This romantic style works beautifully for fairy-tale themed homecomings or garden parties.
- Begin a regular braid at one temple, incorporating hair from the top
- Instead of continuing the bottom strand, drop it and pick up a new section
- Continue this process around the back of your head, creating the waterfall effect
- Secure the braid behind the opposite ear with bobby pins
- Curl the loose “waterfall” strands for enhanced romantic appeal
- Time needed: 10-15 minutes
23. Victory Rolls

Victory rolls bring vintage glamour to your homecoming look with retro styling that’s both bold and elegant.
This 1940s-inspired look pairs perfectly with red lipstick and winged eyeliner.
- Section off the front portions of your hair on both sides
- Roll each section upward and inward toward your scalp, creating cylindrical shapes
- Secure each roll with bobby pins, ensuring they feel tight and secure
- Leave the back section of hair in victory roll curls or smooth waves
- Finish with strong-hold hairspray to maintain the sculptural shape
- Time needed: 12-18 minutes
24. Bubble Ponytail
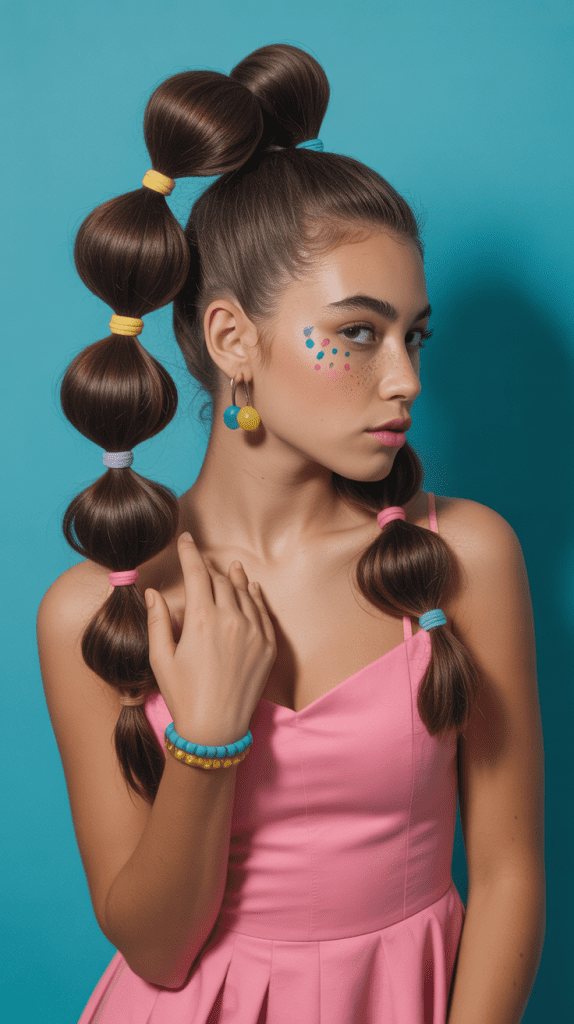
The bubble ponytail adds playful dimension to a classic style, creating visual interest with a modern twist.
This fun look is perfect for students who want something unique but not too complicated.
- Create a high or low ponytail and secure with a strong elastic
- Place additional elastics down the length of the ponytail at regular intervals
- Gently tug at each section between elastics to create bubble shapes
- Ensure each bubble is evenly sized for the most polished appearance
- Hide the elastics by wrapping small sections of hair around them
- Time needed: 5-8 minutes
25. French Twist

The French twist is a timeless updo that exudes sophistication and elegance, perfect for formal homecoming events.
This classic style works beautifully with vintage-inspired or traditional dresses.
- Gather your hair to one side and begin rolling it inward toward your head
- Continue rolling until all hair is tucked into the twist
- Secure with bobby pins along the seam of the twist
- Gently tease the front section for height at the crown
- Finish with strong-hold hairspray and smooth any flyaways
- Time needed: 8-12 minutes
26. Crimped Texture
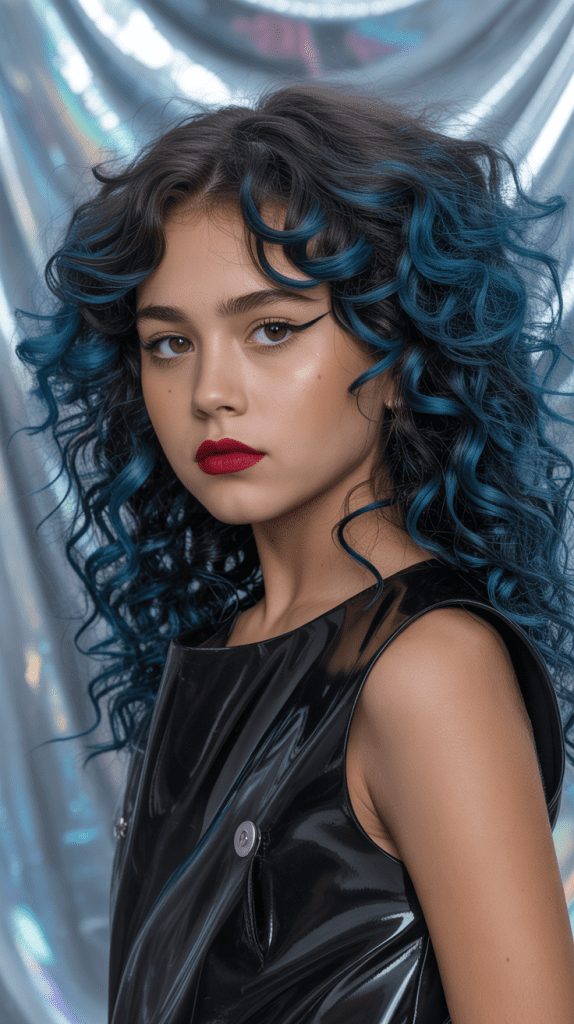
Crimped texture creates bold, voluminous style that’s perfect for making a statement on the dance floor.
This retro-inspired look adds dramatic texture and works well with bold makeup and accessories.
- Apply heat protectant to clean, dry hair before styling
- Use a crimping iron to create zigzag texture throughout your hair
- Work in small sections for even texture distribution
- Gently separate the crimped sections with your fingers for fuller volume
- Finish with volumizing hairspray to maintain the dramatic texture
- Time needed: 15-20 minutes
27. Natural Air-Dried Waves
Natural air-dried waves celebrate your hair’s authentic texture while requiring minimal effort and no heat styling.
This effortless look is perfect for busy students who want beautiful results with minimal time investment.
- Apply leave-in conditioner and wave-enhancing cream to damp hair
- Scrunch gently with your hands to encourage natural wave formation
- Allow hair to air dry completely or use a diffuser for faster results
- Once dry, gently separate waves with your fingers for added volume
- Finish with a light mist of flexible hold hairspray for lasting definition
- Time needed: 5 minutes (plus natural drying time)
Essential Products for Quick Homecoming Styles
- Texturizing spray: Creates grip and volume for easier styling and better hold
- Elastic bands: Choose clear or color-matched options for invisible security
- Bobby pins: Stock up on pins that match your hair color exactly
- Flexible hold hairspray: Maintains style while allowing natural movement
- Heat protectant: Essential for any heat-styling tools to prevent damage
- Dry shampoo: Adds texture and volume while extending time between washes
Time-Saving Preparation Tips
Night Before:
- Wash and condition hair with volumizing products for extra body
- Sleep with hair in loose braids for natural waves
- Prepare all styling tools and products in one easily accessible location
Morning Of:
- Start with the right foundation by using appropriate prep products
- Work quickly but don’t rush – smooth, even application is key
- Have backup style options ready in case your first choice doesn’t work out
During Styling:
- Use clips to section hair for more efficient styling
- Apply products to damp hair for better distribution and hold
- Work with your hair’s natural texture rather than fighting against it
Time is often the biggest challenge when preparing for homecoming, but these 27 Easy Cute HoCo Hairstyles You Can Do in Minutes prove that looking stunning doesn’t require hours of preparation or professional expertise.
The key to successful quick styling lies in choosing looks that complement your natural hair texture and having the right products and tools readily available.
Whether you prefer the sleek sophistication of a high ponytail, the romantic charm of loose braids, or the modern edge of textured styles, there’s a perfect option that can be completed in your time frame.
Remember that confidence is your best accessory, and when you feel comfortable and beautiful in your chosen style, it shows in every photo and every moment on the dance floor.
These time-efficient techniques will help you achieve red-carpet worthy results while leaving plenty of time to enjoy getting ready with friends and creating unforgettable homecoming memories.