Being a mom means juggling countless responsibilities from sunrise to sunset, and finding time for elaborate hair routines often feels impossible.
The good news is that looking polished and put-together doesn’t require hours in front of the mirror or professional styling skills.
This comprehensive guide on 27 Cute and Easy Hairstyles for Busy Moms on the Go is designed specifically for mothers who want to look fabulous without sacrificing precious time with their families.
Whether you’re rushing to school drop-off, heading to work, managing household tasks, or squeezing in a quick coffee date, these hairstyles can be mastered in minutes and will keep you looking effortlessly chic throughout your busy day.
From classic buns and ponytails with modern twists to braided styles and quick fixes for second-day hair, each hairstyle in this collection has been chosen for its simplicity, speed, and style factor.
You’ll discover techniques that work for various hair lengths and textures, learn time-saving tricks that professional stylists use, and find solutions for those inevitable bad hair days.
Get ready to transform your morning routine and reclaim those extra minutes while still looking absolutely amazing.
1. The Classic Messy Bun

The messy bun remains the ultimate go-to hairstyle for busy moms because it combines effortless style with incredible practicality.
This timeless look works beautifully for any occasion, from casual playdates to professional meetings, and can be created in under two minutes.
- Gather your hair into a high ponytail without worrying about perfection, as the “lived-in” look is part of the charm.
- Twist the ponytail loosely around the base and secure it with a hair tie or bobby pins.
- Gently pull out a few face-framing pieces to soften the look and add dimension.
- Pull at the bun slightly to create volume and that perfectly imperfect texture.
- Finish with a light mist of texturizing spray to hold everything in place throughout the day.
2. The Sleek Low Ponytail
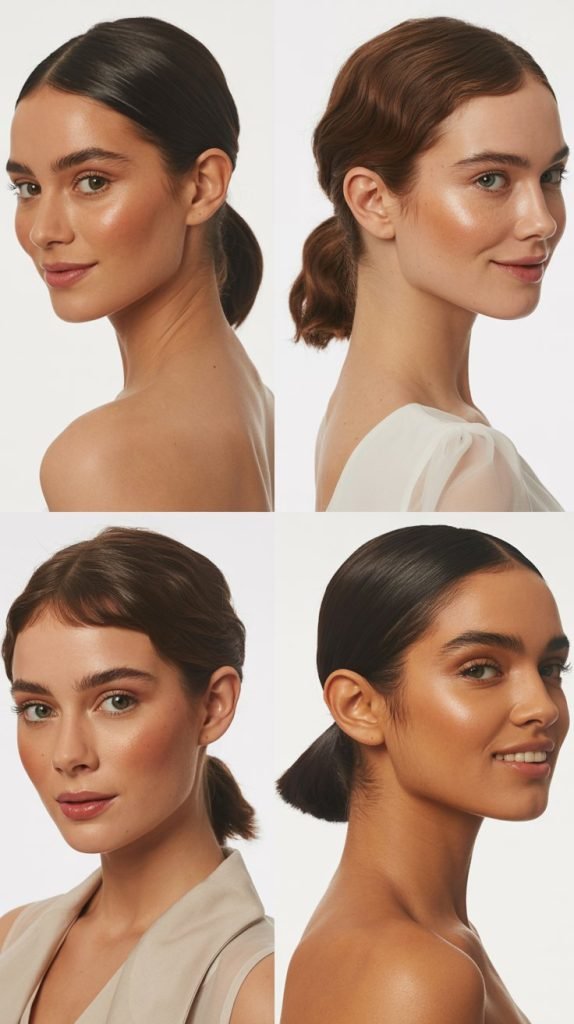
A sleek low ponytail offers sophistication and polish while remaining incredibly simple to achieve.
This elegant style keeps hair completely off your face and neck, making it perfect for active moms who need functionality without compromising on style.
- Start with dry or slightly damp hair and apply a smoothing serum to tame flyaways.
- Brush your hair back thoroughly to eliminate any bumps or tangles.
- Secure the ponytail at the nape of your neck with a quality elastic that won’t damage your hair.
- Take a small section of hair from the ponytail and wrap it around the elastic to conceal it for a polished finish.
- Use a fine-tooth comb to smooth any remaining flyaways and spray lightly with hairspray.
3. The Half-Up Top Knot

The half-up top knot perfectly balances style and practicality by keeping hair out of your face while showcasing your length.
This trendy hairstyle works exceptionally well for moms with medium to long hair and adds a youthful, playful element to any outfit.
- Section off the top half of your hair from ear to ear using your fingers or a comb.
- Gather this top section into a high ponytail and secure it with an elastic.
- Twist the ponytail around itself to form a small bun and pin it securely.
- Leave the bottom half of your hair down, either straight or with loose waves.
- Adjust the tightness and pull out wisps around your face for a softer, more relaxed appearance.
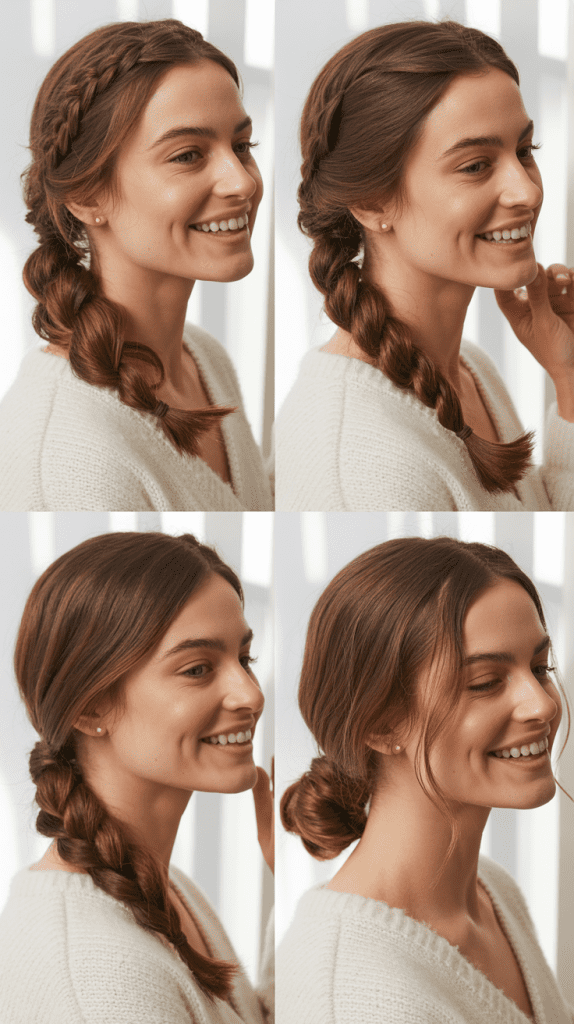
4. The Quick Side Braid

A simple side braid offers effortless beauty and keeps hair controlled during even the busiest days. This versatile style suits all hair types and can be dressed up or down depending on your activities.
- Sweep all your hair to one side of your neck, either left or right based on your preference.
- Divide the hair into three equal sections to begin your basic braid.
- Cross the sections over each other alternately, keeping consistent tension for an even braid.
- Continue braiding down to the ends and secure with a clear or decorative elastic.
- Gently pull at the braid sections to create a fuller, more voluminous appearance known as “pancaking.”
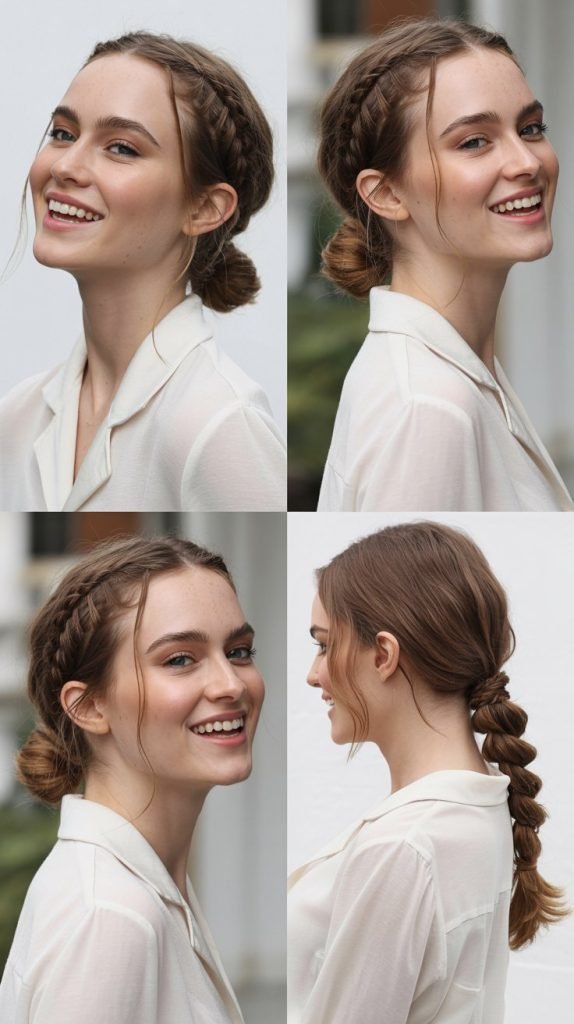
5. The Double Dutch Braids
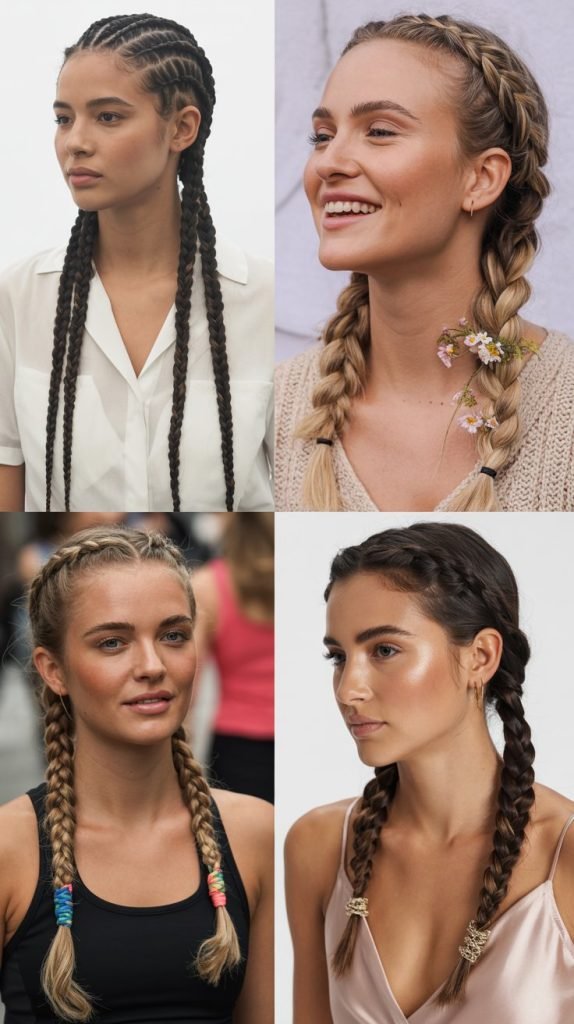
Double Dutch braids provide both style and security, keeping hair completely contained during high-activity days. While they may seem complex, these braids become quick and easy with just a little practice.
- Part your hair down the middle to create two equal sections.
- Working on one side first, divide the section into three strands at the hairline.
- Create a Dutch braid by crossing sections under rather than over, adding hair as you go.
- Continue the braid down to the nape of your neck and secure it.
- Repeat the exact process on the other side, ensuring both braids are symmetrical.
6. The Twisted Crown

The twisted crown creates a romantic, bohemian look that appears far more complicated than it actually is. This elegant style works wonderfully for special occasions or when you want to feel a bit more dressed up.
- Create a deep side part and take a small section of hair from the heavy side.
- Begin twisting this section away from your face, adding small amounts of hair as you twist around your head.
- Continue the twist along your hairline like a headband until you reach the opposite ear.
- Pin the twist securely behind your ear and leave the remaining hair down or style it as desired.
- Set the style with hairspray and gently tug at the twist to add volume and texture.
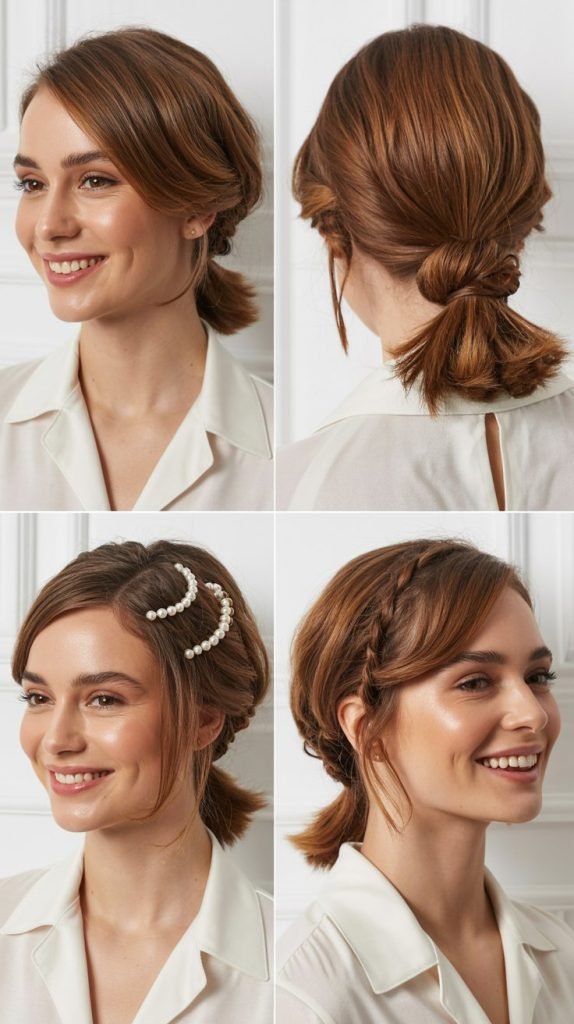
7. The Simple Chignon

A chignon brings timeless elegance to any look and can be mastered in just a few minutes once you know the technique. This sophisticated updo works perfectly for professional settings or evening events.
- Gather your hair into a low ponytail at the nape of your neck and secure it loosely.
- Create a small opening above the elastic and flip the ponytail through it to create a twist.
- Tuck the remaining ends of the ponytail up into the opening you created.
- Secure everything with bobby pins, making sure all ends are hidden and the style feels secure.
- Finish with hairspray and pull out a few soft pieces around your face if desired.
8. The High Ponytail with Volume

A voluminous high ponytail radiates energy and confidence while being remarkably simple to create. This youthful style lifts your features and works perfectly for both casual and active days.
- Flip your head upside down and brush all your hair toward the crown of your head.
- While still upside down, secure the ponytail with a strong elastic to achieve maximum height.
- Flip your head back up and smooth any bumps with a brush or your hands.
- Take a small section from the ponytail and wrap it around the elastic to hide it.
- Gently tease the ponytail at the crown for added volume and spray to maintain lift throughout the day.
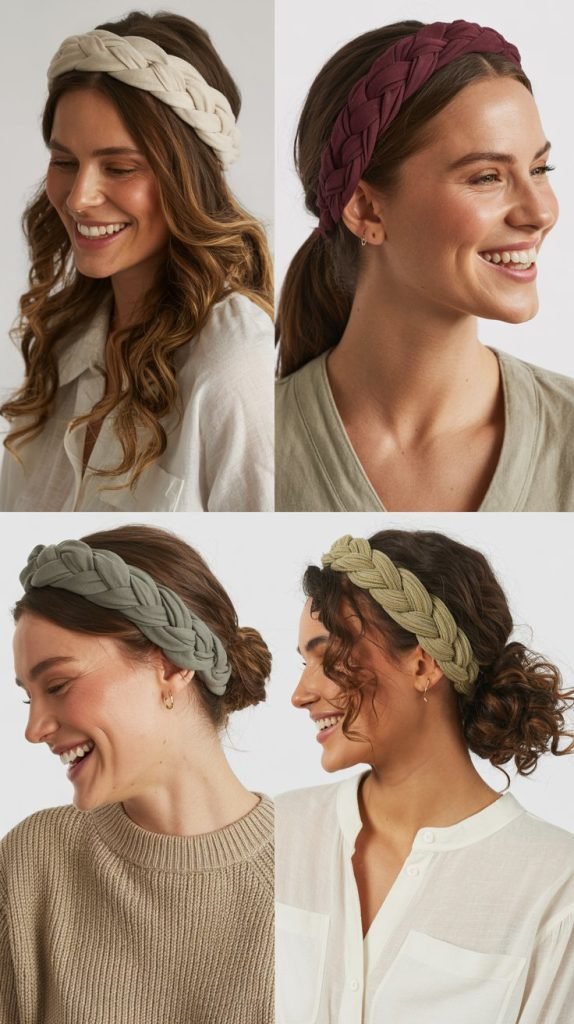
9. The Braided Headband
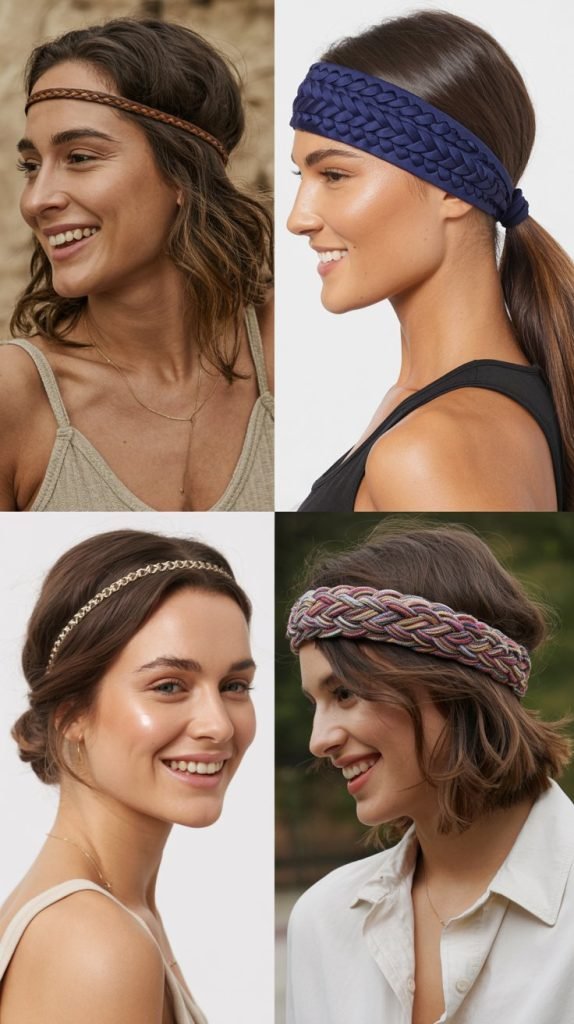
A braided headband creates the illusion of a hair accessory using your own hair, offering a charming and practical solution for keeping hair off your face.
This style combines functionality with feminine appeal effortlessly.
- Take a section of hair from behind one ear and divide it into three strands.
- Braid this section tightly to create a narrow, rope-like braid.
- Bring the braid across the top of your head like a headband and pin it behind the opposite ear.
- Leave the rest of your hair down in its natural texture or style as preferred.
- Secure with bobby pins that match your hair color for an invisible hold.
10. The Quick Twist and Pin

The twist and pin technique offers endless versatility and can be adapted to create numerous different looks in seconds. This method works beautifully for taming sections of hair while maintaining an overall relaxed appearance.
- Take small sections of hair from around your face or wherever you want to add interest.
- Twist each section away from your face until it forms a rope-like strand.
- Pin the twisted sections back with decorative or invisible bobby pins.
- Continue adding twists and pins wherever desired to create your unique look.
- Leave the remaining hair down or incorporate the twists into an updo for a more formal style.
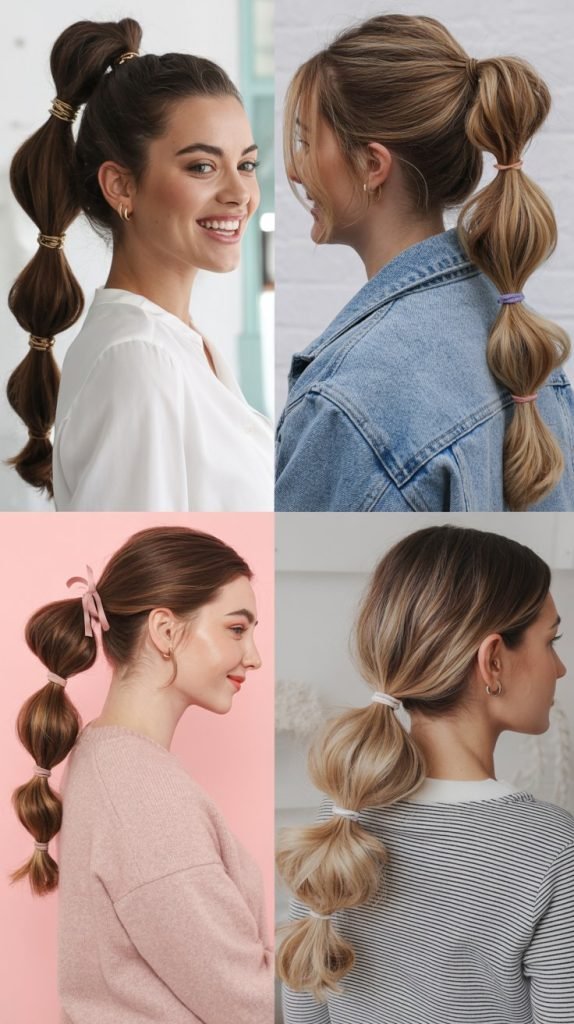
11. The Bubble Ponytail
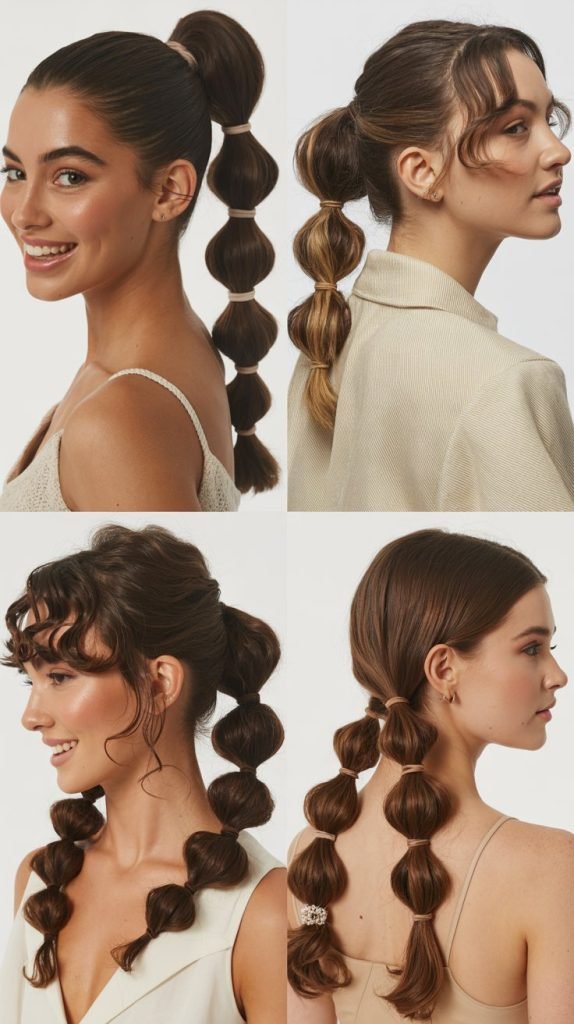
The bubble ponytail adds a playful, modern twist to the traditional ponytail while remaining incredibly easy to execute.
This trendy style creates visual interest and volume without requiring any advanced techniques.
- Create a high or low ponytail as your base and secure it with a strong elastic.
- Place additional elastics down the length of the ponytail at equal intervals, roughly two to three inches apart.
- Gently pull and fluff each section between the elastics to create the “bubble” effect.
- Continue this pattern all the way down the ponytail for a uniform look.
- Finish by adjusting the size of each bubble to ensure they’re even and spray lightly to maintain the style.
12. The Low Twisted Bun

A low twisted bun combines elegance with simplicity, creating a refined look that stays secure all day long. This sophisticated style works perfectly for professional environments while remaining comfortable enough for everyday wear.
- Create a low ponytail at the nape of your neck and secure it with an elastic.
- Divide the ponytail into two equal sections and twist each section individually.
- Wrap the two twisted sections around each other to create a rope-like texture.
- Coil the twisted rope around the base of the ponytail to form a bun.
- Secure with bobby pins throughout the bun and finish with a light hold hairspray.
13. The Side-Swept Waves

Side-swept waves deliver effortless glamour and work wonderfully for moms who want a polished look without spending time on intricate styling. This romantic hairstyle suits nearly every face shape and occasion.
- Apply a heat protectant and create loose waves using a curling wand or flat iron.
- Create a deep side part on your preferred side for dramatic effect.
- Sweep all your hair over one shoulder and secure it loosely if needed.
- Use your fingers to gently separate and tousle the waves for a natural, beachy texture.
- Set the style with a flexible hold hairspray that allows movement while controlling frizz.
14. The French Twist
The French twist epitomizes classic sophistication and can elevate any outfit instantly. While it appears complex, this iconic updo becomes second nature with practice and takes only minutes to complete.
- Gather all your hair to one side at the back of your head and hold it firmly.
- Begin twisting the hair upward while keeping it flat against your head.
- Continue twisting until you’ve created a vertical roll along the back of your head.
- Tuck the ends into the twist and secure everything with bobby pins inserted vertically.
- Smooth any flyaways with hairspray and a fine-tooth comb for a polished finish.
15. The Knotted Ponytail

A knotted ponytail offers a unique alternative to traditional ponytails with a stylish twist that catches attention. This creative style demonstrates that quick hairstyles can still be fashion-forward and interesting.
- Divide your hair into two equal sections as if creating a simple side part.
- Tie these two sections together in a knot, just like tying shoelaces.
- Continue knotting down the length of your hair until you reach the ends.
- Secure the final knot with a clear elastic to maintain the knotted effect.
- Gently pull at the knots to create dimension and texture throughout the style.
16. The Scarf-Wrapped Bun

Incorporating a scarf into your bun adds color, pattern, and personality while disguising second-day hair beautifully. This stylish option takes minimal extra time but creates maximum impact.
- Create your preferred bun style, whether messy, sleek, or twisted.
- Fold a square scarf into a long band or use a pre-tied scarf headband.
- Wrap the scarf around the base of your bun, over the top, or throughout the bun itself.
- Tie the scarf securely, allowing the ends to hang freely or tucking them in for a neater look.
- Adjust the scarf positioning to frame your face attractively and showcase the pattern.
17. The Pull-Through Braid
The pull-through braid creates the illusion of an intricate braid without requiring traditional braiding skills. This impressive-looking style relies on simple ponytails and strategic pulling techniques.
- Create a ponytail at the crown of your head and secure it with a small elastic.
- Make another ponytail directly below the first one, gathering the remaining hair.
- Split the first ponytail in half and bring it around the second ponytail to the back.
- Create a third ponytail using the loose hair plus the split sections from the first ponytail.
- Continue this pattern down your head, gently pulling each section for volume, and secure the end with an elastic.
18. The Fishtail Braid

A fishtail braid delivers intricate beauty through a surprisingly simple two-strand technique. This textured braid adds dimension and interest while remaining secure and comfortable for all-day wear.
- Divide your hair into two large equal sections instead of the traditional three.
- Take a thin strand from the outer edge of the left section and cross it over to join the right section.
- Take a thin strand from the outer edge of the right section and cross it over to join the left section.
- Continue this alternating pattern all the way down, keeping consistent tension.
- Secure with an elastic and gently pull at the braid to create the characteristic textured fishtail appearance.
19. The Space Buns

Space buns bring playful energy and youthful charm while being incredibly practical for keeping hair completely contained. This fun style has made a major comeback and works perfectly for casual, active days.
- Part your hair down the center to create two equal sections.
- Gather one section into a high ponytail and secure it tightly with an elastic.
- Twist the ponytail and wrap it around the base to create a bun, securing with pins.
- Repeat the exact process on the other side, ensuring both buns are at the same height.
- Adjust both buns to match in size and spray lightly to control flyaways.
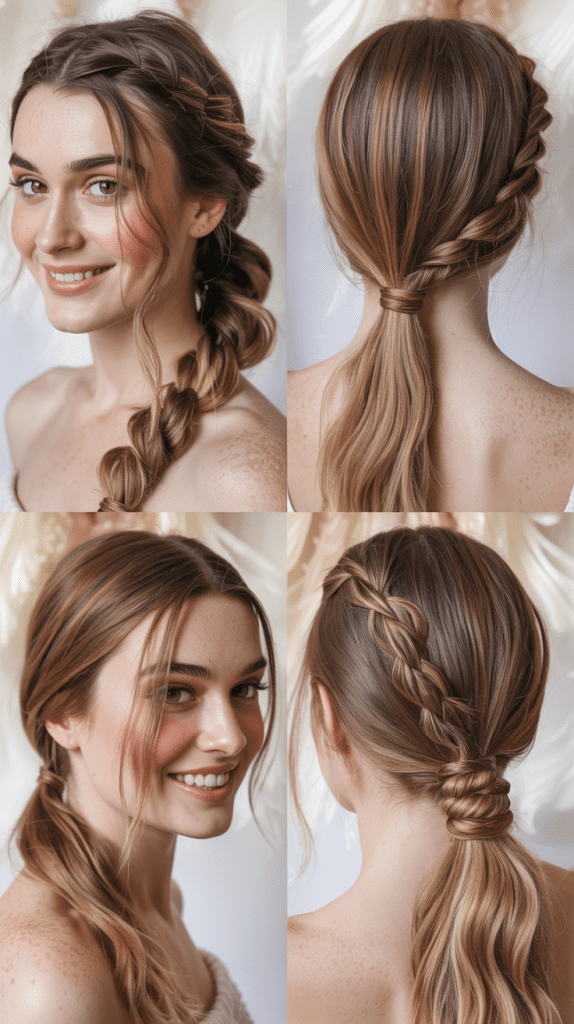
20. The Rope Braid Ponytail
A rope braid ponytail combines two classic styles into one elevated look that’s both simple and striking. This technique adds texture and visual interest to an everyday ponytail without requiring complicated skills.
- Create a ponytail at your desired height and secure it with a strong elastic.
- Divide the ponytail into two equal sections and twist each section tightly in the same direction.
- Wrap the two twisted sections around each other in the opposite direction to create a rope effect.
- Secure the end with an elastic and gently pull at the rope braid to add volume.
- Finish with hairspray to prevent the rope from unraveling throughout the day.
21. The Low Braided Ponytail
A low braided ponytail offers sophistication with an interesting detail that elevates the standard ponytail. This style works beautifully for professional settings while remaining comfortable and secure.
- Create a low ponytail at the nape of your neck and secure it with an elastic.
- Begin braiding the ponytail using your preferred braid technique, whether classic, Dutch, or fishtail.
- Continue braiding all the way to the ends and secure with a small elastic.
- Wrap a small section of hair around the top elastic to conceal it for a polished look.
- Gently pull at the braid to add dimension and spray lightly to maintain the style.
22. The Headband Tuck

The headband tuck method provides an incredibly quick solution for styling hair while keeping it off your face completely. This vintage-inspired technique works with various headband styles and hair lengths.
- Place a stretchy headband over your head, positioning it where you want it to sit.
- Take small sections of hair and tuck them up and under the headband all around your head.
- Continue tucking until all your hair is secured under the headband for a complete updo effect.
- Adjust the headband and tucked hair for even distribution and a smooth appearance.
- Pull out a few face-framing pieces if desired and spray to secure everything in place.
23. The Twisted Side Ponytail
A twisted side ponytail combines romantic texture with practical functionality in one elegant style. This asymmetrical look adds visual interest while keeping hair completely controlled.
- Create a deep side part and sweep all your hair to one side.
- Begin twisting small sections of hair from the heavy side, adding hair as you twist toward the back.
- Continue the twist along the side of your head until you reach behind your ear.
- Gather all remaining hair into a low side ponytail at the nape of your neck.
- Secure with an elastic and gently pull at the twist to add volume and texture.
24. The Criss-Cross Ponytail

The criss-cross ponytail creates an eye-catching pattern that transforms a basic ponytail into something special. This detailed style looks complex but requires only bobby pins and a few extra seconds.
- Section off the front portion of your hair and divide it into two equal parts.
- Cross these two sections over each other repeatedly, securing each cross with a small bobby pin.
- Continue the criss-cross pattern down toward where you want your ponytail to sit.
- Gather all your hair including the criss-crossed sections into a ponytail and secure it.
- Adjust the criss-cross sections to ensure they’re visible and evenly spaced.
25. The Quick Textured Updo

A textured updo provides effortless elegance for those days when you need to look put-together quickly. This loose, romantic style works wonderfully for various occasions and hair types.
- Apply texturizing spray to add grip and volume to your hair.
- Loosely gather your hair at the back of your head without smoothing it perfectly.
- Twist and pin sections randomly to create a loose, organic updo shape.
- Allow pieces to fall naturally and don’t worry about perfection in this intentionally messy style.
- Secure all sections with bobby pins and finish with flexible hold hairspray.
26. The Braided Low Bun

A braided low bun combines the security of a bun with the decorative appeal of a braid. This versatile style transitions seamlessly from day to night and suits both casual and formal occasions.
- Create a low ponytail and braid it completely using your preferred braiding technique.
- Wrap the braid around the base of the ponytail in a circular motion.
- Tuck the end of the braid into the bun and secure it with bobby pins.
- Gently pull at the braid and bun to create fullness and dimension.
- Finish with hairspray and add decorative pins if desired for special occasions.
27. The Sock Bun
The sock bun creates a perfectly round, voluminous bun using a simple sock as a shaping tool.
This clever technique works especially well for creating formal updos or when you want a fuller bun than your hair naturally provides.
- Cut the toe off a clean sock and roll it into a donut shape to create your bun form.
- Create a high ponytail and pull it through the center of the sock donut.
- Spread your hair evenly around the sock form, covering it completely.
- Tuck the ends of your hair under the sock and roll the bun down toward your head.
- Secure with bobby pins around the base and spray for hold.
Conclusion
Finding time for self-care as a busy mom doesn’t have to mean choosing between looking great and spending quality time with your family.
These 27 Cute and Easy Hairstyles for Busy Moms on the Go prove that you can achieve beautiful, polished looks in just minutes without professional skills or expensive products.
From quick ponytails and braids to elegant updos and playful styles, this collection offers solutions for every hair type, length, and occasion.
The key is selecting a few favorite styles that work with your hair texture and lifestyle, then practicing them until they become second nature. Remember that these hairstyles are meant to make your life easier, not add stress to your already full plate.
Embrace the beauty of simplicity and give yourself permission to take those few extra minutes for self-care each morning.
Whether you’re mastering the messy bun, experimenting with braided styles, or trying something completely new, you deserve to feel confident and beautiful as you navigate the wonderful chaos of motherhood.
Keep these techniques in your styling arsenal, and you’ll never again face the mirror wondering what to do with your hair when you’re running late.