As a busy mom, you deserve hairstyles that make you look put-together without stealing precious minutes from your morning routine.
The article “26 Easy Braided Hairstyles for Moms That Look Hard but Aren’t” is your ultimate guide to mastering elegant, Instagram-worthy braids that are surprisingly simple to create.
Whether you’re rushing to school drop-off, heading to a work meeting, or enjoying a rare date night, these braided styles will transform your look from frazzled to fabulous in minutes.
This comprehensive guide walks you through versatile braiding techniques that work for all hair types and lengths, complete with step-by-step instructions and styling tips.
You’ll discover classic braids with modern twists, quick five-minute styles for hectic mornings, and impressive updos that look professionally done.
Each hairstyle has been carefully selected for its ease of execution and maximum visual impact, proving that looking effortlessly chic doesn’t require hours in front of the mirror.
Get ready to expand your styling repertoire with braids that will have everyone asking for your secret, even though they’re easier than they appear.
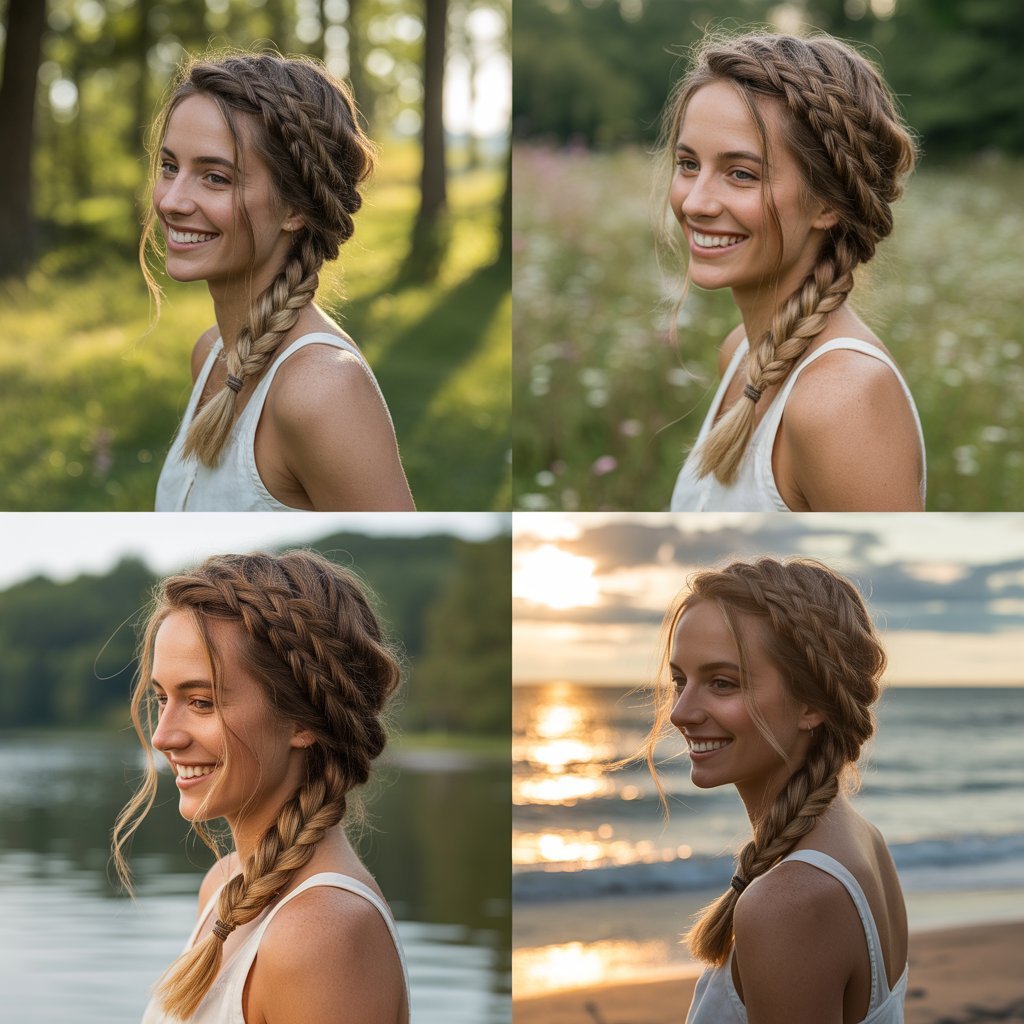
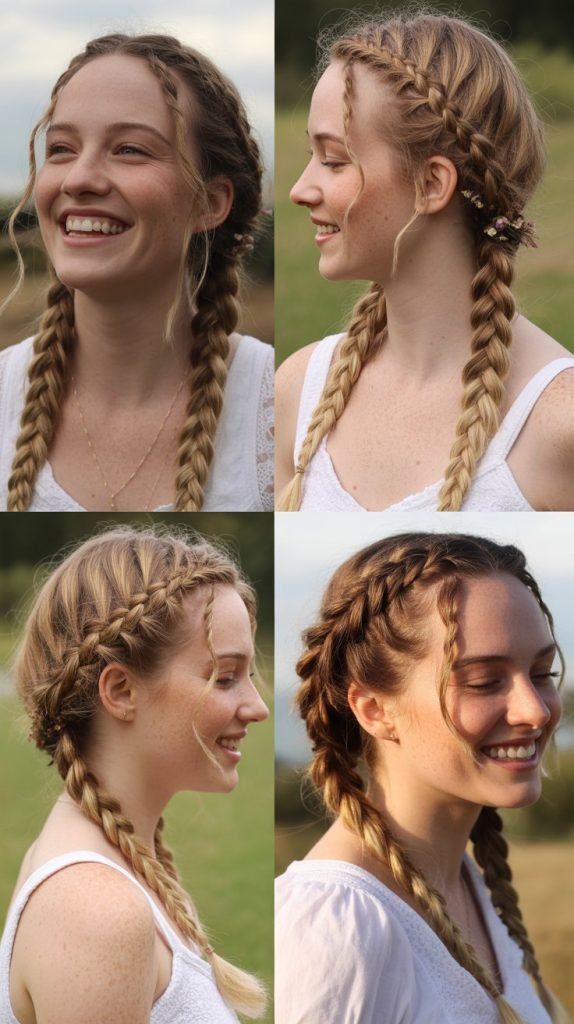
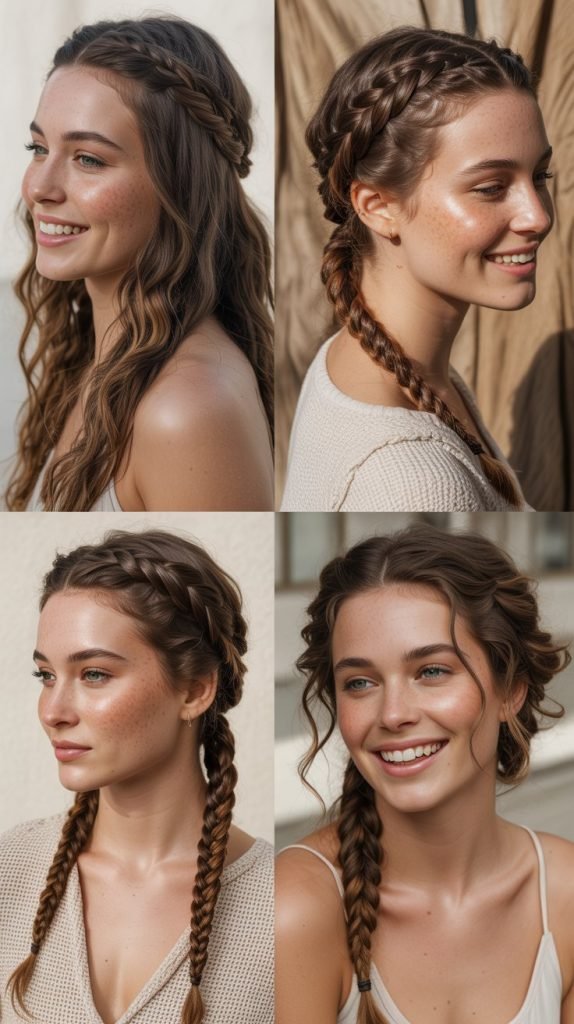
1. The Classic Three-Strand Side Braid
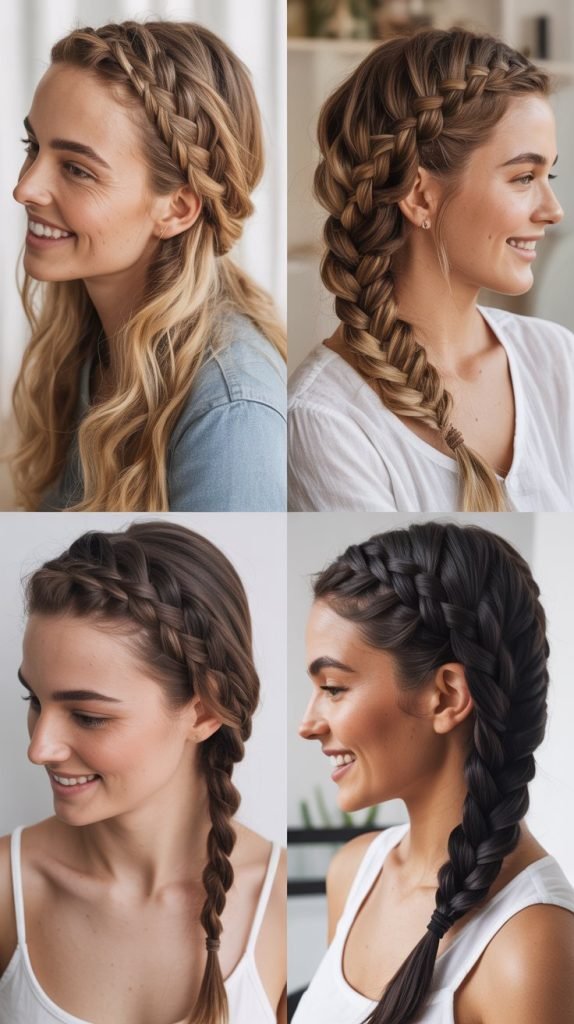
The three-strand side braid is the foundation of all braiding techniques and serves as the perfect starting point for busy moms.
This timeless style takes less than three minutes to complete and works beautifully for casual outings, gym sessions, or even professional settings when styled neatly.
How to Create It:
- Brush your hair to one side and divide it into three equal sections at your shoulder level.
- Cross the right section over the middle section, then cross the left section over the new middle section.
- Continue this pattern, alternating sides until you reach the ends of your hair.
- Secure with a hair elastic and gently pull on the braid sections to create a fuller, more relaxed appearance.
Why Moms Love It:
- Requires zero complicated techniques or special skills to master.
- Takes only 2-3 minutes from start to finish, perfect for rushed mornings.
- Works on both wet and dry hair, making it ideal after morning showers.
- Can be dressed up with accessories or kept simple for everyday wear.
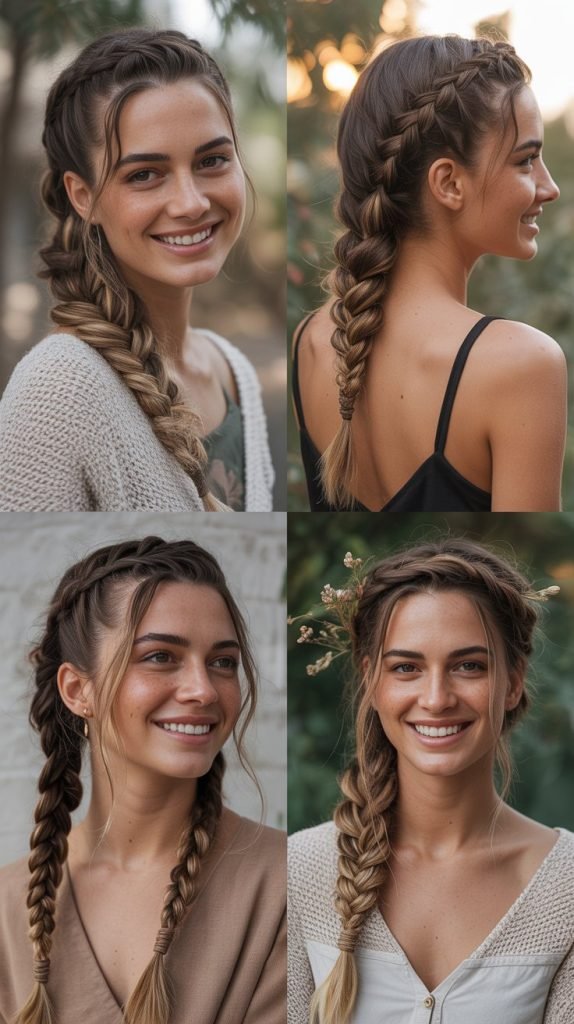
2. The Messy Fishtail Braid

The fishtail braid appears intricate and sophisticated but uses the same basic principle as a regular braid with just two sections instead of three.
This style has become a favorite among fashion-forward moms because it looks deliberately styled yet effortlessly undone.
Step-by-Step Instructions:
- Divide your hair into two equal sections instead of three.
- Take a small piece from the outer edge of the left section and cross it over to join the right section.
- Repeat on the opposite side, taking a small piece from the outer right and crossing it to the left.
- Continue alternating sides, keeping the sections relatively loose for that coveted messy texture.
- Secure at the bottom and pancake the braid by gently pulling the edges to create volume.
Pro Tips:
- The messier this braid looks, the better and more fashionable it appears.
- Second-day hair actually works better than freshly washed hair for added texture and grip.
- Smaller sections create a more intricate pattern, while larger sections speed up the process.
- This style stays secure all day without constant readjustment or touch-ups.
3. The Half-Up Crown Braid
The half-up crown braid combines the elegance of an updo with the ease of leaving most of your hair down.
This versatile style keeps hair out of your face while creating a romantic, bohemian vibe that transitions seamlessly from playground to dinner date.
Creating Your Crown:
- Section off the top portion of your hair from ear to ear, leaving the bottom half down.
- Create a regular three-strand braid with the top section, starting from one side.
- Wrap the braid across the crown of your head like a headband and secure with bobby pins.
- Let the remaining hair flow naturally or add loose waves for extra dimension.
Styling Variations:
- Add small flowers or decorative pins along the crown braid for special occasions.
- Create two smaller braids instead of one for a more intricate crown effect.
- Pull out face-framing pieces before braiding to soften the overall look.
- This style works exceptionally well with highlights as it showcases different hair tones.
4. The Quick Dutch Braid
The Dutch braid, often called a reverse French braid, sits on top of your head rather than woven into it, creating a bold, prominent look.
Despite its impressive appearance, this technique is only slightly more challenging than a regular braid once you understand the simple reversal.
Mastering the Technique:
- Start with a small section at the crown and divide it into three parts like a regular braid.
- Instead of crossing sections over the middle, cross them under the middle section.
- Add small pieces of hair from the sides as you work down, incorporating them under the middle strand.
- Continue braiding down to the nape of your neck and finish with a regular braid to the ends.
Why It Stands Out:
- The raised appearance makes even thin hair look fuller and more voluminous.
- Creates a sporty, athletic look perfect for active moms on the go.
- Keeps all flyaways secured tightly against your head throughout busy days.
- Once you practice the under-motion three times, it becomes completely automatic.
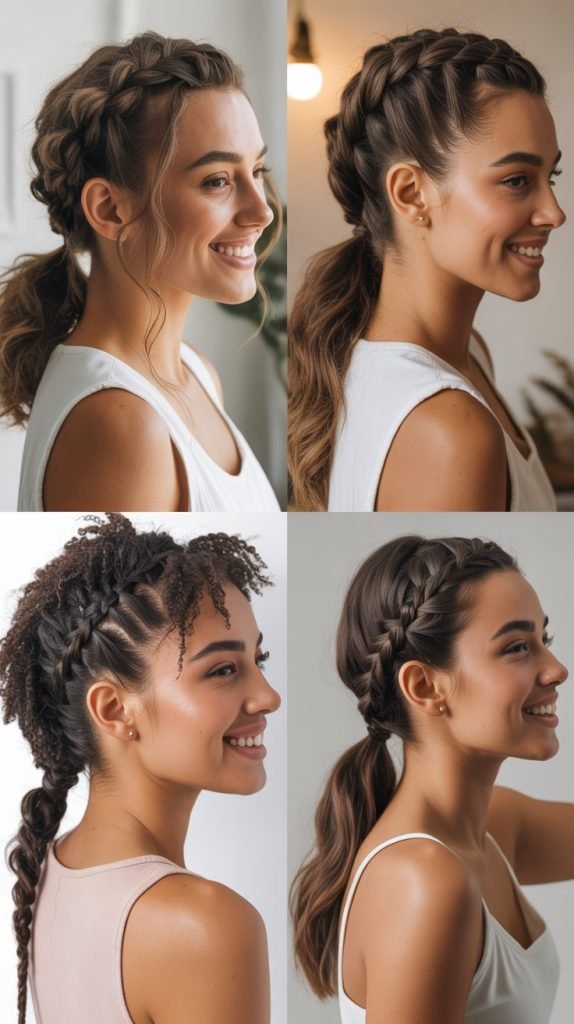
5. The Rope Braid Ponytail
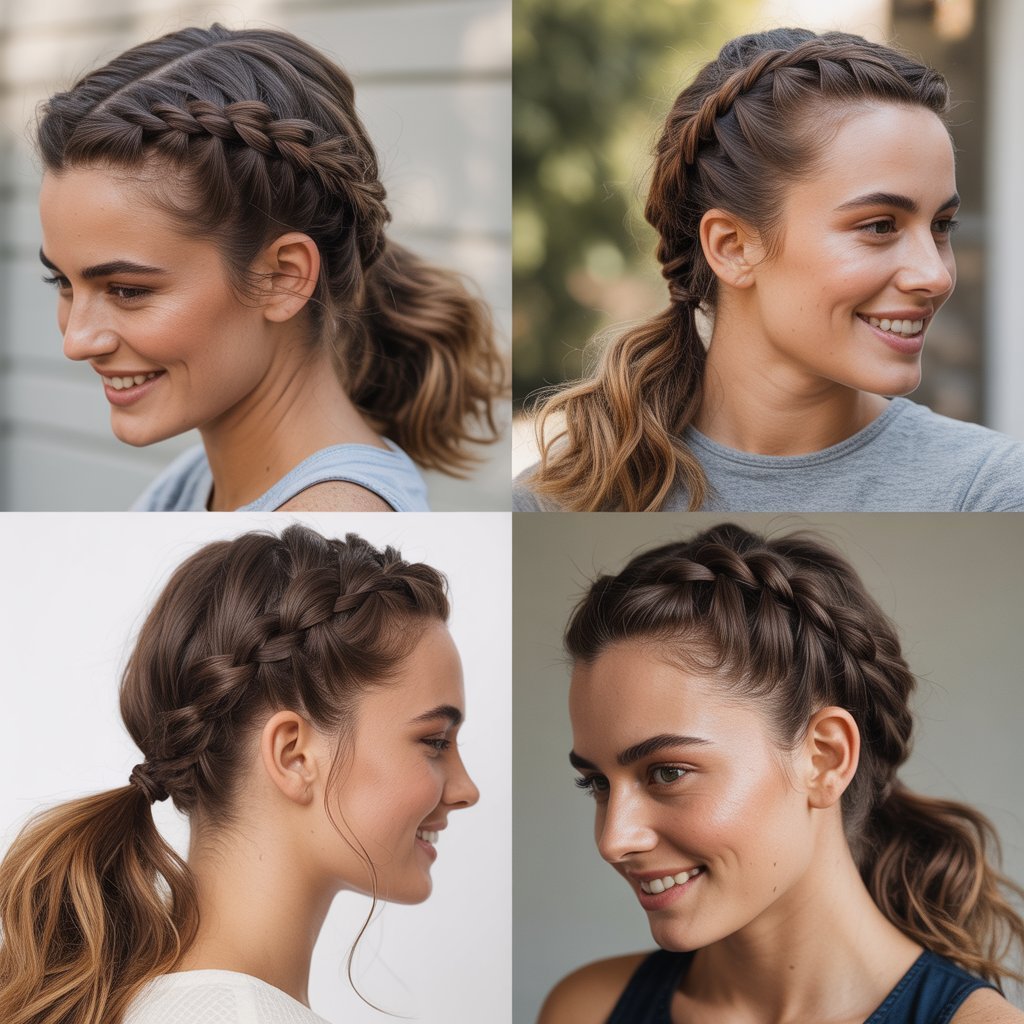
The rope braid transforms a basic ponytail into something special with minimal extra effort.
This two-strand twisting technique creates a sleek, polished look that’s perfect for professional settings or any time you want to appear more put-together.
Simple Steps:
- Pull your hair into a secure ponytail at your desired height.
- Divide the ponytail into two equal sections.
- Twist each section individually in the same direction (clockwise works well).
- Wrap the two twisted sections around each other in the opposite direction (counterclockwise).
- Secure at the bottom with an elastic and gently pull to add texture.
Perfect For:
- Moms who find traditional braiding coordination challenging to master.
- Creating a polished look for virtual meetings or video calls.
- Hot summer days when you need hair completely off your neck.
- Transitioning from office hours to evening activities without restyling.
6. The Waterfall Braid
The waterfall braid creates a cascading effect where sections of hair fall through the braid like a waterfall.
This romantic style looks incredibly complex but involves a simple technique of dropping and replacing strands as you braid horizontally across your head.
Creating the Cascade:
- Begin with a small section near your temple and divide it into three strands.
- Start a regular braid but after the first stitch, drop the bottom strand and let it fall.
- Pick up a new section from behind to replace the dropped strand and continue braiding.
- Repeat this drop-and-replace pattern as you work horizontally across your head.
- Secure the braid behind your ear with bobby pins when you reach the other side.
Styling Success:
- This style showcases your hair length beautifully while keeping the top section controlled.
- Works exceptionally well with curled or wavy hair to emphasize the waterfall effect.
- The technique becomes intuitive after completing it just once or twice.
- Creates a stunning look for family photos, weddings, or special events.
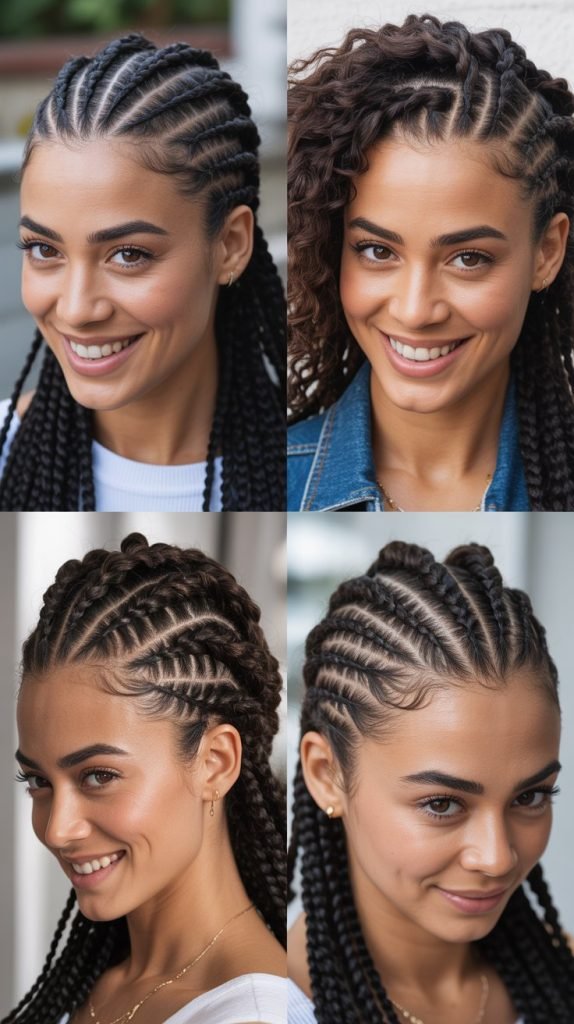
7. The Double Dutch Braids
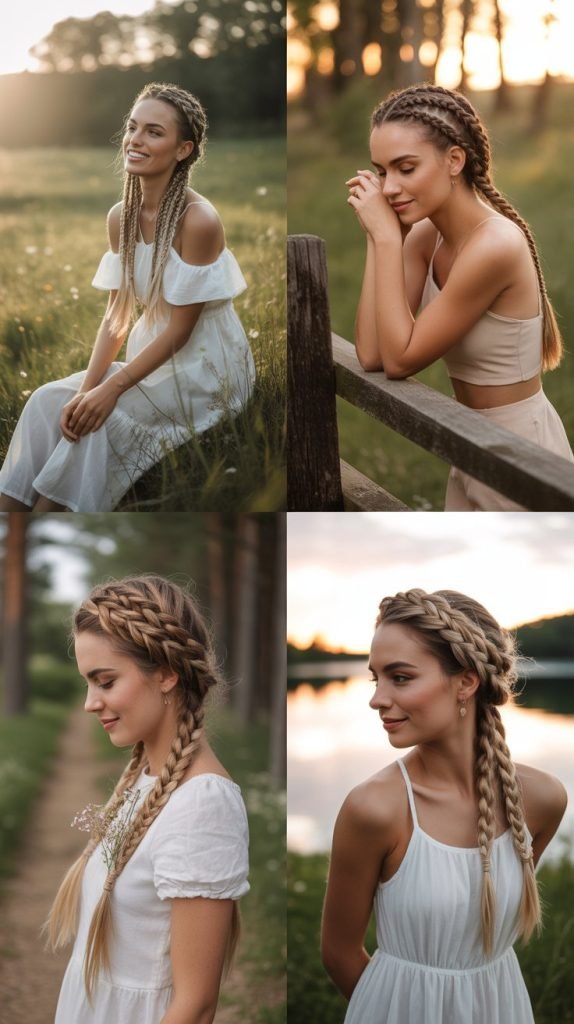
Double Dutch braids, also known as boxer braids, have surged in popularity for their athletic yet stylish appearance.
These parallel braids running down both sides of your head keep hair completely secure while creating a trendy, youthful look.
Braiding Both Sides:
- Part your hair straight down the middle from forehead to nape, creating two equal sections.
- Clip one side away and begin a Dutch braid on the other, braiding under rather than over.
- Work from the hairline down to the nape, adding hair continuously as you braid.
- Secure the first braid and repeat the exact process on the second side.
- Ensure both braids sit at the same height and tension for a balanced appearance.
Practical Benefits:
- Hair stays completely secured during workouts, running errands, or chasing toddlers.
- The style typically lasts 2-3 days with minimal touch-ups needed.
- Reduces hair washing frequency as hair stays protected and less exposed to elements.
- Creates a trendy, confident look that works across all age groups.
8. The Braided Top Knot

The braided top knot combines the practicality of a bun with the visual interest of a braid. This elevated style keeps every strand off your face and neck while adding a fashionable twist to the standard mom bun.
Building Your Knot:
- Flip your head upside down and create a Dutch or French braid starting from the nape of your neck.
- Braid upward toward the crown where you want your bun positioned.
- Secure the end of the braid at the crown and gather any remaining loose hair.
- Twist the braided section and remaining hair together into a bun shape.
- Secure with bobby pins and wrap a hair elastic around the base for extra hold.
Why It Works:
- Combines two popular styles into one efficient morning routine.
- Keeps hair secure and out of the way during cooking, cleaning, or childcare.
- Adds height and dimension that a regular bun cannot achieve.
- The braided base prevents the bun from sliding or loosening throughout the day.
9. The Pull-Through Braid

The pull-through braid creates the illusion of a complex woven braid using only ponytails and strategic pulling.
This innovative technique requires zero actual braiding skills yet produces stunning results that look professionally styled.
The Stacking Method:
- Create a ponytail at the crown and secure with a clear elastic.
- Make a second ponytail directly below the first, leaving about two inches of space.
- Split the top ponytail in half and bring both sections around the second ponytail.
- Create a third ponytail below, incorporating the split sections from the first ponytail.
- Continue this split-and-combine pattern down the length of your hair.
- Gently pull on each section to create fullness and hide the elastics.
Impressive Results:
- Creates incredible volume that makes even fine hair appear thick and luxurious.
- Requires absolutely no coordination or traditional braiding skill to execute.
- The technique can be completed in under five minutes once you understand the pattern.
- Works beautifully for formal events where you want maximum impact with minimum effort.
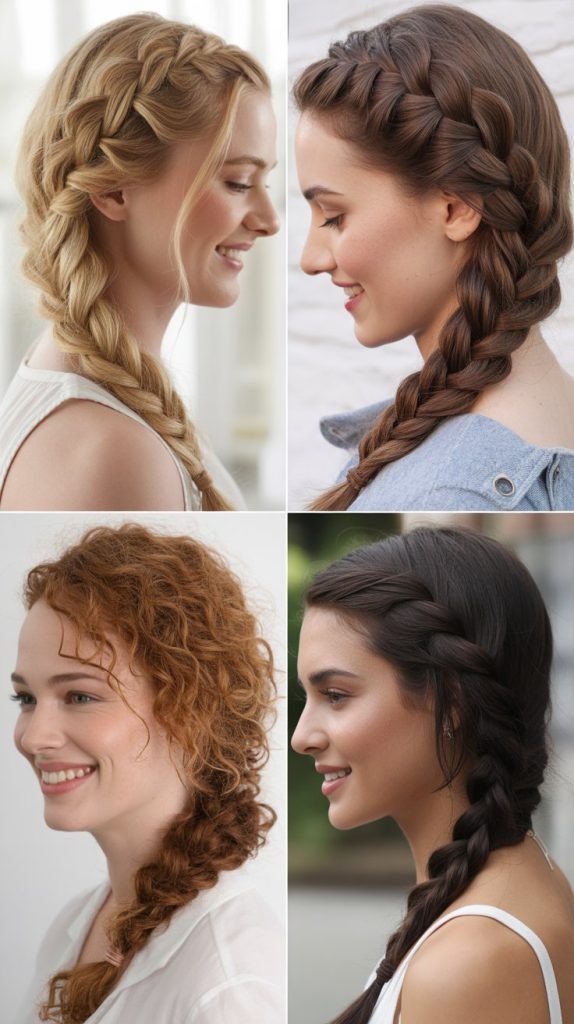
10. The Side French Braid
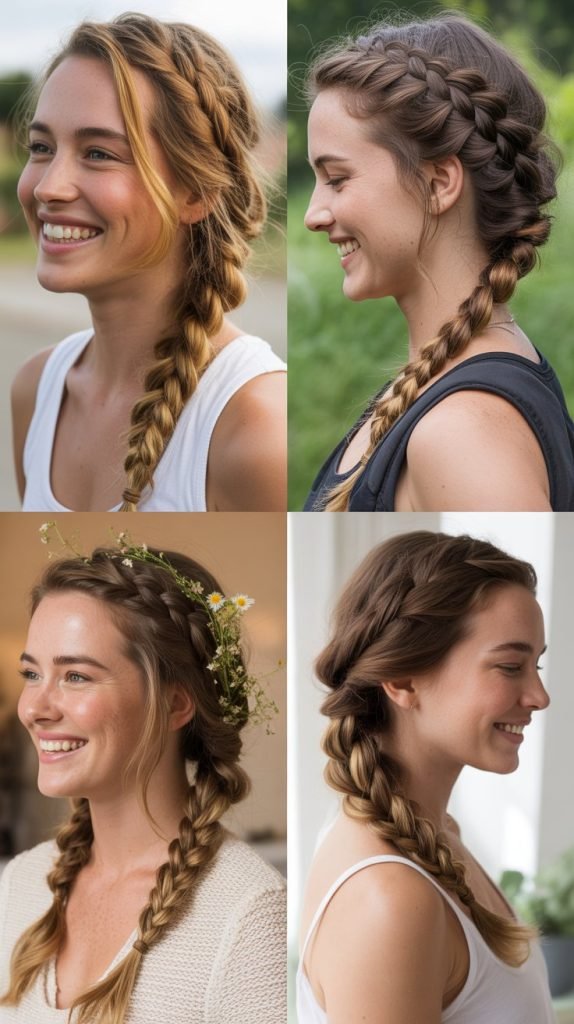
The side French braid elegantly sweeps all your hair to one side while incorporating strands as you go.
This classic style offers sophistication and security, making it perfect for moms who need their hair to stay put through unpredictable days.
Sweeping to the Side:
- Brush all your hair to your preferred side and begin at the temple area.
- Start a French braid by dividing a small section into three parts.
- Add small pieces of hair from both sides as you braid diagonally downward.
- Continue incorporating all loose hair as you work toward the opposite shoulder.
- Finish with a regular three-strand braid once all hair has been gathered.
Versatile Styling:
- Looks equally appropriate at school functions and evening social events.
- The diagonal angle creates visual interest and elongates the neckline.
- Keeps hair completely controlled on windy days or during outdoor activities.
- Can be made tighter for a sleek look or loosened for romantic, soft vibes.
11. The Braided Headband
The braided headband creates a charming accessory effect using your own hair instead of a store-bought headband.
This practical yet pretty style keeps bangs and face-framing pieces secured while allowing the rest of your hair to flow freely.
Creating Your Natural Headband:
- Section off a thin layer of hair from behind one ear, about one inch thick.
- Create a tight three-strand braid with this section all the way to the ends.
- Wrap the braid across the top of your head like a headband.
- Secure behind the opposite ear with bobby pins that match your hair color.
- Leave the remaining hair down, or add curls for a more polished appearance.
Practical Application:
- Keeps growing-out bangs or shorter layers away from your face effectively.
- Creates the illusion of having an accessory without needing to find one.
- Takes approximately three minutes to complete from start to finish.
- Can be created with a French braid for a thicker, more prominent headband effect.
12. The Twisted Halo Braid
The twisted halo braid wraps around your entire head like a crown, creating an ethereal, goddess-like appearance.
Despite its elaborate look, this style uses simple twisting and pinning techniques that any mom can master with minimal practice.
Wrapping Your Crown:
- Part your hair down the middle and divide into two equal sections.
- Take one section and twist it tightly from roots to ends in one direction.
- Wrap the twisted section around your head along the hairline, securing with pins.
- Repeat with the second section, wrapping it in the opposite direction.
- Tuck the ends under the wrapped sections and secure everything with hidden bobby pins.
Elegant Occasions:
- Perfect for weddings, formal events, or any time you want to feel special.
- The style stays secure for extended periods without constant adjustment.
- Creates a romantic, timeless look that photographs beautifully.
- Can incorporate flowers, jeweled pins, or other decorative elements easily.
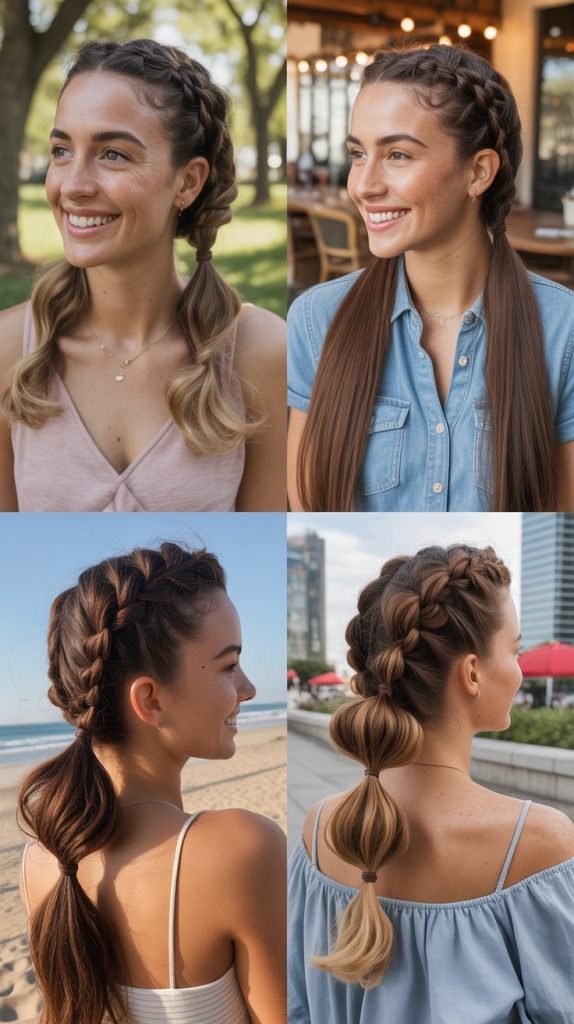
13. The Bubble Ponytail Braid
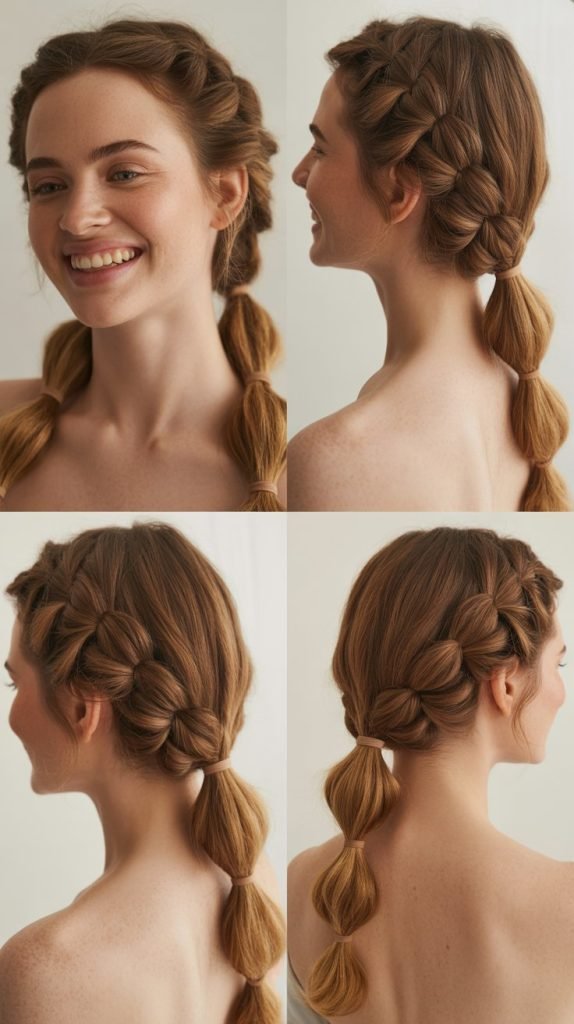
The bubble ponytail braid creates fun, voluminous sections that resemble bubbles stacked down your ponytail.
This playful style appeals to both moms and kids, making it perfect for matching mother-daughter hairstyle days.
Creating the Bubbles:
- Start with a high or mid-height ponytail secured with an elastic.
- Place another elastic about two inches down the ponytail length.
- Gently pull the hair between the elastics outward to create a rounded bubble shape.
- Add another elastic two inches below and repeat the pulling process.
- Continue down the length of your ponytail, creating as many bubbles as desired.
Fun Factor:
- Kids absolutely love this style, making it great for building connection.
- Takes under five minutes and requires no advanced braiding skills.
- The bubbles add dimension and make thin ponytails appear much fuller.
- Can use colorful elastics to match outfits or celebrate special occasions.
14. The French Braid Bun

The French braid bun starts with a braid at the nape and transitions into a bun at the crown, creating an elegant updo with textural interest.
This sophisticated style keeps every strand secured while looking far more complicated than it actually is.
Upside-Down Technique:
- Flip your head forward and begin a French braid at the nape of your neck.
- Add hair from the sides as you braid upward toward the crown.
- Secure the braid with an elastic when you reach your desired bun placement.
- Twist the remaining hair and the braided section into a bun shape.
- Pin securely and use hairspray for extra hold throughout the day.
Professional Appeal:
- Creates a polished look suitable for job interviews, presentations, or formal events.
- Keeps hair completely controlled without a single strand falling loose.
- The inverted braid adds unique visual interest to a classic bun style.
- Appears to require professional styling skills but takes under 10 minutes.
15. The Infinity Braid
The infinity braid creates a figure-eight pattern that looks mesmerizing and intricate.
This unique style uses a special crossing technique that, once learned, becomes surprisingly simple and creates stunning visual dimension.
The Figure-Eight Method:
- Divide your hair into two sections and hold one in each hand.
- Take a small piece from the outside of the left section and pass it over, then under the right section.
- Take a small piece from the outside of the right section and pass it over, then under the left section.
- Continue alternating this over-under pattern to create the infinity symbol shape.
- The pattern becomes rhythmic and automatic after just a few repetitions.
Unique Appeal:
- Creates a conversation-starting style that few people know how to create.
- The intricate pattern photographs beautifully for social media posts.
- Works well with both casual and dressy outfits depending on how you style it.
- Once mastered, takes approximately the same time as a regular fishtail braid.
16. The Four-Strand Braid

The four-strand braid elevates your braiding game with an extra section that creates a more complex, woven appearance.
While it sounds intimidating, following a simple over-under pattern makes this impressive style completely achievable.
Working with Four:
- Divide your hair into four equal sections instead of the usual three.
- Number them 1, 2, 3, 4 from left to right to keep track initially.
- Cross section 1 over section 2, then cross section 4 over section 3.
- Cross the new middle sections (2 and 3) over each other.
- Repeat this pattern rhythmically until you reach the ends of your hair.
Advanced Appearance:
- The extra strand creates a fuller, more dimensional braid than traditional three-strand versions.
- Impresses friends and family who assume it requires advanced training to achieve.
- The wider braid works exceptionally well for special occasions and photos.
- After three practice rounds, the pattern becomes muscle memory and requires no thinking.
17. The Braided Low Bun

The braided low bun sits elegantly at the nape of your neck with braided elements woven throughout.
This refined style offers the sophistication of a chignon with the added interest of braiding, perfect for professional or formal settings.
Sophisticated Construction:
- Create two thin braids on either side of your head, starting near your temples.
- Gather all remaining hair at the nape into a low ponytail with the braids.
- Twist the ponytail and wrap it into a bun shape at the base.
- Wrap the two braids around the bun in opposite directions for added texture.
- Secure everything with bobby pins and finish with light hairspray.
Refined Occasions:
- Perfect for job interviews, client meetings, or any professional setting.
- Creates a sophisticated, mature look while remaining comfortable all day.
- The low placement prevents headaches that high buns sometimes cause.
- Requires minimal products and holds well even in humid conditions.
18. The Zigzag Braid

The zigzag braid creates a playful, unexpected pattern by changing directions as you braid.
This creative style adds visual interest and fun to your look while using the same basic braiding technique you already know.
Creating the Pattern:
- Start a French braid at one temple, braiding diagonally toward the opposite side.
- After a few inches, change direction and braid diagonally the opposite way.
- Continue alternating directions every few inches to create a zigzag pattern.
- Work your way down the head, incorporating all hair as you change angles.
- Finish with a regular braid once all hair has been incorporated into the zigzag.
Playful Energy:
- This style showcases creativity and personality through an unexpected pattern.
- Kids especially love the fun, geometric look of the zigzag design.
- The technique challenges you slightly while remaining completely manageable.
- Creates a unique look perfect for casual outings and family activities.
19. The Lace Braid
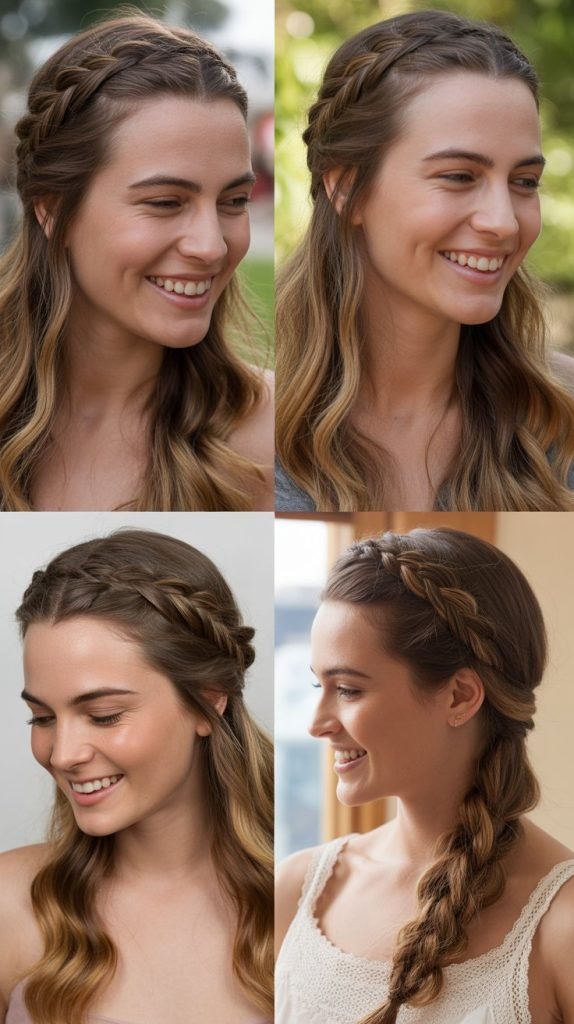
The lace braid resembles delicate lacework by adding hair only from one side as you braid.
This elegant technique creates a beautiful edge detail that’s perfect for creating hair “ribbons” or decorative accents.
One-Sided Technique:
- Section off a small amount of hair where you want the lace braid to begin.
- Start a French braid but only add new hair from the bottom side, not the top.
- Continue braiding along your hairline or desired path, adding hair from one side only.
- This creates a flat, delicate braid that hugs the head beautifully.
- Secure at the end and allow the lace braid to accent your overall hairstyle.
Delicate Detail:
- Works beautifully along hairlines to keep baby hairs and bangs controlled.
- Creates a romantic, feminine accent without overwhelming your overall look.
- Can be incorporated into many other hairstyles as an added detail.
- The one-sided technique is actually easier than traditional French braiding.
20. The Mohawk Braid
The mohawk braid creates an edgy, bold look by braiding down the center of your head while leaving the sides sleek.
This modern style offers attitude and confidence while keeping hair completely controlled and practical for active days.
Central Focus:
- Section the center portion of your hair from forehead to crown, about 3-4 inches wide.
- Smooth the side sections back and secure them temporarily with clips or pins.
- Create a Dutch braid with the center section so it sits prominently on top.
- Secure the braid at the crown or continue it down to the nape.
- Release the side sections and smooth them back, pinning behind the ears.
Bold Statement:
- Creates an edgy, fashion-forward look that still works for everyday activities.
- The prominent center braid makes even fine hair appear fuller and more substantial.
- Works exceptionally well for athletic activities as everything stays secured.
- Can be softened with face-framing pieces or made more dramatic by slicking sides back.
21. The Milkmaid Braid

The milkmaid braid creates a sweet, vintage-inspired crown using two braids wrapped over the top of your head.
This charming style evokes pastoral elegance while being surprisingly practical and easy to maintain throughout busy days.
Sweet Simplicity:
- Part your hair down the middle and create two regular braids, one on each side.
- Lift the right braid up and over your head like a headband, pinning along the opposite side.
- Take the left braid and wrap it over your head in the opposite direction.
- Cross the braids over each other at the crown and tuck the ends underneath.
- Secure with bobby pins hidden beneath the braids for an invisible finish.
Vintage Charm:
- This style works beautifully for weddings, garden parties, or countryside events.
- Creates a soft, romantic appearance that photographs exceptionally well.
- The crossed braids distribute weight evenly, preventing headaches from tension.
- Can be made messier for a bohemian look or kept neat for formal occasions.
22. The Side Braid Bun

The side braid bun combines the romance of a side-swept style with the practicality of a bun.
This asymmetrical look creates visual interest while keeping hair completely off your neck and out of your way during busy mom duties.
Asymmetrical Elegance:
- Create a side French braid starting from one temple and working diagonally downward.
- Continue the braid toward the opposite side, behind the ear at approximately jawline height.
- Gather any remaining loose hair and combine it with the braided section.
- Twist everything into a bun and secure with bobby pins at the side of your head.
- Pull gently on the braid sections to create a softer, more voluminous appearance.
Stylish Function:
- The side placement adds modern, contemporary appeal to a traditional updo.
- Keeps all hair secured while creating an elegant silhouette from every angle.
- Works well for both professional settings and evening social events.
- The asymmetry naturally creates interest without requiring complex techniques.
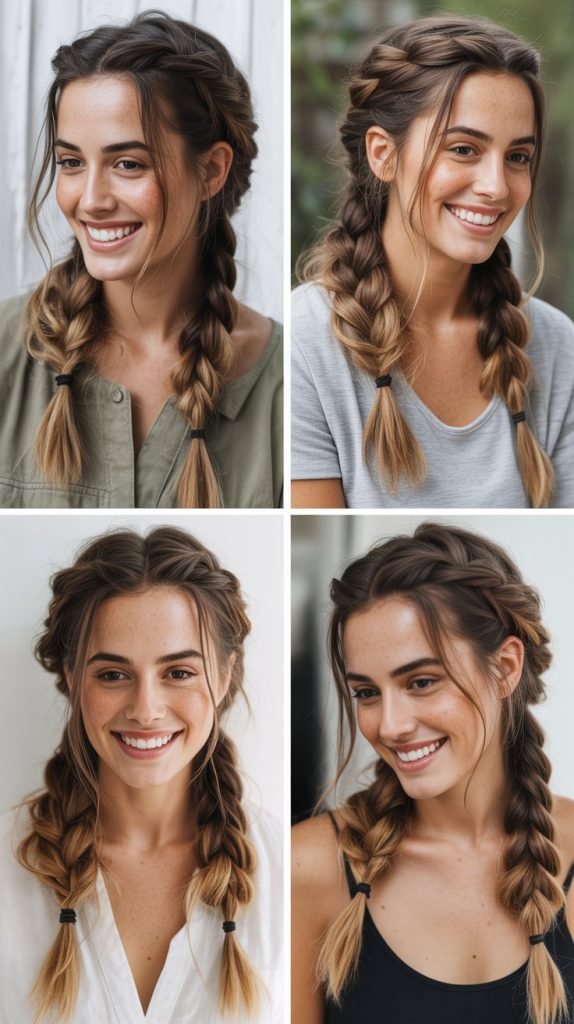
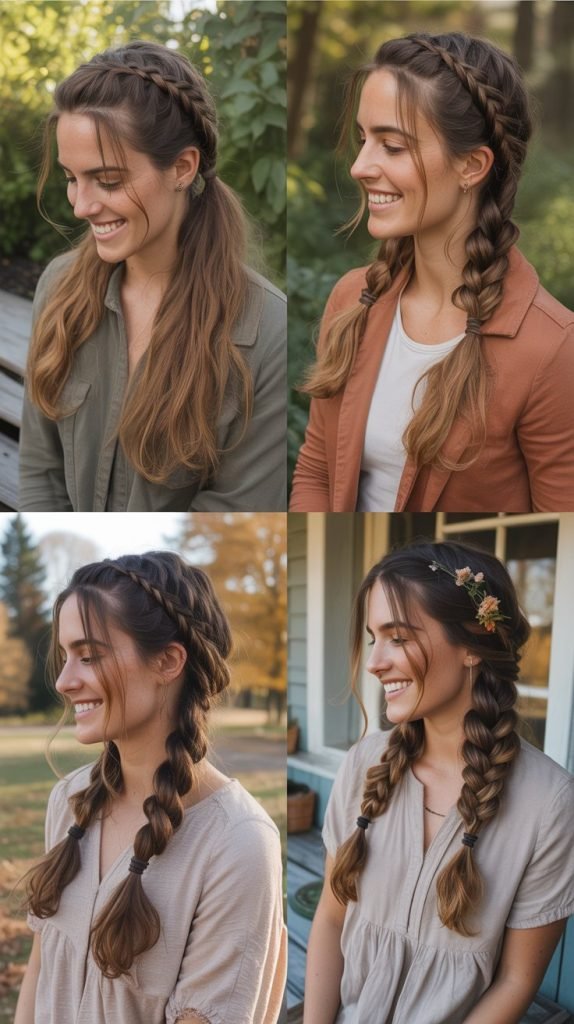
23. The Braided Pigtails
Braided pigtails update a childhood classic into a chic, modern style for adult moms. This playful yet polished look has gained popularity as a trendy, youthful style that’s both practical and fashionable.
Youthful Style:
- Part your hair straight down the middle from forehead to nape, creating two equal sections.
- Create your preferred braid style (regular, Dutch, or French) on one side from root to tip.
- Secure the first braid and repeat with the identical technique on the opposite side.
- Ensure both braids start at the same height and use the same tension for symmetry.
- Keep them neat and tight for a polished look, or loosen for casual vibes.
Modern Appeal:
- This style has become surprisingly trendy and fashion-forward for adult women.
- Works perfectly for athletic activities, keeping hair completely controlled during movement.
- Creates a playful, confident look that challenges aging stereotypes.
- Can be dressed up with ribbons, wrapped with leather cord, or kept simple.
24. The Braided Ponytail Wrap
The braided ponytail wrap elevates a basic ponytail by wrapping a small braid around the elastic.
This sophisticated detail instantly transforms an everyday style into something special with minimal extra effort.
Polished Detail:
- Create your ponytail at your desired height and secure with an elastic.
- Take a small section from underneath the ponytail, about half an inch wide.
- Braid this small section traditionally and wrap it around the elastic base.
- Secure the end of the small braid underneath the ponytail with a bobby pin.
- Tuck the pin and ends carefully so only the wrapped braid shows.
Instant Upgrade:
- Takes literally 60 seconds to add this detail to any ponytail.
- Hides the elastic completely, creating a more refined and finished appearance.
- Works with any ponytail height from low to high placement.
- This small detail makes people assume you spent much more time on your hair.
25. The Snake Braid
The snake braid creates a unique, textured effect by strategically pulling only one side of the braid.
This asymmetrical pulling technique produces a distinctive serpentine appearance that looks complex but requires no additional skills.
Creating the Snake:
- Create a regular three-strand braid from roots to ends with even tension.
- Starting from the top, gently pull outward on the sections of only one side of the braid.
- Work your way down the entire braid, pulling consistently on the same side.
- The unpulled side remains tight while the pulled side becomes fuller and rounder.
- Secure at the bottom and enjoy the distinctive, eye-catching asymmetrical effect.
Unique Texture:
- This technique creates instant visual interest with virtually no additional time investment.
- The snake effect photographs dramatically and catches light beautifully.
- Works with braids of any thickness from thin to voluminous.
- Can be incorporated into other braided styles as an accent technique.
26. The Braided Space Buns

Braided space buns combine playful double buns with the added dimension of braiding.
This trendy style offers a fun, youthful energy while keeping all hair secured and controlled throughout even the most active days.
Double Fun:
- Part your hair down the middle and divide into two high sections at the crown.
- Create a Dutch braid with each section, braiding from the base toward the ends.
- Wrap each braided section into a bun shape at the top of your head.
- Secure each bun with bobby pins and elastics for maximum hold.
- Position buns symmetrically for a balanced, playful appearance.
Playful Practicality:
- Perfect for theme parks, festivals, concerts, or any fun family outings.
- Keeps absolutely every strand of hair controlled and out of the way.
- The elevated style creates a fun, youthful energy that’s surprisingly trendy.
- Can be made neater for a polished look or messier for a casual vibe.
Comparison Table: Time and Skill Level
| Hairstyle | Time Required | Skill Level | Best For | Hair Length Needed |
|---|---|---|---|---|
| Classic Three-Strand Side Braid | 2-3 minutes | Beginner | Everyday wear | Medium to long |
| Messy Fishtail Braid | 5-7 minutes | Beginner | Casual outings | Medium to long |
| Half-Up Crown Braid | 5-8 minutes | Beginner | Date nights, special events | Medium to long |
| Quick Dutch Braid | 5-10 minutes | Intermediate | Active days, sports | Medium to long |
| Rope Braid Ponytail | 3-4 minutes | Beginner | Professional settings | Medium to long |
| Waterfall Braid | 8-12 minutes | Intermediate | Formal events | Medium to long |
| Double Dutch Braids | 10-15 minutes | Intermediate | Athletic activities | Medium to long |
| Braided Top Knot | 5-7 minutes | Beginner | Hot days, busy schedules | Medium to long |
| Pull-Through Braid | 5-8 minutes | Beginner | Special occasions | Medium to long |
| Side French Braid | 7-10 minutes | Intermediate | Versatile for any occasion | Medium to long |
Essential Tools and Products
Having the right tools makes creating these braided hairstyles significantly easier and helps them last longer throughout your busy day.
Must-Have Tools:
- Small, snag-free hair elastics in colors matching your hair keep braids secure without causing breakage.
- Bobby pins in multiple sizes and colors allow you to secure various braid types invisibly.
- A wide-tooth comb helps detangle without breaking hair before you begin styling.
- A fine-tooth comb or brush smooths sections and creates clean parts for polished results.
- Hair clips or sectioning clamps hold portions of hair while you work on other sections.
Helpful Products:
- Dry shampoo adds texture and grip to freshly washed hair, making braids easier to create.
- Texturizing spray provides hold and definition that keeps braids from slipping throughout the day.
- Light-hold hairspray sets finished styles without making hair stiff or crunchy.
- Hair oil or serum smooths flyaways and adds shine for more polished appearances.
- Leave-in conditioner keeps hair manageable and reduces frizz during the braiding process.
Tips for Braiding Success
Preparation Makes Perfect:
- Second-day hair actually braids more easily than freshly washed hair due to natural oils providing grip.
- Slightly damp hair offers more control than completely dry hair, especially for intricate styles.
- Detangle thoroughly before beginning to prevent frustrating snags mid-braid that disrupt your rhythm.
- Apply product before braiding rather than after for better hold and less frizz throughout the day.
Common Mistakes to Avoid:
- Braiding too tightly causes headaches and can damage hair follicles over time.
- Starting with sections that are too large makes the braiding process cumbersome and less defined.
- Failing to secure ends properly results in braids unraveling during your busy day.
- Giving up after one attempt when practice truly makes these techniques second nature.
Making It Last:
- Sleep on a silk or satin pillowcase to reduce friction that causes frizz and loosening.
- Wrap looser braids in a silk scarf before bed to maintain their shape overnight.
- Touch up with hairspray or a bit of water and product on day two to refresh the style.
- Keep small elastics and bobby pins in your purse for quick fixes throughout the day.
Adapting Braids to Your Hair Type
For Fine or Thin Hair:
- Create looser, messier braids and pull them apart to add the illusion of volume.
- Use texturizing products before braiding to give hair more grip and fullness.
- Consider the pull-through braid technique as it creates maximum volume with minimal effort.
- Avoid braiding too tightly as this emphasizes thinness rather than creating fullness.
For Thick or Coarse Hair:
- Apply smoothing products to reduce bulk and make sectioning easier.
- Work with larger sections to prevent braids from becoming too time-consuming.
- Use stronger elastics and more bobby pins to secure heavier braids effectively.
- Consider braiding slightly damp hair for more control over thick, textured hair.
For Curly or Textured Hair:
- Embrace your natural texture for beautiful, dimensional braids with automatic volume.
- Detangle gently with a wide-tooth comb and conditioner to preserve curl pattern.
- Moisturize well before braiding to prevent frizz and maintain hair health.
- Many of these styles work beautifully on natural hair and can protect curls while looking stylish.
For Short to Medium Hair:
- Focus on styles like the braided headband, half-up crown, or Dutch braids that work with shorter lengths.
- Use smaller sections so braids have enough length to secure properly.
- Bobby pins become your best friend for tucking and securing shorter ends.
- Don’t hesitate to combine braided sections with clips or accessories for added security.
Conclusion
The “26 Easy Braided Hairstyles for Moms That Look Hard but Aren’t” proves that looking polished and put-together doesn’t require sacrificing precious time or possessing professional hairstyling skills.
From the classic three-strand side braid to trendy braided space buns, these versatile styles offer solutions for every occasion, hair type, and skill level.
The beauty of these braided hairstyles lies in their deceptive simplicity—what appears intricate and time-consuming often takes just minutes once you understand the basic technique.
Whether you’re managing school drop-offs, powering through work meetings, or enjoying rare moments of self-care, these braids provide practical solutions wrapped in beautiful packages.
Remember that practice transforms these techniques from challenging to automatic, and imperfection often adds to the charm and authenticity of handmade braids.
Start with the beginner-friendly options like the three-strand side braid or rope braid ponytail, then gradually challenge yourself with more complex styles as your confidence grows.
With these 26 braided hairstyles in your styling repertoire, you’ll never again face the mirror wondering how to make your hair look presentable in minimal time.
Each style offers its own unique combination of practicality, beauty, and ease, ensuring that every mom can find options that work for her lifestyle,
hair type, and personal aesthetic. Embrace the braiding journey, celebrate your progress, and enjoy the compliments that inevitably follow when you wear these deceptively simple yet impressively beautiful hairstyles.