When you’re hitting the slopes, the last thing you want is your hair getting in the way of an epic snowboarding session.
Whether you’re a seasoned rider or just starting out, finding the perfect hairstyle that stays put under your helmet while keeping you comfortable and stylish can feel like a challenge.
The good news is that you don’t need to spend hours in front of the mirror or have professional styling skills to achieve snow-ready hair that looks great and performs even better.
From braids that won’t budge to clever bun techniques that fit perfectly under any helmet, this guide will walk you through practical, tested hairstyles that work for all hair types and lengths.
You’ll discover how to manage flyaways in freezing temperatures, prevent that dreaded helmet hair, and even maintain a bit of style when you remove your gear for those après-ski moments.
Each hairstyle in this collection has been chosen specifically for its ability to withstand the unique demands of snowboarding—staying secure during jumps and turns, managing moisture from snow and sweat, and most importantly, keeping you focused on what matters most: enjoying your ride down the mountain.
Get ready to transform your snowboarding hair routine with these 25 Simple and Easy Snowboarding Hairstyles You Can Do in Minutes.
1. Classic Low Ponytail
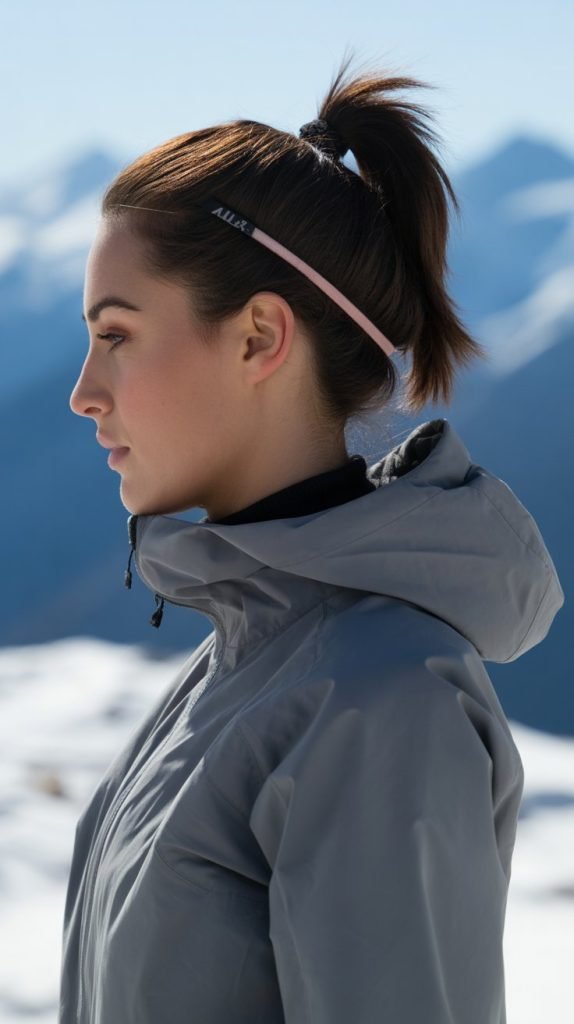
The classic low ponytail is one of the most reliable hairstyles for snowboarding because it sits comfortably at the nape of your neck, avoiding any pressure points from your helmet.
This timeless style works for all hair lengths past shoulder-level and takes less than a minute to create, making it perfect for those early morning lift times.
- Start by brushing your hair thoroughly to remove all tangles and create a smooth base
- Gather all your hair at the nape of your neck, positioning it just above where your jacket collar sits
- Secure with a strong elastic band, wrapping it at least three times to ensure it stays tight
- For extra security, spray with a light-hold hairspray to tame flyaways before putting on your helmet
- Pull the ponytail slightly to create a small amount of volume at the crown if desired
- This style prevents hair from bunching uncomfortably under your helmet while keeping everything contained
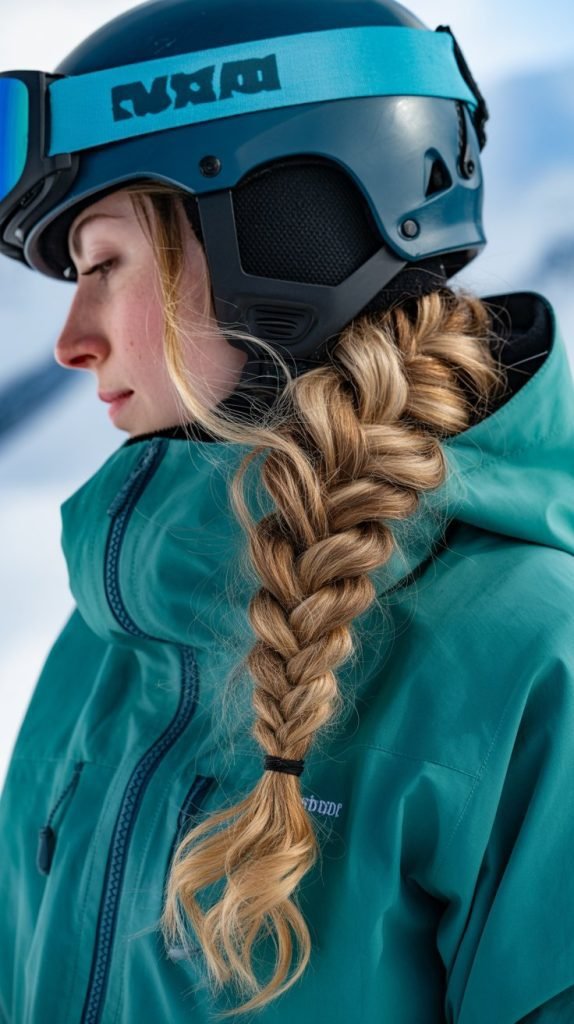
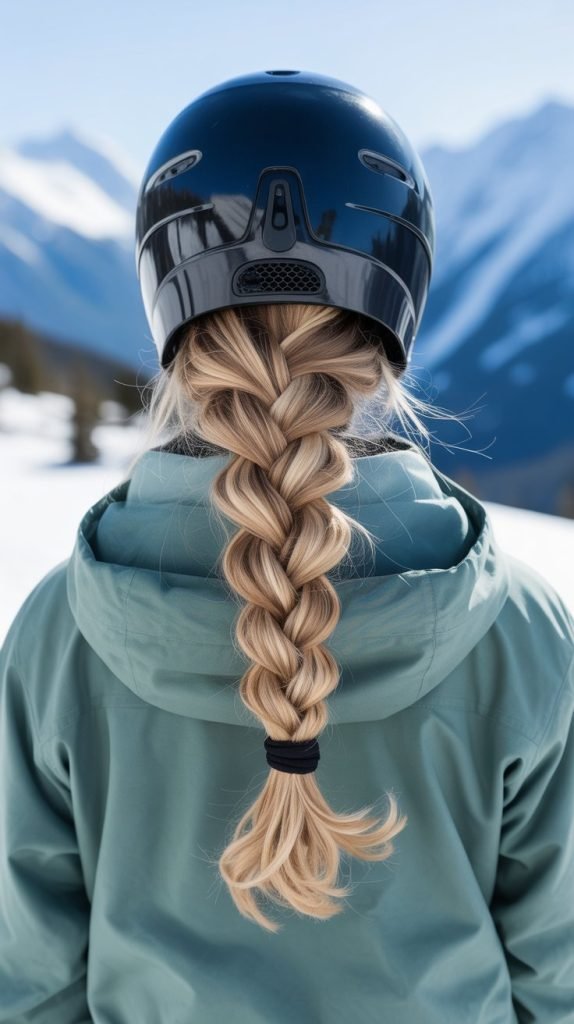
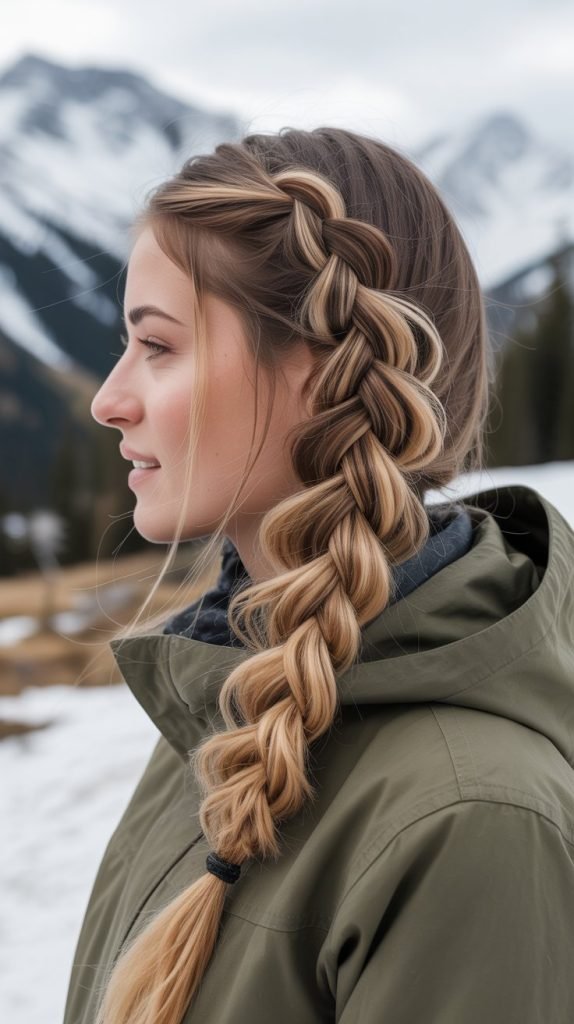
2. Dutch Braid Down the Back

A Dutch braid (also called an inside-out French braid) creates a raised, textured braid that lies flat against your head and stays remarkably secure during intense snowboarding sessions.
Unlike a regular French braid, the Dutch technique creates a braid that sits on top of your hair rather than blending in, making it both functional and visually striking.
- Begin by sectioning a triangle of hair at the top of your head, starting from your hairline
- Divide this section into three equal strands to start your braid
- Cross the right strand under the middle strand, then cross the left strand under the new middle strand
- With each subsequent stitch, add small sections of hair from the sides to the outer strands before crossing them under
- Continue this pattern all the way down to the nape of your neck, keeping consistent tension
- Braid the remaining loose hair in a regular three-strand braid and secure with an elastic
- The Dutch braid technique creates a ridge that accommodates helmet padding better than flat braids
3. Double French Braids
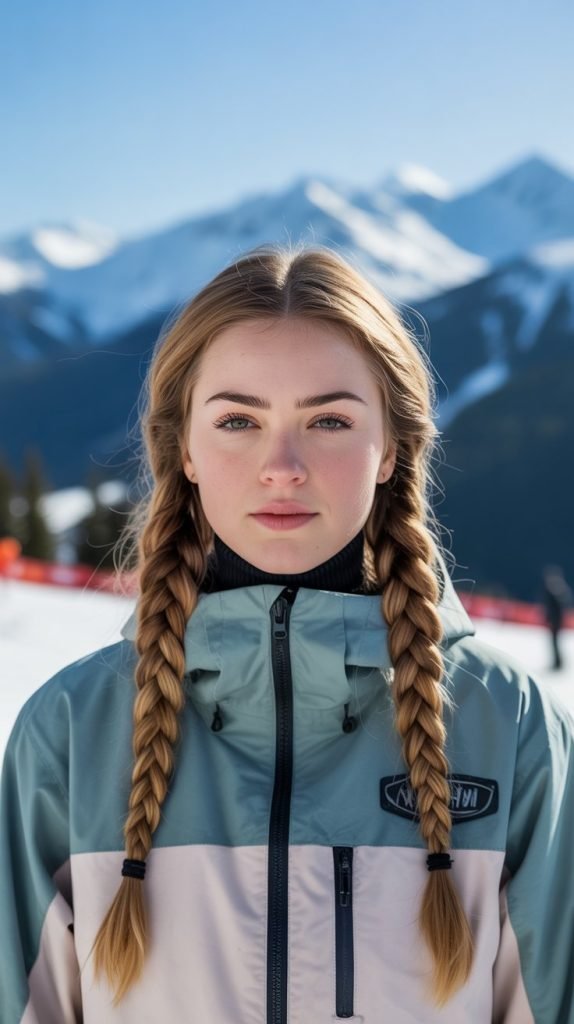
Double French braids (also known as boxer braids or pigtail braids) divide your hair into two sections, creating a balanced, symmetrical look that distributes weight evenly across your head.
This style is particularly popular among snowboarders because it eliminates the bulk of a single central braid while providing maximum security.
- Create a straight center part from your forehead down to the nape of your neck using a comb
- Clip one side away while you work on the first braid to keep sections separate
- Starting on one side, take a small section at the hairline and divide it into three strands
- Begin French braiding by crossing outer strands over the middle while adding hair with each stitch
- Continue braiding all the way down, keeping the braid close to your head for the first few inches
- Secure the end with a small elastic and repeat the entire process on the other side
- These braids fit perfectly on either side of your helmet’s padding and won’t create uncomfortable pressure points
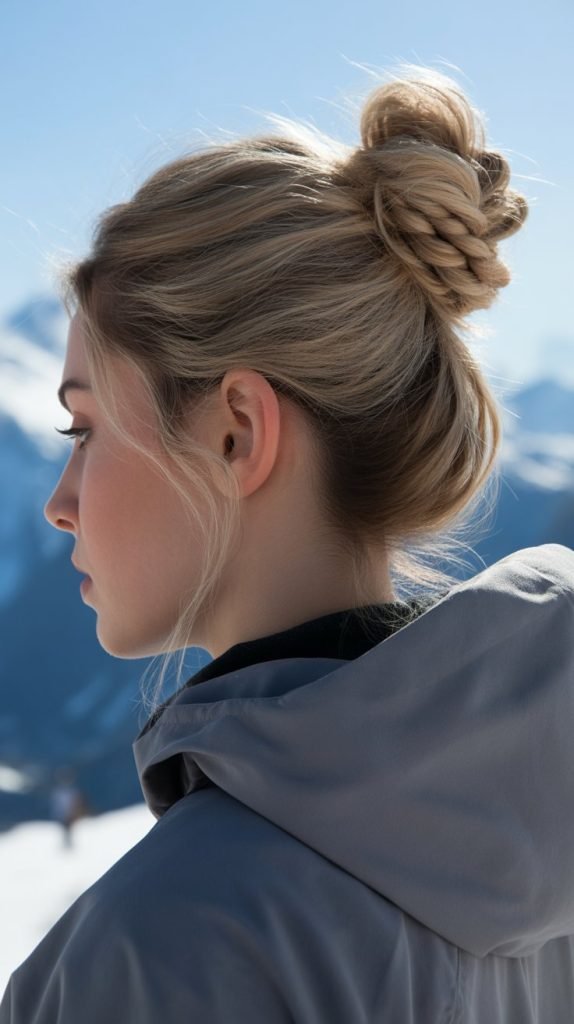
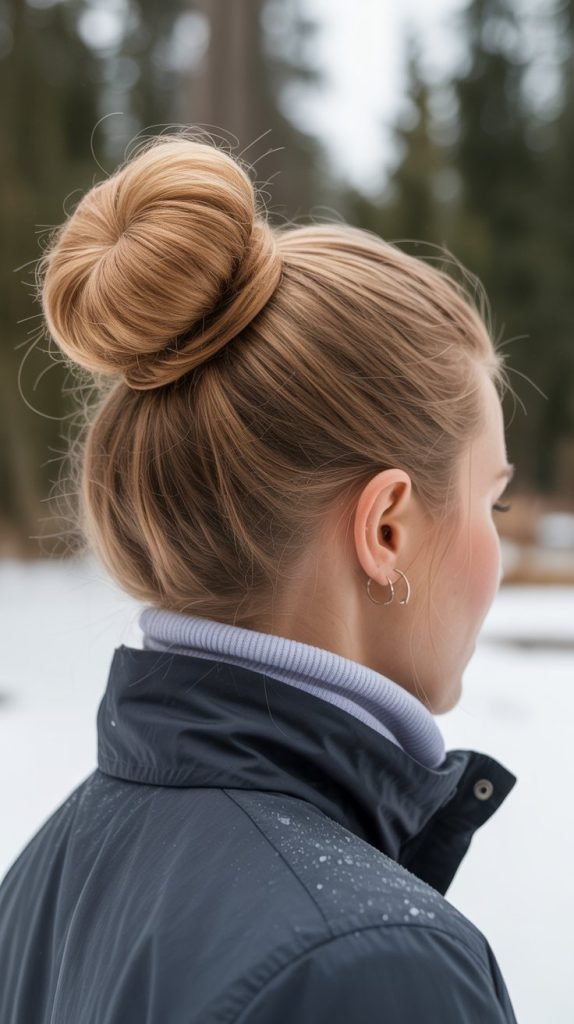
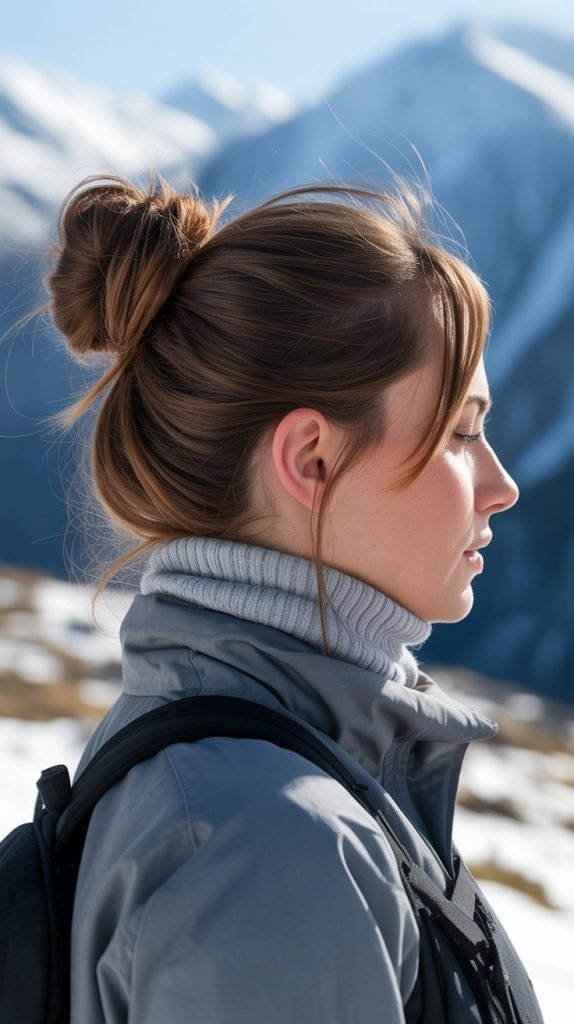
4. Messy Top Knot
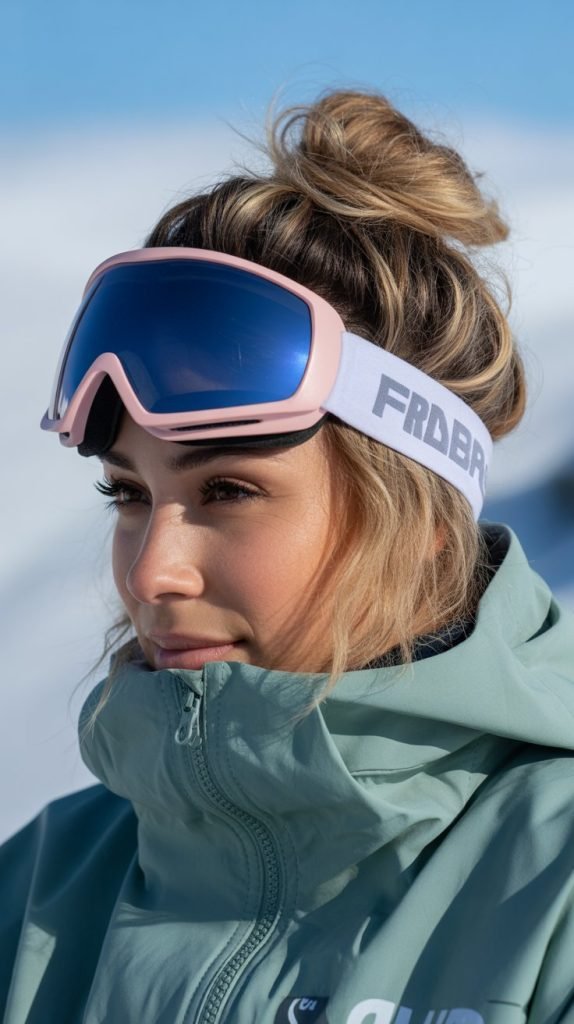
The messy top knot combines style with practicality, positioning your hair high on your head where it won’t interfere with helmet fit or neck warmers.
This effortless style actually benefits from a bit of texture and looseness, making it perfect for those mornings when you don’t have time for perfection.
- Flip your head upside down and gather all your hair at the crown of your head
- Twist the ponytail loosely as you wrap it around the base in a circular motion
- Secure the bun with a strong elastic, leaving the ends poking out for that intentionally messy look
- Pull out a few face-framing pieces if desired to soften the look
- Use bobby pins to secure any sections that feel loose, especially around the base
- The high placement keeps all hair contained above the helmet line, preventing any uncomfortable pulling
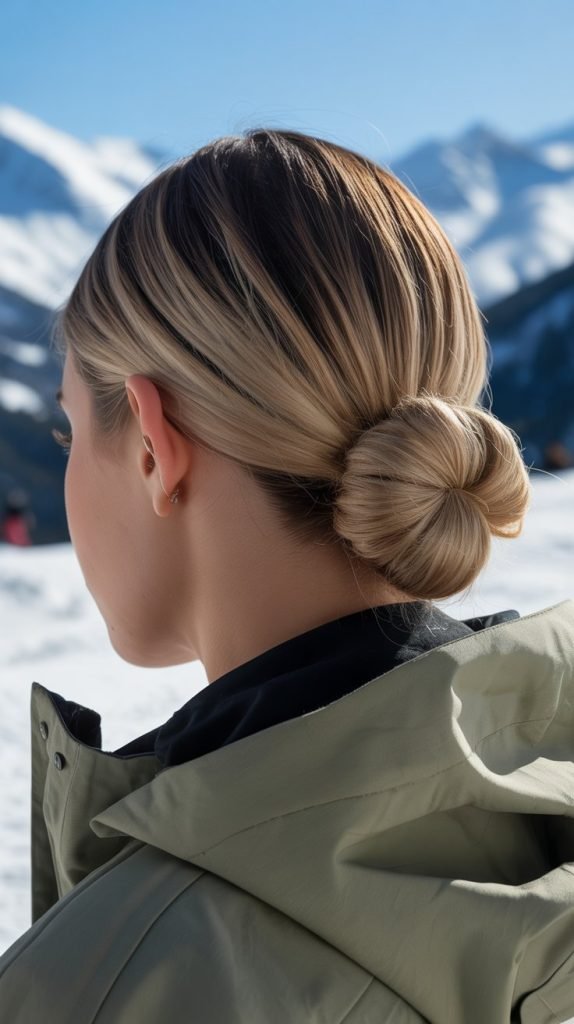
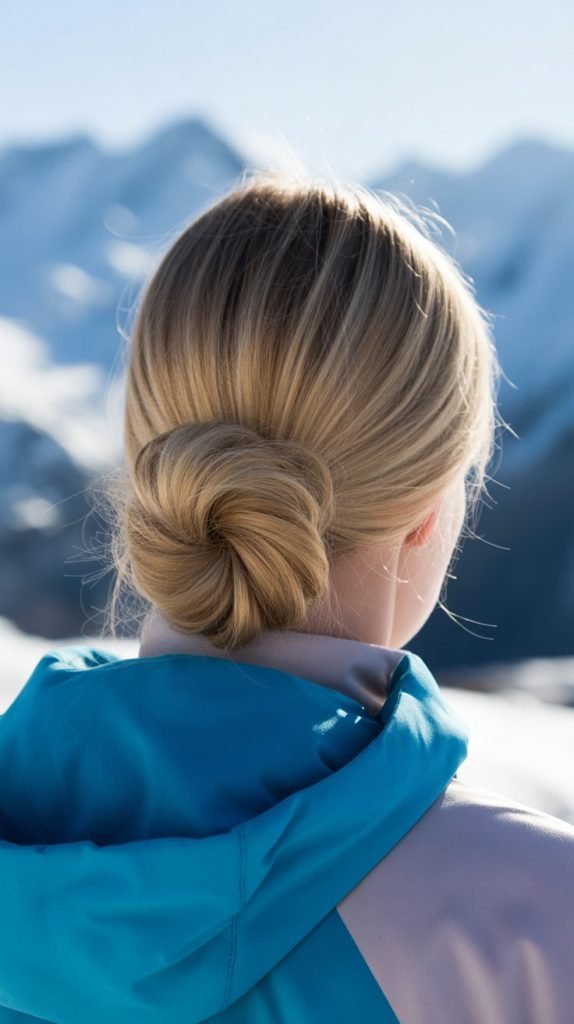
5. Low Braided Bun
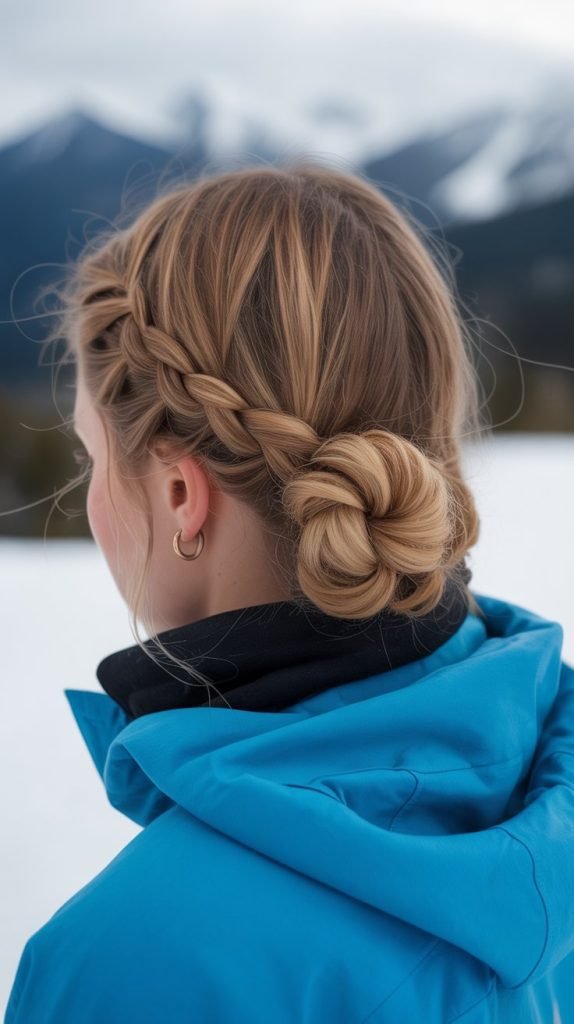
The low braided bun combines the security of a braid with the compact nature of a bun, creating a sophisticated style that sits perfectly at the nape of your neck.
This hybrid approach means your hair stays controlled from root to tip, with the bun adding an extra layer of containment.
- Create a low ponytail at the nape of your neck and secure it with an elastic band
- Braid the entire length of the ponytail in a simple three-strand braid
- Wrap the braid around the base of the ponytail in a circular motion, creating a coiled bun
- Tuck the end of the braid under the bun and secure everything with bobby pins
- Add extra pins around the perimeter of the bun to ensure it stays flat against your head
- This style creates minimal bulk, making it ideal for helmets with less interior space
6. Side Braid with Wrapped Band

A side braid brings all your hair over one shoulder, creating an asymmetrical look that’s both practical and stylish for snowboarding.
Wrapping the elastic with a small section of hair adds a polished finishing touch that elevates this simple style.
- Brush all your hair over to one side, choosing whichever shoulder feels more comfortable
- Create a side ponytail positioned just behind your ear at a comfortable height
- Braid the ponytail using a French, Dutch, or regular three-strand technique based on your preference
- Secure the end with a clear or matching elastic band
- Take a small section from the underside of the braid and wrap it around the elastic to conceal it
- Secure the wrapped section with a small bobby pin tucked underneath where it won’t be visible
- Position the braid so it falls over your front, keeping it from getting caught between your back and backpack
7. Twisted Low Bun
The twisted low bun uses rope-twist techniques instead of traditional braiding to create a textured, elegant style that’s incredibly quick to execute.
The twisting method adds visual interest while keeping every strand secured, making it perfect for all-day snowboarding adventures.
- Gather your hair into a low ponytail at the nape of your neck
- Divide the ponytail into two equal sections
- Twist each section tightly in the same direction (both clockwise or both counterclockwise)
- Wrap the two twisted sections around each other in the opposite direction, creating a rope effect
- Coil the rope twist around the base of the ponytail to form a compact bun
- Secure with bobby pins, inserting them at angles for maximum grip
- The twisted texture creates natural grip, helping the bun stay in place even during falls or hard landings
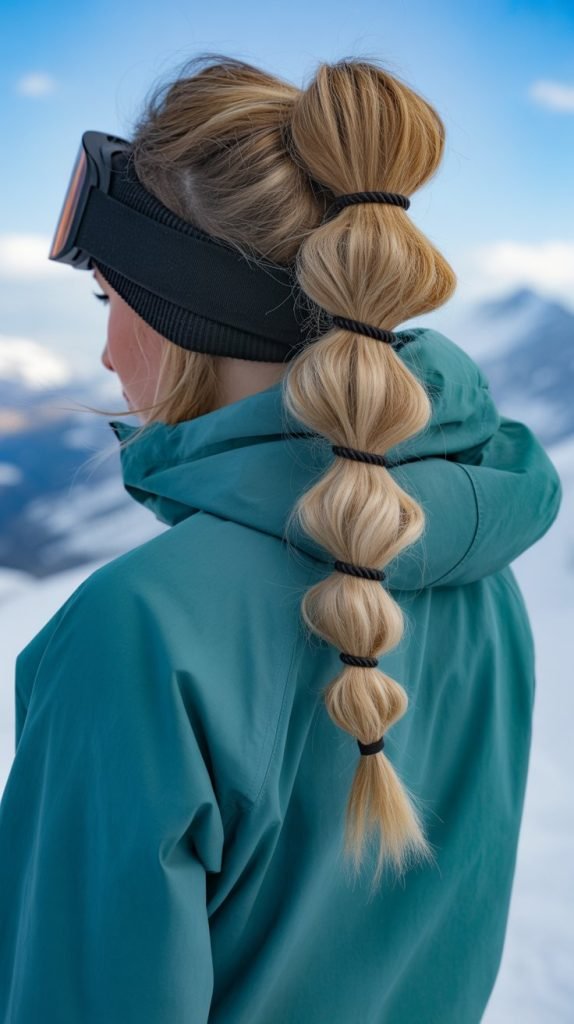
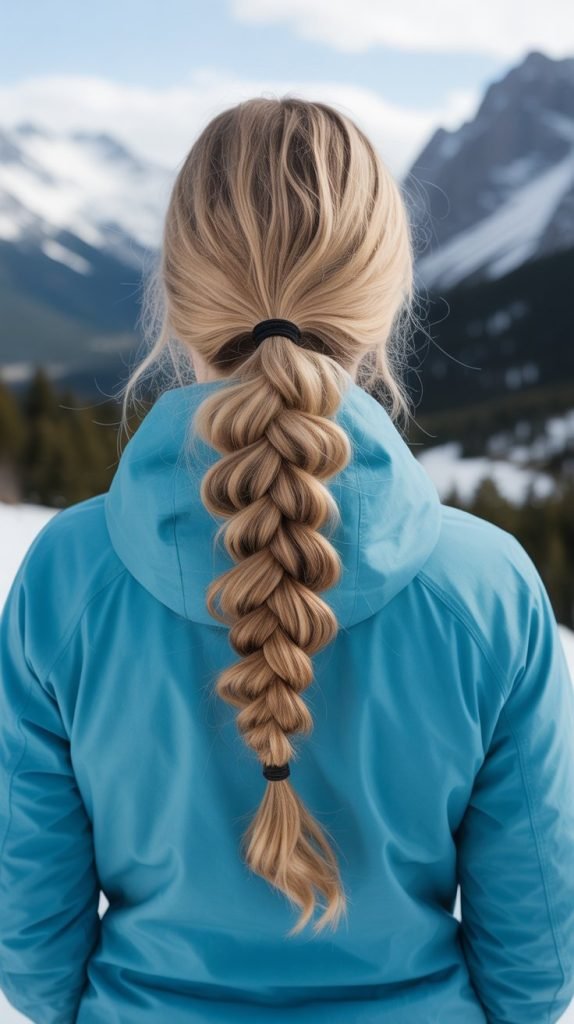
8. Bubble Braid Ponytail
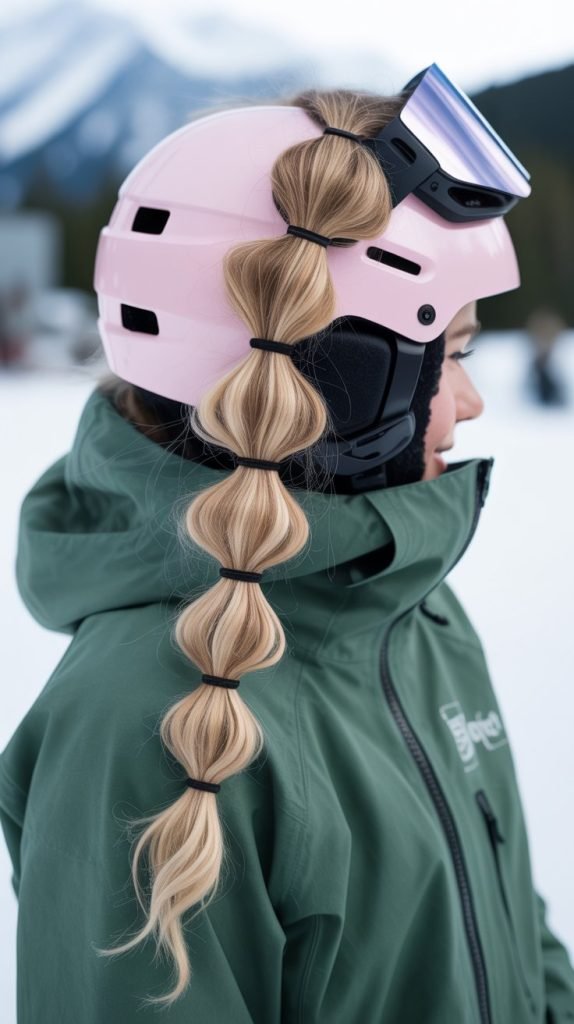
The bubble braid ponytail creates a segmented, dimensional look by adding multiple elastics down the length of a ponytail and gently pulling each section apart.
This modern style not only looks interesting but also adds extra security since multiple elastics hold your hair rather than just one.
- Create a ponytail at your desired height—low, mid, or high depending on your helmet fit
- Secure the base with a strong elastic band
- Measure approximately two to three inches down the ponytail and add another elastic
- Gently pull the hair between the two elastics outward to create a bubble effect
- Continue adding elastics every two to three inches down the length of the ponytail
- Create bubbles in each segment by carefully pulling the sides of each section
- The multiple elastics ensure that even if one loosens during activity, the rest keep your hair contained
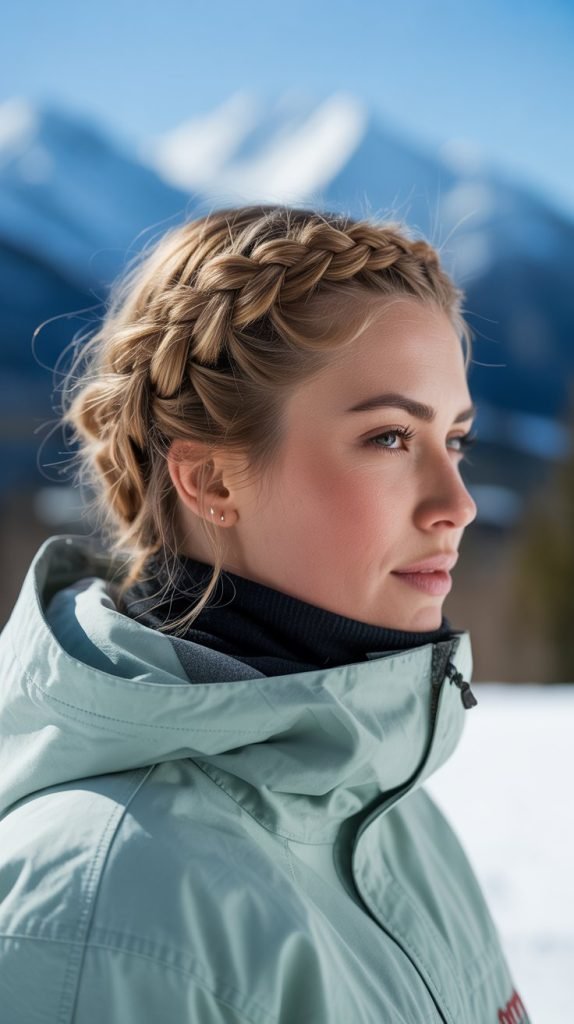
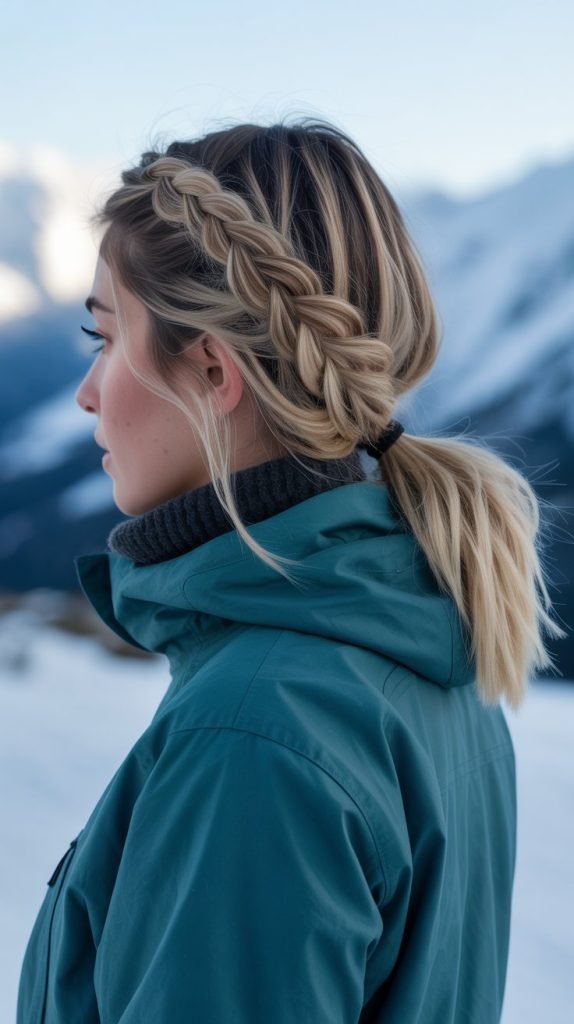
9. Headband Braid
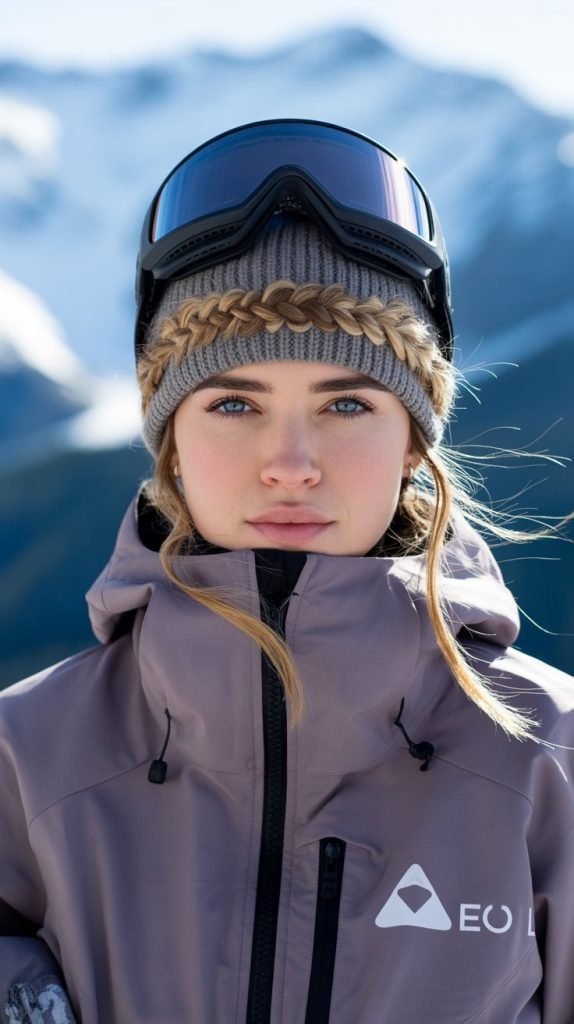
The headband braid creates a functional and decorative element by braiding a section of hair across your hairline like a natural headband.
This style keeps face-framing pieces secured while allowing the rest of your hair to hang freely or be styled separately.
- Section off hair from behind one ear, across your hairline, to behind the other ear
- Clip the remaining hair back to keep it out of the way
- Starting behind one ear, divide the sectioned hair into three strands
- Create a French or Dutch braid along your hairline, adding small sections as you go
- Continue the braid to the opposite side and secure it behind your ear with bobby pins
- Release the remaining hair and style as desired—leave it down, create a ponytail, or add a bun
- This technique keeps shorter face-framing layers from escaping under your helmet
10. Slicked Back Low Bun
The slicked back low bun is a sophisticated, no-nonsense style that uses styling products to create a smooth, controlled look from roots to bun.
This approach is particularly effective for managing shorter layers that might otherwise escape from other styles.
- Apply a smoothing gel or pomade to damp or dry hair, focusing on the roots and hairline
- Use a fine-toothed comb or brush to slick all hair straight back from your face
- Gather everything into a low ponytail at the nape of your neck
- Twist the ponytail and wrap it into a tight, compact bun
- Secure with an elastic band and add bobby pins for extra hold
- Apply additional gel or hairspray to any flyaways or shorter pieces around the hairline
- The slicked-back approach ensures nothing escapes during helmet wear and removal
11. Fishtail Braid
The fishtail braid creates an intricate, textured pattern using only two sections of hair instead of the traditional three.
Despite its complex appearance, this braid is relatively simple to execute once you understand the technique, and it holds remarkably well during physical activity.
- Gather your hair into a ponytail at your desired height and secure with an elastic
- Divide the ponytail into two equal sections
- Take a small piece from the outer edge of the right section and cross it over to join the left section
- Take a small piece from the outer edge of the left section and cross it over to join the right section
- Continue this alternating pattern, keeping the crossed pieces small for a more intricate look
- Maintain consistent tension throughout to create an even, tight braid
- Secure the end with an elastic and gently pull on the edges to create a fuller, more dimensional braid
- The fishtail’s unique construction creates a braid that resists loosening even during aggressive snowboarding
12. Half-Up Top Knot

The half-up top knot secures the top portion of your hair in a small bun while leaving the bottom half loose or in a separate style.
This versatile approach provides control where you need it most—at the crown—while offering styling options for the remaining length.
- Section off the top half of your hair from ear to ear across the crown
- Gather this top section and pull it up to the crown of your head
- Twist the section and wrap it into a small, compact knot
- Secure with an elastic band, leaving the ends loose or tucking them in depending on preference
- Leave the bottom section loose, braid it, or create a low ponytail as desired
- Add bobby pins around the base of the knot to ensure it stays secure under your helmet
- This style keeps the bulk of hair at the crown while preventing the weight of all your hair from pulling on your scalp
13. Rope Braid Ponytail
The rope braid ponytail uses a simple twisting technique that creates a sleek, elegant braid in less time than traditional braiding methods.
This two-strand approach is perfect for those who find three-strand braiding challenging or time-consuming.
- Create a ponytail at your preferred height and secure it tightly with an elastic
- Divide the ponytail into two equal sections
- Twist the right section clockwise several times until it’s tightly wound
- Twist the left section clockwise the same number of times
- Wrap the two twisted sections around each other in a counterclockwise direction
- The opposing twist directions create tension that holds the rope braid together
- Secure the end with another elastic band
- This braid naturally tightens when pulled, making it exceptionally secure for snowboarding
14. French Braid into Low Ponytail
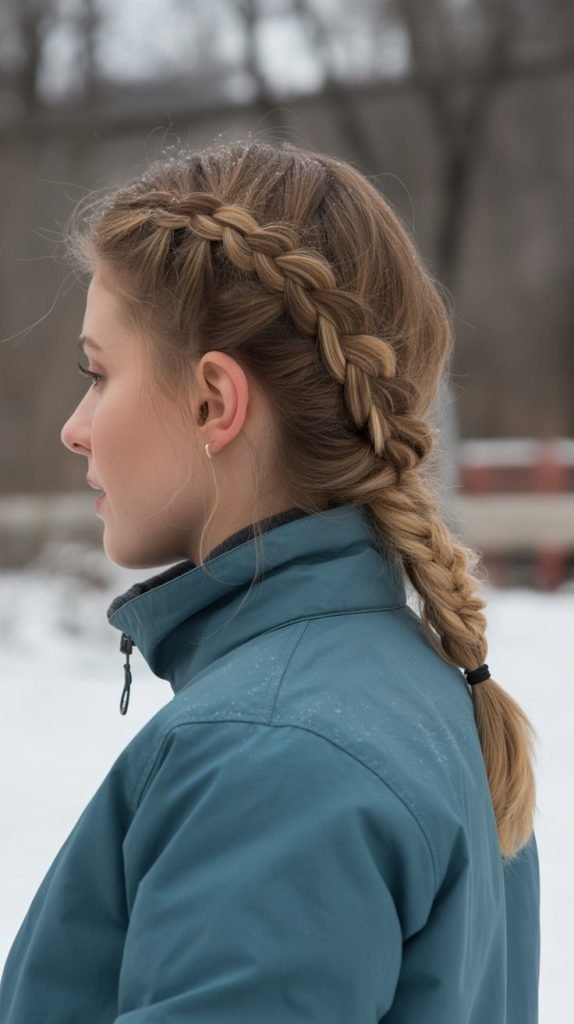
This hybrid style starts with a French braid at the crown and transitions into a ponytail at the nape, combining the security of braiding where your helmet sits with the simplicity of a ponytail for the remaining length.
It’s an excellent option for those who want maximum control at the top of the head.
- Begin French braiding at your hairline, taking a section and dividing it into three strands
- Add small sections of hair to the outer strands with each crossing, working your way back
- Continue the French braid until you reach the crown or nape of your neck
- Stop adding new sections and gather all remaining hair together
- Secure everything with a strong elastic band, letting the rest hang as a ponytail
- The braided section provides extra security under the helmet’s pressure points
- The ponytail portion remains manageable and can tuck into your jacket or hang free
15. Braided Pigtails
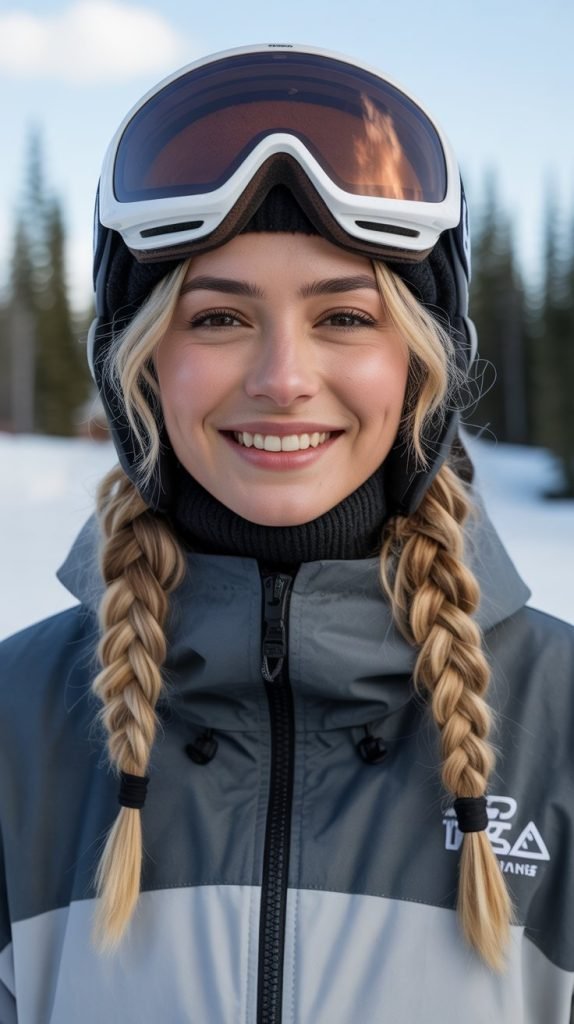
Braided pigtails take the classic double ponytail and add braiding for extra security, creating a youthful, functional style that works exceptionally well under helmets.
The two-braid system distributes hair weight evenly and eliminates the central bulk of a single braid.
- Create a center part from your forehead to the nape of your neck
- Secure one side with a clip while working on the first pigtail
- Gather hair on one side into a ponytail at your desired height
- Braid the ponytail completely and secure with an elastic
- Repeat the process on the other side, ensuring both pigtails are at the same height
- The symmetrical placement fits naturally around helmet padding
- These braids can be positioned to fall forward over your shoulders, keeping them away from your backpack straps
16. Tucked and Pinned Updo
The tucked and pinned updo creates a secure, helmet-friendly style by rolling hair under at the nape and securing it with pins rather than creating a protruding bun.
This flat-to-the-head approach minimizes bulk while keeping everything contained.
- Brush all your hair straight back from your face
- Gather hair at the nape of your neck as if creating a low ponytail, but don’t secure it
- Roll the gathered hair upward and under itself, creating a tucked roll against your head
- Pin the roll in place using multiple bobby pins inserted horizontally
- Tuck the ends under and secure them with additional pins
- Use pins in an X-pattern for maximum security
- This style creates minimal projection from your head, allowing helmets to sit comfortably without pressure
17. Crown Braid
The crown braid wraps around your head like a halo, creating a regal, secure style that keeps all hair tucked away.
This elegant option works beautifully under helmets because it distributes hair evenly around your head rather than creating concentrated bulk.
- Create a deep side part on one side of your head
- Starting on the side with more hair, begin a Dutch or French braid along your hairline
- Continue braiding around the back of your head, curving to follow your natural hairline
- Keep the braid close to your head and relatively tight for security
- Continue braiding around to the opposite side where you started
- Tuck the end of the braid under the beginning section and secure with bobby pins
- This style creates an even, circular distribution that accommodates helmet padding perfectly
18. Double Twisted Ponytail
The double twisted ponytail uses two rope twists that wrap around each other, creating a textured, secure alternative to traditional braiding. This technique is faster than braiding and creates a similar level of hold.
- Create a ponytail at your preferred height and secure with an elastic
- Divide the ponytail into two equal sections
- Twist each section individually in the same direction (clockwise) multiple times
- Hold both twisted sections and wrap them around each other in the opposite direction (counterclockwise)
- The opposing tensions create a self-securing rope that stays twisted
- Secure the end with another elastic band
- Pull slightly on the wrapped sections to create more volume and texture if desired
- This style tightens naturally during activity, making it increasingly secure as you ride
19. Sock Bun
The sock bun technique uses a circular fabric form (often made from a sock) to create a perfectly round, voluminous bun that stays in place all day.
This method is particularly effective for creating buns with thinner hair that might not otherwise create substantial volume.
- Cut the toe off an old sock and roll it into a donut shape, or use a commercial bun form
- Create a ponytail at your desired bun location and secure with an elastic
- Thread the ponytail through the center of the sock donut
- Spread hair evenly around the donut, covering it completely
- Tuck the ends of your hair under the donut as you roll it down toward the base
- Continue rolling until the sock reaches the elastic at the base of your ponytail
- Secure with bobby pins around the perimeter and tuck any stray ends
- The sock creates a stable structure that maintains its shape even under a helmet
20. Waterfall Braid
The waterfall braid creates a cascading effect by dropping strands as you braid, resulting in a romantic, flowing look that can be adapted for snowboarding by securing the loose strands.
While typically more decorative, this style can be modified for functionality.
- Start with a small section of hair near your temple on one side
- Divide this section into three strands and begin a basic braid
- After the first cross, drop the bottom strand and let it fall
- Pick up a new section from above to replace the dropped strand
- Continue this pattern of dropping and replacing strands as you braid toward the back
- Secure the braid with bobby pins once you reach your desired endpoint
- For snowboarding, gather the dropped strands into a low ponytail or braid for security
- This style works best as a decorative element combined with a more functional base style
21. Space Buns
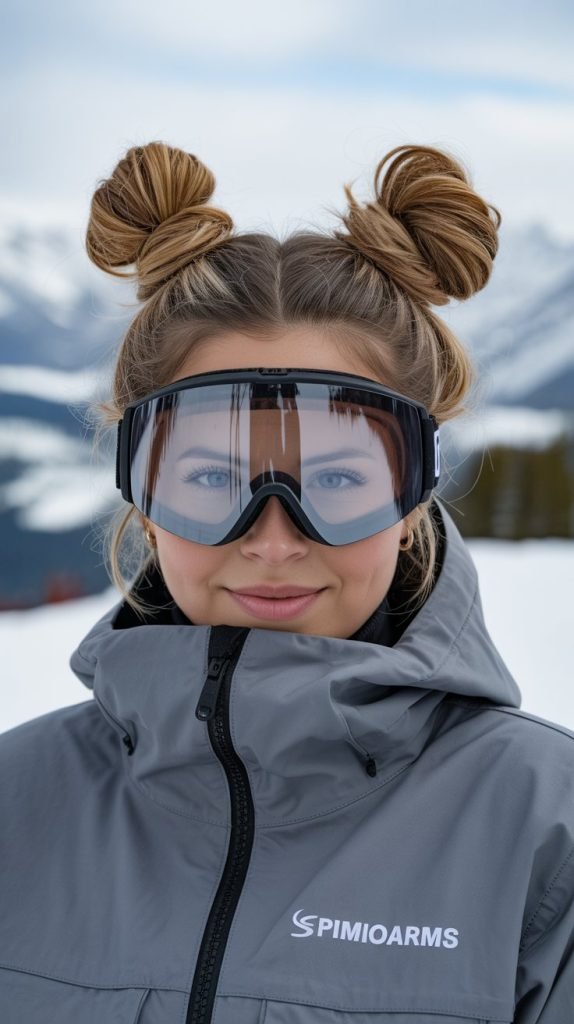
Space buns create two high buns on top of your head, positioned symmetrically on either side of a center part.
This playful, youthful style keeps hair completely off your neck and face while creating a distinctive look that’s become increasingly popular in winter sports culture.
- Create a center part from your forehead to the nape of your neck
- Divide your hair into two equal sections, one on each side
- Gather one section into a high ponytail positioned above and slightly behind your ear
- Twist the ponytail and wrap it around the base in a circular motion to create a bun
- Secure with an elastic and add bobby pins for stability
- Repeat the entire process on the other side, matching the height and position
- Tuck any loose ends into the buns and secure with additional pins
- The high placement keeps these buns above most helmet padding, though they work best with helmets that have adjustable sizing
22. Pull-Through Braid
The pull-through braid creates a voluminous, intricate-looking braid without any actual braiding skills required.
This technique uses multiple ponytails that are pulled through each other, creating a stunning faux-braid effect that’s remarkably secure.
- Create a ponytail at the crown of your head and secure with a clear elastic
- About two inches below, gather the loose hair beneath the ponytail into another ponytail
- Split the first ponytail in half and bring both sections down on either side of the second ponytail
- Create a third ponytail below, including the split sections from the first ponytail
- Split the second ponytail and bring those sections down around the third ponytail
- Continue this pattern of creating ponytails and pulling previous sections through
- Gently pull on the edges of each section to create volume and the braid-like appearance
- The multiple elastics create exceptional security, ensuring the style holds during any activity
23. Bandana-Wrapped Low Bun
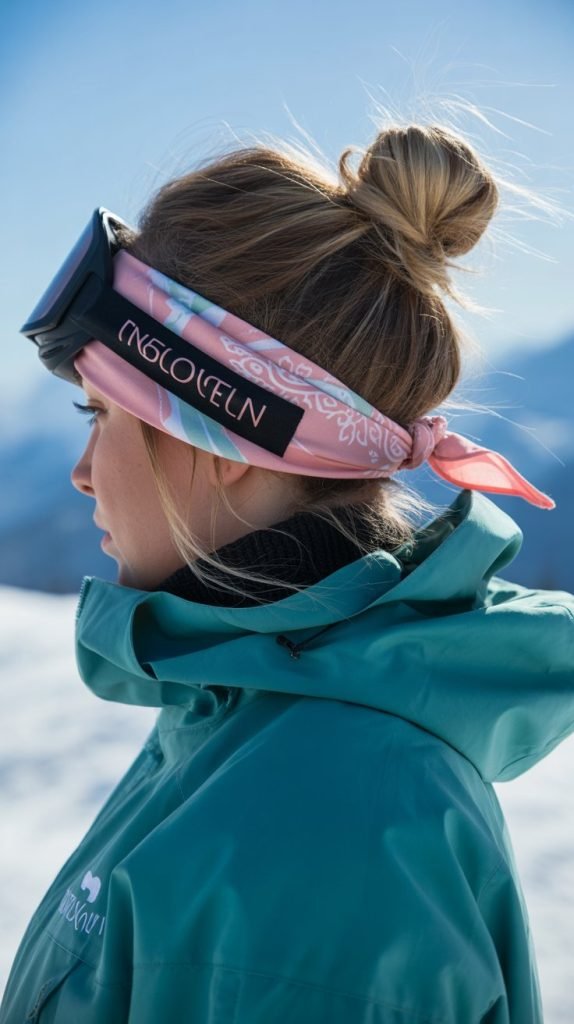
The bandana-wrapped low bun incorporates a bandana or thin scarf into a classic bun style, adding color, pattern, and extra security. The fabric helps absorb moisture while adding a stylish element that remains visible even under a helmet.
- Fold a square bandana into a long strip by folding it corner to corner, then folding again
- Create a low ponytail at the nape of your neck
- Place the center of the bandana strip under the ponytail at the elastic
- Wrap the ponytail into a bun using your preferred technique
- Bring the two ends of the bandana up and wrap them around the bun
- Tie the bandana ends in a knot or bow on top or to the side of the bun
- Tuck any excess fabric into the bun and secure the bun itself with bobby pins
- The bandana adds friction that helps keep the bun secure while adding moisture-wicking properties
24. Ninja Bun
The ninja bun is a clever technique that creates a compact bun while simultaneously creating a “hair scarf” from the loose ends. This innovative approach provides extra warmth around your neck while securing your hair completely.
- Create a high ponytail at the crown of your head and secure with a strong elastic
- Wrap the ponytail around the base once to create a bun, but leave the ends long
- Secure the wrapped section with another elastic or bobby pins
- Take the remaining length and split it into two sections
- Bring one section forward over each shoulder
- Wrap both sections around your neck like a scarf and tuck the ends into your jacket
- This technique keeps both your hair and neck warm while eliminating any loose hair
- The wrapped sections can also be tucked back into the bun itself if you prefer them out of the way
25. Braided Crown with Low Ponytail
This elegant combination features a crown braid that travels halfway around your head before transitioning into a low ponytail, creating a sophisticated style that’s both decorative and functional.
The braided section keeps hair away from your face while the ponytail portion remains easy to manage.
- Create a deep side part and section off hair from your hairline on the heavier side
- Begin a Dutch or French braid starting at your temple
- Continue braiding along your hairline toward the back of your head
- When you reach the area behind your ear, stop adding new sections to the braid
- Gather all remaining hair, including the braid, into a low ponytail at the nape
- Secure with a strong elastic band
- The braided crown section stays tight against your head under helmet pressure
- Pull slightly on the braided sections to create more volume and a softer appearance if desired
Conclusion
Finding the perfect hairstyle for snowboarding doesn’t have to be complicated or time-consuming, and with these 25 Simple and Easy Snowboarding Hairstyles You Can Do in Minutes, you now have a complete arsenal of options for any hair type, length, or skill level.
Each style has been selected for its ability to withstand the unique challenges of snowboarding—from staying secure during high-speed runs to fitting comfortably under helmets and managing moisture in cold conditions.
Remember that the best hairstyle is one that you can execute quickly, that stays in place throughout your day on the mountain, and that makes you feel confident and comfortable.
Don’t be afraid to experiment with different styles to find what works best for your hair texture and your particular helmet fit, and consider keeping essential tools like extra elastics, bobby pins, and a small comb in your gear bag for quick adjustments.
With practice, these styles will become second nature, allowing you to spend less time worrying about your hair and more time enjoying the thrill of the slopes.
Whether you opt for a classic low ponytail, intricate braids, or creative buns, you now have the knowledge to keep your hair under control while looking great, proving that style and function can absolutely coexist in winter sports.