Prom night is one of those unforgettable moments when every detail matters, and your hairstyle can make or break your entire look.
If you have medium-length hair and are considering a side-part style, you’re in for a treat because this classic yet versatile approach offers endless possibilities that blend elegance with modern flair.
The side part has made a powerful comeback, proving that sometimes the most timeless styles are the ones that truly shine on special occasions.
Whether you’re drawn to romantic waves, sleek sophistication, or bohemian braids, medium-length hair provides the perfect canvas for creating a stunning side-part look that will have you feeling like the star of the evening.
This comprehensive guide explores 25 gorgeous side-part prom hairstyles specifically designed for medium-length hair, covering everything from classic Hollywood waves to contemporary twisted updos, complete with styling tips and inspiration to help you find your perfect match.
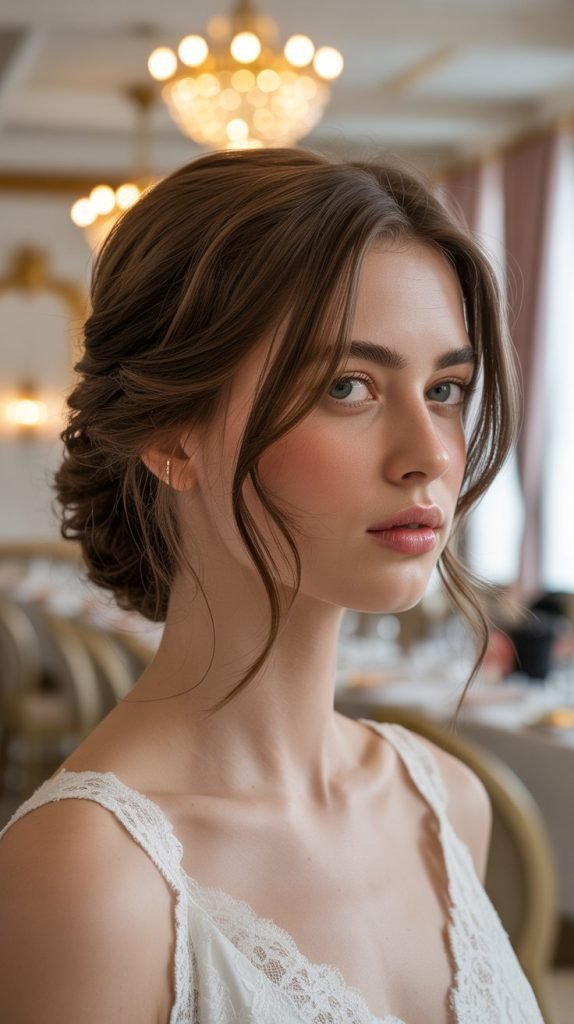
1. Classic Hollywood Side Waves
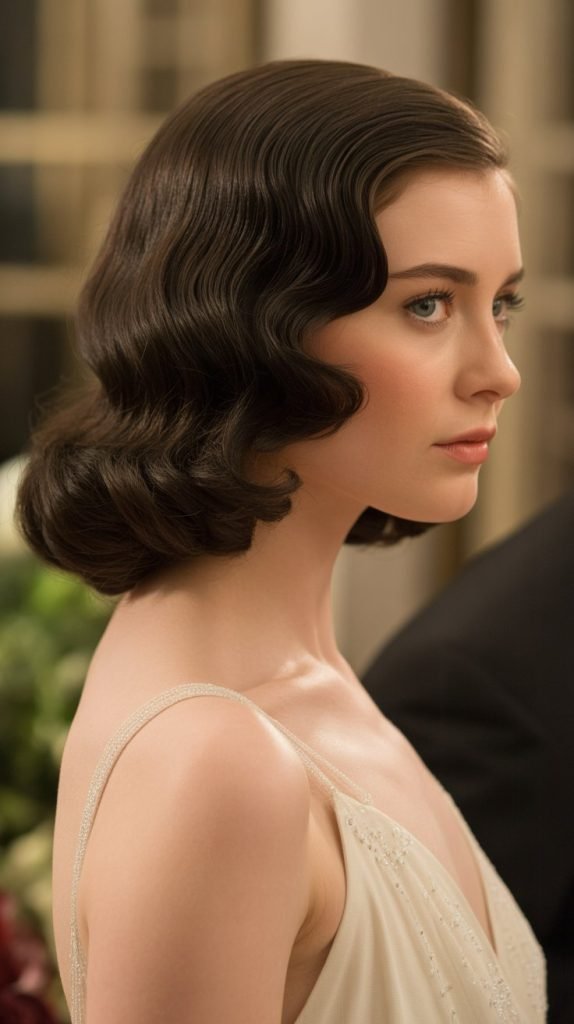
The Classic Hollywood Side Waves evoke the glamour of old Hollywood starlets, bringing timeless elegance to your prom look. This style features deeply defined waves that cascade from a dramatic side part, creating a sophisticated and red-carpet-worthy appearance that works beautifully with medium-length hair.
Styling Technique
- Start with clean, slightly damp hair and apply a volumizing mousse from roots to ends
- Create a deep side part using a fine-tooth comb, positioning it about two inches from your natural part
- Section the hair into 2-inch segments and wrap each around a 1.5-inch curling iron, holding for 10-12 seconds
- Allow curls to cool completely while pinned against your head with large clips
- Once cooled, brush through gently with a paddle brush to create smooth, connected waves
- Apply a strong-hold hairspray and use your fingers to define the wave pattern
- Pin the heavier side behind your ear with decorative bobby pins for added security
Best Face Shapes
- Oval faces benefit most from this style as it accentuates balanced proportions
- Heart-shaped faces find this look flattering as it adds width at the jawline
- Round faces can elongate their appearance by keeping the waves sleek and close to the head
- Square faces should soften the style with wispy pieces around the temples
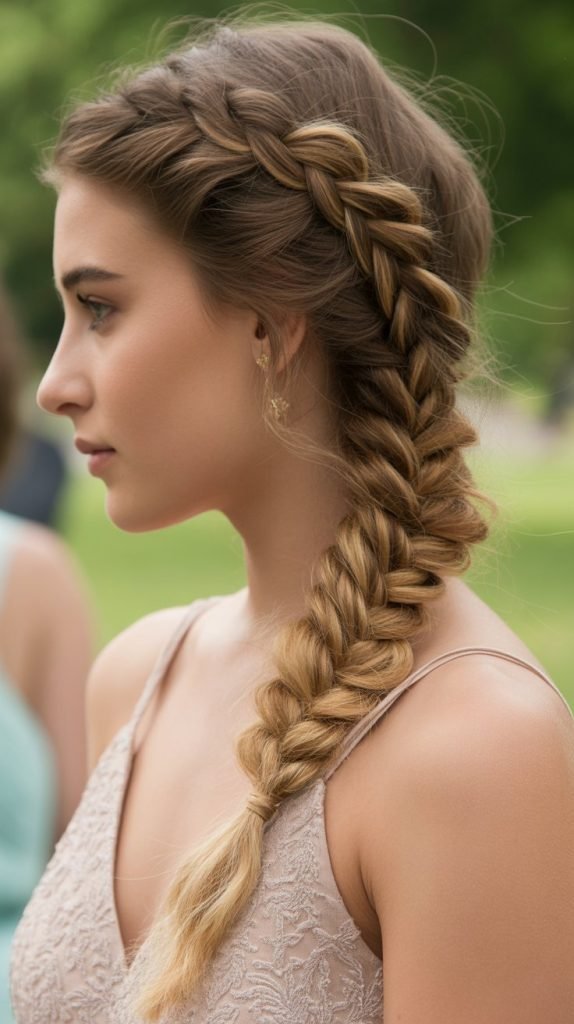
2. Braided Side Sweep
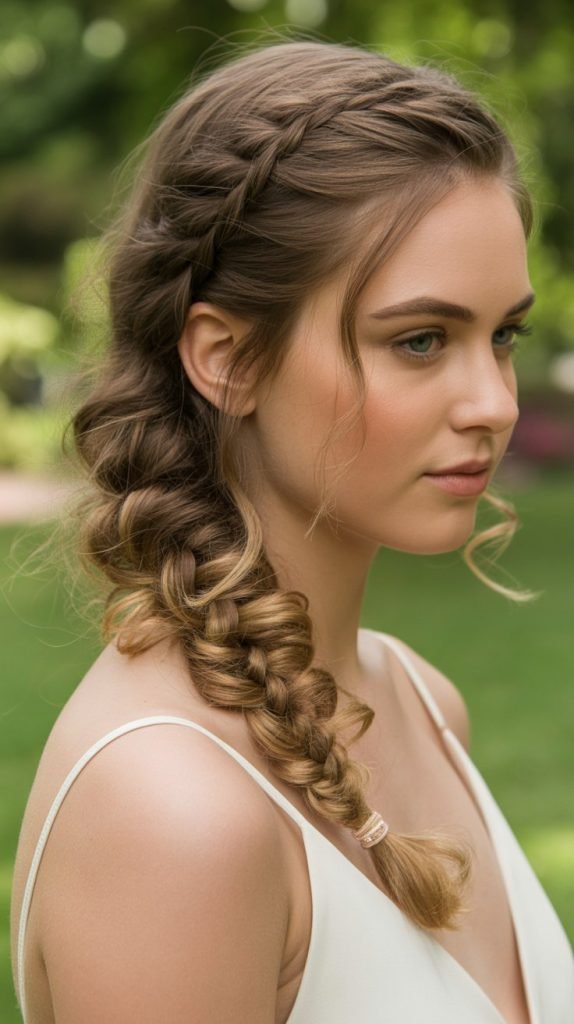
The Braided Side Sweep combines the romance of braiding with the elegance of a side part, creating a textured and intricate style perfect for prom. This look involves weaving one or more braids from the heavier side of the part and sweeping them across or down for a bohemian-meets-formal aesthetic.
Creating the Braid
- Part hair deeply to one side and divide the heavier section into three parts near the hairline
- Begin a Dutch braid (reverse French braid) by crossing sections under rather than over
- Continue braiding while incorporating small sections of hair, keeping the braid tight near the scalp
- Secure the braid with a clear elastic band once it reaches behind your ear
- Gently pull on the outer edges of the braid to create a fuller, more voluminous appearance
- Curl the remaining loose hair with a 1-inch curling wand for soft, romantic waves
- Use bobby pins to secure any loose pieces and finish with a flexible-hold hairspray
Accessory Suggestions
- Small pearl pins inserted along the braid add subtle elegance
- Fresh flowers woven into the braid create a garden party aesthetic
- Crystal hairpins at the base of the braid catch light beautifully
- Thin metallic ribbon threaded through the braid adds a modern touch
3. Sleek Side-Parted Bob
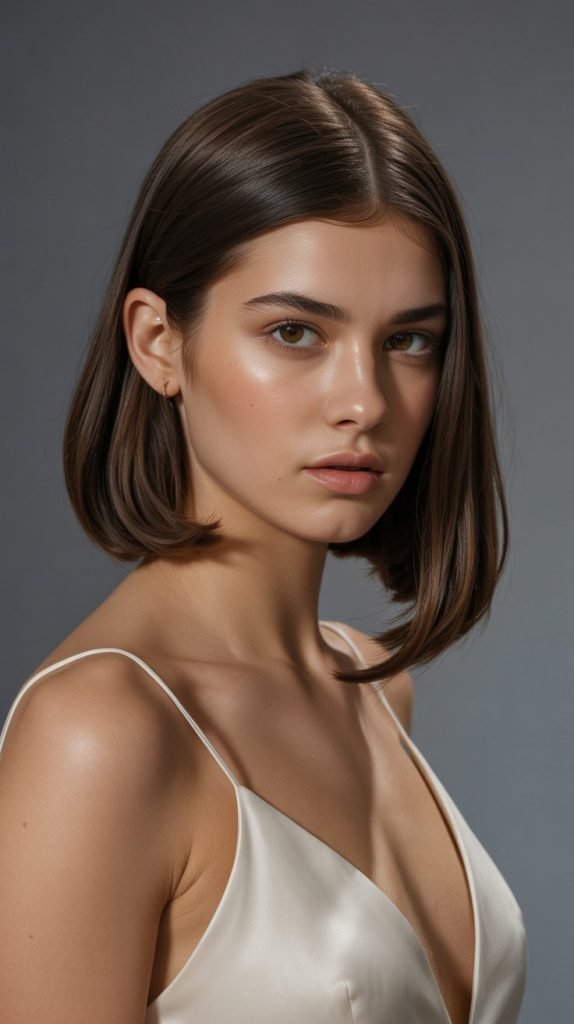
The Sleek Side-Parted Bob is a modern and sophisticated choice that proves medium-length hair doesn’t need elaborate styling to make a statement. This minimalist approach emphasizes shine, precision, and clean lines for a contemporary prom look.
Achieving Ultra-Sleekness
- Wash hair with a smoothing shampoo and conditioner designed to eliminate frizz
- Apply a heat protectant serum to damp hair, focusing on the mid-lengths and ends
- Blow-dry hair using a paddle brush, directing the airflow downward to seal the cuticle
- Create a precise side part with a rat-tail comb, using hairspray on the comb for a clean line
- Flat iron small sections of hair from root to tip using slow, steady passes
- Apply a shine serum or oil to the finished style, avoiding the roots
- Tuck the lighter side behind your ear and secure with a decorative pin or clear bobby pins
Maintenance Tips
- Bring blotting papers to manage any oil that appears on your scalp throughout the evening
- Pack a travel-size flat iron for quick touch-ups if needed
- Use a silk or satin scarf in the car to prevent friction and frizz
- Apply a light mist of anti-humidity spray before leaving for prom
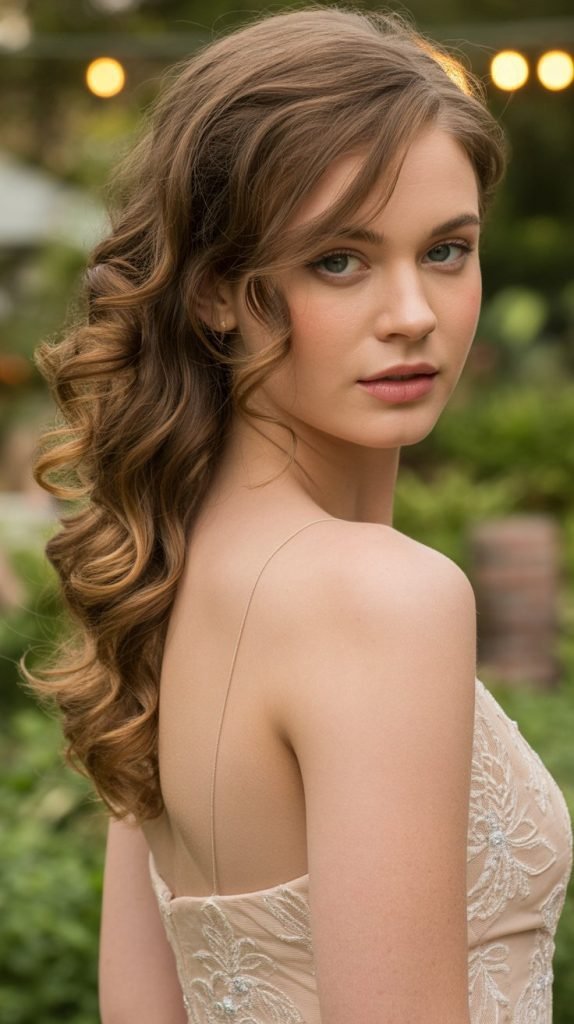
4. Side-Part with Loose Curls

The Side-Part with Loose Curls creates an effortlessly romantic look that balances structure with softness. This versatile style works for various prom themes and dress styles, offering a timeless appeal that photographs beautifully.
Curl Formation
- Apply a curl-enhancing cream to towel-dried hair and allow it to air-dry 80% before styling
- Create a deep side part and clip the lighter section out of the way
- Use a 1.25-inch curling wand to create loose spirals, alternating the direction of each curl
- Wrap hair around the barrel without clamping for a more natural, modern curl pattern
- Allow curls to cool in your hand before releasing them gently
- Lightly finger-comb through the curls to separate and soften them
- Set with a light-hold hairspray that allows movement while maintaining definition
Volume Enhancement
- Tease the hair at the crown before creating your part for added height
- Use a volumizing powder at the roots for lift that lasts all night
- Flip your head upside down and spray hairspray at the roots, then flip back up
- Place large velcro rollers at the crown while doing makeup for natural volume
5. Half-Up Side Twist
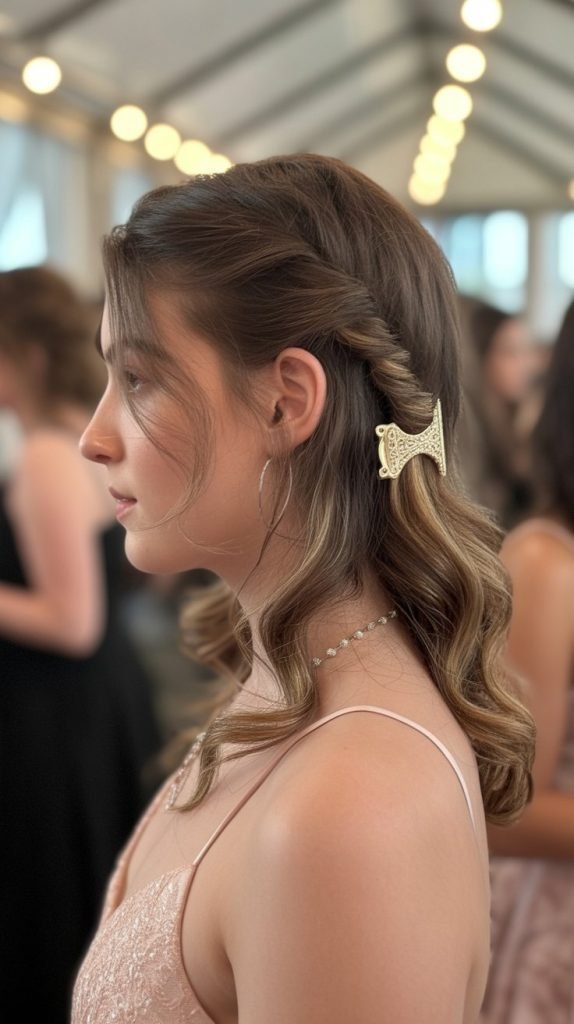
The Half-Up Side Twist combines the best of both worlds—showing off your medium length while adding elegant detail through twisted sections. This style keeps hair off your face while maintaining the romantic flow of loose hair.
Twisting Technique
- Create a deep side part and divide hair horizontally from ear to ear
- Take a 2-inch section from the heavier side of the part near your hairline
- Twist this section tightly while moving toward the back of your head
- Secure the twist at the crown with bobby pins, crossing them for extra hold
- Repeat with additional sections if desired, creating multiple twists
- Leave the remaining hair down and curl loosely for contrast
- Pull gently on the twists to loosen them slightly for a softer appearance
Decorative Elements
- Secure twists with an embellished barrette or jeweled clip
- Wrap a thin strand of hair around the bobby pins to conceal them
- Add small crystal pins throughout the twisted sections
- Use a decorative hair comb where the twists meet at the back
6. Side-Swept Low Bun

The Side-Swept Low Bun offers sophisticated elegance with a modern twist, positioning the classic bun off-center for added visual interest. This style is perfect for showcasing statement earrings and works exceptionally well with formal gowns.
Bun Construction
- Part hair deeply to one side and gather all hair at the nape of your neck, slightly off-center
- Secure with an elastic band, leaving the ends loose rather than pulling them completely through
- Wrap the loose ends around the base of the ponytail, creating a loose, textured bun
- Pin sections of the bun randomly with bobby pins for a slightly undone appearance
- Pull a few face-framing pieces loose for a softer, more romantic look
- Spray with a medium-hold hairspray to maintain the style without stiffness
- Add texture spray to the bun itself for dimension and visual interest
Nape Styling Options
- Leave the bun sleek and smooth for a more formal appearance
- Create a messy, textured bun for a relaxed, bohemian vibe
- Braid the ponytail before wrapping it into a bun for added detail
- Wrap a section of hair around the elastic to conceal it
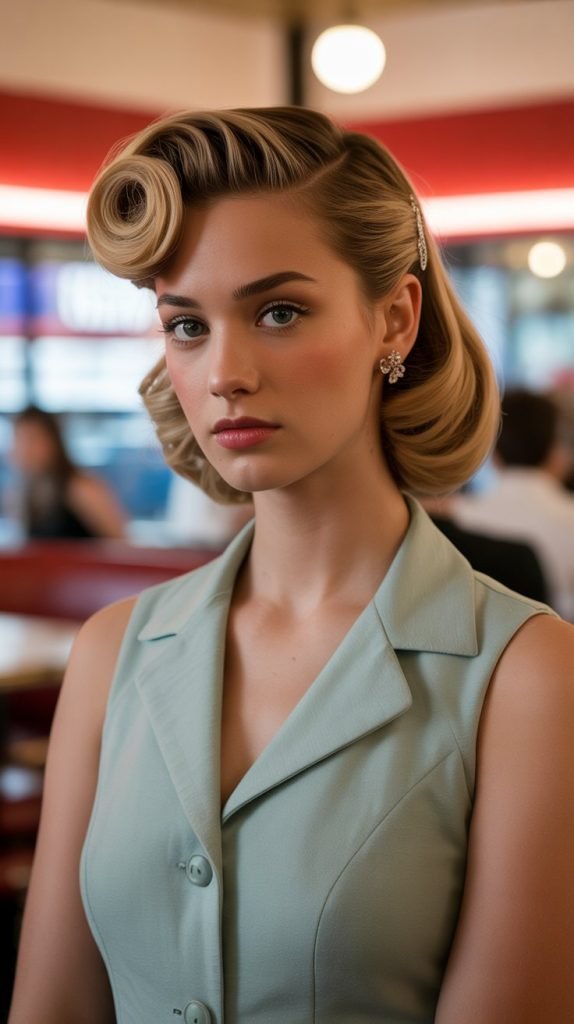
7. Vintage Pin Curls

Vintage Pin Curls bring retro glamour to your prom night, featuring tightly wound curls pinned close to the head in classic 1940s fashion. When styled with a dramatic side part, this look channels old Hollywood elegance perfectly suited for medium-length hair.
Pin Curl Formation
- Start with freshly washed and completely dried hair for maximum hold
- Create a deep side part and section hair into 1-inch squares across the entire head
- Apply setting lotion to each section before curling to ensure longevity
- Wrap each section around two fingers in a flat circle, creating a uniform curl pattern
- Secure each pin curl flat against the scalp with two crossed bobby pins
- Allow curls to set completely (at least 2 hours or overnight under a silk scarf)
- Carefully remove pins and gently separate curls with your fingers, never with a brush
Modern Adaptations
- Create larger sections for a more contemporary, less structured appearance
- Mix pin curl sizes for varied texture throughout the hairstyle
- Allow some curls to fall loose rather than pinning all of them up
- Use only on one side of the part for an asymmetrical, modern twist on the classic style
8. Textured Side Ponytail

The Textured Side Ponytail elevates the casual ponytail into prom-worthy territory through strategic placement and deliberate texturing. This style is youthful, fun, and surprisingly sophisticated when executed with attention to detail.
Creating Texture
- Prep hair with a texturizing spray on dry hair before styling
- Curl random sections throughout your hair using various barrel sizes for dimension
- Create a deep side part and gather hair into a low ponytail at the side of your neck
- Secure with a clear elastic, then wrap a small section of hair around it to conceal
- Gently tease the ponytail itself for added volume and texture
- Use a texturizing paste on the ends to create piecey, separated definition
- Pull small sections of hair out of the ponytail for a slightly undone appearance
Ponytail Placement
- Position the ponytail at the side of the neck, slightly below the ear, for classic elegance
- Place it higher, near the ear, for a more playful, youthful appearance
- Angle it toward the shoulder for a romantic, cascading effect
- Keep it at the nape but off-center for a subtle side-swept look
9. Side-Part Finger Waves

Side-Part Finger Waves represent the pinnacle of vintage styling, featuring sculpted S-shaped waves that lie flat against the head. This artistic hairstyle requires patience and skill but creates a show-stopping result perfect for formal occasions.
Wave Sculpting Process
- Apply generous amounts of strong-hold gel to freshly washed, damp hair
- Create a deep side part with a fine-tooth comb
- Place your index finger flat against the head where you want the first wave to begin
- Use a comb to push hair forward, creating a ridge against your finger
- Hold the ridge in place while moving your finger to create the next wave in the opposite direction
- Continue this process down the length of your hair, creating uniform S-shaped waves
- Secure each wave with metal wave clips while the hair dries completely
Setting and Finishing
- Allow hair to dry completely naturally or under a hooded dryer (never use a blow dryer)
- Remove clips carefully once hair is 100% dry, starting from the bottom
- Do not touch or manipulate the waves—they should hold their shape on their own
- Apply a shine spray for added gloss without disturbing the wave pattern
- Use a silk scarf if needed to protect waves during transportation
- Touch up with a small amount of gel on a comb if any sections lose definition
10. Braided Crown with Side Part

The Braided Crown with Side Part creates a regal, ethereal look by weaving a braid across the crown of the head while maintaining a dramatic side part. This style works beautifully for medium-length hair and adds a fairy-tale quality to your prom appearance.
Crown Braid Technique
- Create a deep side part and begin at the heavier side of the part near your temple
- Take a small section and divide it into three parts to start a Dutch or French braid
- Braid along your hairline, incorporating small sections as you move across the crown
- Continue the braid from temple to temple, creating a crown effect
- Secure the end of the braid with a small elastic and hide it beneath loose hair with bobby pins
- Leave the remaining hair loose and curled, or gather it into a low side bun
- Gently pull on the braid edges to create a fuller, more romantic appearance
Braid Variations
- Create a fishtail braid instead of a traditional three-strand braid for texture
- Weave two thinner braids parallel to each other for a double-crown effect
- Incorporate ribbon, pearls, or small flowers into the braid as you work
- Leave some face-framing pieces out of the braid for softness
11. Asymmetrical Side Waves

Asymmetrical Side Waves play with proportion and balance, creating more volume and dramatic styling on one side while keeping the other sleek and controlled. This modern approach to side-part styling offers edge and sophistication.
Creating Asymmetry
- Part hair deeply to one side, making the part more extreme than usual
- Apply smoothing serum to the lighter side and blow-dry it flat against your head
- Secure the sleek side behind your ear with decorative pins or a jeweled clip
- Focus all curling efforts on the heavier side, creating large, voluminous waves
- Use a 1.5-inch curling iron and wrap large sections for maximum impact
- Brush through the curls on the heavy side to create connected, smooth waves
- Apply volumizing powder at the roots on the wavy side for dramatic height
Styling the Sleek Side
- Use a flat iron on the sleek side for ultra-smooth finish
- Apply edge control gel along the hairline for a polished appearance
- Create an interesting pattern with bobby pins on the sleek side
- Consider adding a temporary metallic tattoo or jeweled stickers along the exposed skin
12. Side-Part Soft Updo
The Side-Part Soft Updo combines the elegance of an updo with the modern appeal of a deep side part, creating a sophisticated style that’s both classic and contemporary. This versatile look works for various prom themes and highlights your facial features beautifully.
Updo Construction
- Create a deep side part and apply texturizing spray throughout damp hair
- Blow-dry hair using a round brush to create natural volume and movement
- Divide hair into three sections: the heavy side of the part, the light side, and the back
- Loosely pin each section to the back of your head, leaving sections slightly loose and textured
- Allow pieces to fall naturally rather than pulling everything tight
- Create small twists or braids within sections before pinning for added detail
- Pull face-framing pieces out around your hairline for a softer, romantic finish
Securing the Style
- Use bobby pins that match your hair color for seamless blending
- Cross bobby pins in an X-pattern for maximum hold
- Spray each section with hairspray before pinning for longer-lasting results
- Insert decorative pins or a hair comb at the base of the updo for added glamour
13. Cascading Side Curls
Cascading Side Curls create a waterfall effect of bouncy ringlets that flow from a side part down over one shoulder. This romantic, show-stopping style emphasizes the beauty of medium-length hair while creating movement and dimension.
Ringlet Formation
- Start with clean, product-free hair for maximum curl definition
- Create a deep side part and section hair into 1-inch pieces
- Use a 3/4-inch curling iron for tight, springy ringlets
- Wrap hair vertically around the barrel without overlapping for uniform curls
- Hold each section for 8-10 seconds, then release into your hand and allow to cool
- Avoid touching or separating the curls until all sections are complete
- Once cooled, gently separate larger curls into smaller sections with your fingers
Directing the Cascade
- Position most of your hair over one shoulder for maximum cascade effect
- Use small, clear elastics to create a loose side ponytail, then remove the elastic for positioning
- Strategically place bobby pins to encourage curls to flow in the desired direction
- Apply a light-hold hairspray with your head tilted to maintain the cascading shape
14. Side-Swept Waves with Accessory

Side-Swept Waves with Accessory combines classic styling with statement jewelry pieces, allowing you to showcase a beautiful hair accessory while maintaining elegant, flowing waves. This style is perfect for those who want their hair accessories to be a focal point of their look.
Incorporating Accessories
- Style hair in soft, side-swept waves using the techniques from previous styles
- Choose a statement accessory: jeweled comb, floral piece, vintage brooch, or art deco clip
- Position the accessory at the side part where the hair naturally divides
- Secure heavy accessories with both the decorative element and hidden bobby pins underneath
- Consider the weight of your accessory—heavier pieces need more secure pinning
- Balance the accessory placement with your dress neckline and jewelry choices
- Ensure the accessory complements rather than overwhelms your overall look
Accessory Styles by Theme
15. Side-Part Low Waves

Side-Part Low Waves offer understated elegance through gentle, flowing waves that sit close to the head without excessive volume. This refined style works beautifully for formal settings and complements sophisticated gown choices.
Creating Low-Profile Waves
- Apply smoothing cream to damp hair and blow-dry using a paddle brush for sleekness
- Create a deep side part with precision using a fine-tooth comb
- Use a 1.5-inch curling iron with low to medium heat to create subtle bends rather than tight curls
- Wrap hair around the iron and hold for only 5-6 seconds for gentle waves
- Brush through immediately with a boar bristle brush to soften and flatten the waves
- Apply a shine serum and smooth hands over hair to encourage waves to lie flat
- Use a light mist of hairspray rather than heavy application to maintain the subtle movement
Maintaining Control
- Pin the lighter side of the part behind your ear to keep it sleek and controlled
- Use a small amount of pomade on flyaways along the hairline
- Press waves against your head with your palms after spraying to encourage flatness
- Avoid volumizing products that would counteract the low-profile aesthetic
16. Dutch Braid Side Style
The Dutch Braid Side Style incorporates the dimension and texture of an inside-out braid positioned prominently on one side of a deep part. This style offers visual interest and keeps hair secure throughout the evening while maintaining a romantic, intricate appearance.
Dutch Braiding Method
- Create a deep side part and take a 3-inch section from the heavier side near your hairline
- Divide this section into three equal strands to begin your braid
- Cross the right strand under the middle strand, then the left strand under the new middle
- As you continue, add small sections of hair to each outer strand before crossing under
- Keep tension consistent throughout the braid to create a uniform, raised appearance
- Continue the braid diagonally across your head or straight down, depending on your preference
- Secure with a clear elastic and gently pull on the outer edges to create a fuller braid
Styling the Remaining Hair
- Leave the non-braided side smooth and sleek, tucked behind your ear
- Curl the lengths of hair below the braid for romantic contrast
- Create a second smaller braid parallel to the first for added detail
- Gather all hair into a low side ponytail, incorporating the braid as one element
17. Side-Part Sleek Ponytail
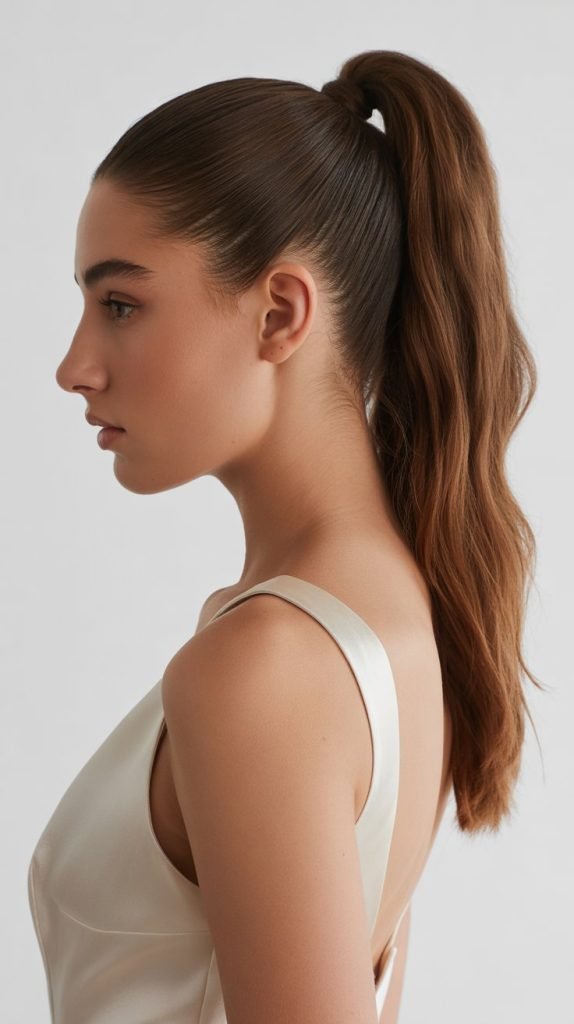
The Side-Part Sleek Ponytail brings high-fashion elegance to a classic style through precise parting and ultra-smooth execution. This modern, minimalist approach works exceptionally well for contemporary prom themes and sophisticated personal styles.
Achieving Sleekness
- Wash hair with a smoothing shampoo and apply a leave-in straightening treatment to damp hair
- Blow-dry with a paddle brush, pulling hair taut and directing airflow downward
- Create a precise side part using a rat-tail comb, sealing the part with hairspray
- Flat iron the entire head in small sections for maximum smoothness
- Brush hair to the desired ponytail position (center back, side, high, or low)
- Secure tightly with a strong elastic, then wrap a small section of hair around it
- Apply shine spray and use a boar bristle brush to smooth any surface imperfections
Ponytail Positioning Options
- High ponytail (crown level) creates a youthful, energetic appearance
- Mid-level ponytail (ear level) offers classic, versatile styling
- Low ponytail (nape level) provides sophisticated, mature elegance
- Side ponytail (shoulder level) adds asymmetrical interest and modern appeal
18. Vintage Side Roll
The Vintage Side Roll captures 1940s and 1950s glamour through a rolled section of hair positioned prominently on one side. This sculptural style requires technique and patience but creates a truly unique and memorable prom look for medium-length hair.
Creating the Roll
- Apply strong-hold mousse to damp hair and blow-dry completely before styling
- Create a deep side part and section off a 3-4 inch section along the heavier side
- Backcomb this section at the roots to create a foundation for the roll
- Place a foam hair rat or rolled piece of fabric along the section where you want volume
- Smooth the outer layer of hair over the padding, creating a rounded roll shape
- Secure the roll at the base with bobby pins inserted horizontally into the roll
- Use additional pins along the length of the roll to ensure it stays in place all night
Roll Size and Placement
- Create a large, dramatic roll from temple to behind the ear for maximum vintage impact
- Make a smaller, more subtle roll just at the front hairline for modern interpretation
- Position the roll higher for a victory roll effect popular in the 1940s
- Keep it lower and longer for a 1950s Hollywood starlet appearance
19. Messy Side-Swept Look
The Messy Side-Swept Look embraces texture, movement, and an intentionally undone aesthetic that feels effortlessly romantic. This style works particularly well for bohemian prom themes and creates a relaxed, approachable elegance.
Creating Artful Messiness
- Start with day-old hair or apply dry shampoo to clean hair for better texture
- Spray texturizing spray liberally throughout hair for grip and separation
- Curl random sections with various sized barrels, alternating directions for natural movement
- Avoid curling some sections entirely to create varied texture
- Run your fingers through all curls to break them apart and create separation
- Sweep all hair to one side and secure loosely behind your ear with bobby pins
- Pull small pieces out around your face and at the crown for intentional dishevelment
Maintaining Structure
- Use bobby pins strategically to create the swept shape without visible pinning
- Apply a flexible-hold hairspray that allows movement while maintaining the sweep
- Spray dry shampoo at the roots for added texture and volume
- Don’t aim for perfection—embrace pieces that fall out of place naturally
20. Side-Part with Face-Framing Layers
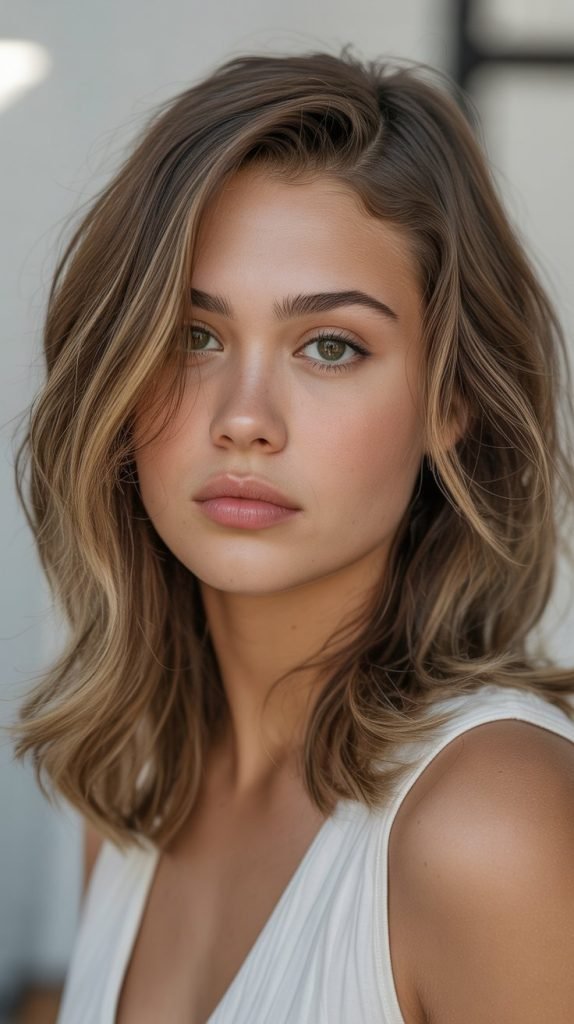
Side-Part with Face-Framing Layers capitalizes on strategic cutting and styling to enhance facial features through carefully positioned shorter pieces around the face. This style works beautifully with medium-length hair and suits various face shapes.
Styling Layers Effectively
- Apply heat protectant and blow-dry hair with a round brush, turning ends under slightly
- Create a deep side part and identify your face-framing layers
- Use a small curling iron (1 inch or less) to curl face-framing pieces away from your face
- Curl the rest of your hair in larger sections with a bigger barrel for contrast
- Allow face-framing curls to cool, then gently separate them with your fingers
- Apply a small amount of pomade or wax to the ends of layers for definition and separation
- Spray the face-framing pieces separately with a light-hold spray to maintain their shape
Layer Placement by Face Shape
- Oval faces: Layers can begin anywhere from cheekbone to chin length
- Round faces: Start layers at or below the chin to elongate
- Square faces: Position layers at the cheekbone to soften angular features
- Heart-shaped faces: Keep layers at jawline level to balance a wider forehead
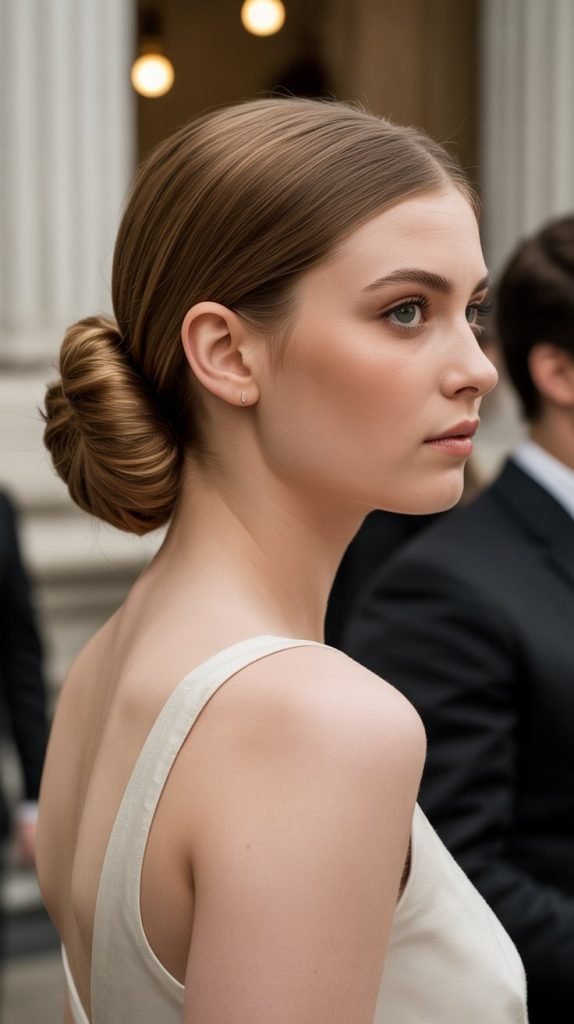
21. Twisted Side Chignon

The Twisted Side Chignon combines the sophistication of a low bun with the detail of twisted sections, positioned elegantly at the side of the neck. This style offers secure, long-lasting wear while maintaining romantic elegance perfect for prom.
Chignon Construction
- Create a deep side part and divide hair into four sections: top, two sides, and back
- Take the top section and twist it loosely, pinning it temporarily out of the way
- Twist each side section and bring them together at the side of your neck, just below your ear
- Secure these twisted sections with bobby pins crossed in an X-pattern
- Take the back section and twist it, bringing it to meet the other sections
- Wrap all twisted sections together, creating a coiled bun shape
- Tuck ends under and pin securely throughout the chignon for all-night hold
Chignon Styling Variations
- Create a sleek, tight chignon by smoothing hair before twisting for formal elegance
- Pull gently on twists before pinning for a softer, more romantic textured appearance
- Incorporate small braids within the twisted sections for added detail
- Leave a few pieces loose around your face for a softer, more approachable look
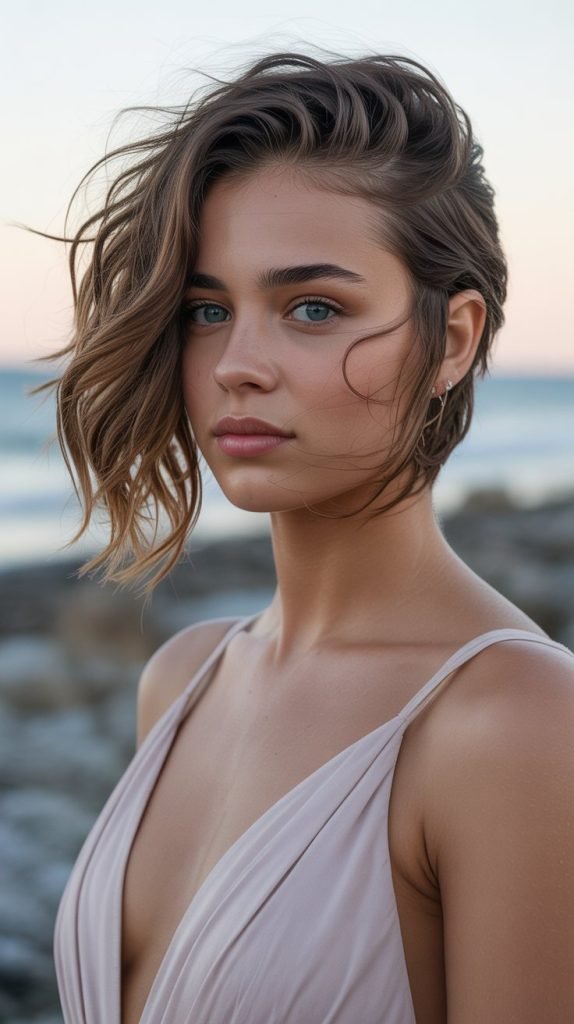
22. Side-Part Beach Waves

Side-Part Beach Waves bring casual, windswept texture to formal styling, creating an effortlessly beautiful look that suggests both sophistication and relaxed confidence. This style works particularly well for outdoor or destination proms.
Creating Beach Texture
- Apply sea salt spray to damp hair and allow to air-dry 50% before styling
- Create a deep side part and divide hair into large 2-inch sections
- Braid each section loosely and quickly with flat irons for 5-7 seconds through each braid
- Allow braids to cool for a few minutes, then release and shake out with your fingers
- Alternatively, twist sections and wrap around a curling wand, holding for just 5 seconds
- Apply texturizing paste or cream to the mid-lengths and ends, scrunching as you go
- Finish with a light mist of sea salt spray and scrunch again for maximum texture
Enhancing the Beachy Effect
- Avoid brushing or combing through the waves—use only your fingers
- Leave some sections slightly less wavy than others for a natural, varied appearance
- Spray dry shampoo at the roots and scrunch for added texture and volume
- Keep the style soft and undefined rather than perfectly curled
23. Elegant Side French Twist
The Elegant Side French Twist reinvents the classic French twist by positioning it off-center, creating an asymmetrical updo that’s both timeless and contemporary. This sophisticated style showcases the neck and shoulders beautifully.
French Twist Technique
- Create a deep side part and brush all hair to the opposite side of where you want the twist
- Secure hair temporarily with bobby pins along the center back of your head
- Take all hair and twist it upward and inward toward the pinned side
- Continue twisting until hair forms a vertical roll along one side of your head
- Tuck the ends under and secure with bobby pins inserted horizontally into the twist
- Insert additional pins along the entire length of the twist for security
- Smooth any bumps with a boar bristle brush and seal with strong-hold hairspray
Twist Positioning
- Position the twist further to the side for more dramatic asymmetry
- Keep it closer to center for a subtle side variation on the classic style
- Angle the twist diagonally from one shoulder toward the opposite side of the crown
- Create a lower, looser twist at the nape for a more relaxed interpretation
24. Side-Part with Ribbons
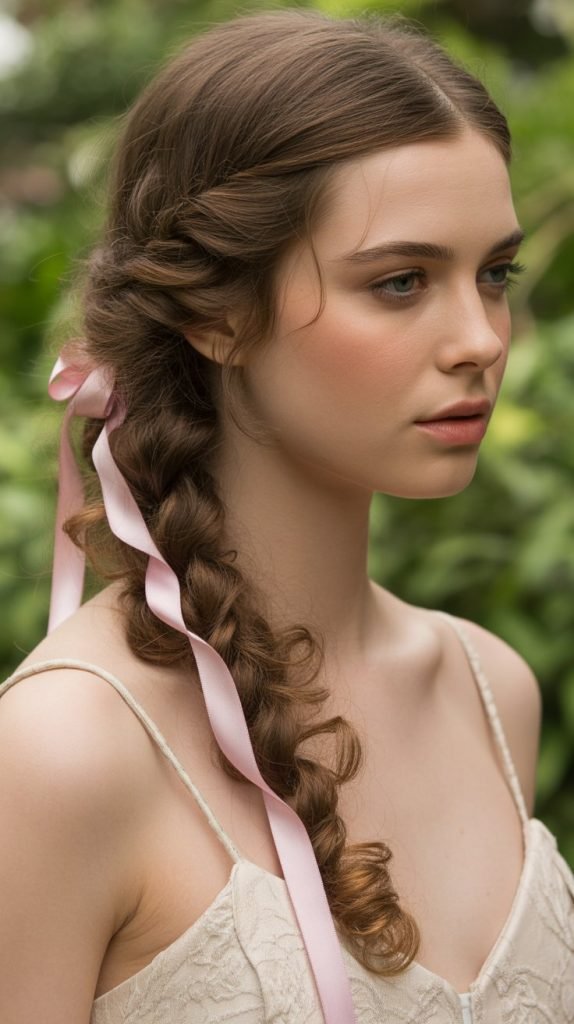
Side-Part with Ribbons incorporates fabric elements into your hairstyle, adding color, texture, and whimsical detail to your prom look. This playful yet elegant style allows you to coordinate your hair with your dress or prom theme while adding dimension through woven or wrapped ribbon details.
Ribbon Integration Methods
- Choose ribbon that complements or matches your dress color, keeping width between 1/4 to 1/2 inch
- Create a deep side part and divide hair into sections where you’ll incorporate ribbon
- For braided styles, use ribbon as one of the three strands, weaving it throughout the braid
- For loose curls, wrap thin ribbon around sections before curling, then remove for ribbon-crimped texture
- Tie ribbon around a low ponytail or bun, allowing the tails to cascade with your hair
- Weave ribbon through an updo by threading it under bobby pins in a decorative pattern
- Secure ribbon ends with small bobby pins or by tying them to hair elastics
Ribbon Selection Guide
- Satin ribbon: Creates a luxurious, formal appearance with beautiful sheen
- Velvet ribbon: Adds rich texture and works beautifully for winter or evening proms
- Organza ribbon: Provides delicate, ethereal quality perfect for romantic themes
- Grosgrain ribbon: Offers structured appearance and holds shape well in updos
- Lace ribbon: Creates vintage, romantic detail ideal for bohemian styles
Color Coordination
- Match ribbon exactly to your dress for a cohesive, monochromatic look
- Choose a contrasting color from your dress details or accessories for visual interest
- Select metallic ribbons (gold, silver, rose gold) for glamorous, versatile coordination
- Use multiple thin ribbons in complementary colors for a unique, layered effect
25. Side-Part Waterfall Braid

The Side-Part Waterfall Braid creates a cascading effect where strands of hair appear to fall through the braid like water over a waterfall. This intricate, romantic style is a stunning choice for prom and showcases both skill and beauty in hairstyling.
Waterfall Braid Technique
- Create a deep side part and take a small section near your temple on the heavier side
- Divide this section into three strands and begin a standard French braid
- After the first stitch, drop the front strand and let it fall, replacing it with a new section from above
- Continue braiding, dropping the front strand each time and replacing it with new hair
- The dropped strands create the “waterfall” effect, cascading through the braid
- Continue the braid along your hairline from temple toward the back of your head
- Secure the end with a small clear elastic and hide it beneath the remaining hair
Enhancing the Waterfall Effect
- Curl the dropped strands individually with a small curling iron to make them more prominent
- Use two fingers to gently pull on the braid edges, creating a fuller, more dimensional appearance
- Add small decorative pins or crystals where the braid passes the ear for sparkle
- Create a double waterfall by adding a second braid parallel to the first
Finishing the Style
- Leave all remaining hair loose and curled to showcase the waterfall strands
- Gather the waterfall braid and remaining hair into a side ponytail for a different look
- Create a waterfall braid on both sides, meeting at the back for a crown effect
- Apply shine spray to both the braid and the loose strands for a polished, cohesive appearance
Styling Tips for All Side-Part Hairstyles
Regardless of which style you choose from these 25 gorgeous options, certain universal principles will help ensure your side-part prom hairstyle looks flawless and lasts throughout the evening.
Pre-Styling Preparation
- Wash hair 24 hours before prom rather than the same day for better texture and hold
- Use a clarifying shampoo to remove product buildup that can weigh down styles
- Apply a deep conditioning treatment 2-3 days before prom for healthy shine
- Trim any split ends at least one week before prom for polished appearance
- Consider your dress neckline when planning your hairstyle—show off beautiful details
- Test your chosen hairstyle at least once before prom day to identify any challenges
Product Recommendations by Hair Type
Tools and Accessories Checklist
- Multiple sizes of bobby pins in your hair color (bring extras in your purse)
- Clear elastic bands that won’t damage hair or show in photos
- Travel-size hairspray and touch-up tools for throughout the evening
- Small mirror for checking the back and sides of your hairstyle
- Hair oil or serum for adding shine and taming flyaways
- Decorative pins, clips, or accessories that complement your style
- Teasing comb or brush for adding volume where needed
Making Your Style Last
- Set your completed hairstyle with a strong-hold hairspray from 10-12 inches away
- Spray in sections rather than all at once for even coverage and better hold
- Allow hairspray to dry completely before touching your hair or getting into a car
- Bring a small emergency kit with bobby pins, hairspray, and hair ties
- Avoid touching or playing with your hair throughout the evening
- If dancing, consider applying additional hairspray or switching to an updo partway through
- Use a silk or satin pillowcase if you plan to rest before prom to prevent frizz
Working with Your Stylist
- Bring reference photos of styles you love, including these descriptions
- Schedule your appointment several months in advance, especially for busy prom season
- Have a trial run at least 2-4 weeks before prom to test the style and timing
- Communicate your dress style, neckline, and overall prom theme to your stylist
- Discuss your hair’s natural texture and any challenges you typically face
- Ask your stylist which products they use and consider purchasing them for touch-ups
- Arrive with clean, dry hair unless your stylist specifically requests otherwise
Choosing the Right Style for You
With 25 gorgeous side-part prom hairstyles to choose from, selecting the perfect option for your medium-length hair requires consideration of several personal factors that will ensure you feel confident and beautiful.
Consider Your Dress
- Strapless or off-shoulder gowns: Pair with updos or half-up styles to showcase your shoulders and neckline
- High necklines or detailed bodices: Choose styles that sweep hair away from the dress to avoid competing details
- Low-back or backless dresses: Opt for side-swept styles or side buns that show off the back of your dress
- Heavily embellished dresses: Select simpler, more understated hairstyles to balance the overall look
- Simple, elegant gowns: Feel free to choose more elaborate, detailed hairstyles as a focal point
Face Shape Considerations
Understanding your face shape helps identify which side-part styles will be most flattering:
- Oval faces are versatile and can wear virtually any of these styles successfully
- Round faces benefit from styles with height at the crown and volume on top to create length
- Square faces look best with soft, romantic styles that soften angular jawlines
- Heart-shaped faces should choose styles with volume at the jawline and chin level for balance
- Long/rectangular faces need width and volume at the sides rather than excessive height
Personal Style and Comfort
- Choose styles that reflect your everyday aesthetic—don’t stray too far from your comfort zone
- Consider how much time you’re willing to spend on styling and maintenance
- Think about your activity level—will you be dancing all night or sitting for formal photos?
- Be honest about your hair-styling skills if you plan to do your own hair
- Factor in weather conditions—outdoor proms may require styles that withstand humidity or wind
Hair Texture and Condition
- Naturally curly hair: Embrace styles that work with your texture rather than fighting it
- Very straight hair: Choose styles that incorporate texture through braiding or strategic curling
- Fine hair: Select styles that create the illusion of volume and fullness
- Damaged hair: Opt for styles that conceal ends and showcase healthier sections near the roots
Conclusion
Finding the perfect hairstyle for prom is an exciting part of preparing for this memorable occasion, and these 25 Gorgeous Side-Part Prom Hairstyles for Medium-Length Hair offer something for every personal style, face shape, and prom theme.
From the timeless elegance of Classic Hollywood Side Waves to the whimsical romance of the Waterfall Braid, each style brings its own unique character while celebrating the versatility and beauty of medium-length hair with a flattering side part.
The side part has proven itself to be more than just a styling technique—it’s a transformative element that adds sophistication, asymmetry, and visual interest to any hairstyle you choose.
As you prepare for your special night, remember that the best hairstyle is one that makes you feel confident, beautiful, and authentically yourself, allowing you to focus on creating wonderful memories rather than worrying about your hair.
Whether you choose an intricate braided style, sleek and modern sophistication, or romantic flowing waves, your medium-length hair provides the perfect foundation for a stunning prom look that you’ll treasure in photos and memories for years to come.
Take your time exploring these options, consider scheduling a trial run with your chosen style, and most importantly, enjoy the process of preparing for a night you’ll never forget with one of these gorgeous side-part hairstyles that perfectly complement your medium-length hair.